How to make a vase from plastic bottles with your own hands?
Now everything is original in fashion, including vases. If you do not want to get the item stamped, from mass production, you should contact the masters who will accept your order and take into account all the wishes. If there is no suitable artist or you do not want to spend money, try to make a vase with your own hands. To do this, it is not necessary to go to workshops or circles - it’s enough to read step-by-step instructions and have an attitude of success.
Special features
A vase made from a plastic bottle has a lot of advantages.
- Availability. All sorts of bottles remain after food and household liquids, which are constantly running out. And if suddenly you need to urgently put flowers, you can take any of the available ones or pour the remains into another container.
- Low cost. The cost price of such a product mainly depends on how you decorate it. To create the simplest version without coverage, you only need time. More complex options will help out if there is a need to decorate the room temporarily, for example, when moving to a cottage, a rented apartment, etc.
- The opportunity to show their talents. Even the creation of a small vase requires patience and some work skills. In addition, in the process of creativity can manifest quite unusual abilities. In any case, a thing done by hand is a reason for pride.
- Ease of processing. It is easier to work with plastic than with more solid and thicker materials. Even a child can do a simple craft. Naturally, care must be taken with cutting tools.
- Environmental friendliness. Using materials again, you contribute to the reduction of landfills.
Among the shortcomings, many say that homemade items look too simple and rude. Yes, if you just fill the bottle with water, it will look primitive. It all depends on your desire and skill. Even if something does not work out - there is an opportunity to do better next time, turning a random hack into a hobby.
What materials will be needed?
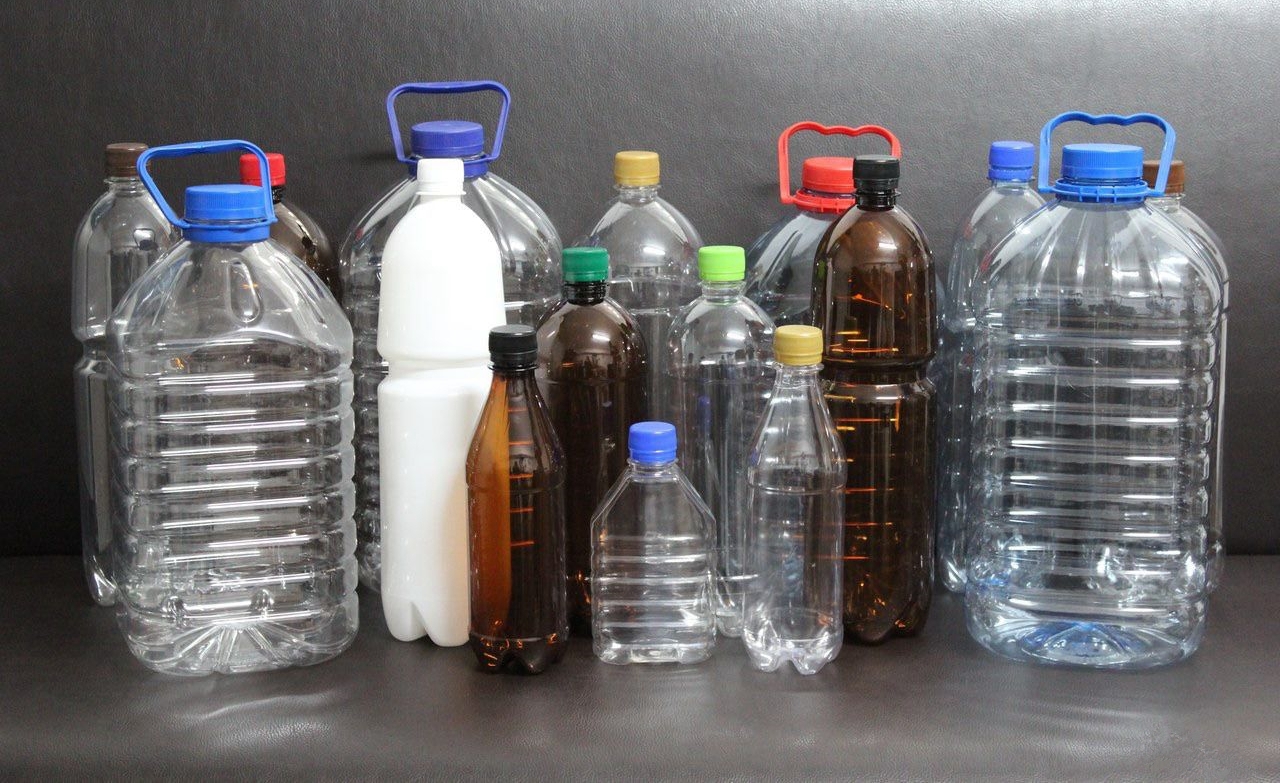
The most affordable are plastic bottles. Usually they are made of two types of plastics.
- PET - they sell drinks, sauces, butter. As a rule, the walls of such containers are quite thin, easily crushed. Content can easily outweigh them, so they are more suitable for dried compositions, pencils and other trivia.
- PE HD - polyethylene of higher strength, therefore dairy products, shampoos and other cosmetics, household chemicals are poured into it. Such packaging will be more sustainable. In it you can safely pour water and put flowers.
Virtually any type of plastic that we may encounter in the grocery store cannot be re-used for food due to the release of harmful substances. In everyday life, they can be used under certain conditions: they can not be heated and exposed to direct sunlight. If you want to ensure the safety of the material - pay attention to the markings on the bottom.

Before choosing a blank for a future vase, you need to understand how you will use it. Depending on this, it can be:
- high or low;
- round, square or oval;
- smooth or threaded;
- with straight or curved walls;
- transparent or color.
Think about where it will be located. The floor models are larger, while the vase on the dining table should be as low as possible. After you decide - rinse the bottle thoroughly, remove the label and adhesive layer under it, dry well.
How to do?
In fact, before choosing one of the options to stock up on materials and tools, you need to soberly assess your own strength. This does not mean that if you have never done anything with your own hands or have already had a sad experience, you should not even begin. No and no again! In this case, you need to start with the model that does not require a lot of time and effort, so that there is no temptation to leave everything halfway through. Start with the simple and move on to the more complex, then you will be proud not only of the result, but also of the knowledge, experience, and skills gained in the creation process.

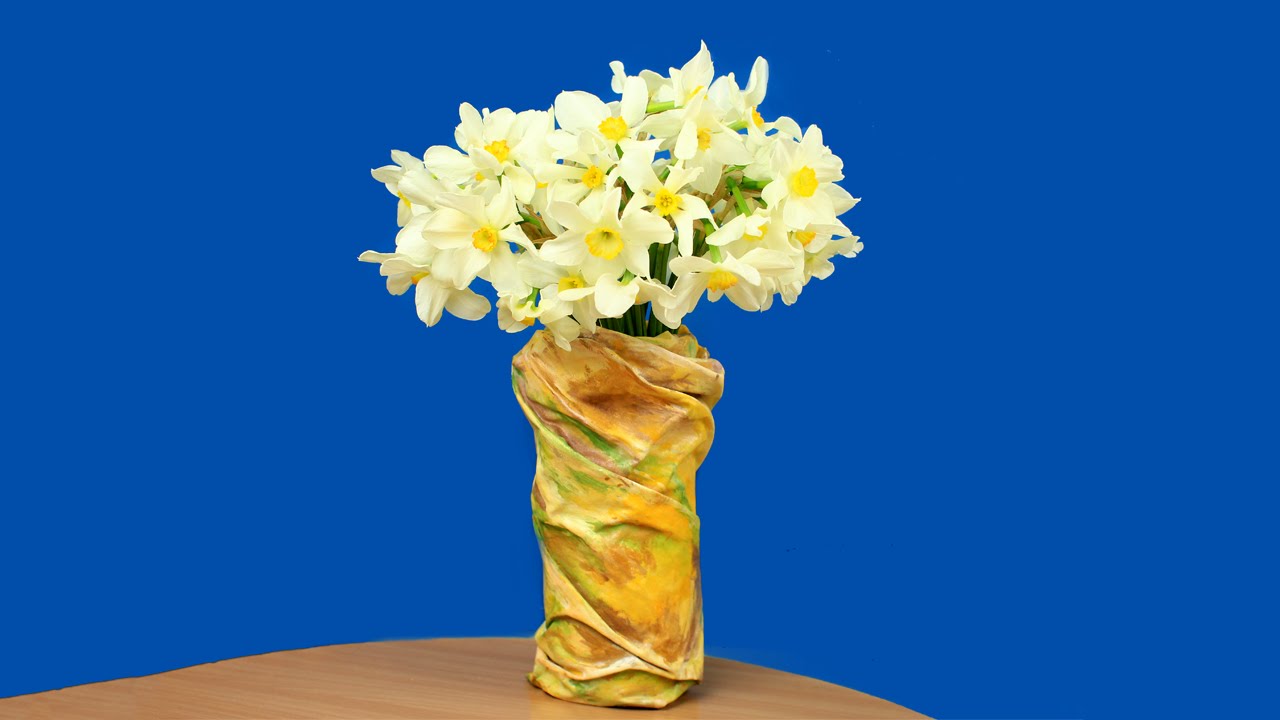
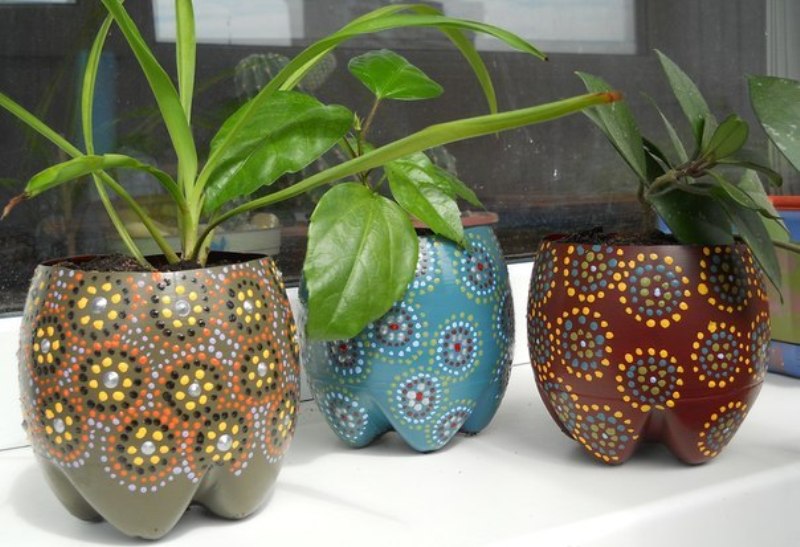
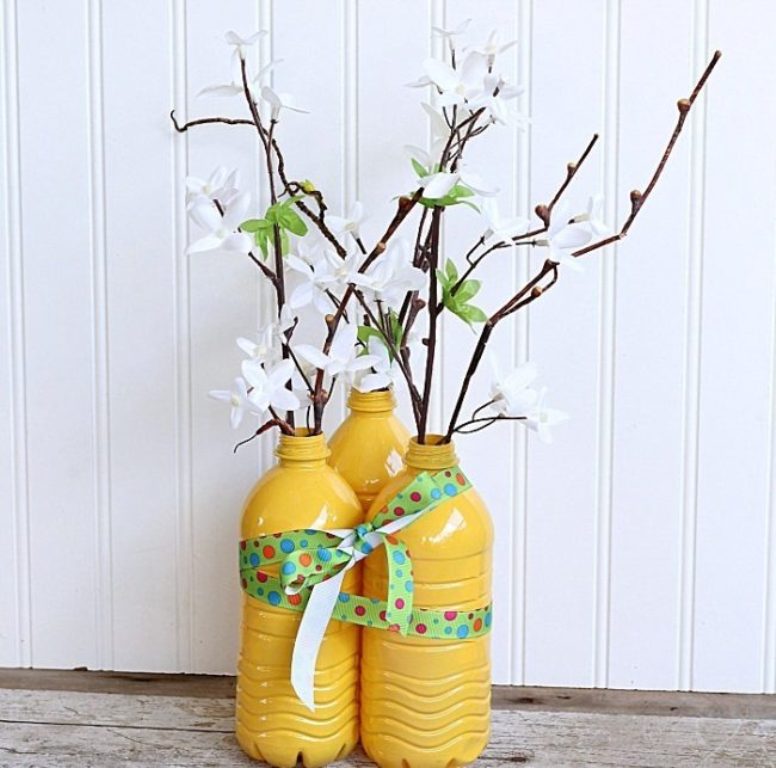
Painted vase
For its manufacture you must follow several steps in sequence.
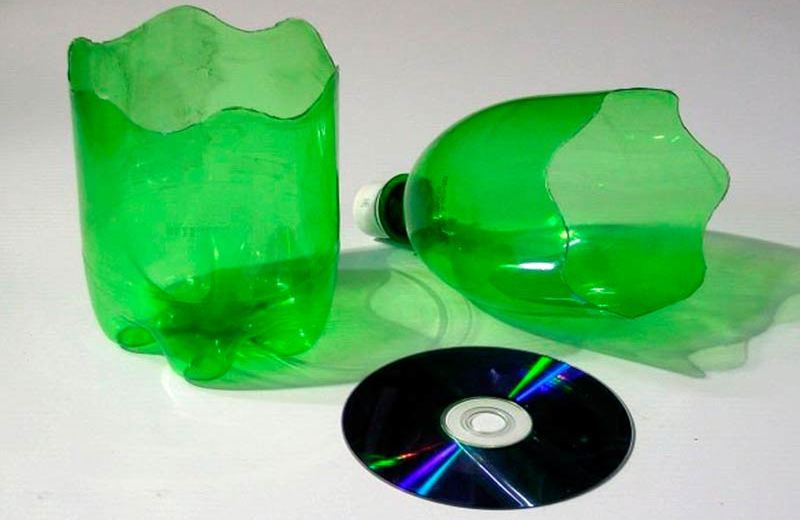
- Measure out the required height. Using a knife, remove the top.
- Sand all irregularities on top with fine sandpaper.For reliability, glue the top edge with tape or colored adhesive tape.
- You can proceed to staining. To do this, take measures so that the paint does not get on the environment, hands or clothes. Prefer aerosols: they are applied more evenly than with a brush. If the bottle is very smooth, first apply a primer, wait for it to dry, and proceed with painting.
- If there are patterns or patterns on the vase, wait until it is completely dry.
Despite the apparent simplicity, it is important to consider a few nuances.
- In order to lay the paint evenly and not peeling off ahead of time, thoroughly clean and dry the cooked dishes.
- White or clear bottles are ideal for coloring. The brighter their color, the more layers of paint you may need. In addition, the layers of paint affect the intensity of color.
- For stability, any material can be placed at the bottom, which will not dissolve with water when it hardens, as well as pebbles, decorative beads, etc.
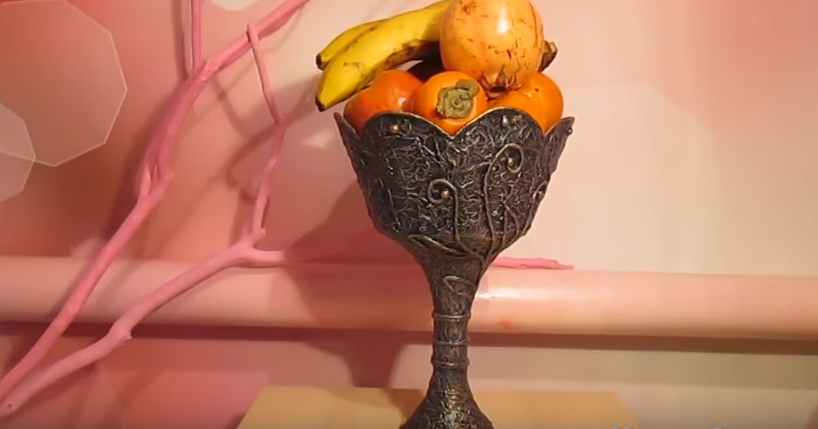
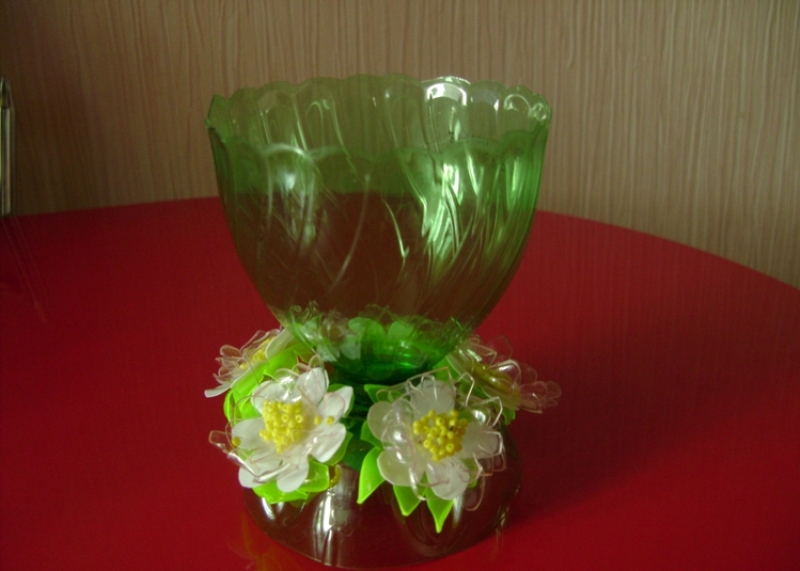
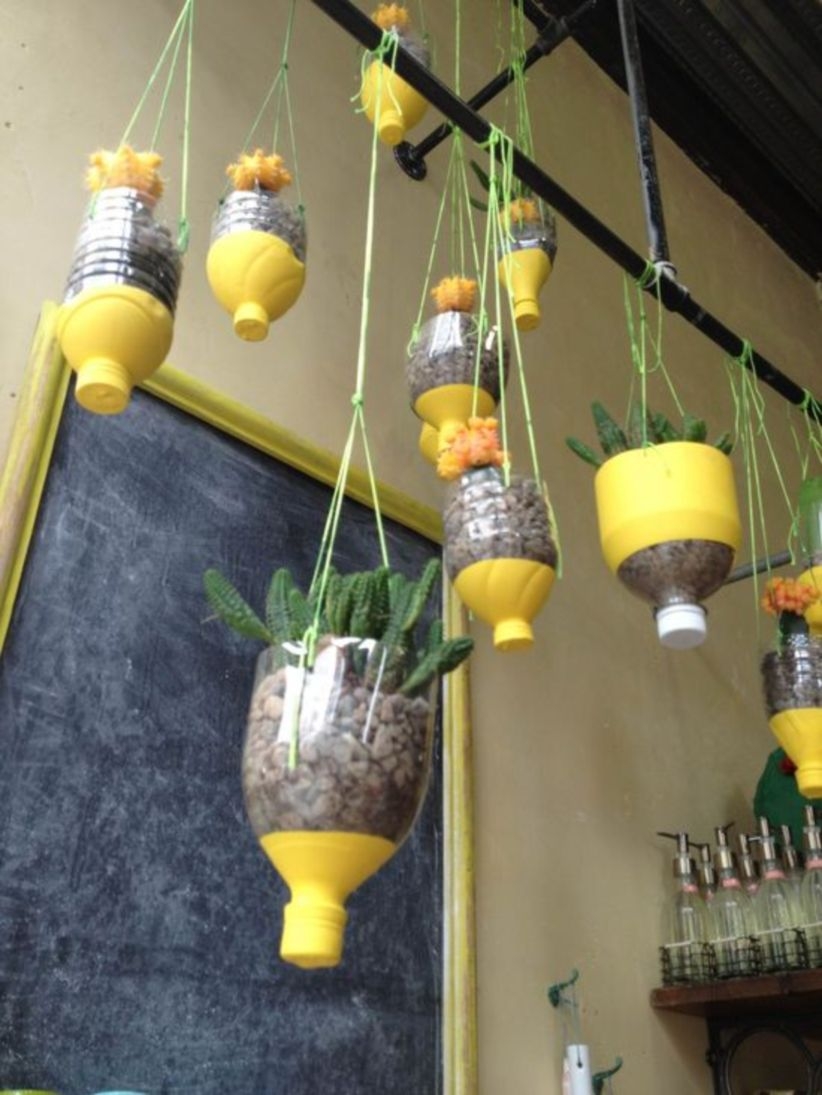
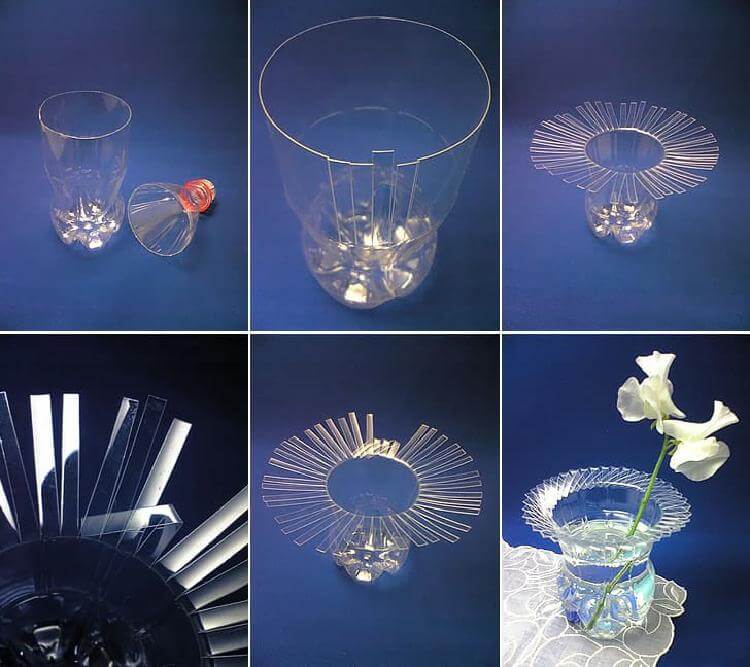
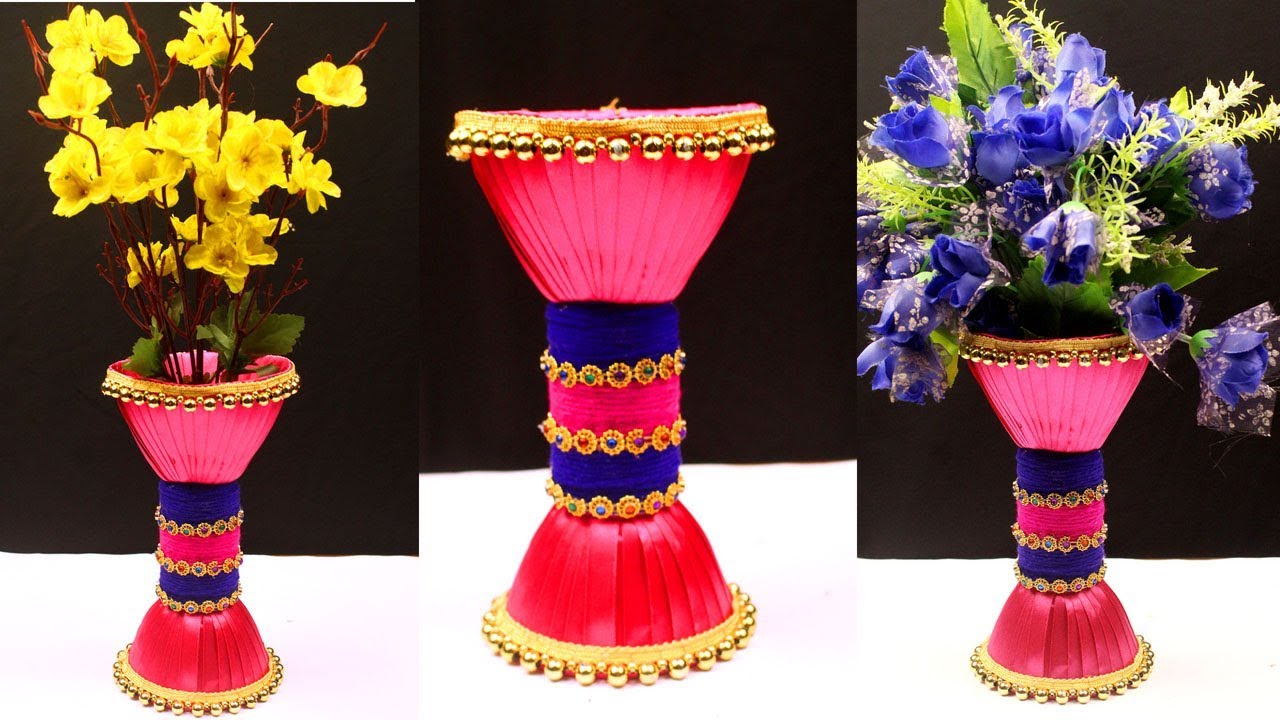
On stand
In this case, both the upper and lower parts are used.
- Separate the lower part up to five centimeters.
- In the bottom, cut a hole equal to the diameter of the bottle neck.Remove the bumps.
- Insert the neck (without the cap) into the hole. So you get a kind of pot on the leg with a stand.
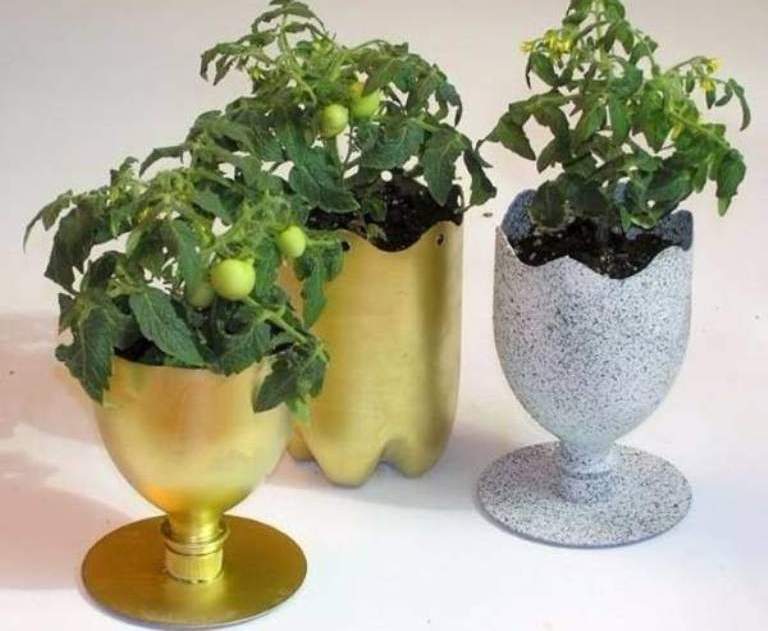
For stability, instead of support, you can take a piece of plastic or wood and give it any shape. The width of this stand should not be less than the diameter of the bottle. You can also increase the height of the legs with a suitable tube. You can connect the components with glue.
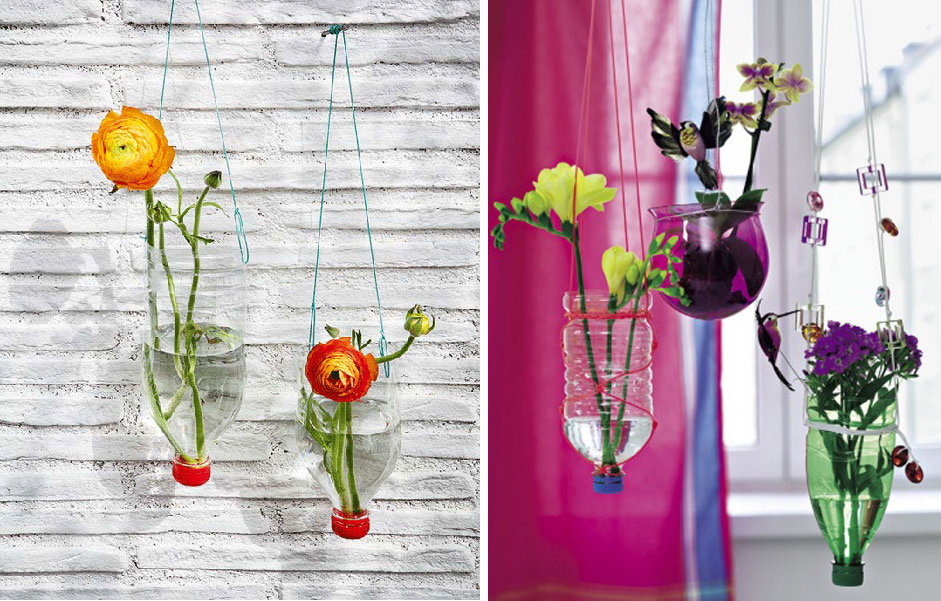
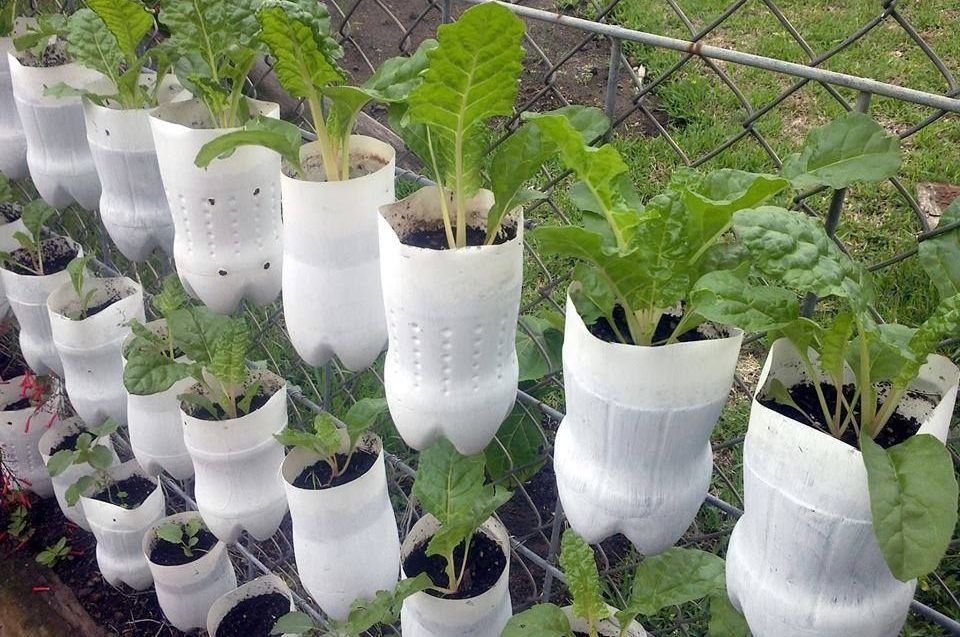
Wall mounted
With it, you can revive the wall, turning the room into a blooming garden. For this you can use ropes.
- Cut off the top of the workpiece.
- Make two or four marks at a distance of 1 cm from the edge opposite each other.
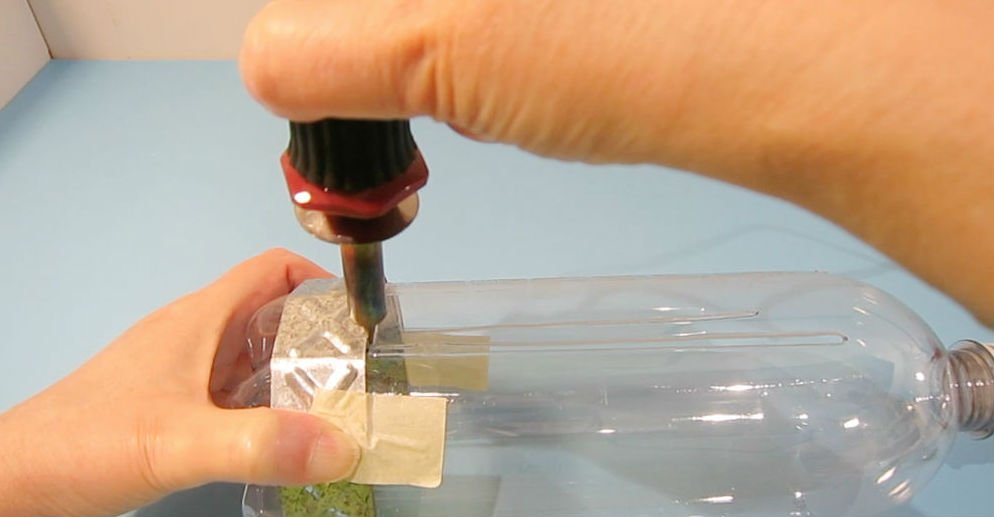
- Glow a nail, an awl or a screwdriver on a fire and pierce in the marked places.
- Now it remains to put the rope or laces and hang it on the wall. So that they do not fall out, tie knots at the ends.


You can do without laces. For example, a nail in the wall can be threaded directly into the hole itself, then it will not be visible.
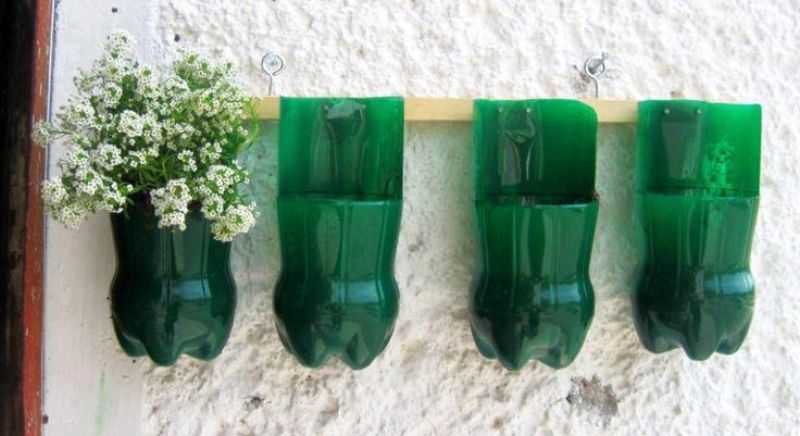
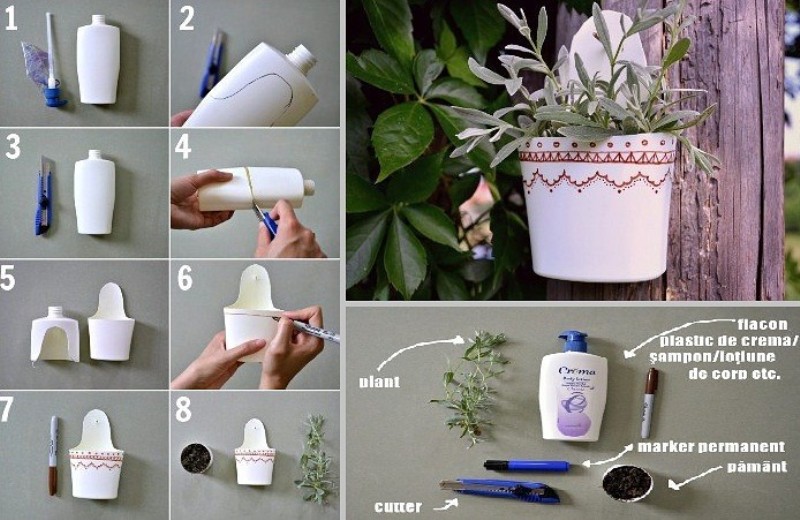
For this method of placement is more convenient to use square or oval bottles. Depending on the method of decoration, holes are made before or after.Also, the necessary parts of the bottles can be glued to a wooden base and already attached to the wall.
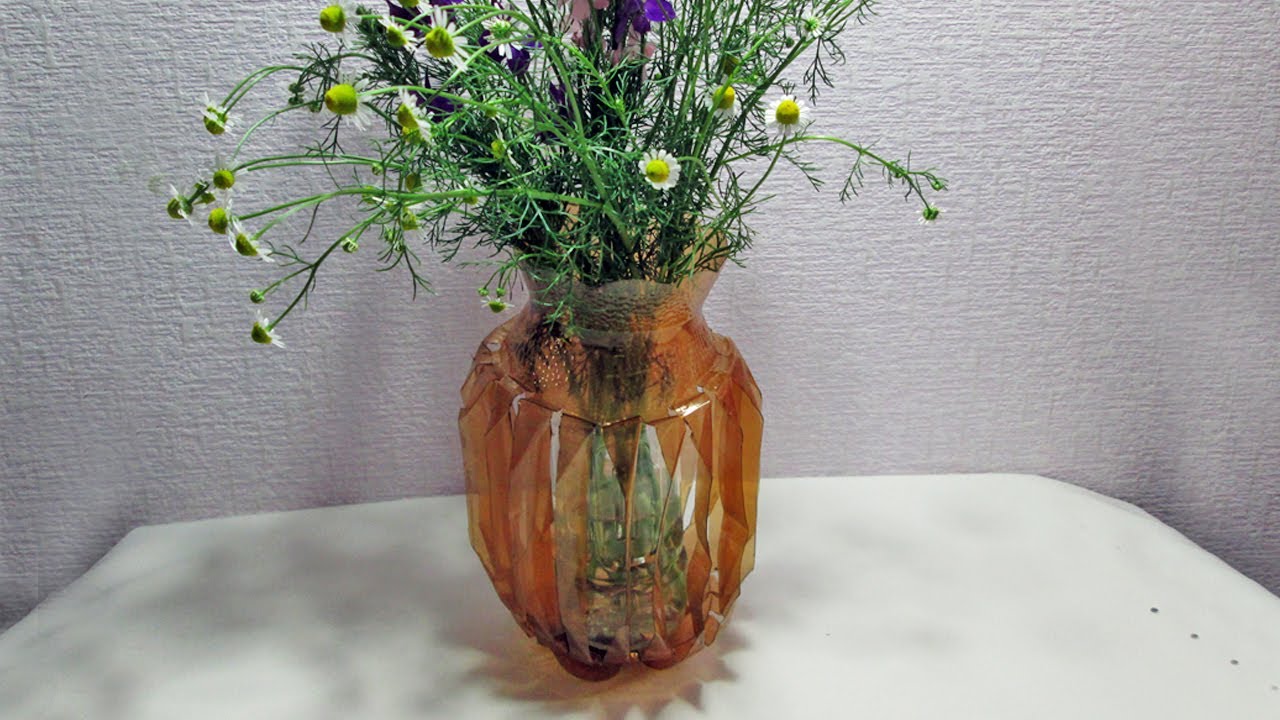
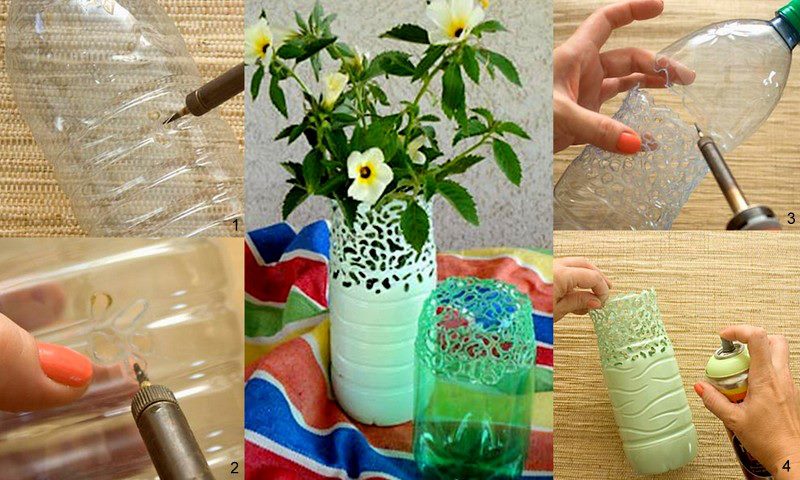
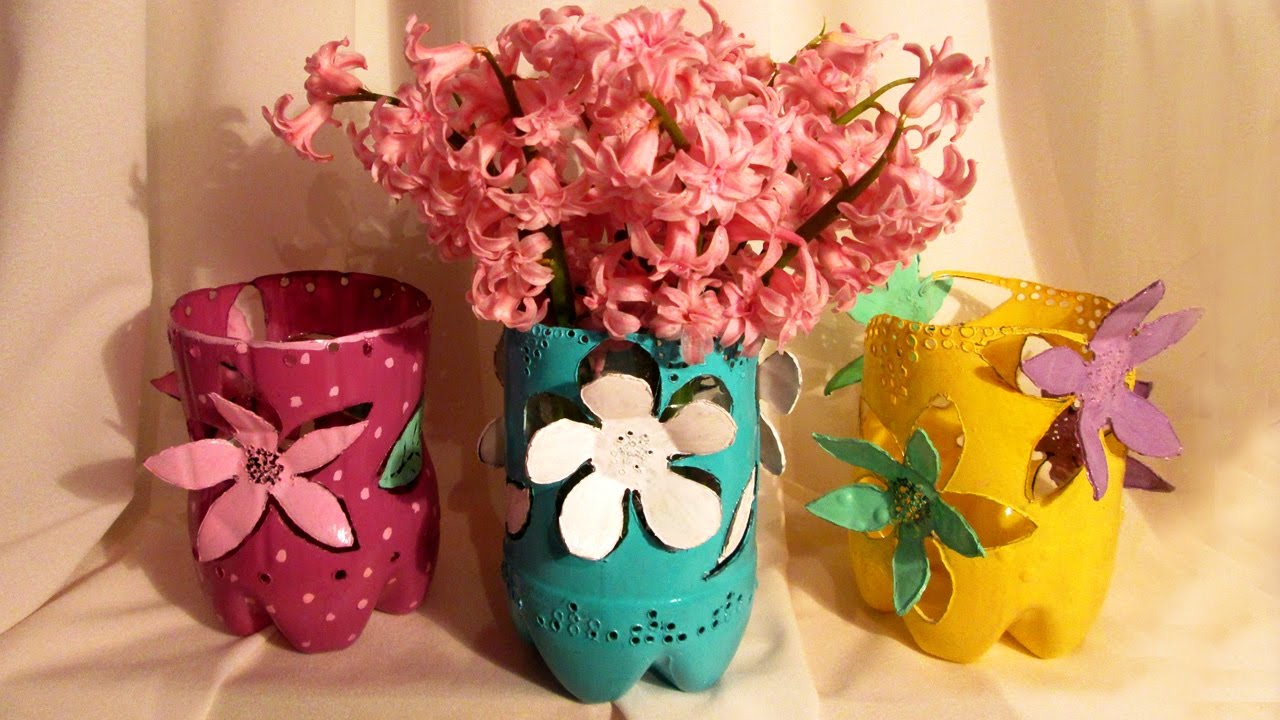
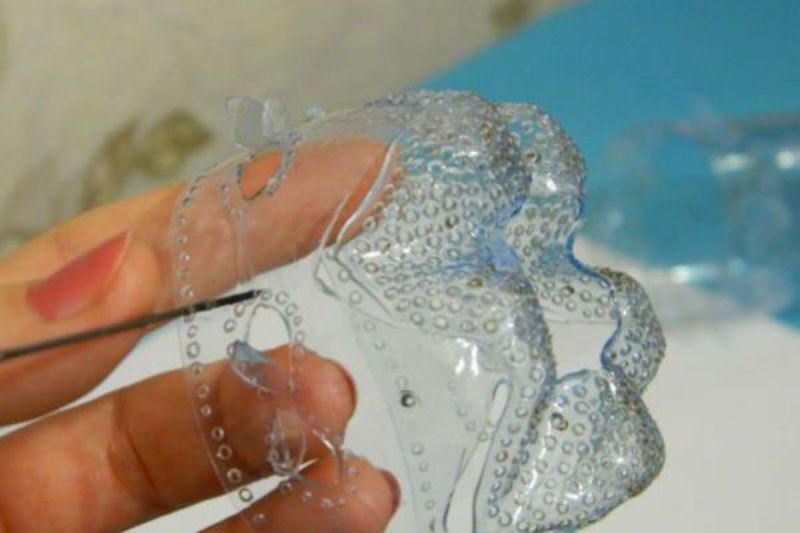
Openwork or carved
Sometimes in order for the view to change drastically, you can arrange only the edge. Even a schoolboy can cope with this task. In fact, the top line can be not only flat - depending on your fantasy, it can easily become asymmetrical, wavy or jagged. To make it look beautiful and do not have to redo or trim, pre-mark and cut it. For this you can use both scissors and stationery knife.

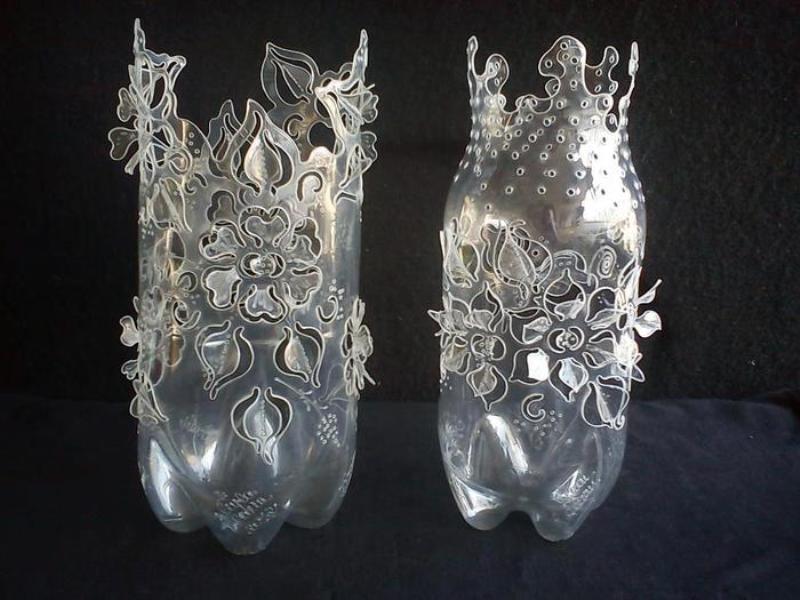
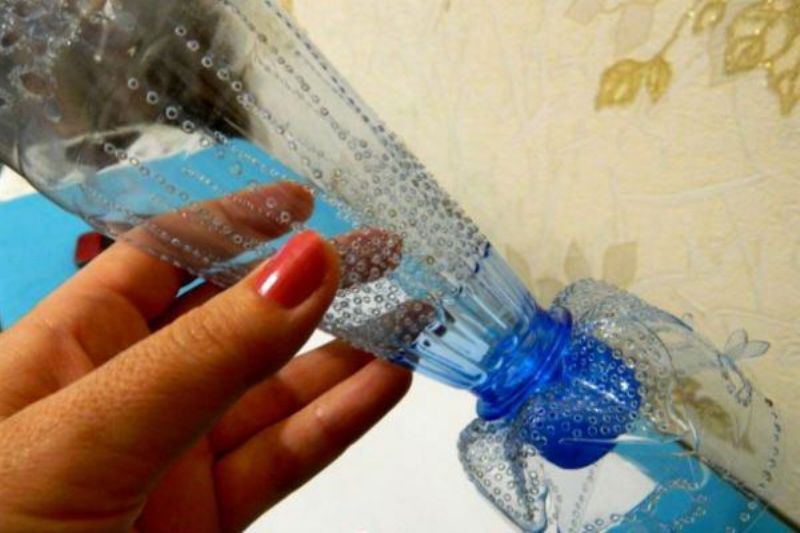
In this case, the fringe can become a more complicated way of decoration, and it can be bent both in the inner side and outwards. This can be done with all elements, but it is possible through one, or lay them on each other in the form of weaving.
If there are only dry compositions in the vase, then all along its length you can make all kinds of cuts and holes. They can be repeated, forming a lace pattern. For their execution, the pattern can be applied directly to the plastic. Also, the figure can be printed on paper, fasten it in several places and cut through it.This will significantly reduce the time, but it is necessary to constantly monitor that it does not move.
To create patterns, you can use knives, a soldering iron or heated metal tools with appropriate tips. The choice of tools depends on your skill level and dexterity.
Interesting examples
The above options, of course, are not the only ones, but they can be taken as a basis, change the technology and get completely new. For example, on top of a monochromatic layer, you can walk with a sponge or brush with a paint of a contrasting color. The resulting effect looks volume and bright.
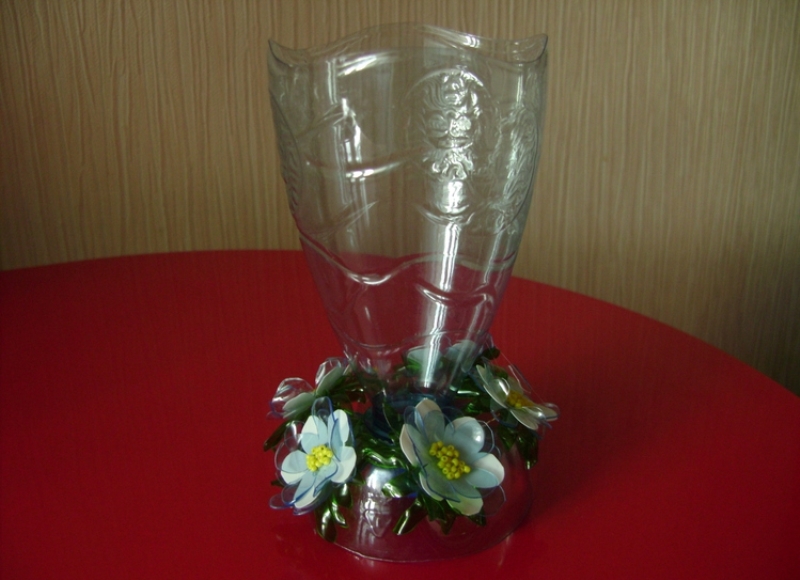
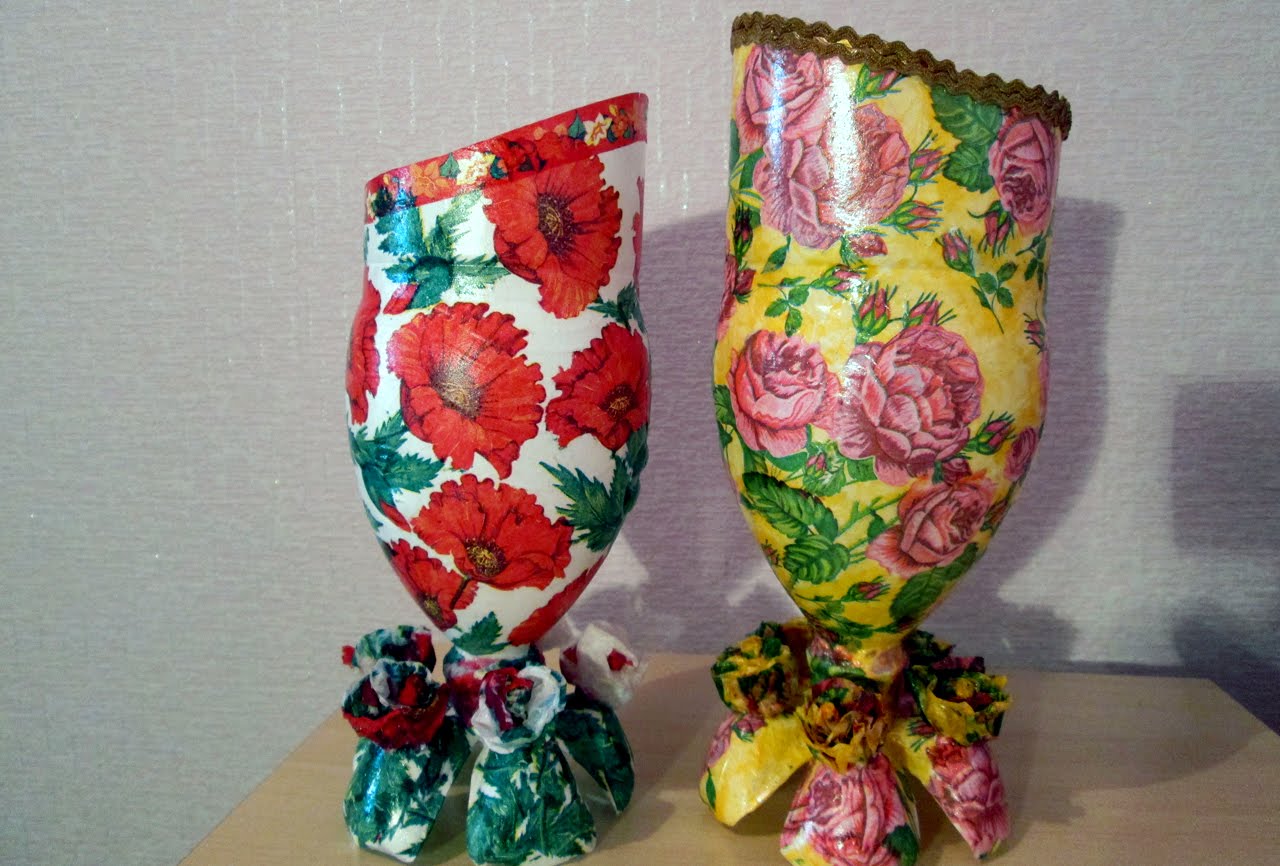
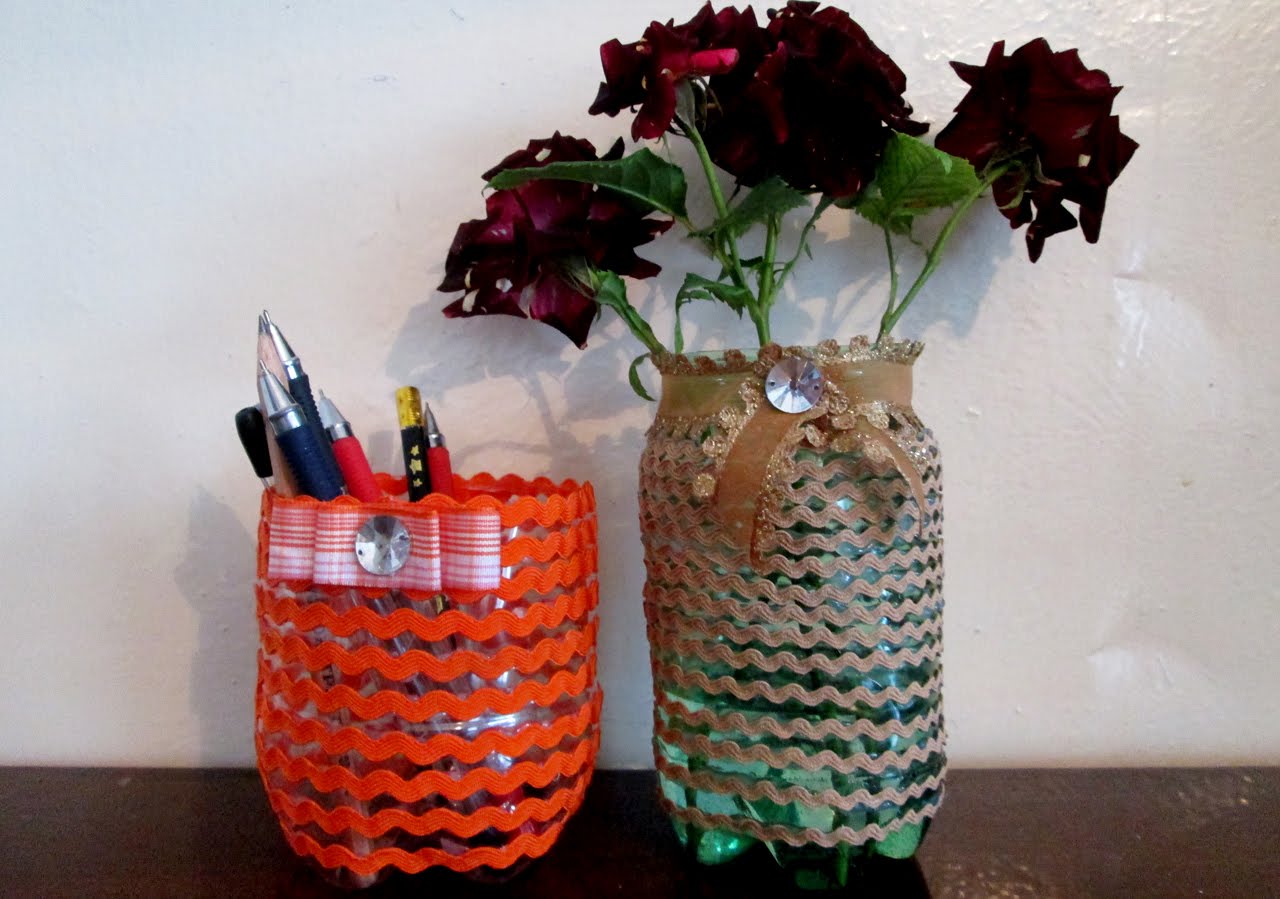
To hide the polyethylene base, it can be pasted over with threads, fabric, lace, ribbons, rhinestones or any other decorative material at hand. One of the most popular techniques is decoupage. It is important that the decor fits together. In order not to overdo it - use no more than two materials, colors or textures. And then your vase will be a worthy exhibit of your apartment.
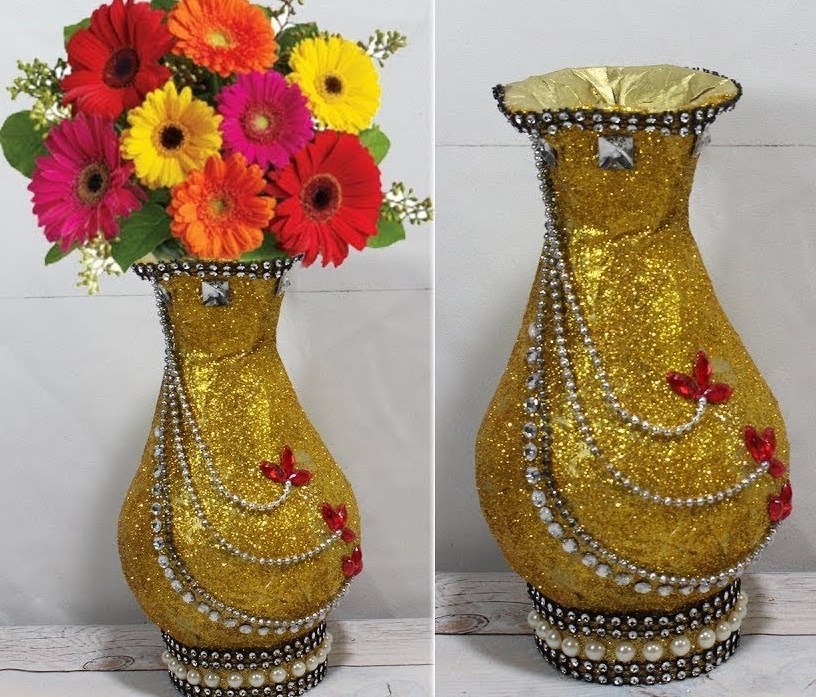
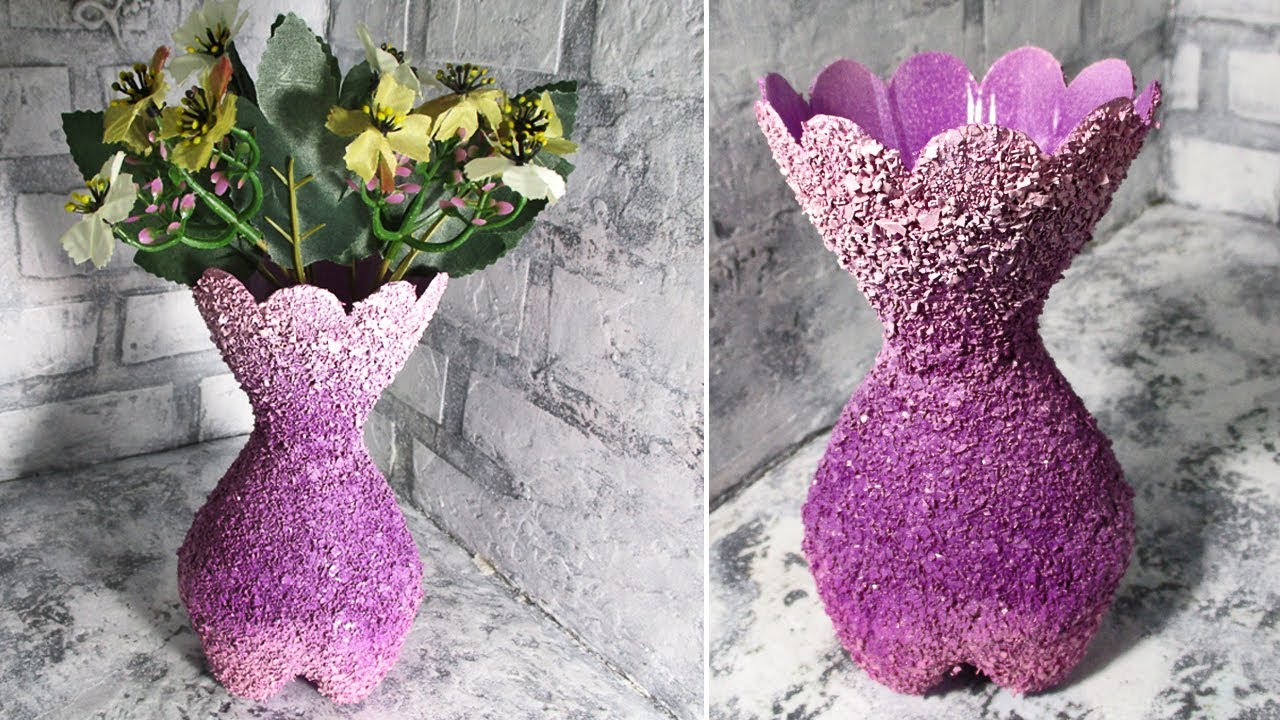
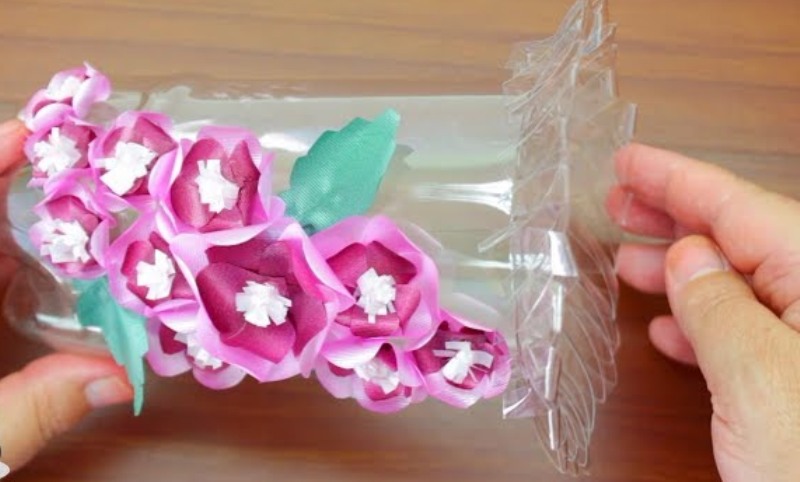
You can complicate the product by applying on a smooth surface convex parts. It can be all the same pieces of rope and fabric, glued and subsequently painted, as well as large rhinestones, pebbles, shells. To keep stucco elements on the surface, it must be processed.It is much easier to work with light plastic parts. And the same flowers for decoration can be made from the remaining parts, so do not rush to throw them out.
By the way, it is not always the color and appearance in which the bottle was originally worth hiding. Transparent plastic, caught in the right hands, will compete with glass. Such material is easy to process and does not require any costs, only time. And the result can be very worthy.
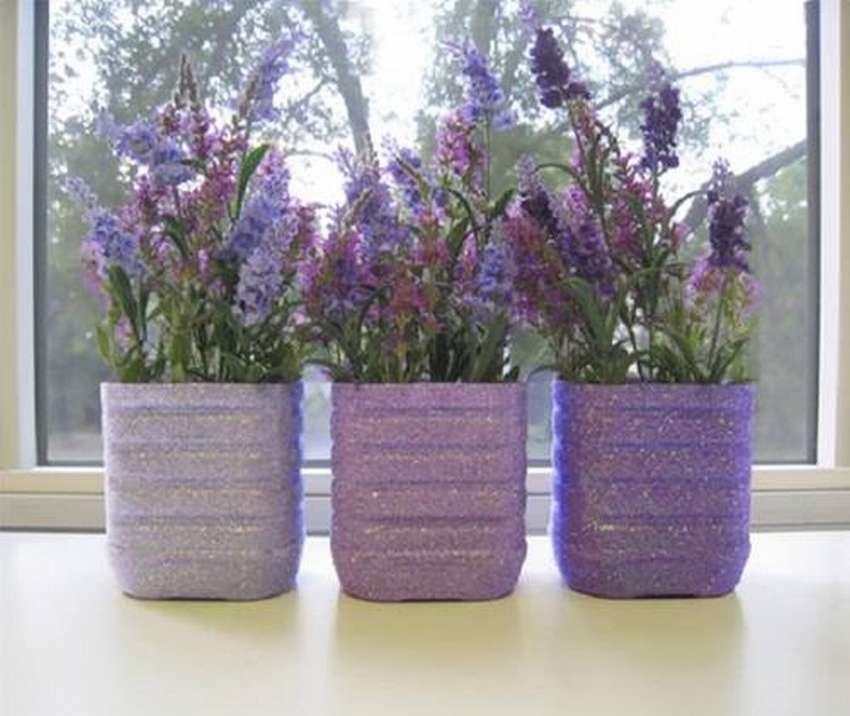
If you have already made one vase and can not stop, think about how to create a kit. Such an ensemble can be placed together or at some distance - in any case, their consistency and beauty will be visible. With this technique you can easily change the interior at no cost.
To learn how to make a vase from plastic bottles with your own hands, see the next video.


