Bath from a log: pros and cons, stages of construction
A bath from a log has both pros and cons. The process of its construction has a certain specificity: there are characteristic stages of construction that are not so obvious at first glance. In order for a bath of logs to be built correctly, the builder needs to familiarize himself with some theoretical information.
Special features
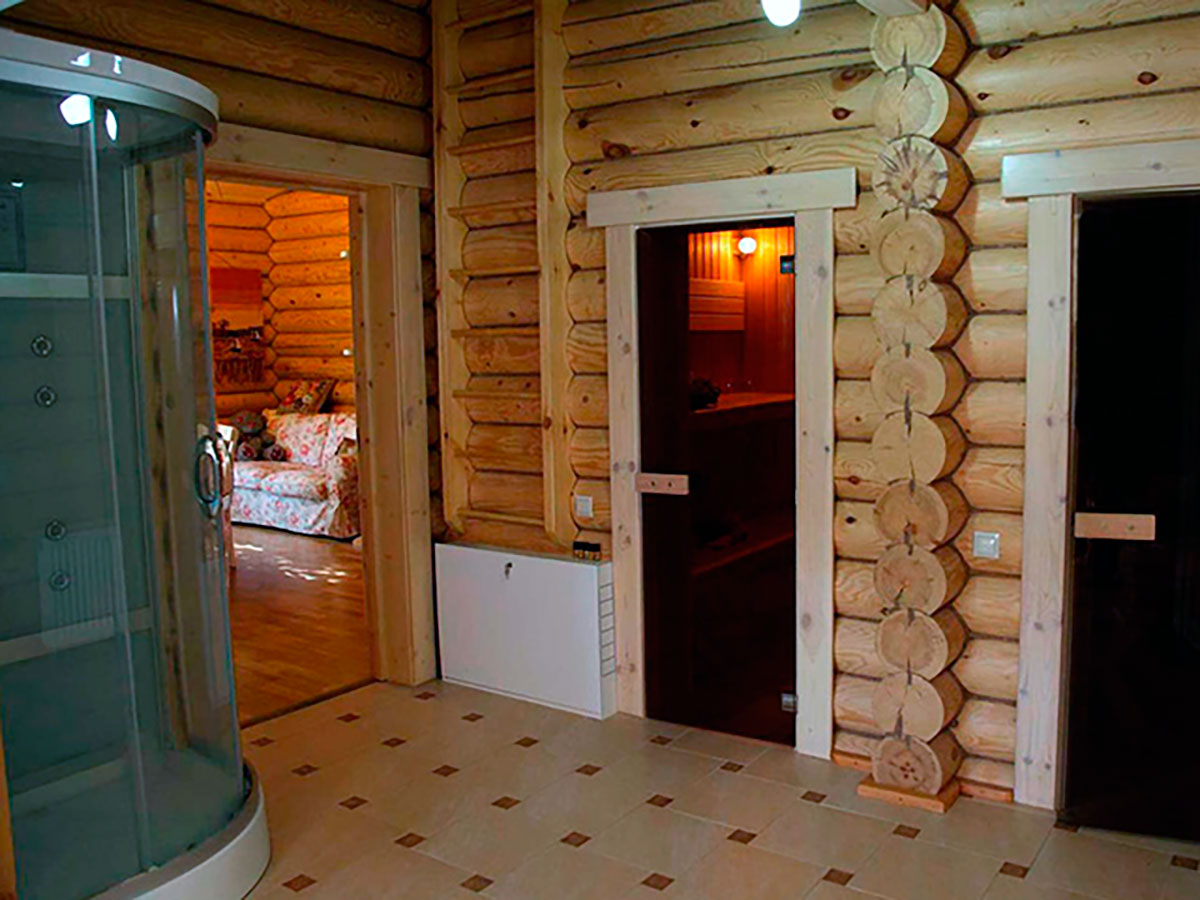
Bath from a log - traditionally Russian construction. Such baths were built in Ancient Russia, but since then the technology has been somewhat modified and improved. In particular, this is due to the fact that the technology of tanning logs has changed a lot. Changed and requirements for bath buildings. So, now it is necessary that the bath was equipped not only with a waiting room and a steam room, but also a shower room, a bathroom, a rest room, a billiard room. The size of the bath and, accordingly, the amount of material depends on how many rooms will be equipped.
Wooden baths differ from their brick counterparts in a number of advantages.
- Wood has an excellent effect on human health. Healing steam in such steam rooms improves mood and improves overall well-being. Depending on which wood is selected, the effects produced are different. For example, if you choose to build a log of coniferous wood (spruce, pine), then you can be sure that after a visit to the bath you will increase your mood, insomnia will disappear. In addition, the evaporation of the resin secreted by these breeds has the ability to kill viruses in the human body.
- The beam is an environmentally friendly material, so even in the process of destroying a bath, the environment will not be harmed. It is also very easy to dispose of logs: simply unload them somewhere in the forest. So your garbage will turn into useful fertilizer.
- Ventilation in wooden buildings at height. This is due to the fact that the timber by nature has excellent ventilating properties, so that problems with stagnation of moist air will not arise. Due to this peculiarity, during the bath procedures a microclimate is formed that is most suitable and comfortable for soaring in principle, and as a result, the best results are achieved.

- Wooden baths keep warm well, do not cool quickly. Wood has a low thermal conductivity, which is not the case with bricks. The low thermal conductivity gives another advantage: in the winter period, the bath from the log house will warm up much faster than the brick one.
- Due to natural ventilation and low thermal conductivity, it will not be necessary to expend additional funds to equip a wooden bath with ventilation, nor should it be warmed additionally. In the end, this will save much more money than was spent on the purchase of logs.
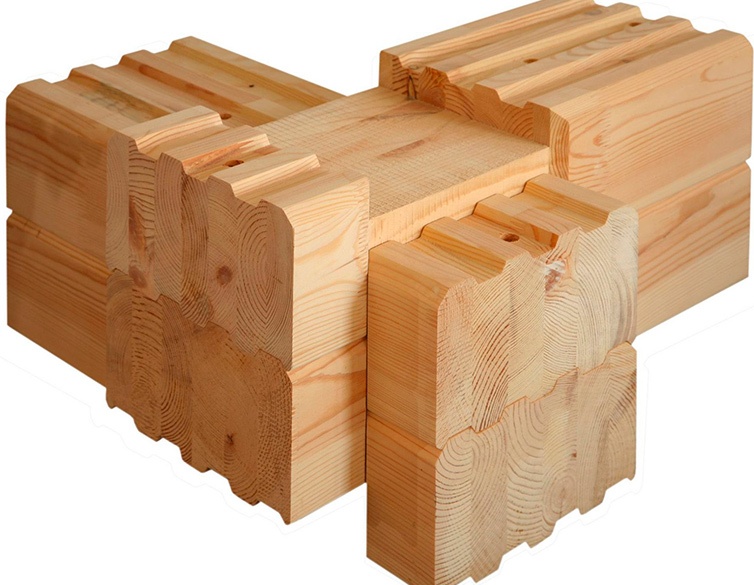
- The wood surface is attractive on its own, so no additional lining or interior decoration of the bath is required. If a profiled timber has been selected for construction, the building will look neat and tidy, not “sit down” and not warp. In addition, the soundproofing quality of the tree at a height.

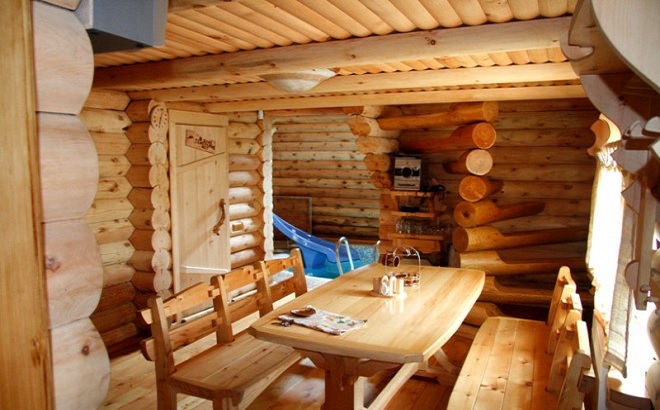
- The wooden bath on the site is evidence of the high status of the owner. It can even be called a status thing. In addition to the fact that it is comfortable and beautiful, a sauna from a bar gives you the opportunity to get together with a company or a family and have a good time for emotional conversations in between the procedures in the steam room.
Materials
Deciding to build a log bath, you need to take into account several factors, the first of which is the difference in materials.
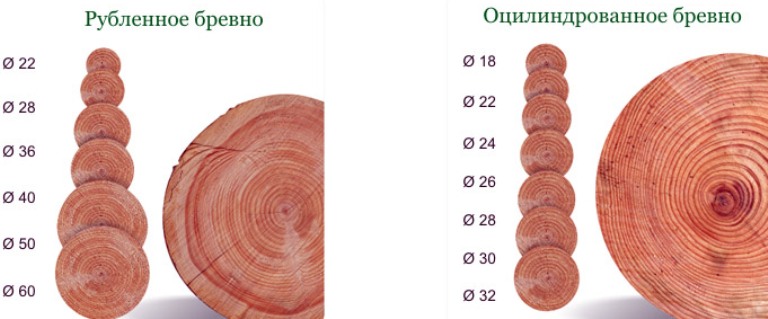
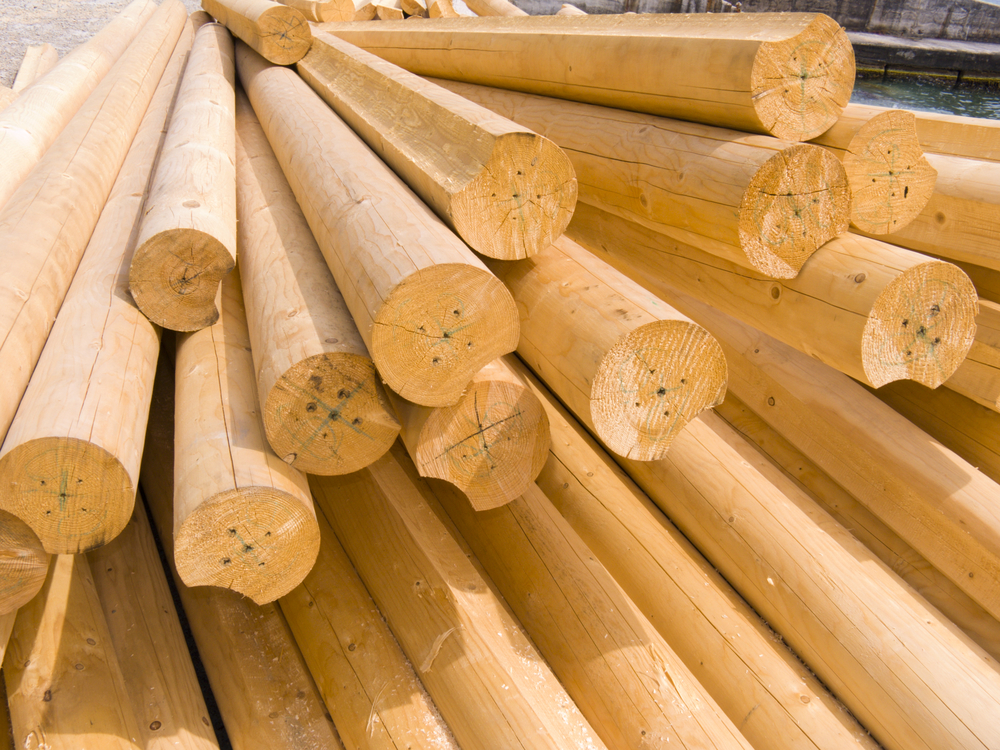
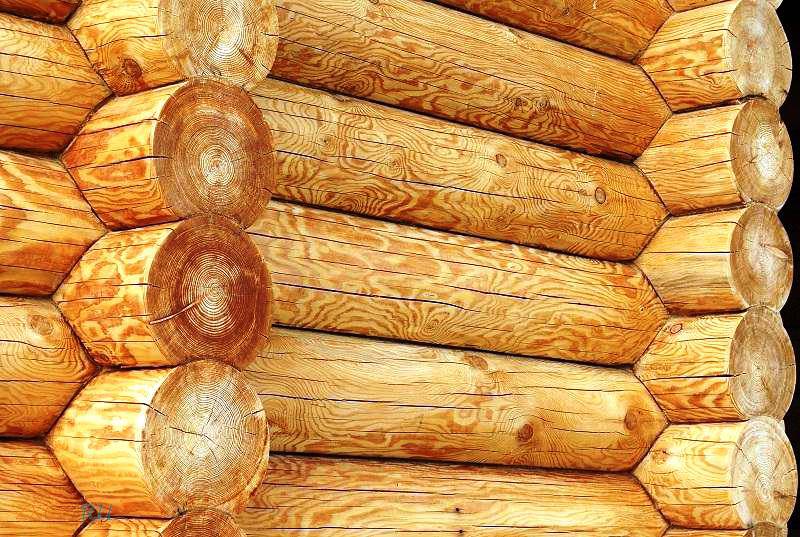
Chopped or planed logs (they are also called peeled) are an ordinary oval-shaped log house, all the processing of which was carried out manually. The top layer of wood, called sapwood, is carefully removed. The result is a log of different size, slightly gnarled and rough to the touch. Due to the fact that the tree is not polished and, roughly speaking, remains in its original form, it retains the ability to resist all sorts of negative impacts that can be exerted on it not only from inside the bath, but also the external environment. Since logs have different diameters, it is quite difficult to achieve good thermal insulation: you must have experience with this material. In addition, the chopped log is cheaper.
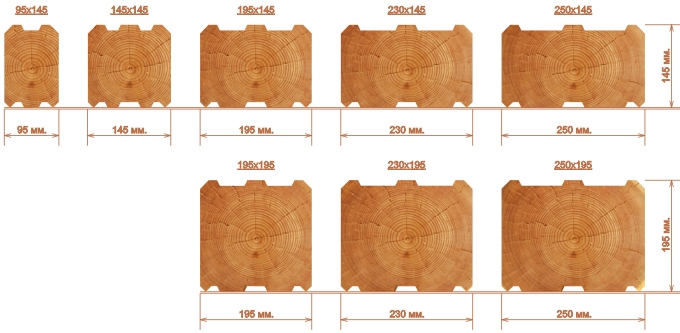
Galvanized or calibrated log It has a great value and a completely different appearance. The logs here are processed on a special machine, which makes them all equally round, smooth and beautiful. It turns out a smooth surface without a single roughness.However, along with the original appearance, the tree loses a good half of all its qualities during such processing. The forest becomes more sensitive to external influences, as it loses most of its stability. However, the masters have found a solution to this problem: they repeatedly process wood with various impregnations and antiseptics, and as a result, galvanized wood becomes more stable.
Solid array buildings are popular, but you need to know which particular array to choose.
The following breeds are optimal:
- spruce;
- Pine;
- larch;
- oak;
- birch and others.
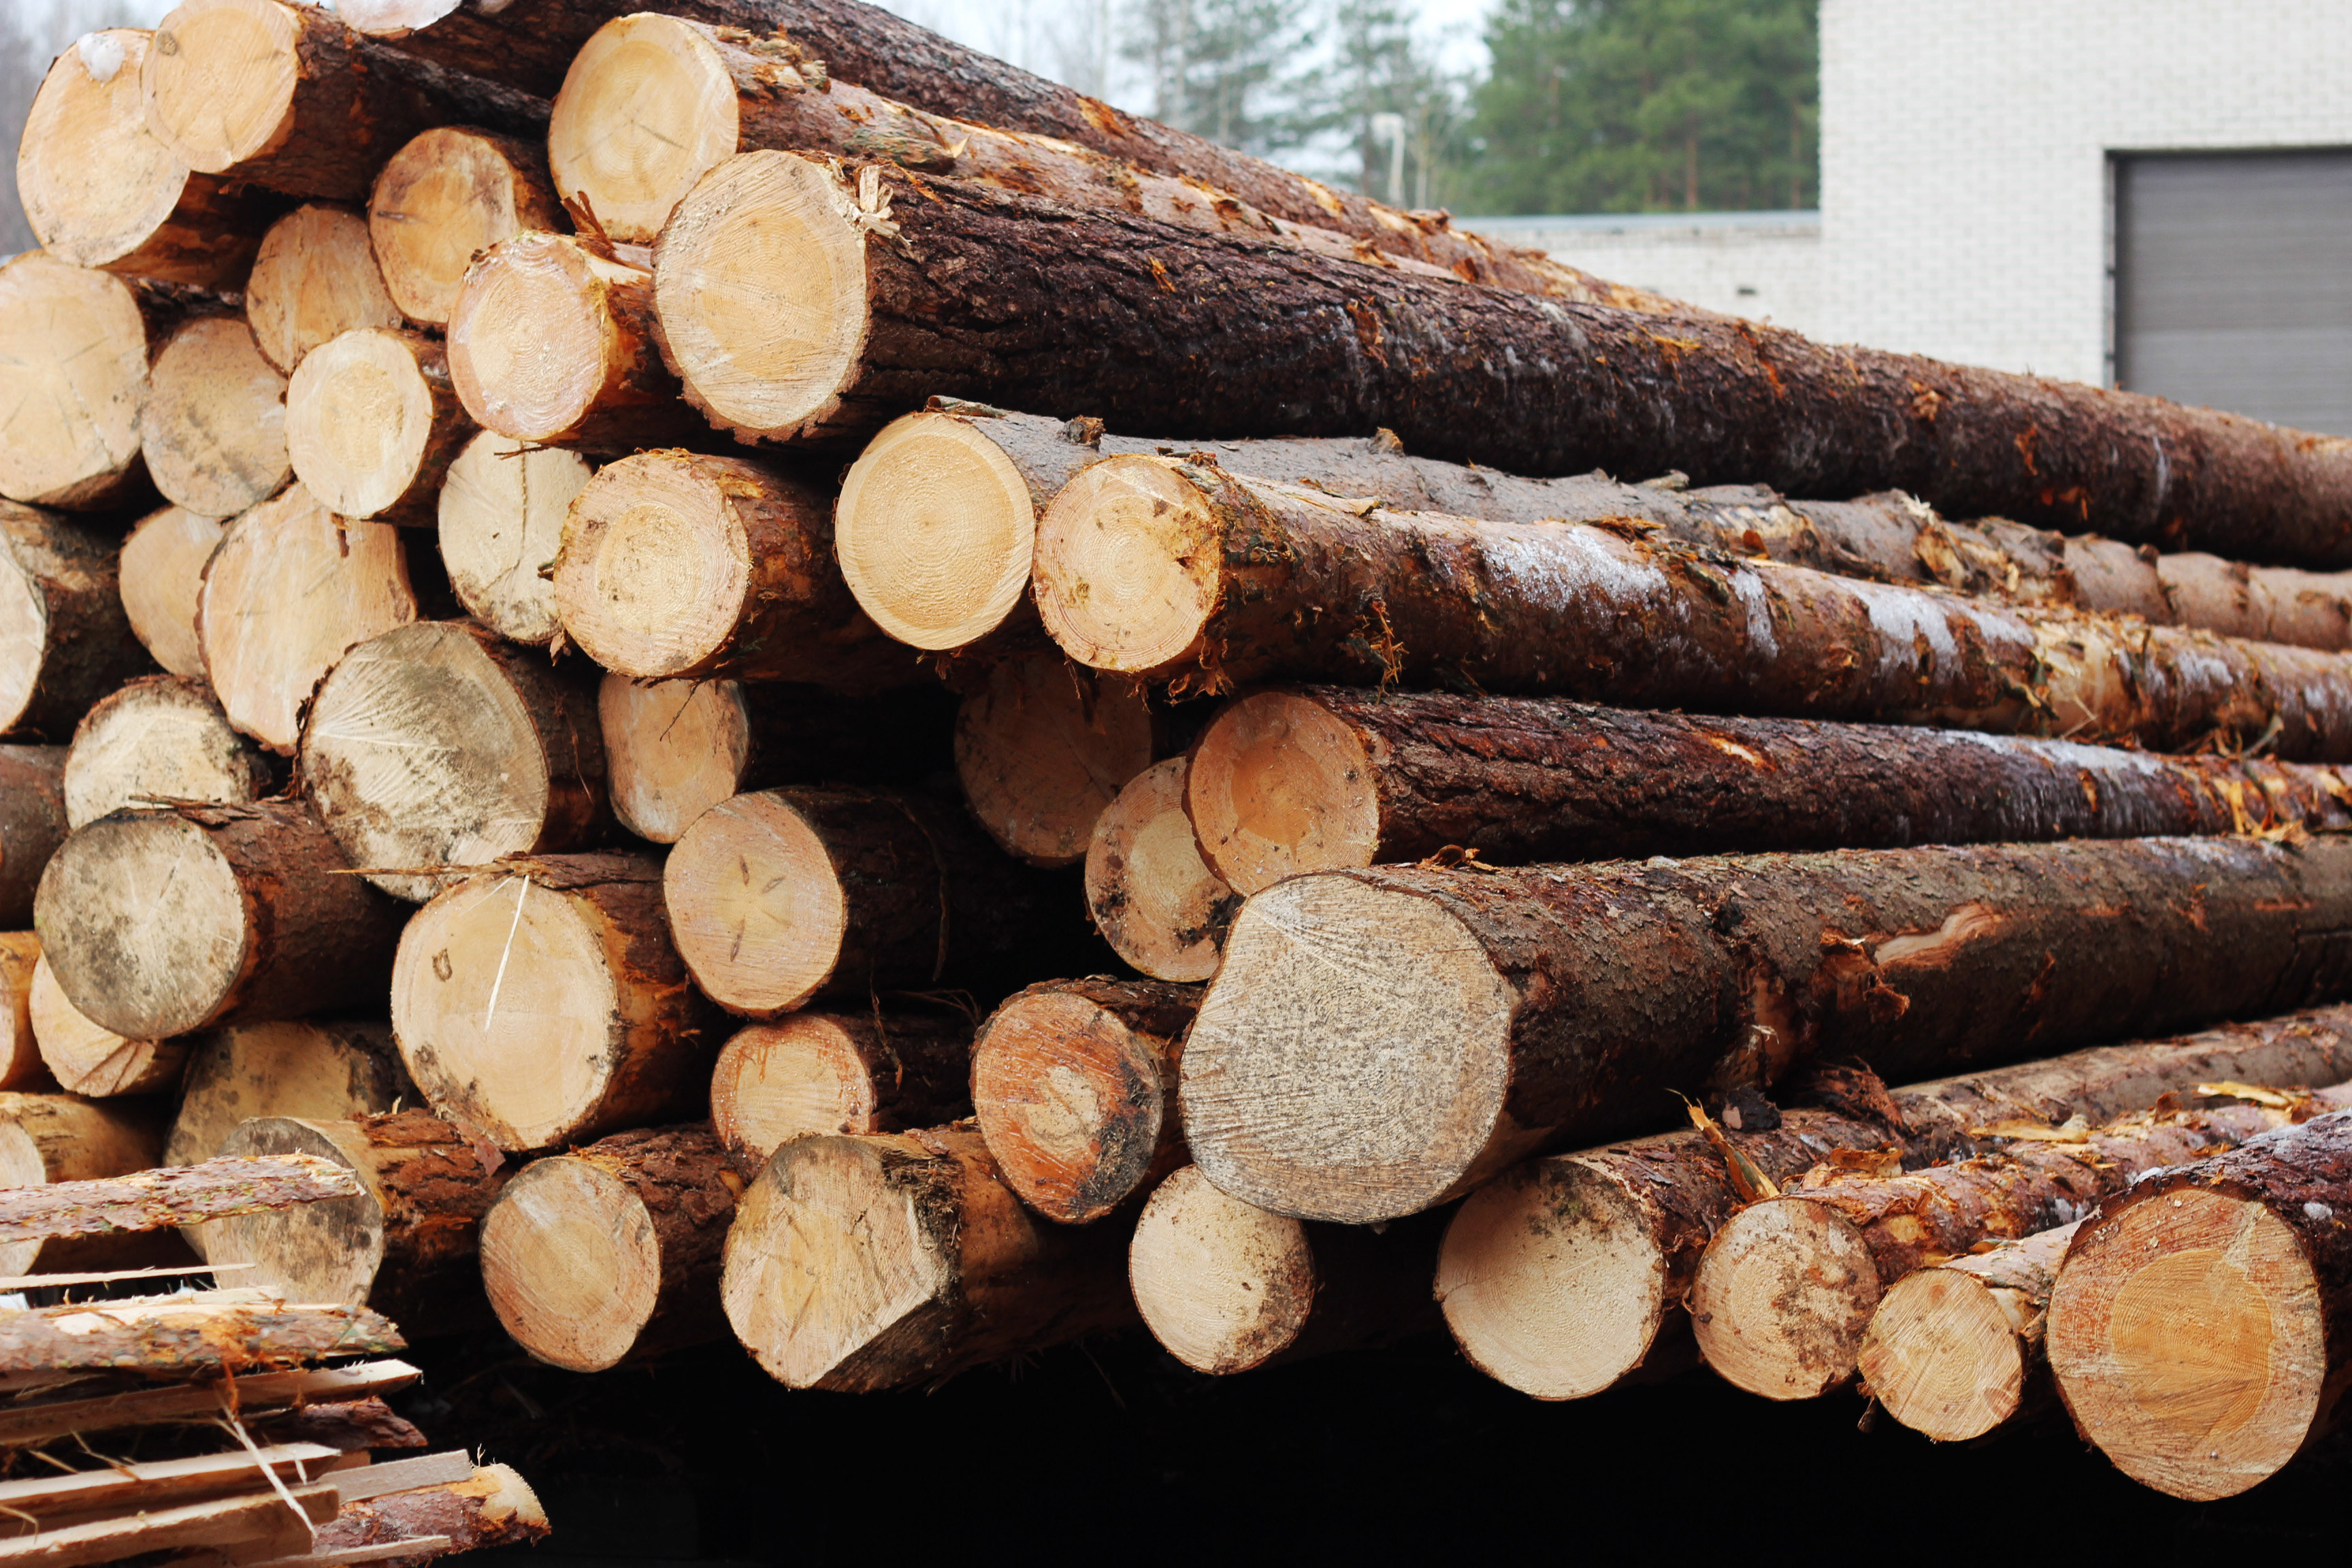
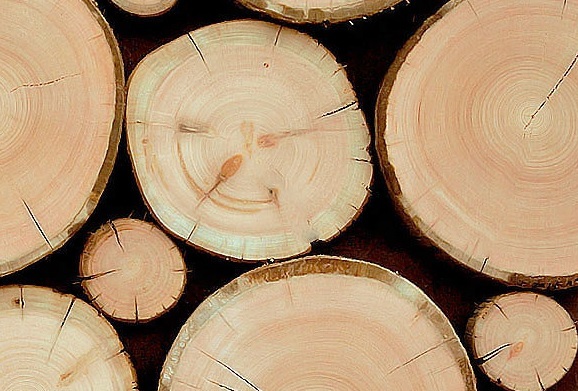
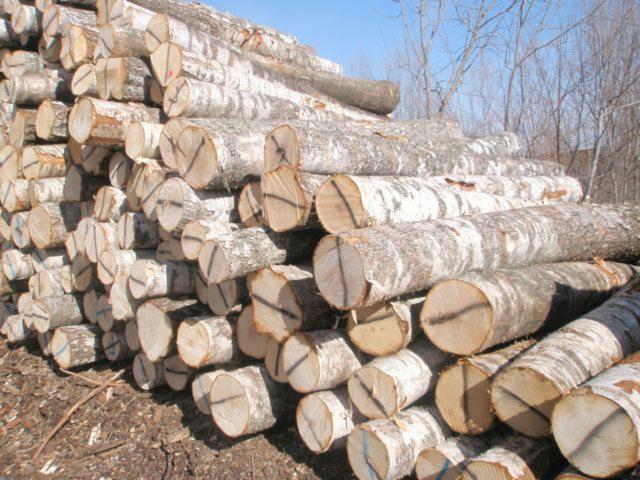
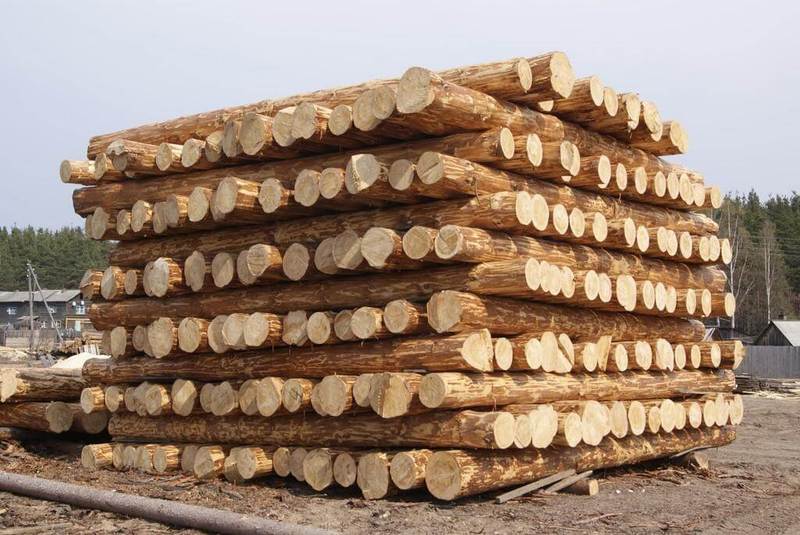
All of these options are dense and solid enough to withstand the constant effects of hot temperatures and steam. It is best to buy wood brought from the northern regions. The greatest honor and demand is wood from the Pskov region. You also need to pay attention to the time of purchase: it is best if the wood was harvested in winter. Try not to choose too thick logs, as they will crack more quickly than others. It is necessary to give preference to young trees of medium diameter.


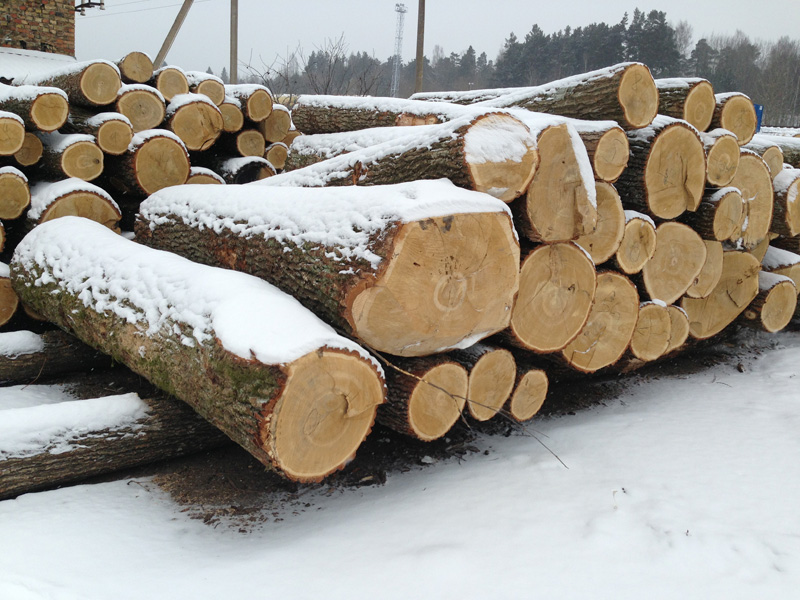
After buying timber, you need to carefully consider the preparation for the subsequent construction. It is necessary to give the log house at least a month "lie down." Logs stacked piles. It is necessary to leave a ventilation gap of 5 cm between them so that the material can “breathe”. Only after the log house "otlezhitsya", you can proceed to construction.
The selection and preparation of the material is an important step on the way to the construction of the bath. You should not try to save money by choosing low quality wood. The walls of the bath can crack, and the insulating properties are below average. In order not to risk, buy high-quality forest, cut down in the winter and supplied from the northern regions.
Project
Turning directly to the planning of the bathhouse itself, it is necessary to determine its specific appearance and layout. There are two ways: either you can choose a ready-made project, or you can create your own individual one that meets all the requirements and wishes of future owners. The first method is simpler. Below are examples of projects with a brief description.
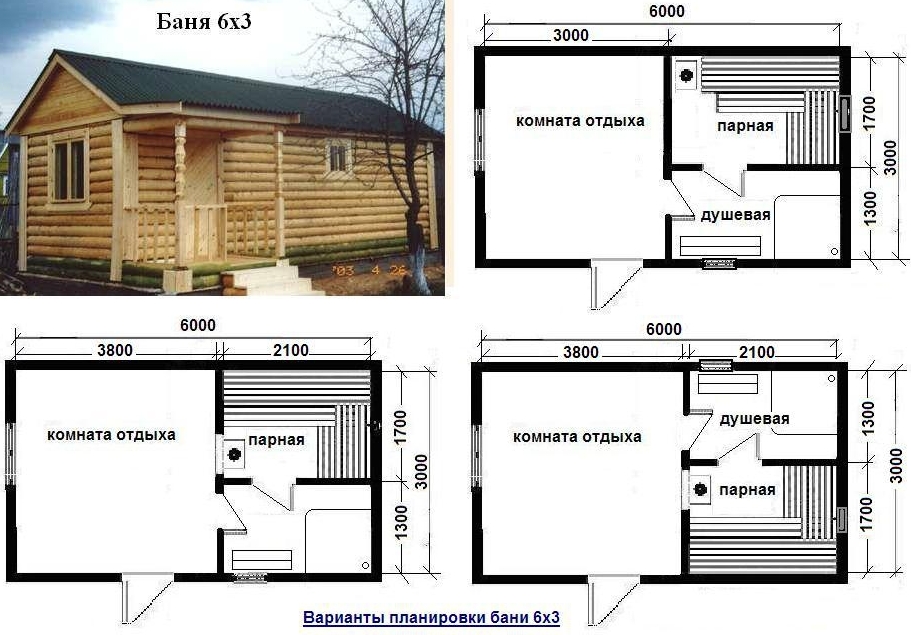
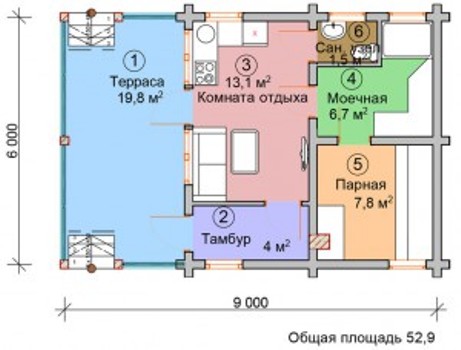
If you plan to build a small bath, for example, the size of 6x3 mthen you should look at minimalistic options with a small number of rooms. In this project, only the necessary is left: a shower, a steam room and a spacious dressing room. This is enough for a comfortable bathing holiday.
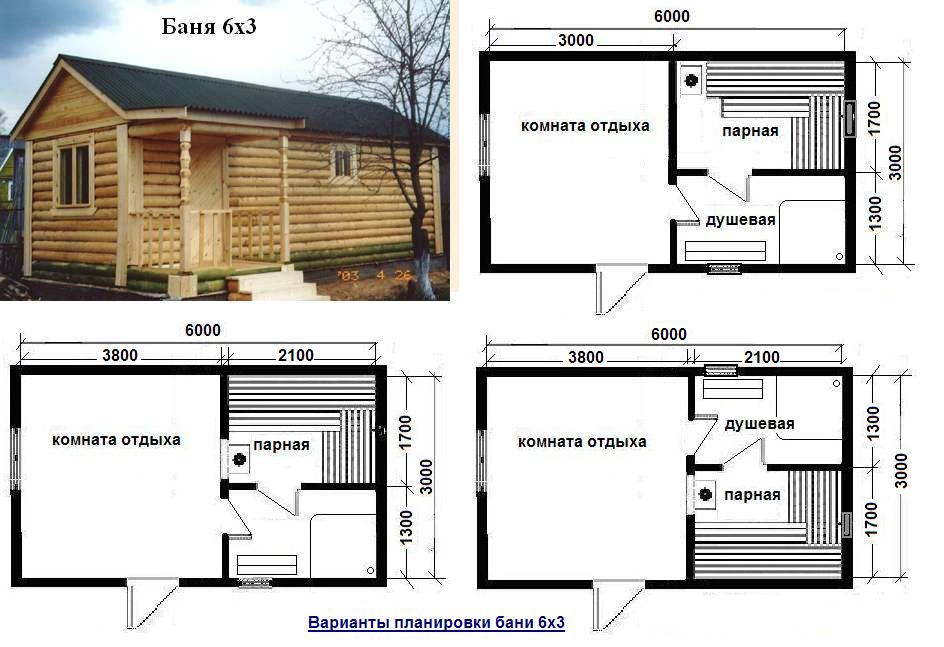
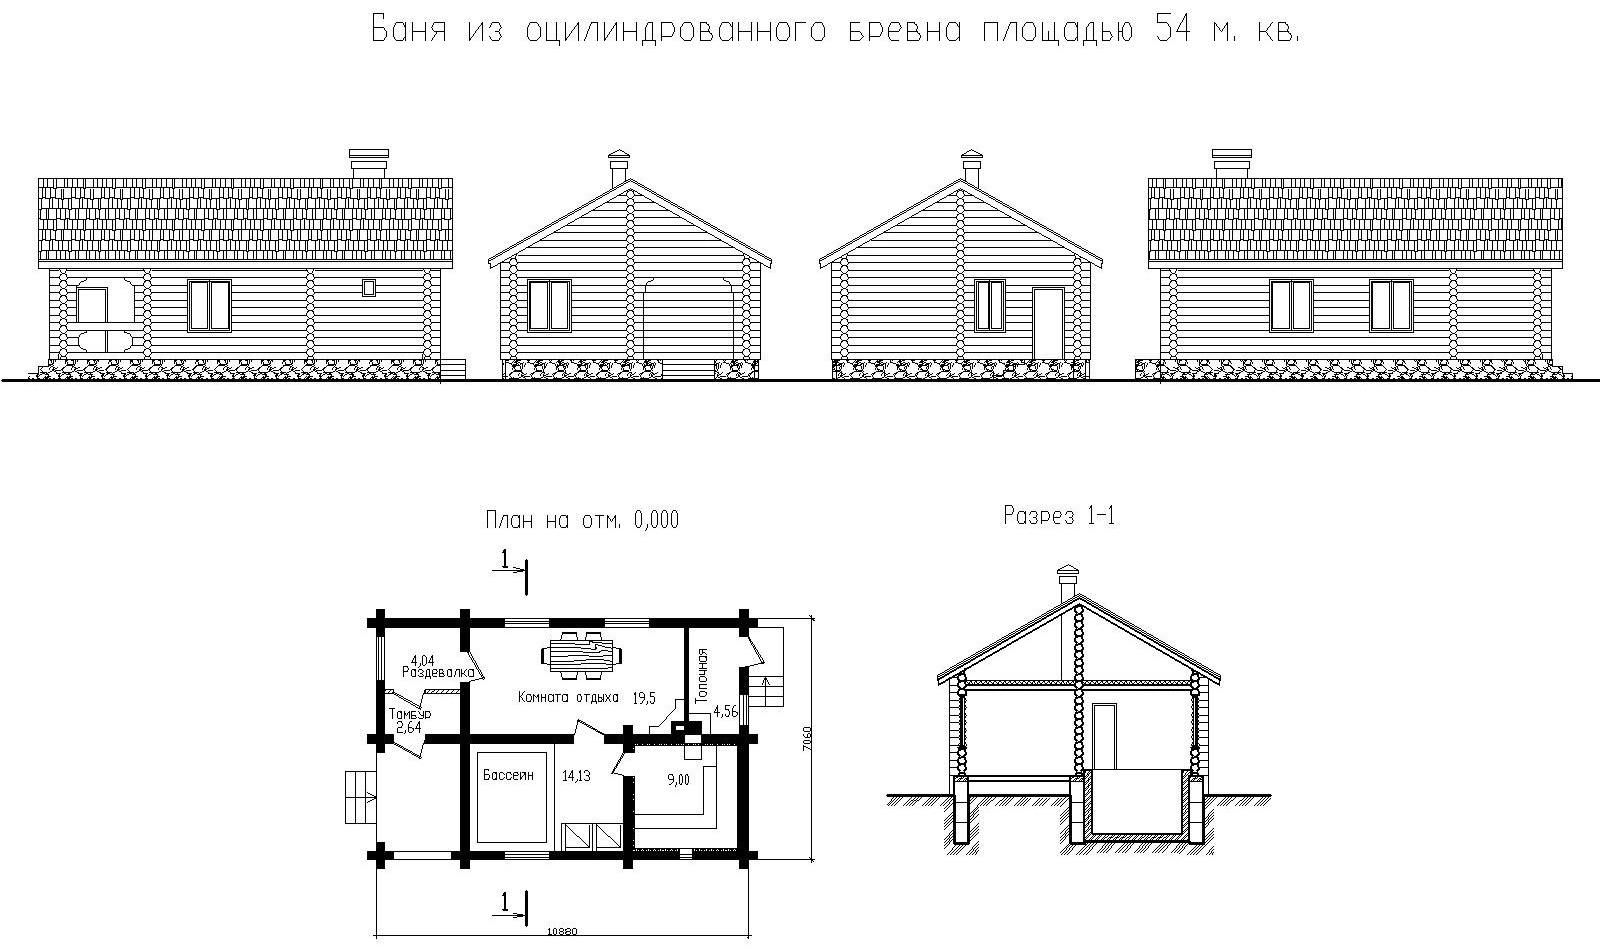
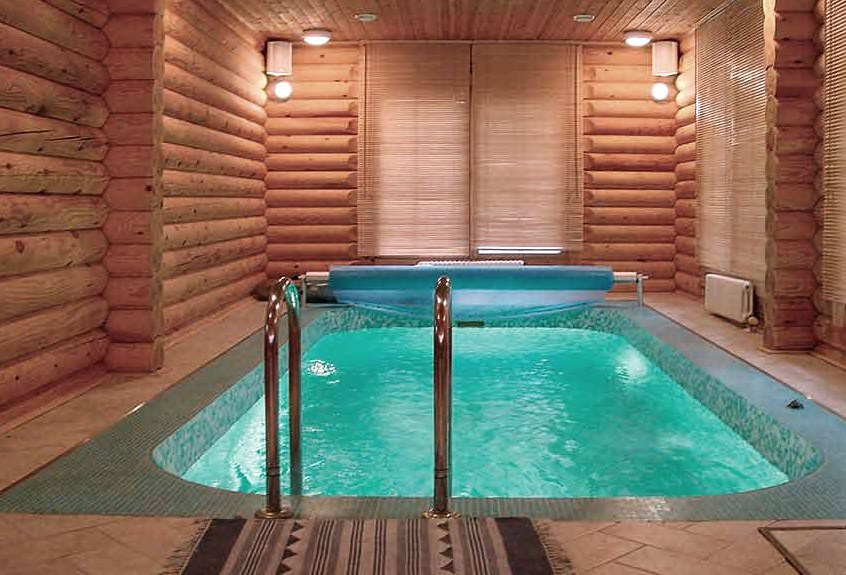
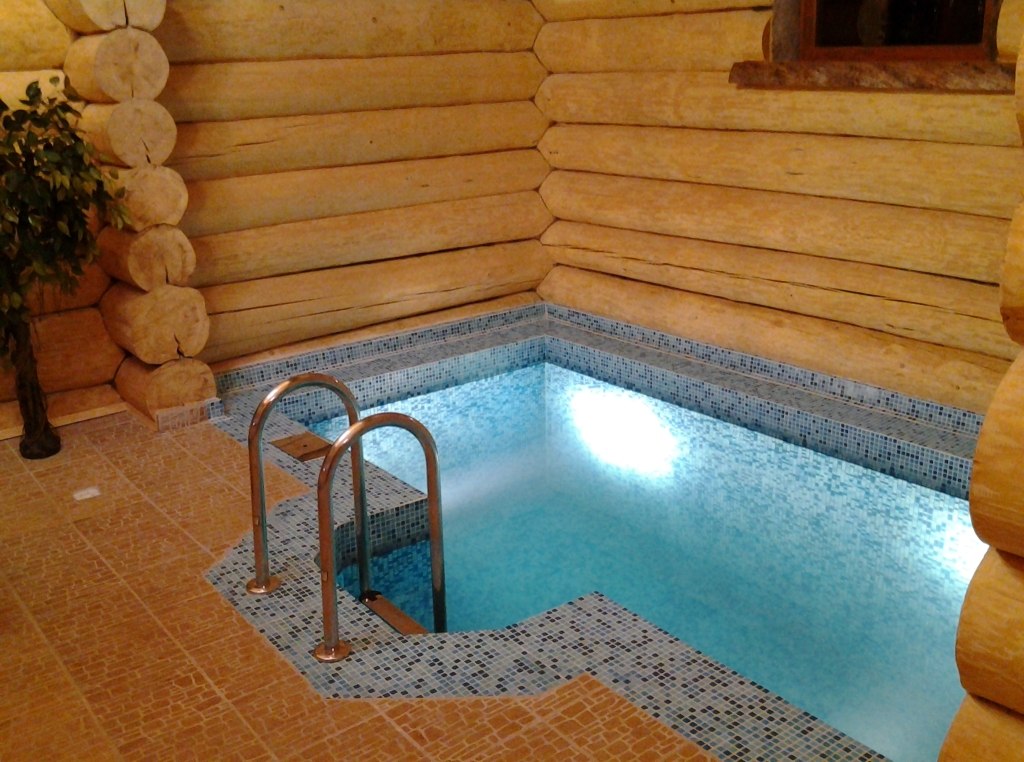
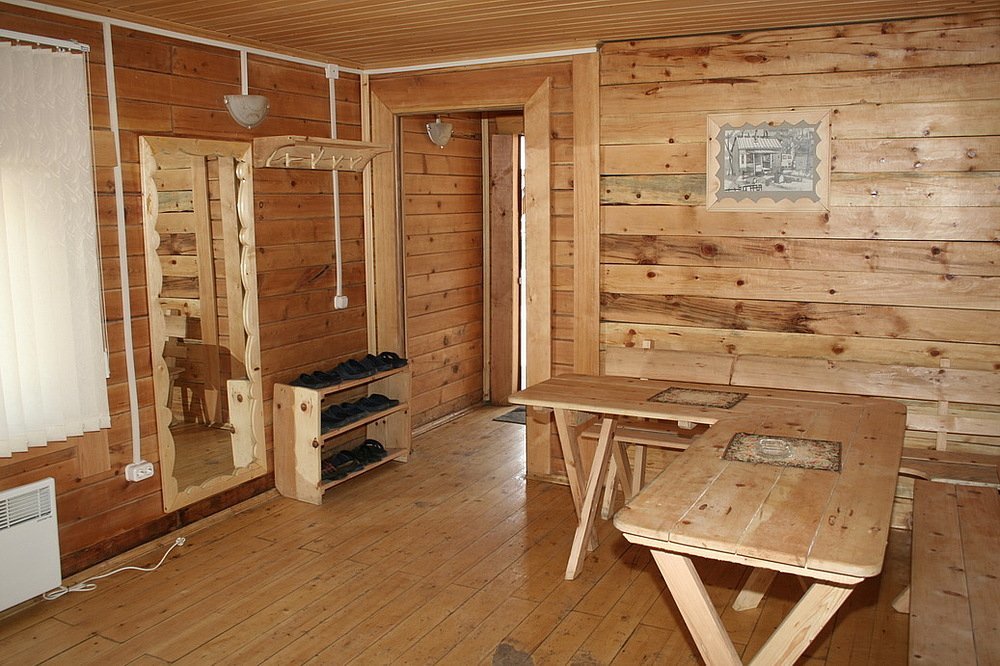
This bath is more like a whole house, especially given its impressive dimensions. Here, the rest room can no longer be called a waiting room because of the large area and high functionality. If desired, the recreation room could be supplemented with a TV or converted into an indoor pool.
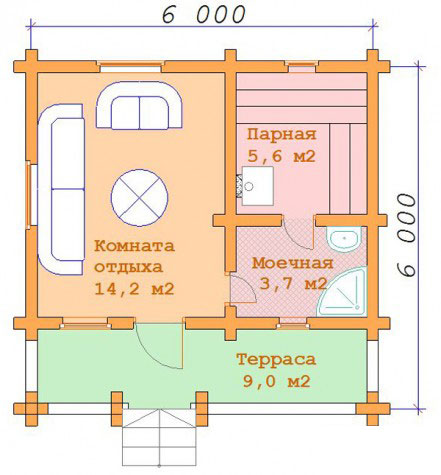
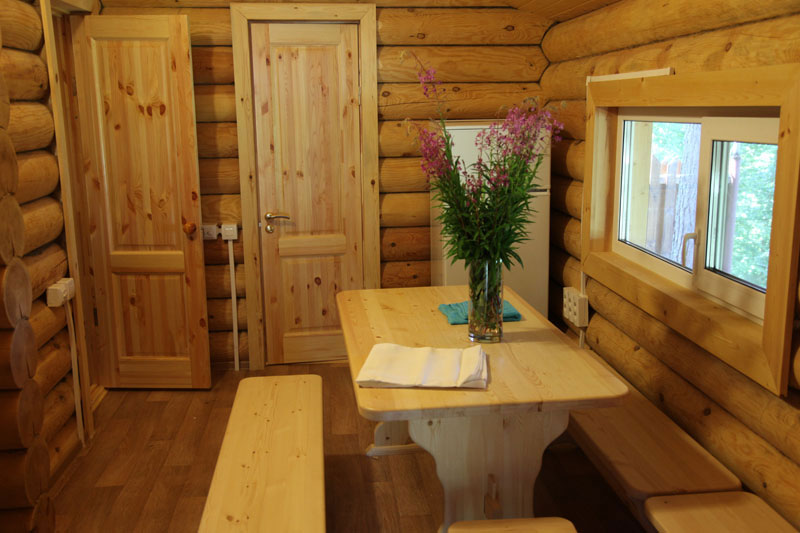
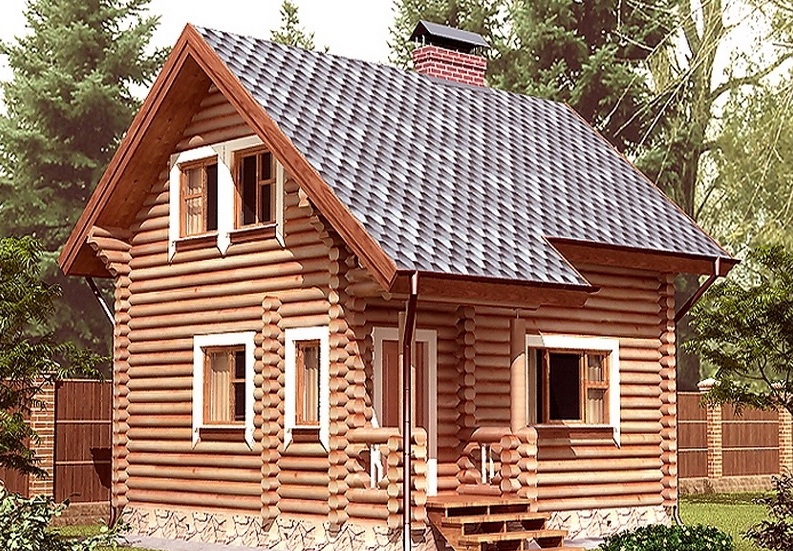
A small wooden bath of 6x6 m equipped with everything you need, including a bathroom. Even a small building may have sufficient functionality. The only thing that is inconvenient in this project is that the stove used here is not equipped with a portable firebox.

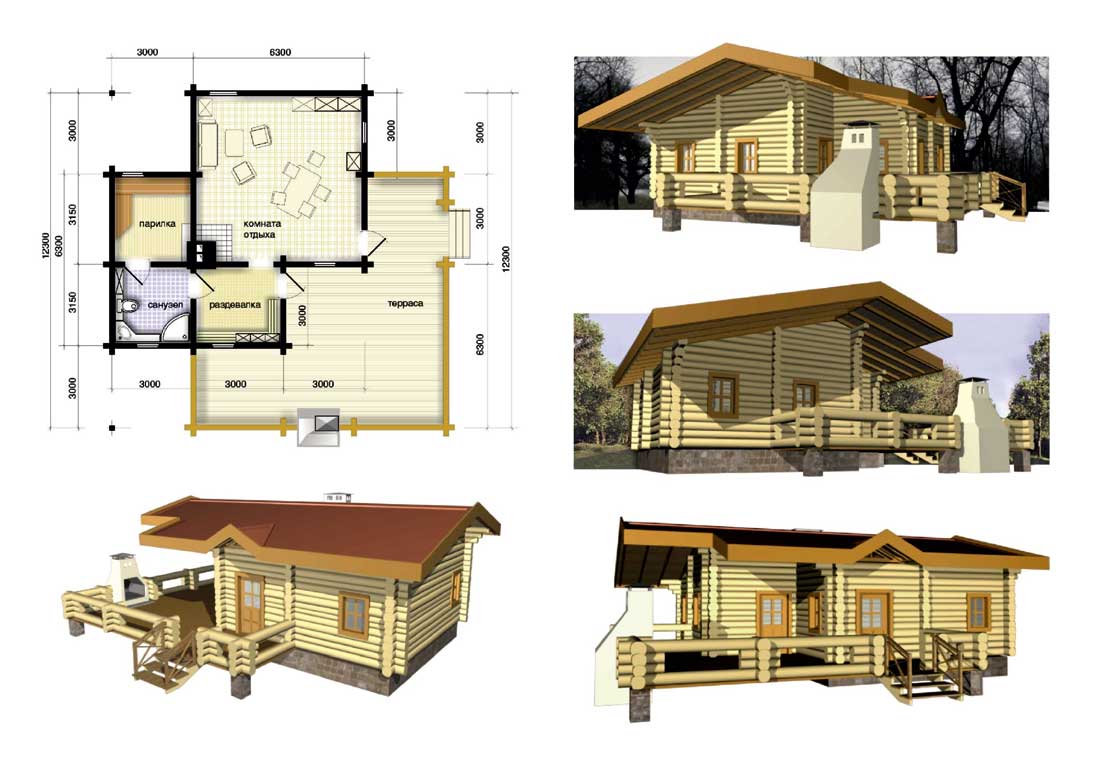
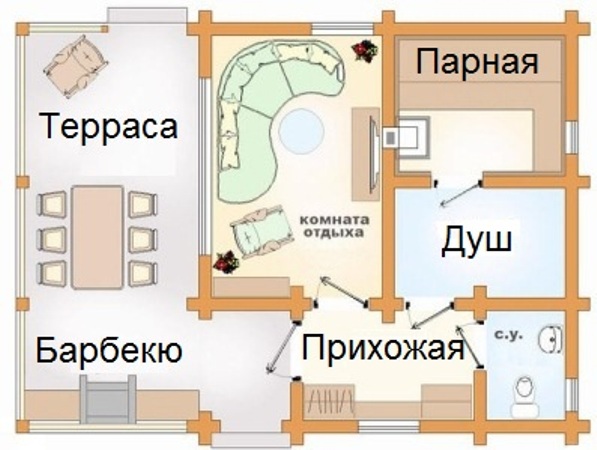
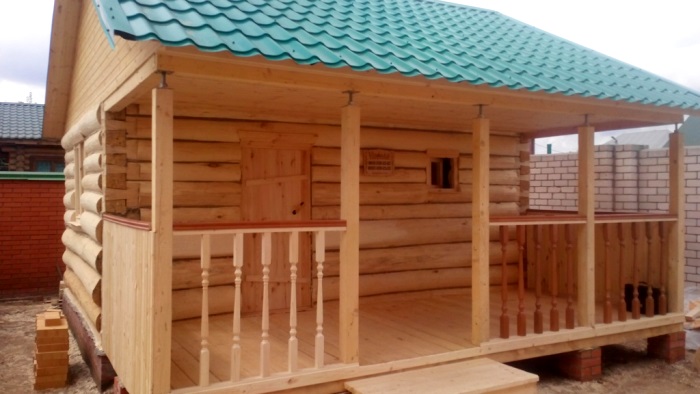
Bath can be a full-fledged vacation spot, especially if you supplement it with several functional zones: equip a barbecue on the terrace, equip a recreation room with a TV or come up with something else. The restriction imposes only the project area.


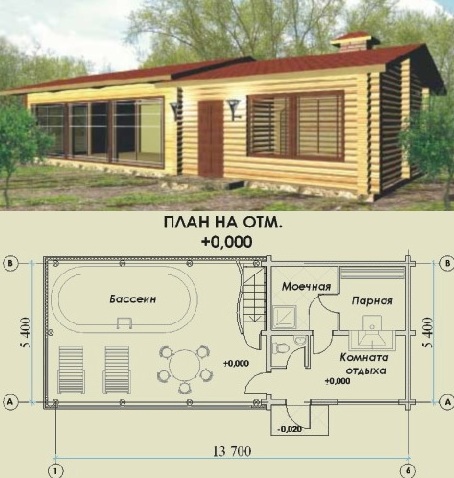
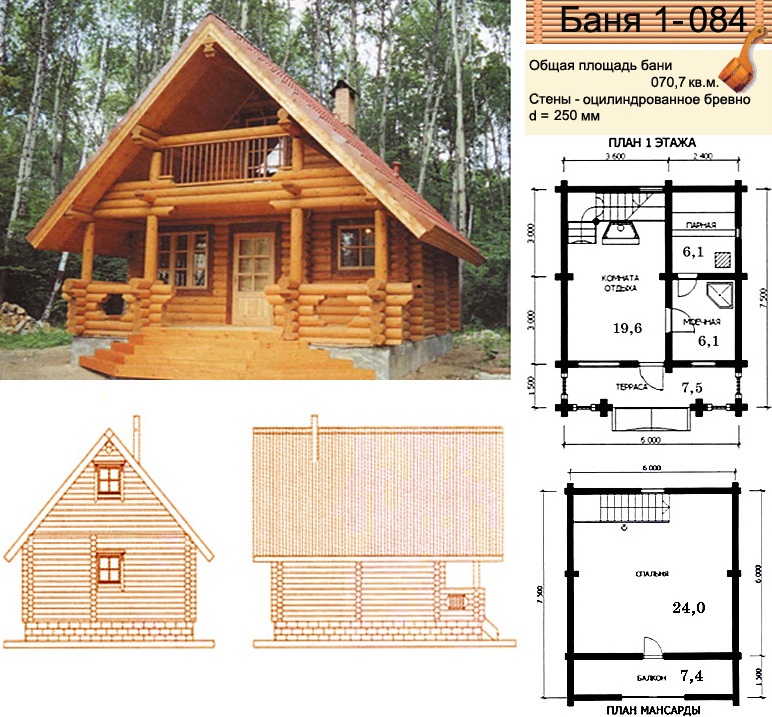
A truly large bath, equipped with a special room for the pool. As can be understood from the plan, this building is a two-story building, but it is not necessary to equip the second floor or the attic: the building is good and so.
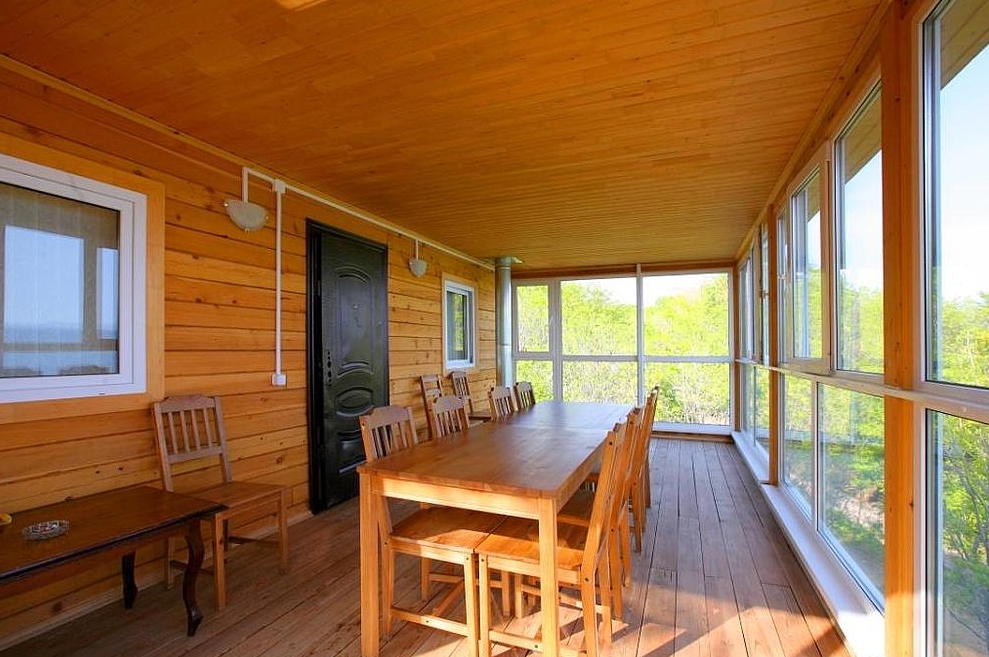
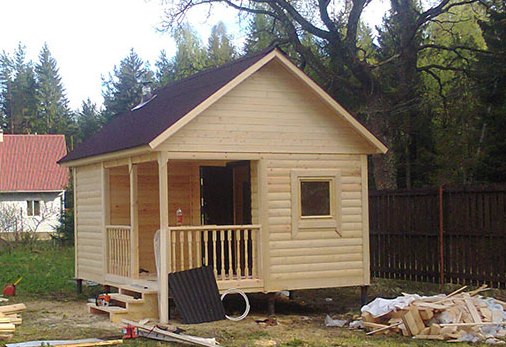
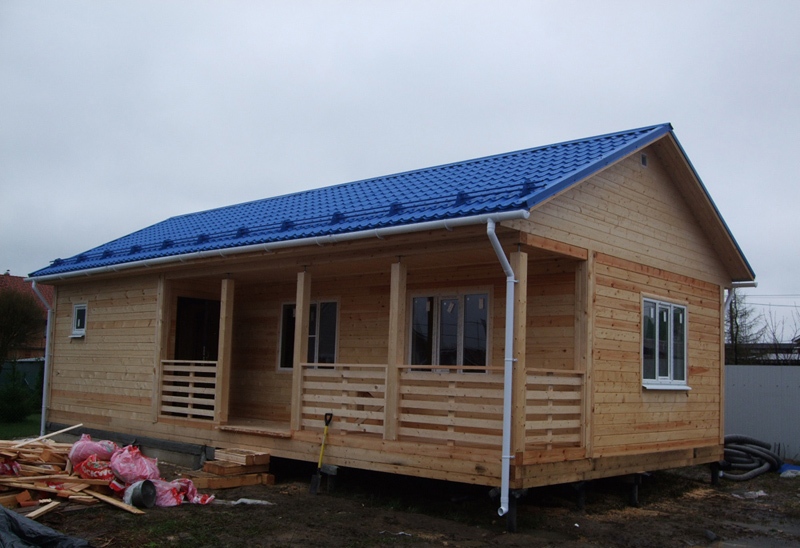
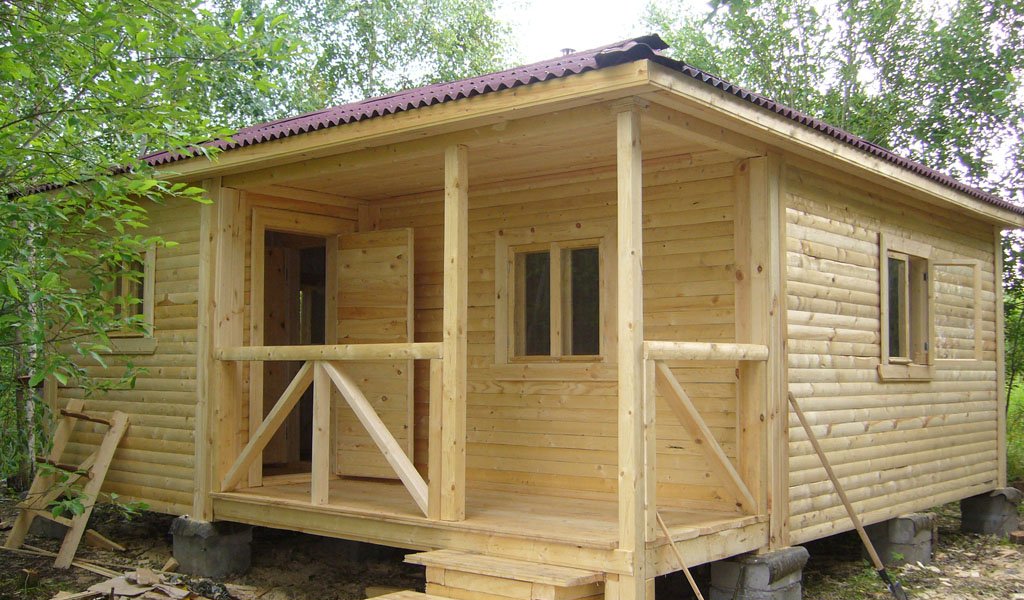
Here the bath is equipped with a veranda. In one building two recreation areas are combined: on the one hand, the terrace can be used simply for tea drinking, on the other - to rest on it after holding bath events.

Another small project that involves entering the rest room through the vestibule. Among others, there is also a technical room, which helps to control the functioning of all systems. An electric oven is regulated just from here.
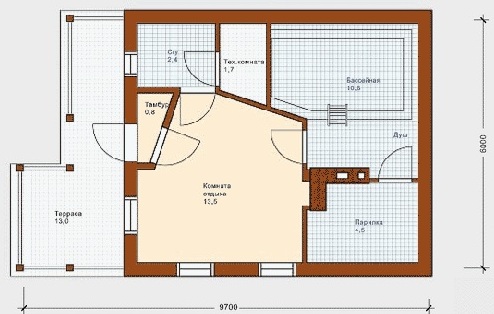
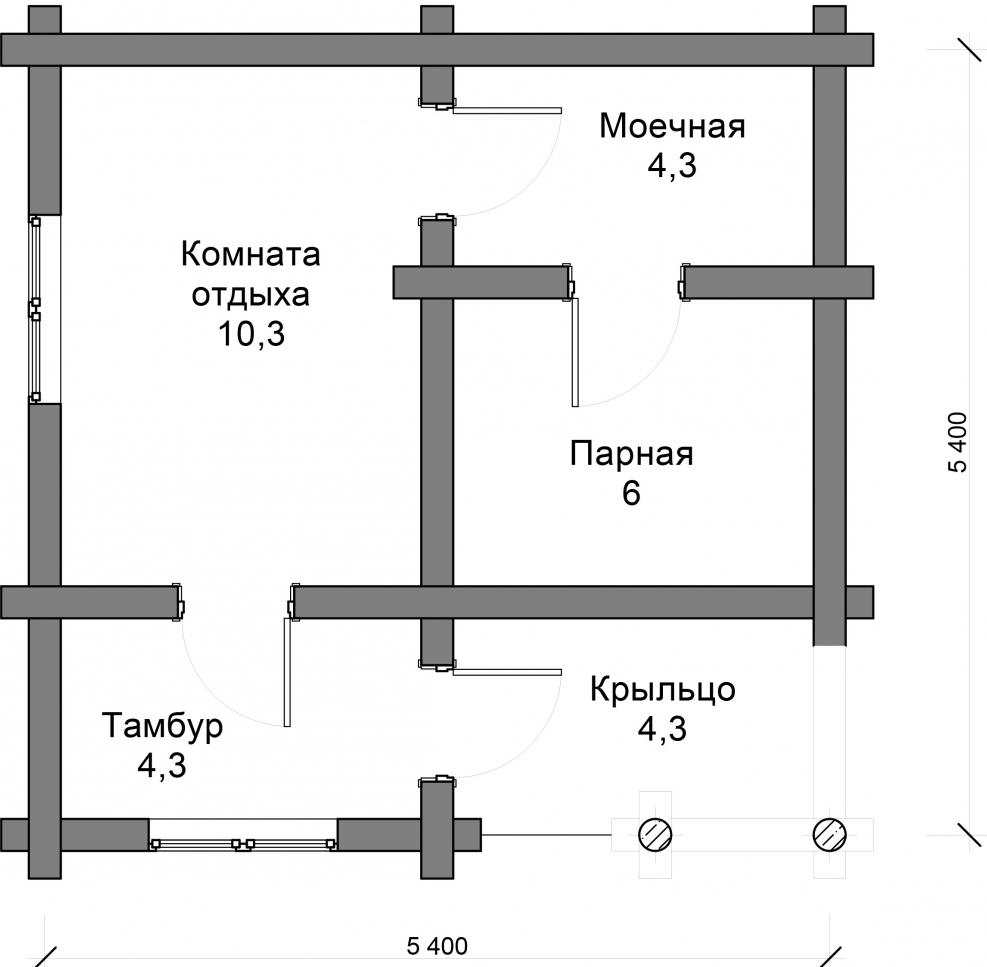
A good example of how a project should not be. Please note that there is no access to other rooms besides the vestibule. Be extremely careful when drawing up project plans and do not make such elementary mistakes.

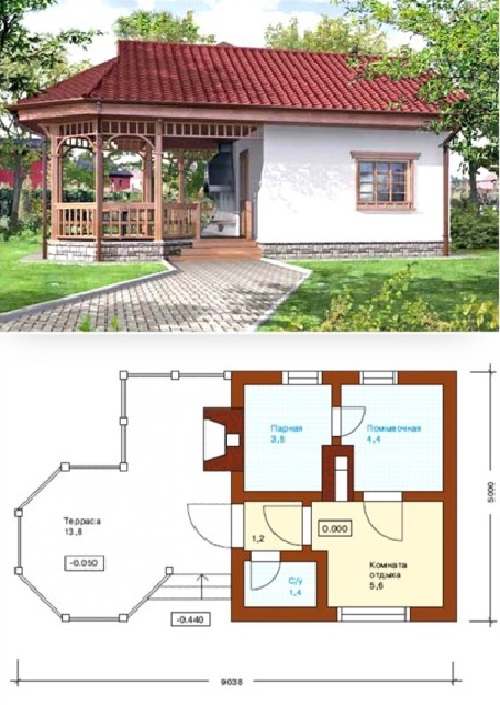
Miniature bath of 4x5 m may be enough for a good rest. A large company does not fit here, but if the building is being built for a small family, a pair of such dimensions will be more than enough.


In which case, in such a building you can even live in the summer.In the kitchen, you will need to make an extract, because if the smells from it reach the steam room (which is unlikely), then the tree will absorb all the unnecessary odors, and get rid of them will not work.

As for the individual sketches, they can be made up on their own or be commissioned by a professional. The main thing is that your bath should be the right size and accommodate all the necessary rooms, in your opinion. Despite the fact that single-storey buildings are more popular than two-storey buildings, in some cases two floors allow saving area of the site, while creating additional space in the bathhouse building. Please note that the steam room is always located on the floor, as a reinforced foundation is required for the stove.
Foundation
In order to make a foundation, you do not need special knowledge and experience. All that is needed is to arm yourself with materials and tools and be ready to spend enough time on construction.
You will need the following materials and tools:
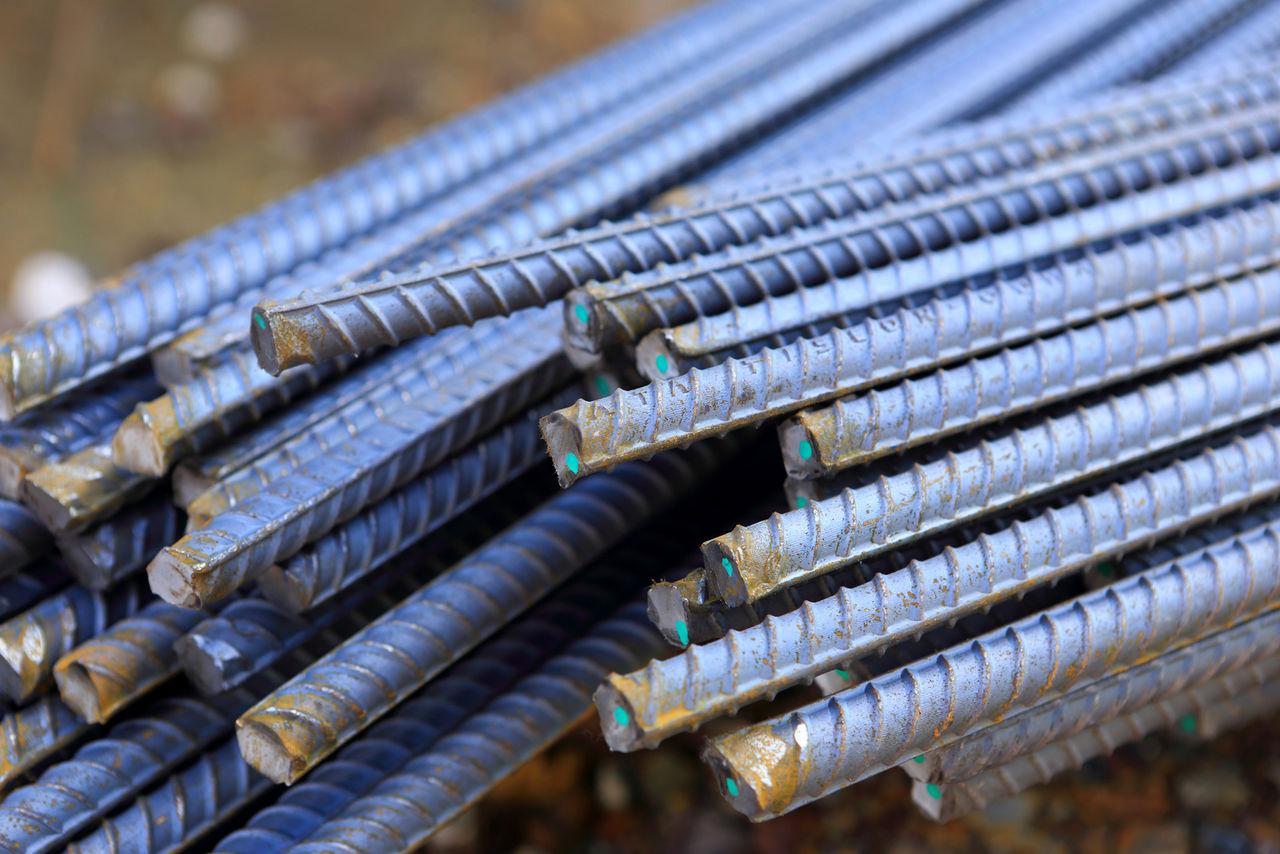
- fittings;
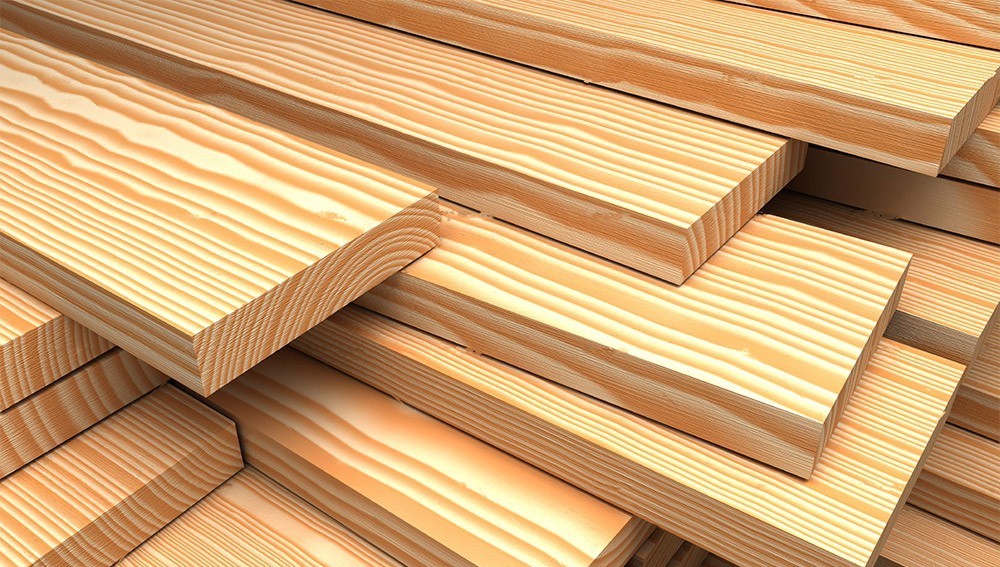
- lumber;
- nails;

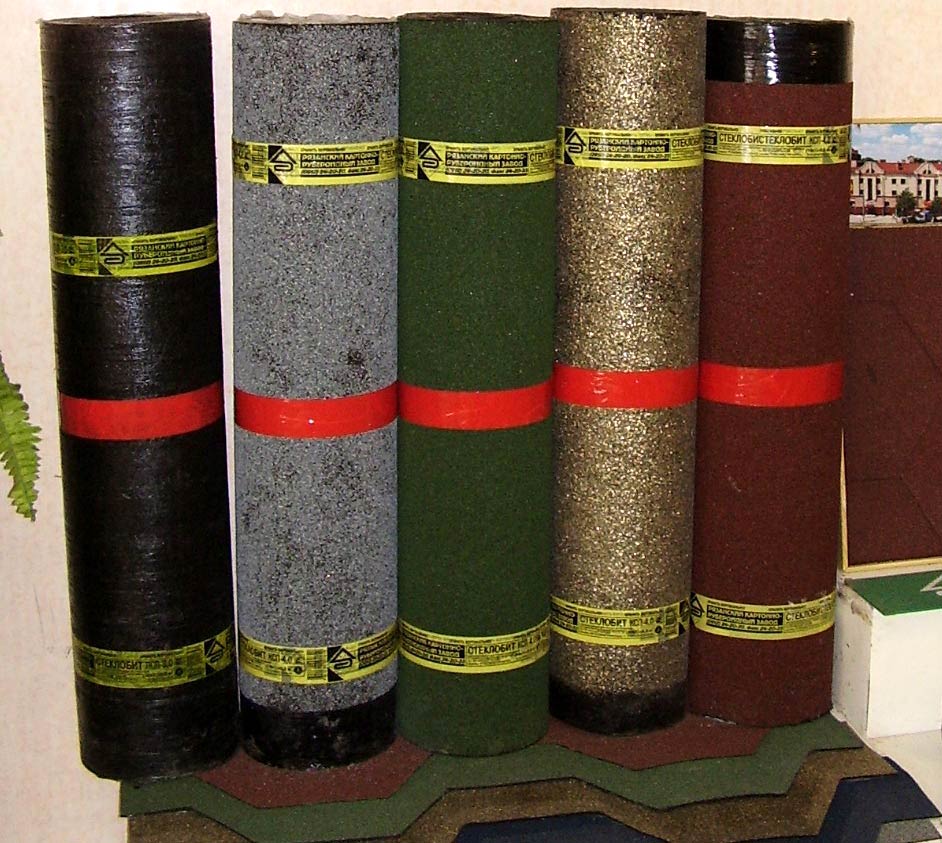
- a pair of rolls of ruberoid for waterproofing;
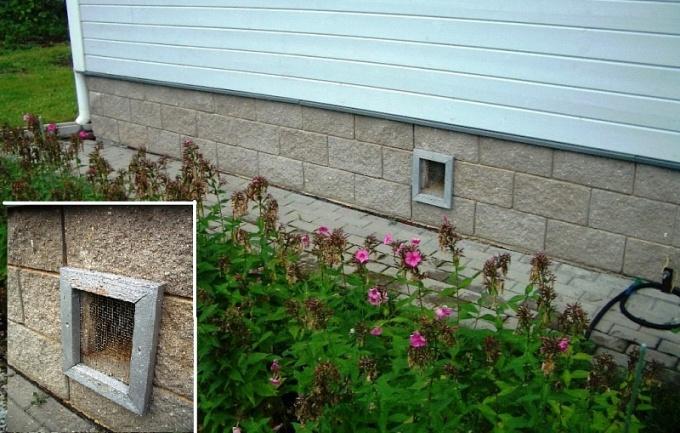
- plastic airways;
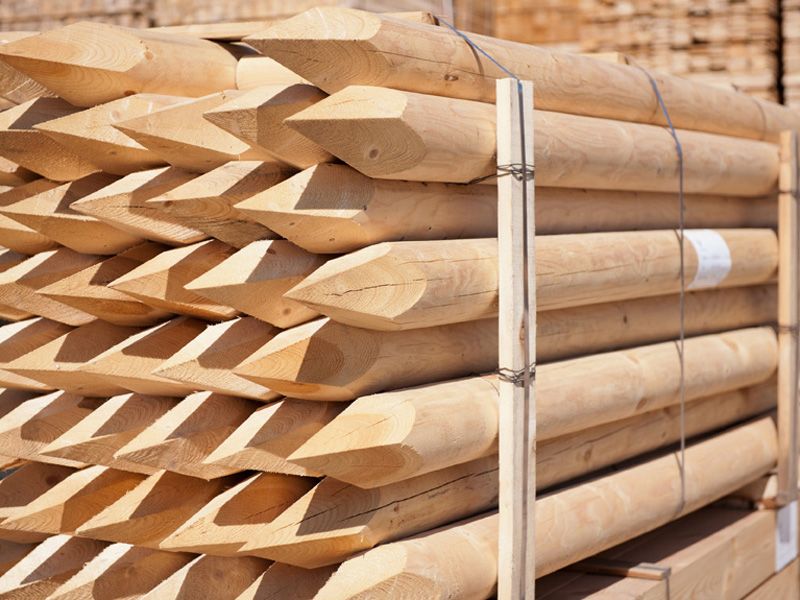
- wooden stakes;
- rope;
- hammer;
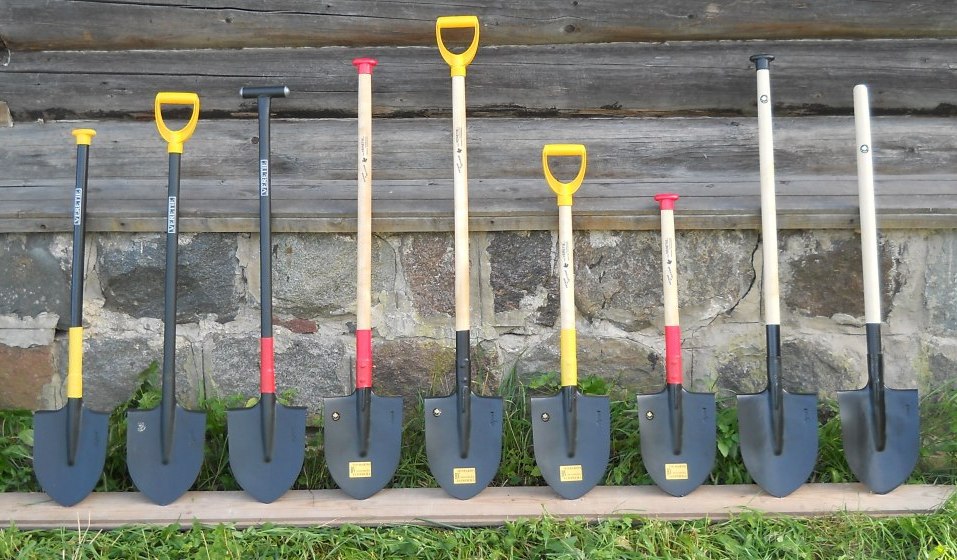
- shovel;
- level.


Pay attention to the condition of the soil. If it is heaving, then it will be necessary to additionally strengthen the foundation with reinforced belts.
Now you can proceed to the construction of the foundation from scratch. Below is a list of steps that you need to perform in stages.
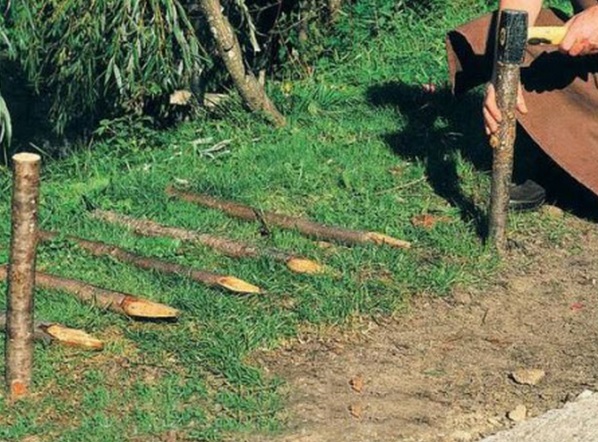
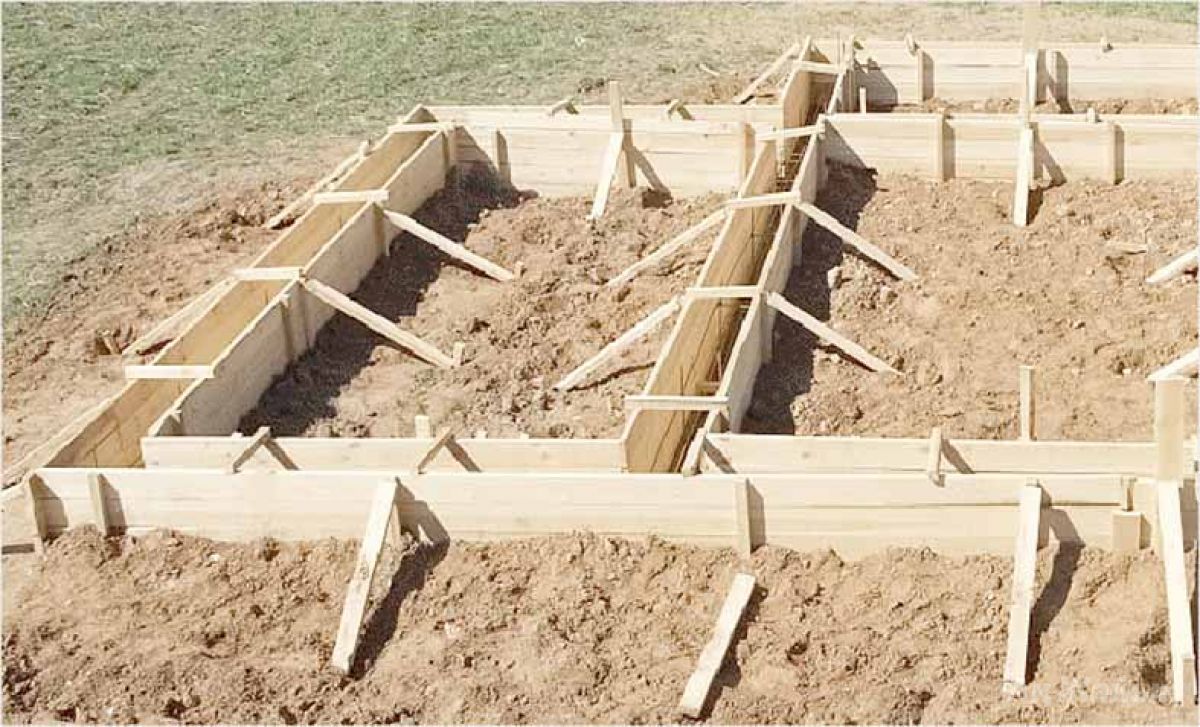
- Separate the site for building a bath with stakes and a rope. Set the stakes on the alleged corners of the future bath, and stretch the rope between them.


Keep in mind that the foundation should be made 45 cm high. For a log sauna this is quite enough. If you make the foundation lower, you may not be able to arrange all communications, and a higher foundation is a waste of money.
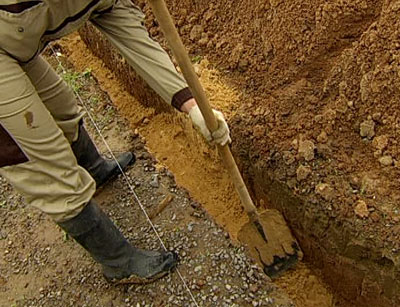
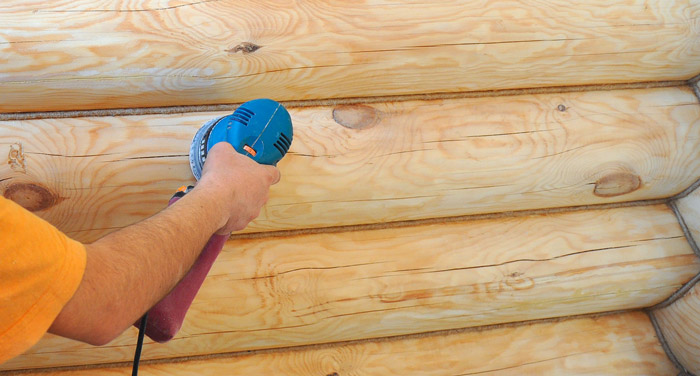
- The shovel should be well sharpened before you start digging a trench. To grind, use the grinder.
- Dig trenches with a depth of 50 cm, strictly observing the boundaries laid out at the first stage.
- The walls of the trench should not crumble; a spade was ground for this. If you are building a bath in the area with loose soil and there is no possibility to correct the situation, then protect the walls from falling over with wooden panels.

- In the corner, dig a plot for the future boiler.Its size depends on the dimensions of your chosen boiler.
- Check how quality lumber you delivered. It is extremely important that it be truly high-quality: then the base will not crack or fall apart. Timber should not have any knots or breaks.
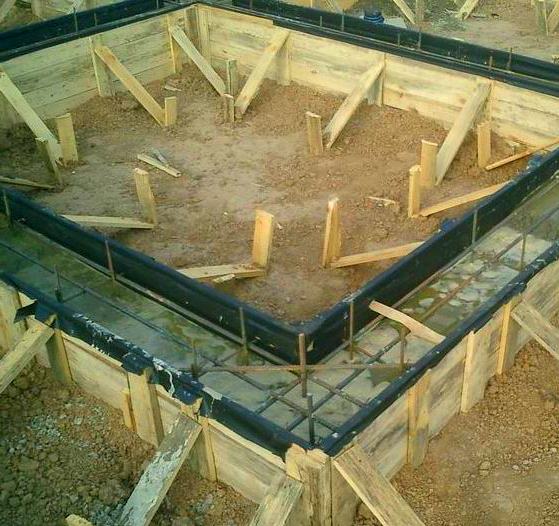
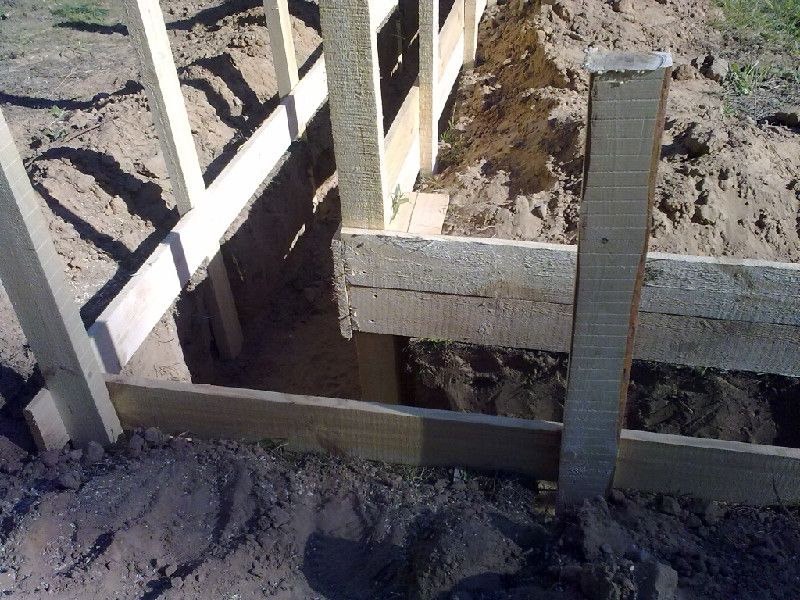
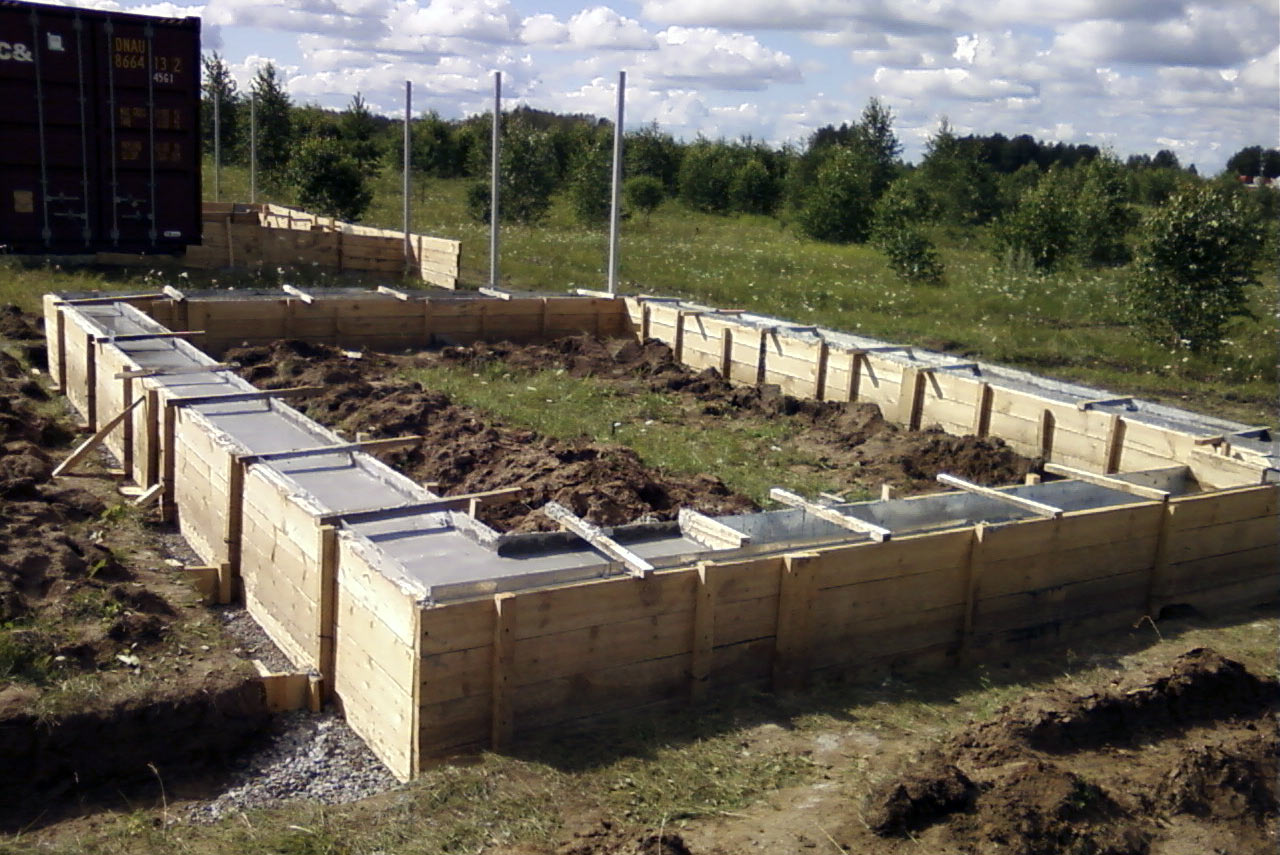
- Install the box on the boundaries of the trench, not plunging into it. A lumber box must be slightly larger than a trench wide. Through each meter on the walls of the box of the longitudinal boards, you need to install one transverse bar. On the sides, fasten the wooden “walls” with screws.

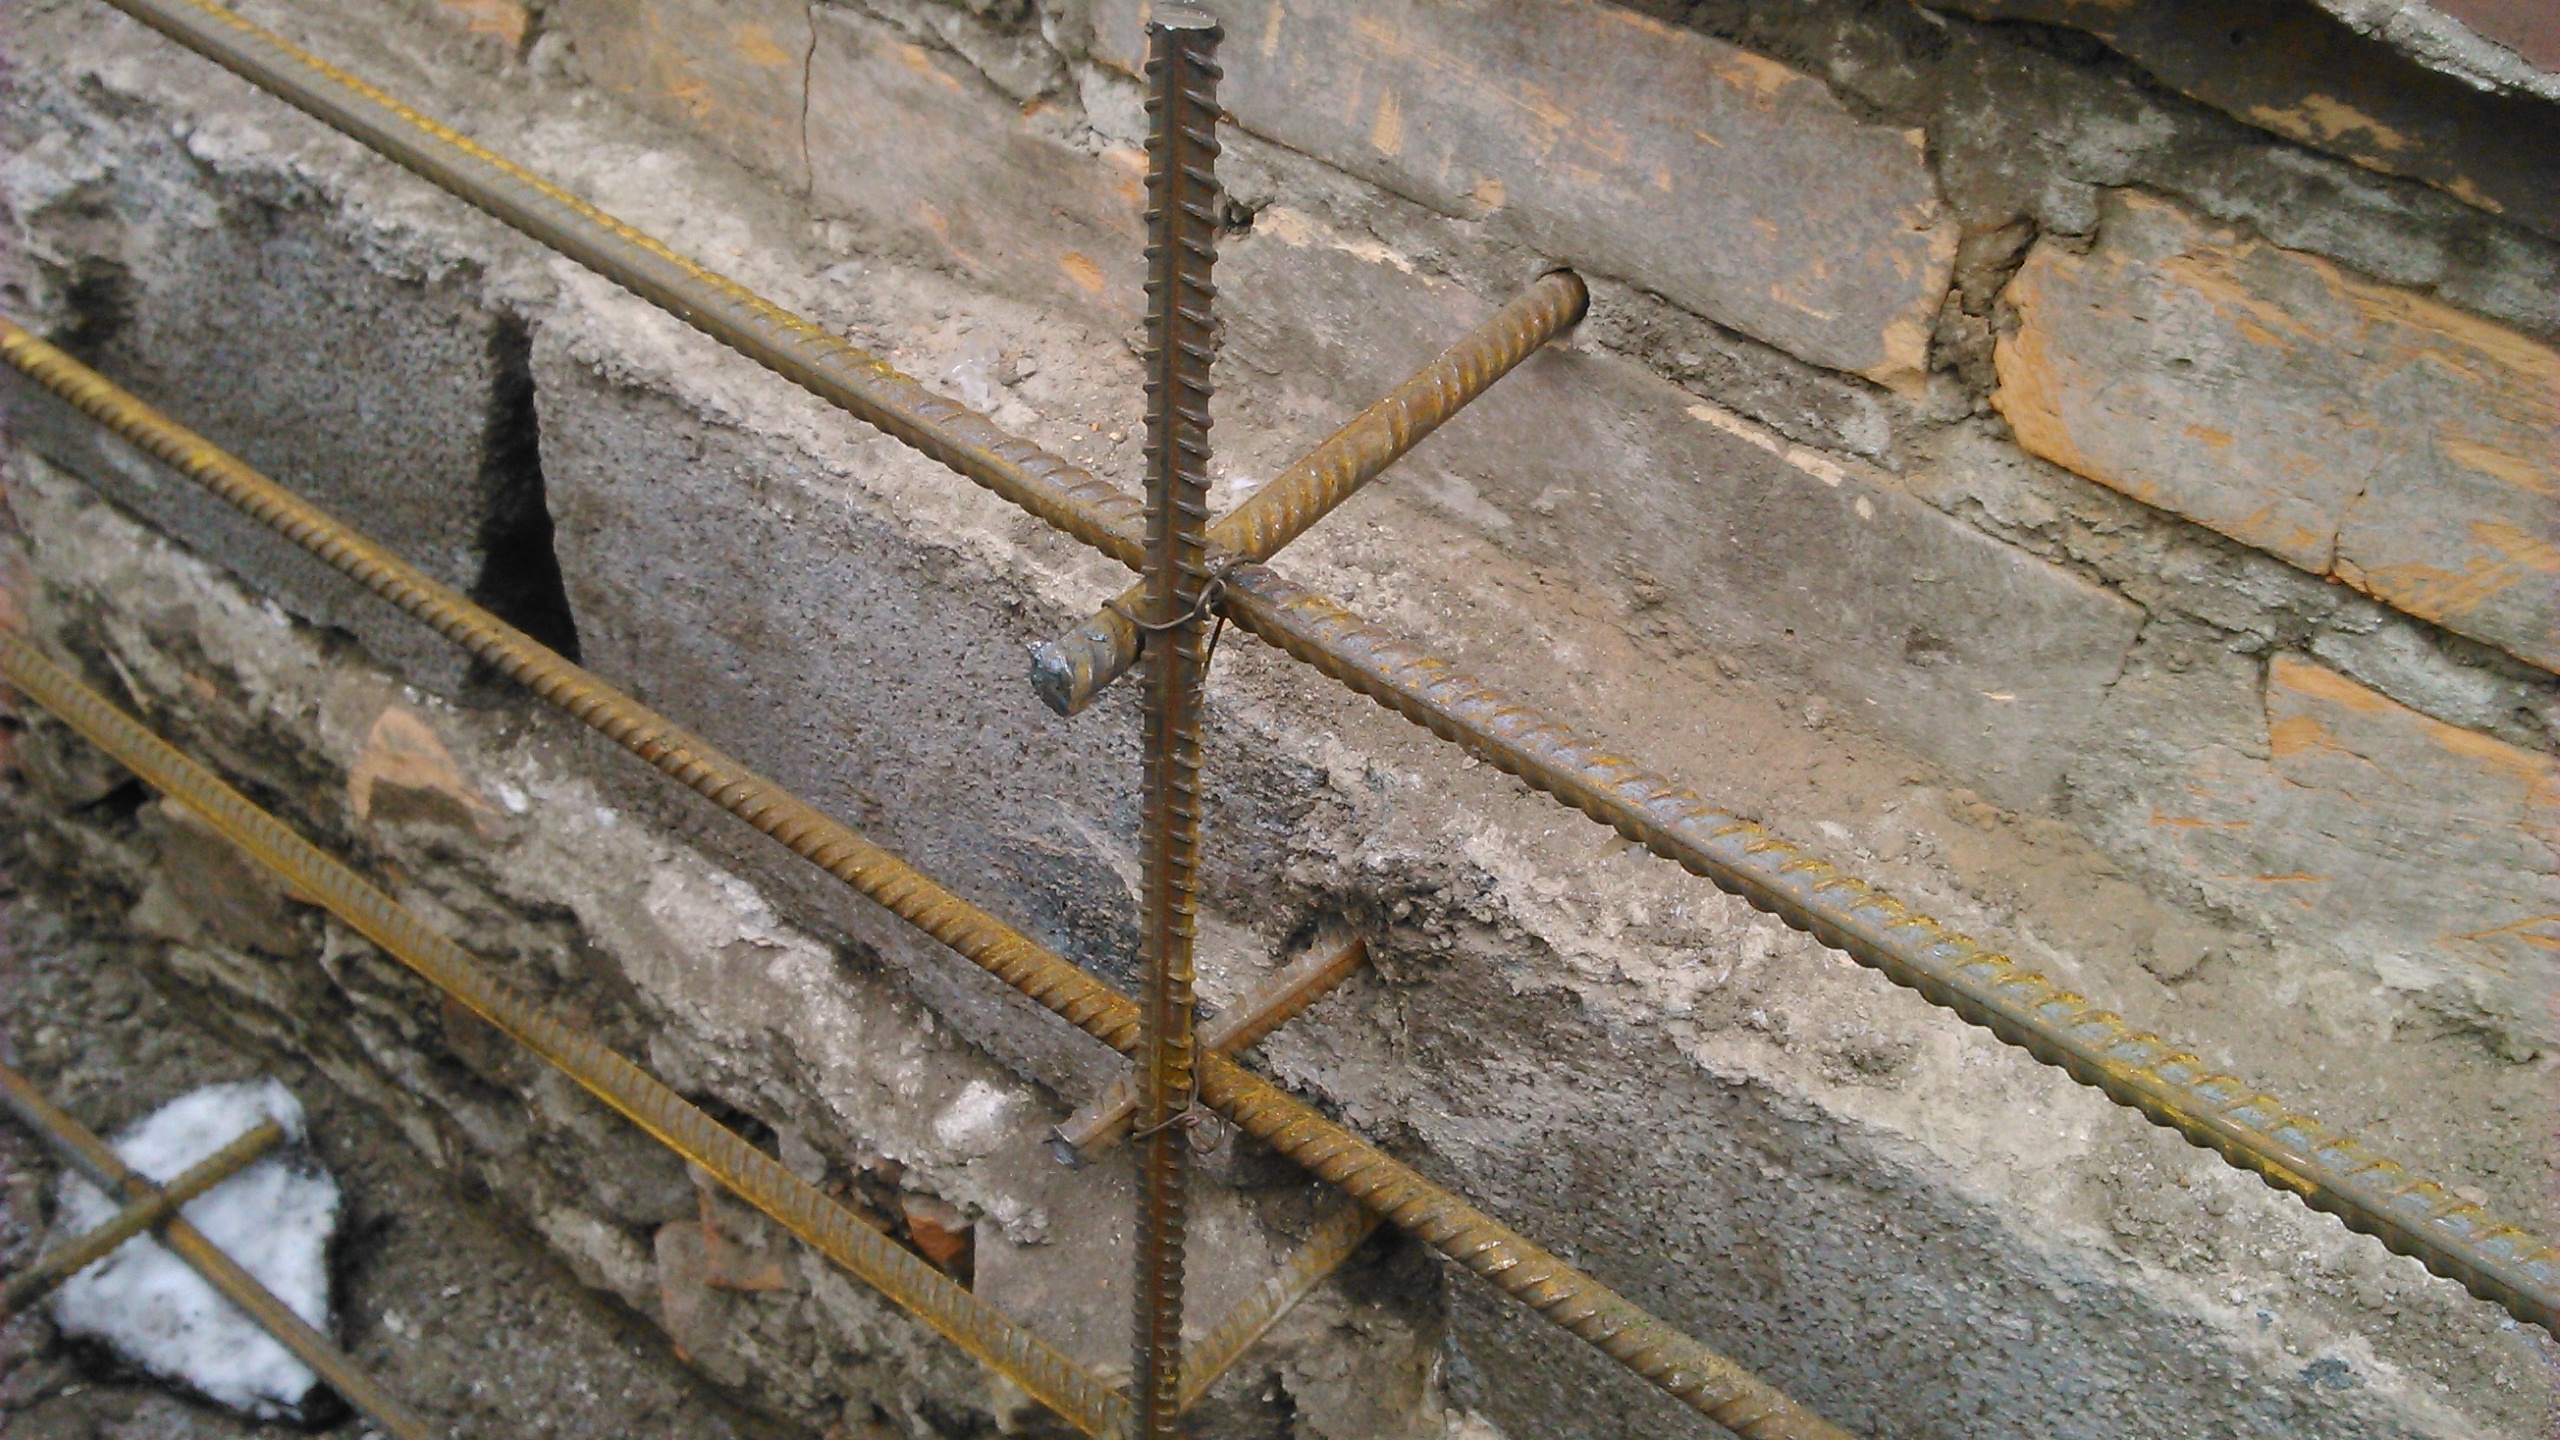
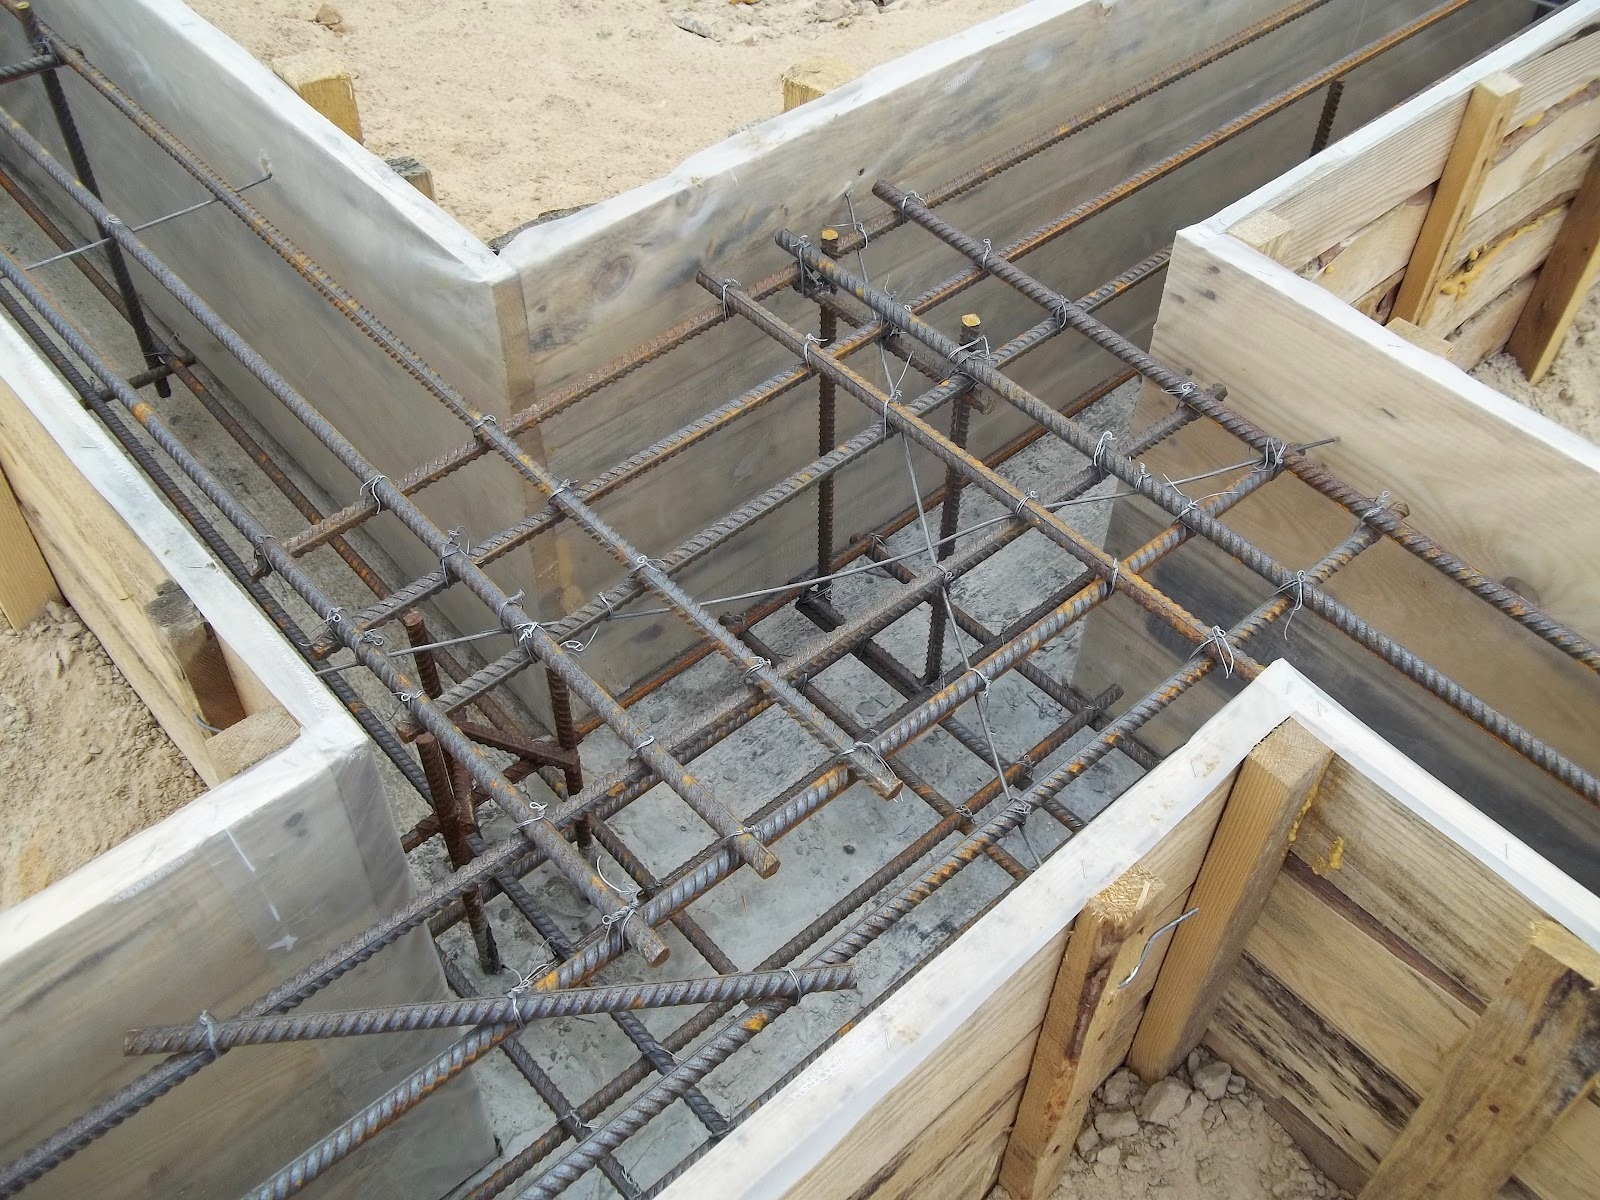
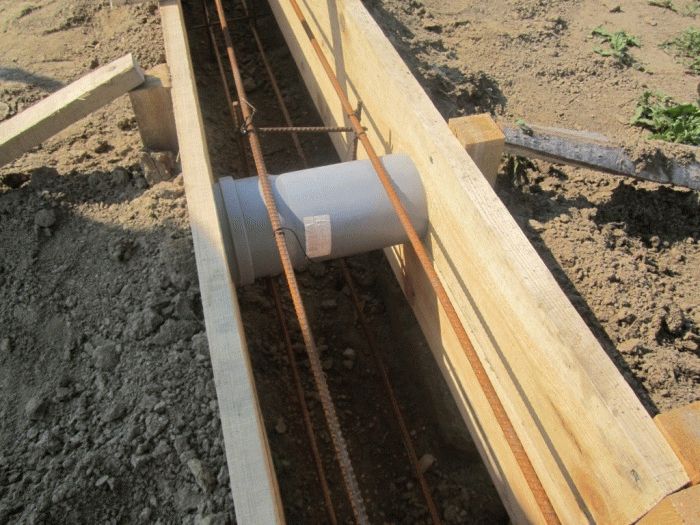
- Reinforce the trench by installing metal rods into it. They should be 10 cm away from the wall and protrude 1.5 cm upwards.
- Check the box width in several places. The distance between the walls everywhere should be the same, otherwise the foundation will not be perfectly smooth. Cover the inner walls of wood with ruberoid.
- Install the vents by placing them across the box boundaries above the trench. Thanks to them, the air will constantly and freely circulate under the bath.
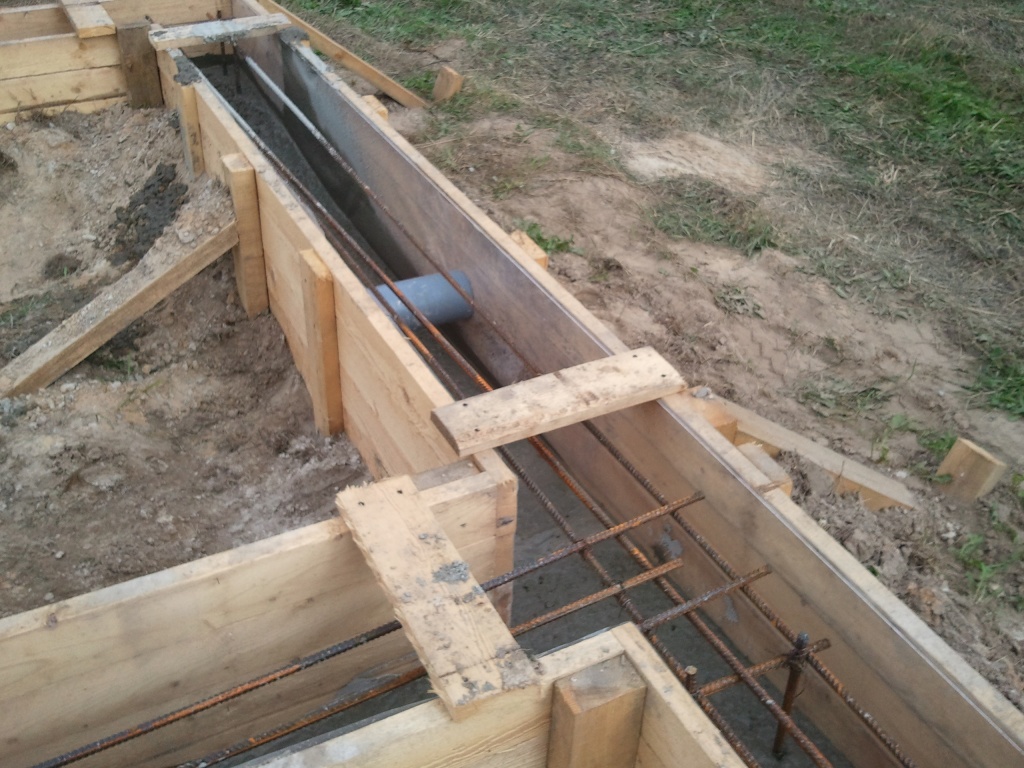
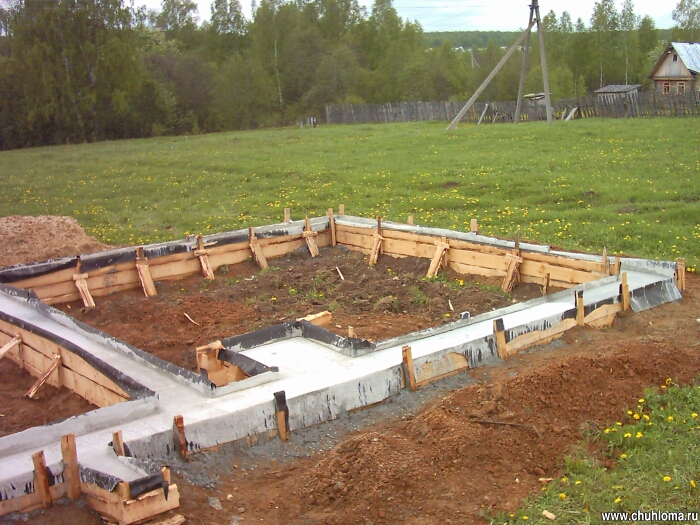
- Pour the foundation. You can use a special machine for this, or you can just cast concrete into a trench and a box with a shovel.In the process of laying the mortar, be sure to level the places in which the concrete has already “grabbed” and has gone knolls. This is done in order to completely level the foundation.
- Leave the foundation to dry for 30 days. If there are concerns about precipitation, cover the structure with polyethylene, otherwise just leave it to dry in the open air.
How to build?
After the foundation has been erected and dried, it is time to build the bath itself directly. Pay attention to what must pass some time after the logs were cut down. Only then they are as well suited for construction.
To build a bath with his own hands and at the same time do everything right, use the following instructions.
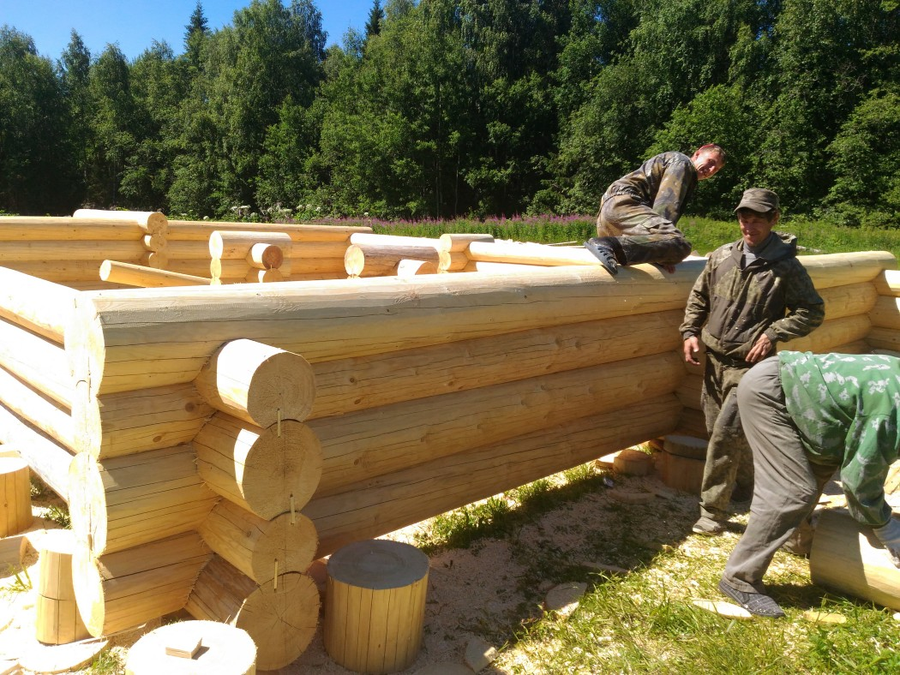
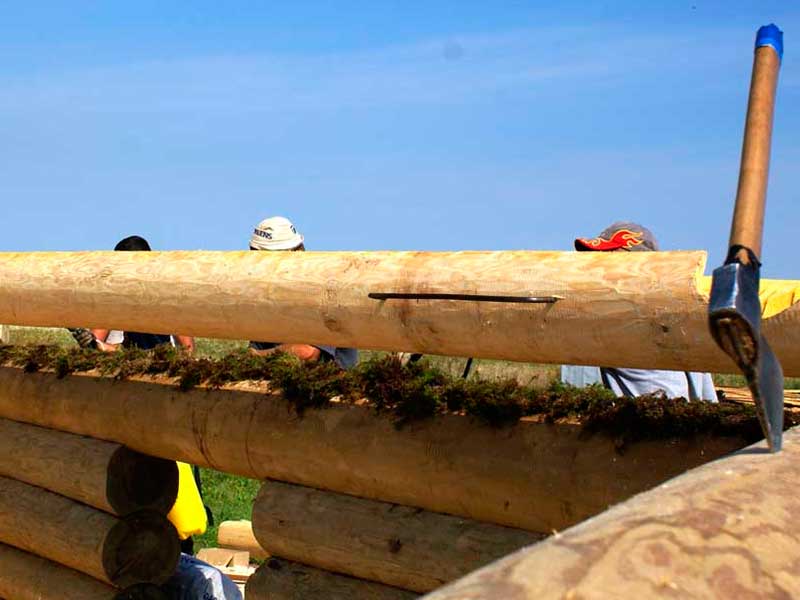
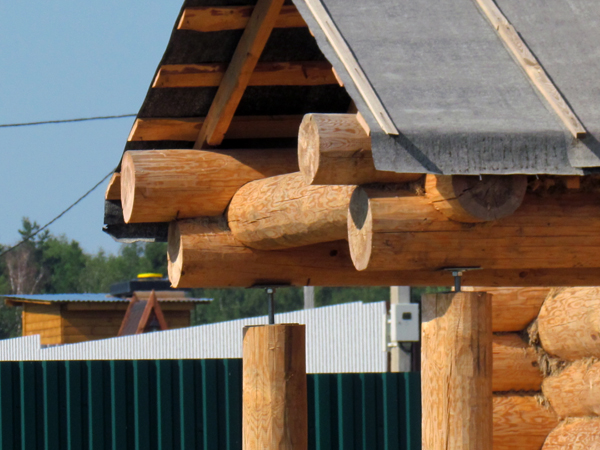
- One row of logs in a building erected from a log is called a crown. The first crown should be as durable and evenly laid as it accounts for the rest of the load. Therefore, a log house is selected from hardwoods: oak or larch. Only such rocks have a sufficient margin of safety to withstand the weight of the entire structure and the heat and humidity loads without cracking.For the first crown, it is permissible to use logs of large diameter.
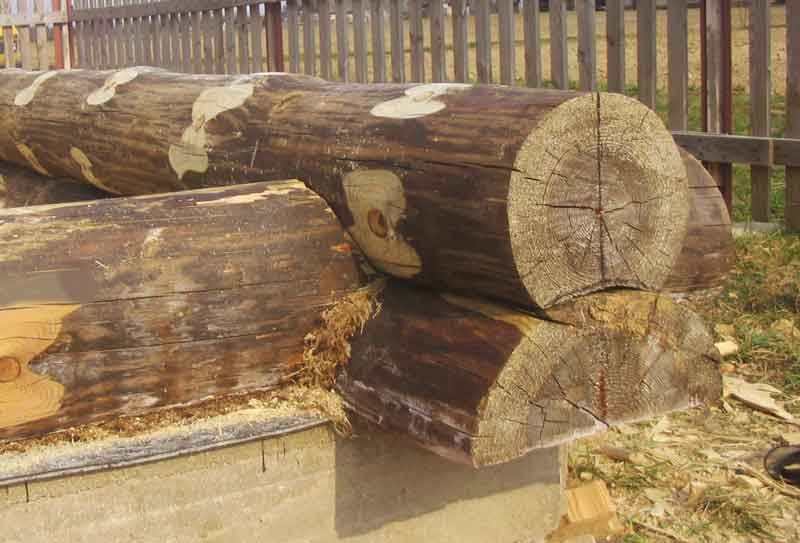
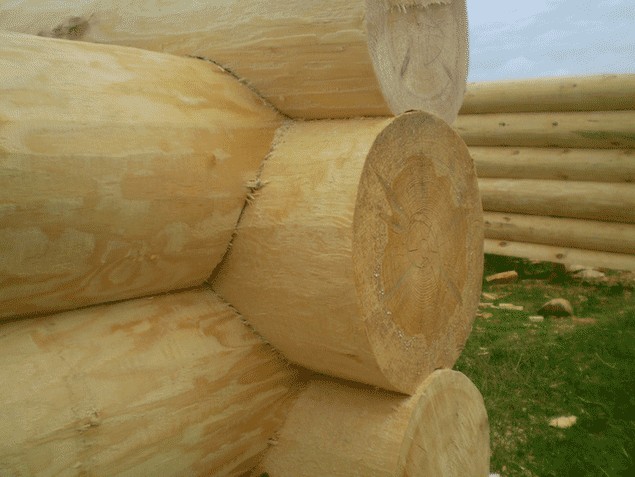
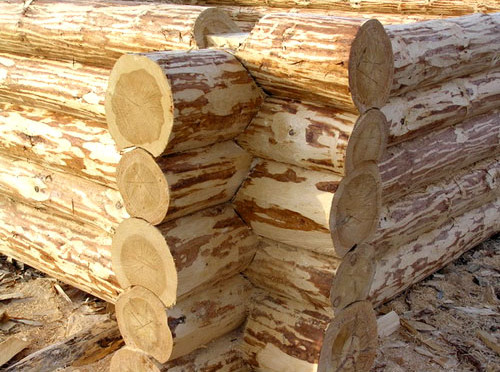
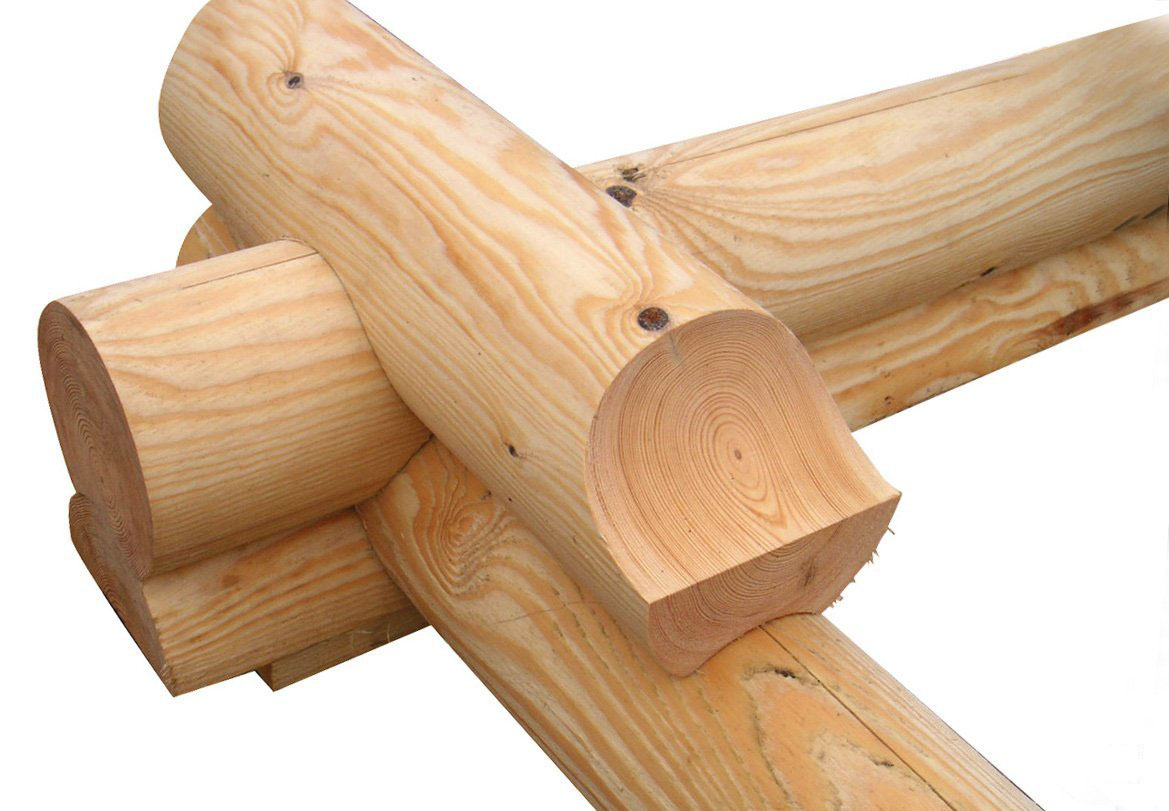
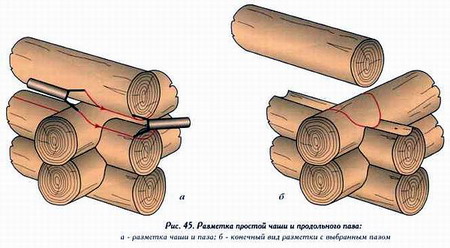
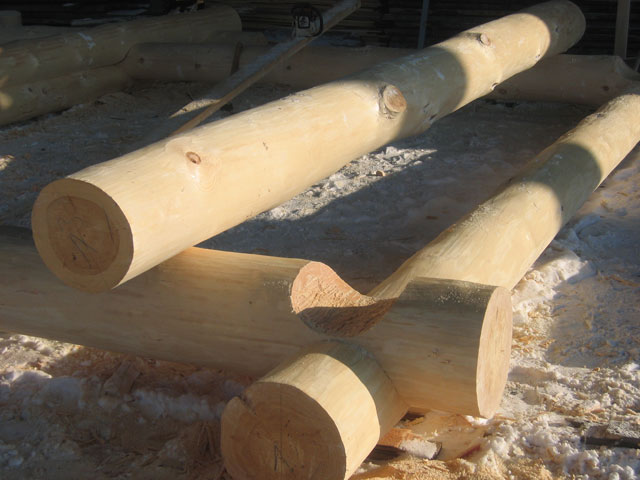
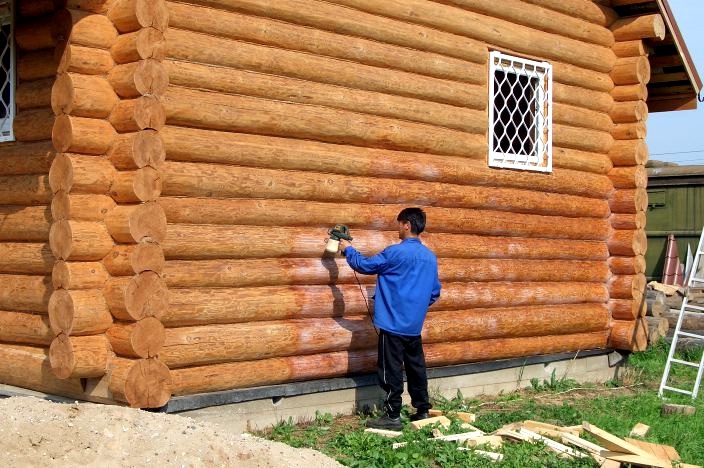
- The first crown is laid on the foundation, equipped with waterproofing. It is extremely important to pay special attention to the treatment of logs with all sorts of antiseptics and water-repellent impregnations. The lower part must be cut to ensure maximum adhesion of the log house to the foundation. When laying, you can use the method "in the bowl" or in the paw, as well as "in the burr." The marking process and the manual cutting technology are depicted in the following pictures. The depth of the groove depends on the ambient temperature in winter: the colder it is in the region in which you live, the deeper the groove should be.


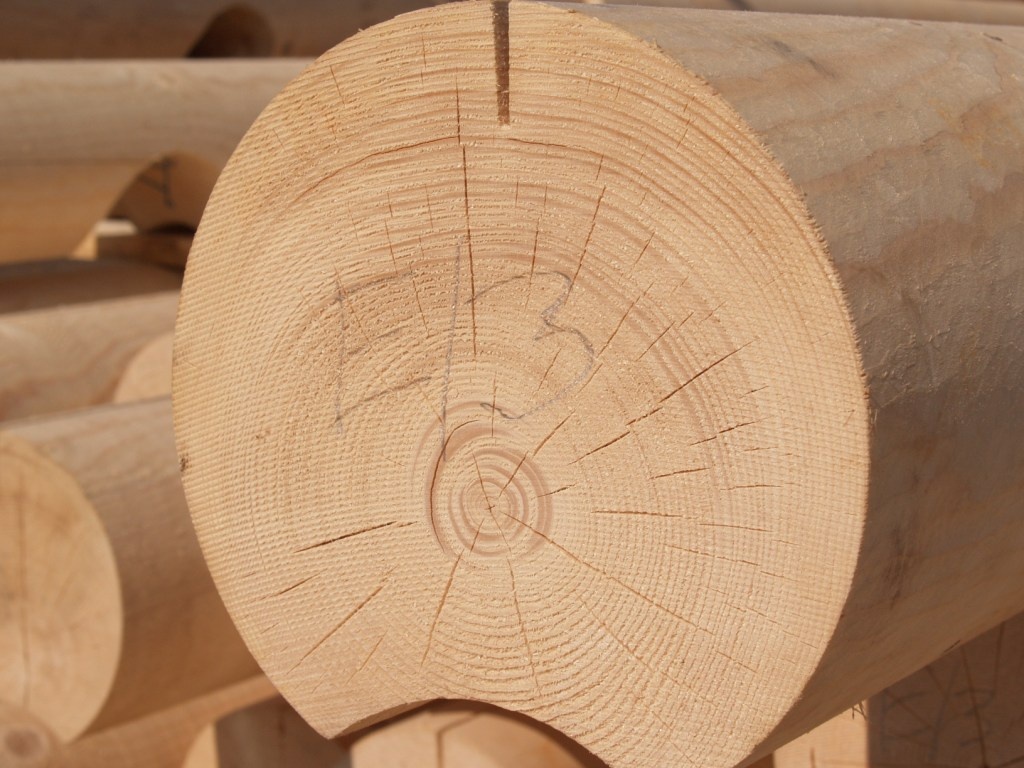
- When laying, keep in mind and which side where the log is located. So, its northern side should be located outside, and the southern - inside. The side is determined by the annual rings on the cut: on the north side they are thinner. This feature is due to the fact that the tree on the north side is more resistant to adverse effects and less susceptible to warping, so the likelihood that the log will crack or rot is minimized.A bath built in this way will be able to stand several times longer - from 50 years.
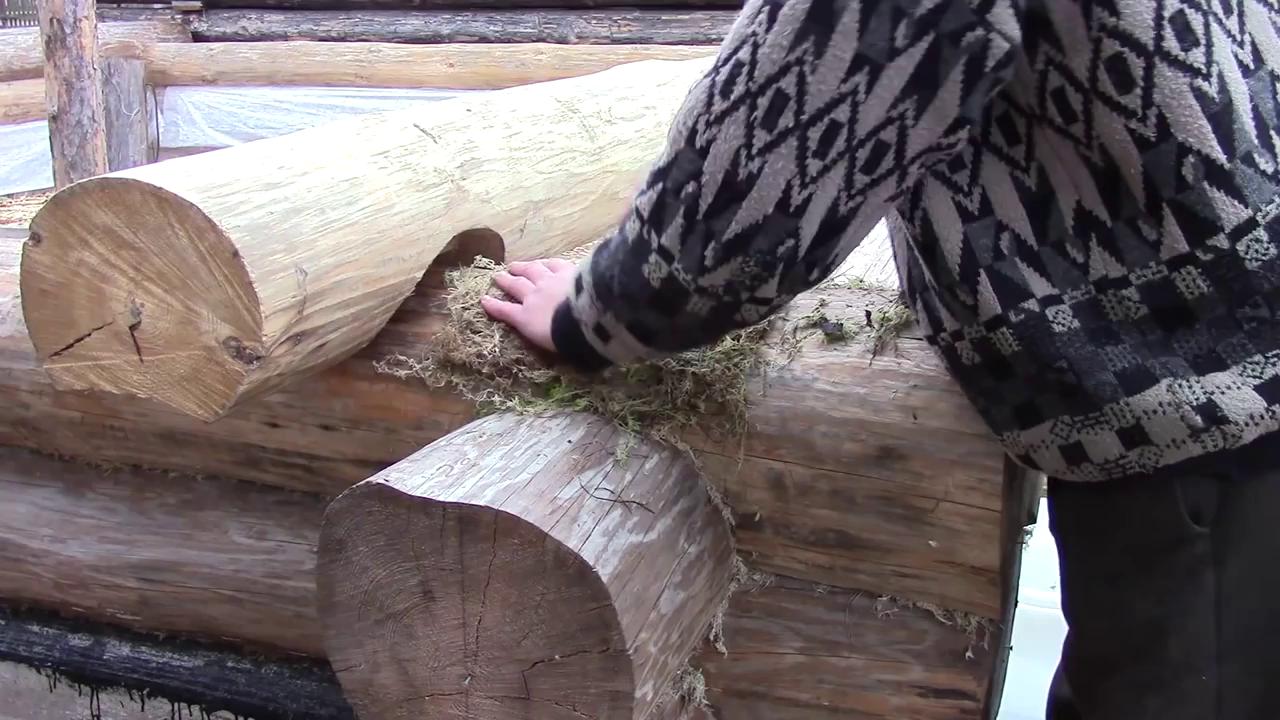
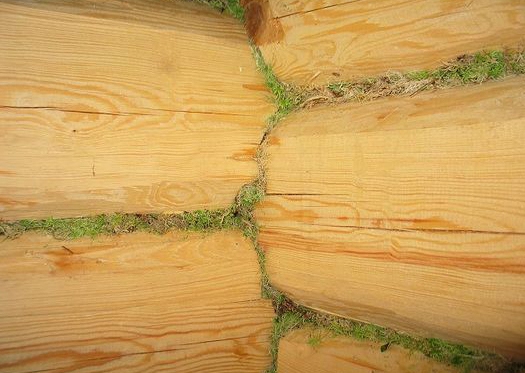
- Since the timber can not be the same thickness on both sides, then it is placed on a thinner side, one to the other. This helps keep the top edge horizontal. After the walls are laid out, it is necessary to cut them in - to plug all the gaps and gaps. You can caulk only with some suitable materials for this: hemp fiber, dried moss, linen, felt. These materials will tolerate the shrinkage process perfectly, and they will not lose their properties over time. Caulk bath in a circle, "passing" gradually along all the seams from top to bottom. If you hold the cauldron first on one wall, then on the other, and so on, then the bath can be “tale”.
- The upper crown, also called the mauerlat, must be chosen as carefully as the first. Mauerlat will continue to keep the roof, ceiling and, in general, the entire truss system.

Roof
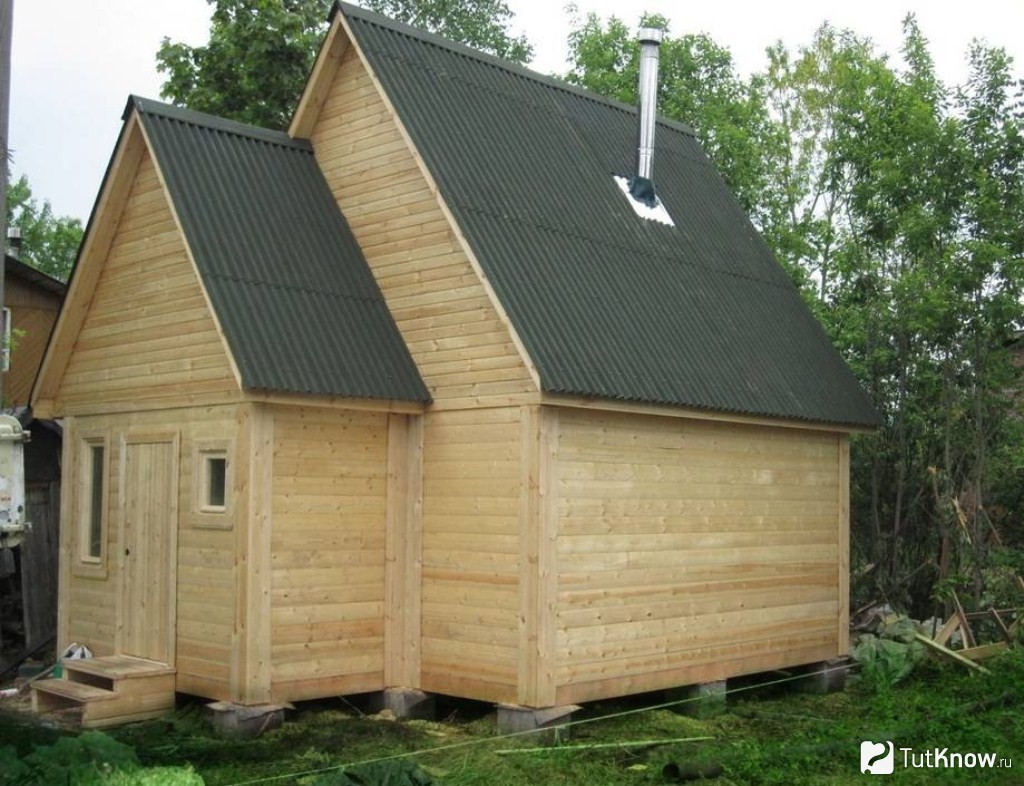
The roof is built over a bath of logs in the same year. It can be both temporary and permanent, but it is extremely important to build it within its timeframe.It is best to choose a roof of a simple construction, for example, a gable. Unnecessary delights will come to nothing. A small attic is always left under the roof, but it is important to ensure that it is well ventilated.

Depending on the snow load determine the distance, on which rafters are located from each other. Usually the step is 1-, 15 m. If you plan to equip the attic under the room or you just want to insulate it, then choose the distance between the rafters, depending on how wide the insulation boards are.
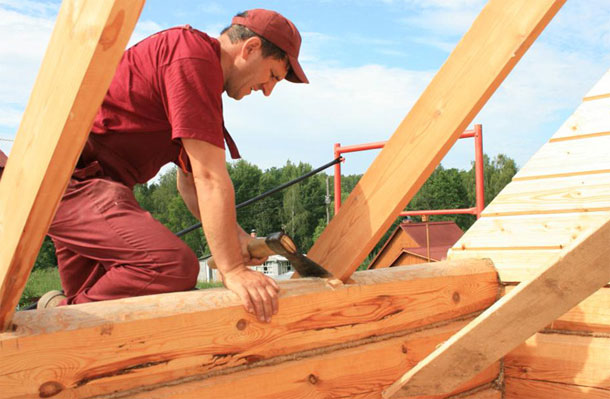
To install the rafters, you must embed from the upper crown - Mauerlat. It turns out that the upper crown serves as a support for the rafters.
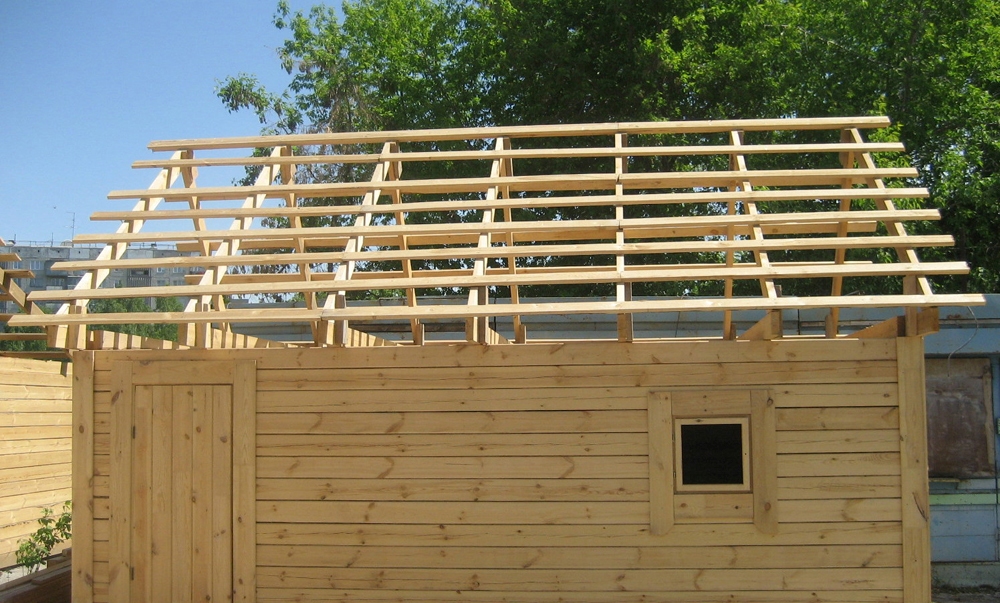
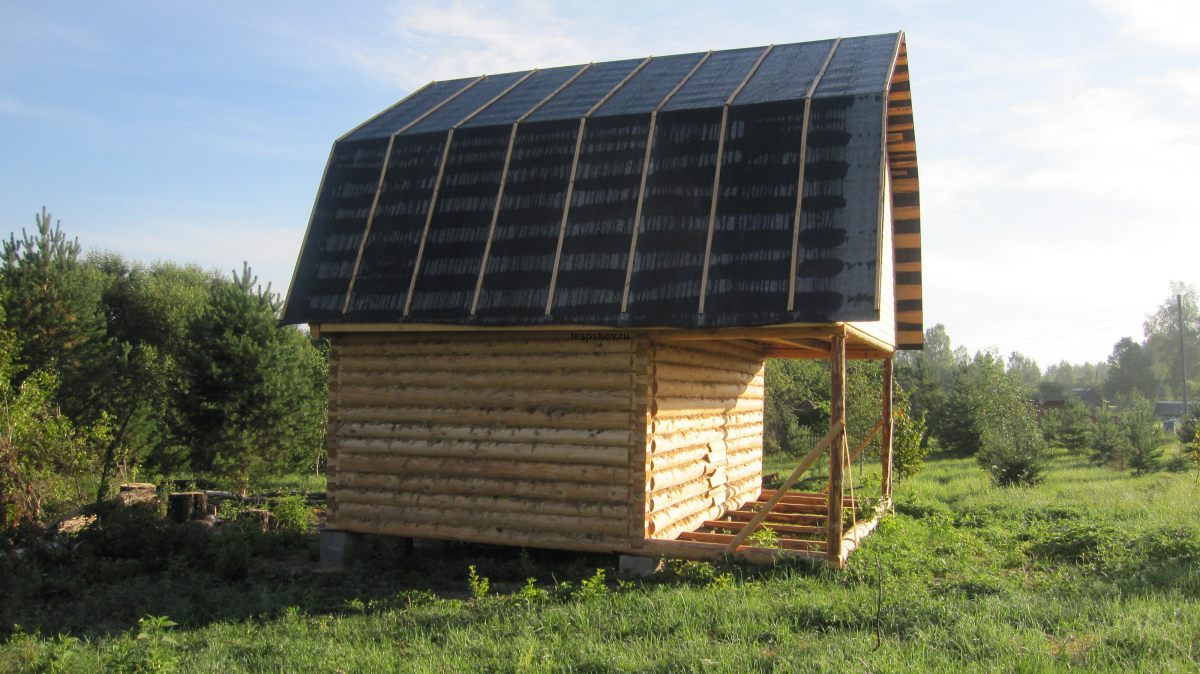
Rafters are interconnected at the top. Then you can begin to form the roof itself. First you need to make a crate for a gable roof. An example of how it looks is shown in the photo below.

On the crate stack any waterproofing material, for example, roofing material. It will protect not yet had time to properly sit down a tree from getting wet.
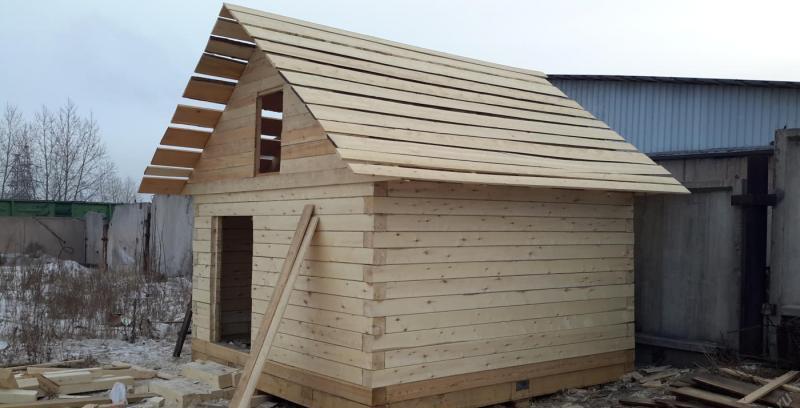
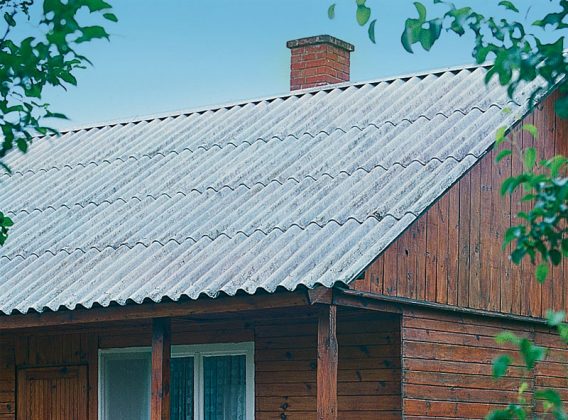
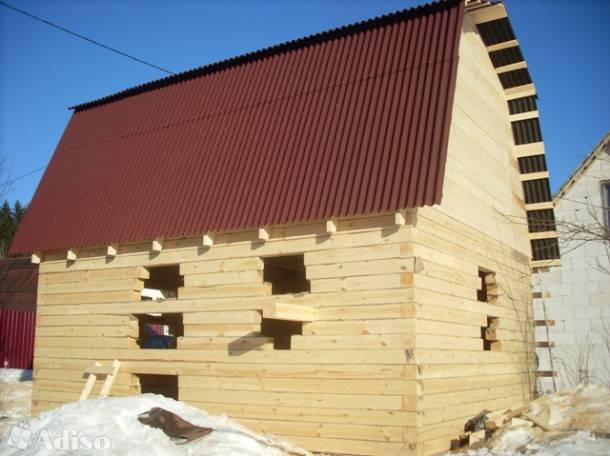
Only after the construction of the waterproofing layer can you lay the finish coat.It depends on the project and is usually chosen for aesthetic reasons. Examples include ondulin, slate, metal tile, decking and others.
Since the main functions of the roof are protective, then after its equipment you can safely proceed to finishing works, including making floors.
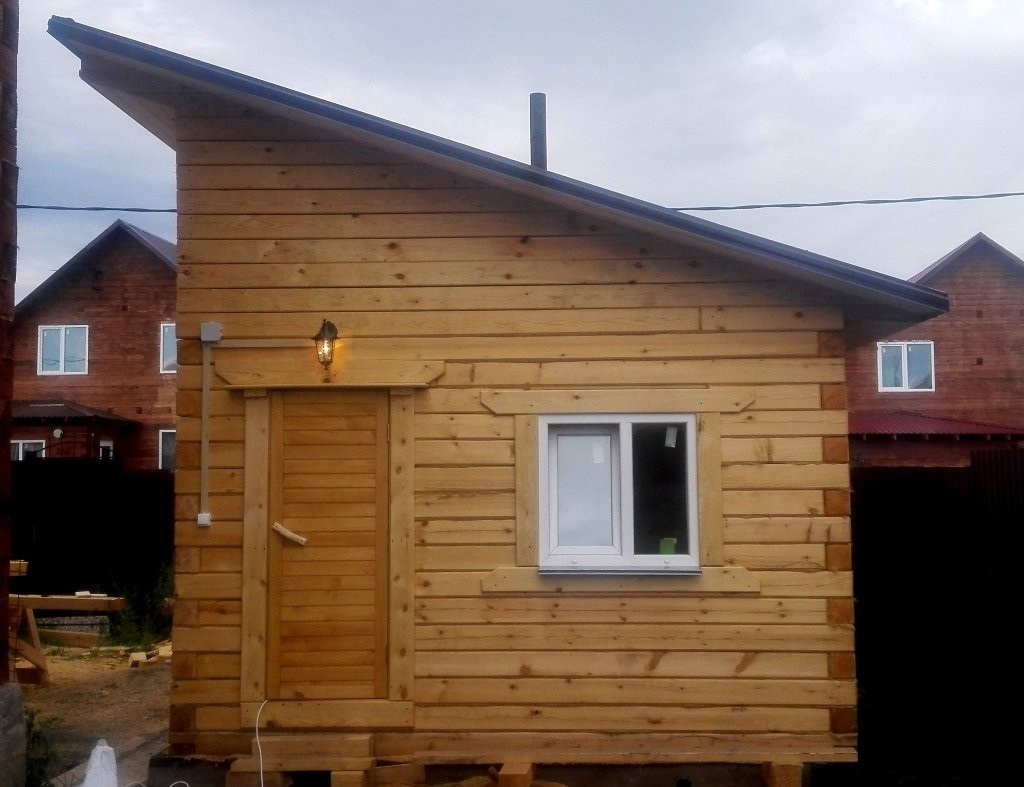
In spite of the fact that gable roofs are usually chosen, there are cases when a single-sided construction is more acceptable.
The choice of one or another option depends on a number of factors.
- The location of the bath. The wooden structure can be either detached or attached. In the second case, the option with a single-sided roof is more relevant.
- Finance. The construction of a shed roof is much cheaper than a gable, and many choose this option in order to save, even though outwardly it does not look so attractive.
- The presence of an attic. So, if its equipment is planned, then it is best to make the roof a gable, otherwise you can successfully get along with a lean-to construction.
The most attractive in the baths of logs look gable roofs with high ridge.Having warmed such a roof, you can make an extra room: a recreation area, a billiard room, a room for storage of towels and other bath accessories. If you do not warm the space, it can also be used by adapting brooms for storage, for example. Shed roofs are usually made almost flat, with almost no inclination, which has a fundamental effect on the fact that no room can be equipped with them.

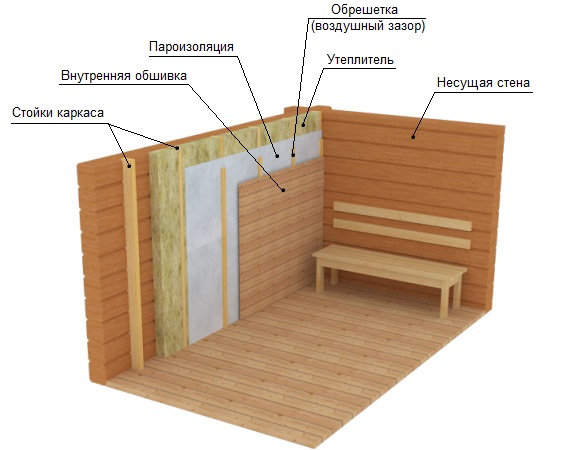
Heater
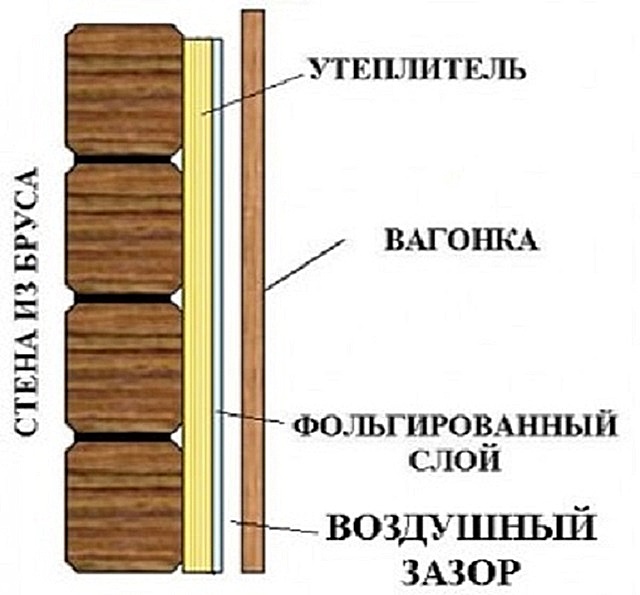
The bath from a log is warmed both from within, and outside. In theory, a variety of synthetic materials that most resemble foam plastic can be used for insulation. However, it should be borne in mind that when building insulation, the lion's share of the useful qualities of bath procedures is lost. This is due to the fact that the vapor barrier does not allow the walls to "breathe", so that the microclimate created in the steam room cannot be called useful.
Among the materials for insulation there are some that should not be used. One of them is waterproof foam, which just helps to create a greenhouse effect in the steam room. This also includes synthetic polystyrene: in the process of heating it evaporates highly toxic substances that are dangerous to humans. Mineral wool is also a bad option, as it does not withstand high humidity.Materials on a plastic base, heating up above 60 degrees, quickly collapse. It can be concluded that synthetic compounds are not suitable for warming a bath from logs.
It is necessary to use only natural insulation.
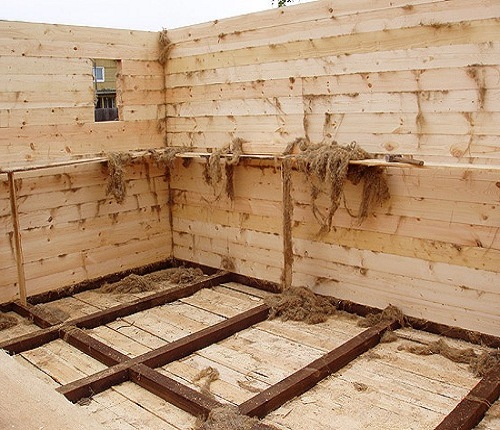
- Tow. This material is used for insulation quite often. This is due to its excellent insulating qualities, low price, as well as a convenient form of sales in rolls. Laying tows between logs is very easy. The procedure of warming this material takes a little time, and the result exceeds all expectations.
- Ecowool The advantage of the material is that it can be used to regulate the level of humidity in the steam room. This environmentally friendly material can absorb excess moisture when it is too much, and give when it is not enough. So, the most comfortable microclimate is guaranteed. Among other things, ecowool perfectly isolates, "locking" the heat in the room.

- Jute. Another name for jute is felt or lnovatin. The material consists of a mixture of flax and jute fibers. It has enhanced strength characteristics, more dense, which makes it an excellent choice for warming a log bath. Felt does not rot, insects start up in it, the material is also heat resistant.
- Moss. Since it is difficult to work with moss, it is rarely chosen. Only a professional can do the work on moss insulation correctly and quickly. Nevertheless, moss perfectly protects against heat loss, it is completely natural, environmentally friendly, so some still prefer it.

Bath necessarily need to warm. This is done in order to minimize heat loss, otherwise you will have to constantly turn the oven on at full capacity. It will quickly fail and will have to do repairs. It is much more correct and cheaper to immediately warm a wooden bath, thereby reducing all possible negative consequences.
Finish
By and large, it is not required to carry out finishing of a bath from logs. This is due to the fact that it already looks aesthetically attractive and neat. Nevertheless, many ordinary log walls seem boring and they think about how to update the interior design.
Any work on the design of the bath should be postponed until the moment when the design is fully seated. Interior decoration of the steam room, if it is planned, must necessarily be carried out only with the help of environmentally friendly and natural materials.Also, do not use metal parts, as when heated, they will become scalding hot. This will increase the risk of injury. This partly applies to fasteners, but if it is not possible to use wood, then galvanized metal must be deepened.

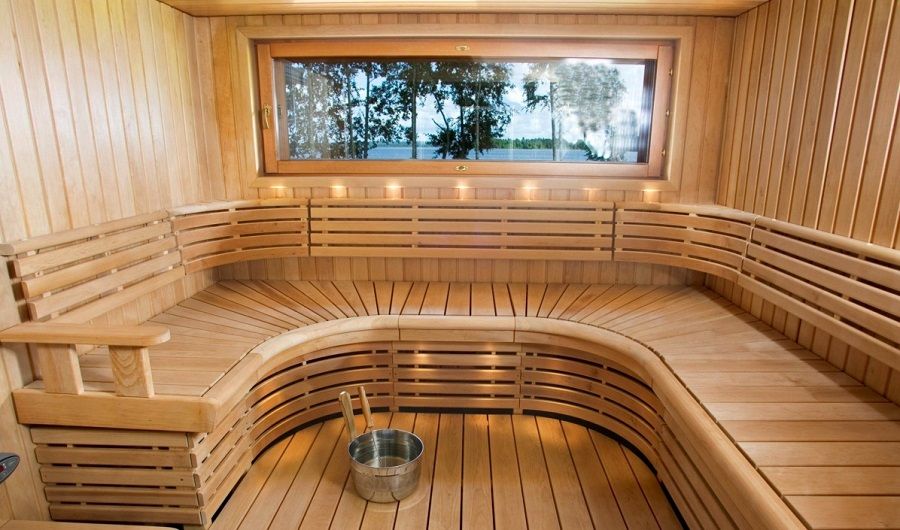
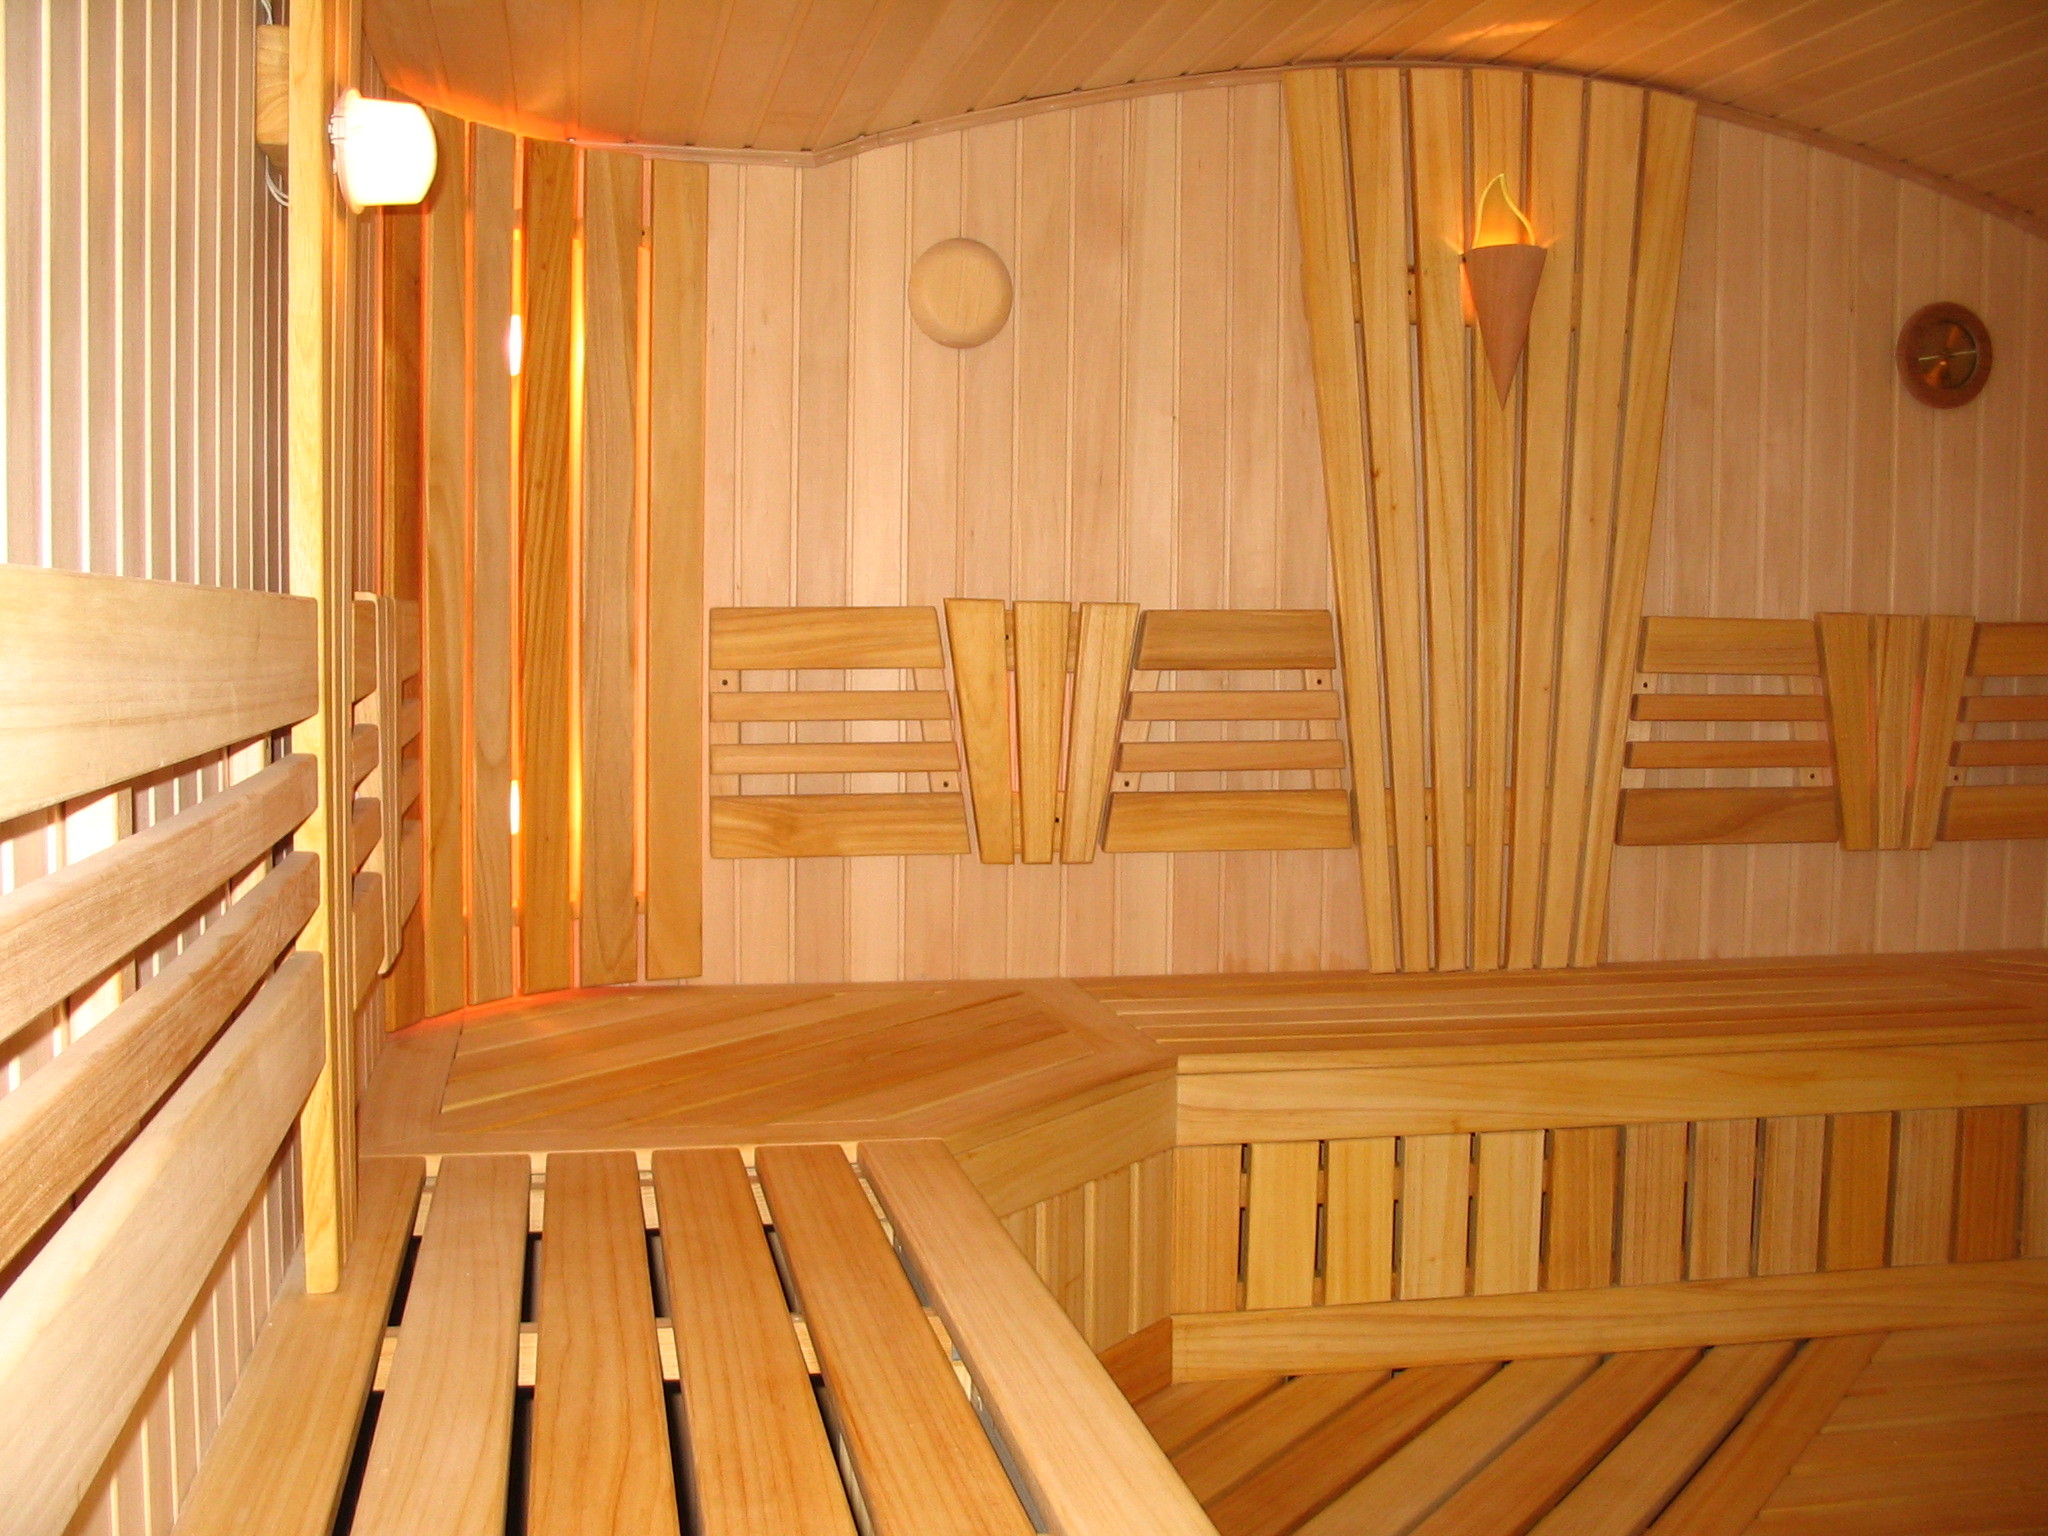
Lining is perfectly suitable for internal finishing of a bath from a bar. It should be subjected to additional processing, well soaked with antiseptic compounds. As for wood, linden and larch are best suited for steam. They do not get hot, so even if there is a very high temperature in the steam room, you will not burn yourself. Lining of conifers can not be used: warming up, the tree gives the resin, which is able to burn the skin. Alternatively, you can combine wood species, but this option is appropriate only for horizontal installation and is made for smell, and not for practical reasons.
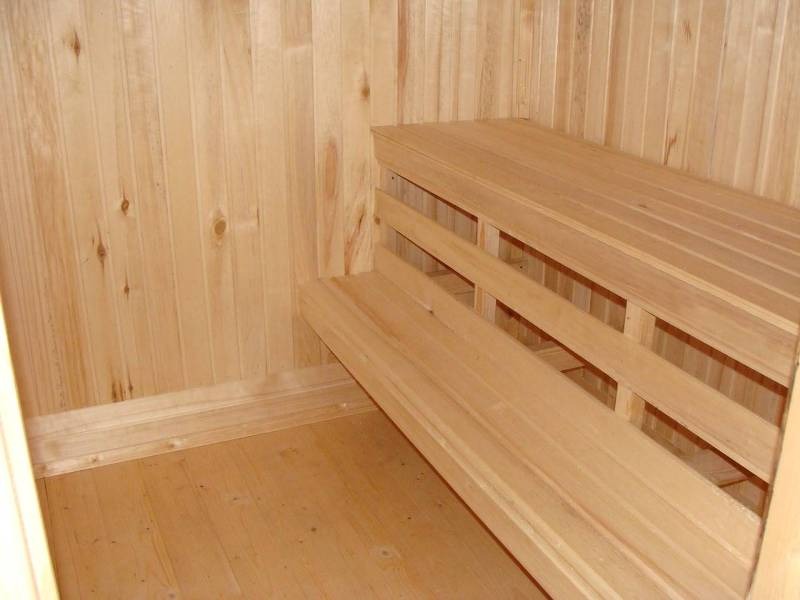
Most often, the vertical method of placing the wall paneling is used for covering the steam room from the inside. To begin with, they make a special marking, the walls are covered with waterproofing, and only after that is the installation of the wall paneling.
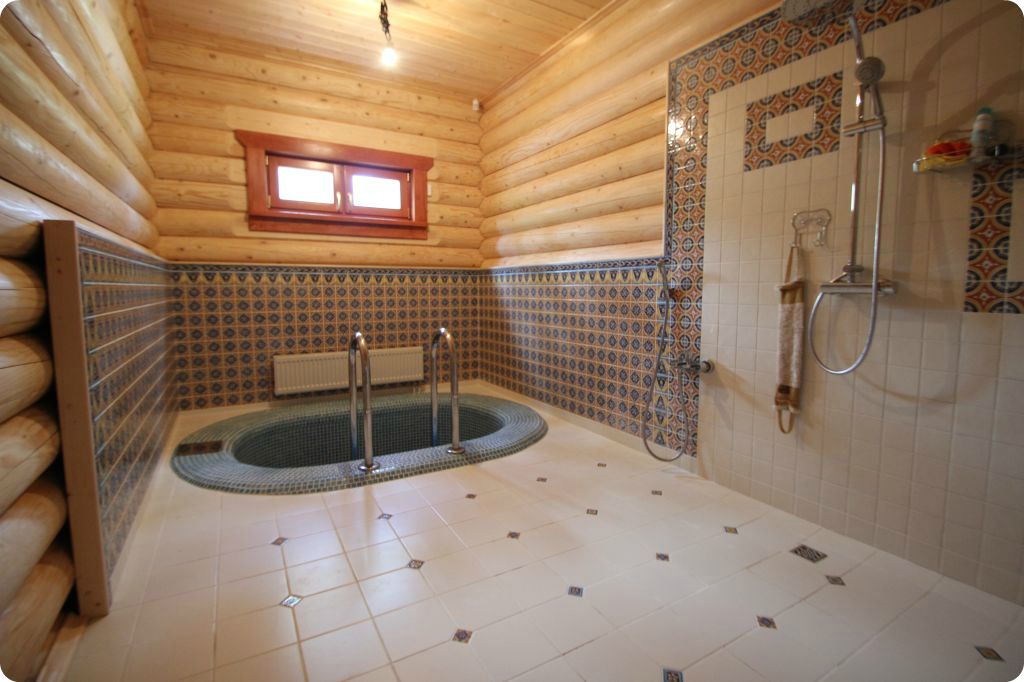
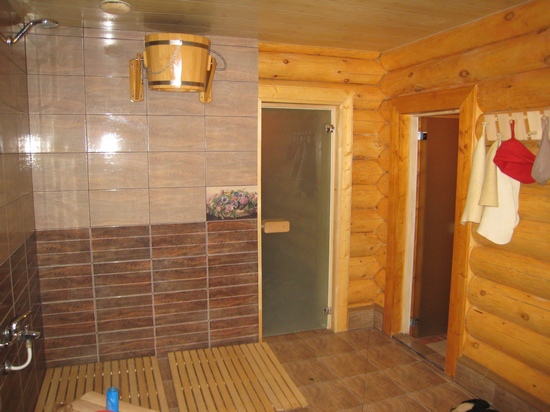
It is also possible to use a facing plate for internal finishing. It is a versatile material, moreover, it is extremely resistant to all “bath” negative effects: elevated temperatures and humidity. The tile is easy to maintain and durable, besides laying a bath tile, you will get the most unusual structure of all.
The walls must first be isolated from moisture, and then attach a special plaster grid to them. Further it is necessary to plaster everything. The tile keeps within on glue solution. Be sure to wipe the seams with a water-repellent and antiseptic composition in order to achieve a presentable appearance for many years.

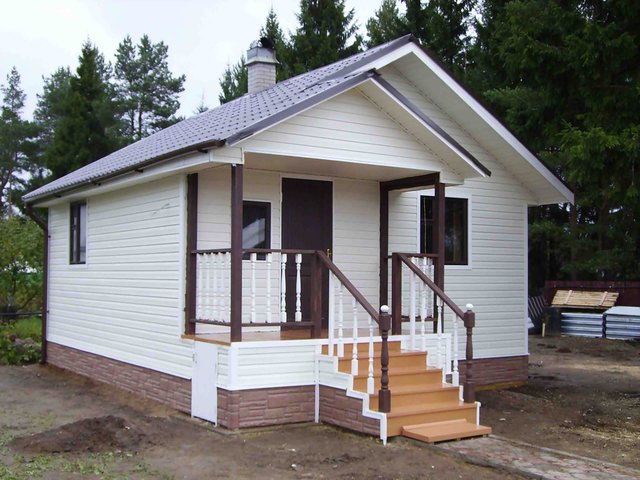
Outside baths from a bar are usually sheathed with a siding. So they are protected from many climatic influences, including rain and frost. Siding must be left for a couple of days, previously spreading out on a flat surface. So get rid of creases and bends. It is important to keep track of which siding you choose: you need a waterproof version.
To lay the siding, the walls are primed, make a crate. It is also necessary to make additional warming. The waterproofing is done with a special film.After that, the elements are fixed, leaving a small gap between the insulation and the finishing facing itself. All work is carried out in the direction from the bottom up. At the end install trim.
Also used for outdoor decoration block house. Most often it is chosen in cases where the bath was built from a cheaper debarked log, and you need to create the appearance of rounded. The material just faithfully simulates a calibrated log house. It must be remembered that the panels of the block house before installation must be properly prepared: treat with antiseptic solutions or mixtures.
To fix the panels, you must make the batten. To install using special klimmery. Fastening is made from top to bottom, you only need to move horizontally. Next, windows, doors and corners are decorated with platbands and baseboards.
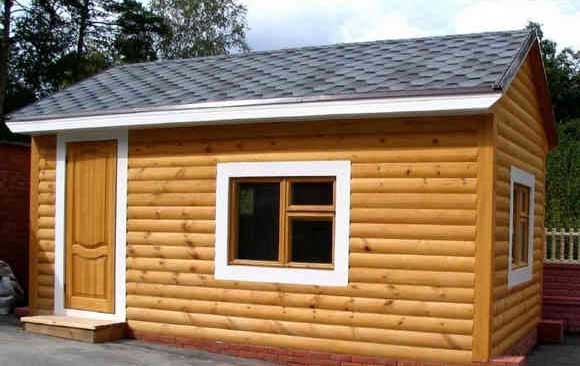
It is impossible to make insulation when working with a block house, otherwise the tree will rot.
Tips
As the professionals say, the process of building a log bath may not be as difficult as it seems.
They give several recommendations that will help to cope with the construction and finishing of the bath with high quality and as soon as possible:
- Do not neglect the time allowed for shrinkage. In addition to the fact that the bath can “lead”, it will soon lose in height. Installation of expensive equipment (boiler or furnace) should be done only after a complete shrinkage, otherwise there is a risk of spoiling expensive structures.
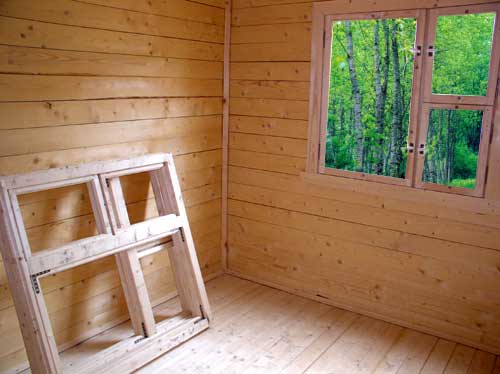
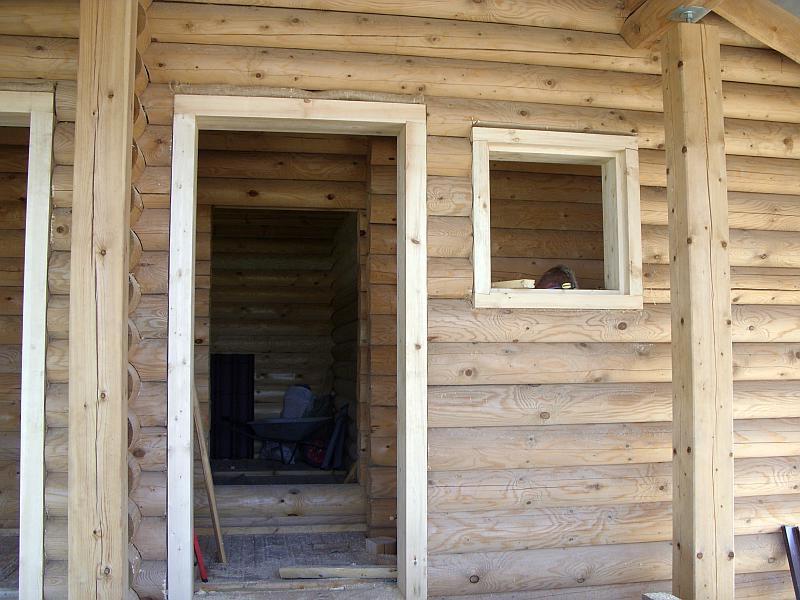
- Doors and windows also need to be cut through only after the wood is fully seated. This is due to the fact that the cuts can be deformed, because the frame does not always dry out evenly.
- To save money, it is worth buying wood in the winter. During this period, its prices are much lower. There are also various promotions and sales that allow you to save even more financial resources.
- Attention is paid to the knotty of timber. So, the smoother logs you choose, the easier it will work with them. The easiest way to handle a rounded beam, but it is the most expensive. Keep in mind that the smoother the wood, the more expensive it is.


- In no case do not decorate the bath chipboard. Under the influence of humidity, they are strongly deformed, swell, when heated emit toxins into the air, which are dangerous to human health.
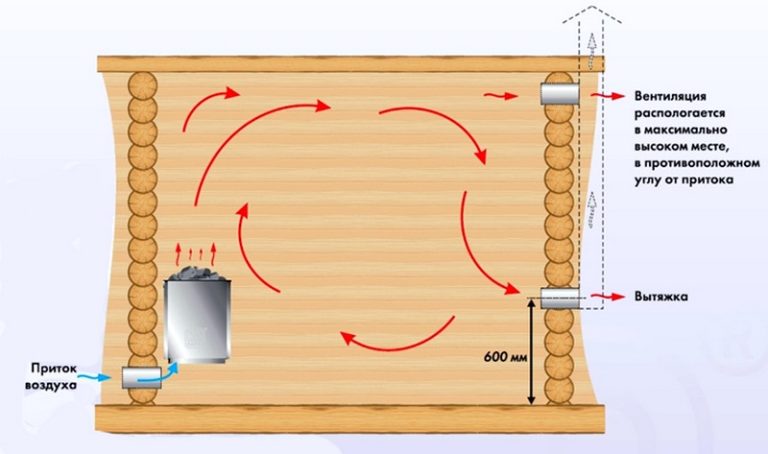
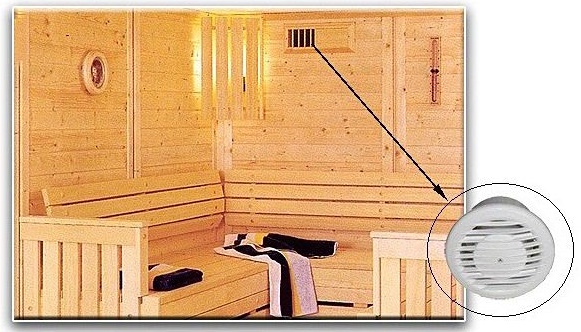
- In order that at your discretion it was possible to lower the humidity in the steam room, it is necessary to equip it with a ventilation system. You will be able to turn it on and off at will, achieving the ideal microclimate.

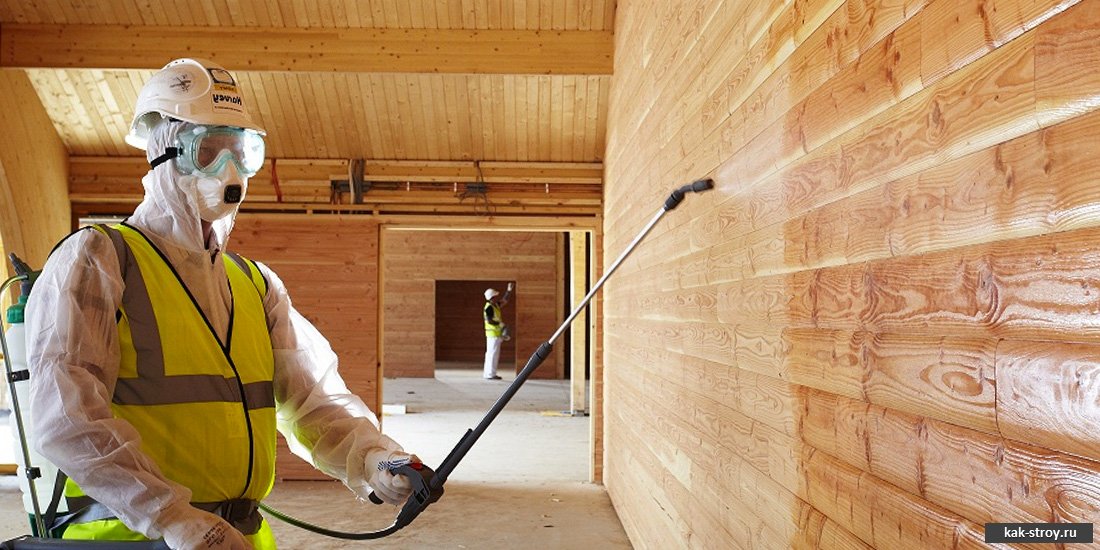
- If you want to reduce the likelihood of a fire, then be sure to treat the logs with a fire retardant.
- It is important to remember about the need to process a calibrated bar with all sorts of antiseptics, as it very quickly decays, collapses, and is infected with fungi and mold.
- If a timber is selected as the material, and not a log house, then the shrinkage time will be greatly reduced. This is due to the fact that the timber has already been processed and dried, which is not the case with freshly chopped wood.
- Be sure to take care of fire safety: purchase a fire extinguisher and place it in a place that you can safely reach in case of fire. It should not be a steam room. The dressing room in which the furnace is located is ideal.

Beautiful examples
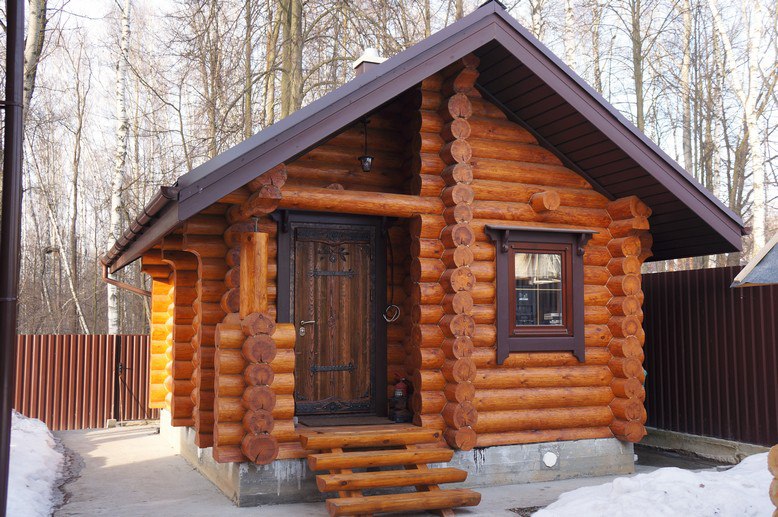
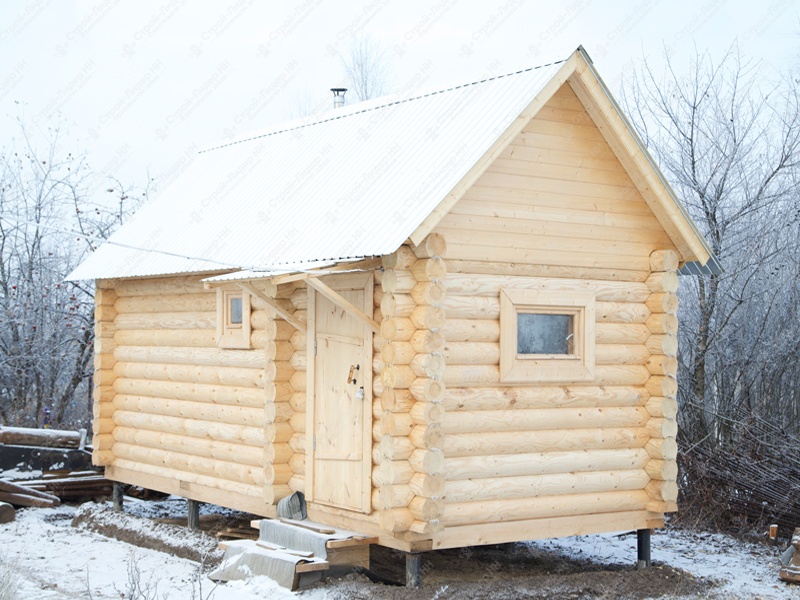
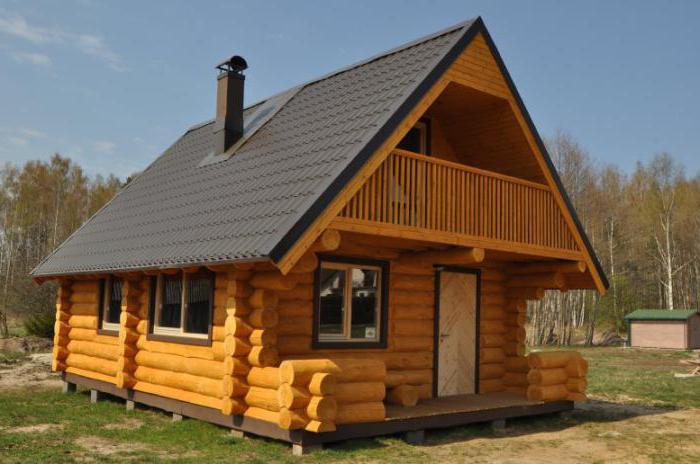
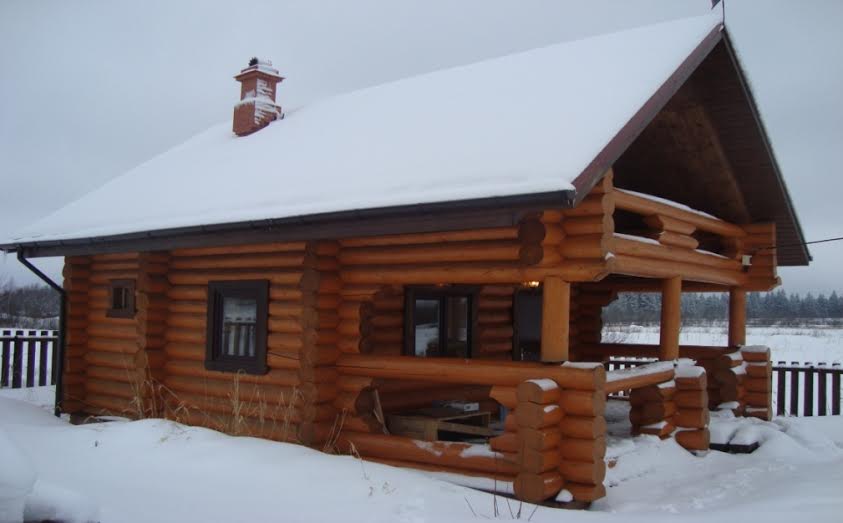
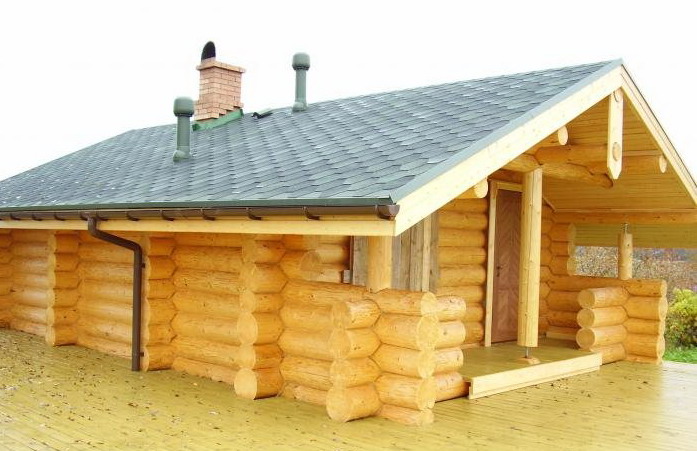
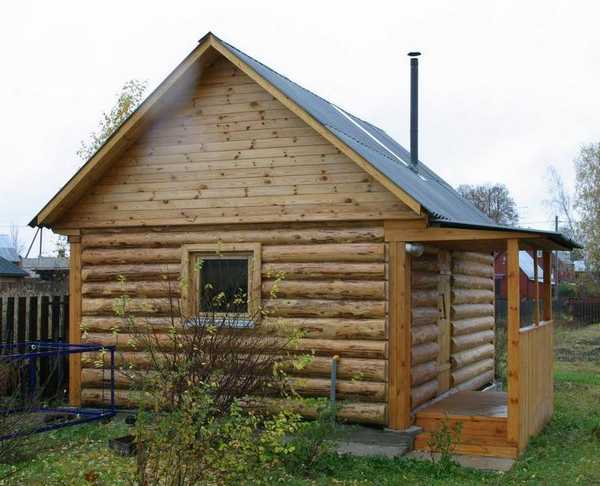
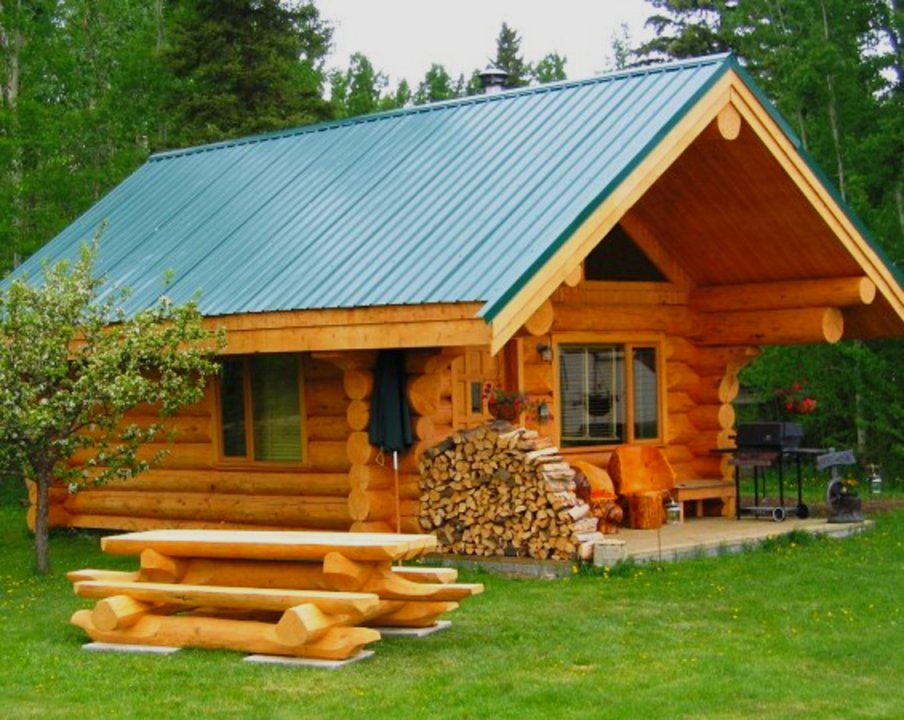
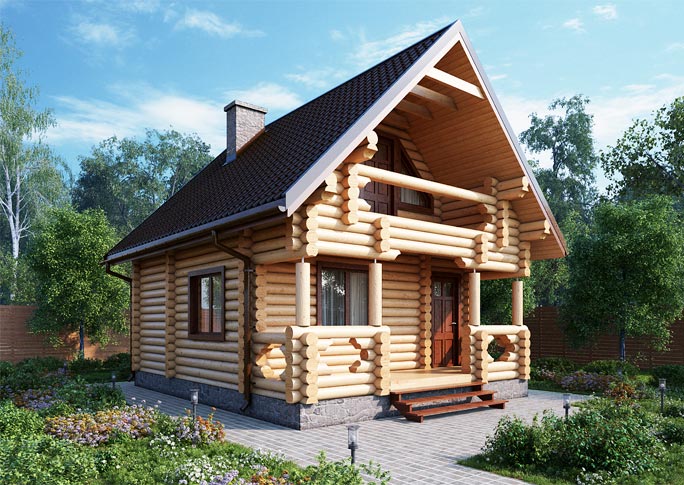
Beautiful bath, built according to the rules. The quality factor of the structure is immediately visible: such a structure will last more than a decade. The bath is equipped with two heating systems, which is very unusual.

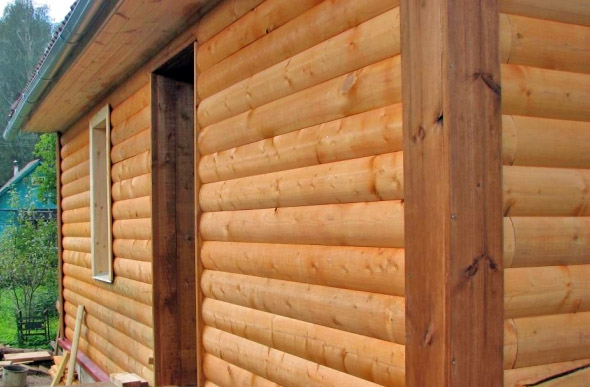
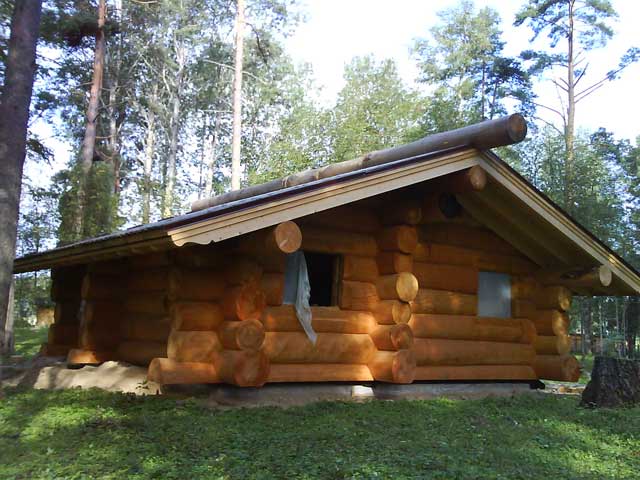
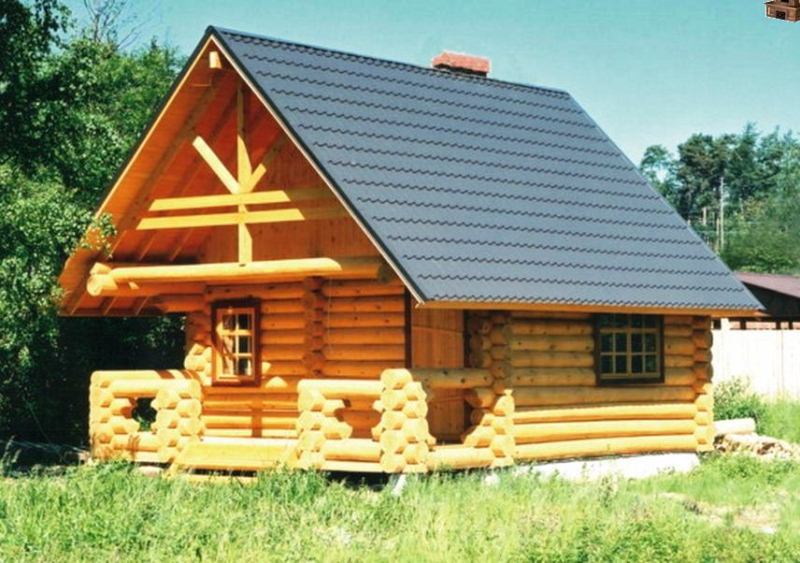
It is not necessary to build a bath from a rounded log so that it looks presentable. Planed logs look unusual and original. This design attracts attention, decorates the site.

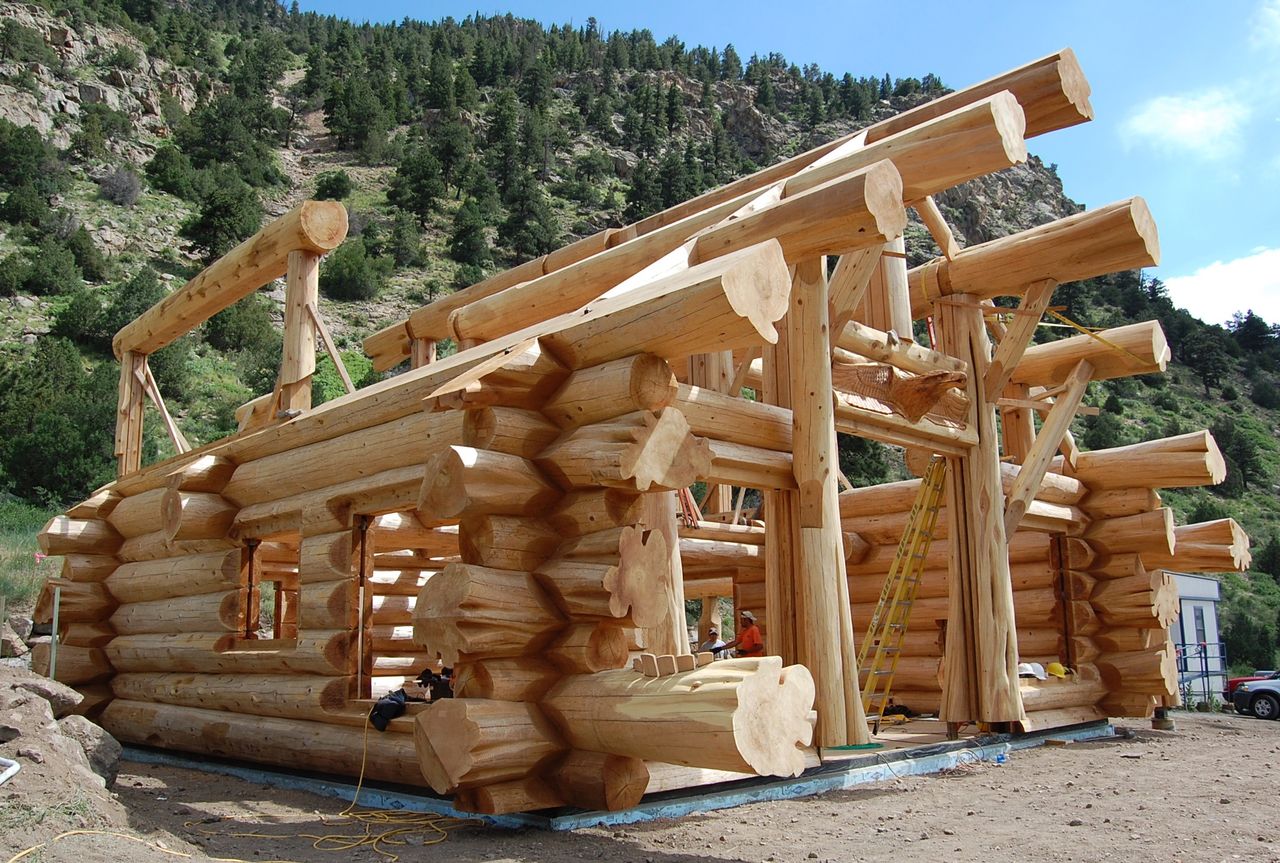
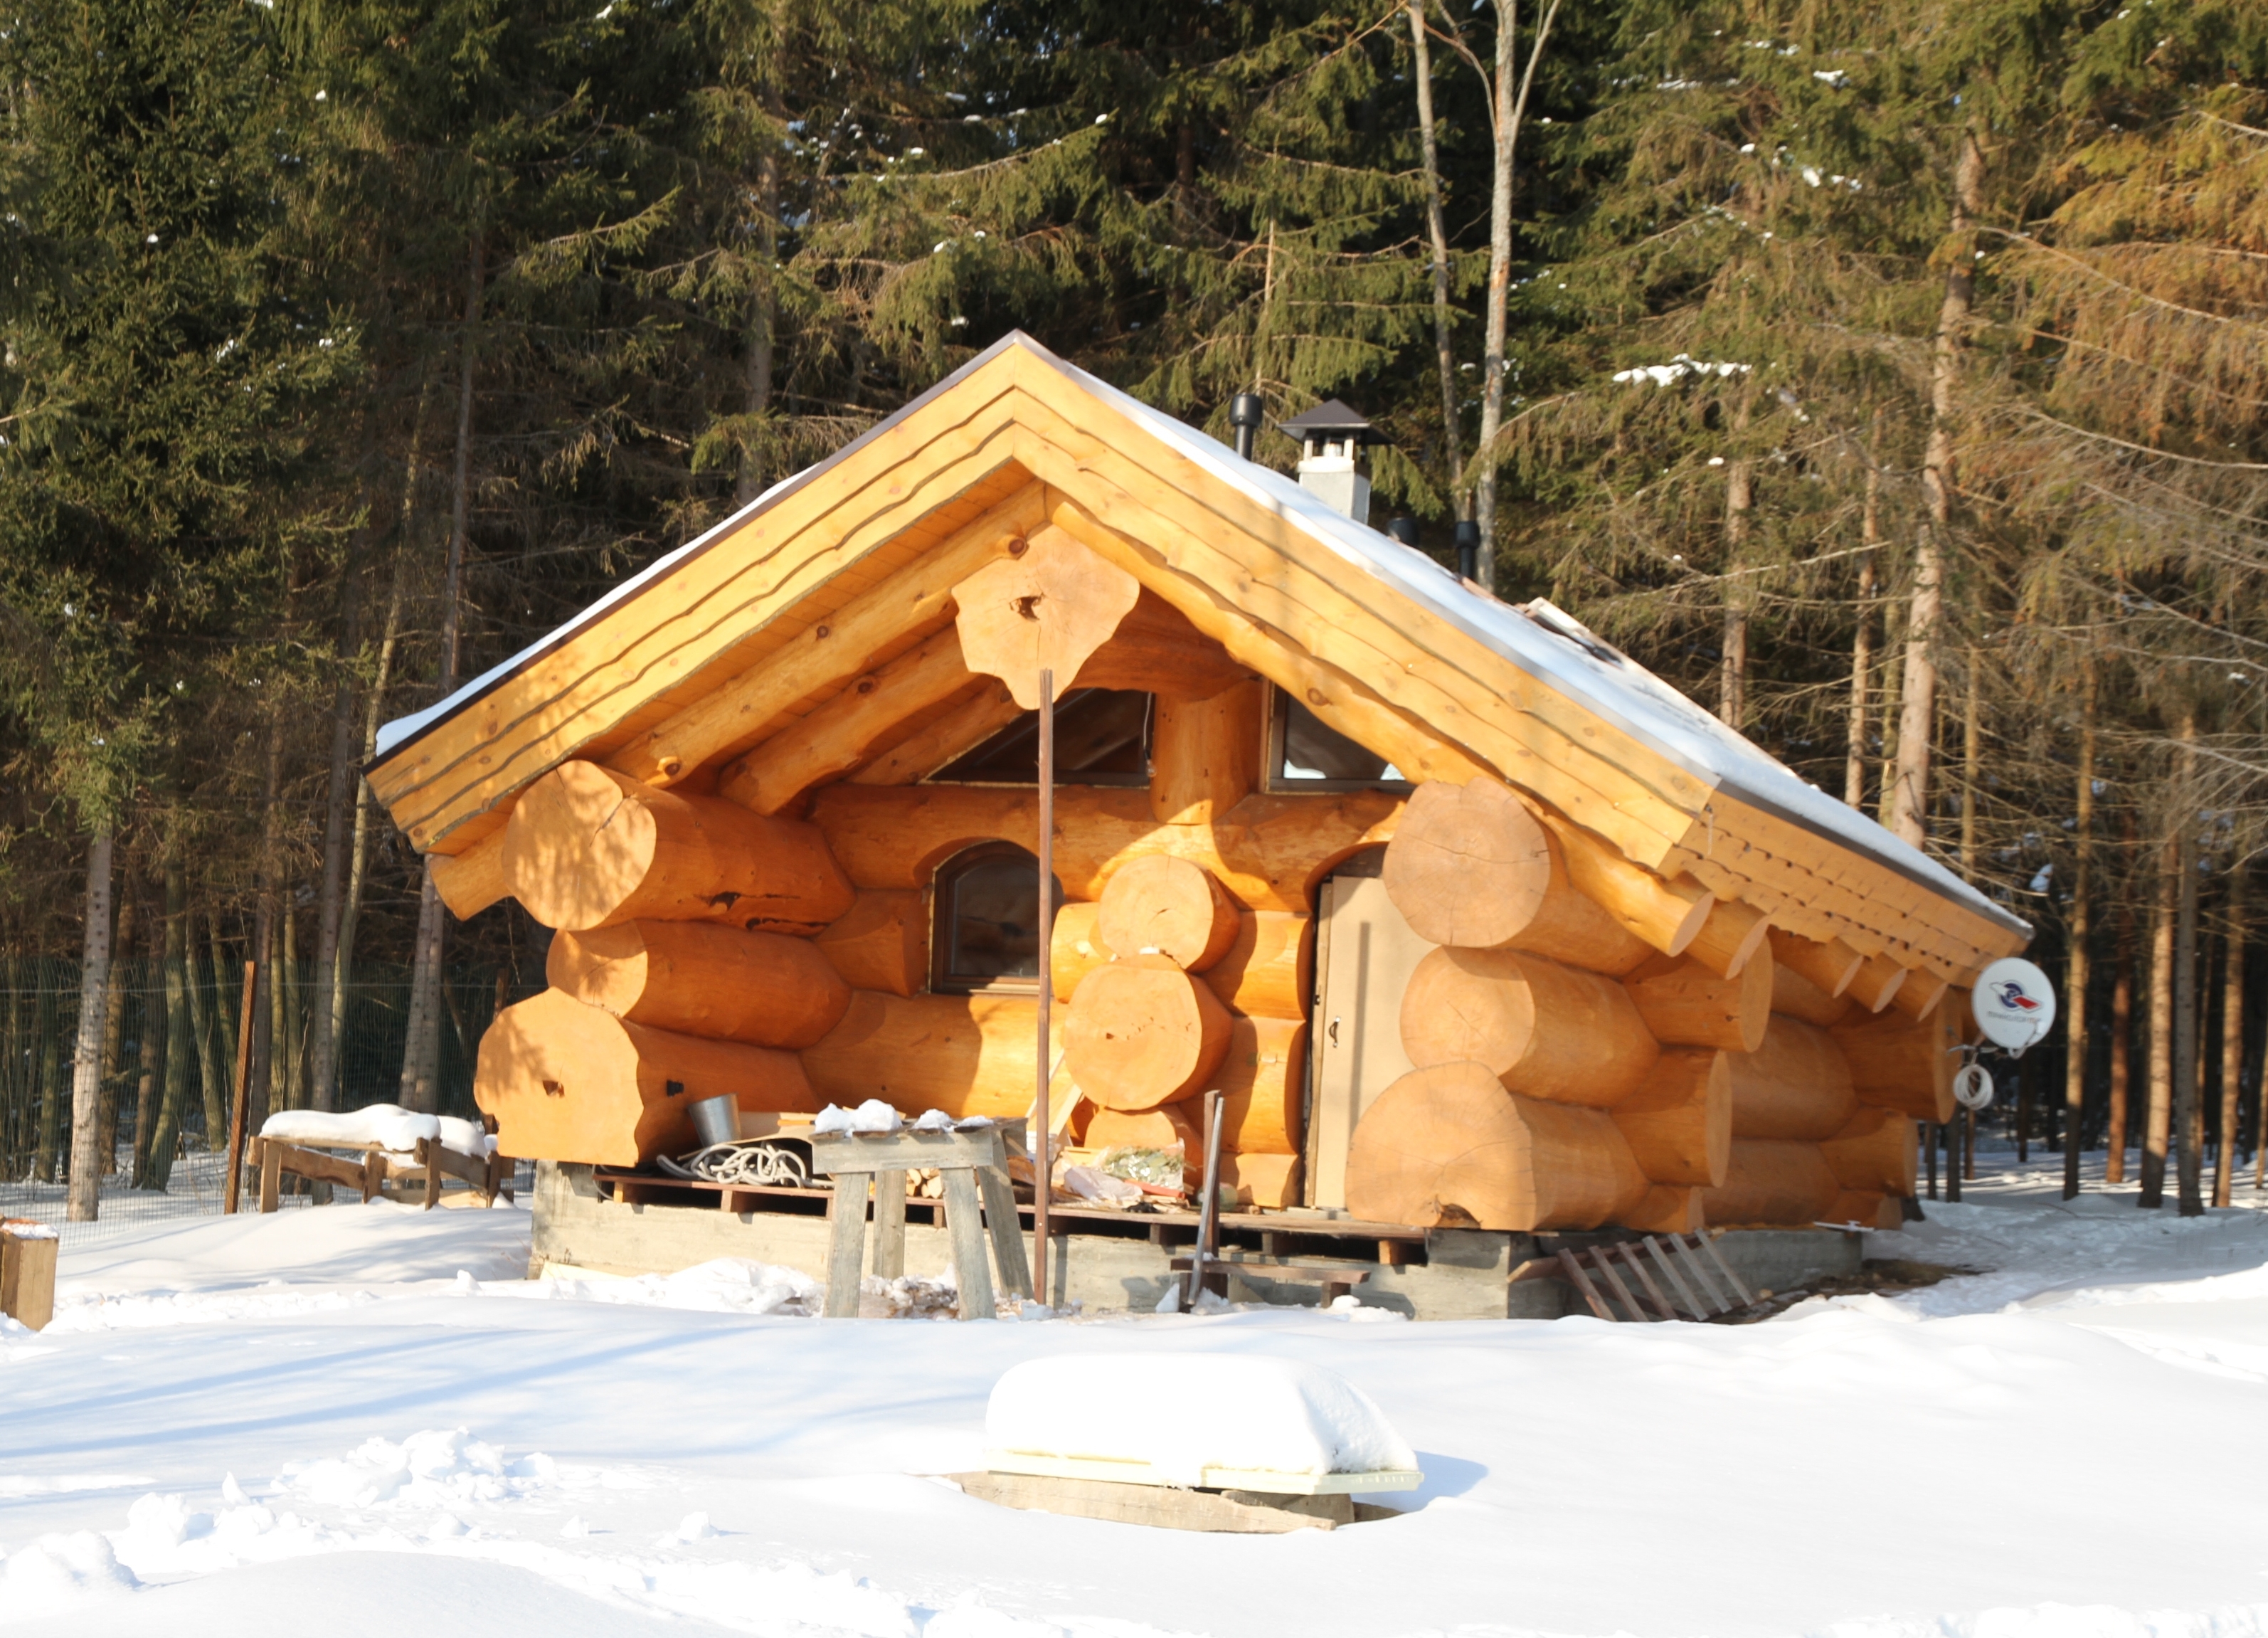
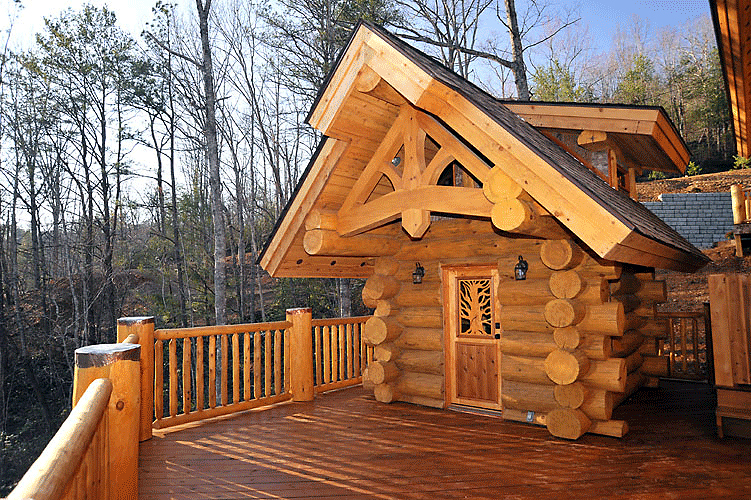
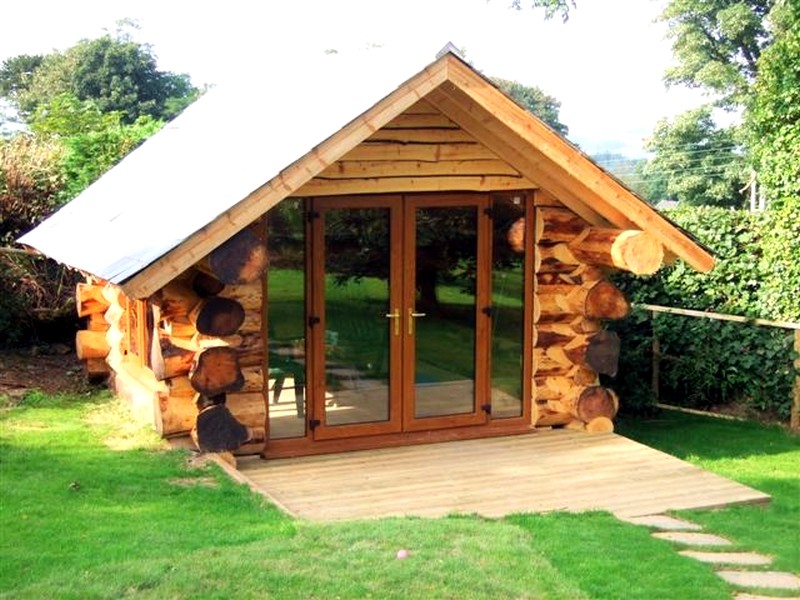
Extremely unusual log bath from a log of large diameter. Please note that it is possible to locate such accent buildings only under appropriate conditions, placing them against the background of the forest or selecting a house that has already been built in the same style. It is also extremely difficult to achieve an optimal level of thermal insulation, so it is better to entrust such construction to a professional.

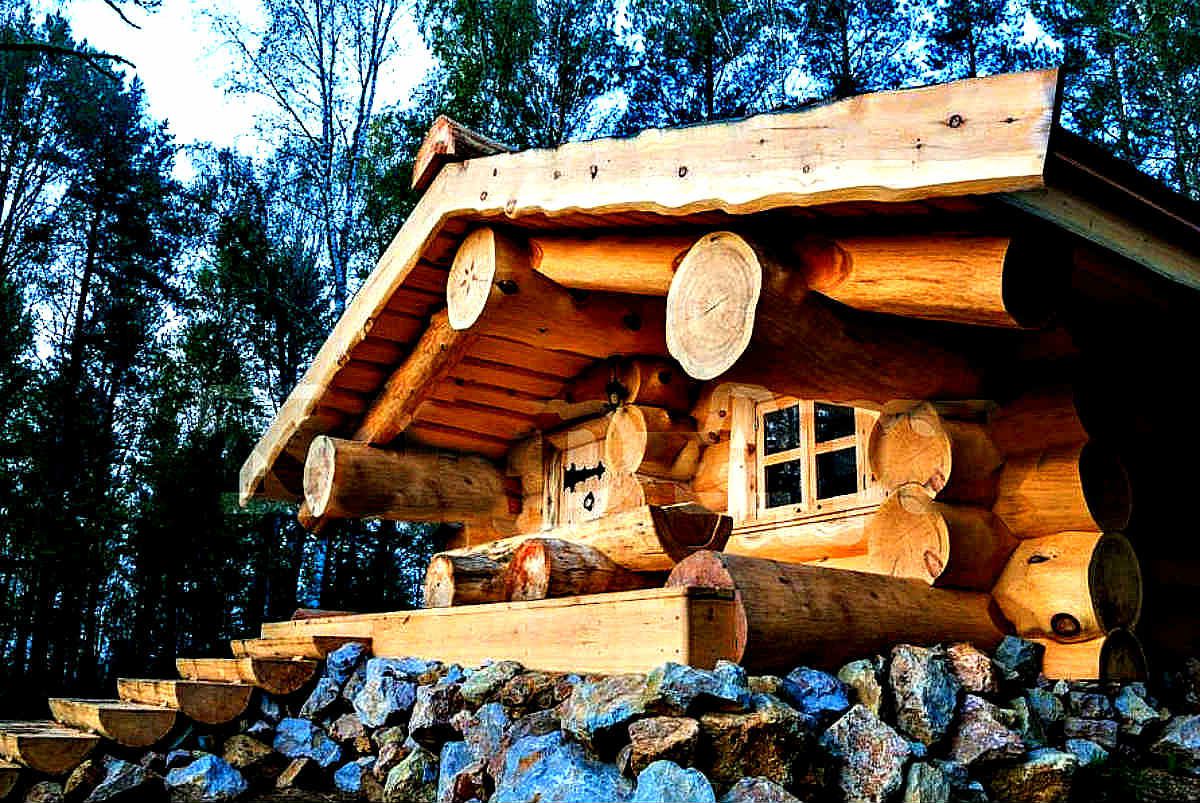
Another bath in the background of the forest. Buildings of logs of such a large diameter look like toy ones; nevertheless, this building is quite spacious and functional, despite its apparent miniature.
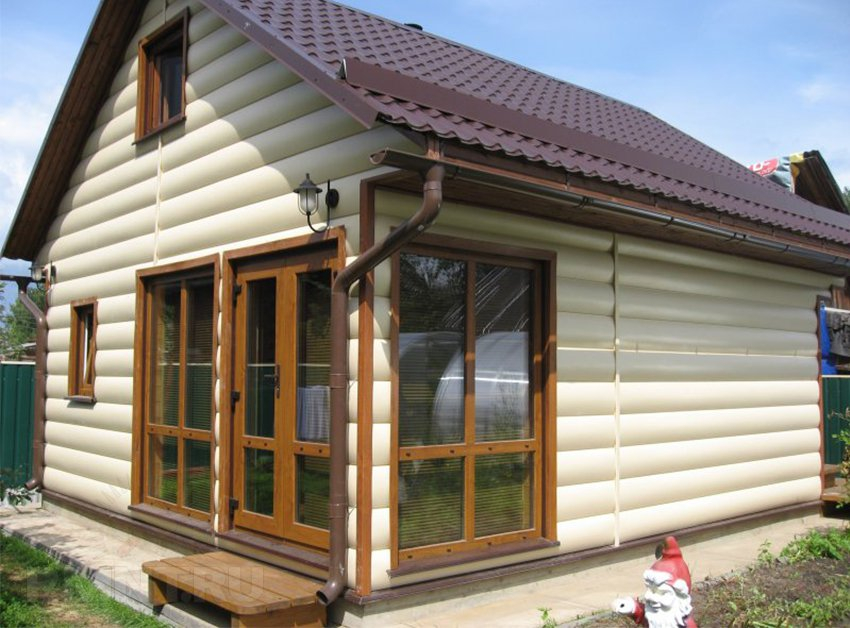
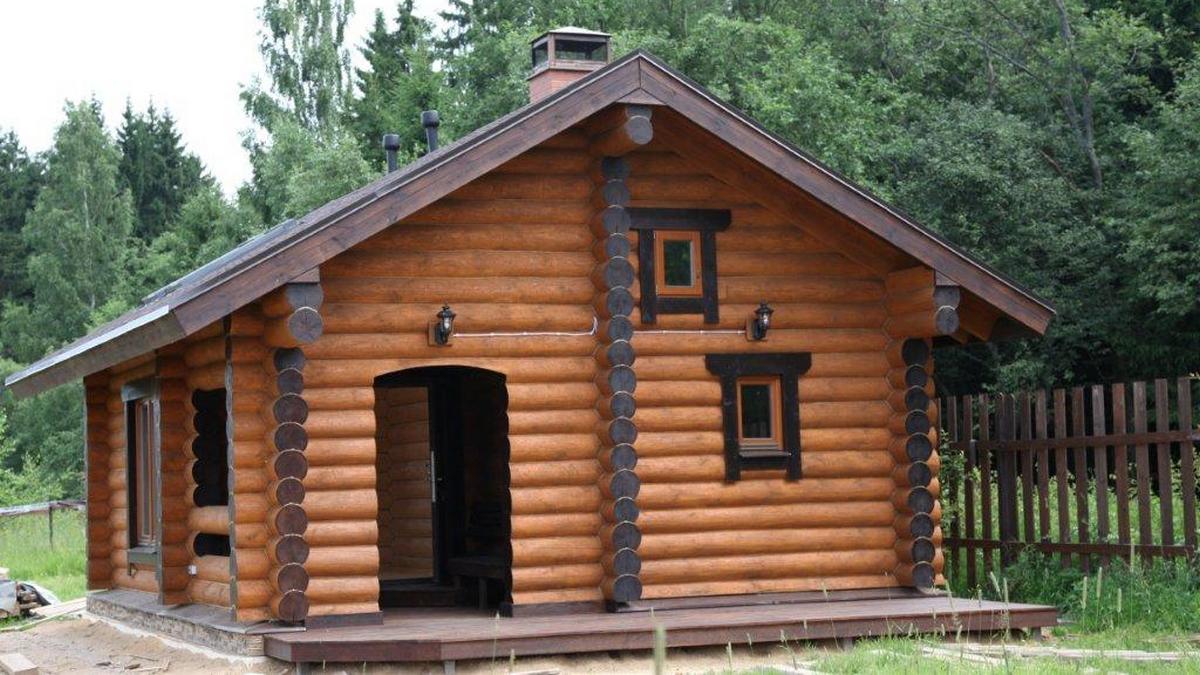
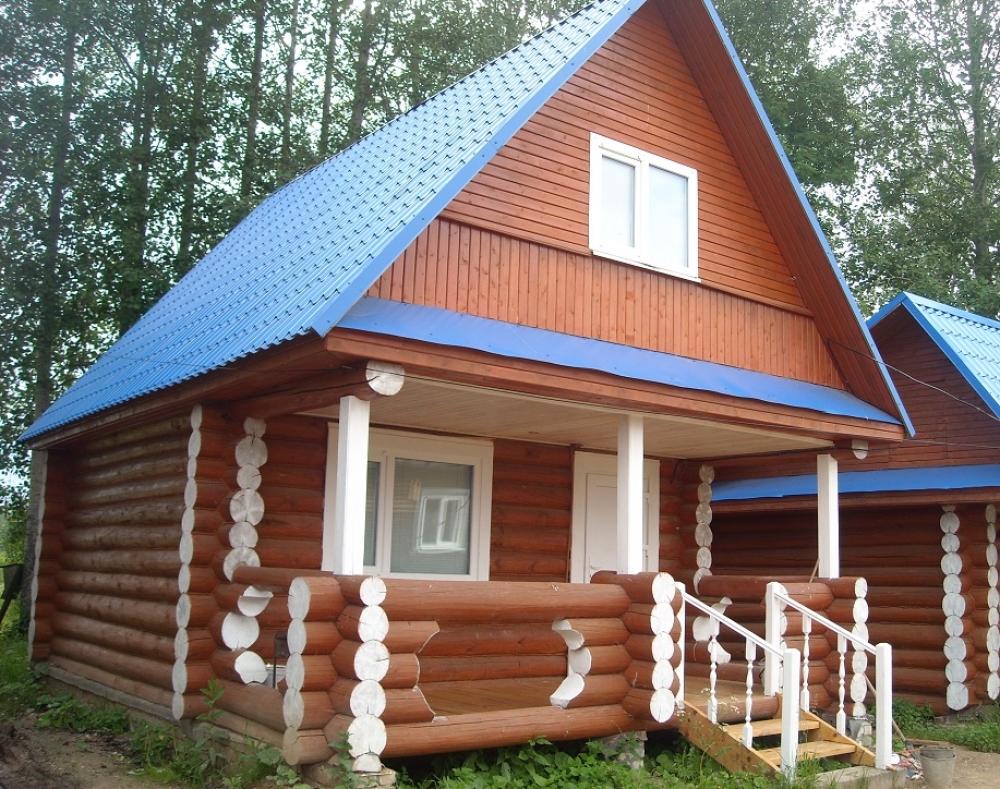
In the decoration you can use interesting and original techniques, for example, to highlight the windows dark, thereby complementing the ensemble of the roof and contrasting sections of the log house.
In this case, under the roof is not equipped with a full room, and atticwhich stores all sorts of things. In the same place, if you wish, you can arrange a place for storing firewood, but it is not very convenient to run upstairs each time.
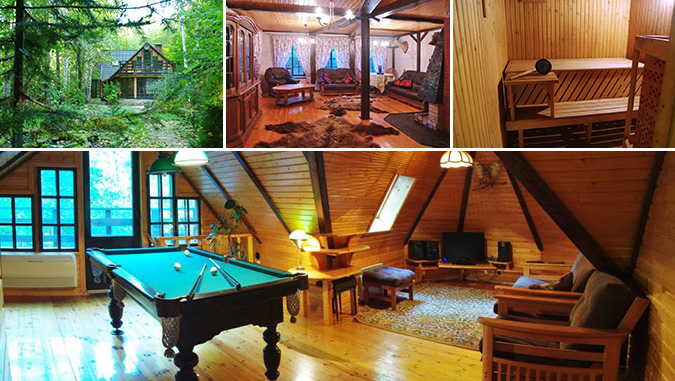
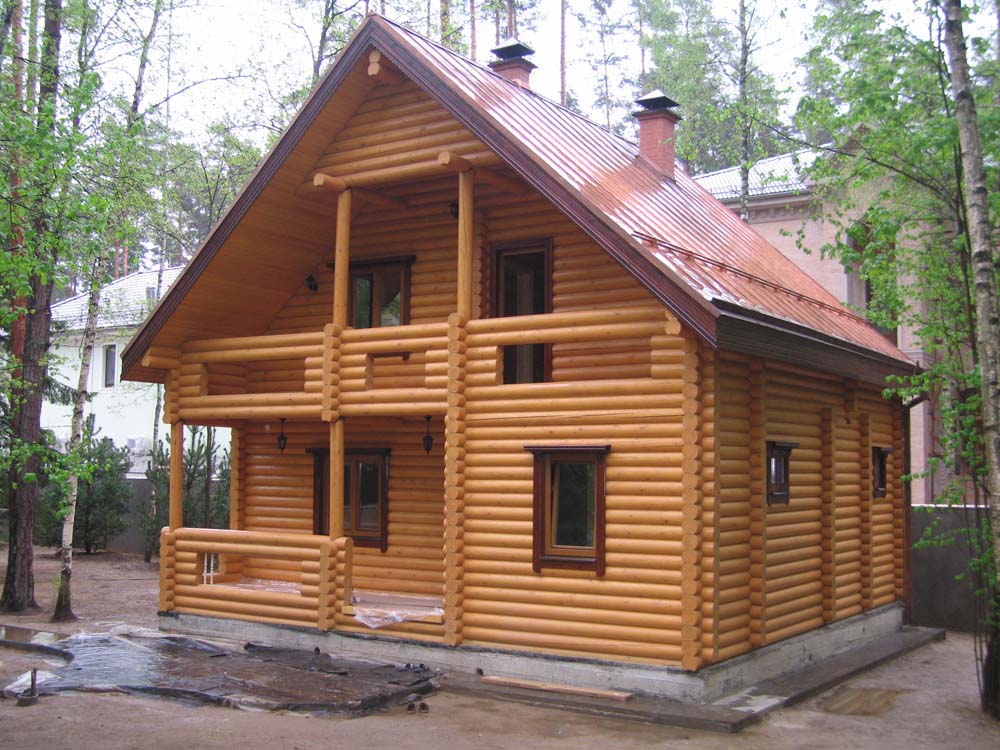
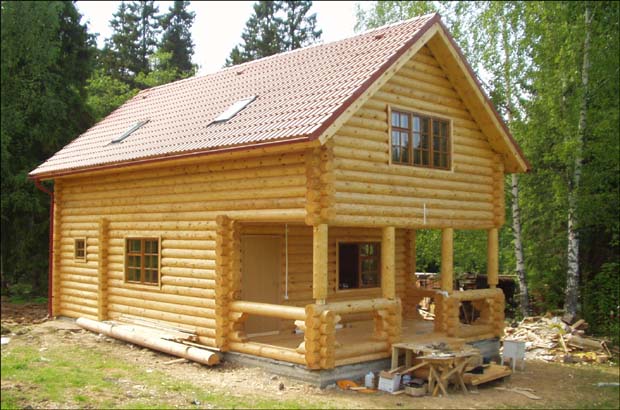
On the second floor of such a bath room is equipped with full.If desired, it would be possible to make a small balcony right under the roof, having equipped another corner for tea drinking and gathering with friends.

Often, baths look like full-fledged residential buildings, especially when they have a second floor. Here the second floor is a full-fledged living room, which is well lit, judging by the windows in the roof and on the side, and is visited very often.

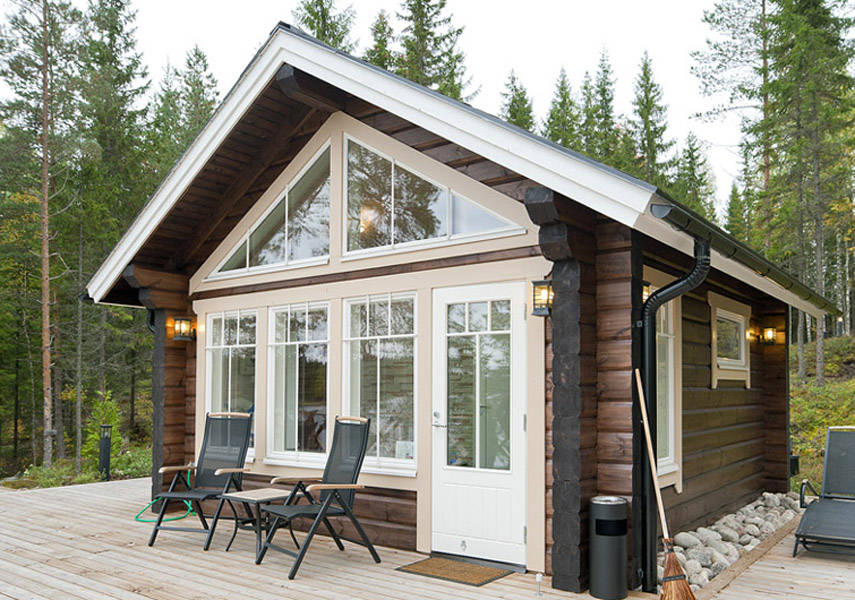
Baths from roughly treated logs - a tribute to fashion, ecology and Scandinavian style. The building, supplemented with mirrored doors, looks ultramodern, while maintaining a rustic flavor.
A bath from a log is an excellent acquisition, which faithfully will serve you for many years. Built with her own hands, she will keep the warmth of intimate conversations with friends or members of the household, while retaining forever a part of the soul building. If you are still considering whether to build a log bath, the answer is unequivocal - yes.
Tips for building a bath are waiting for you in the next video.


