Frame bath: the pros and cons of designs

Frame construction is gaining increasing popularity among fans of bath procedures and owners of private plots. The construction of a frame bath is an excellent option for those who are not able to give a lot of money, but want to find a building on the site, which by its basic parameters will not be inferior to similar more expensive projects. In addition, the frame baths have a rather pleasant appearance, which can be made very original and aesthetic with the help of exterior trim. Let us consider in detail the features of all stages of the construction of a frame bath, the subtleties of the selection of materials for construction and the current design trends.
Advantages and disadvantages
The construction of the bath on the basis of the frame ensures the speed of construction, because the principle of construction is quite simple. The frame technology has a number of other advantages.
- The building will be very budget. This is possible due to the availability and low cost of materials.
- No need for a strong foundation. It will be enough lightweight option.
- The room heats up quickly. This is possible due to the low thermal conductivity.
- All communications can be carried out inside the walls. This preserves the aesthetic appearance of the building.

- The ability to use the bath immediately after construction. And all thanks to the absence of shrinkage.
- All materials used are environmentally friendly. Steaming here is really helpful.
- There is no need to use construction machinery. But renting such can be very expensive.
- No special skills are required for the independent construction of a frame bath. Installation will master even a beginner in this business.
Construction can be conducted at any air temperature and weather. Climatic conditions will not affect the process.
In the absence of serious errors in the construction of such a structure will have a long service life. The main thing is to act according to the instructions.
- The method of construction already says that such a building is easy to repair. You can replace one of the modules and this will not adversely affect the other module or the entire building as a whole. If desired, the bath can be made mobile (transportable), but few people resort to this method.
All these undoubted advantages contribute to the popularity of frame baths. True, they also have a rather noticeable disadvantage: during precipitation, moisture can penetrate into parallel bars.
To avoid this, careful adherence to certain rules will help.
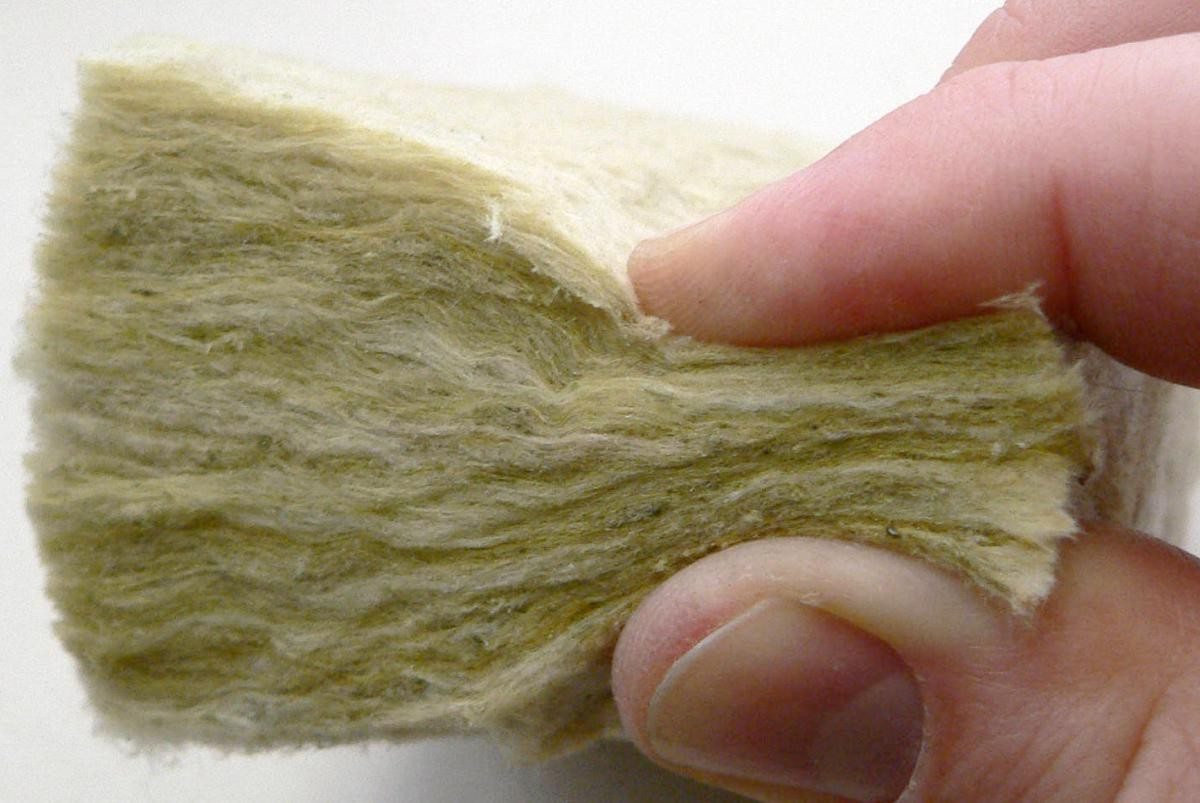
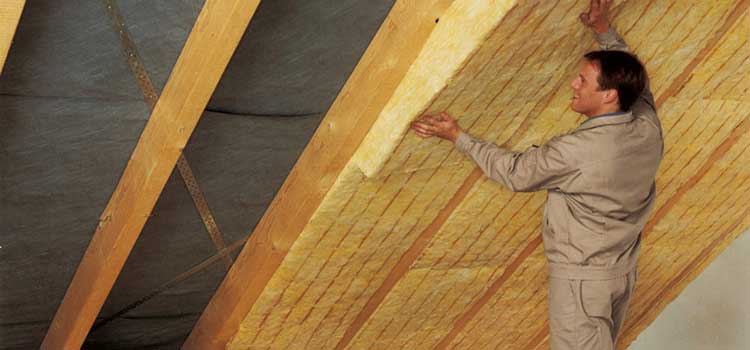
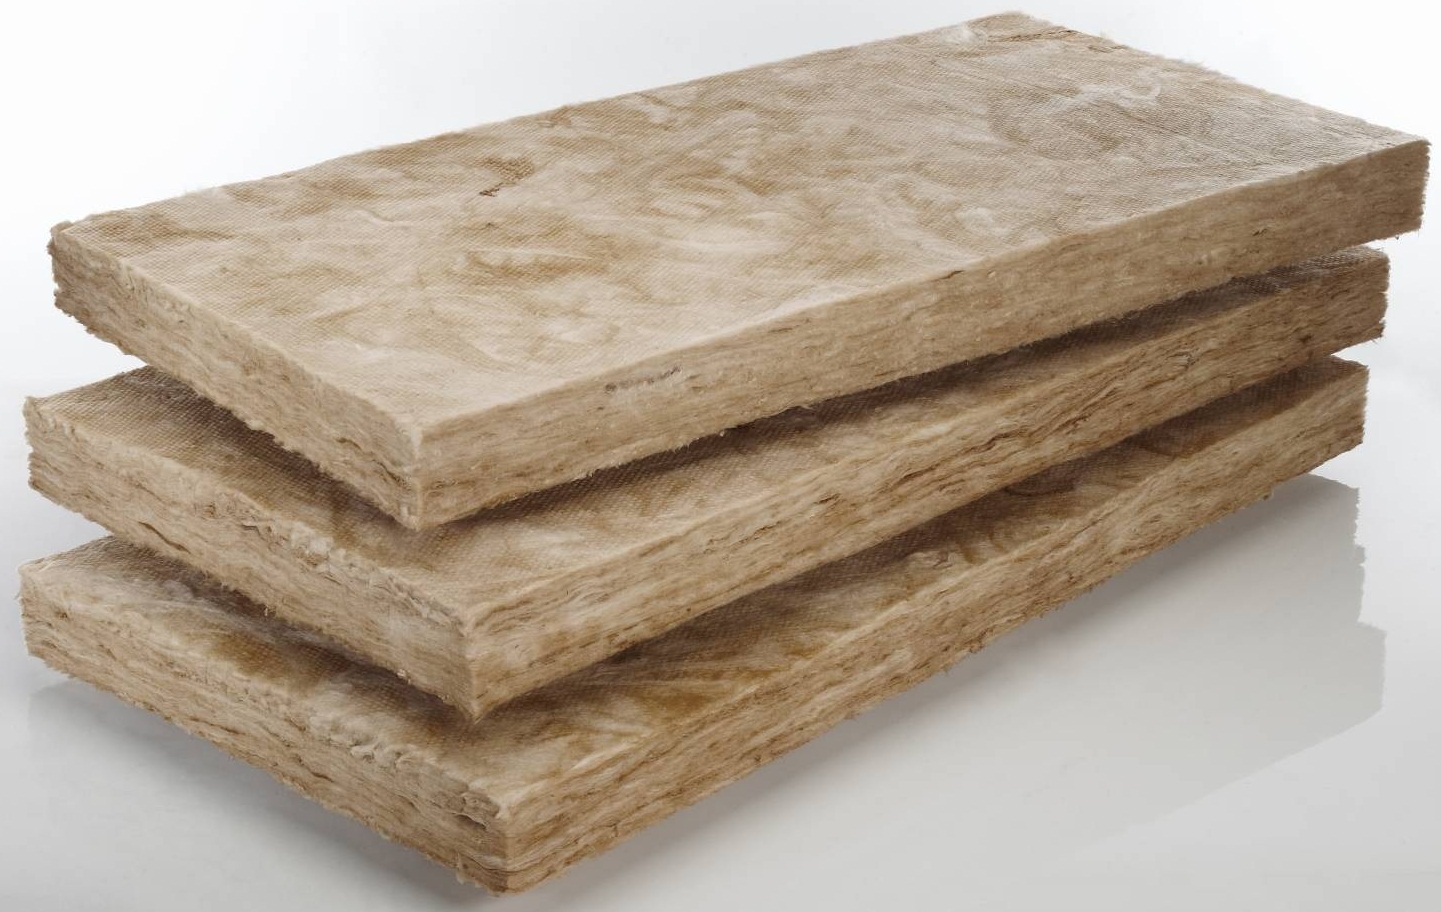
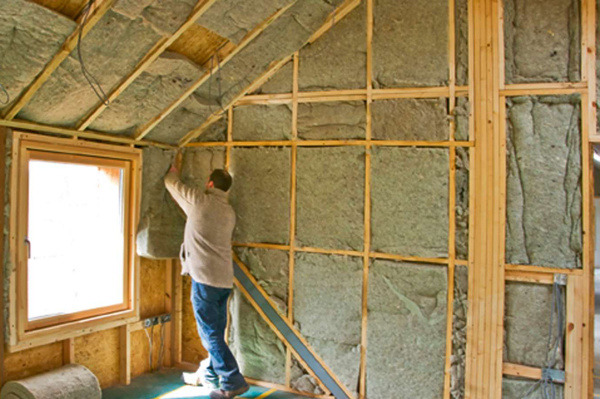
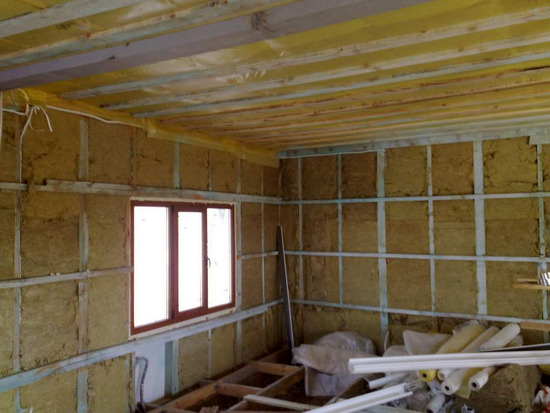
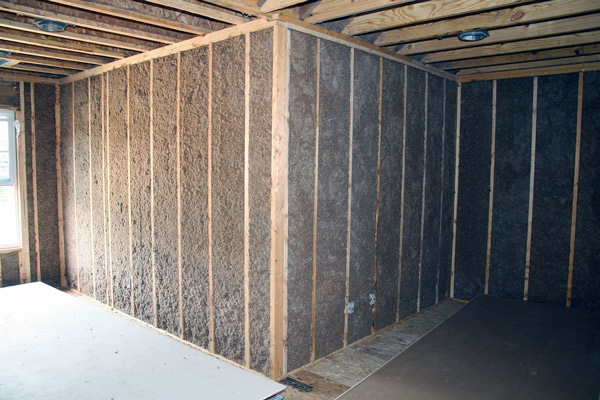
- The use of thermal insulation during construction is necessary. It allows you to retain heat for a longer time, promotes tightness and prevents moisture penetration. As a thermal insulating material is well suited mineral wool or fiberglass.
- Vapor barrier equipment will help avoid condensation and extend the life of the wood.
- A simple type of foundation (pile, columnar) is ideal for arranging on dense soils.
After reviewing the main features of the frame structure, you can begin to design a future bath.
Projects
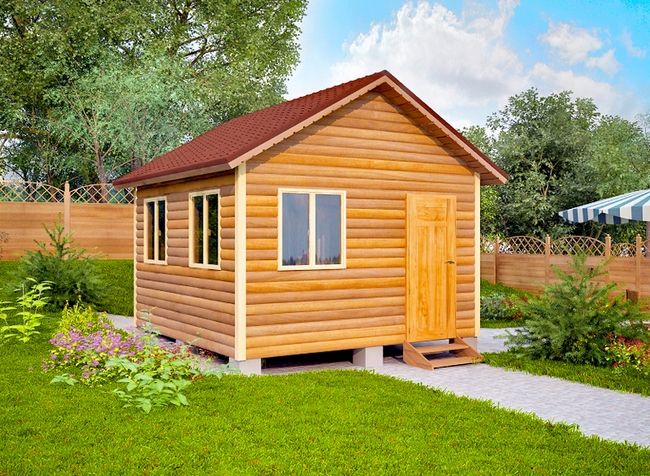
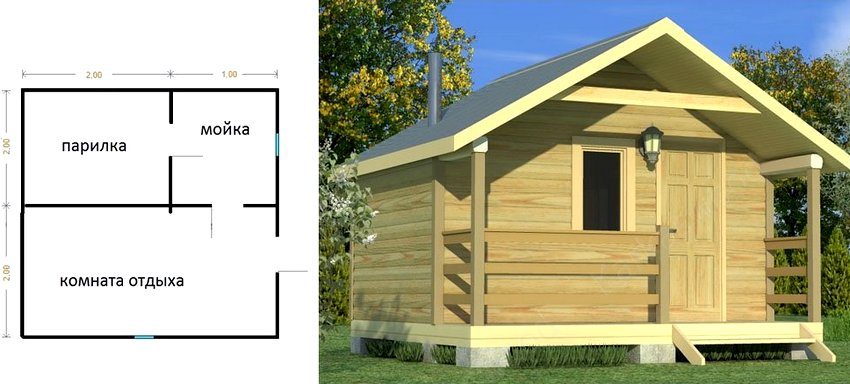
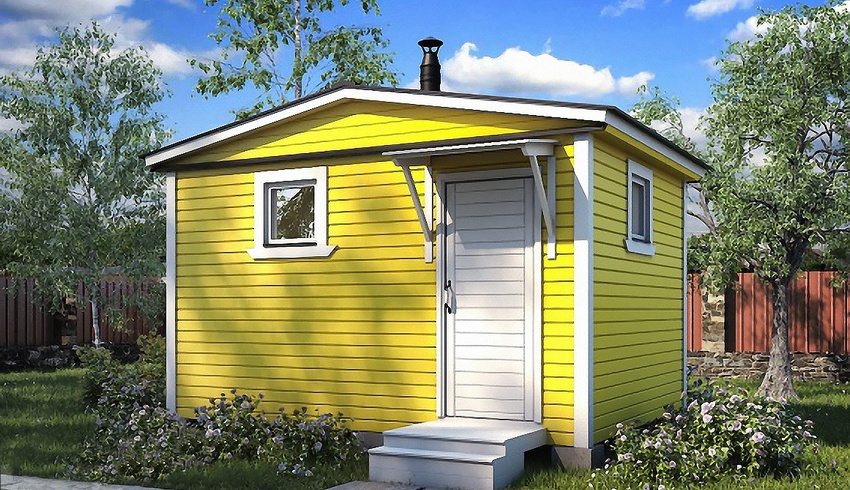
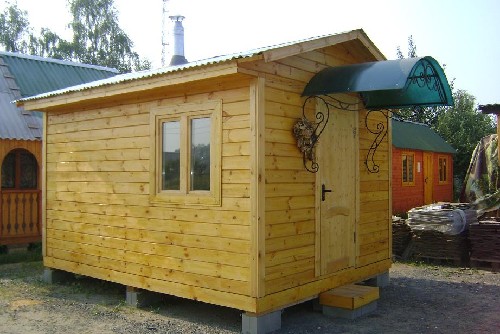
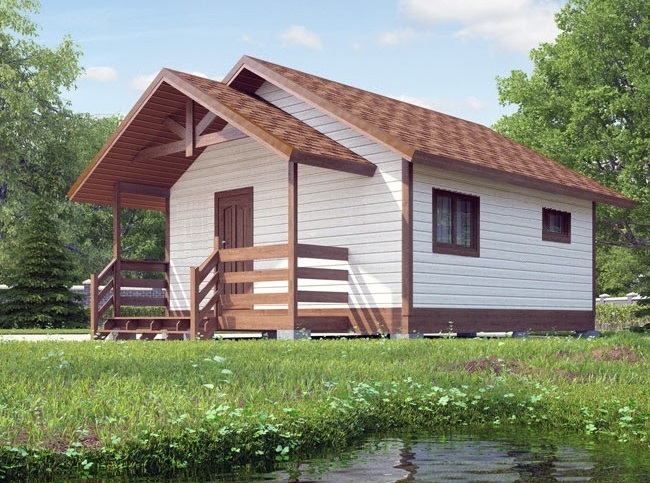
Options 2 x 4, 3 x 4, 4 x 4 m
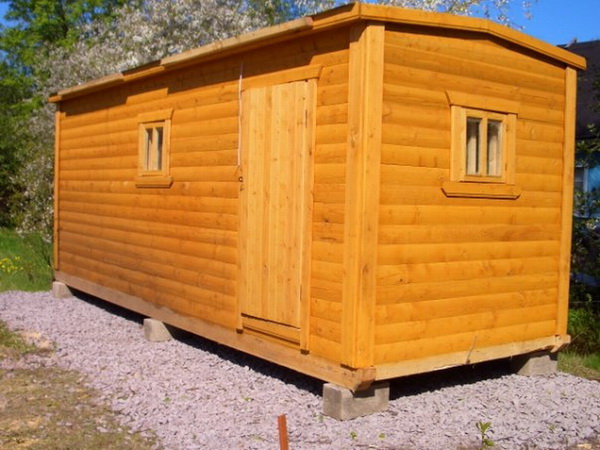
Starting the construction of such a small-sized bath, you need to be able to use all the internal space as efficiently as possible. Such mini-baths are often built on sites where it is necessary to save territory or as an extension to the house. At the same time, no more than two people can bathe in such a small bath.
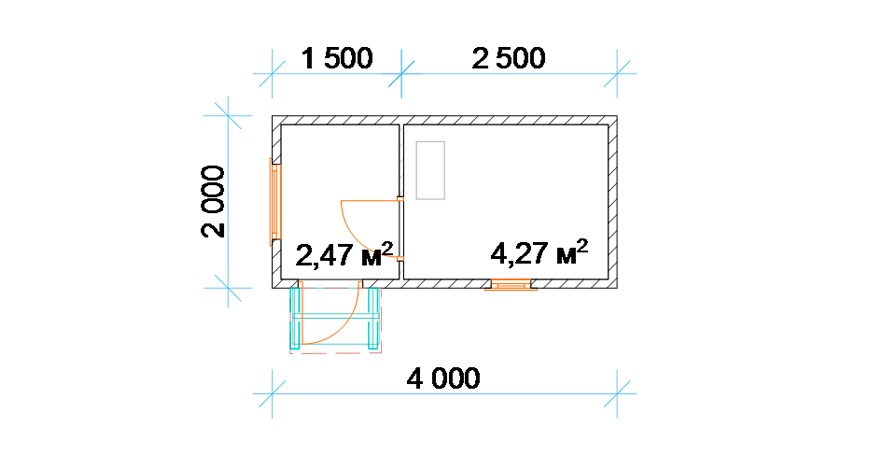
In the finished project of the future bath, the number of rooms should be detailed. (steam room, shower room, dressing room, swimming pool, etc.). Typical 3 x 4 bath projects include separate rooms for a steam room, a relaxation area and a shower room. For heating often use a boiler or wood stove.
Such small buildings have their advantages.
- The opportunity to save on building materials. The standard timber has a length of 6 meters, which means you can simply cut it in half (if the length of the wall is 3 meters), leaving almost no waste. Or in 3 parts with a wall length of 2 meters.
- Such baths are built fairly quickly. With the finished project and drawing, you can complete the work in 2 weeks.
- Saving on the amount of material will focus on its quality. Good wood with high-quality impregnation will last for many years.
When planning the construction of the bath, it is worth remembering that any new construction on the site must be registered in the cadastral registry.
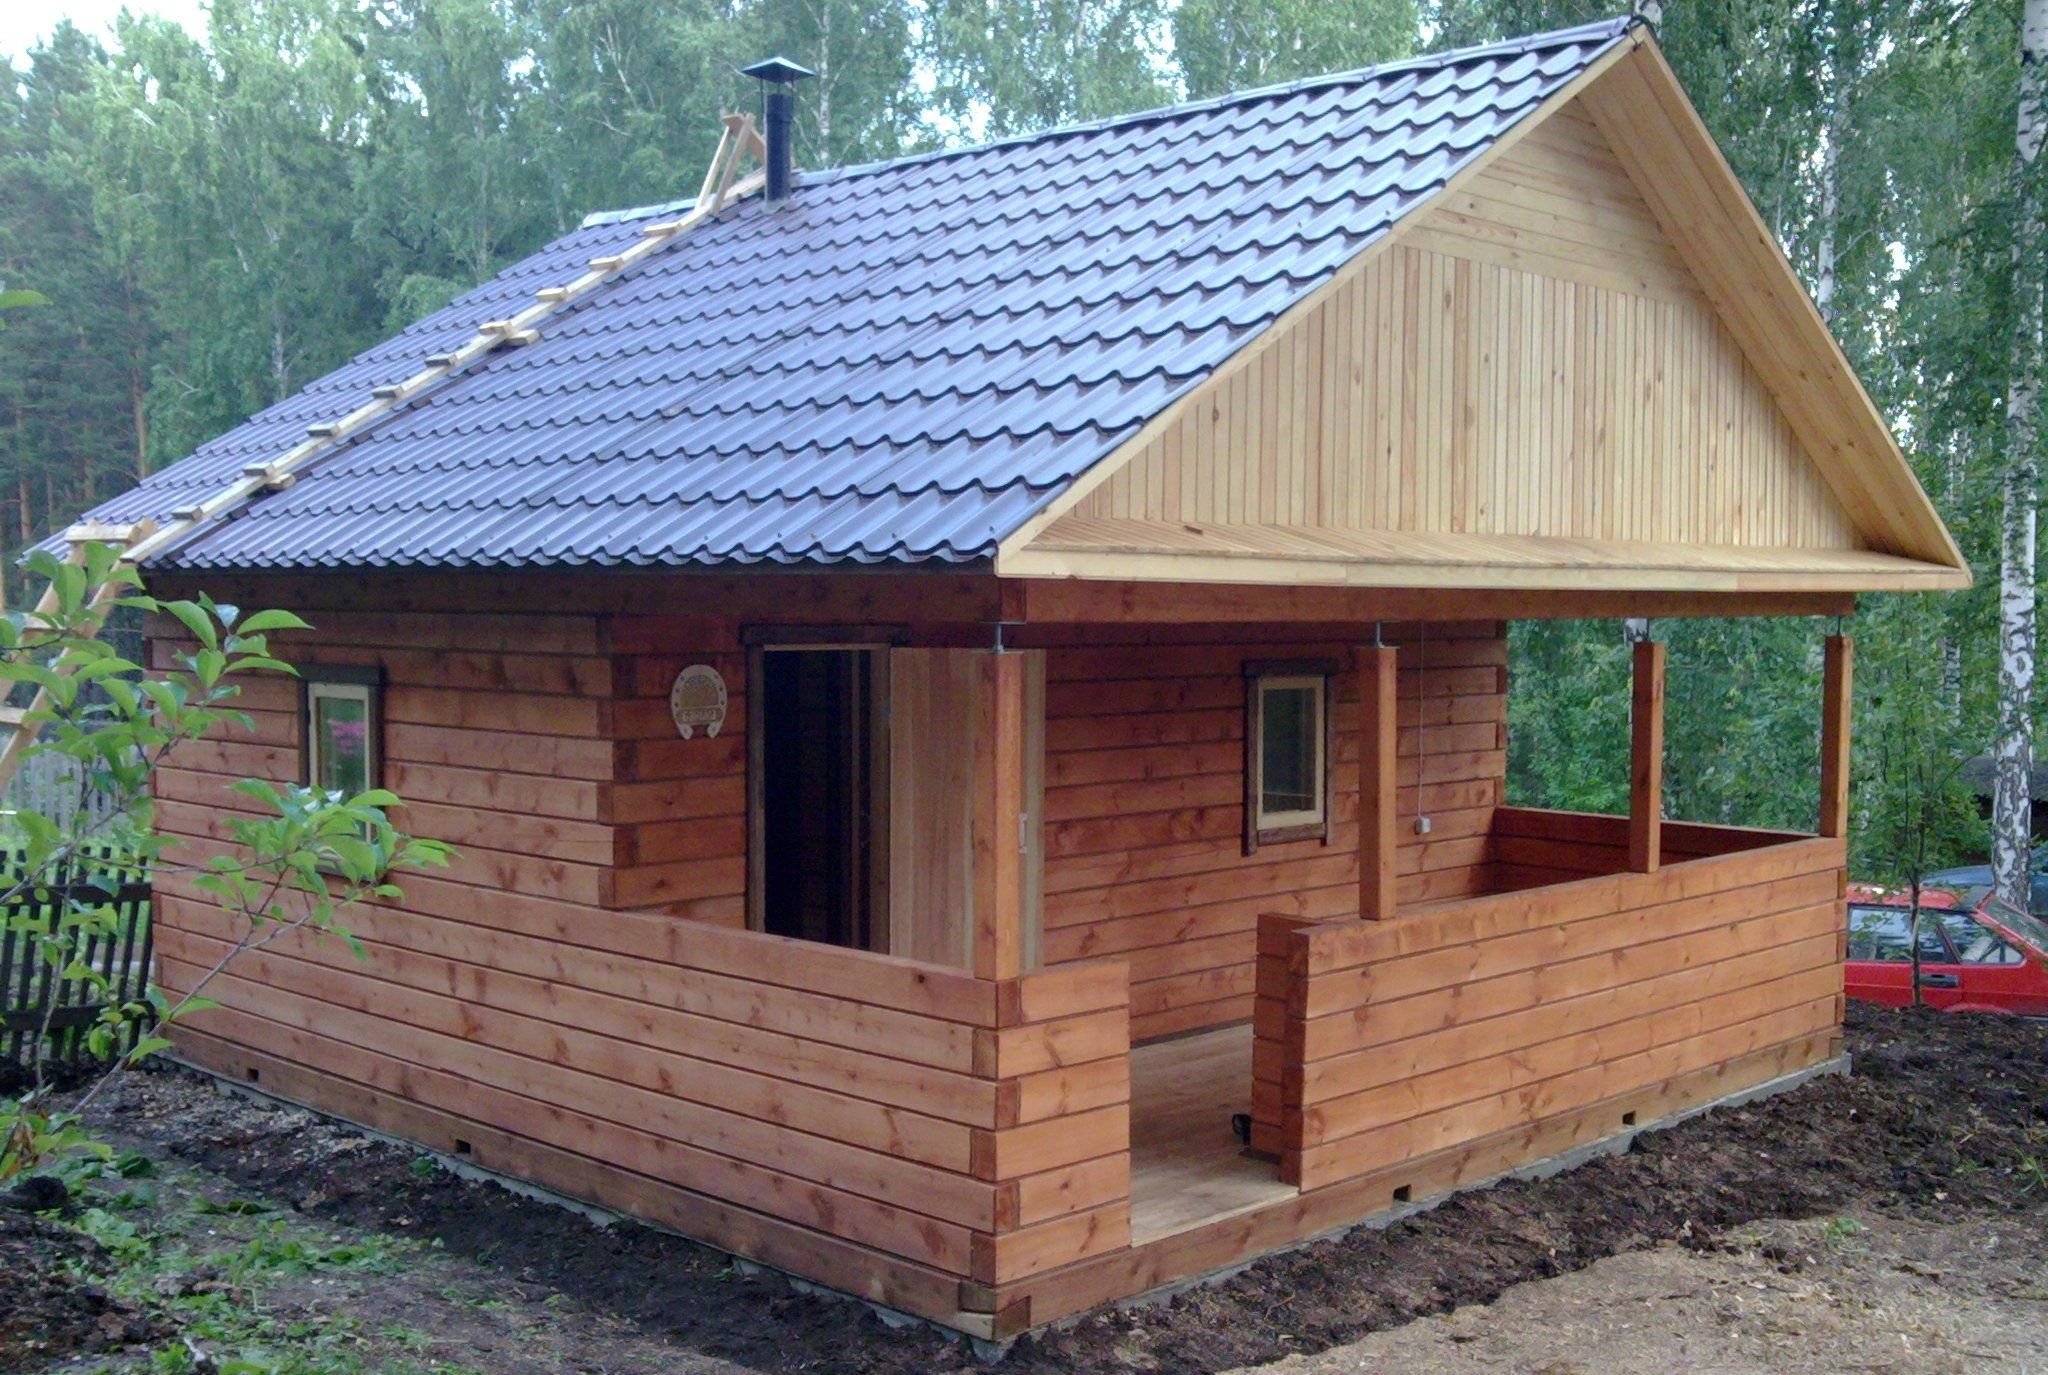
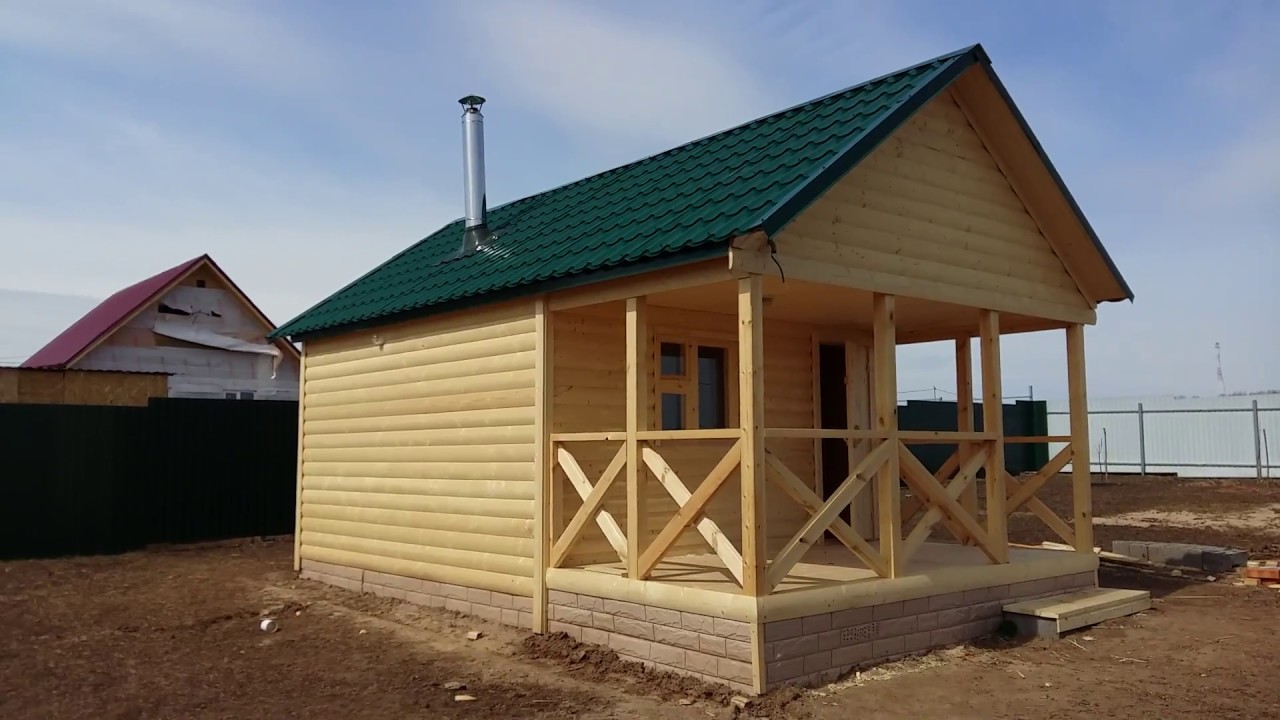
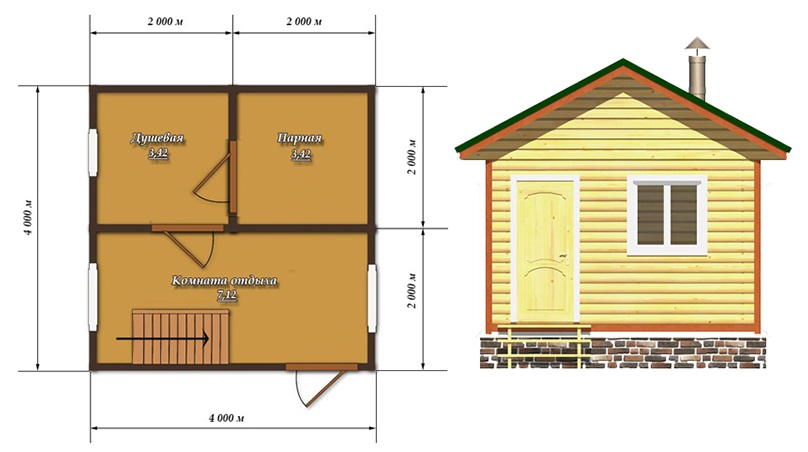
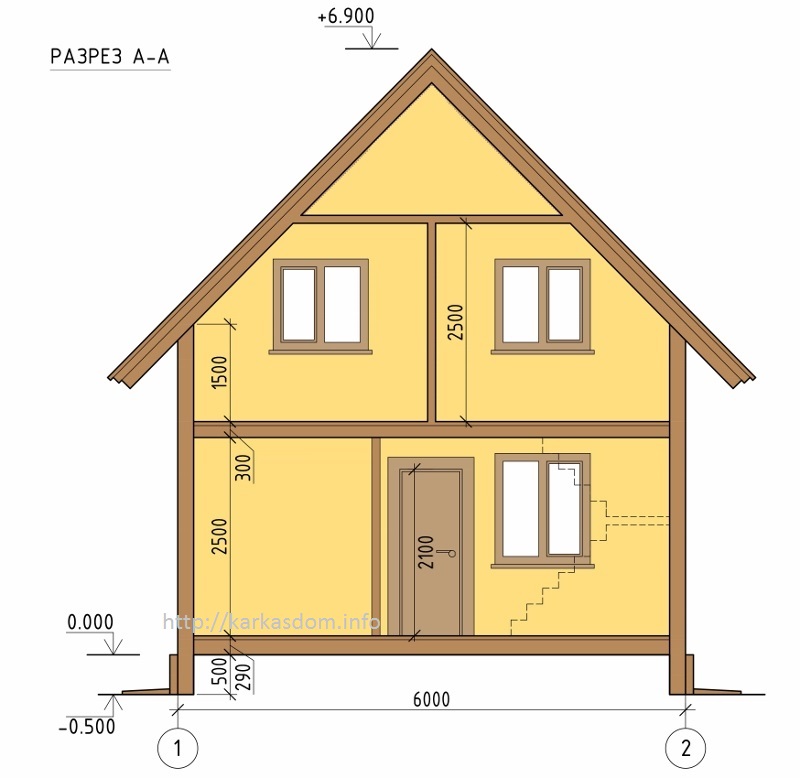
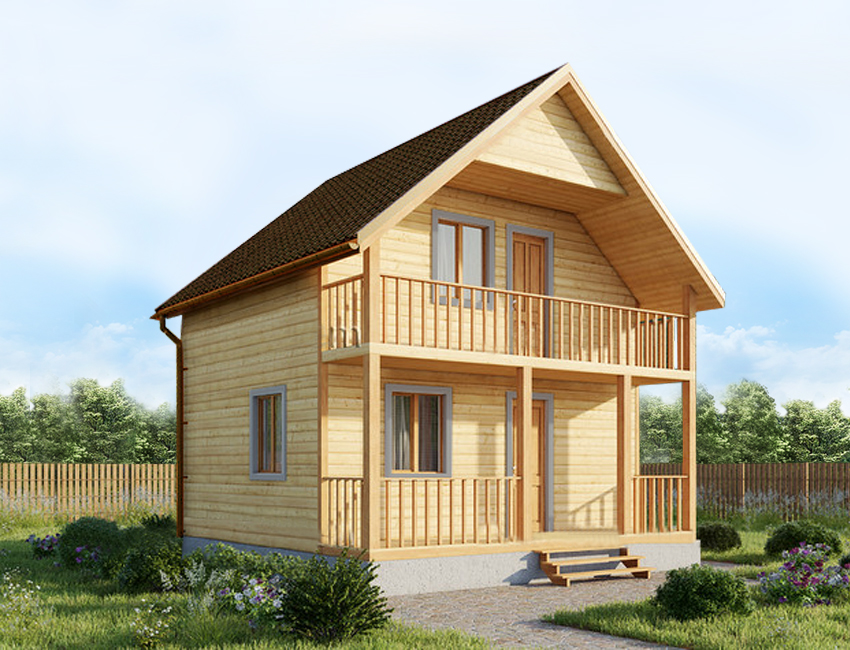
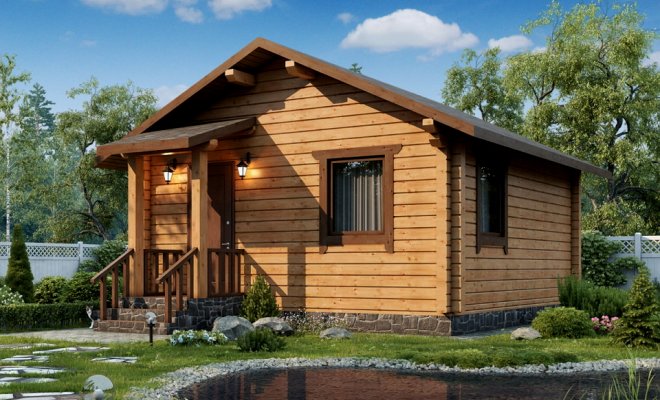
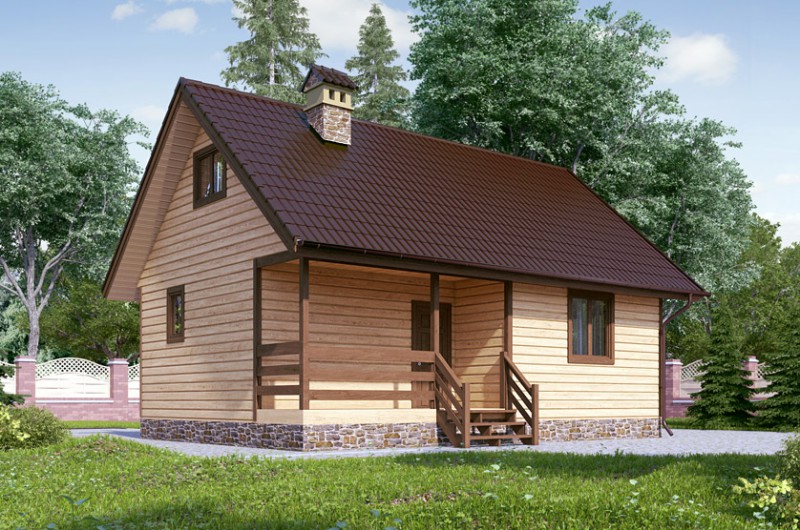
Projects 6x6 frame bath with a loft
If the size of the site allows you to build a luxurious spacious bath, why not do it? Especially those who not only likes to steam themselves, but also invite friends.

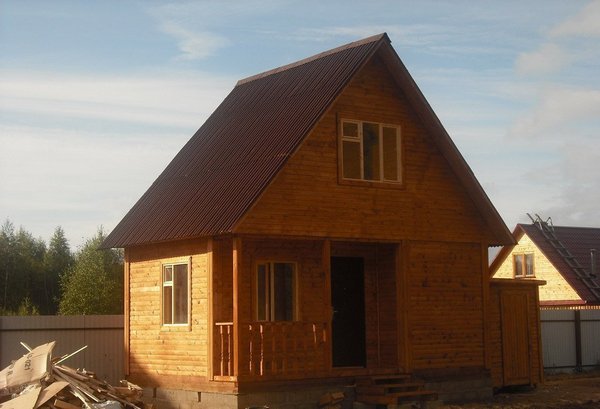
Baths with an attic are often designed so that the staircase leads from the lounge to the attic floor. The advantage of a two-story building is that the second floor provides a lot of additional space, while the costs do not increase significantly, because the bulk of the costs go to the construction of the foundation.
Design
The last stage of the construction of a country house is interior and exterior.
It is clear that it is carried out to the taste of the owner, but even here there are some universal rules that are better to follow.
- The inner lining of the bath can not be painted. When heated, the paint emits an unpleasant odor and harmful substances.
- It is better to start the inner lining six months or a year after the completion of construction. During this time, the building will shrink naturally.
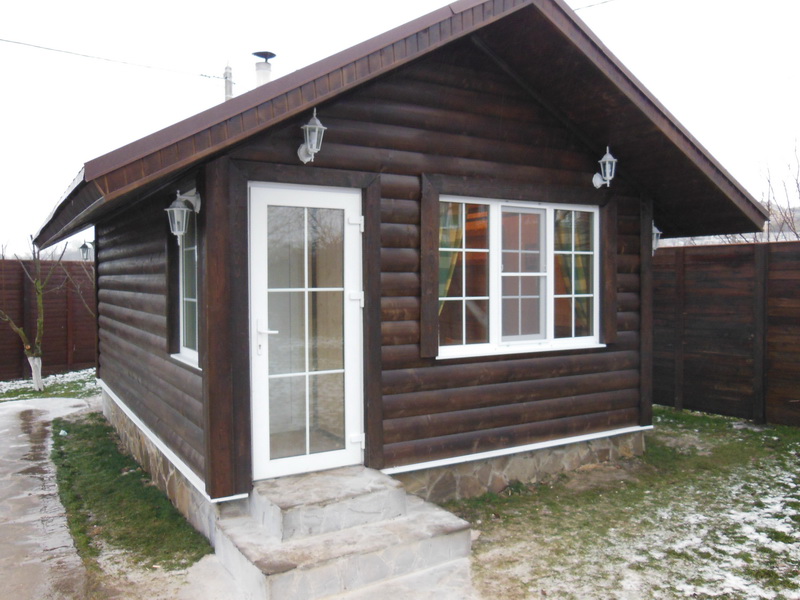
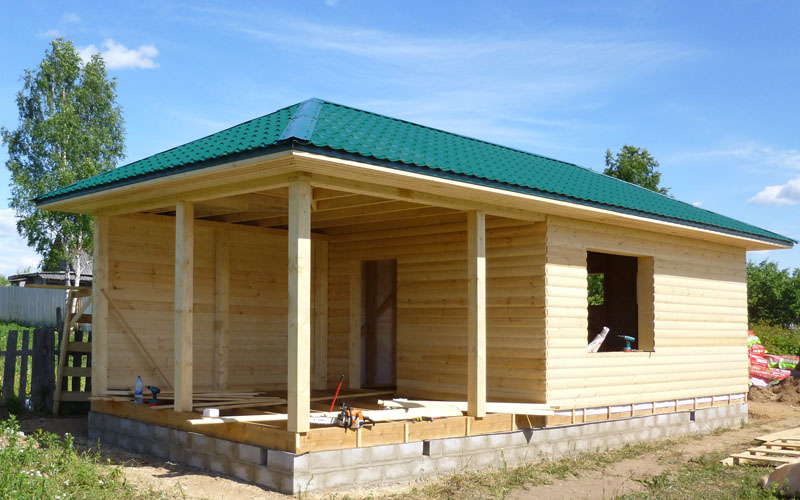
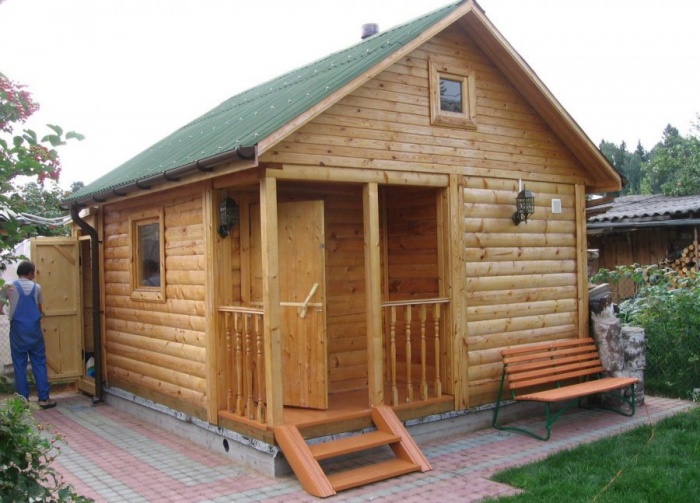
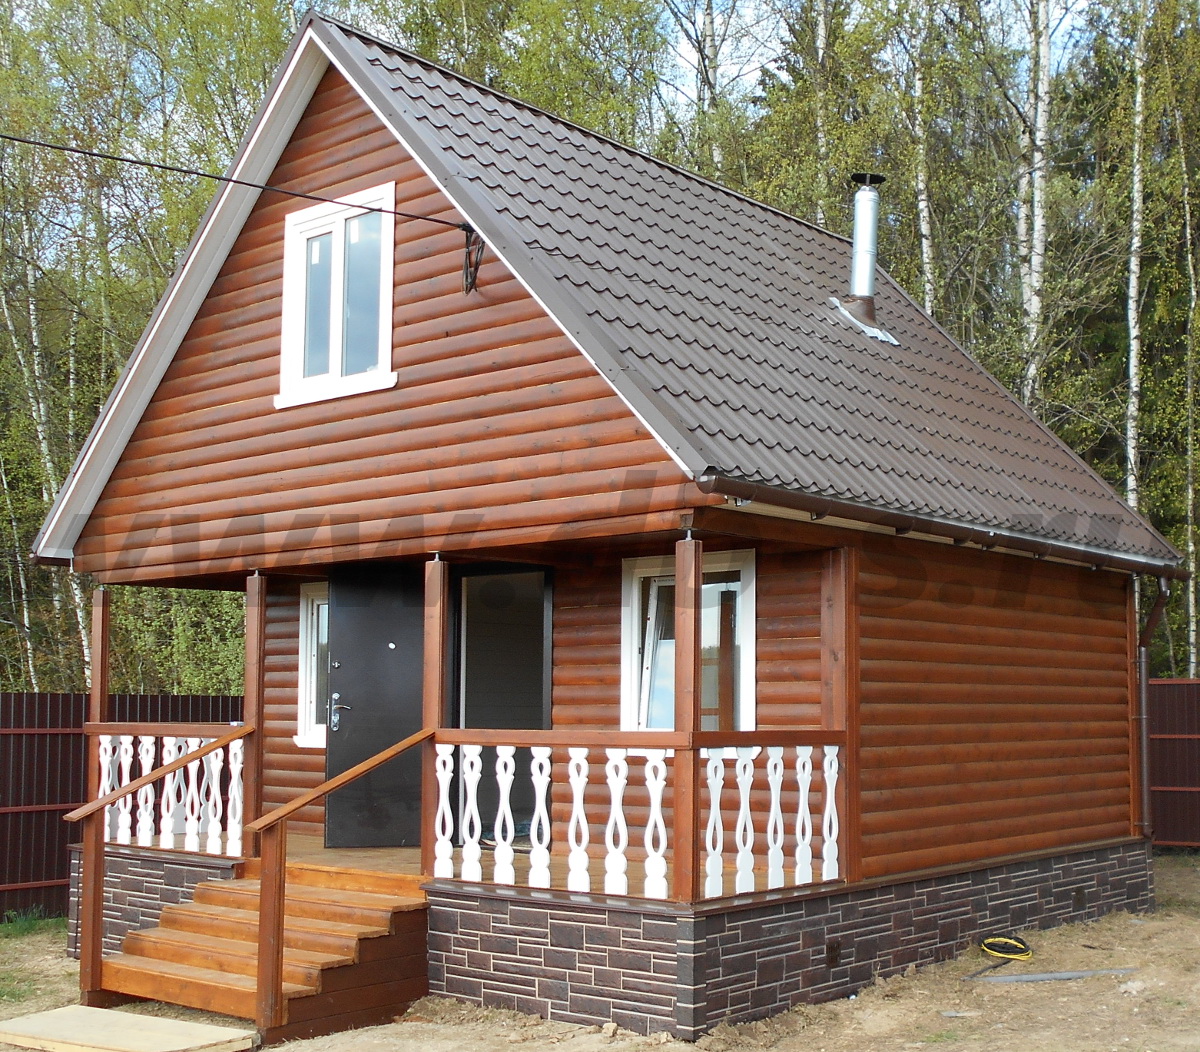
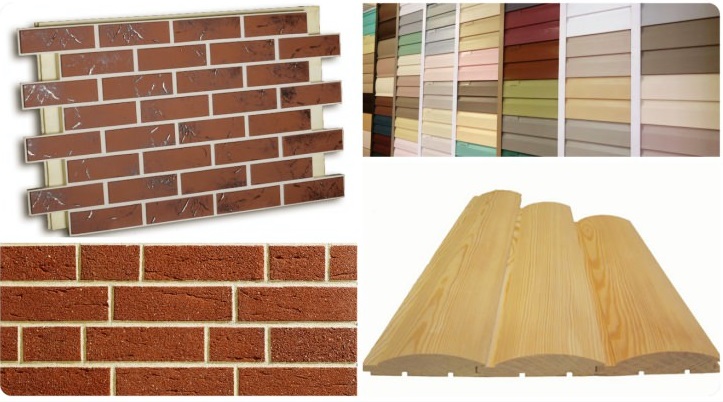
The main methods of exterior finish are plaster,siding or clapboard made of coniferous trees, block-house, tile. Thermopanels and facing bricks are less commonly used.
Absolutely all the materials that are used for interior decoration of the bath should have a number of characteristics:
- resistance to moisture, hot air and direct contact with water;
- in no case should the material release toxins when exposed to high temperatures;
- durability and long service life;
- environmental friendliness.

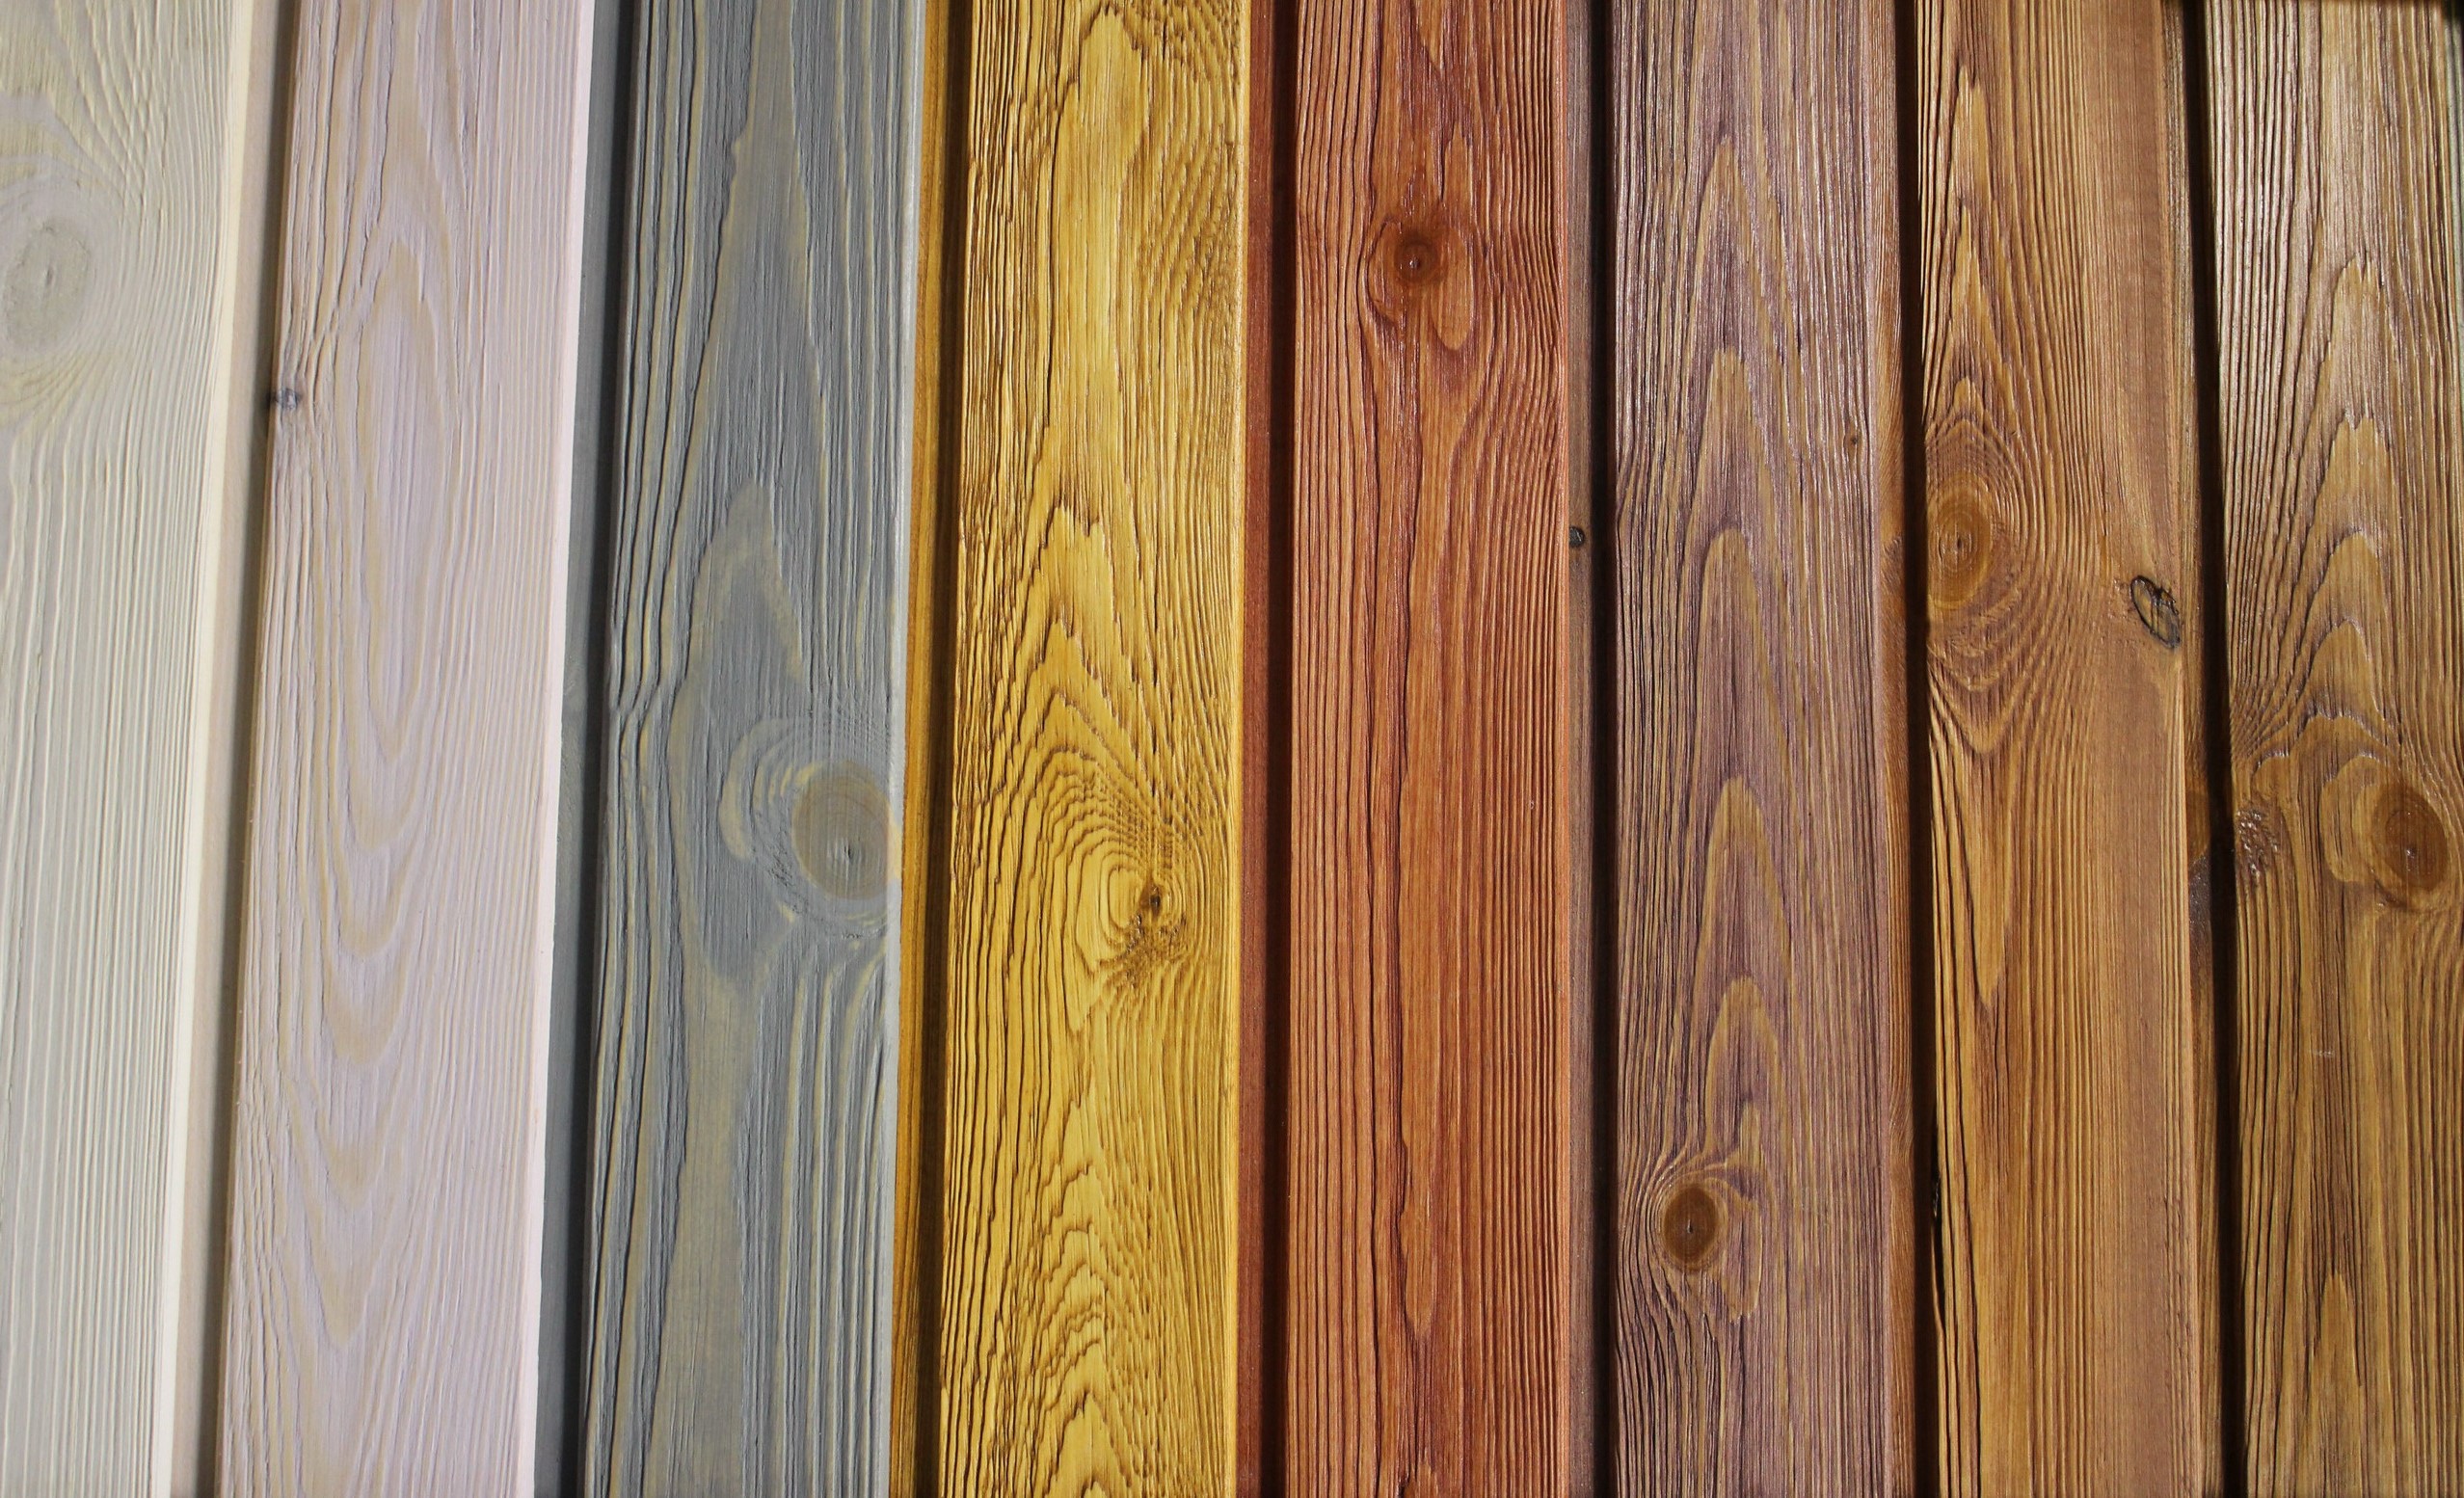
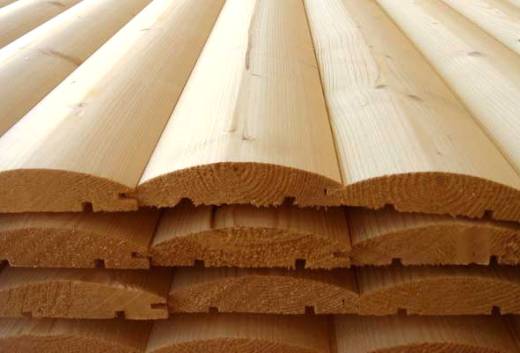
Naturally, the most common material that combines all of the above characteristics is a tree. It easily absorbs moisture and dries quickly, is absolutely safe for humans and has its own unique smell (which everyone has long been associated with bath procedures).
Next is to determine the type of wall paneling, of which there are many. After all, if you choose a poor-quality wall paneling, it can get water and swell. Or vice versa, to decrease in size, forming cracks (this is possible with the purchase of raw lining).


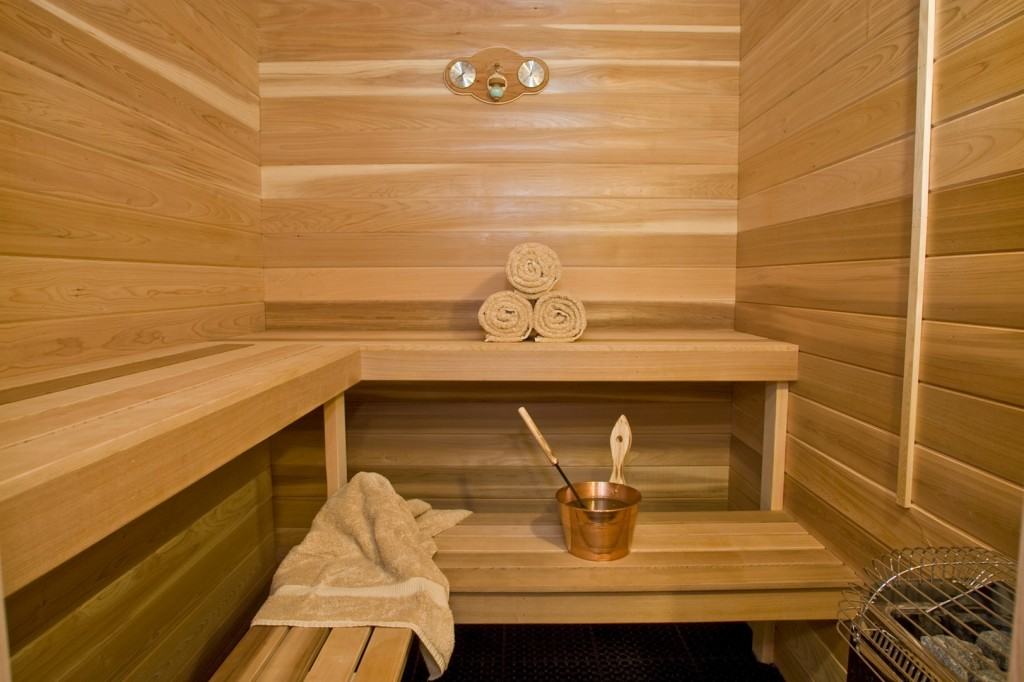
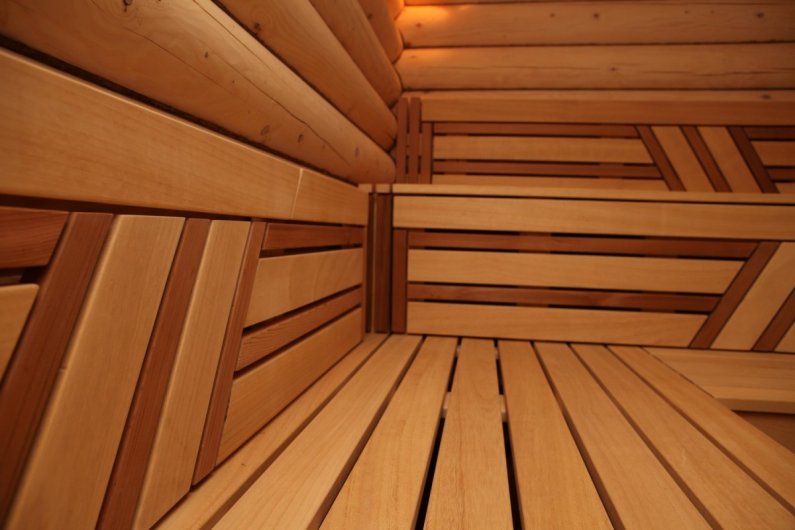
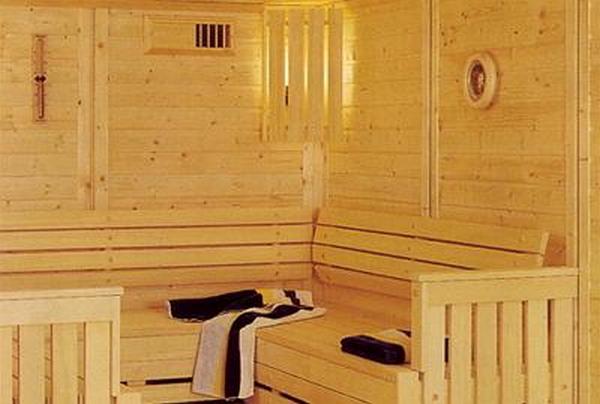
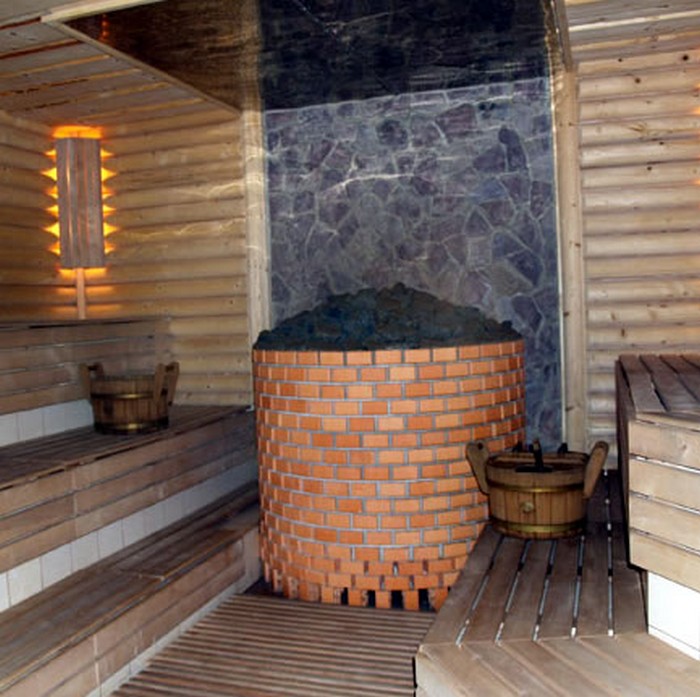
Steam room decoration
Traditionally, hardwood trees are used for interior trim.They do not emit tar when heated, do not heat and dry very quickly. Therefore, the appearance of the fungus is almost excluded. Often, saunas and steam rooms are finished with ash, which is known for its durability. In addition, this tree has a very beautiful internal pattern, which will give the room an aesthetic look.
Alder is also quite popular for interior plating. And it is no coincidence: the tree does not absorb smells and has a natural unusual color (brown-pink). Foreign manufacturers of saunas very often make them alder.

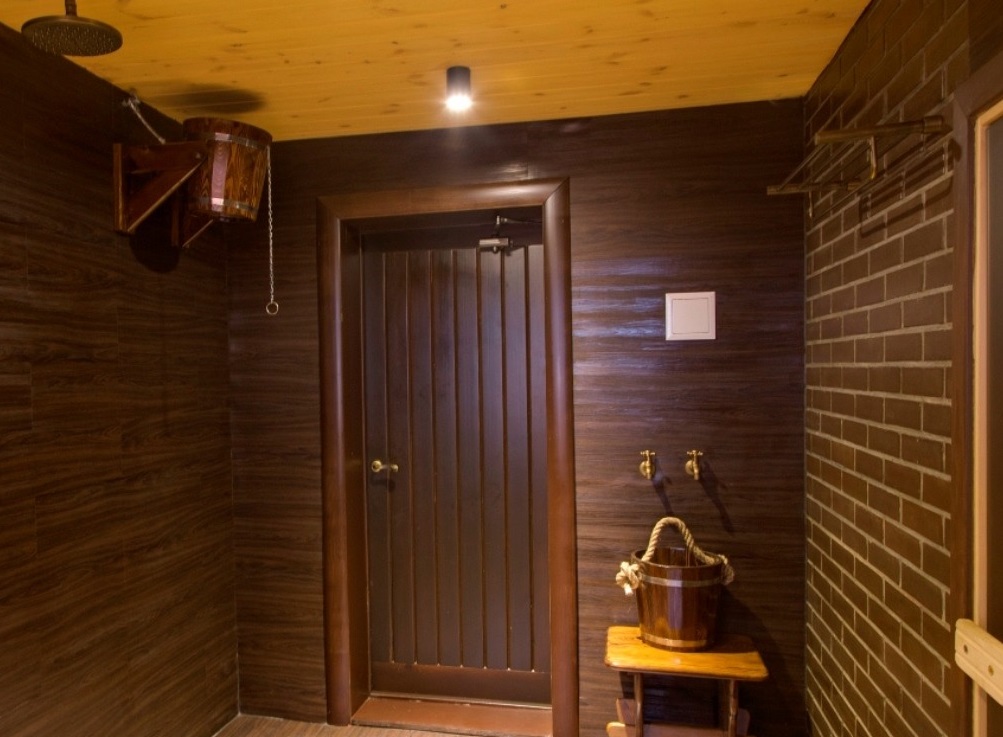
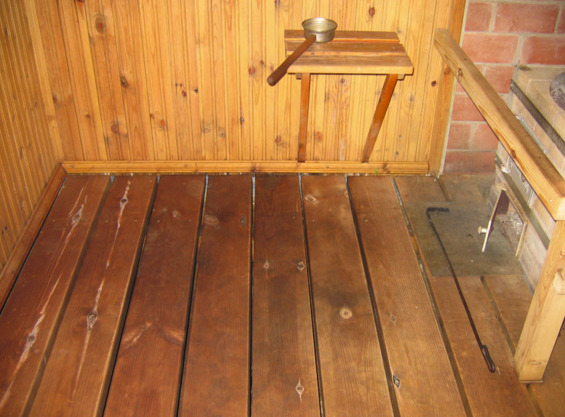
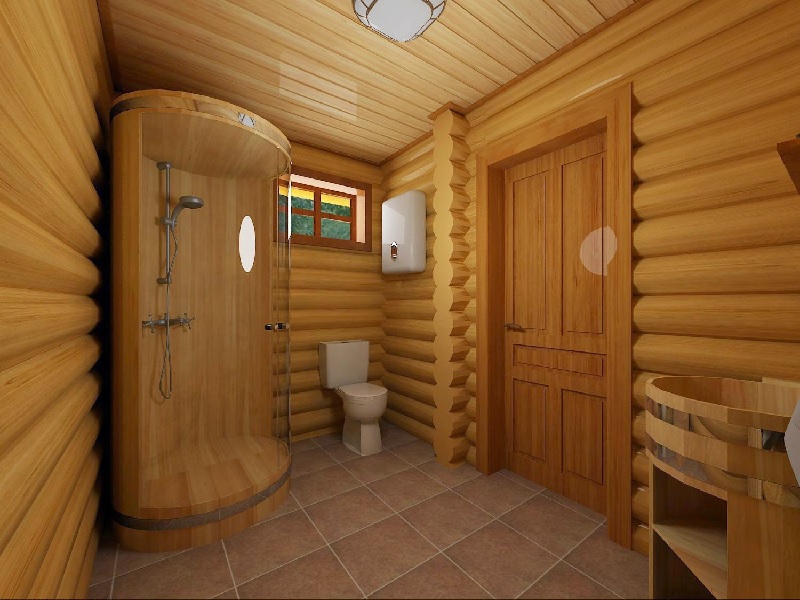
Finish washing
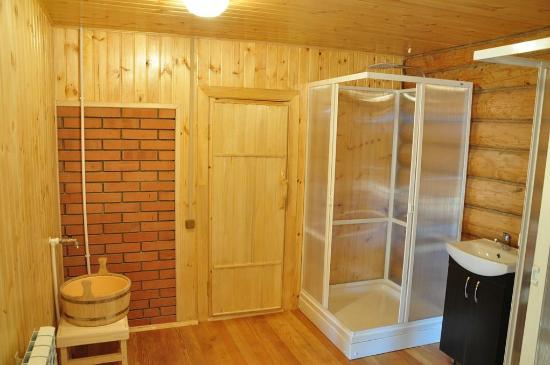
Experienced builders are advised to sheathe washing spruce clapboard. It has a beautiful bright orange color and is resistant to moisture. But there are no strict rules, so you can choose from a variety of options: tile, moisture-resistant fibreboard, drywall.
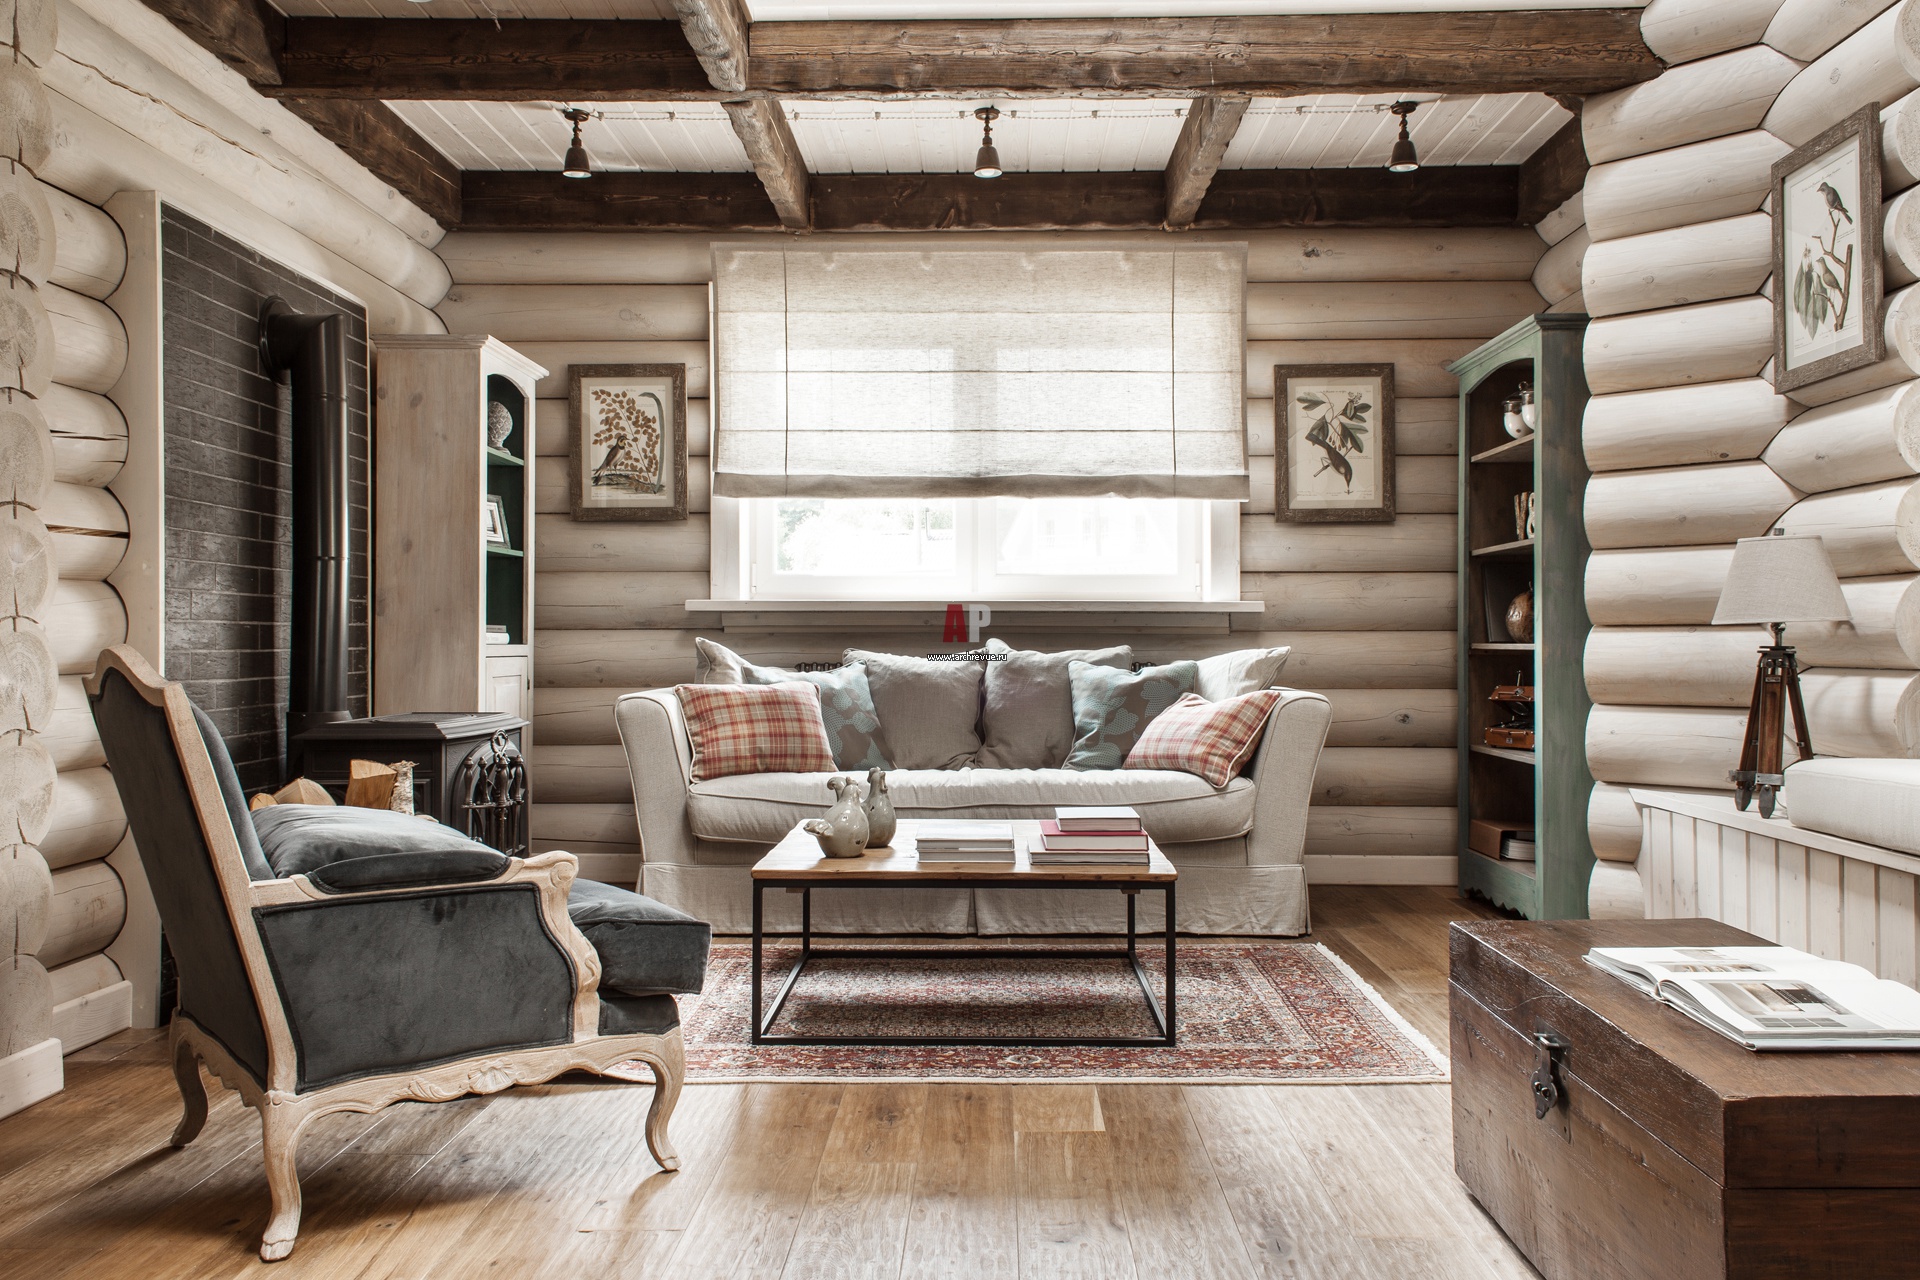
Decoration of the rest room
This is perhaps the only room in the bath for which design comes first, and then practicality and functionality.
The only requirement for the design of a rest room is the resistance of furniture and decorative elements to high temperature and high humidity.
Traditionally, the decoration is made of environmentally friendly materials (it will not be very pleasant to come from the steam room to the room with the design of solid synthetics).

The most logical would be decoration in ethnic style. It implies wooden furniture, lace curtains, a samovar and other attributes of the ancient Russian culture.
Less often, a rest room is designed in minimalism or in Scandinavian style.
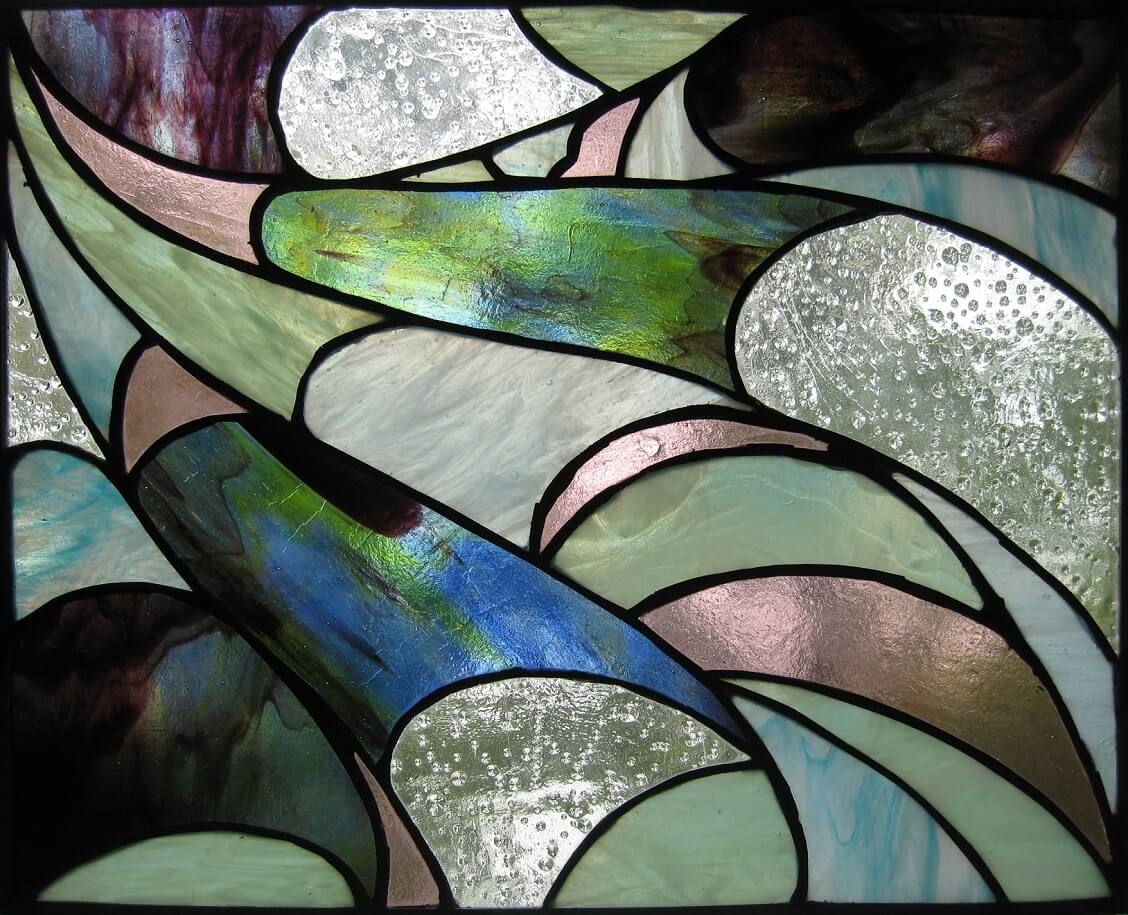
For those who love to decorate their own rooms, but do not know what to choose for a bath, there is a great solution - a homemade stained glass window. With the invention of color adhesive film, stained glass ceased to be the art of the elect, and then we describe in detail the process of its creation.
The technology is ridiculously simple - the color film is cut into pieces (these can be certain characters, geometric shapes or abstraction) and are glued to the window. Thus, you can get a beautiful imitation of colored glass. Lead tape can be stuck on the joints between the glued figures. Such a stained glass window has a huge variety of variations, does not require large expenditures for manufacturing, increases the strength of glass and serves as an original design element.
Followed to familiarize yourself with the step by step scheme of creating the original stained glass window. Thinking through the design for different rooms in the bath, you should pay attention to the proper organization of lighting. The light should not be too bright, because initially come to the bath for relaxation and rest. But the soft and diffused light perfectly cope with the function of calming and relaxing visitors. Therefore, devices for lighting with high power should be abandoned.
Often, the lighting is arranged with the help of small light bulbs evenly spaced around the room or around the perimeter of the ceiling. LED bulbs are perfect - they provide high-quality warm lighting, exerting minimal load on the electrical network.
Materials
The calculation of materials must be made at the planning stage of the bath. Having decided on the size, type of foundation, material for insulation and type of ventilation, you can proceed to the calculations.
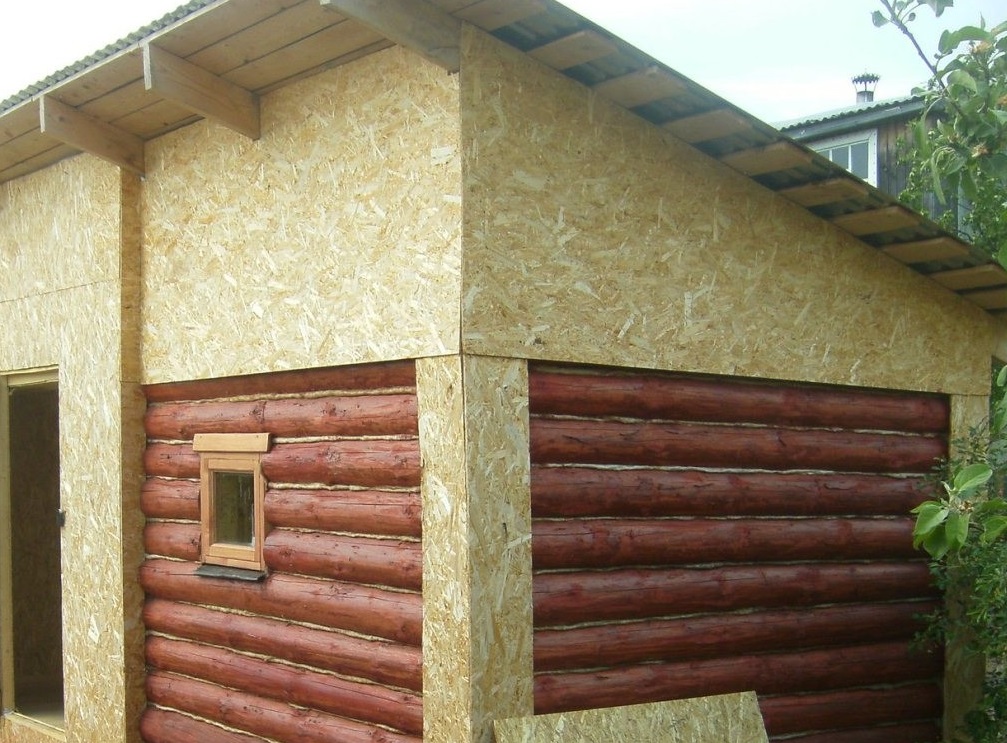
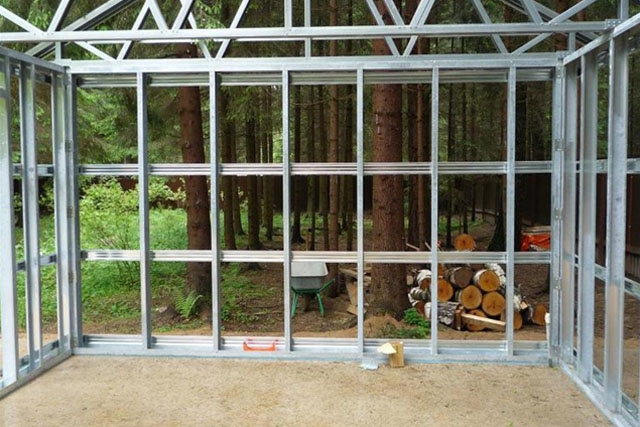
For the construction of baths on a frame-shield-based basis is not very large amount of building materials. Consider the variation of materials used for the construction of each element of the structure.
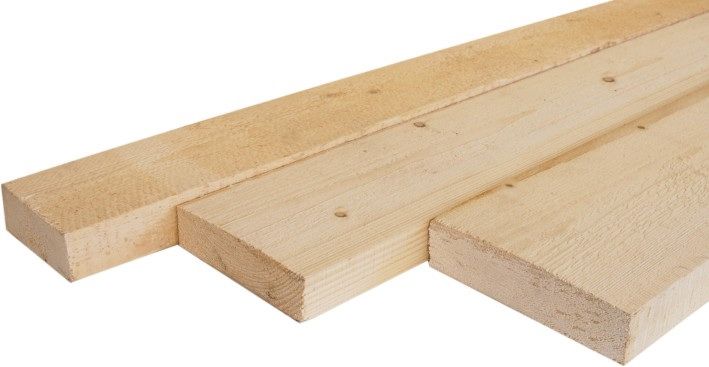
The material for the frame can be a wooden beam or metal profile. Most often gardeners prefer timber: it weighs little and is easy to assemble. The optimal cross section is considered to be 5 to 10 for supports and 10 to 10 for racks at the corners. Boards for headlining take a thickness of 34 cm and a width of 13-15 cm.
It is necessary to choose a material for covering the frame at the design stage. Because when assembling the frame between the racks, leave exactly enough space to fit one plate. This helps to avoid unnecessary gaps. Many opt for oriented strand board. Work with him does not require special skills and construction equipment. While the cement-shaving plate can be cut only with the help of the grinder.

Mineral wool, foam or fiberglass are suitable for insulation. The thickness of the insulation material should be the same as the thickness of the timber from which the frame is made.
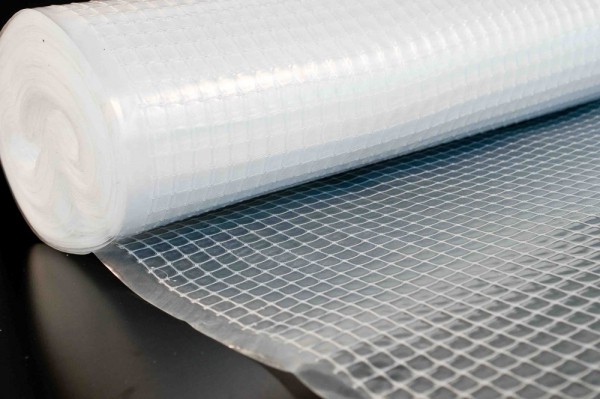
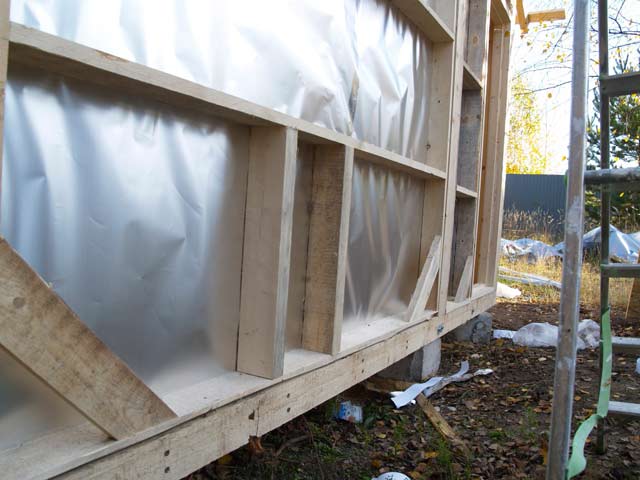
In order to properly organize the vapor and waterproofing, it is undesirable to use roofing material. The fact is that when heated, it begins to emit a not very pleasant smell.
It is better to use it only for external waterproofing and when laying the foundation.And the foil film will perfectly cope with the task of vapor barrier.


Interior decoration is most often made of wooden lining, but it can be decorated with completely different materials, it all depends on the owner's imagination.
You will also need metal sheets and bricks to equip the space around the furnace as safely as possible.
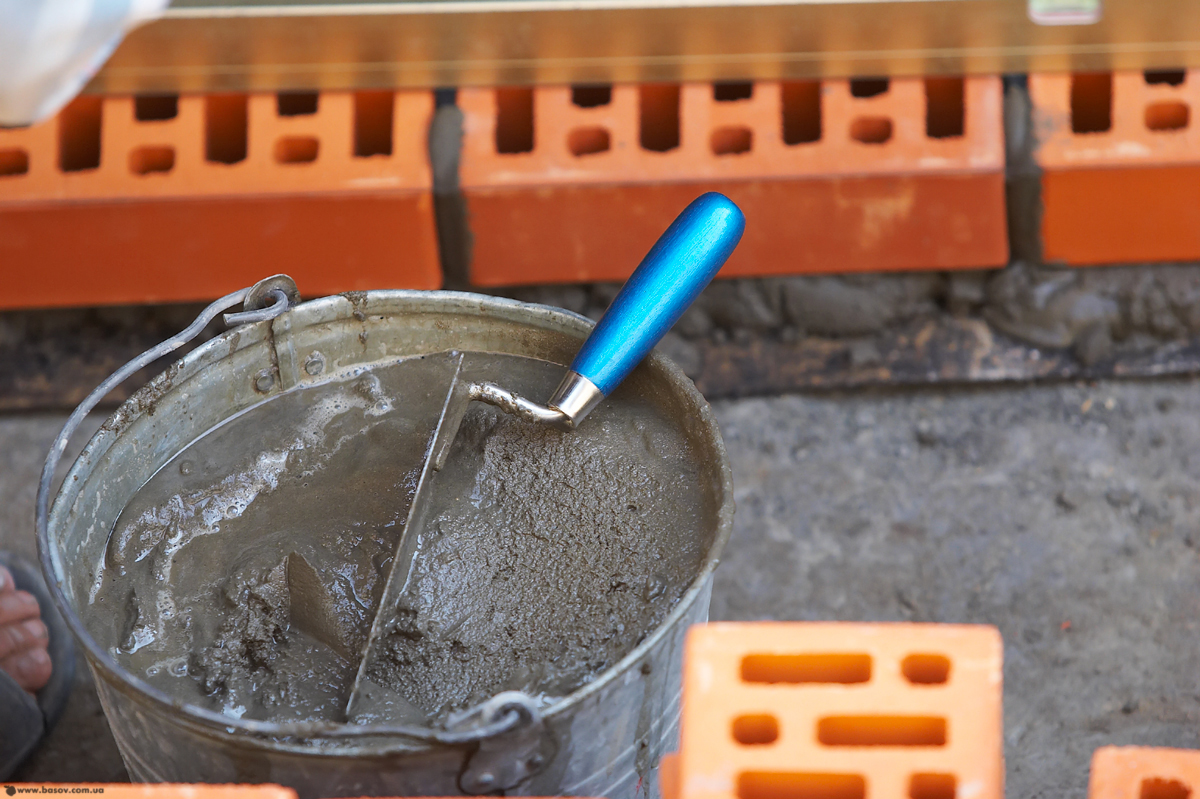
The main part of the estimate often goes to the materials for the foundation. Here the list depends on the specific type of foundation (for example, screw piles are not needed for the construction of a conventional strip foundation). But concrete is used for almost any foundation. Therefore it is worth figuring out what it consists of and how to choose it correctly.


Cement
This material consists of clay, lime and special additives. Initially it has the form of sand, after dilution with water, it acquires the consistency of dough, after which it solidifies and becomes as hard as stone. Flooded concrete begins to harden after 50 minutes, and for complete drying it will take several days. Dry concrete can lose its strength if it is improperly stored or transported. The material has strength classes that are worth paying attention to when buying.

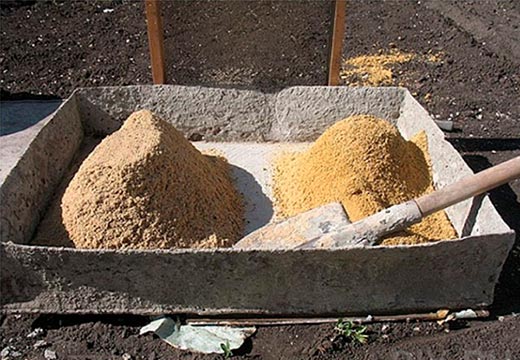
Sand
Sand is used when mixing concrete solutions as a filler.It can be river or career. River has a high quality, because there are few different impurities. In the same career often contains a lot of dust and clay. Before adding to the cement sand, sand must be sieved and rinsed.

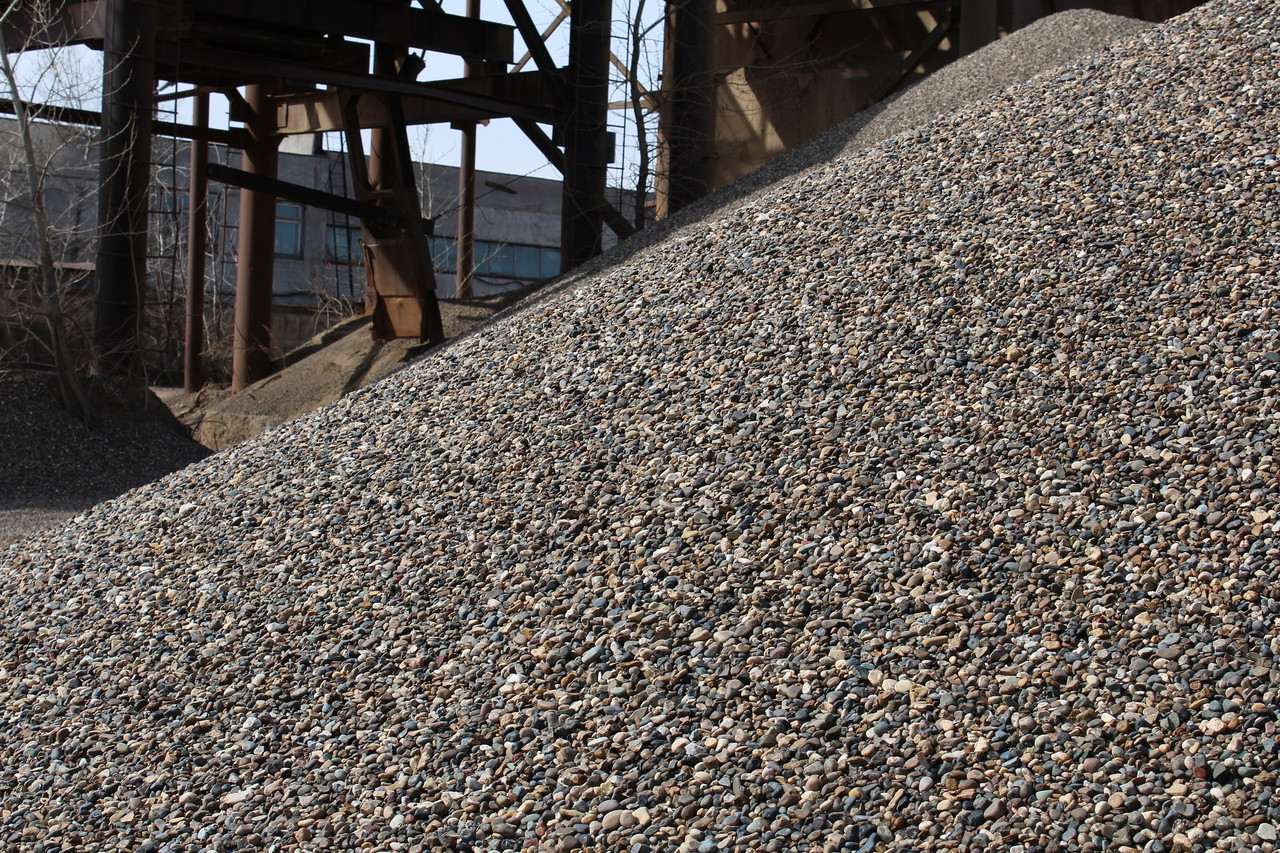
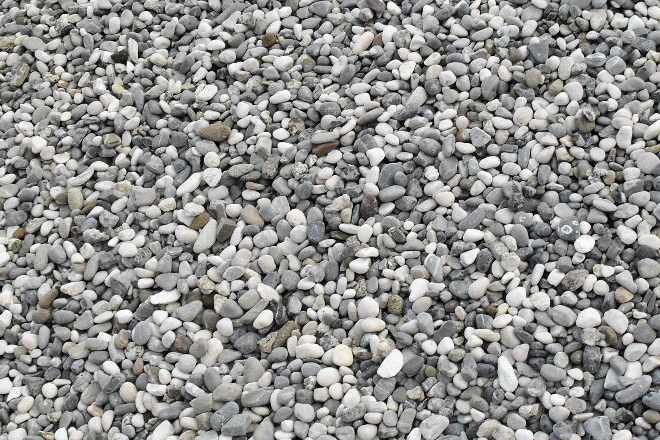
Gravel
Gravel is called small stones of natural origin and is also used as aggregate for mixing concrete. Gravel is divided into river, sea and mountain.
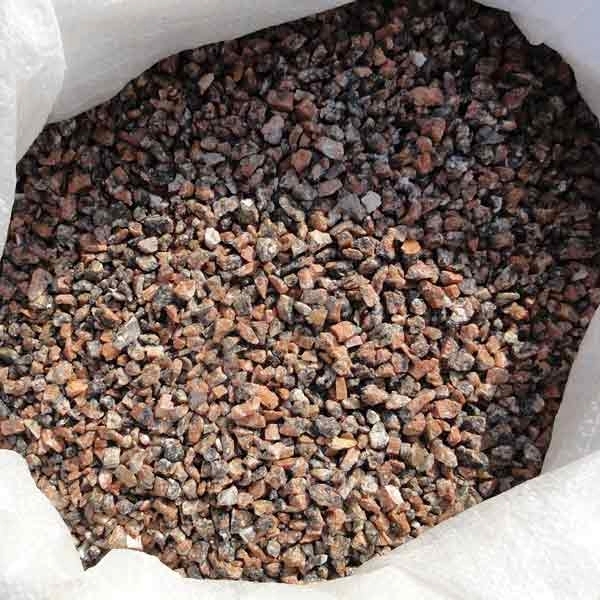
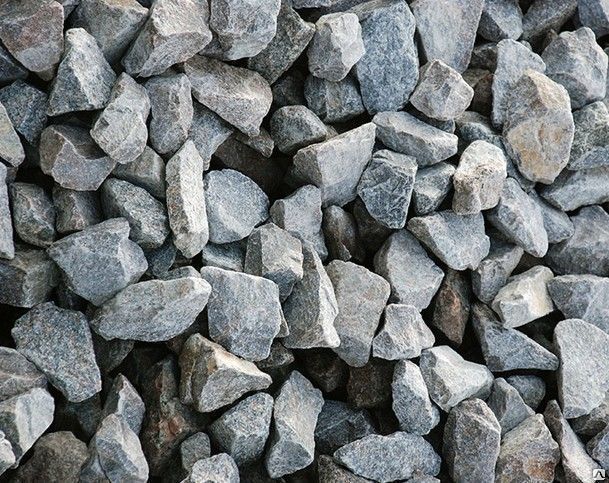
Rubble
These are also small stones, but they are obtained by grinding larger ones. May be small, medium and large. When choosing rubble, you need to pay attention to all its characteristics: strength, frost resistance and the level of radioactivity. Crushed stone used in the preparation of concrete should not contain clay or any inorganic impurities.
Water is a very important component of the concrete solution. Drinking water is perfect for the manual manufacture of concrete or for sealing the foundation layers. Technical or natural water is also suitable if it is clean enough. The most important requirement for water is the absence of fat, oil, sugar and other artificial additives.
Deciduous varieties of wood fit perfectly for the manufacture of the frame of the future bath. They are good for their low susceptibility to deformation and a high degree of thermal insulation.
Of course, many opt for a cheaper material (for example, pine timber), but it will fit only for the assembly of the frame. For finishing it is undesirable to use it, because when heated, resin is released, which can be burned.

Naturally, for the construction will need a large number of fasteners. Their types and quantity is determined by the design of the future bath. It is better to take nails, screws, self-tapping screws with a large margin, because it is very difficult to count how many they will be needed during construction.
How to warm?
The most common material - rolled insulation about 4-5 cm thick. Less commonly used mats or mineral wool. Heater should be placed between the racks, and then nailed to them slats. Polyethylene is well suited for thermal insulation. It is not advisable to use ruberoid, since it emits an unpleasant smell when heated.

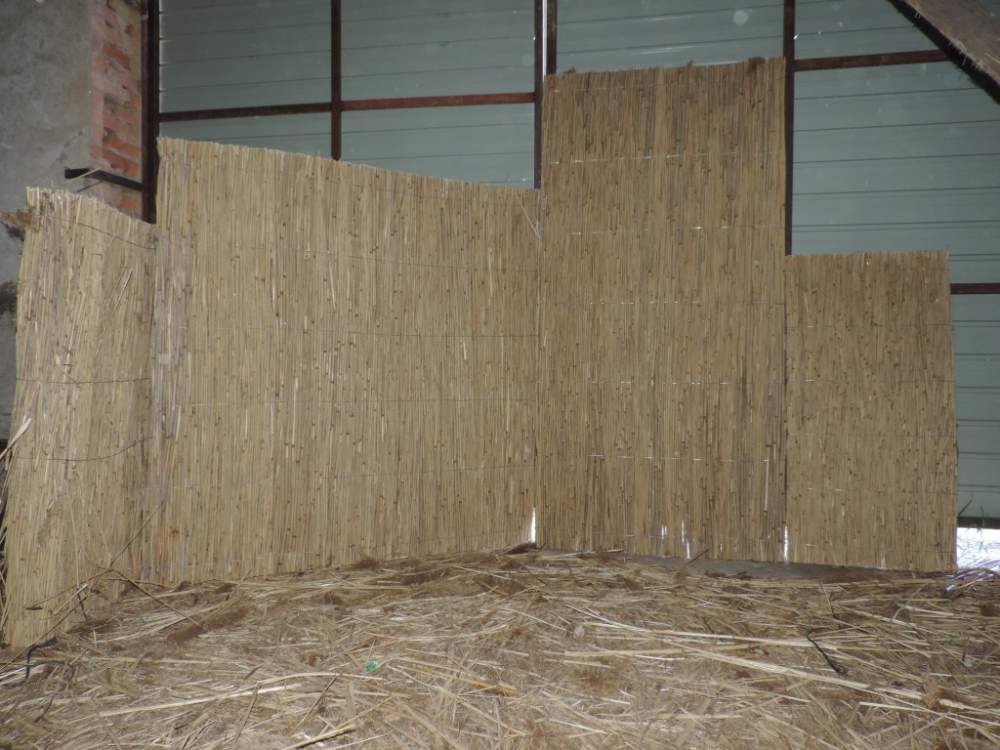
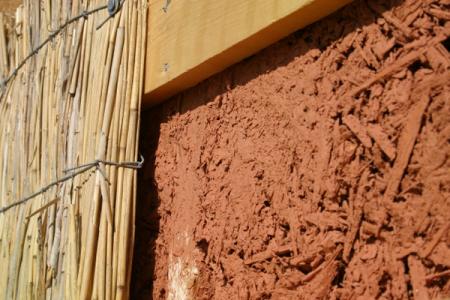
Not very common, but quite high-quality and environmentally friendly material for insulation - reed plates. Their thickness is usually 15 centimeters, which is great for frame construction.In the technology of its mounting there is nothing to distinguish it from the installation of other heaters. There is one important nuance that should be taken into account when using reed plates to insulate baths. It is flammable. Therefore, it is worth paying special attention to anti-pretreatment treatment before starting work.
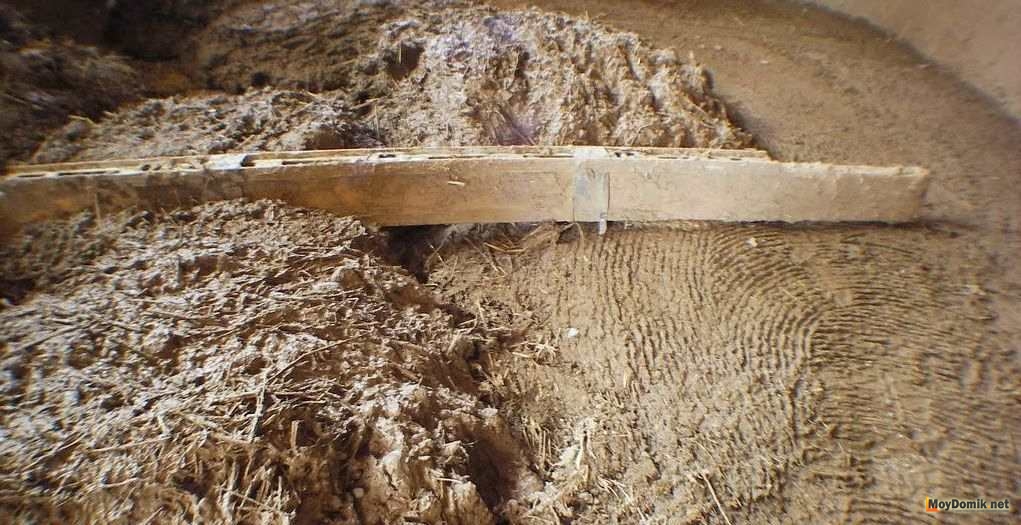
A mixture of plaster and sawdust is also used by some builders as a heater. It is very easy to prepare such a mixture on your own by mixing dried sawdust with cement or gypsum in a ratio of 10 to 1. This insulation is probably the cheapest of the existing ones.
Polymeric materials can also be used for insulation. The advantages are obvious: low cost, easy and fast installation, low weight and good thermal insulation of the material. What is most important - complete immunity to moisture. But there are also disadvantages: polymeric materials burn quickly, are not intended for use in rooms with high temperatures and can emit unpleasant odors over time.
Basalt insulation was quite popular at one time. This is a kind of wool made from mineral fibers and glue.
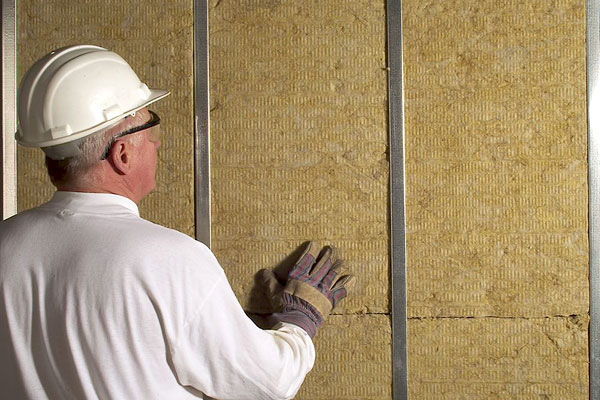
This material has many advantages.
- Basalt cotton wool retains heat well.
- The ability to withstand temperatures as much as 900 degrees.
- It can serve more than twenty years, because over the years it does not deteriorate and does not lose its characteristics.
- Sound insulation in the bath, insulated with basalt wool, will increase several times.
- The material does not absorb moisture, which will allow it not to linger in the frame.
It would seem that here it is - the perfect insulation. But not everything is so simple. The main disadvantage of basalt wool was discovered only by 2014. Until that time, it was considered one of the most environmentally friendly materials. But it turned out that the adhesive composition, the bonding fibers, releases formaldehyde vapors. Naturally, the popularity of this heater has decreased dramatically.
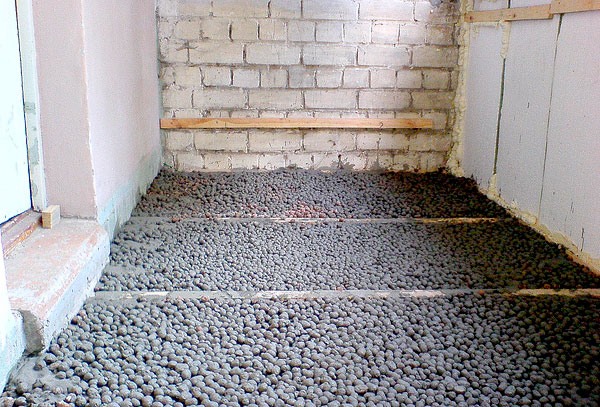
With the insulation of the floor covering, the expanded clay or other backfill will cope; foam can be used for the ceiling.
It should be very responsible approach to the stage of warming baths. After all, with the quality of work performed at this stage, the heat will go much slower, which means that there will be less cost for heating the bath.
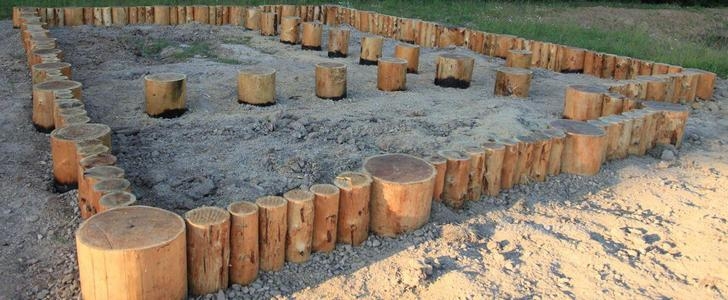
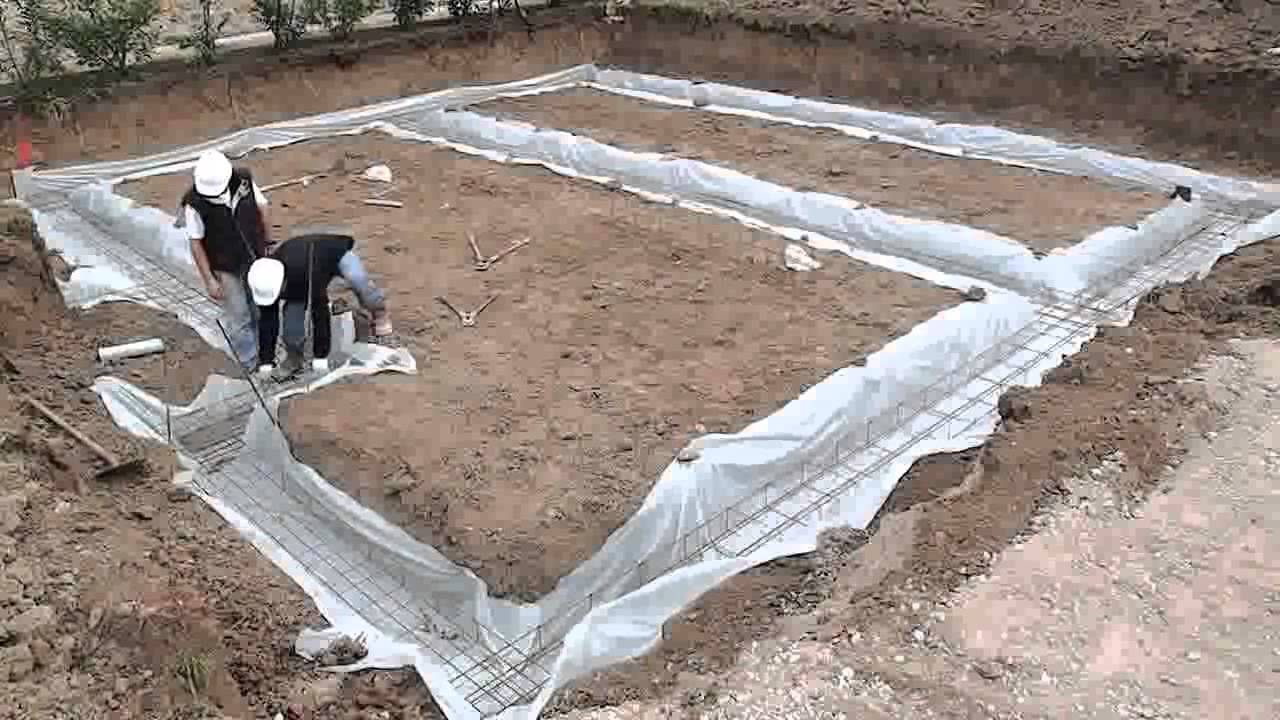
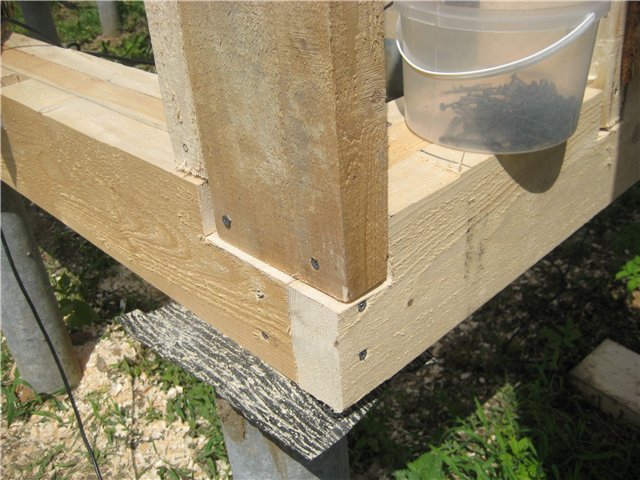
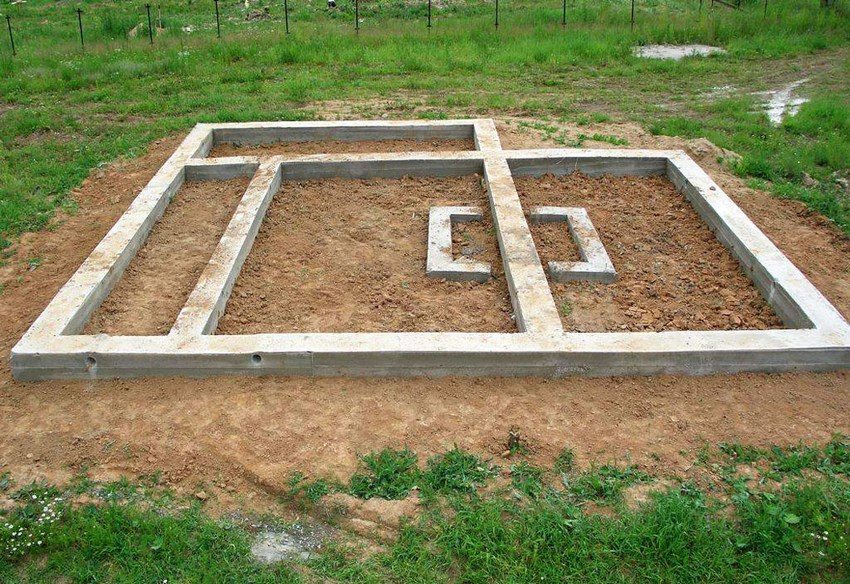
Foundation
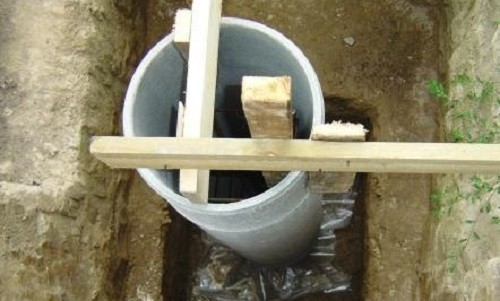
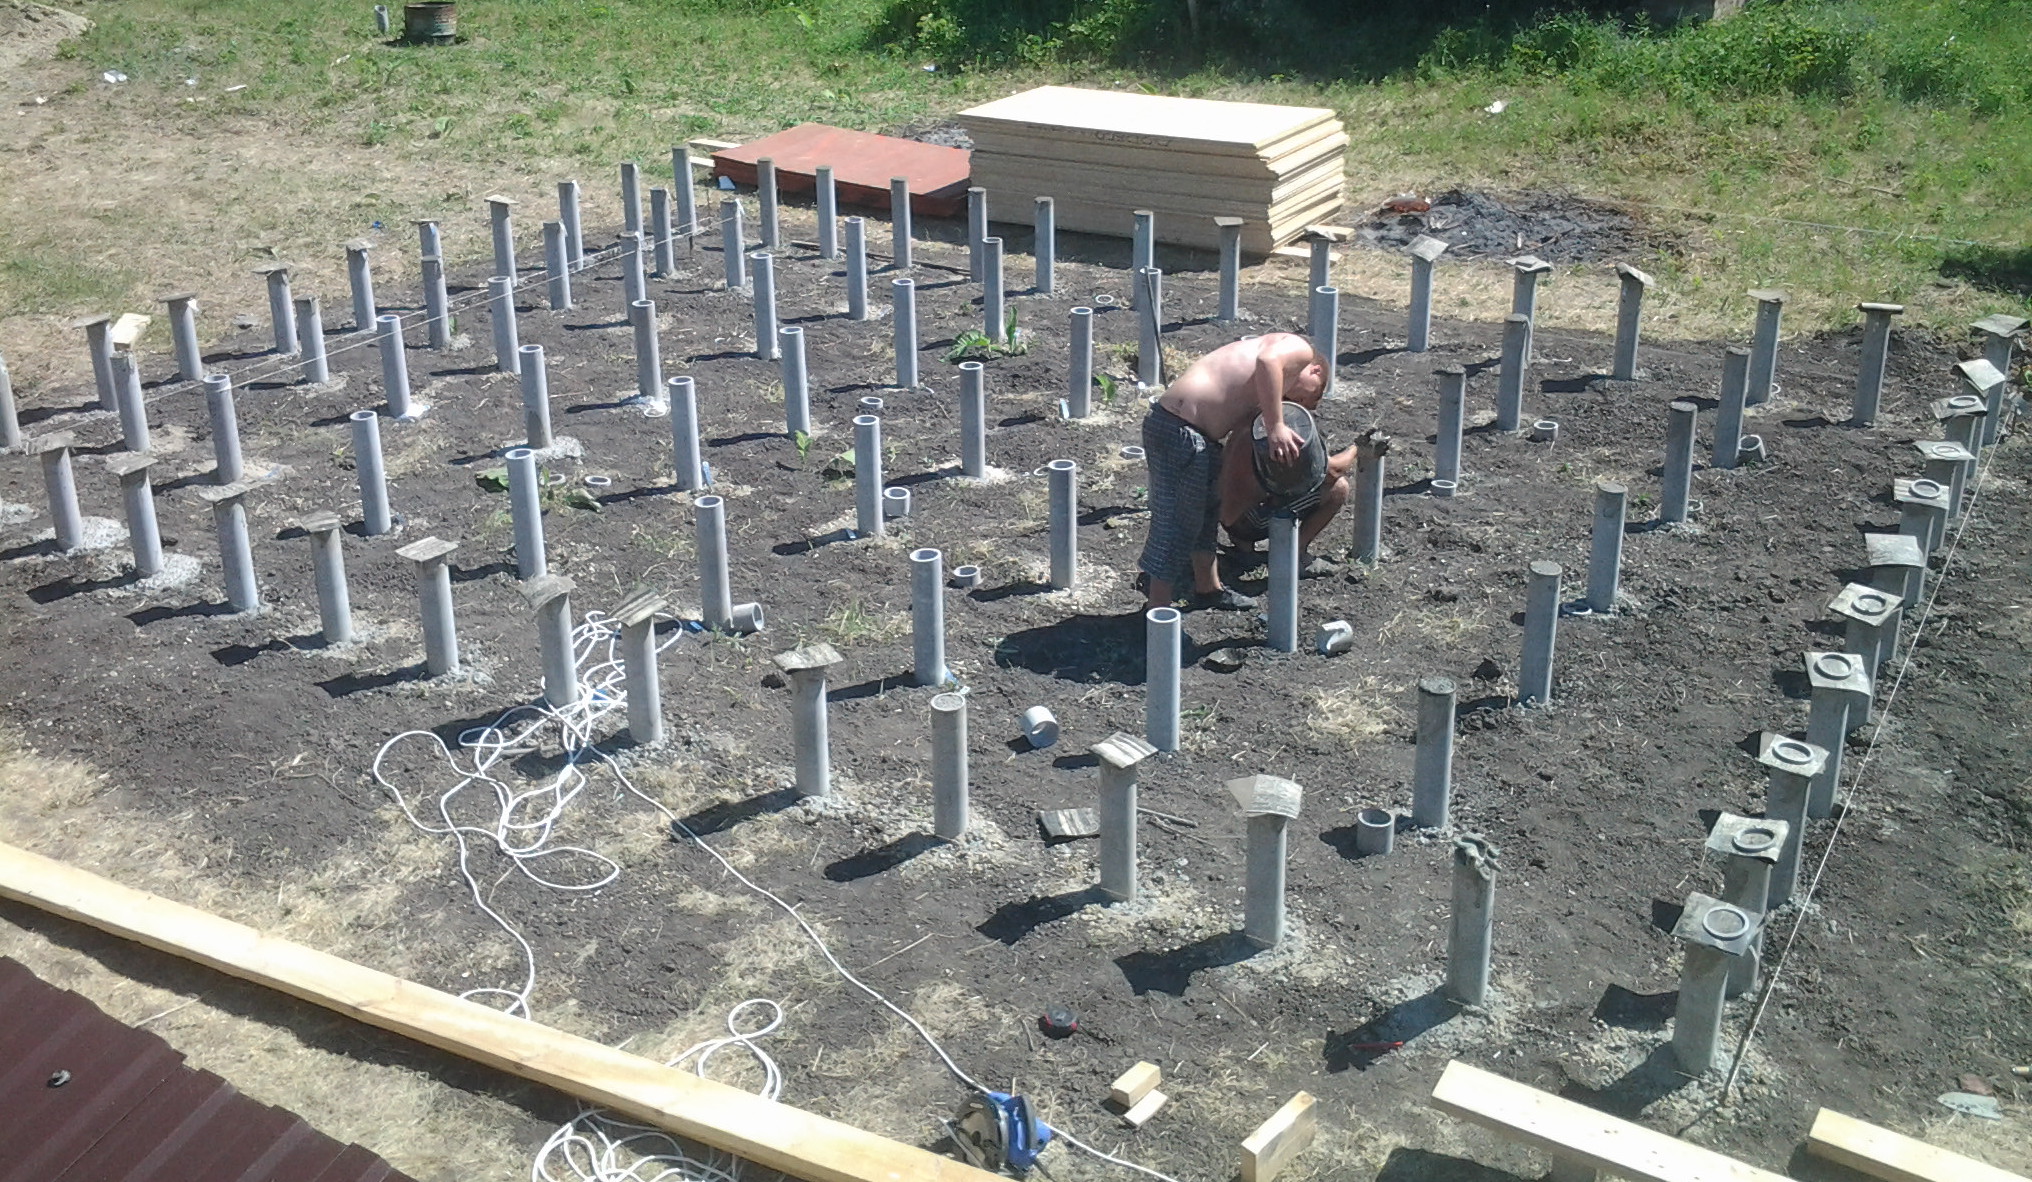
For frame buildings do not need a strong foundation, thanks to the small mass of the frame itself, you can do the simplest.The most popular option is the pillar foundation. Asbestos-cement pipes filled with concrete will serve as supports.
Step-by-step instruction for the equipment of the column foundation.
- First you need to select and purchase asbestos-cement pipes. The optimal diameter of such pipes is 10 cm, and the length is 3-4 meters. Their number depends on the area of the future bath. The number of supports may vary, but they must be installed at all angles of the structure.


- The second stage will be digging holes with a diameter of about 20 cm and about 1.5 meters in depth. It will be easier if there is a gasoline drill, but it is possible to dig holes by hand, it just takes much longer.
- Next, you need to cut the pipe in half and place them in the resulting wells. The place around the pipes is covered with sand and very carefully compacted.
- Then you need to mix the concrete solution. This can be done according to the standard scheme of proportions - 1 unit of cement itself, 2 units of sand, 4 units of rubble and water.
- At the last stage, the pipes are filled with concrete. After complete drying of the foundation, you can proceed to the construction of the remaining parts of the bath.

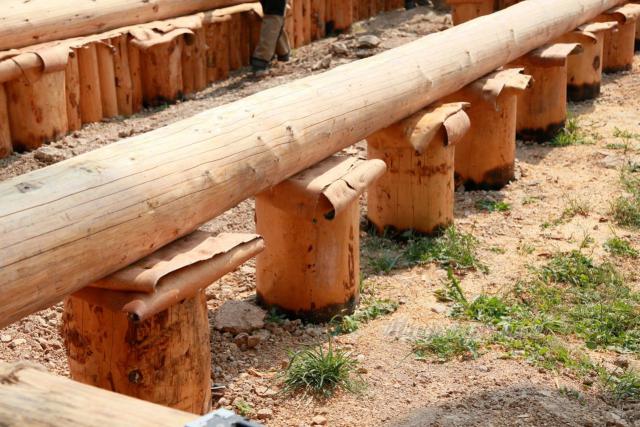
Wooden foundation
For small buildings with dimensions of 3 x 4, 3 x 5, 4 x 5 or 3 x 6 meters, you can equip a simple wooden foundation. This is a good option for mobile clay soils. Do not forget that the roof and walls of small buildings should be light. Otherwise, you will need to think about a solid foundation.
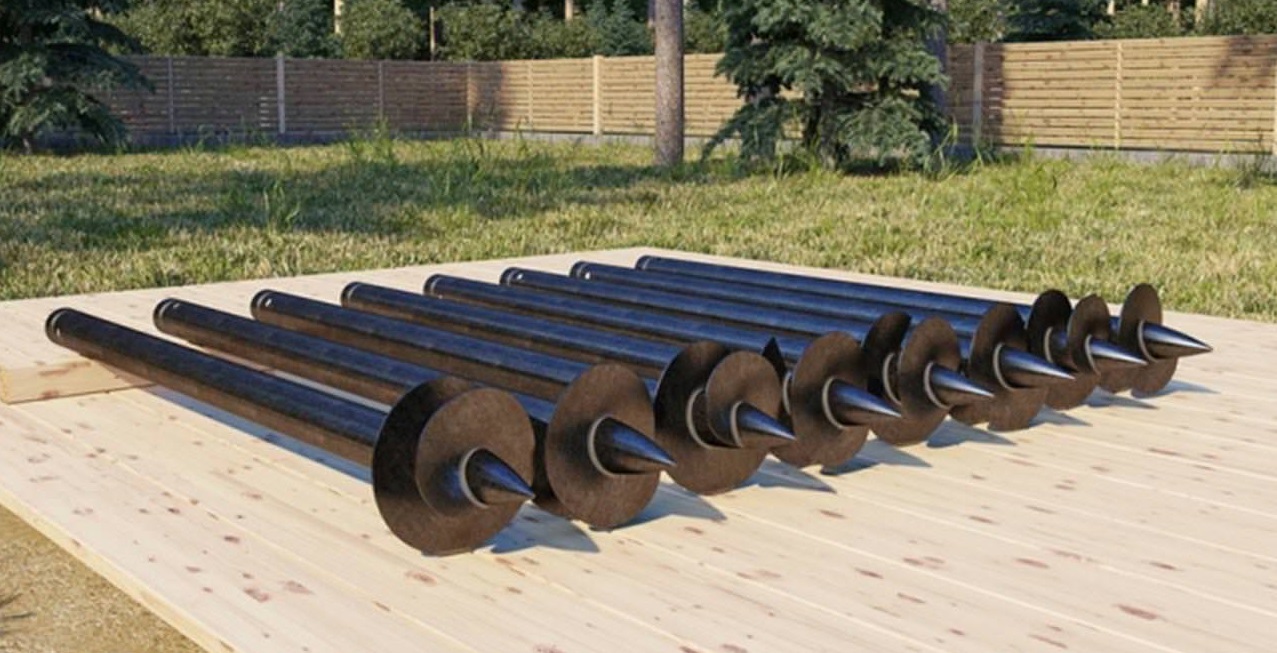
Pile-screw foundation
For a large frame construction, this option is best suited.
The construction technology is simple:
- marking is made for the location of the piles;
- holes for piles are drilled in the ground, while the depth is determined according to the type of soil and the level of groundwater;
- piles are screwed into the holes;
- the final step is to build the strapping.

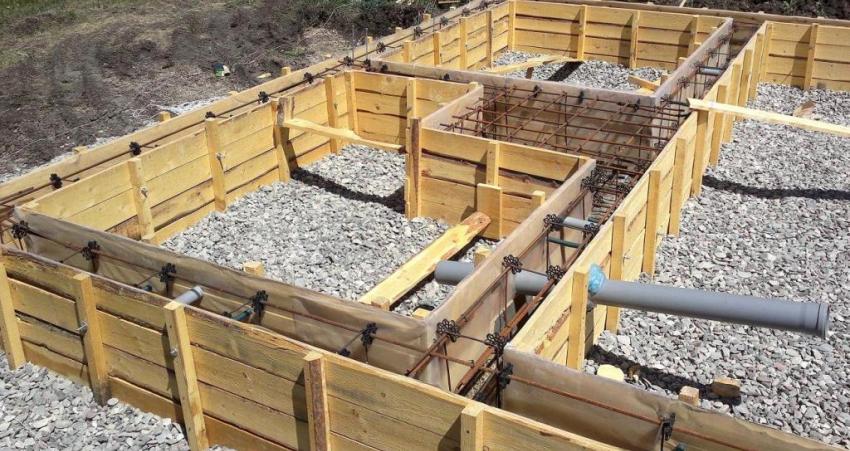
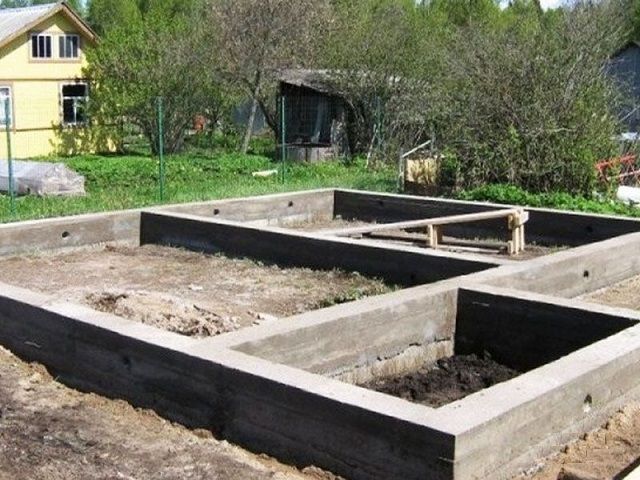
Strip foundation
For heaving soils, the tape foundation is ideal.
It can also be equipped with their own hands, following the instructions.
- On the site under the bath you need to dig a trench about 45 cm wide and about half meter deep.
- This trench is filled with sand to the top. Like a cake, the foundation is laid in layers and each layer of sand needs to be tamped, adding water will help.
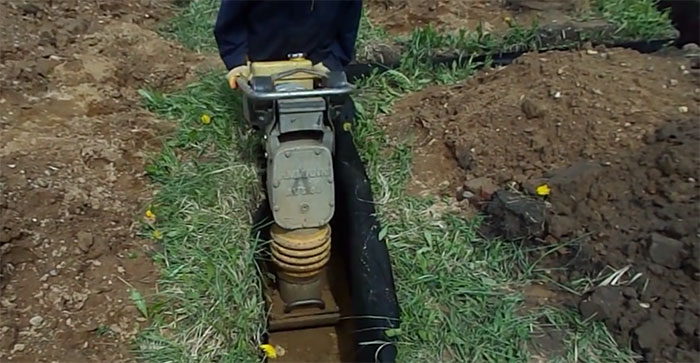
- Next put the formwork with dimensions of about 45 to 30 cm.The formwork base can be strengthened with metal pipes and rods.
- Then you can pour concrete.
- After complete drying of the concrete, the foundation is covered with roofing felt. This will provide the necessary waterproofing of the frame structure.
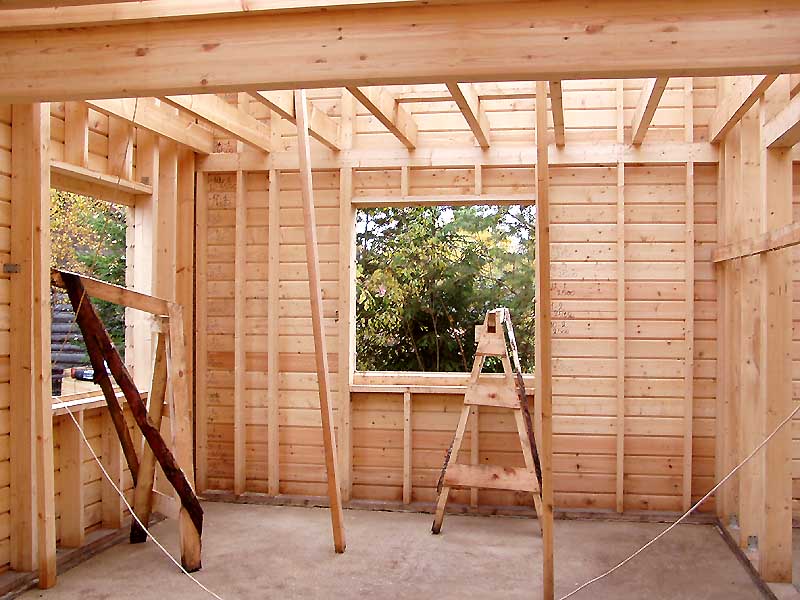
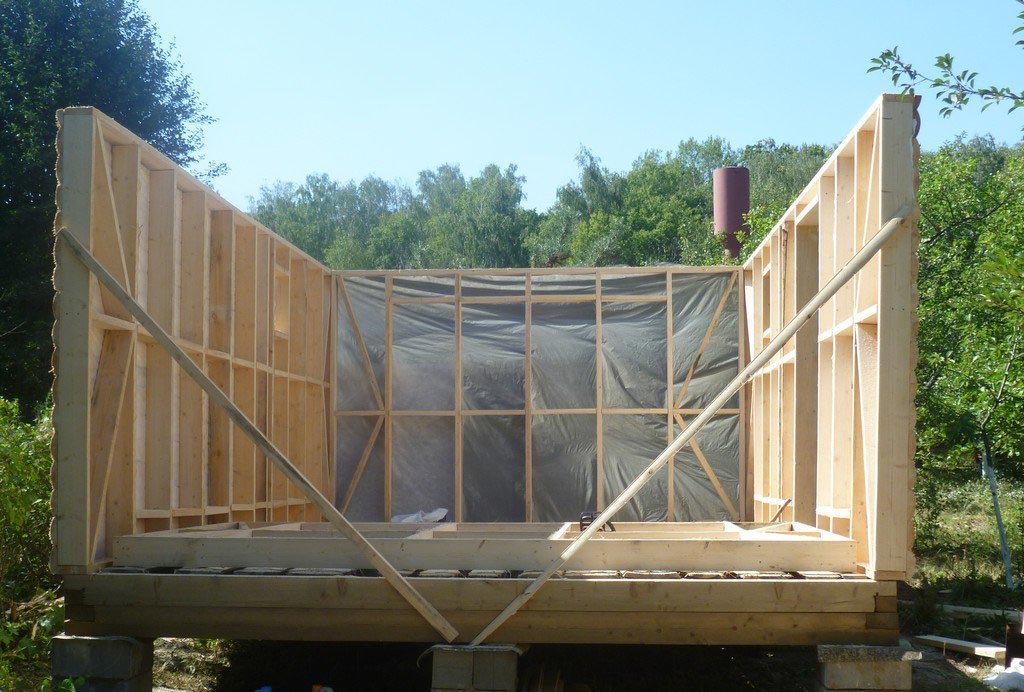
Walls and floor
To build strong walls of a frame bath, it is enough to follow some rules:
- It is necessary to dry the lumber well. Do not recommend to build a birch, because it quickly rots. Aspen, linden or larch, which have good thermal insulation properties, are better suited.
- Boards of all rooms with the exception of the steam room and shower are treated with antiseptic from the inside. Outside usually applied varnish. The bottom strapping is made of bars, fastened with nails.
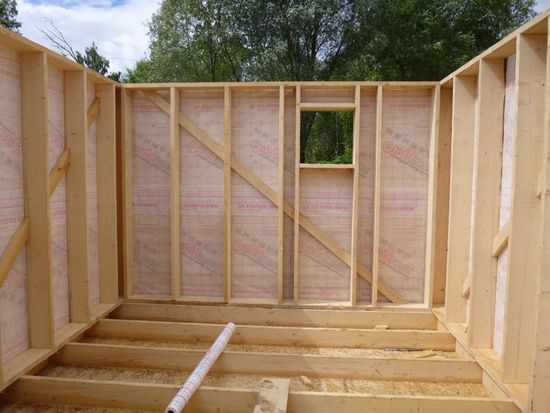
- It is necessary to wall the corner posts in concrete.
- When lining the clapboard should overlap it to avoid the formation of gaps between the sheets. Also this method protects against moisture penetration.
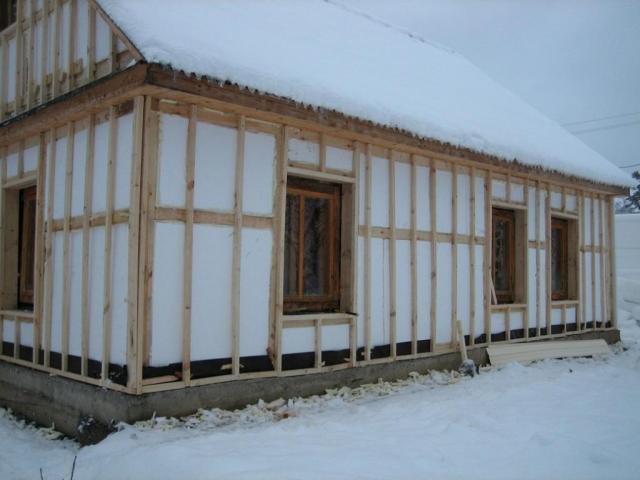
The most convenient way to collect the frame in the free area in the yard. The distance between the posts depends on the type of material used for the trim. So that the sheets organize a solid wall and they do not have to be customized,you can make a step of 60 cm. The same value is suitable when installing insulation that is placed between the racks.

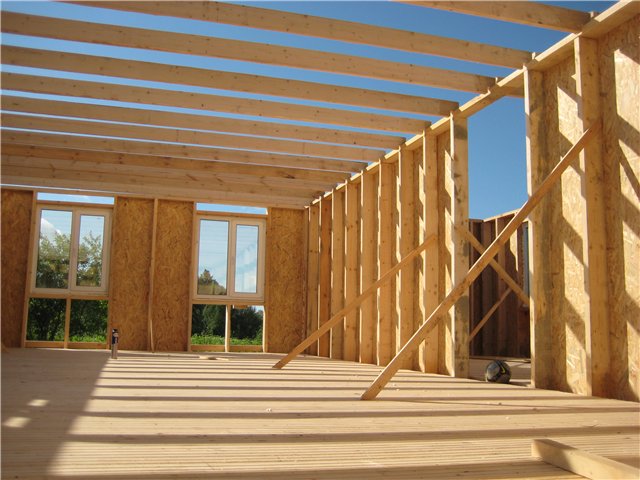

In those places where the holes will be made for ventilation, you can increase the intervals by another 30-35 cm. The distance between the vertical supports is filled with thermal insulation.
External lining is often made of wooden lining laid horizontally.
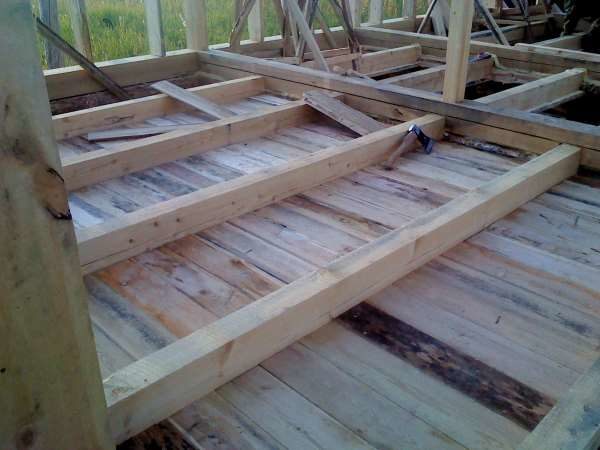
Floor arrangement
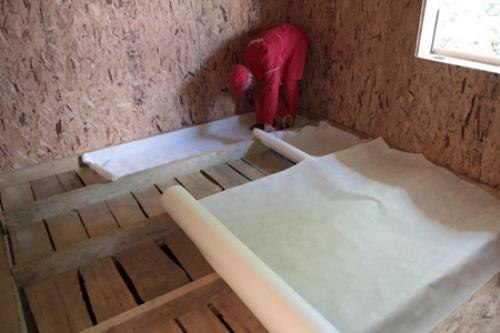
The design and flooring can be different depending on which bath room it is made for. Where there will always be water, it is better to make a pouring floor. It is assembled from ordinary boards not closely, but with small gaps, so that water flows into the ground. Insulation such a floor is not required.
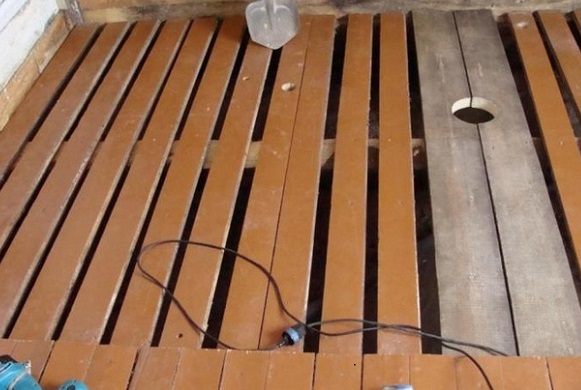
Work on laying the floor begins laying a log. Support posts will be required if the distance between the points of support exceeds 3 meters. In places where the lags touch the base, the roofing felt is laid in several layers. Boards are mounted on top of the logs. Pouring the floor is often not fixed, to be able to raise it and how to dry.
In the rest of the rooms (steam room, dressing room and lounge) the floors are also quite simple.Bars are attached to the logs, and boards for the sub-floor are put up. Roofing material and insulation in thickness of about 10 cm are laid on them. When installing boards for a clean floor, you need to remember about vapor barrier equipment with glassine.
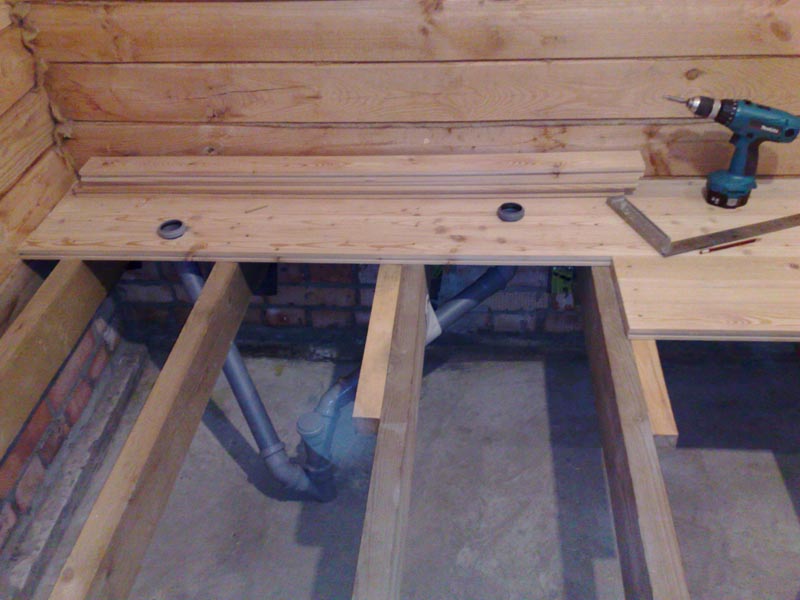

For the floor in the shower you need a completely different technology. You can even make a separate foundation for this room. Asbestos-cement pipes serve as lags for such a floor. On top of them cuts an edged board about 5 cm thick. Between the boards it is necessary to leave small gaps of 5-6 mm. Upon completion of all stages of the floor is pressed down with baseboards.
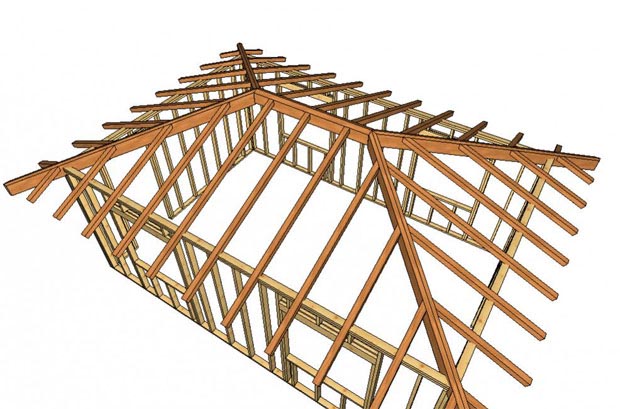
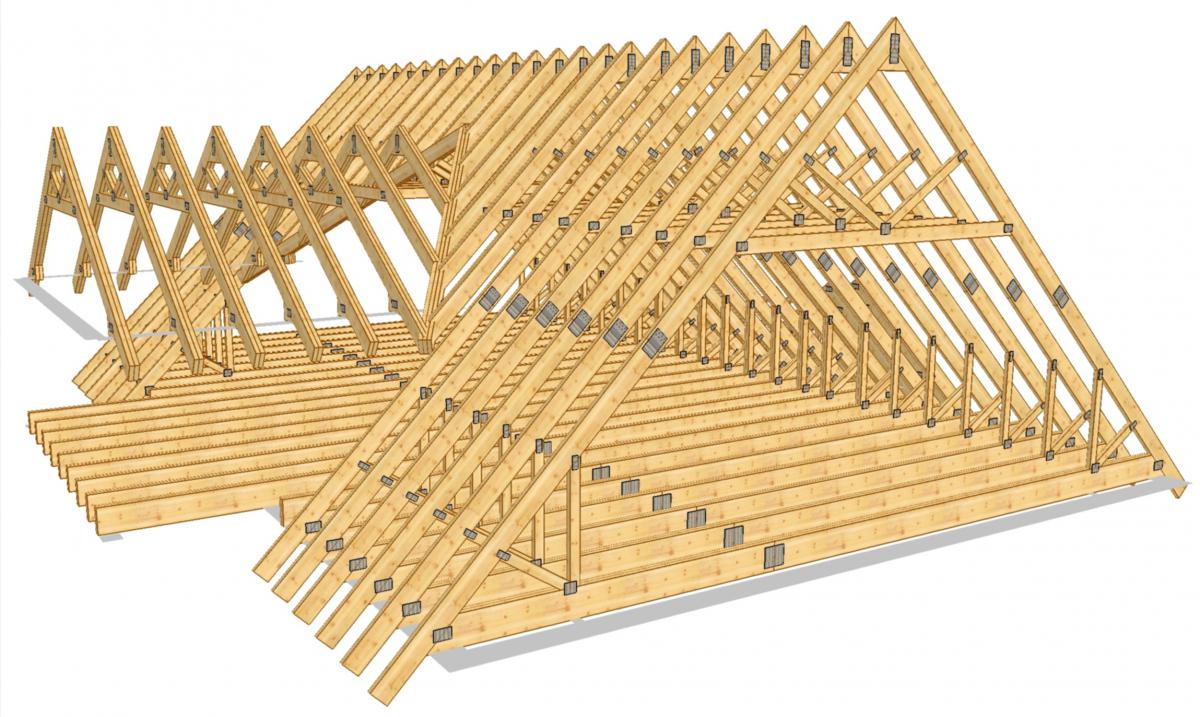
Roof
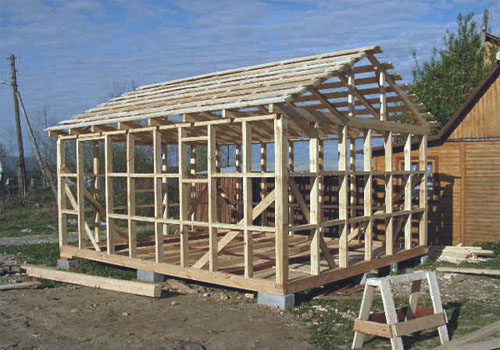
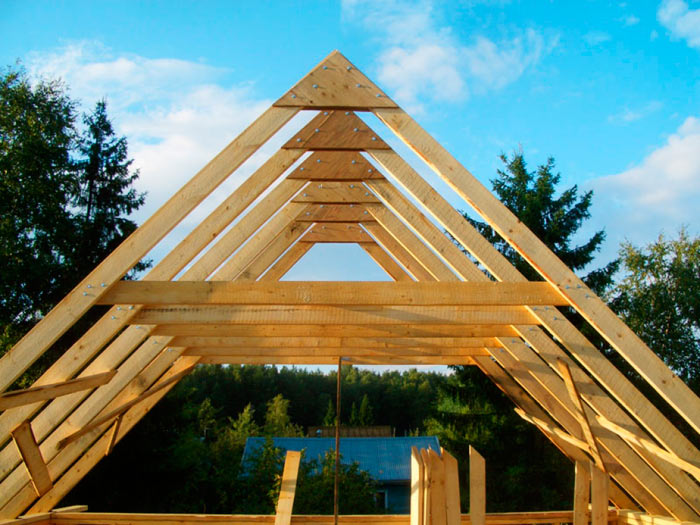
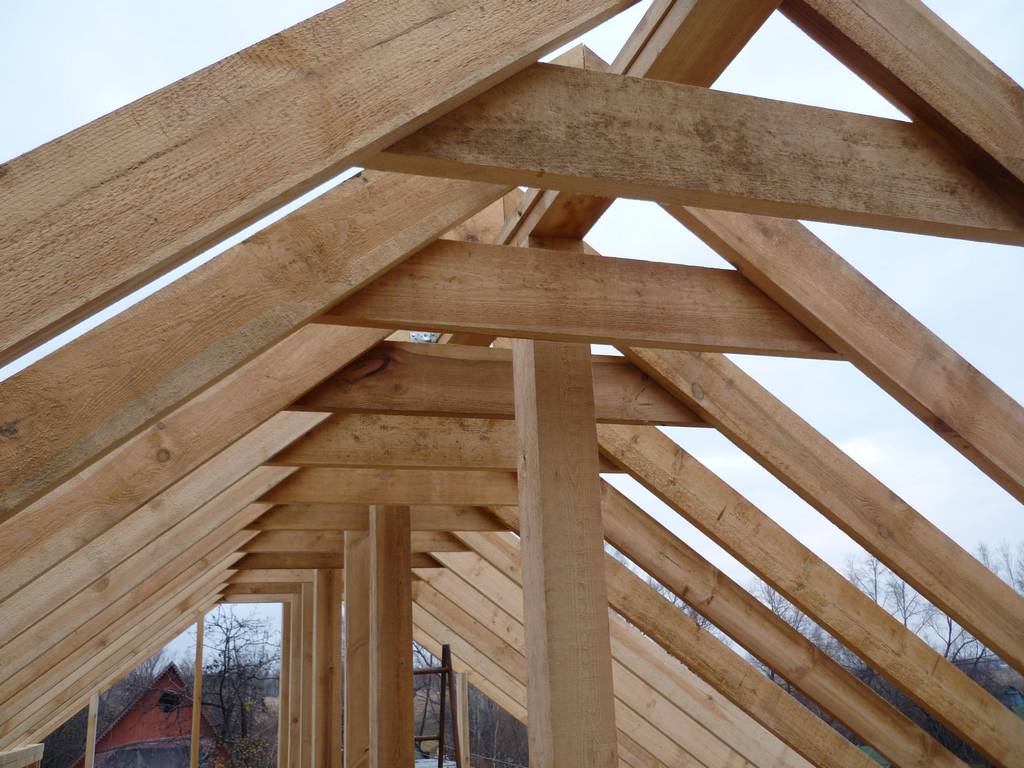
To summarize, the roof structure consists of two main elements: the system of rafters and the flooring itself with lathing. It may also include an attic floor, but often flat roofs are made without it. The roof for the bath can be single or dual gable. Quadruple designs are much less common. The scheme of their construction is quite simple and even a novice builder will cope with it.
The roof with one slope is constructed when the bath is attached to the living room or, if necessary, save money. Its advantages are the lack of requirements for the height of the roof, low cost and ease of construction.
Gable roof often do in log baths. The owner chooses the height and slope, taking into account the weather conditions in the region and the existence of plans for the further use of the under-roofing space.
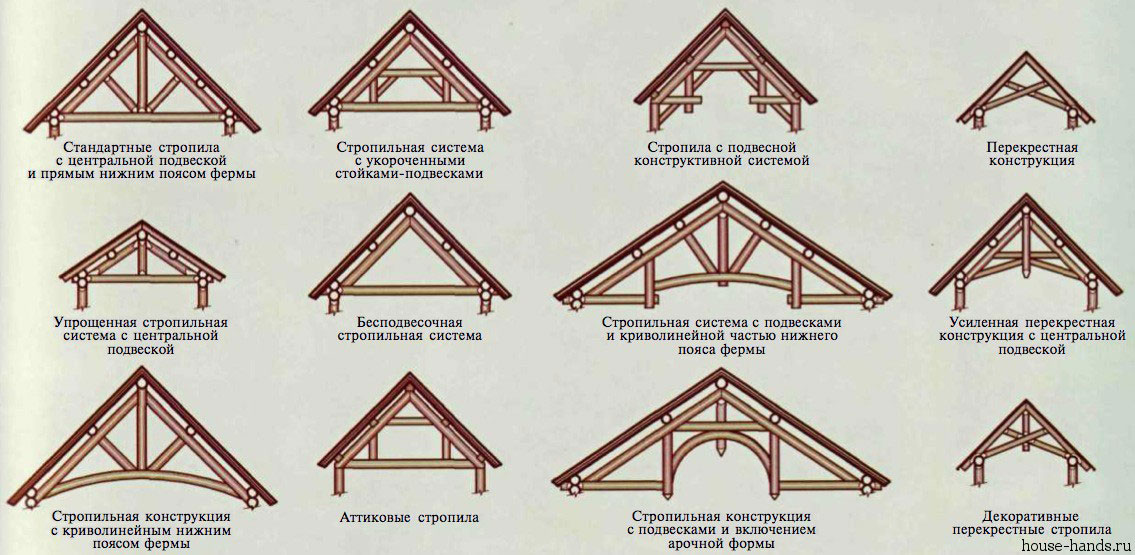
Varieties of roof systems are shown in the diagram.
The angle of inclination of the roof can be determined independently, the more it will be, the easier the precipitation will slide off the roof. Too steep slope should not be done on the ground with strong gusty winds. In the snowy regions of the north, an angle of 45 degrees would be optimal, and in places with scarce winter precipitation it is better to equip a flat roof. It must be remembered that the smaller the angle of the roof, the less material is needed and the cost, of course, will be lower.
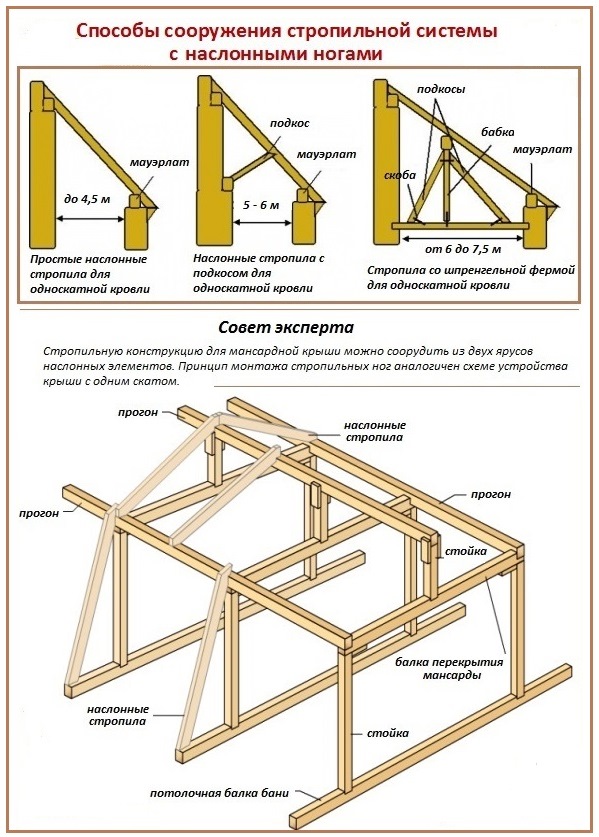
Props
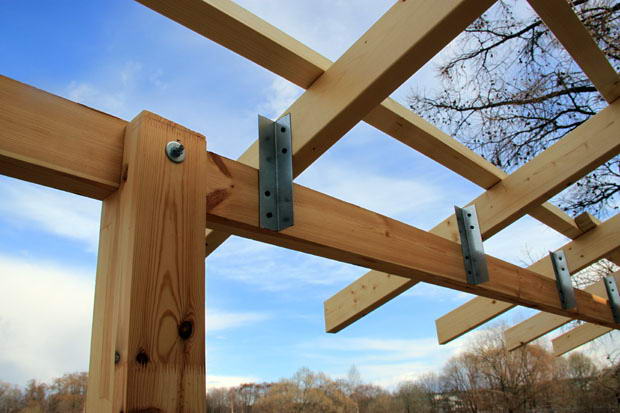
The supports are the beams and the foundation for the rafters, which is located along the perimeter of the walls (Mauerlat). Beams can extend beyond the walls by no more than half a meter, otherwise additional supports will be required. The shed roof system is supported by walls at different levels, and the roof trusses are fixed using roof frames and girders.

Ways to install rafters
Rafters - the basis of the future roof. The easiest way to build from ready-made elements, connecting them with screws or screws.Nicks should be done exclusively at the points of support, and which ones and where exactly are shown in the diagram.


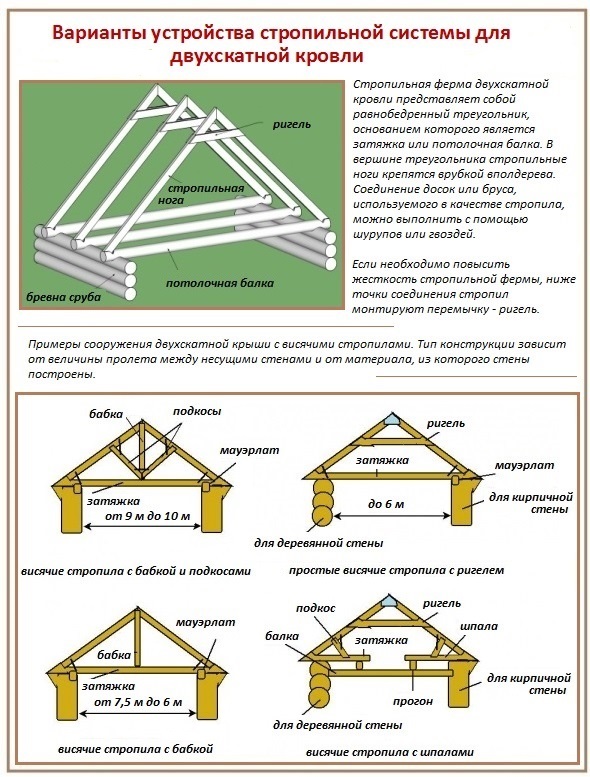
Rafters are trailing and hanging. Let us consider in more detail each of the varieties.
Hanging rafters
Such rafters abut each other at the highest point, forming a tangible horizontal pressure. To reduce it, you need to build a lower belt, which in this design can be called the base of the "triangle".
It is worth paying special attention to the connections in such a truss system, they must be as reliable and rigid as possible to cope with significant loads.
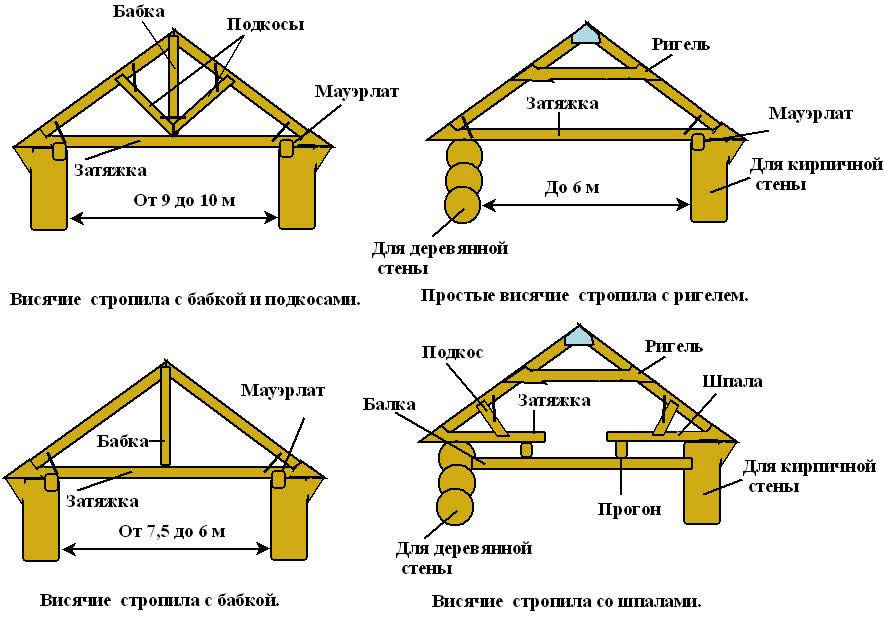

Rafter rafters
This type is more often used for shed roofs. There is no need for tightening rafters. They are installed just along the slope and lean on the mauerlat, which, in turn, rests on the bearing walls. Variants of erection of a system with nasl rafters are shown in the diagram:

Rafters for a gable roof
The basis of this roof - rafters of the same size, installed alternately. On this basis, the roof, insulation, hydro and vapor insulation later fit. Depending on the design features, an “isosceles triangle” complementsadditional elements to strengthen.
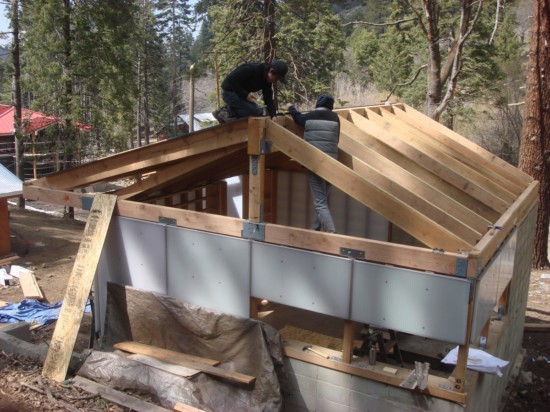
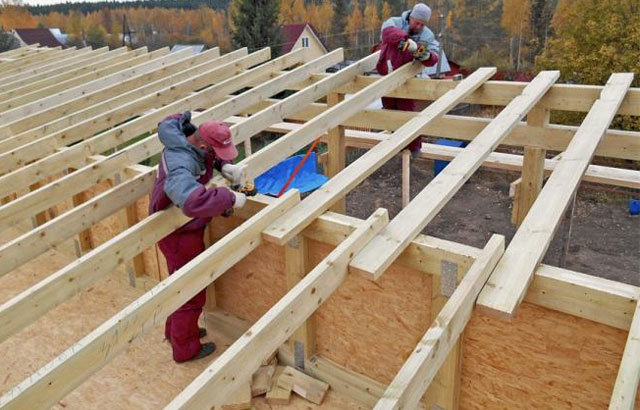
For convenience and safety, you can assemble a roof system on the ground. True, then it will have to be raised up, which will require a whole team of workers or special construction equipment.

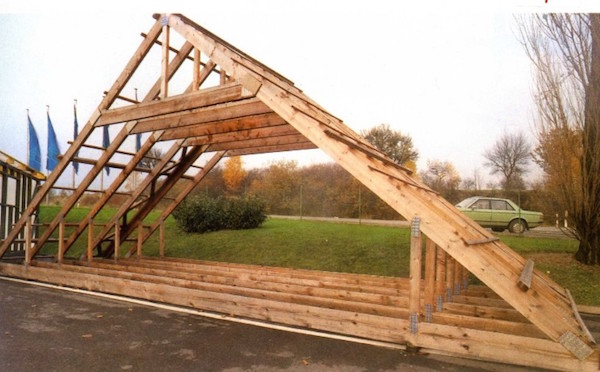
Professional builders recommend to start with a template that will be exactly the same as all subsequent roof trusses. To do this, you need to connect the two trusses at the top point with a nail. Then the opposite ends are placed at the point of the future support and fixed. It is important throughout the work to control that the installation of rafters is clearly vertical. You can do this with a plumb line.
Installation begins with the installation of front truss trusses, between which you need to pull the cord (in the future it will serve as a guide). The standard distance between the rafters is 1.2 meters, but the value can vary both upwards and downwards depending on the characteristics of each individual roof.

Rafters for single-pitch roof
The basis for insulation is laid out for such roofs with an optimal step of 0.5 meters.If the distance between the supports is less than 5 meters, additional stands can be omitted.
For the perimeter of the building, the rafters are usually carried out by 40–45 cm, which will help to equip the eaves. A bar or board is suitable for the material of the batten. The pitch between its elements is determined according to the type of roof. For a soft roof, suitable plank lathing with intervals of 1-2 cm. For sheet roofing - from timber with a distance between elements from 20 to 45 cm.
The technology of installation implies the beginning of work from the ridge and a gradual movement to the eaves. For fixing using conventional screws or screws.

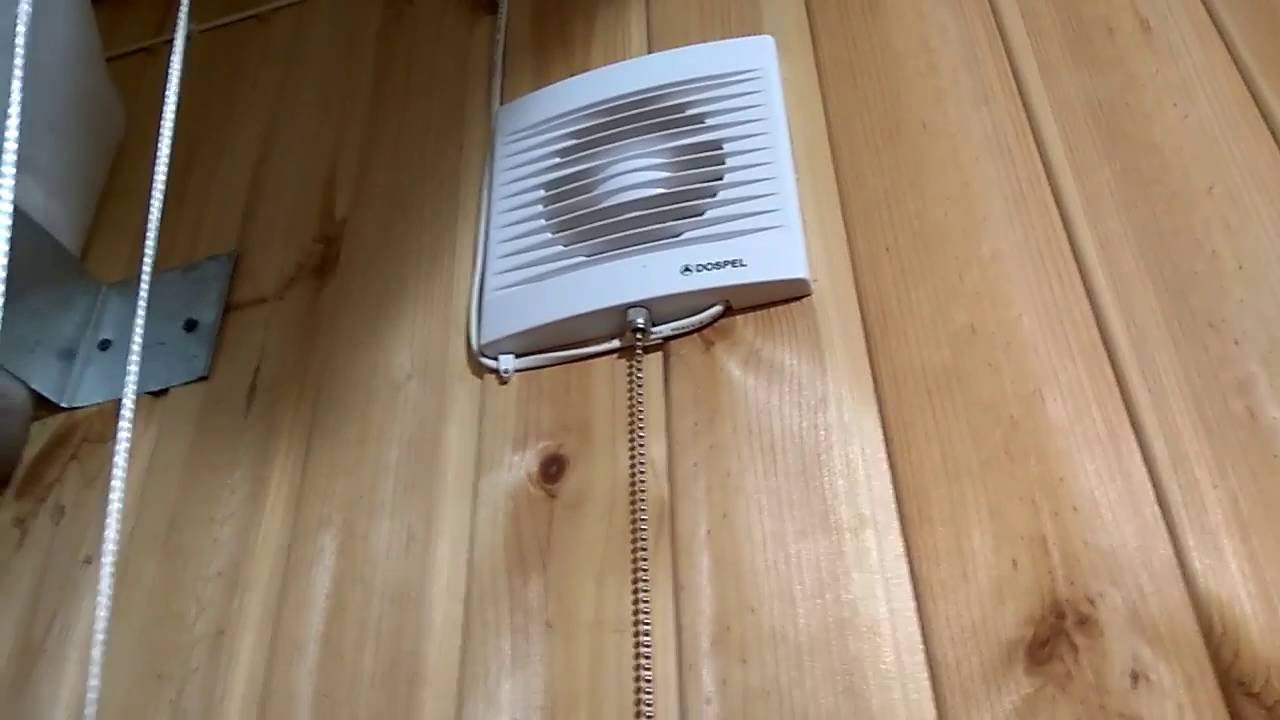
Ventilation
The equipment of the ventilation system is one of the most important stages in the construction of a frame bath. Not only comfortable bathing procedures, but also the safety of people inside depends on its quality.
For kindling coal or wood is used. In order not to get poisoned by carbon monoxide and prevent the penetration of combustion products into the interior, high-quality ventilation is necessary. It also helps to cope with the formation of fungus and condensate.
At certain intervals of time from the steam room can not release the air, this means that ventilation must be tightly closed. It is desirable to organize a system with the ability to manually control the movement of air in the bath.

It is important to think over the system in advance, even at the design stage. In the finished building to introduce ventilation will be very problematic.
For different types of buildings, separate ventilation systems are implied. This also applies to frame baths.
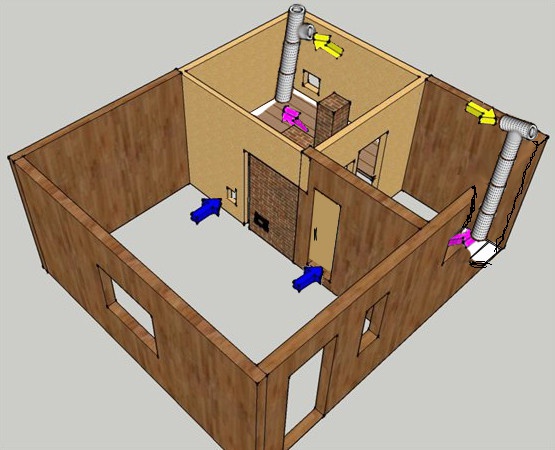
It is very important that there is where to leave excessive moisture and heat. For frame structures, professionals advise installing adjacent ventilation. She can get rid of excess steam, and bring in fresh air instead.
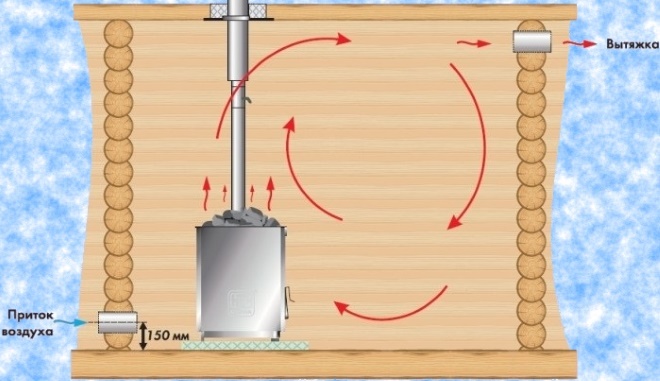

It will take two holes - through one air will enter the room, through the other out. They are installed pipes, which can be supplemented by the installation of fans. Such a system will work in all weather conditions.
To get good ventilation, you need to properly place these holes. Then the air will be able, roughly speaking, to enter where it should and where it should go from.
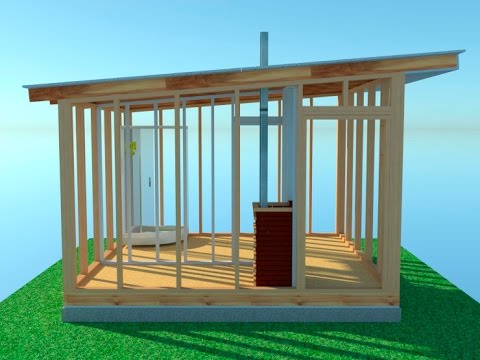
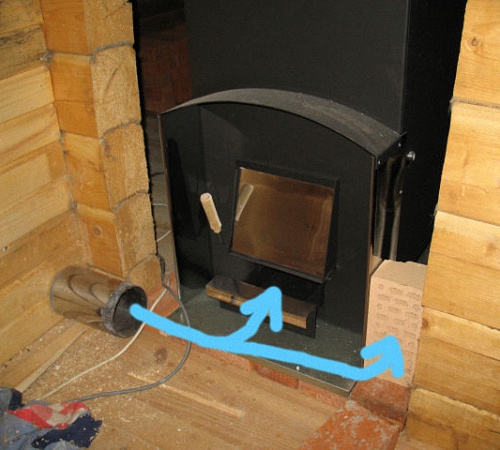
There are several standard hole patterns. The first thing to consider is the location of the furnace in the bath. If it is inside the steam room, it will be necessary to work according to one scheme; if outside it, according to another.
The intake pipe should be located fairly close to the firebox, but below the level of the chimney. Exhaust pipes are often placed in the opposite wall under the ceiling.
Sometimes in the frame baths make two outlets (not far from each other, but at different heights) and one inlet. It helps to control the movement of air masses in the bath. There is a clear rule: the higher the exhaust port, the stronger the thrust. That is, it is not necessary to make the outlet pipe both in the middle of the wall and near the entrance. Otherwise, ventilation will lose its functionality.
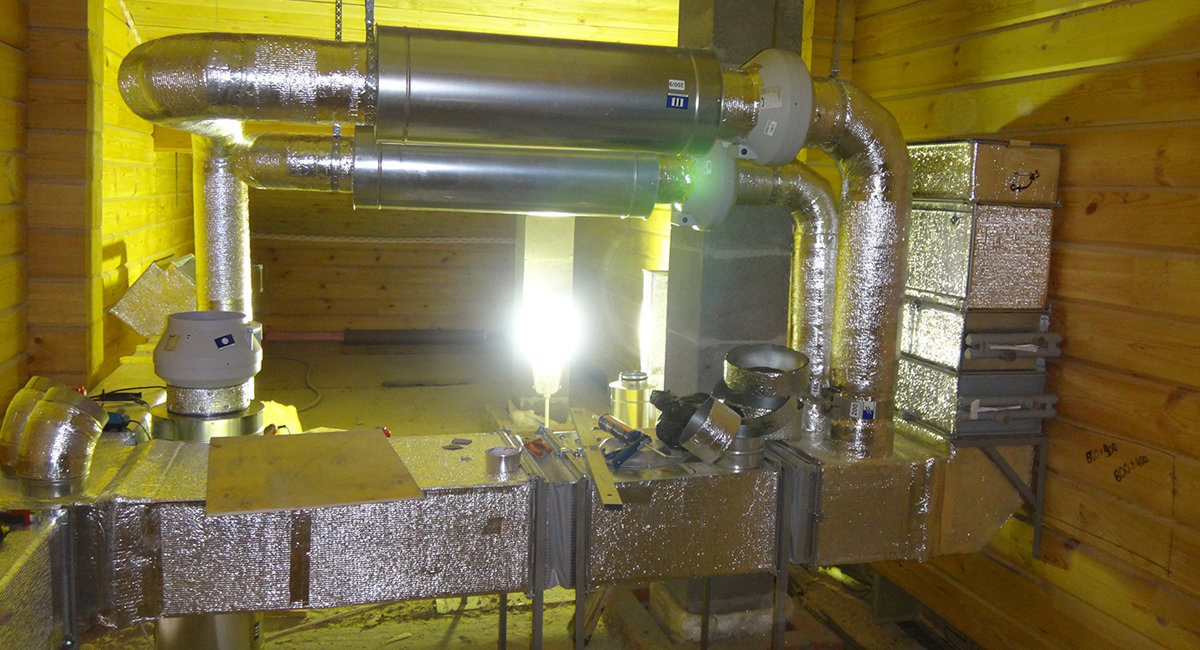
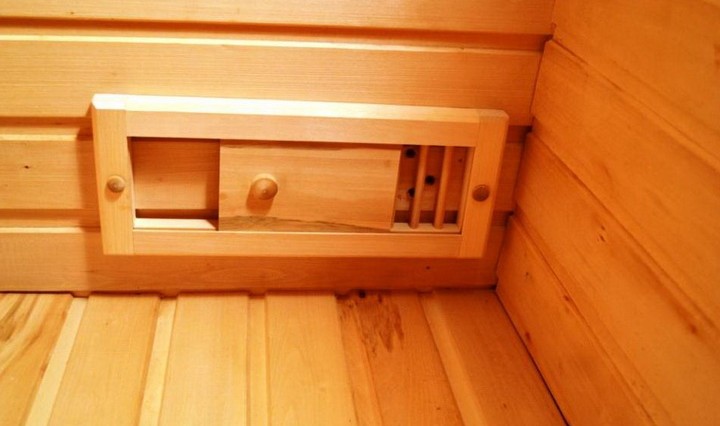
Gate valves have special significance. This will allow you to regulate the flow of air into the room. This is very important if it is windy outside. It is recommended to do not only valves to close the pipes, but also to install the fan inside.
This will give the opportunity to well ventilate the bath even in the absence of wind on the street.
Using the steam room, you need to open the valves every three hours and update the air. Otherwise, being in the bath may become unsafe.

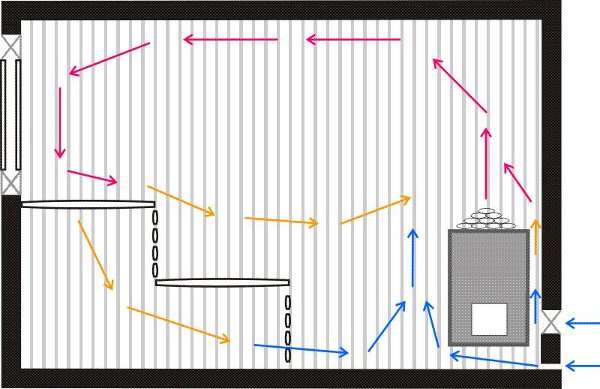
Ventilation for a bath with a stove in the next room with a steam room
This option is the most common placement of the furnace. Its significant advantage can be called the absence of debris in the steam room and heat preservation (since it is not necessary to open the door often).
Adjacent ventilation is suitable, and to get hot steam into the steam room you need to organize a kind of tunnel under the floor. Its role can be performed by a regular pipe.A grille should be installed at both ends of this pipe, and a gate valve is needed at the outlet to regulate the intake of air.
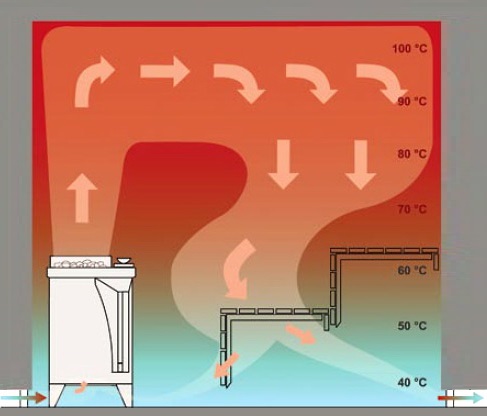
The optimum place for the equipment of an extract will be the opposite wall (or a wall on a diagonal). Her role can perform a box with dimensions of about 25 to 30 cm.
It is important to remember that all vents should be the same size. Otherwise, the system will simply not be able to function normally: for example, the hot air will go out faster than the cold will have time to go inside and heat up.
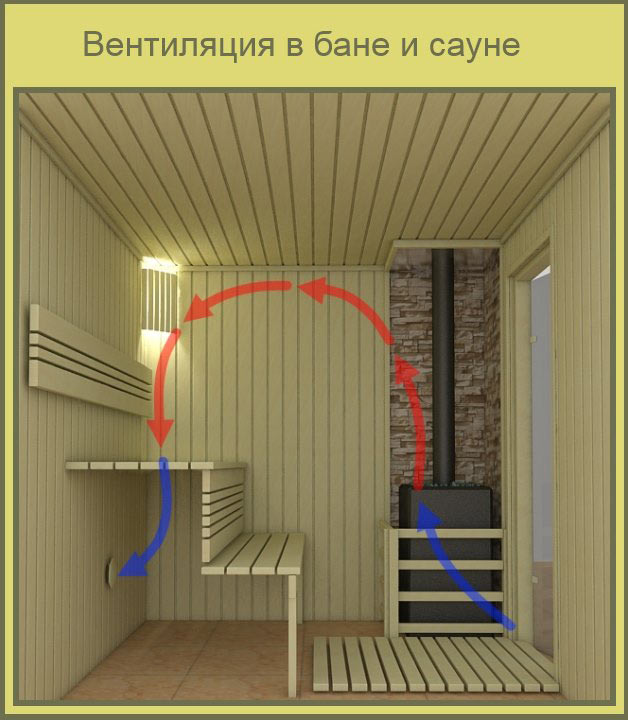
Ventilation system for bath with stove in the steam room
The option of placing the firebox directly in the steam room is not popular. After all, it takes up a lot of space, and trash remains on the floor from firewood and coal. But for such a room there are separate rules for the arrangement of ventilation. Oddly enough, everything is much easier.
Some bath owners do not even spend time on the organization of an additional ventilation system, but simply release steam through the slightly opened door. In this case, fresh air enters the steam room using a blower that is in each stove. If the furnace does not have a full-fledged pipe, it will be necessary to equip the ventilation according to all the rules - with inlet and outlet pipes.

It is better to place the stove without a pipe on a kind of podium in order to make it easier to bring the pipe to it from the street. It will also allow air to quietly circulate in the building.
Reviews
If there are doubts about the construction of the dacha bath on the frame system, you can ask about the reviews of the owners of such buildings on the Internet forums. Here, of course, opinions diverge: some write that they are dissatisfied with the bath because of the rapidly appearing fungus on the walls. Often this is due to the fact that the room cools down too quickly.

This can be fought with the help of high quality insulation. After all, low-grade foam or mineral wool will not be able to fully perform the necessary functions. Also cheap polystyrene can suddenly catch on fire.
Even in the reviews often write about a significant shrinkage of the bath. Some examples indicated shrinkage of about 10 cm in just 1.5 years. This, respectively, leads to the deformation of the exterior and interior.
Probably, it will not be possible to completely prevent shrinkage of the bath, but it can be minimized by using sawn timber after chamber drying.

Those owners who did not save on insulation and other building materials, note a great advantage - in comparison with the timber construction, the frame version is much less labor-intensive and complex.
If you summarize the most popular reviews, then the main problems of such baths can be called the high costs of insulation, shrinkage and insufficient fire resistance. Despite this, frame baths are gaining increasing popularity due to the extensive list of benefits.
Tips and tricks
- The pillars, which will be the basis of the walls of the bath, should be placed in the places of the greatest load: under the corners and bearing walls, under the furnace.
- The thicker the insulation material, the better the building will be insulated. The width of the frame boards is also of great importance. A board with a minimum width of 15 cm is recommended.
- Before you proceed to the construction of the frame itself, you should make sure that the foundation is completely dry. Proper drying should be gradual. To do this, the entire structure must be covered with polyethylene for about 3 days, then remove it and wait another couple of days.
- Arranging the base of the floor, be sure to leave room for the stove foundation.
- Modern building materials make it almost non-flammable, but the abundance of wood makes you think about fire safety techniques. The wall, to which the stove is attached, is better to lay out of brick. It will not be superfluous to lay brick on the platform around the stove, and the floor should be covered with a metal sheet so that coals (sparks) that have fallen out of the rough are not burned.
- If the stove in the bath is made of metal, then it will be necessary to pre-reinforce the frame in the place of its installation. For a brick kiln you need to equip a separate foundation. You also need to provide a room where there will be a container with water in case there is no water in the bath.

- It is clear that if you need to save space, you can design a sauna room of any size. But the steam room has a minimum size limit of 2.5 by 2.5 meters. If it is smaller, it will create a lot of inconvenience when using it.
- After laying the subfloor, it should be treated with a waterproofing solution. This will prolong its service life and protect against moisture ingress into small cracks in the concrete. The latter, in turn, can harm not only the material of the floor, but also the insulation.
- To avoid moisture, you need to put a vapor barrier before the layer of insulation, which can collect condensate.
- Choosing insulation, special attention should be paid to its characteristics relating to high temperature. After all, for a bath is a determining factor. It is worth remembering that many materials perfectly perform the function of warming, but under the influence of high temperatures they begin to emit various substances that may adversely affect health.
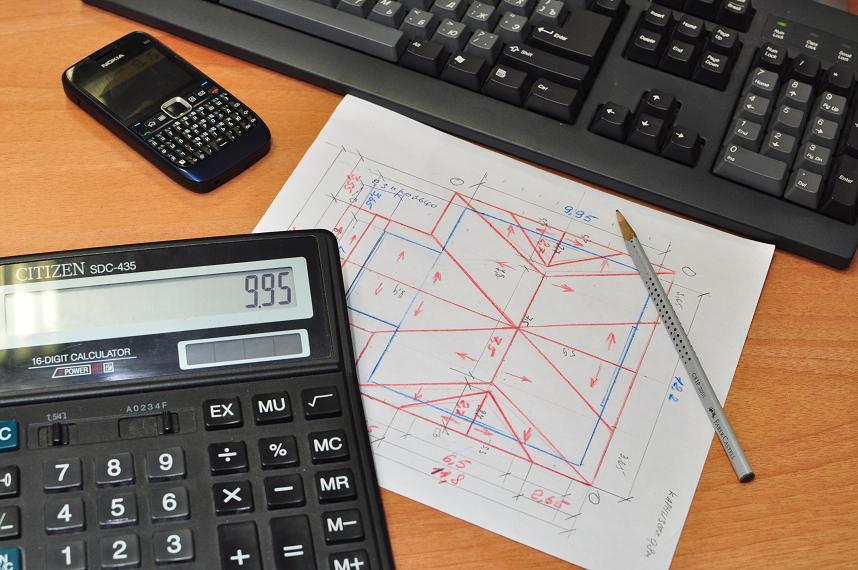
- Not being a professional builder and not having much experience, it is worth spending a lot of time drawing up a project. It is necessary to describe in detail all the stages of work, the required materials and estimate how many people may be needed to complete the work. After all, it will be very unpleasant in the midst of construction to understand that you have no opportunity to continue it due to the omission of some important stage in drawing up a plan.
- When there is a strong need to save material resources, straw, sawdust and other available materials can be used for insulation. But their use a priori is unsafe, because they have a very high flammability.It is necessary to find the best option, so as not to spend too much, but also not risk life every time you drown the bath.

Beautiful examples
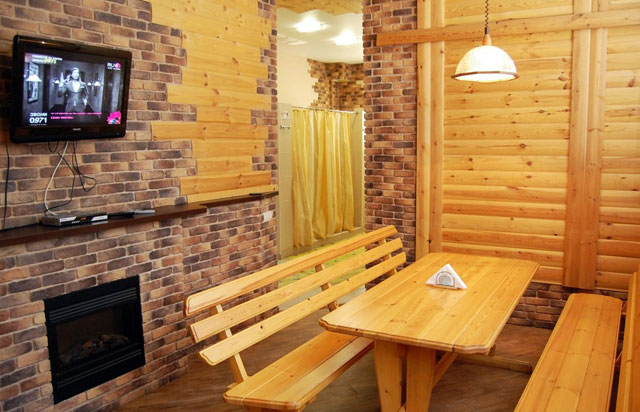
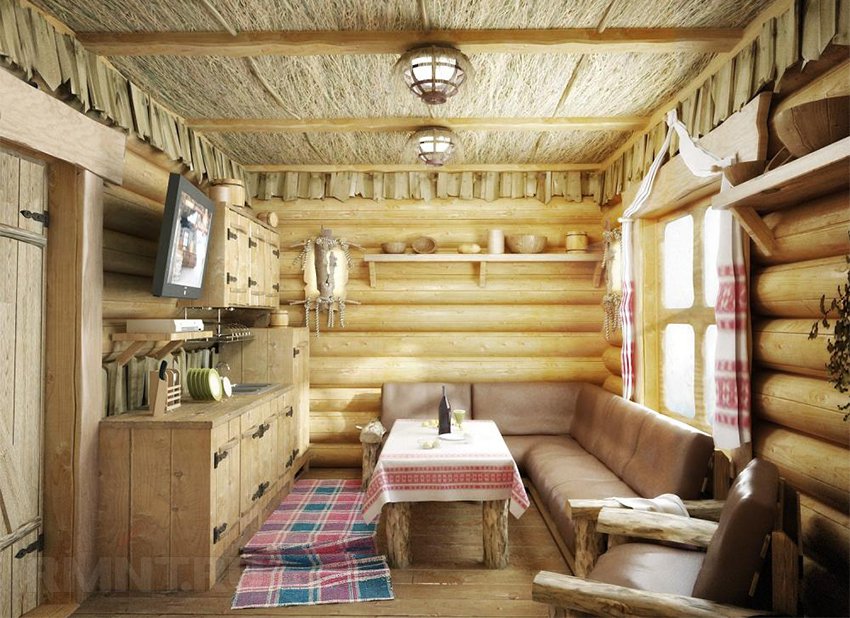
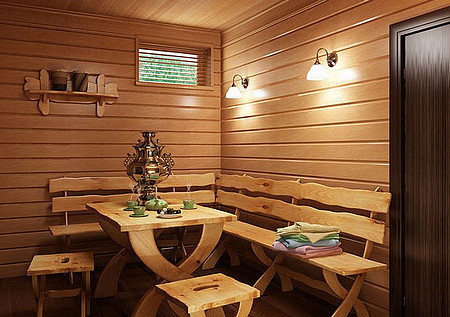
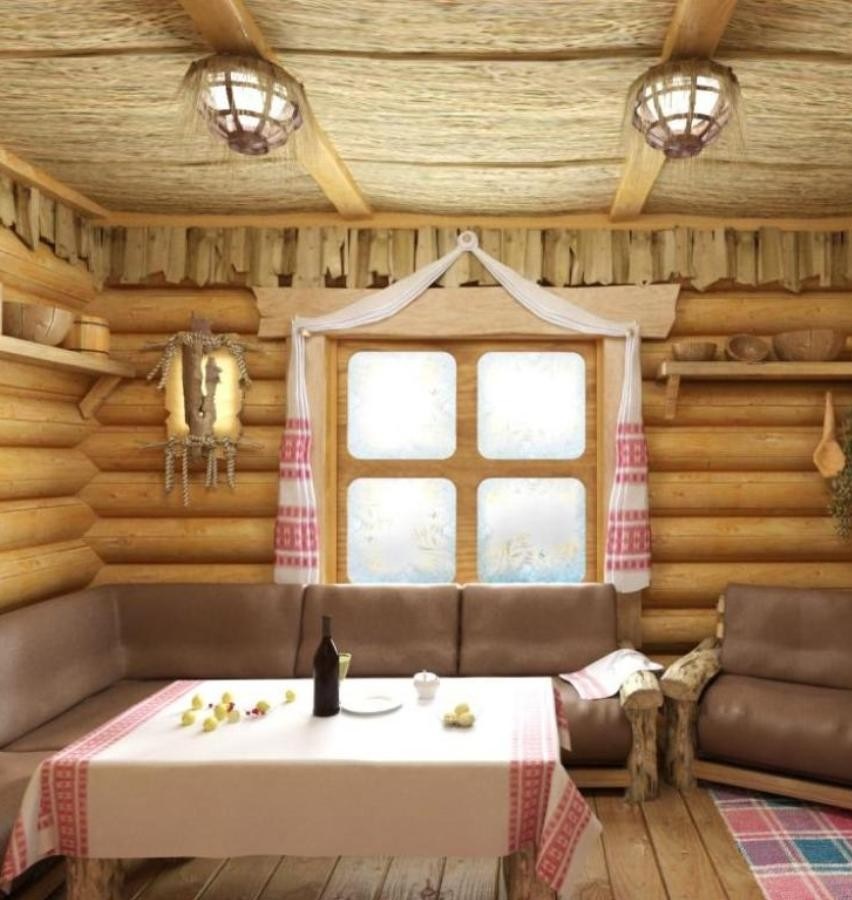
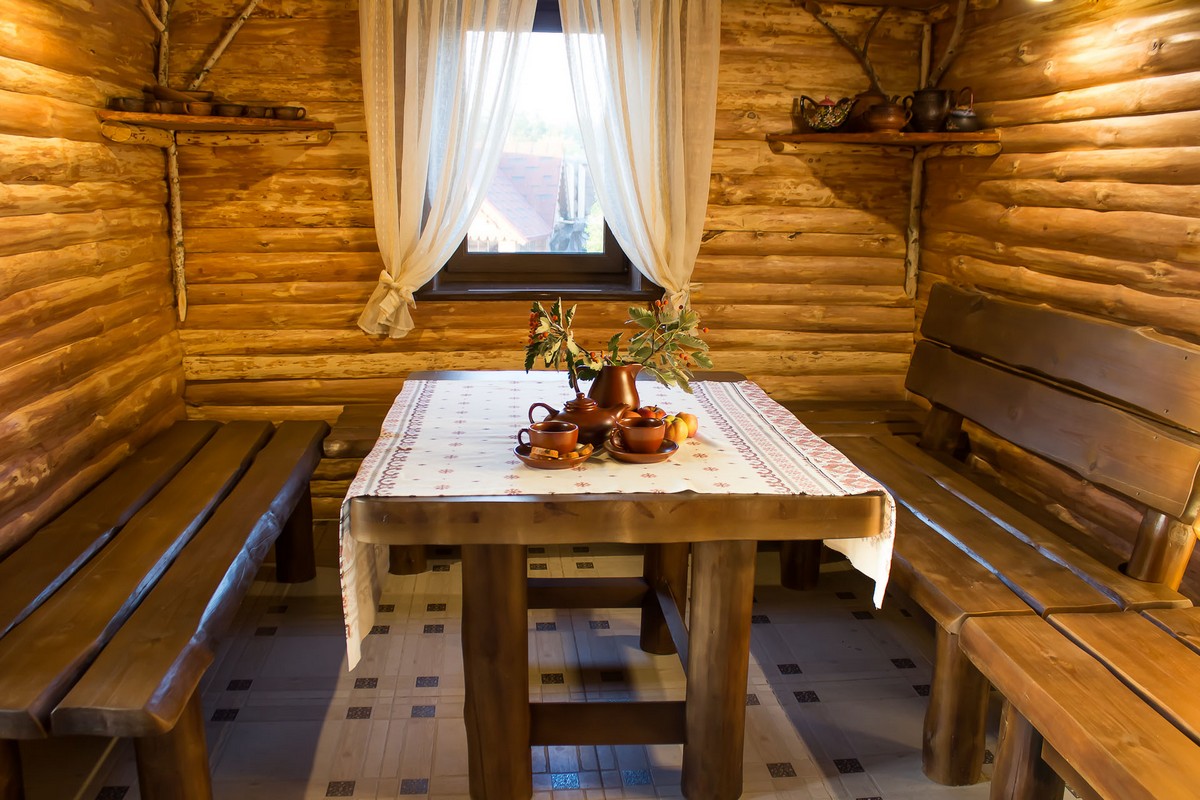
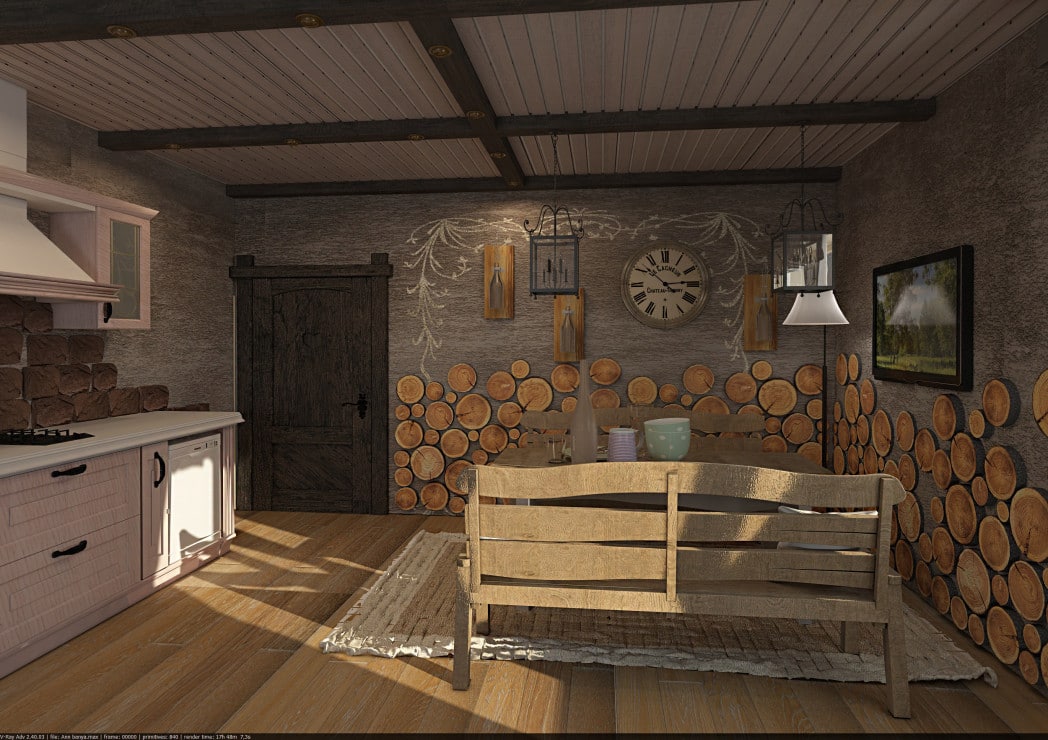
The design of the relaxation room in a traditional style: wooden benches, a samovar, and calm, warm lighting perfectly contribute to relaxation after taking bath procedures.

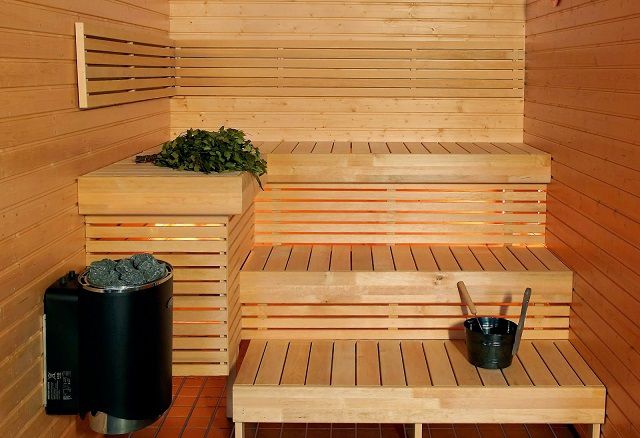
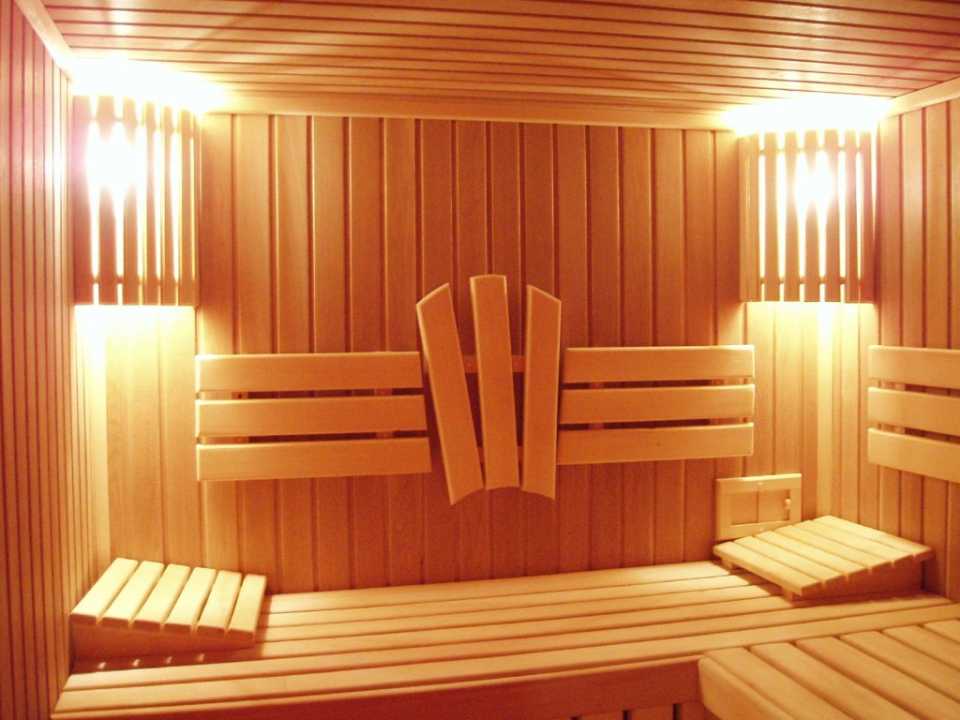
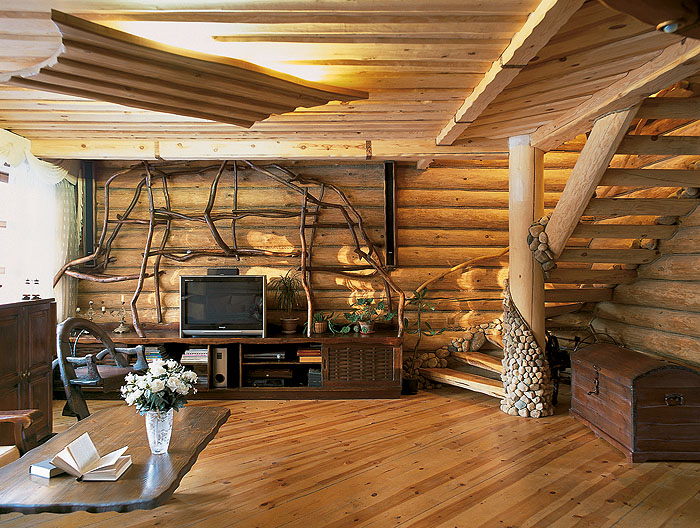
This is the original way you can lay out wooden wall paneling in the steam room. In this example, the lamps are very well disguised: they themselves are not visible, and the light is beautifully scattered through the original wooden elements.

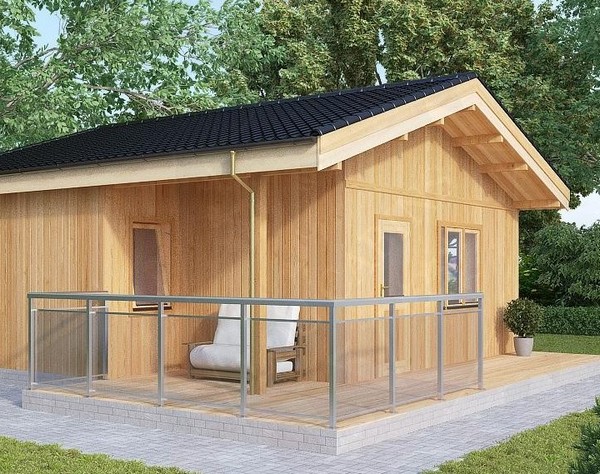
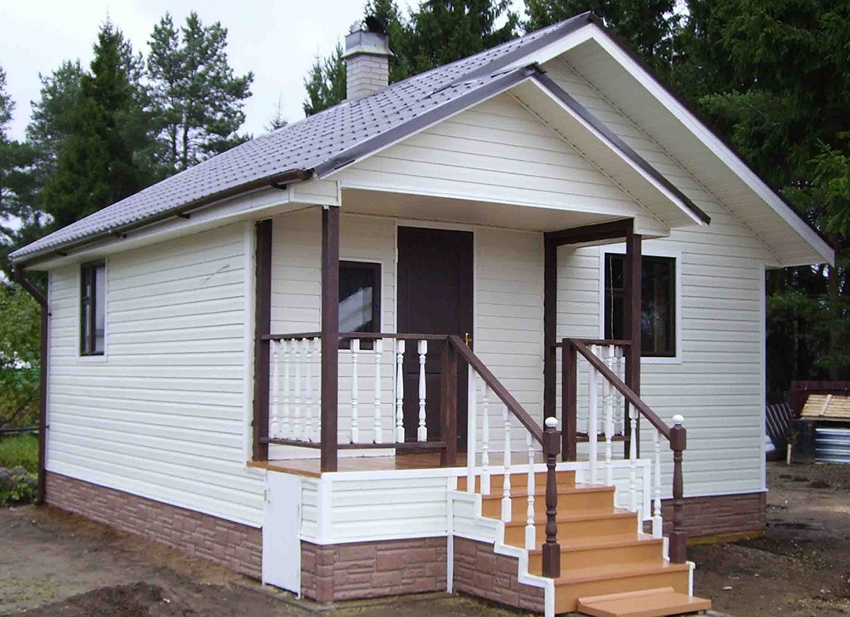
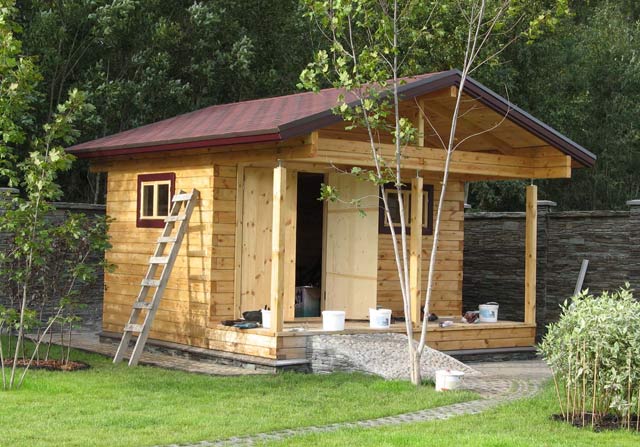
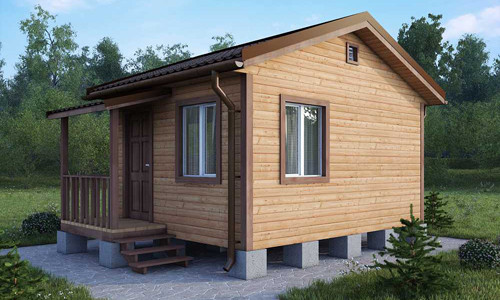
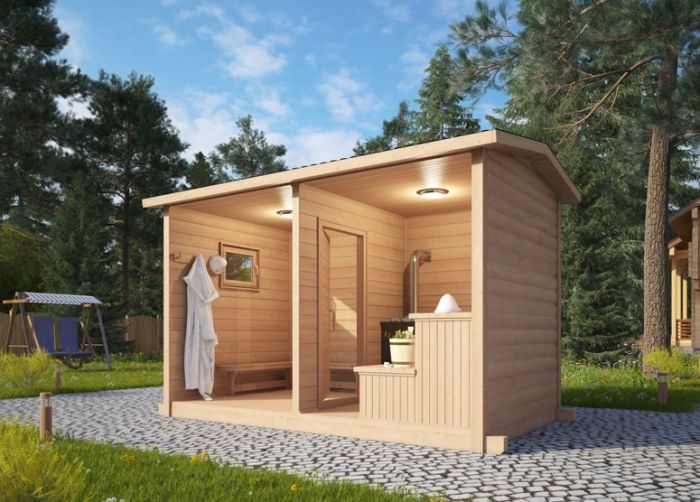
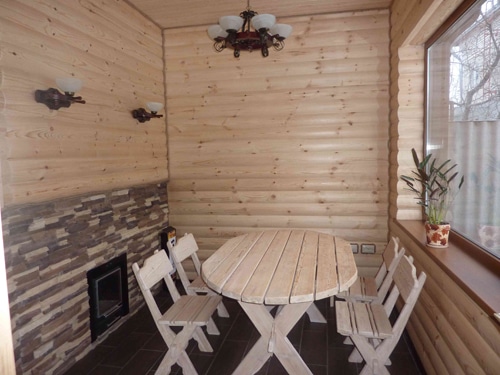
Option frame bath with a small veranda. It looks quite simple and at the same time, all the basic rules of decor are observed.
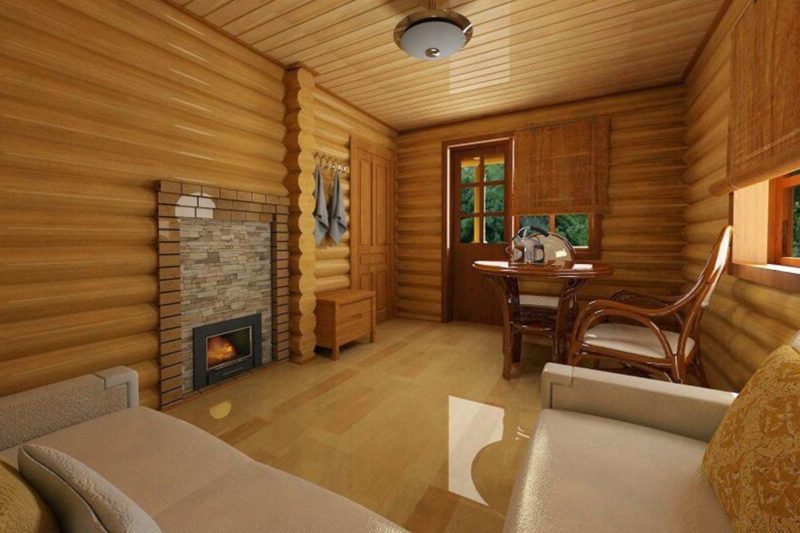
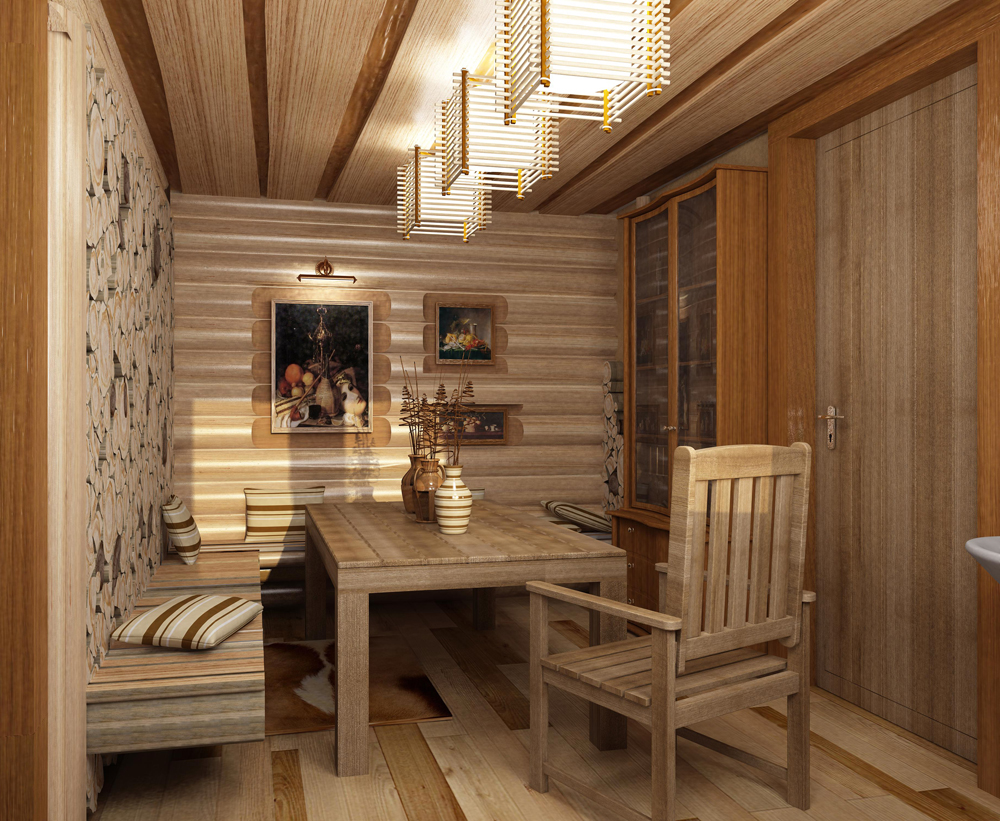
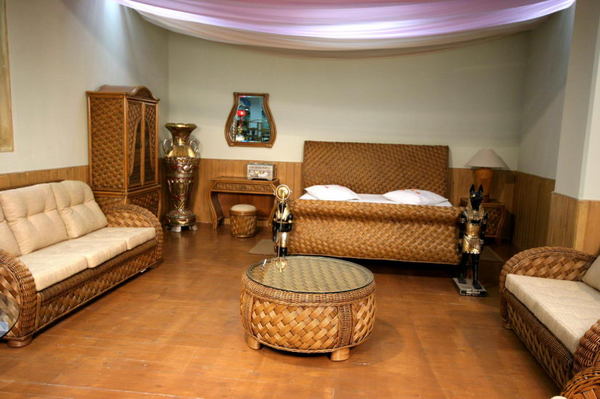
This rest room is completely finished in wood, which does not prevent the mirror and upholstered furniture from harmoniously fitting. To match the color of the base material, the lamps for this design have chosen yellow.

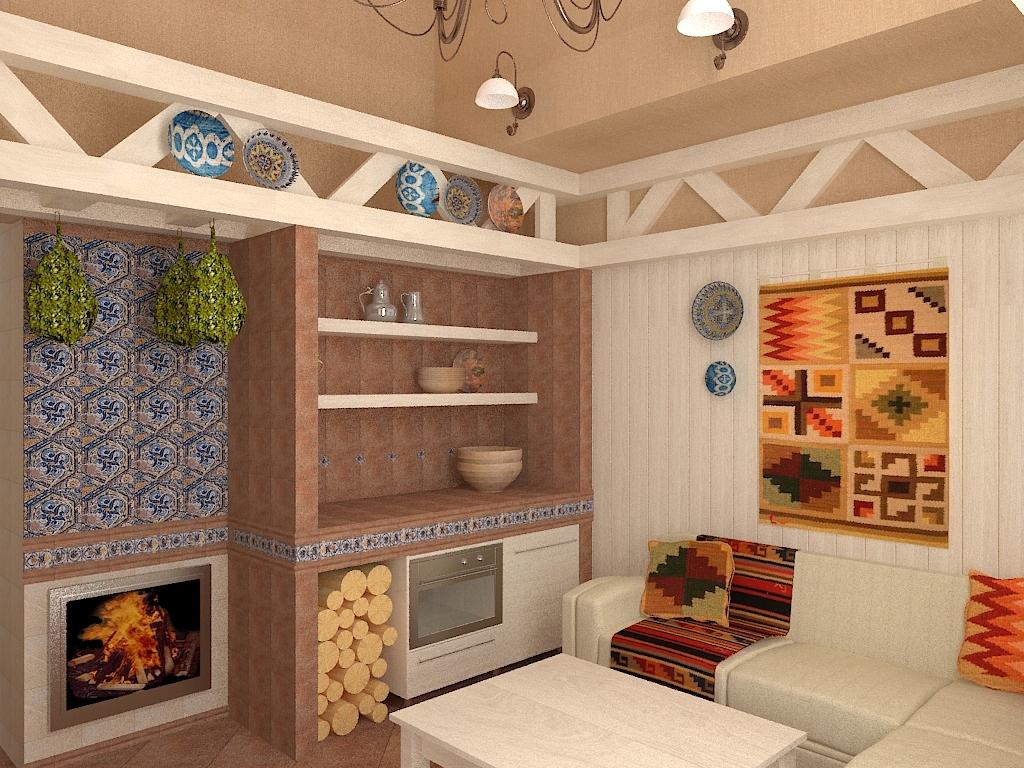
A striking example of design in ecostyle: all elements are made of natural materials, the canvas with ethnic ornament is great for curtains and tablecloths. Furniture frames are also made of wood that is close to the natural form.
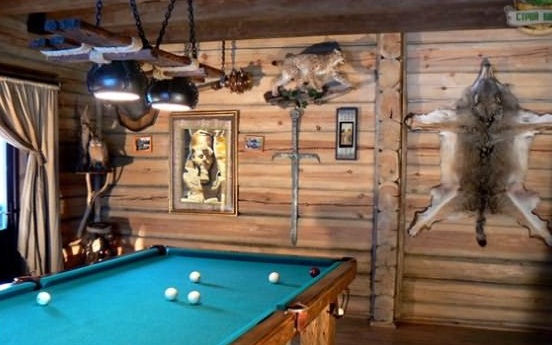
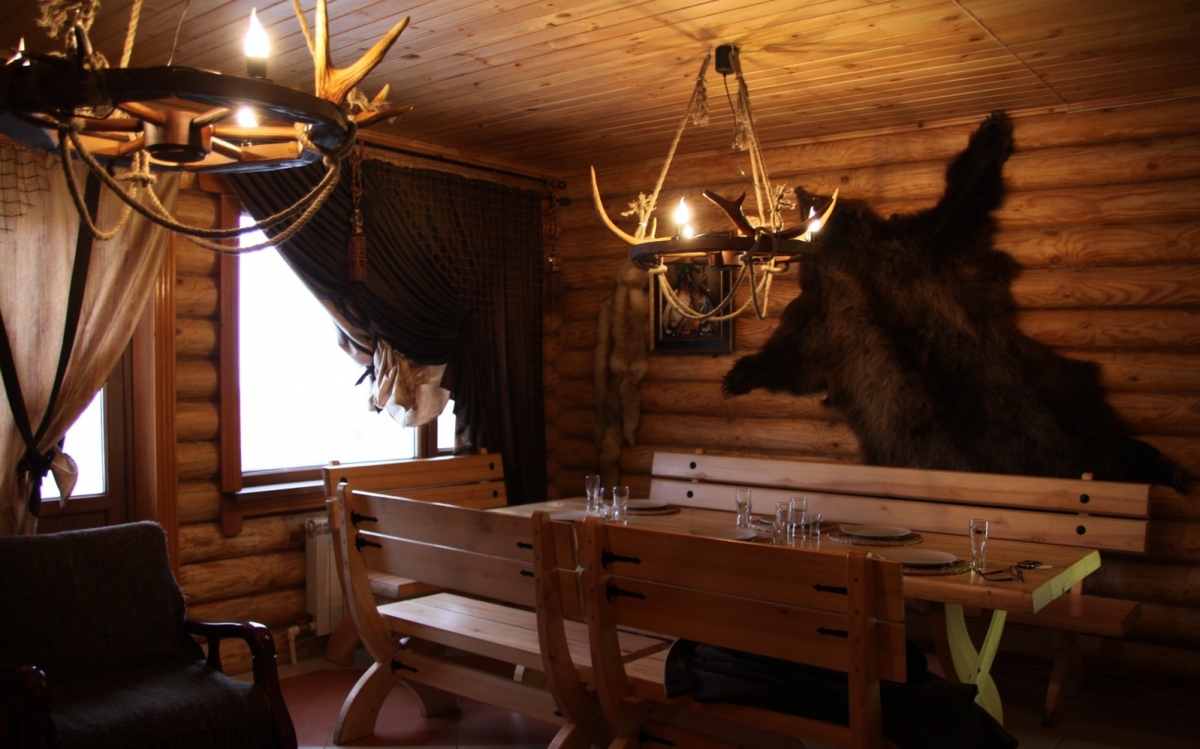
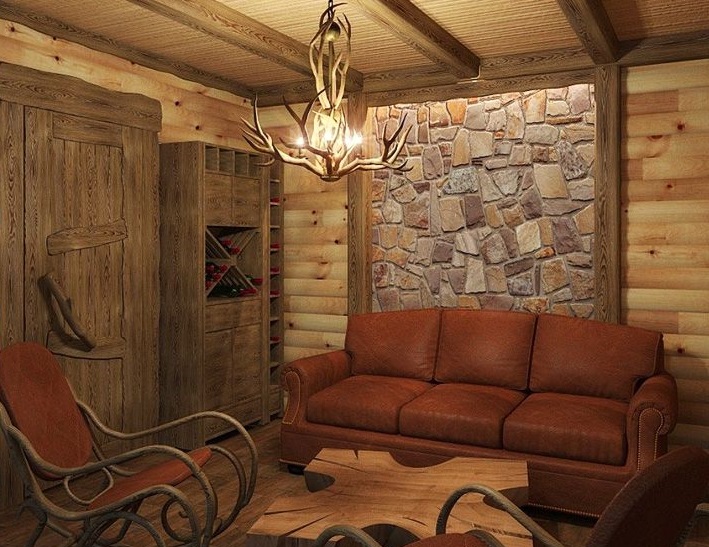
In this case, the design was very brutal.Animal skins, iron elements and a massive billiard table made of wood create a real “male den” in which you can spend time with friends.
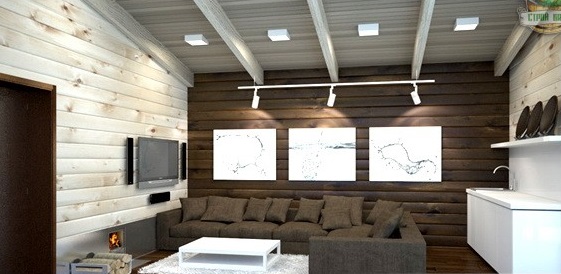
Minimalism is used to design baths quite rarely, but this example can be called a benchmark. The contrast of wall colors in combination with the composition of paintings and stylish furniture looks great.

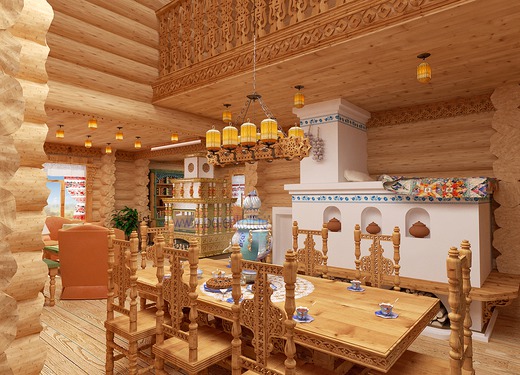
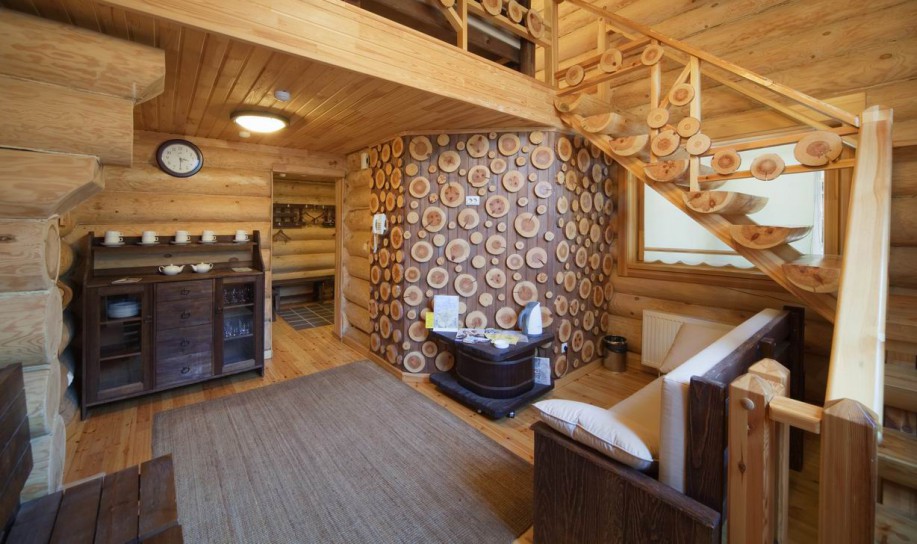
This decoration is clearly performed by these craftsmen. Here and carved furniture, and a mosaic of small tiles, and fancy wooden compositions on the wall. All this creates a unique composition and has to rest.

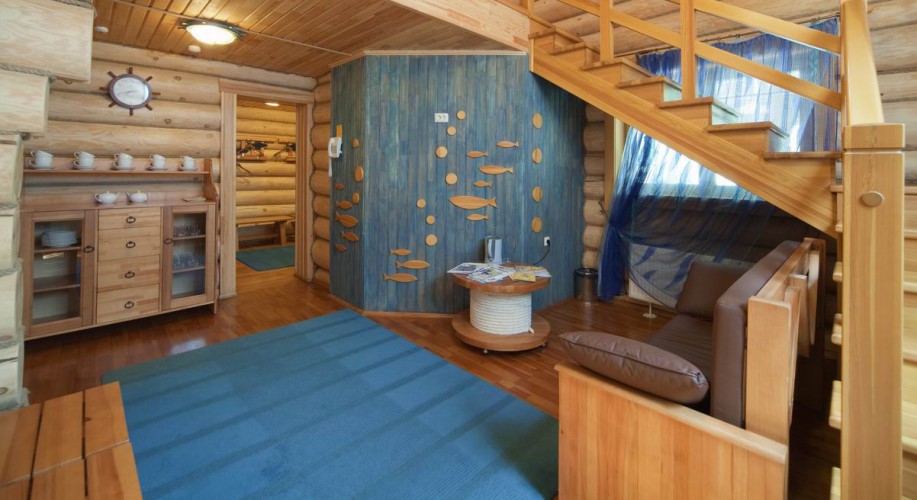
But the interesting design in the marine style. Homemade table in the form of a coil with a rope is an original solution that can be repeated by every lover of unusual furniture.
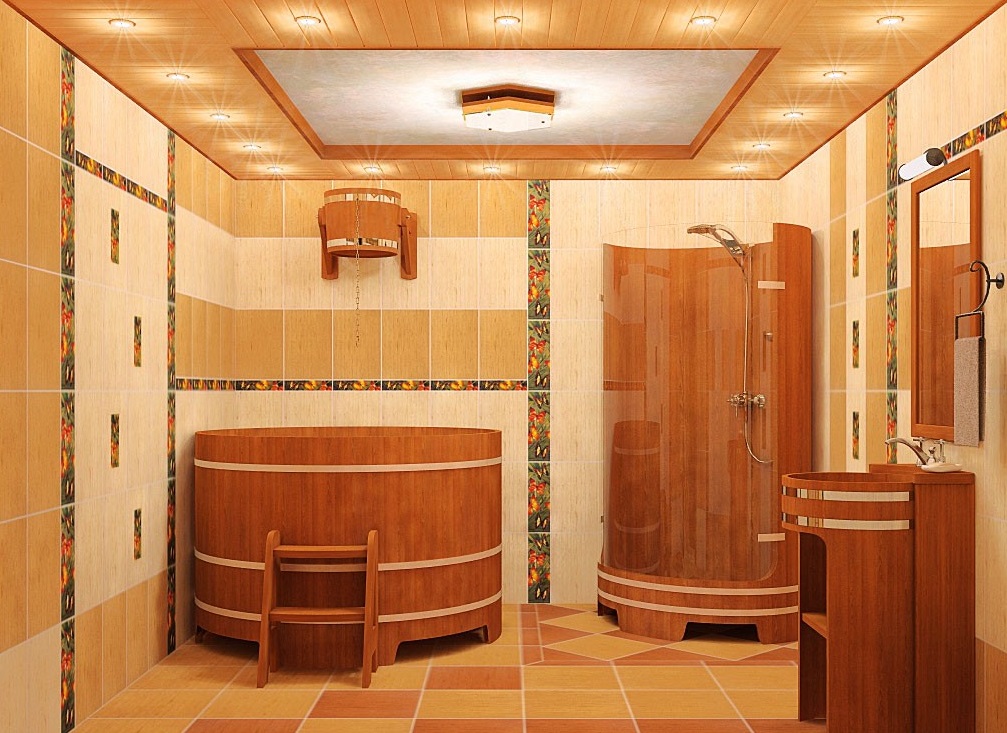
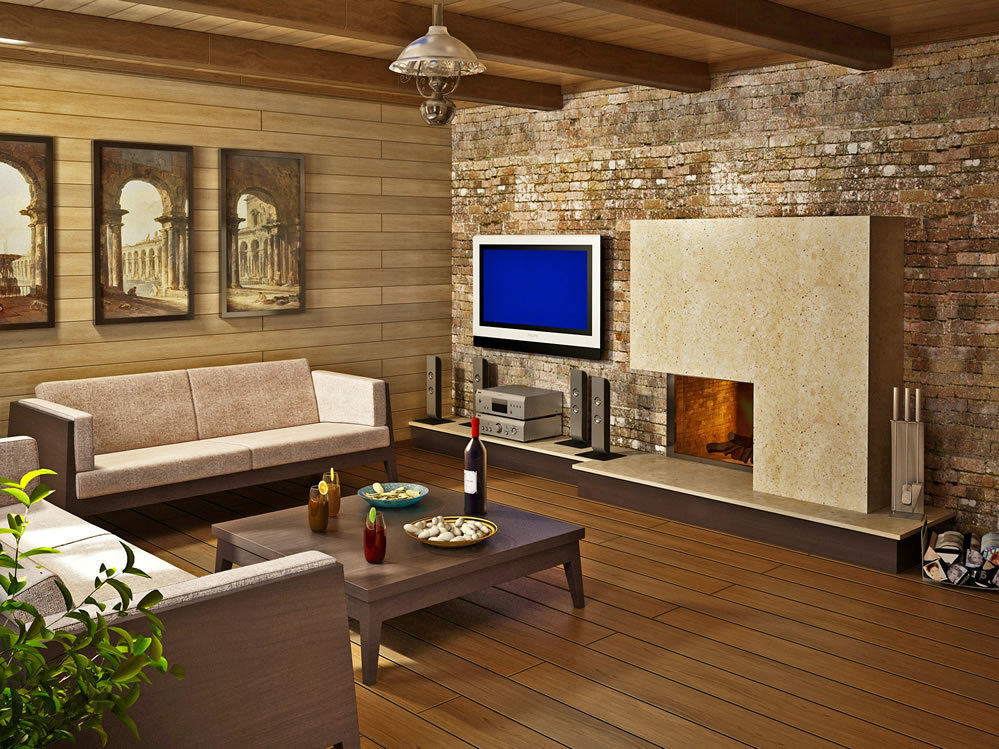
This design option looks very rich and expensive. Hardly any private owner designed it himself, but he clearly has a sense of style. Obviously, this design took a lot of time, brickwork on the back wall alone requires a lot of effort and time. Fireplace equipment is also a very laborious process, but the result is admirable.

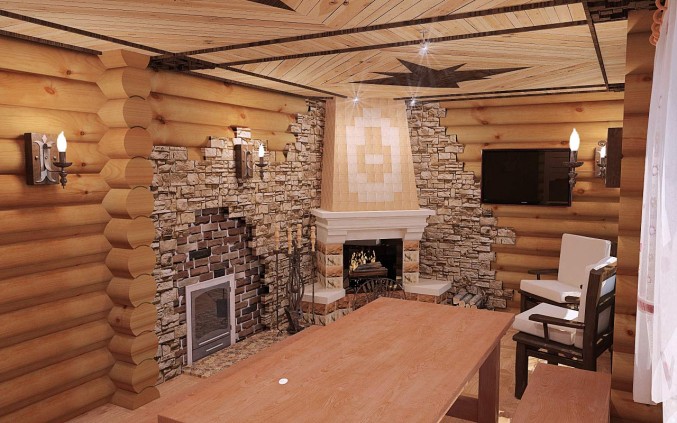
In this design, they managed to correctly combine dark and light wood, a forged lamp and whimsically romantic blinds on the windows. This decor can hardly be attributed to any particular style, but it all looks very aesthetically original.

Chic decor element - chandelier. Of course, to imitate the horns, most likely, ordinary wood was used, but it was so beautifully processed that the associations come by themselves. Such a chandelier with a not very powerful light bulb will be able to cast fancy shadows on the walls, complementing the atmosphere.


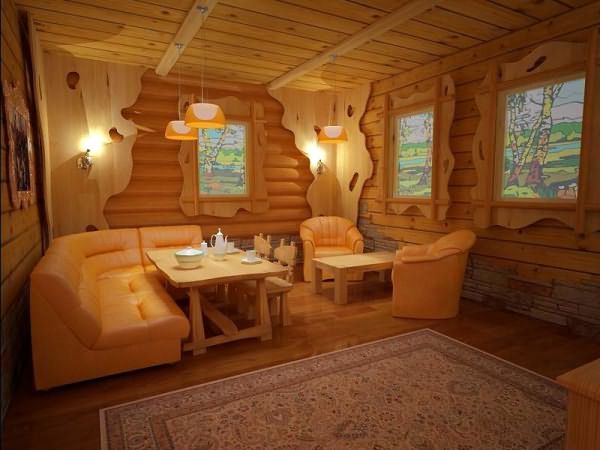
A rather simple but interesting design of the rest room with a ceramic tile floor, an artificial barbecue and a stained-glass window. Also pay attention to the method of lighting equipment: the lamps are hidden in the ceiling support. So they are not a special decoration of this interior, but they also do not distract the eyes from its main elements.


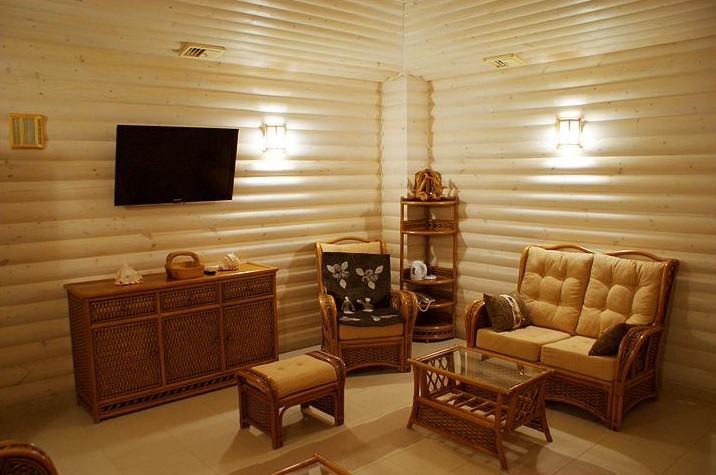
High-quality wicker furniture is an excellent solution for the decoration of a rest room. It goes well with a bar painted in a light color. But it is worth noting that the owners of the baths often do not paint the walls from the inside, but leave them in their original form.
The landmark of any two-story building is a staircase. This example shows a chic curved design with wrought iron railings. Such projects are most often made to order and require large financial investments, but such an element can turn a bath from simply beautiful into chic.


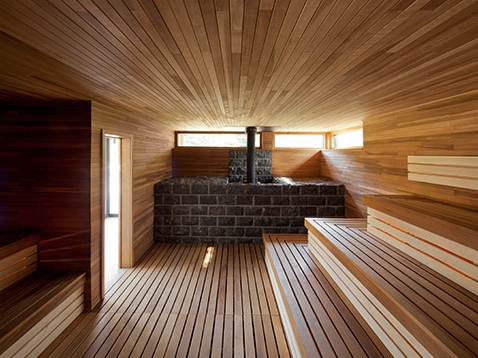
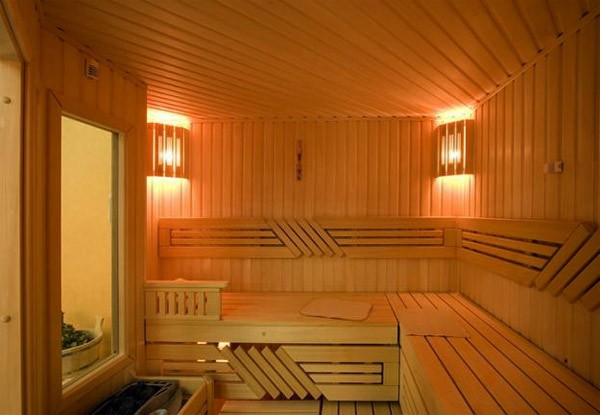
The design of such a steam room will take a lot of time and effort, but the result looks incredibly ambitious and majestic. In this bath you want to bring guests all the time, because the dimensions allow you to place quite a lot of people.


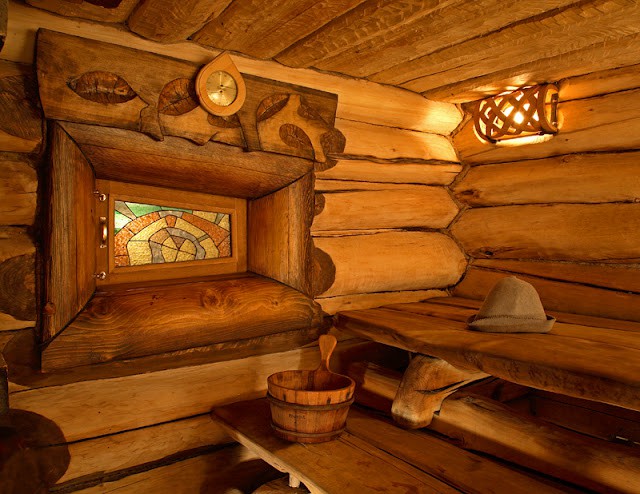
Homemade stained glass - the perfect design solution for window decoration in the steam room. It looks much more impressive than a simple curtain and at the same time closes the view from the outside of the building. The method of making such a stained glass window with your own hands is given above in the article.

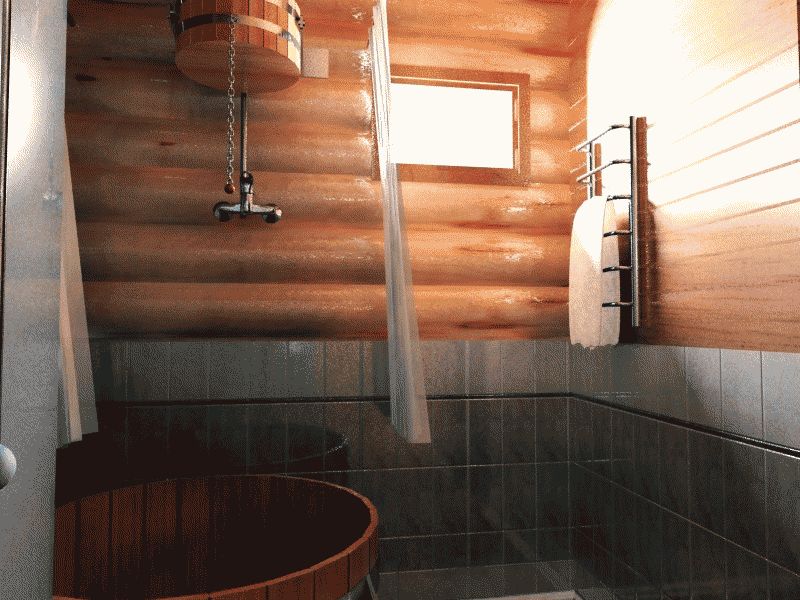
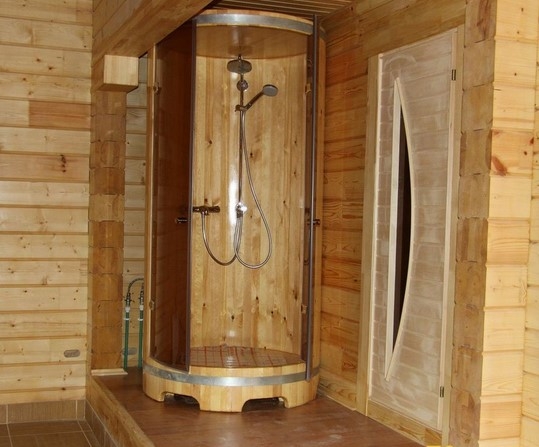
Here we see the original device in the form of a shower with a base of wood. You can, of course, do a lot of work and make something similar to yourself (or order from the master), but again you can achieve a similar effect with a film with a pattern imitating a wood pattern. True, such a film will not last long inside the cabin.
How to equip a frame bath, see the video below.


