Installation of interior door frame
Sooner or later there comes a time when you decide to upgrade your home with the help of repair. You will have to take care not only about furniture and wallpaper, but also about the replacement of interior doors. It is important to remember that the door is an important element of the interior, and it should look perfect, because the installation process will have to be approached responsibly.
Special features
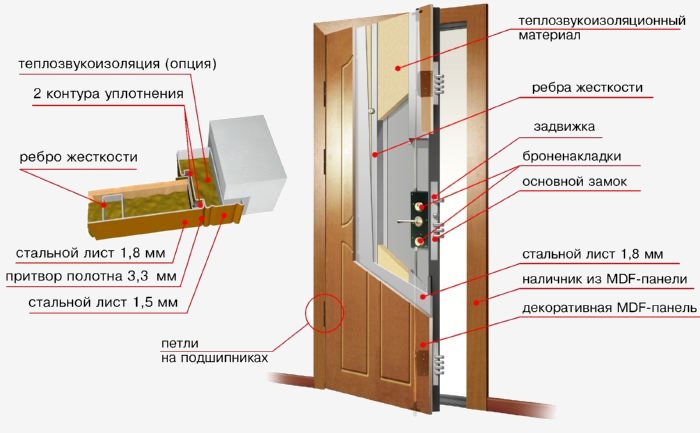
The standard door block consists of two elements:
- A box consisting of an upper, feigned and hinged bar (boxes for blocks with a threshold, supplemented by another lower bar);
- Doors.
Loop bar carries the main load of the door.
The threshold is often not set, but sometimes necessary to avoid drafts.
Most often, the door leaf is hung with two hinges.The kit may include a door handle with a latch. If the frames are not included in the factory set of the door unit, they are purchased separately.
In factory designs, the fixed casing is usually combined with a box. When collecting a box of separately purchased materials, it is better to buy a telescopic casing, since it is very easy to install. When the doorway is wider than the installed door frame, the lack is compensated by fittings. If you do not want to buy additional elements of the wall trim slopes. Too wide aperture can be reduced by installing from the hinge rack beam. In such cases, it is attached, like the feigned stand, to the wall with the help of anchors, and the looped stand - to the beam with self-tapping screws with a smaller diameter.

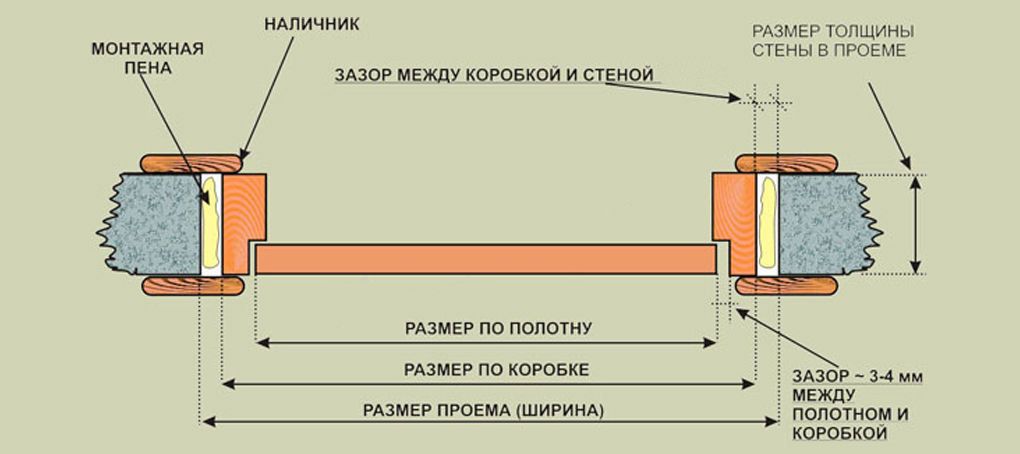
The door block consists of many parts, and for its assembly it is important to know all the parameters of the components. Their dimensions primarily depend on the height and width of the wall into which the door unit will be embedded. A box with a width of 108 mm will fit into a brick wall 70 mm thick. If the wall of the bar is 100 mm thick, then the box size will be 120 mm. This is the size of typical finished blocks in our country. If you have a team box, it is important to make measurements in advance.
Measurements are a key point in the installation process.It is important to carefully calculate the height of the uprights and the top bar. The size of the finished box should be less than the size of the doorway by 20-30 mm.
Thus, the gap between the block and the wall will be 10-15 mm. Sometimes the opening is much larger than required, in which case the extra gap is sealed with bricks or sewn up with drywall. If the gap is not too large, then the openings are filled with mounting foam on all sides, puttied and closed with casing.
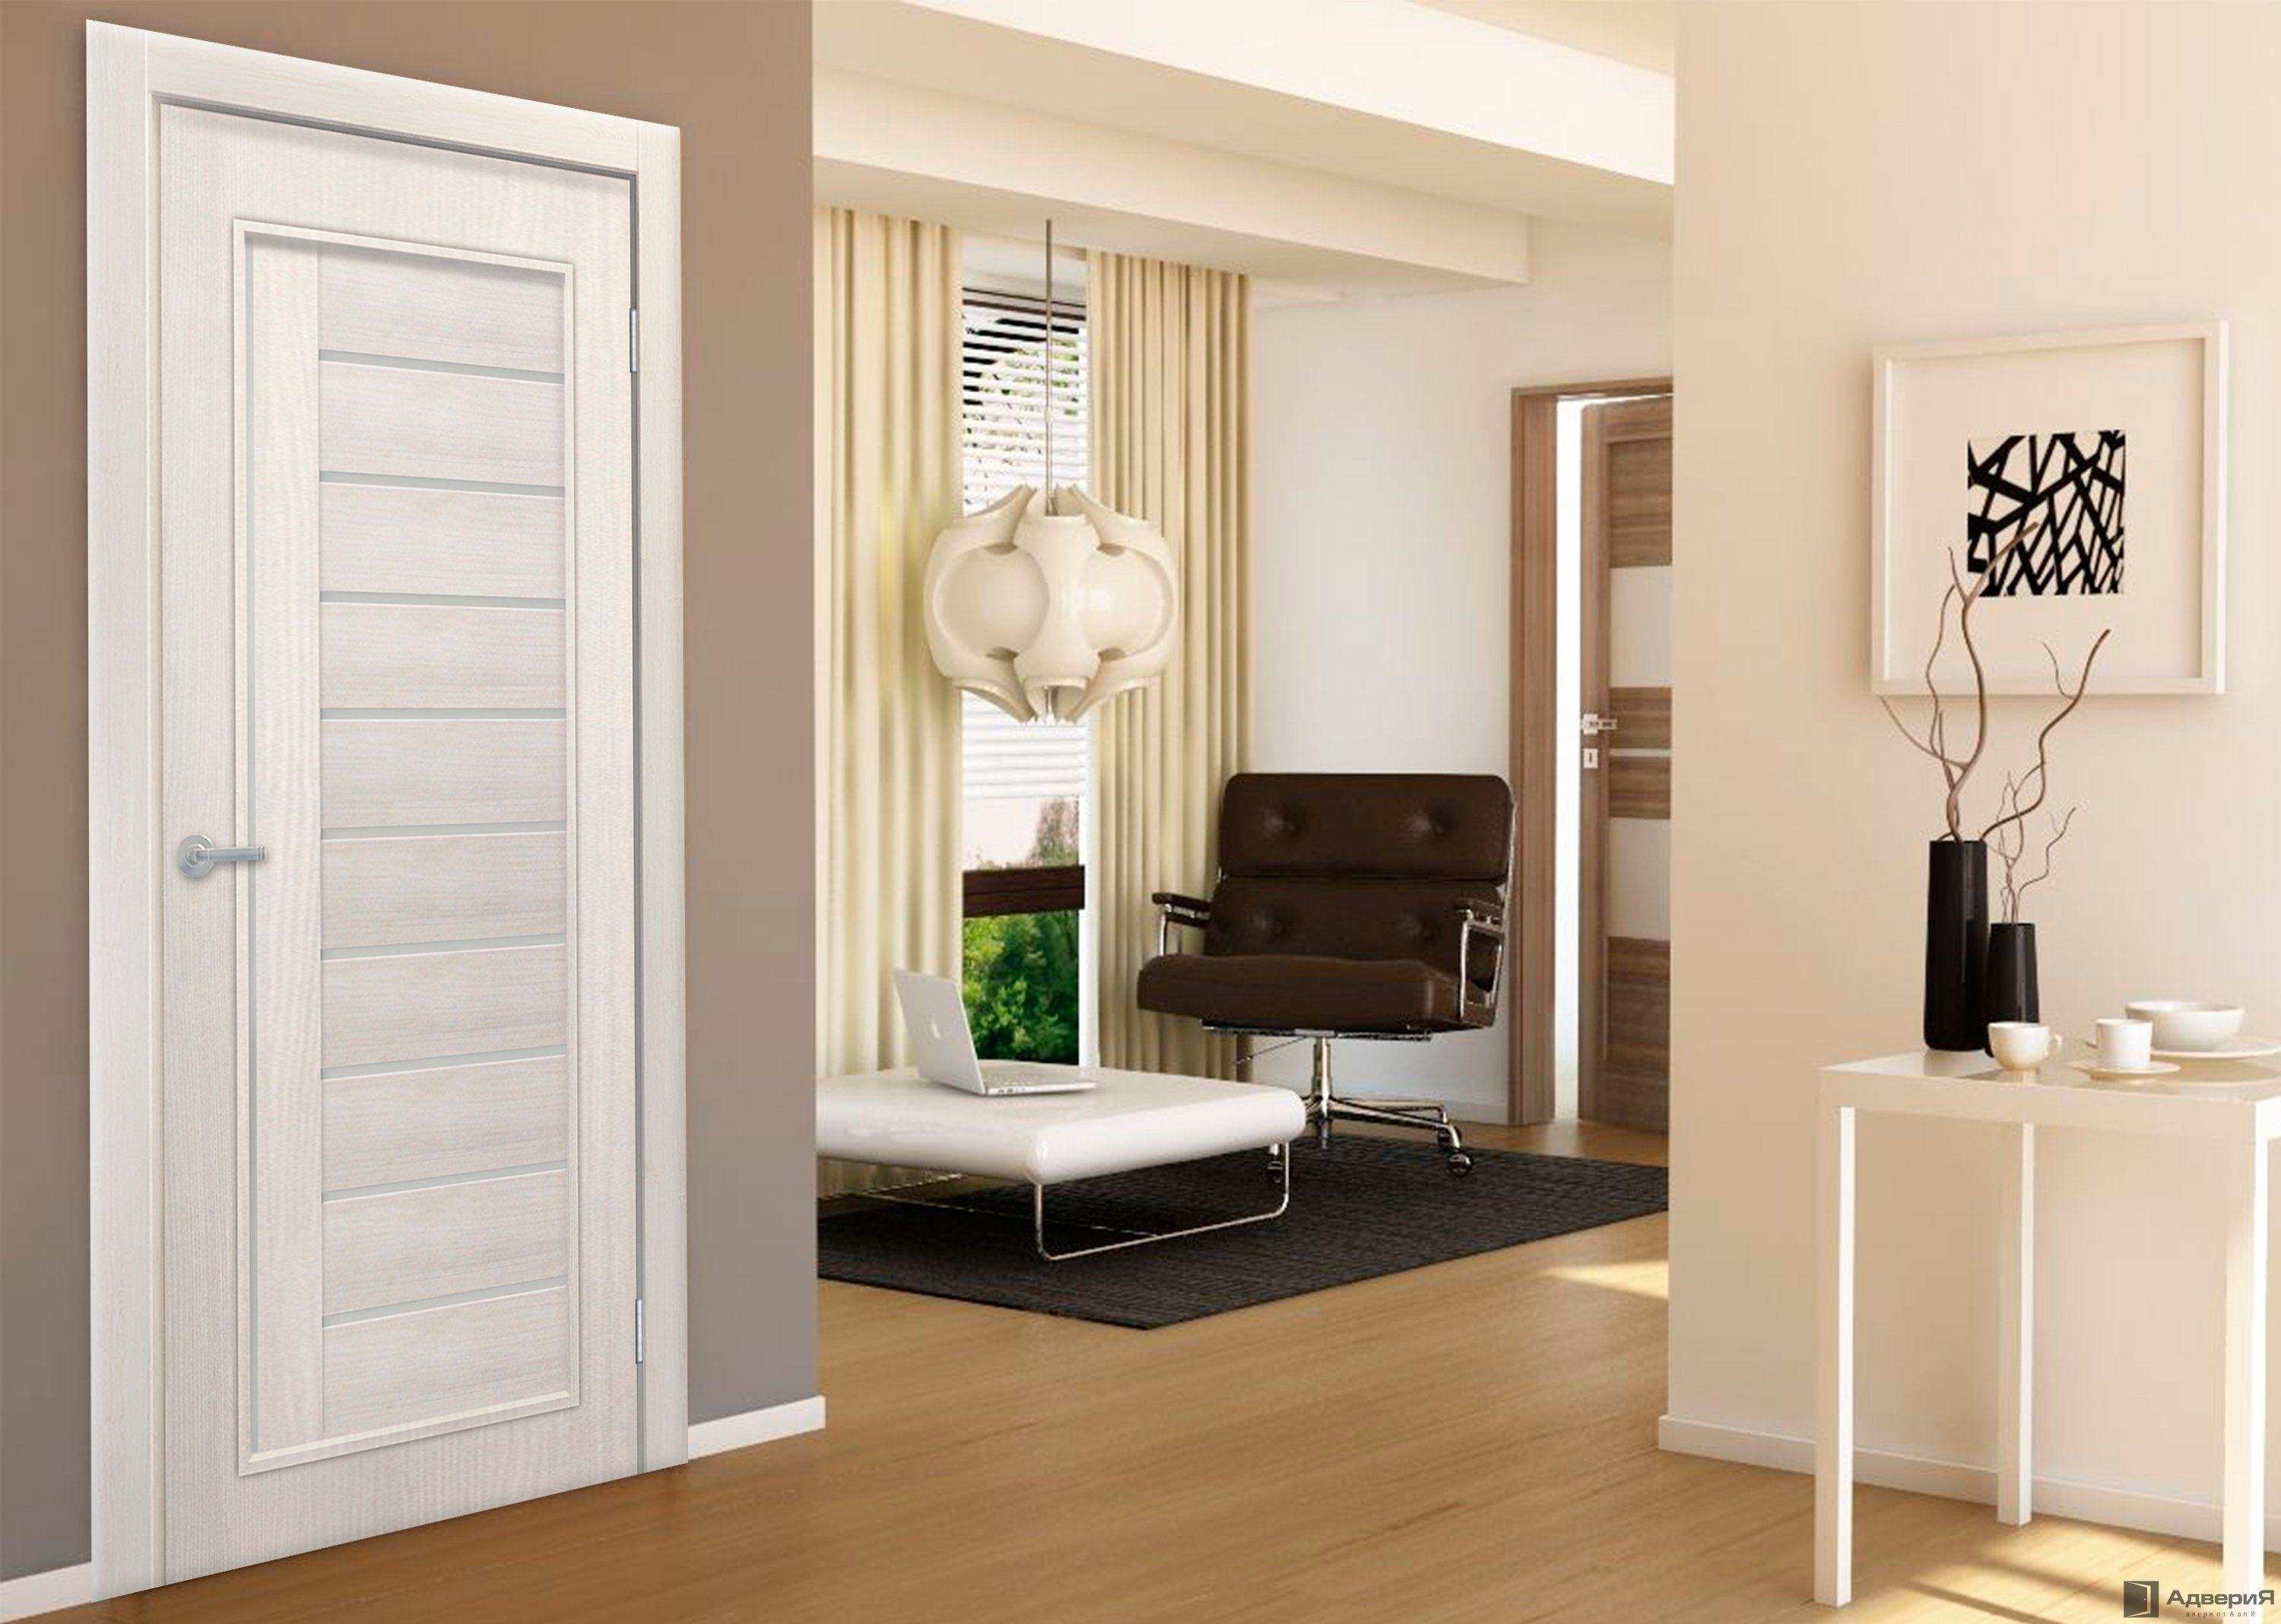
Doors can have different configuration:
- The door frame is assembled completely, with hinges and a hinged door. This is a very convenient option. Everything is ready for installation, it remains only to mount the unit in the opening.
- Cloth and box. In the presence of all parts ready for assembly. All elements are combined with each other, but not assembled. The consumer will have to independently assemble and integrate everything.
- Only the door leaf. All the necessary lumber you need to purchase separately. In this case, you have an advantage. You can adjust the box to the dimensions of the opening during assembly.
Door frames can be made of the following materials:
- From the bar. Such structures are very durable, but they require special treatment, since they are not outwardly attractive. They are treated with impregnations, stain, tinted varnish. At the exit very strong and wearproof blocks turn out.
- From fiberboard. In essence, this is compressed paper. This material is suitable for structures with the lightest doors possible. Door blocks of fiberboard are short-lived and quickly fail.
- From MDF. Door frames are the most attractive and durable enough. Their lifespan mainly depends on the top cover. This is usually veneer, laminate or PVC.
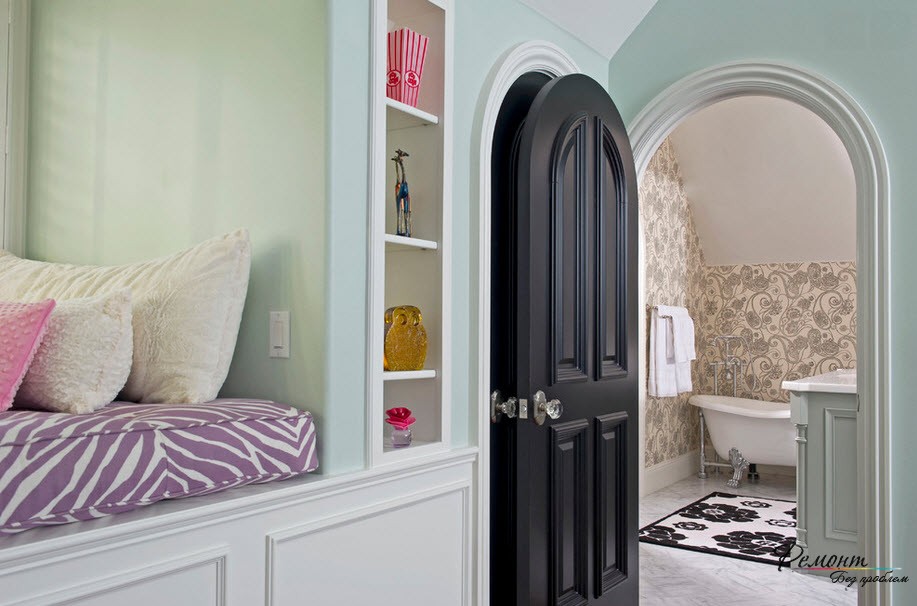
There are 2 types of door block shape:
- Complete box Consists of two side profiles, lintel and sill.
- In the form of letters P. This box has no threshold.
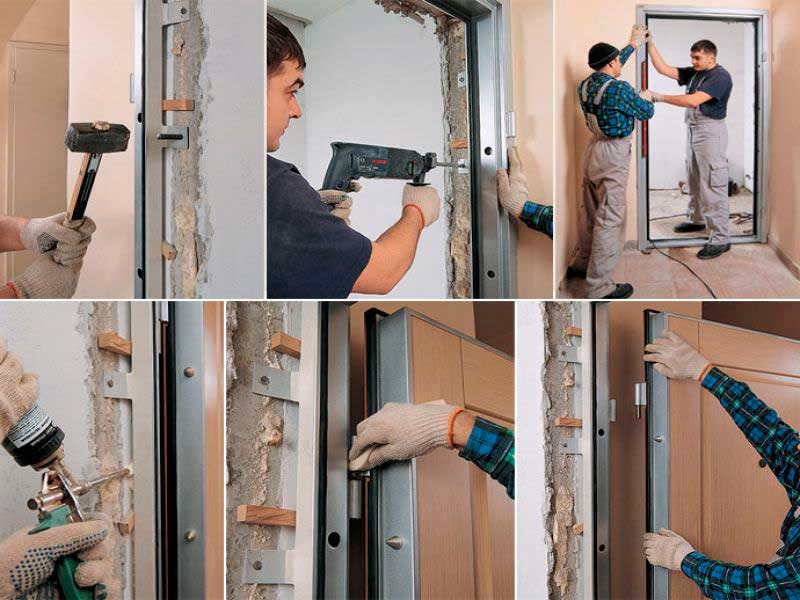
To replace the old door block with a new one, you need to step through the following steps:
- To dismantle the old door frame.
- Assemble the main bearing structure.
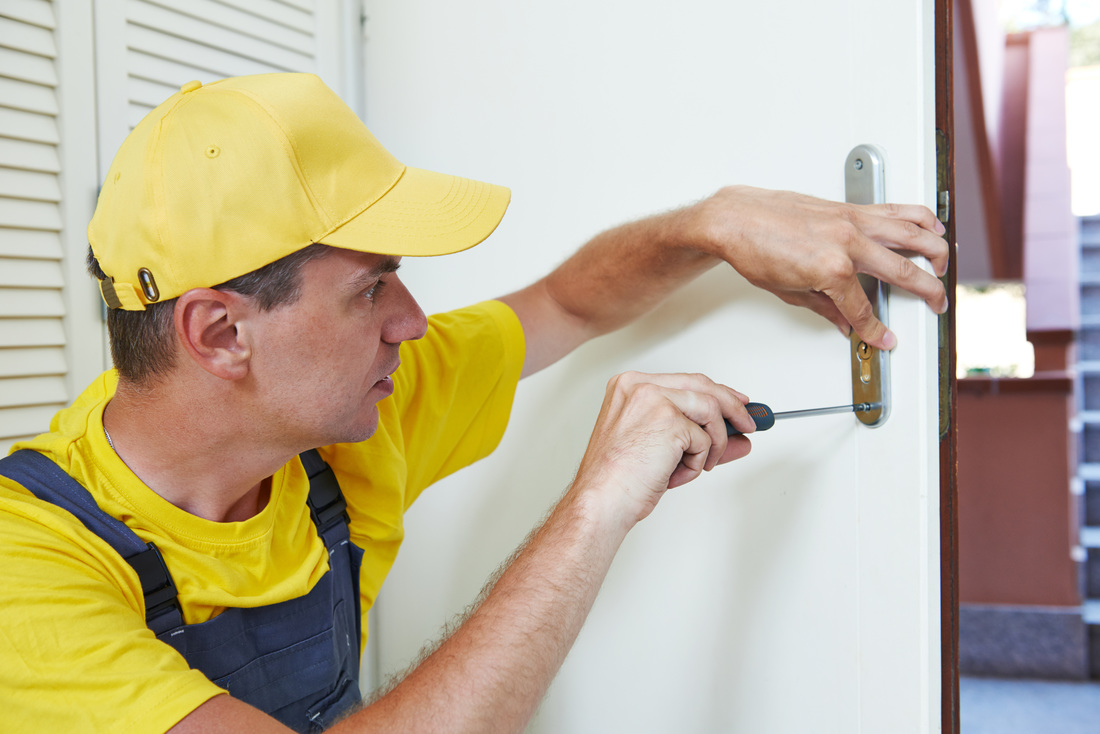
- To equip the door leaf and box with the necessary fittings.
- Properly install the box in the opening.
- Hang the door leaf.
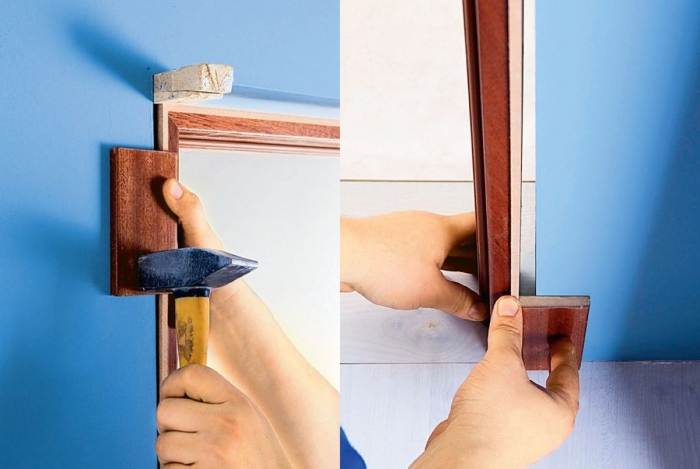
- Install trim.
When dismantling the old box pre-removed trim.The way they will be removed will depend on how they are fastened. If they are planted on liquid nails or glue, it is enough just to pry them with a tool and pull them to the side. The same applies to telescopic platbands, they are easily dismantled. If the rims are nailed, you will have to use a nail puller, and possibly an ax. When removing a feigned and stitch bar, it is not superfluous to cut them in the middle, this will facilitate their removal from the opening. Then you need to check the wall for strength, and if necessary, then strengthen it.

To do this, conduct work on concreting. If the doorway itself is weakened, then steel corners are set “in the girth”. It is possible to reinforce the opening with a steel profile or to apply both angles and a profile at the same time for guaranteed strength.
Due to the reinforcement of the old wall, the lifetime of the door frame will increase significantly.
Assembly methods
In spite of the fact that there are a lot of ways of assembly, the most common among them is only 2, and they are easy to do with your own hands. Profiles are attached drg to a friend at an angle of 45 and 90 degrees. Measurements while significantly different.
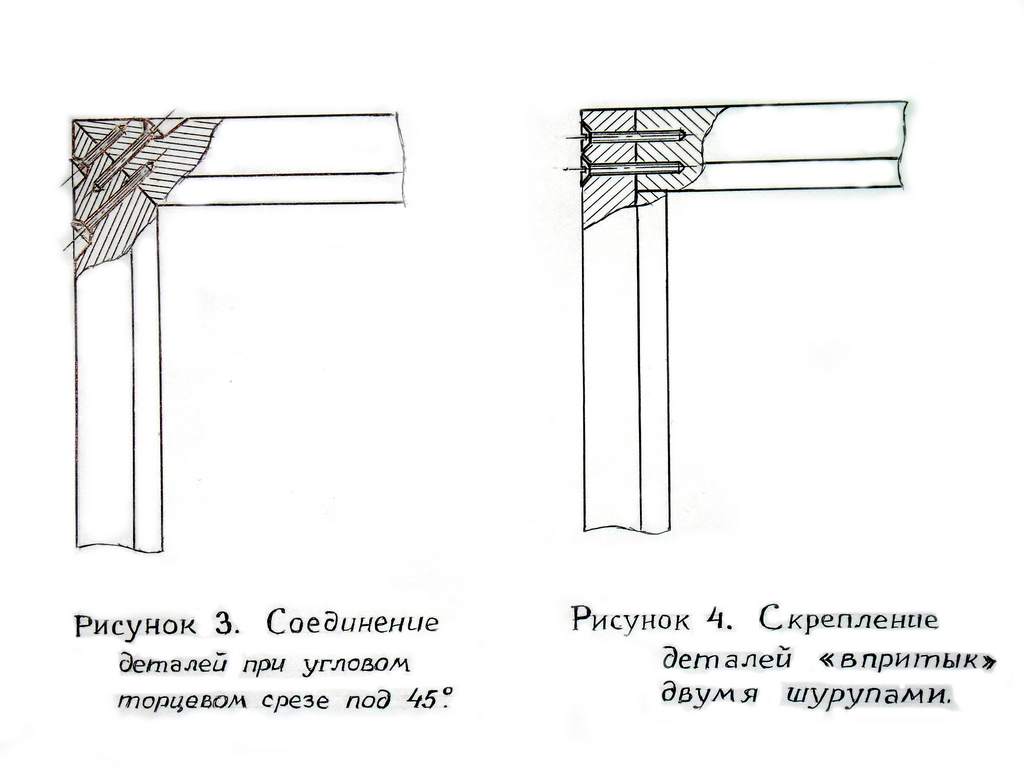
45 degrees
All work is done on the floor.We decompose profiles and perform measurements and calculations.
We will have 3 details:
- 2 vertical profiles;
- loop and feigned rack;
- jumper.
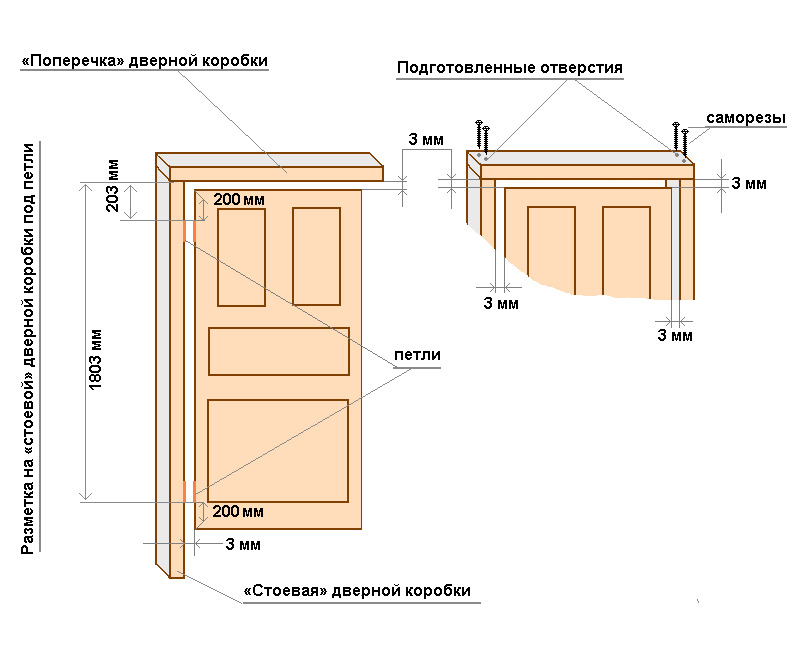
To calculate the height of vertical profiles, you need to add the height of the door, the thickness of the panel, 2 gaps of 3 mm on each side and the thickness of the threshold, if provided. The length of the threshold and jumper folds similarly - the width of the door, the thickness of the vertical profiles are measured and added and 2 gaps of 3 mm are added. After calculations, you need to make a markup and sawn timber.

Next you need to note part of the profile of the porch, which will be deleted. The marked part must be cut, further cut to perform the depth of the protrusion. Sawed bars put around the door, denoting the gaps by inserting pieces of cardboard. We mark the fastening points of future loops, retreating from the bottom and from above by 20 cm. We attach the loops to the marks and bait the screws to the corresponding bar, noting the place for the material sampling and the point of the subsequent screwing. According to the mark we make, choose material with a chisel to a depth corresponding to the thickness of the hinge leaf. Screw the hinges into the grooves.We attach the top and second vertical profiles, keeping the gaps, and check the perpendicularity of the elements with respect to each other. Then we connect with the help of screws. They must be screwed at a 45 degree angle to the surface and perpendicular to the cut of the joint. Holes for screws should be drilled in advance.

90 degrees
In this version of the assembly, we will fasten the upper timber over the side. That is, it must be put on top. The length of the side profiles is calculated as follows: we measure the height of the door and add 2 gaps of 3 mm each if the threshold is established. If the threshold is not set, add 1 cm for the bottom gap so that the door does not touch the floor and does not scratch the floor. The entire assembly is similar to the previous one, except that the screws need to be screwed into panels perpendicular to the surface.
We looked at how the door frame would be assembled., but before installing a new one, it is necessary to dismantle the old block. Pre-remove trim. When removing a feigned and stitch bar, it is not superfluous to cut them in the middle of the height, this will facilitate their removal from the opening.Then you need to check the wall for strength and, if necessary, then strengthen it.

To do this, also conduct work on concreting. If the doorway itself is weakened, then steel corners are set “in the girth”.
The opening can be strengthened with a steel profile or you can apply both angles and a profile at the same time for greater strength.
Installing the door block of an interior door is not an easy task, but with a competent approach and a detailed study of the nuances and peculiarities, almost everyone can do it. With the help of an additional element, when installing a door in a wall of a standard thickness of 70 mm, an installation bar is installed to reduce the doorway between the wall and the box. The casing then installed will hide the additional element. This method is suitable when the doorway is even in height, but slightly larger than the required width.
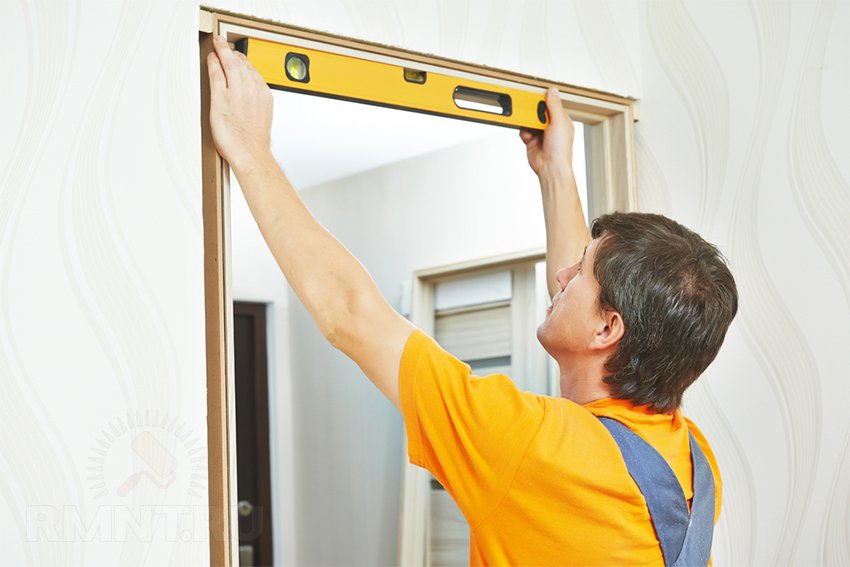
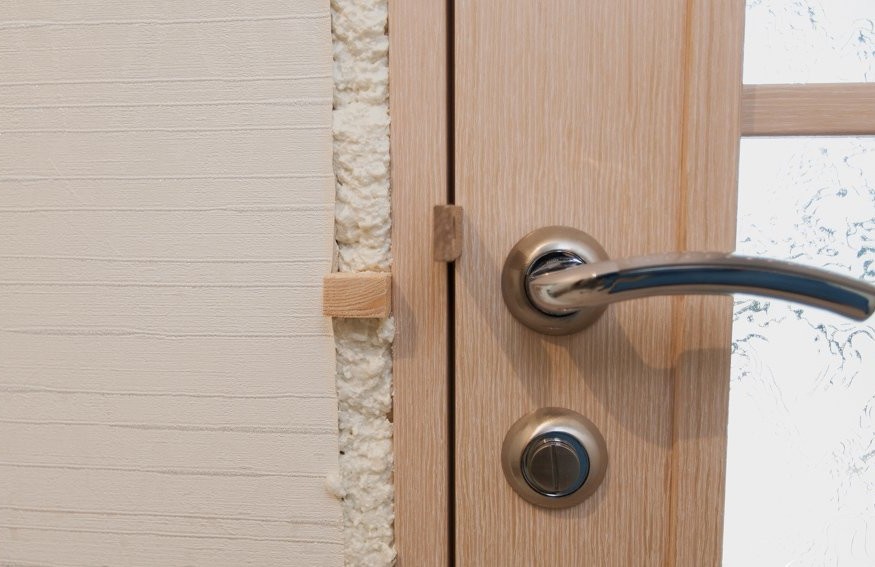
On mounting foam
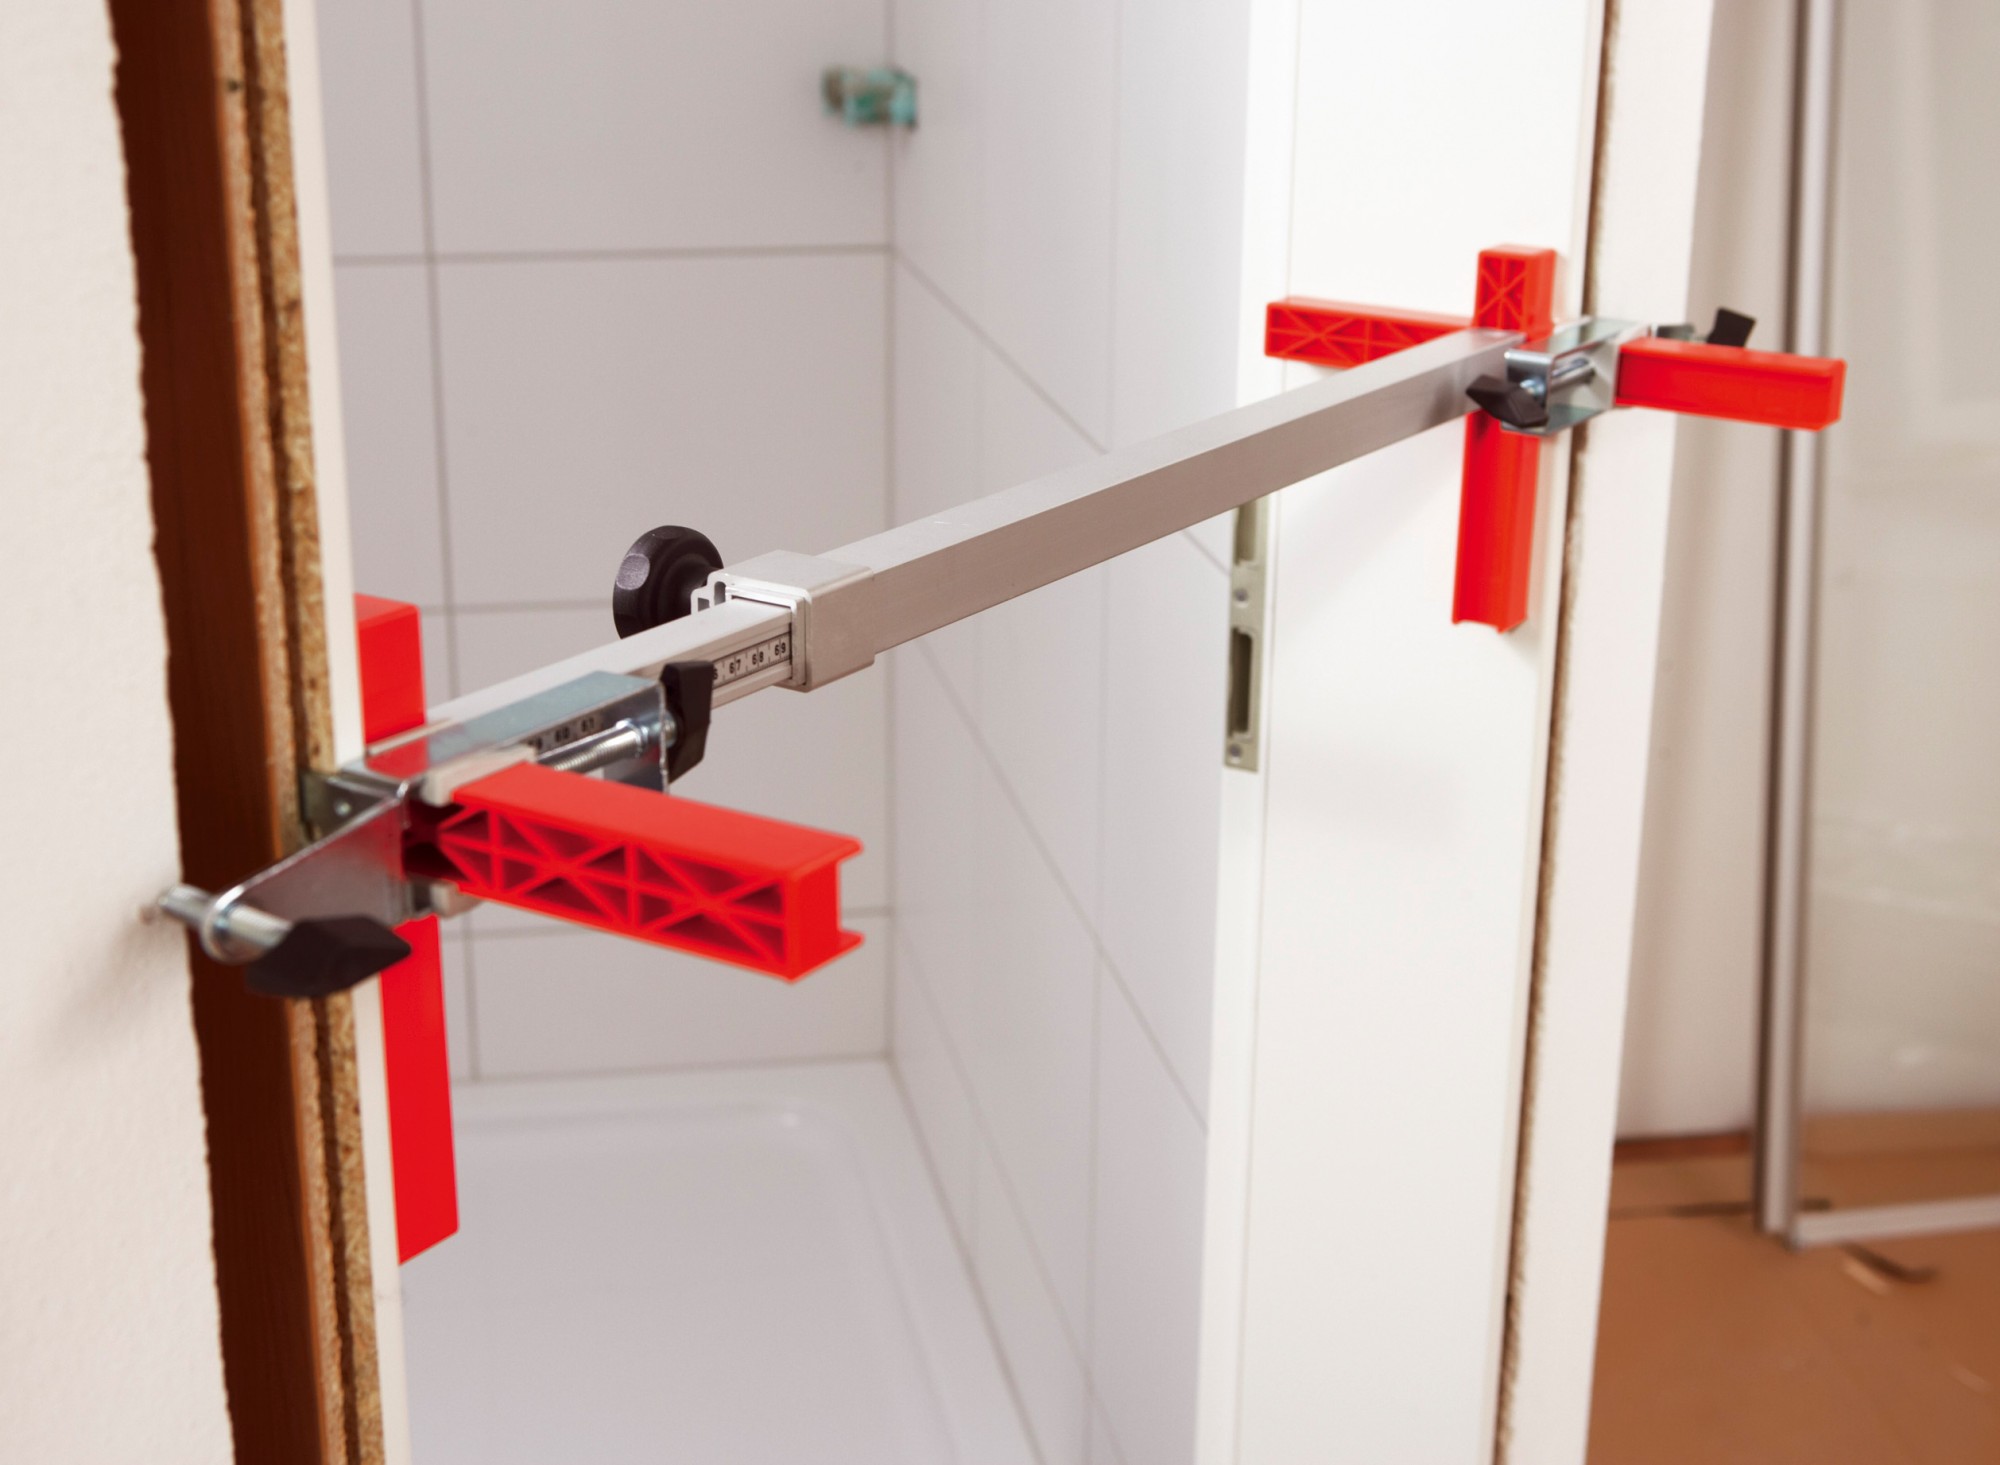
The door unit with a fixed door and inserted struts, preserving the gap between the door and the box, is placed in the prepared opening. The design is carefully checked with a plumb and level on the subject of vertical location and fixed with wedges in the wall opening.It is necessary to level very carefully to avoid further skewing of the door in the box. Then the gap is carefully filled with foam.
It is necessary to apply foam slowly, in small portions.
First, a thin layer, then additional, until the opening is filled. The main thing - do not overdo it. The box will stick solely on the foam. After it dries, the surplus is cut off and the trim is installed.
How to fix?
To fasten the door to metal hangers, you will need metal fasteners used to connect the structures for drywall. You will need at least 4 of them. The door with the installed accessories is hung on the box, in the technical gaps are installed spacers or pieces of cardboard. Then the suspensions are screwed outside the box. Next, insert the block into the opening and secure it with wedges. The design is properly aligned with the level. Next we need to note where we will mount the suspensions. On the marked sites, choose the material for the plates. Again we align the construction and fix the plates to the wall. We deepen the grooves with the screwed-in hangers, fill the gaps with foam.


When fastening the anchors through the anchors, they are drilled in the marked places of the side profiles. First, mark up the space for anchors on 2 on each side. Using a 14 mm drill hole, make a hole for the plug. Next, we make a hole for the anchor using a 10 mm drill bit. Install the box in the opening, align and fix with wedges. Then we drill the concrete with a special drill and install the anchors. The box installed with anchors is very durable. If they are replaced with screws, then the plugs will be smaller in size. At the end are established platbands. This method is ideal for installing particularly heavy doors.
Often, for greater reliability, the door frame is fixed to anchors or screws that are hidden under the hinge leaves.
Between the screws need to drill another hole in the hinge flap. It is through it that the anchor will be attached. From the antechamber fixation is carried out under the lock plate. Thus it turns out 3 points of attachment. Spacers are installed under the door and spaces between the box and the wall are foamed. When the foam dries, its surplus is removed and the trim is attached.

What if the door hits the box?
Sometimes self-installation of the unit is not ideal, the door can cling to the profile and close with difficulty. It is important to understand why this happens - the box or the door itself is swollen, and how these situations are resolved.
If the box led, you need to check the loops and make sure that the problem is not in them. Most likely, the mounting foam swelled with temperature drops and the box was slightly deformed.
To fix this, you need to drill the box through with long screws and hide the holes with plugs in color. You can also use anchors.

If the door is made of wood, then you need to remove the lock and sand the end. For this you need to put sandpaper on a plank or bar to get a flat surface. During grinding, the door must be checked for contact. If the problem is fixed, we put the lock in place, and the polished butt is tinted and varnished.
We considered the most common examples and options for installing interior door frames, as well as mounting methods. This will help to properly prepare and install the door unit with your own hands. With the quality of work carried out problems in the operation of the door will not arise.
Learn more about how to properly install the interior door, you can learn from this video.


