Choosing trim on the door
It is difficult to imagine a house or apartment without a door. The purpose of the entrance doors is, first of all, the protection and preservation of heat, and the main function of interior doors is the zoning of space in the room. The variety of materials of which today doors are made is amazing, but door leafs cannot be installed without trim, because they give the canvas a finished and aesthetically attractive look.
Special features
What is this trim? And why without them the door does not look so attractive? To answer these questions you need to understand all the features of these elements.
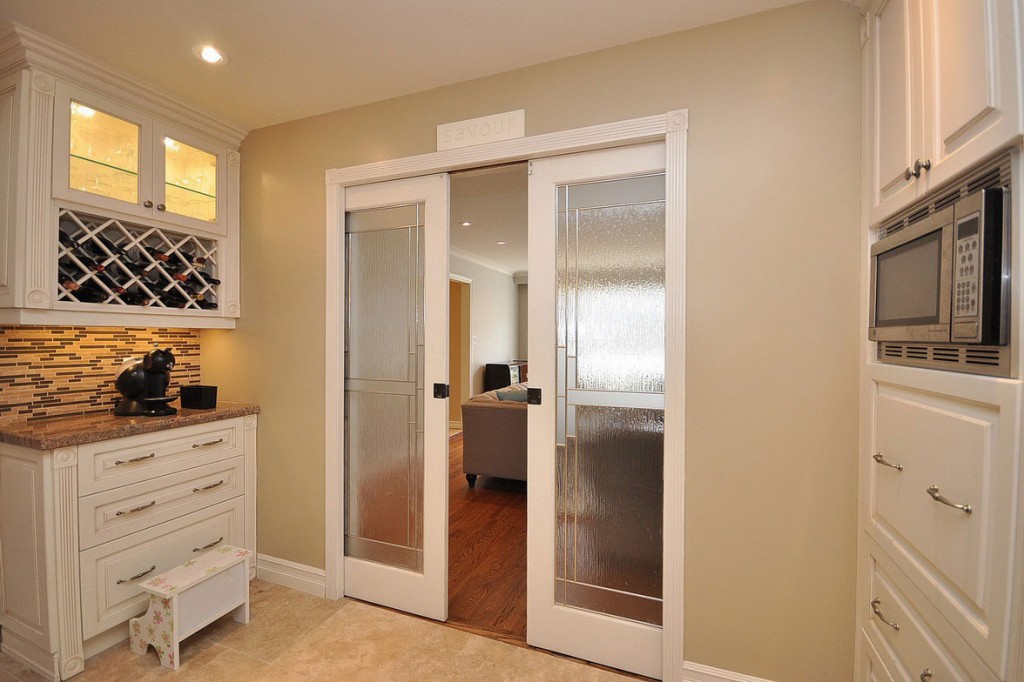
Platbands are the strips installed along the perimeter on both sides of the entrance aperture, in which the door is located. The main function of the trim is to cover the gap between the wall and the door frame.
They perfectly hide the individual elements of construction and installation (the ends of the door frame, screws, fasteners, mounting foam), and also prevent the penetration of drafts, thereby maintaining the heat in the room. Equally important is their decorative function. Correctly selected and installed trim plates decorate not only the door itself, but also the opening in which it is installed.
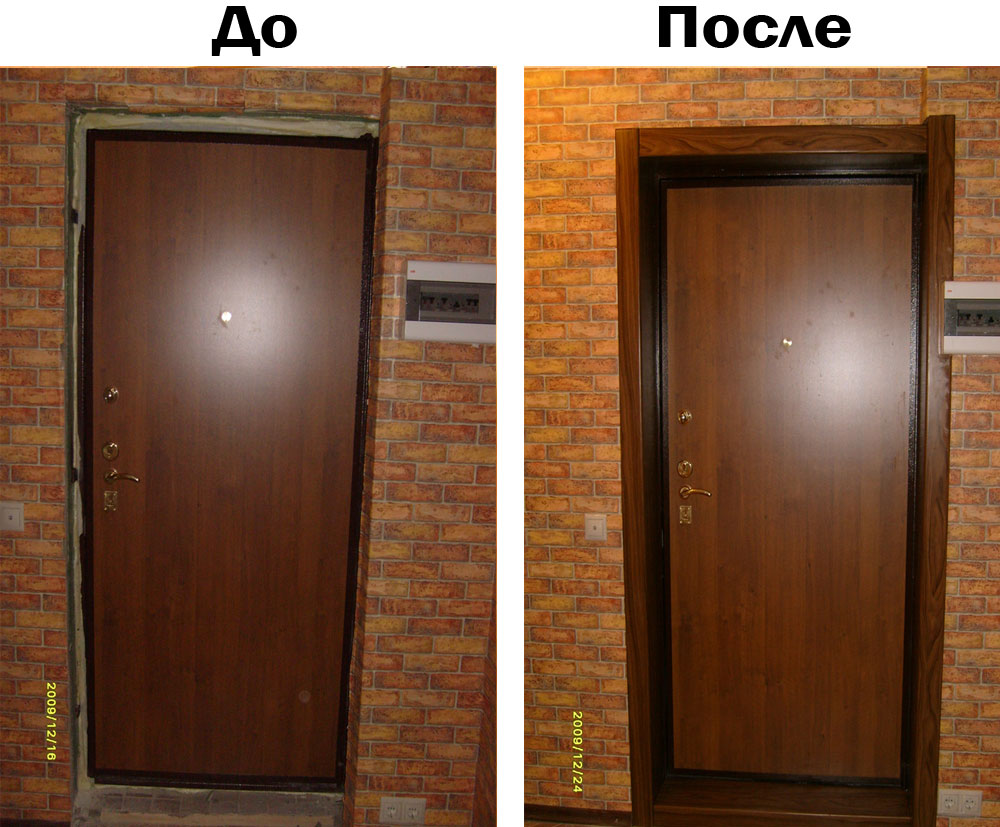
The installation of the platbands is the final touch in the transformation of the whole room, therefore, their selection and installation should be approached very carefully, having thought through all the details and having studied not only the features, but also the types of these important elements.

Kinds
Door trim have their own classification, thanks to which they can be divided into types on several grounds. The most significant differences include the form and method of installing these elements.
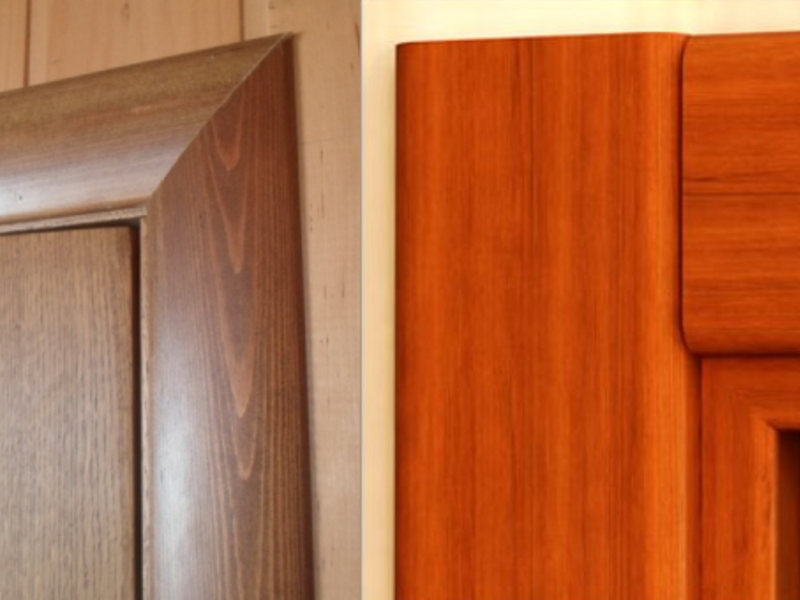
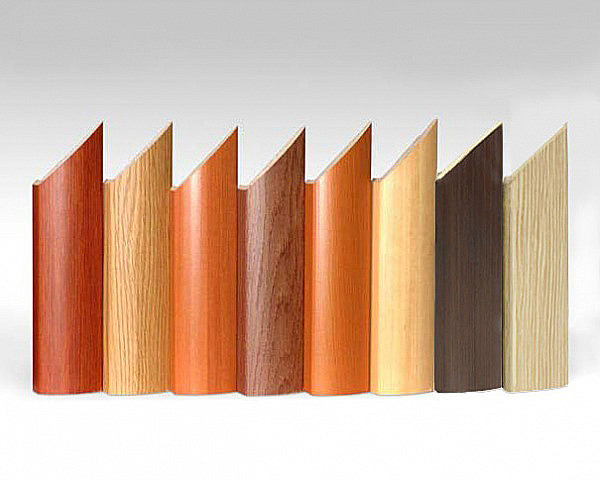
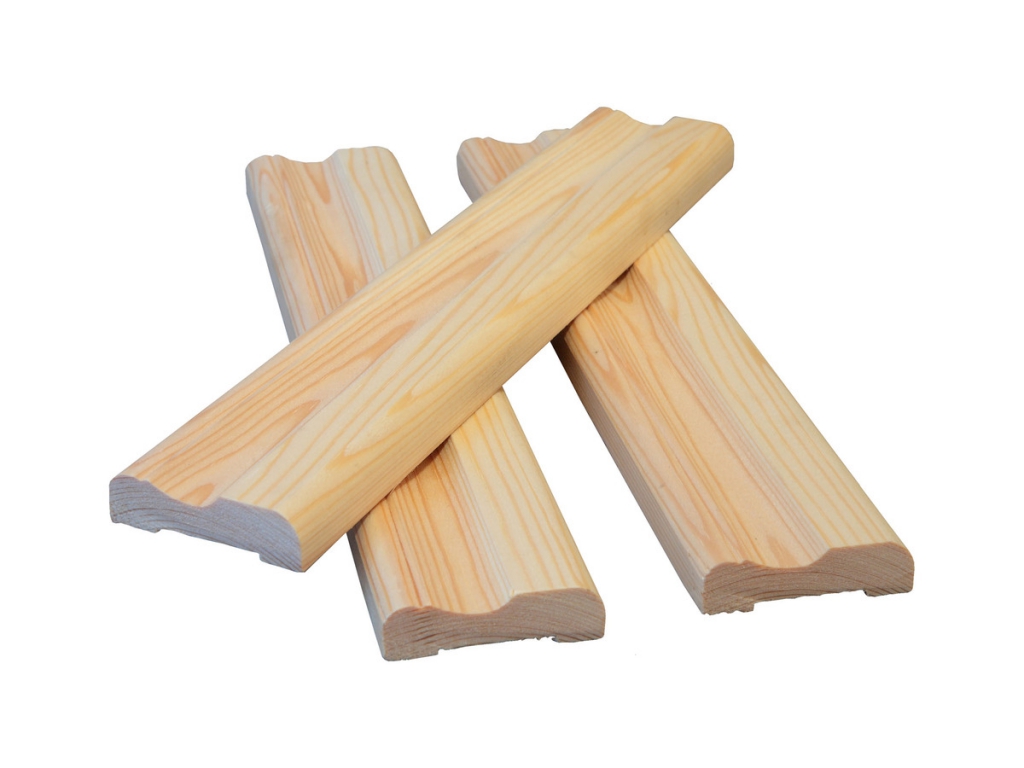
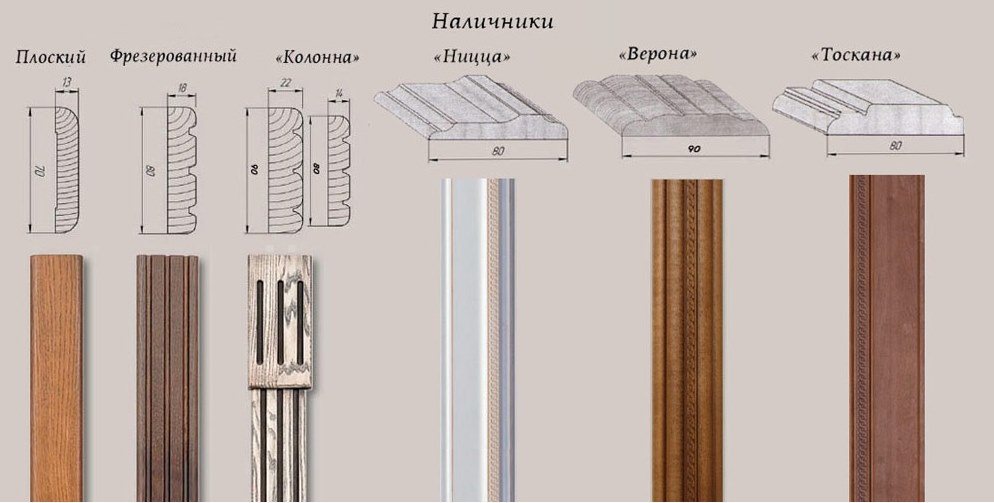
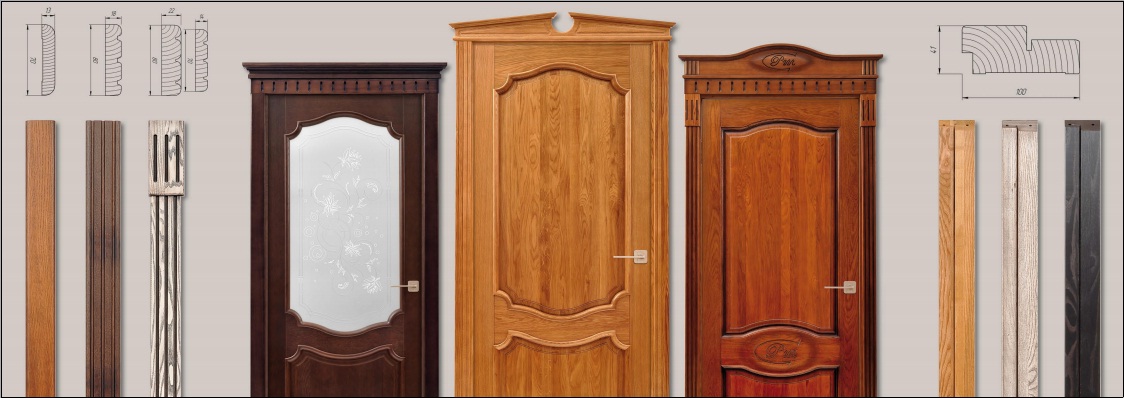
The platbands mounted around the perimeter of the doorway, as a rule, have a rectangular shapebut differ from each other in the shape of the front side. It is the shape of the surface that makes it possible to subdivide them into flat, semicircular, and figured ones.
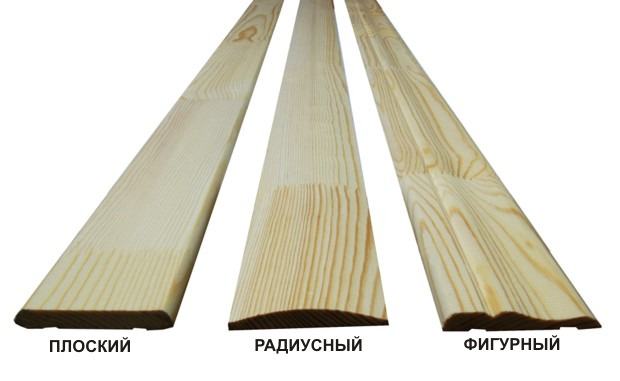
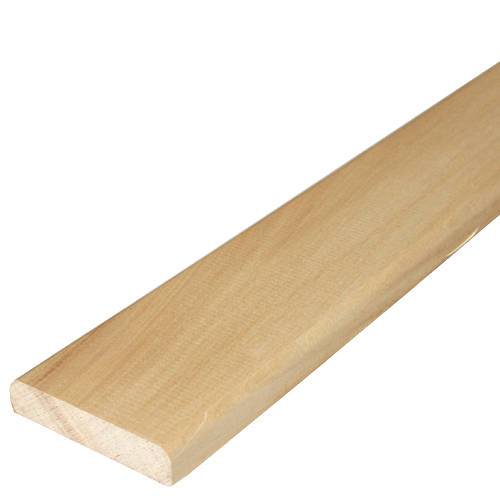
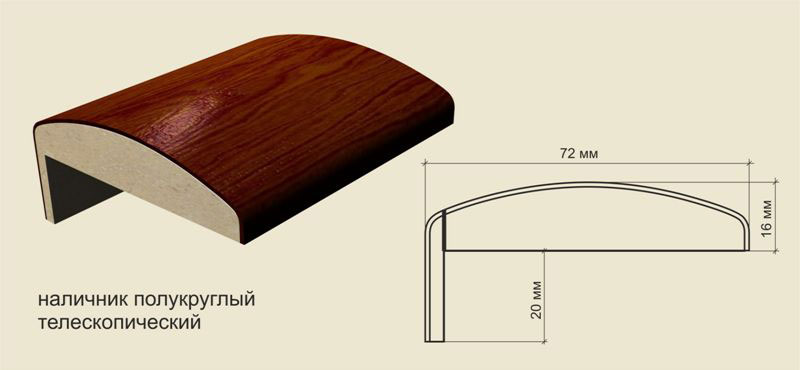
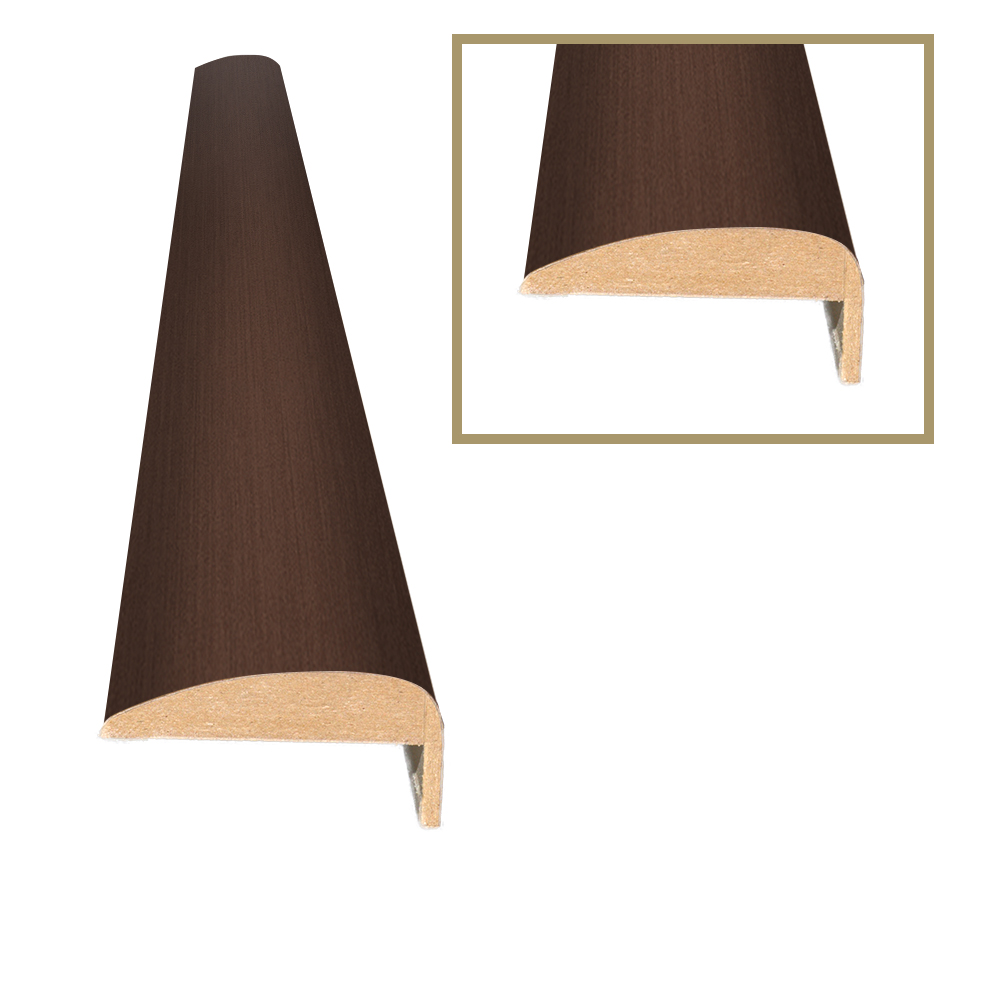
Caps in shape are flat and, as the name suggests, a flat surface, in cross section, such a bar has the shape of a rectangle. In semicircular platbands, the surface is convex, and depending on the designer’s idea, it may be symmetrical in the shape of a crescent, or maybe slightly shifted to one side of the bar and resemble a falling drop. Flat and semi-circular views are among the most common platbands: they are most often installed on interior doors.
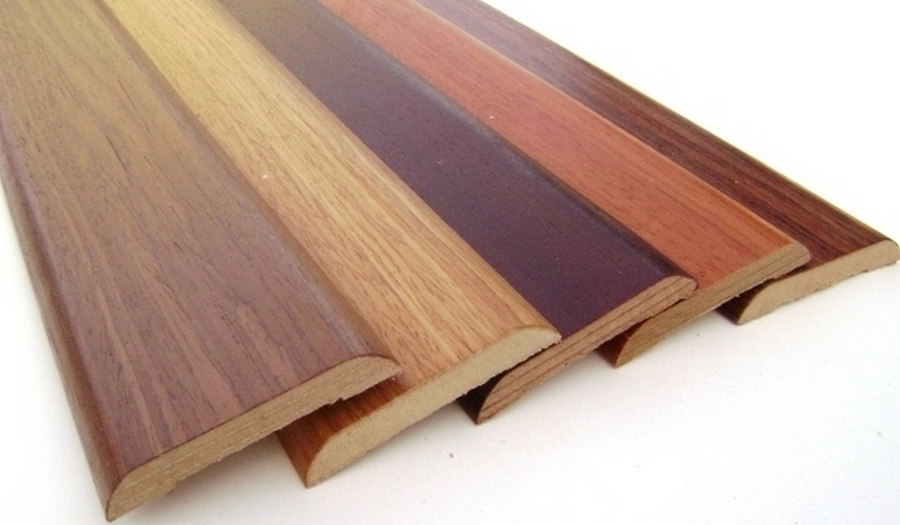
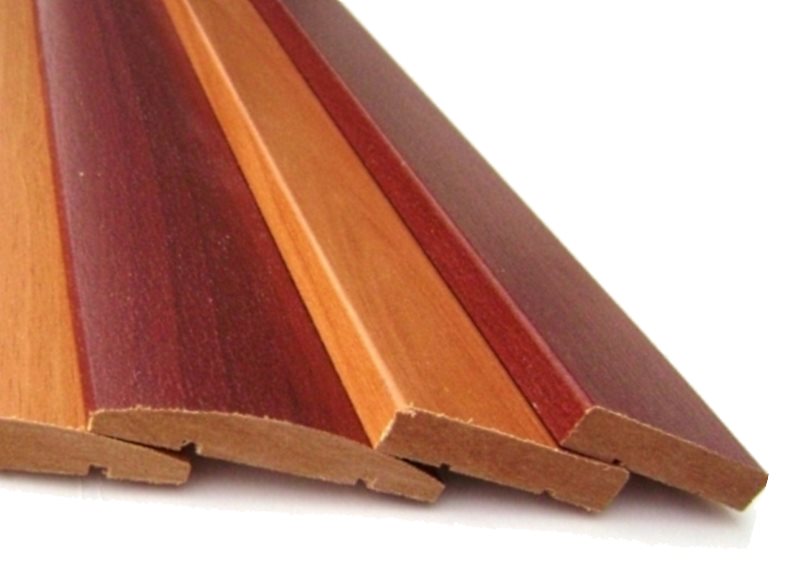
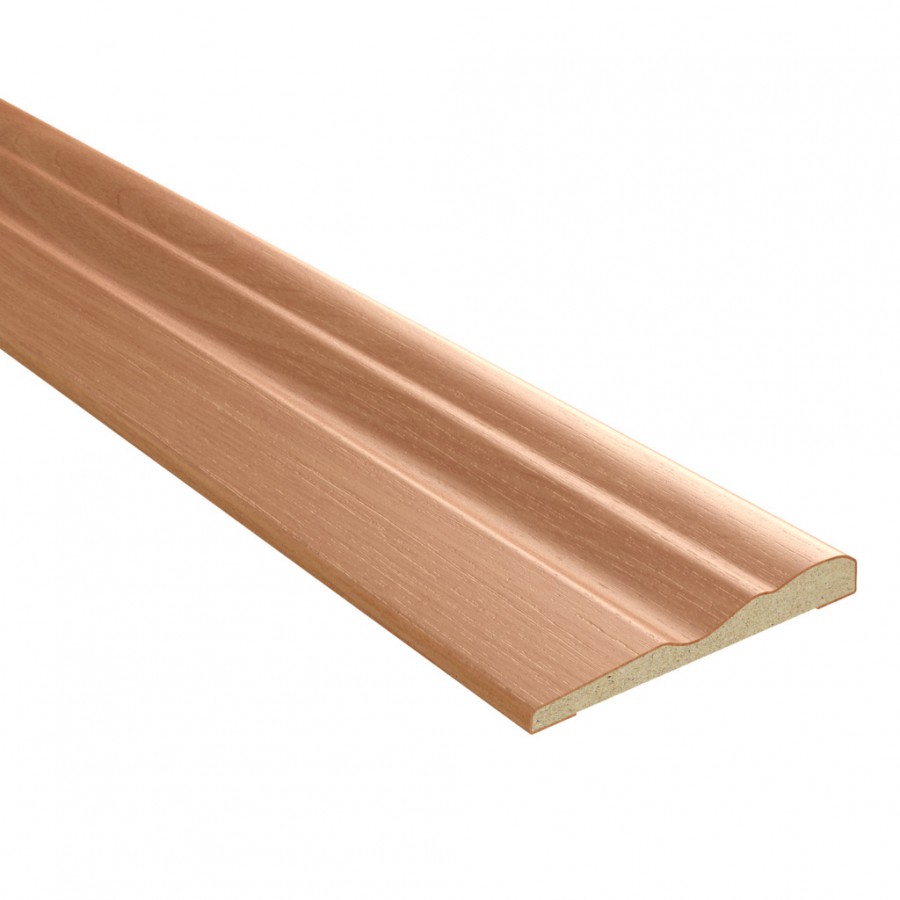
A more expensive and not so common option is curly platbands. A distinctive feature of this species is the presence of a certain relief on their surface. The relief pattern is located along the plank and is a figured hollows in the form of furrows, interspersed with elevations in the form of rollers. Embossed platbands give the doors a rather attractive and original look.

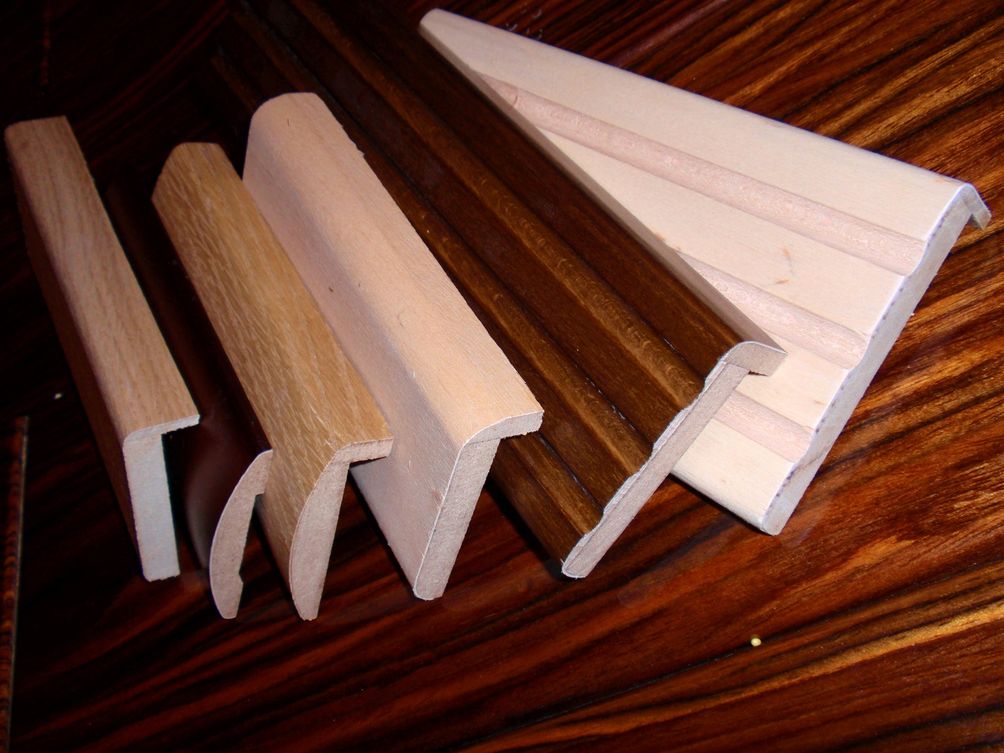
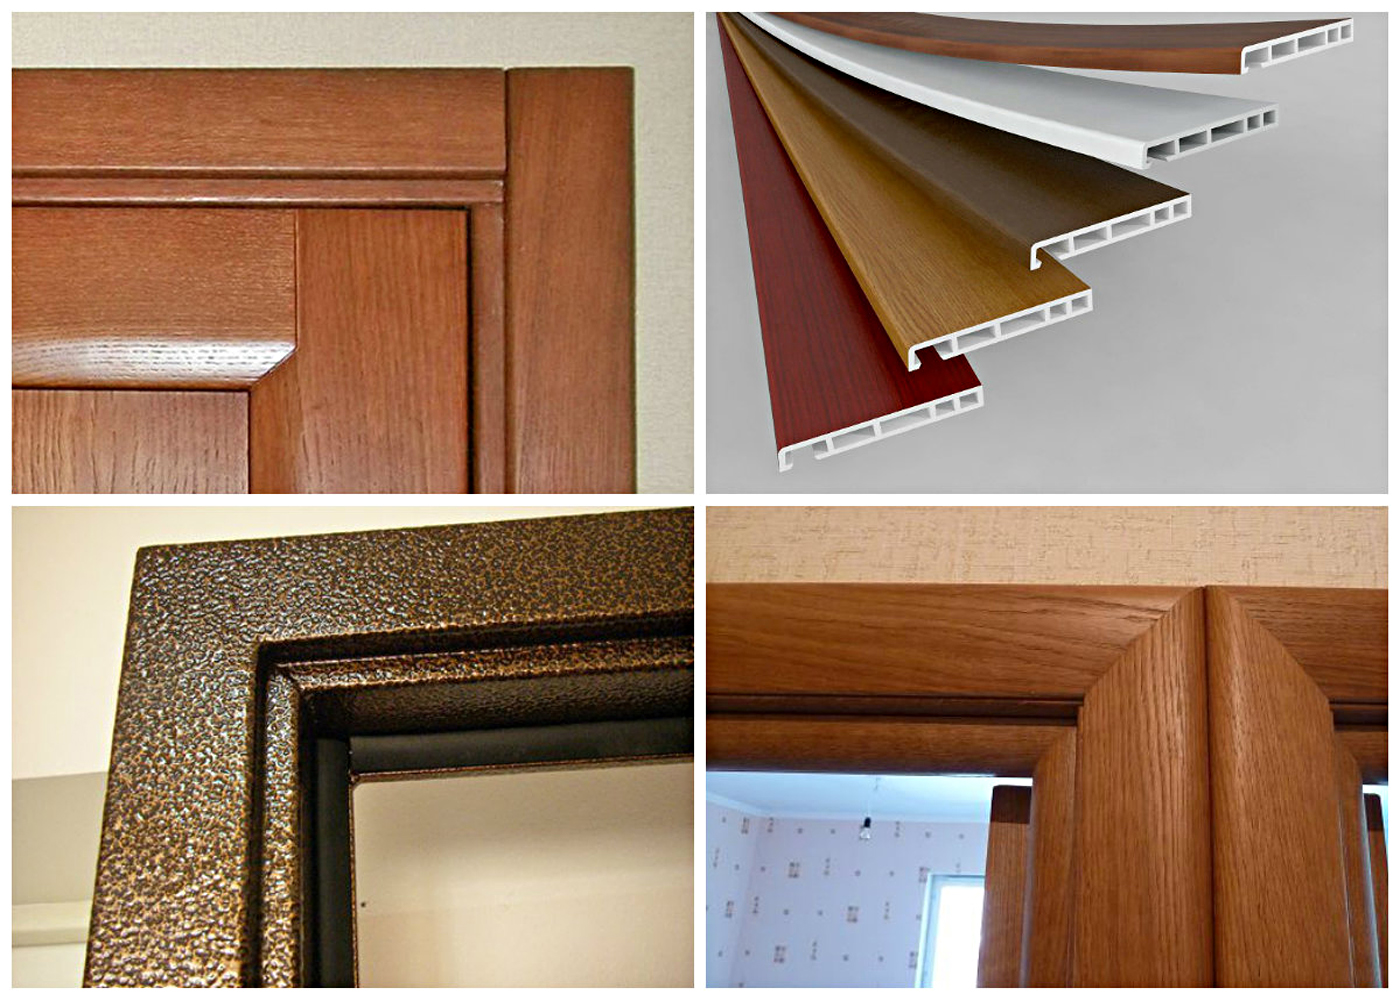
The method of installation is another feature that allows to classify the platbands. Depending on what and how the strips are fastened in the opening, they are divided into overhead and telescopic ones.
The more common option is overhead strips.In order to install them in the opening, nails, screws, PVA glue, liquid nails or sealant are required. It is with these fasteners that the overlays are attached to the wall.

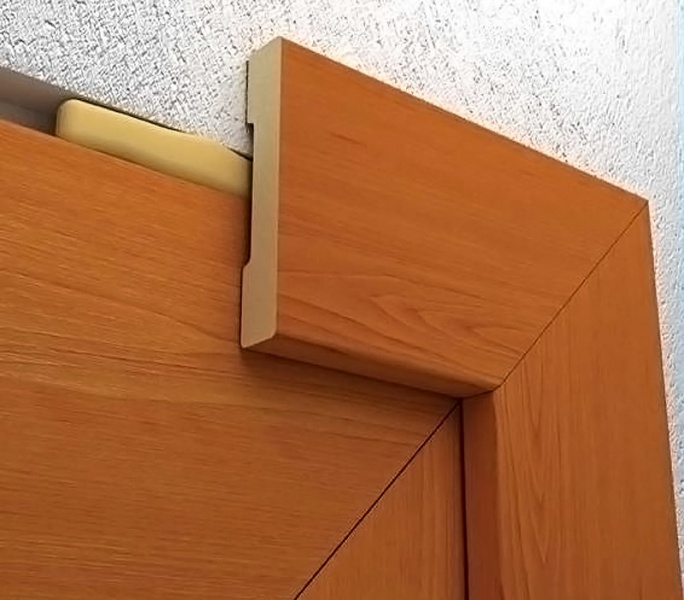
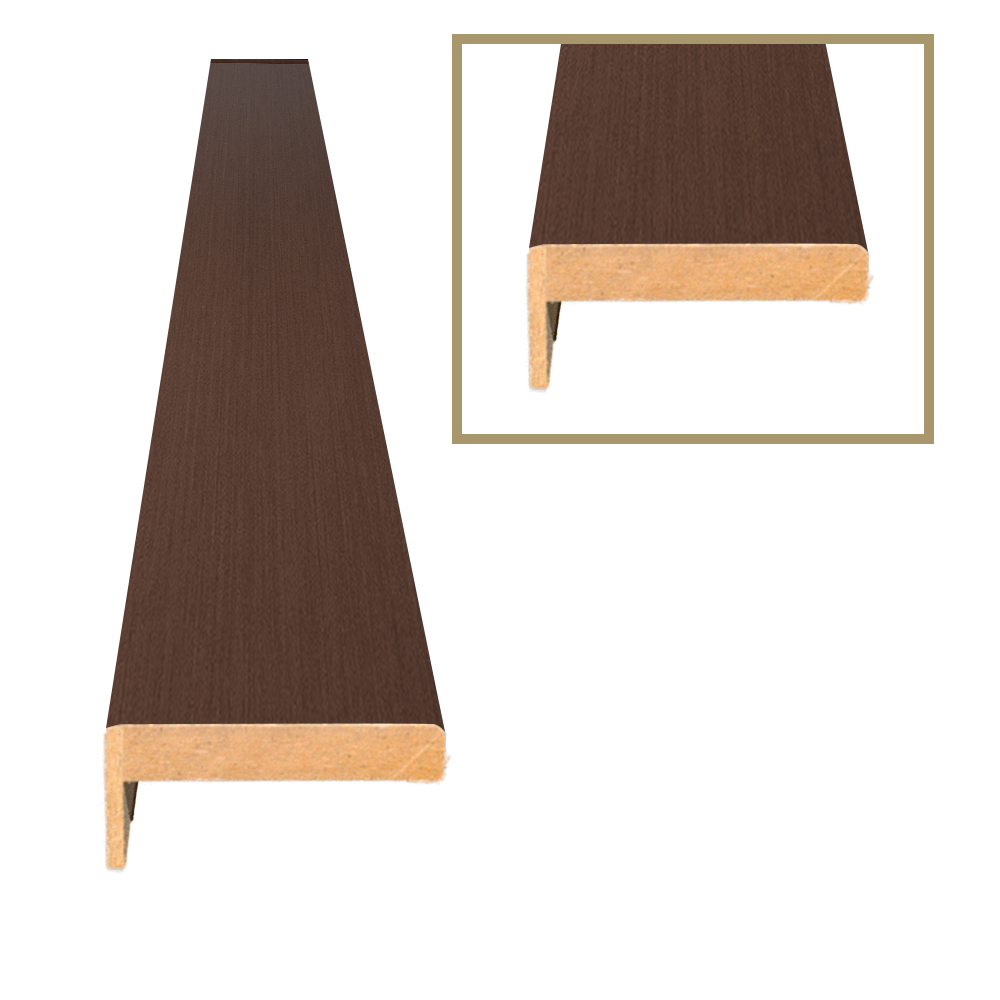
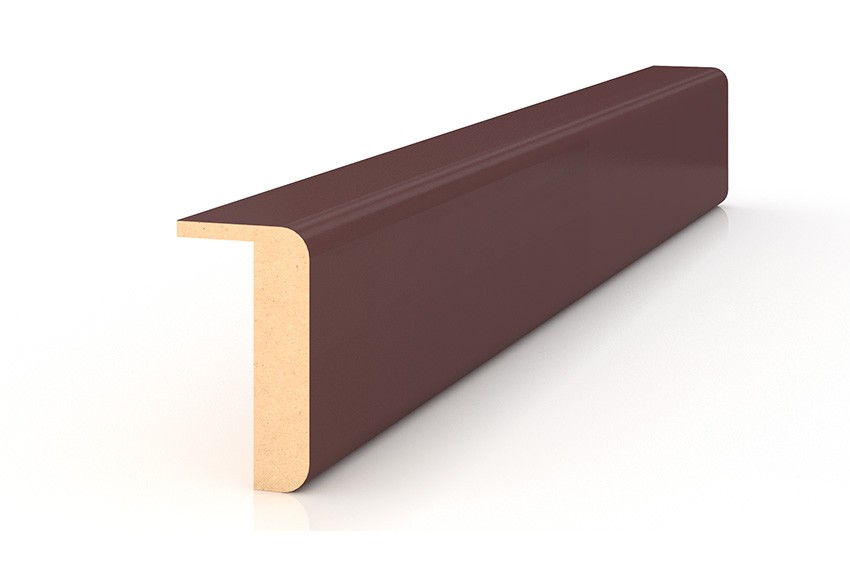
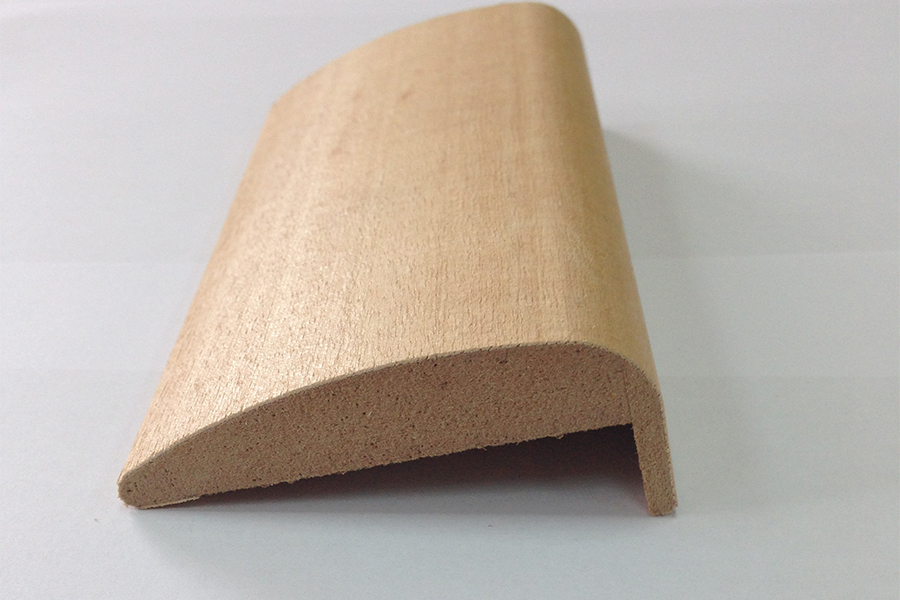
Telescopic platbands are attached in a different way: they do not need to be nailed or screwed to the wall with self-tapping screws - they hold perfectly due to their special L-shaped shape, which is their undoubted advantage. One edge at such a strip has a rounded shape and is adjacent directly to the wall, and the other is bent in a special way and when installed goes into the recess (groove) of the box, firmly connecting with it.
This mounting method allows you to avoid installing special laths, if the box thickness does not exceed the wall thickness by more than 10-15 mm. If necessary, the telescopic slats can be extended to a length of 1-2 cm. Thus, they perfectly hide the gap between the box and the wall.
Telescopic platbands can be attached not only to the box, but also to the fittings. If the distance between the wall and the box exceeds the mark of 15–20 mm, then mounting of the panels is not avoidable. Most often, the front door is installed with dobory, since the opening almost always has a greater thickness than the box.
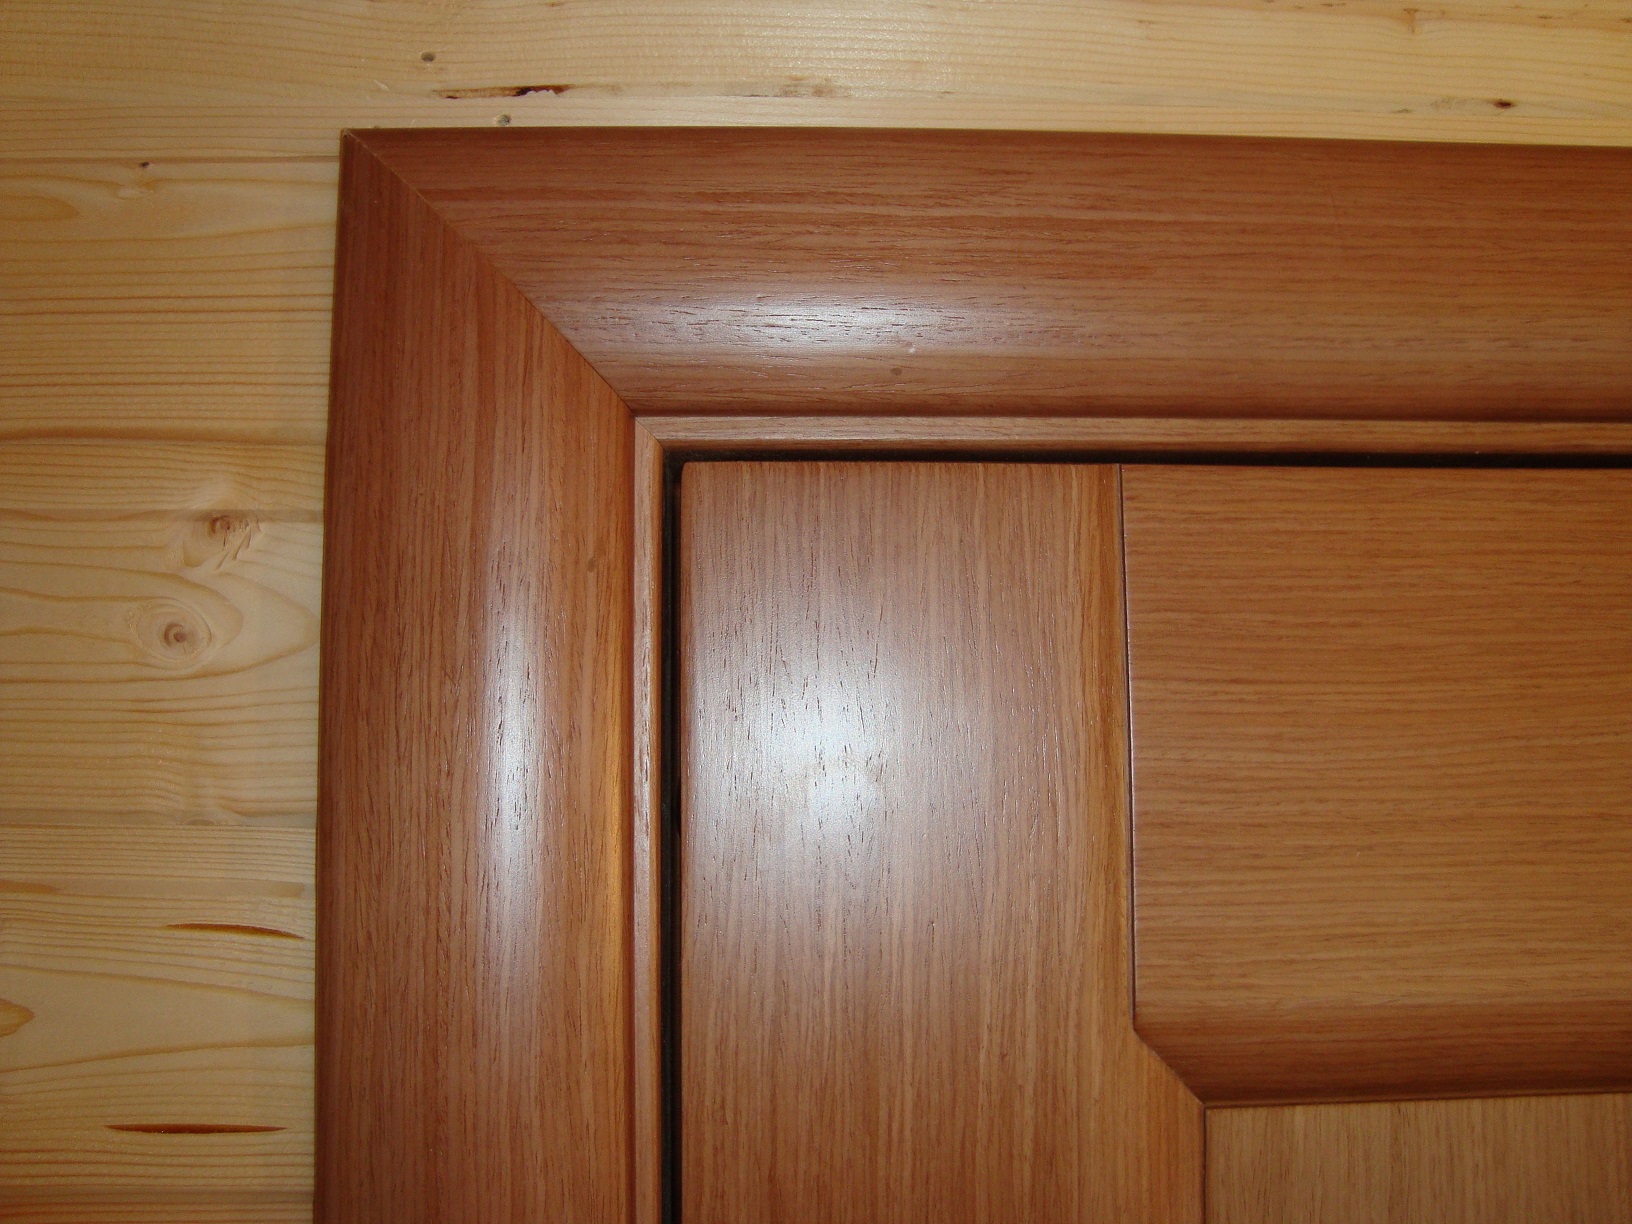
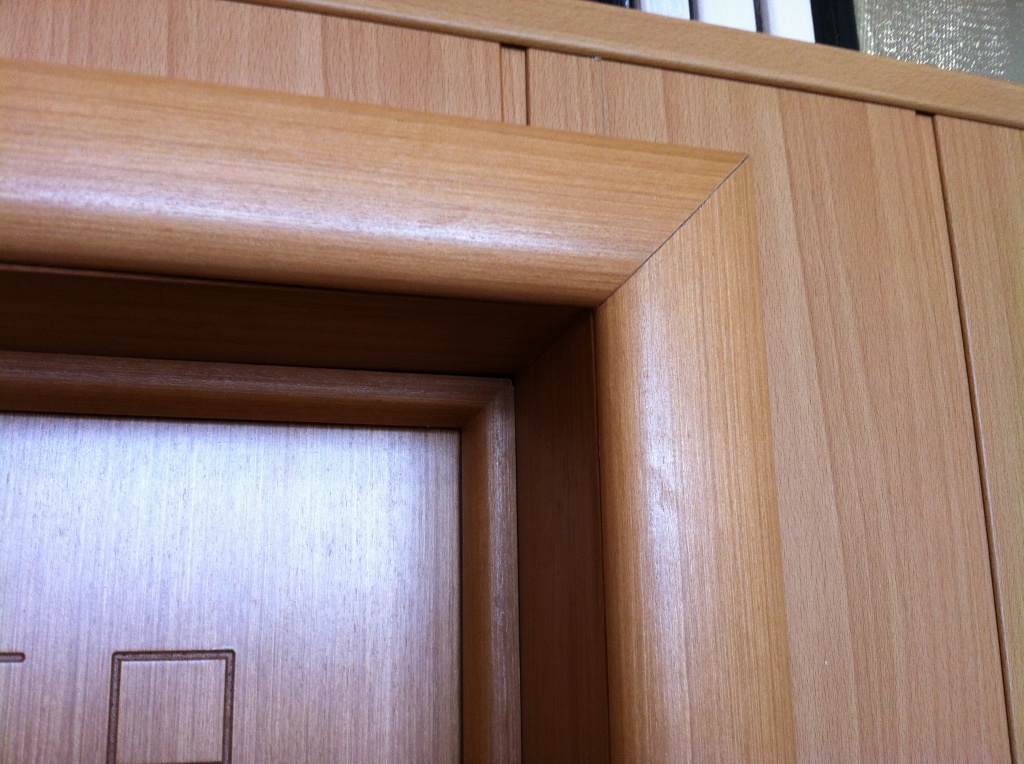
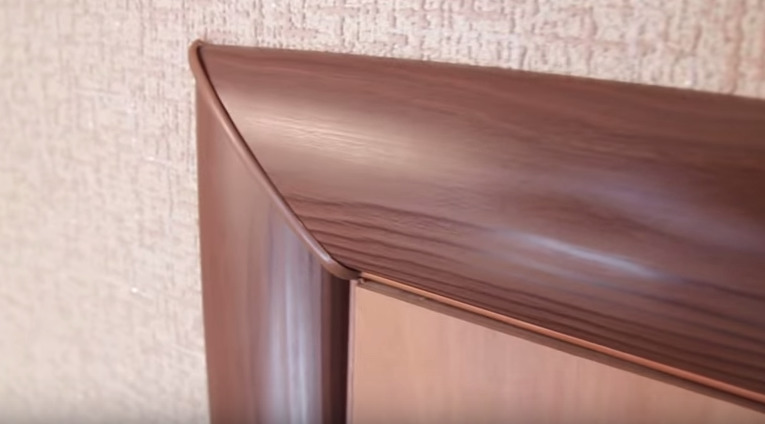
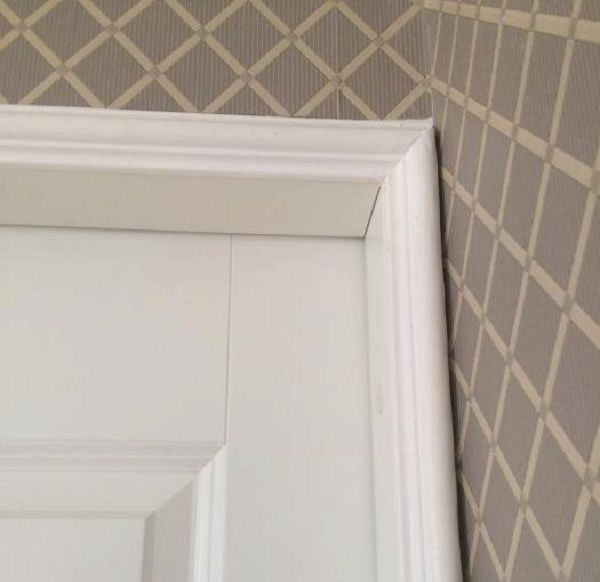
You can classify the platbands by the method of docking. In the upper part of the aperture, the planks are in contact with each other, the angle of their connection is the basis for helping to classify the platbands according to the method of joint. The connection of the ends of the slats can occur both at an angle of 45 and 90 degrees.
In order to connect the ends of the plank at an angle of 45 degrees, you will have to trim each plank from the side of the joint. This cutting method is the most common and suitable for slats with any surface shape.
The platbands, joining the ends at an angle of 90 degrees, can have two directions of joining: horizontal and vertical. This matching method is suitable for straight bars with a rectangle in cross section.

The platbands with a figured and semicircular surface cannot be installed in this way, since a convex or figured end part with such an arrangement will rise above the surface of the docked bar.
Materials
For the manufacture of casings in the production using different materials of origin. Each of them has its advantages and disadvantages, which are taken into account during installation.
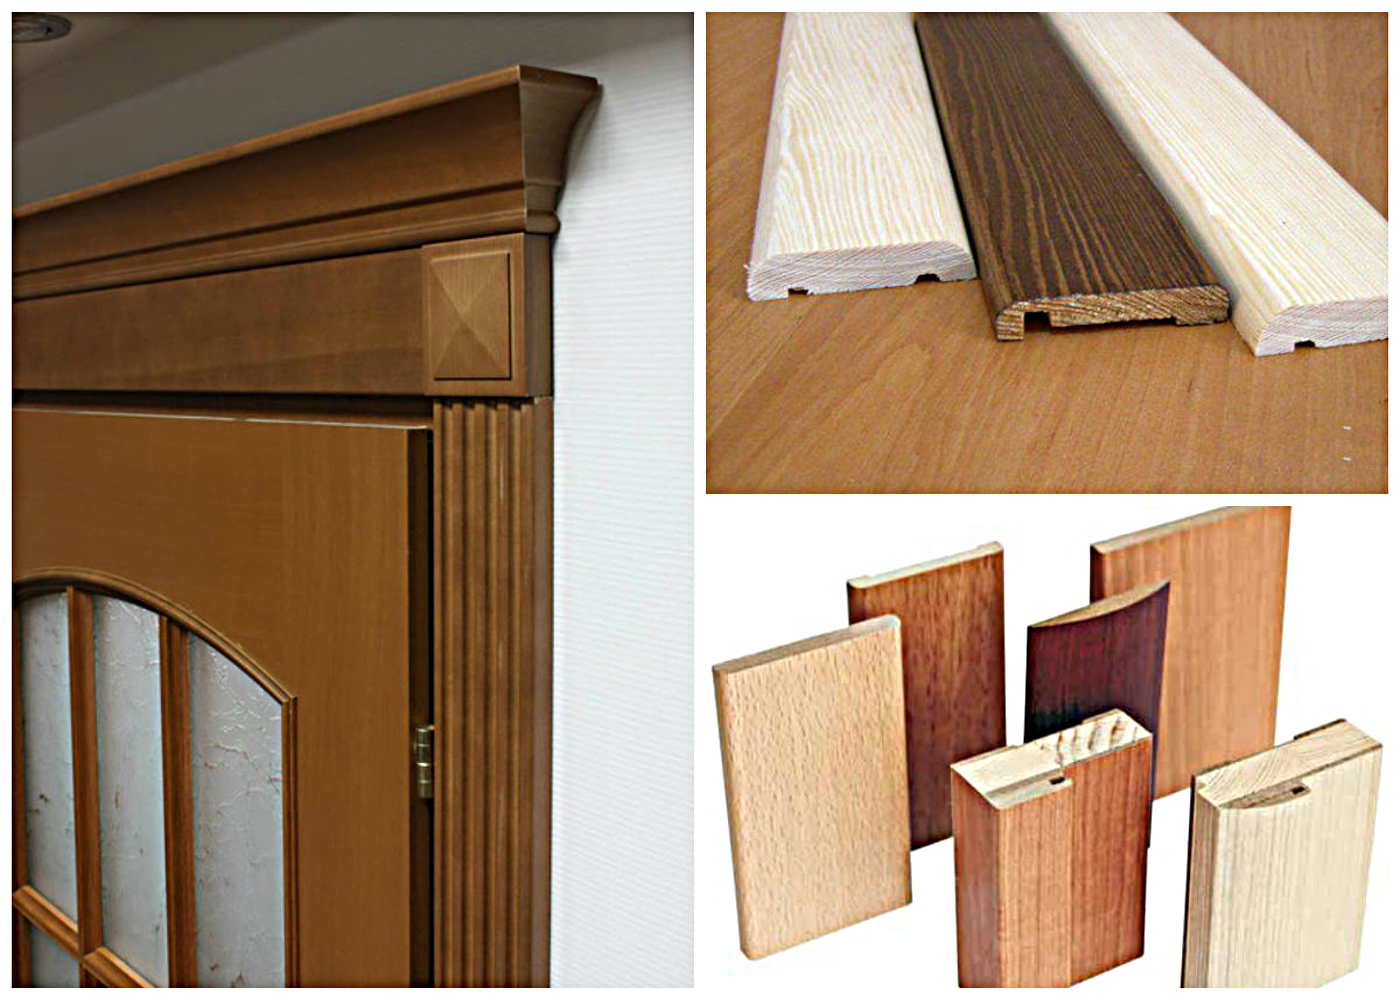
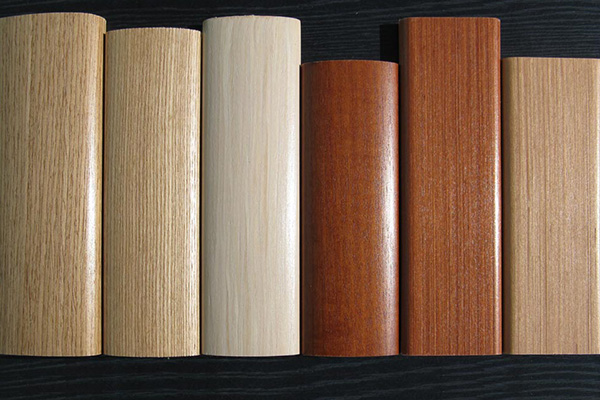
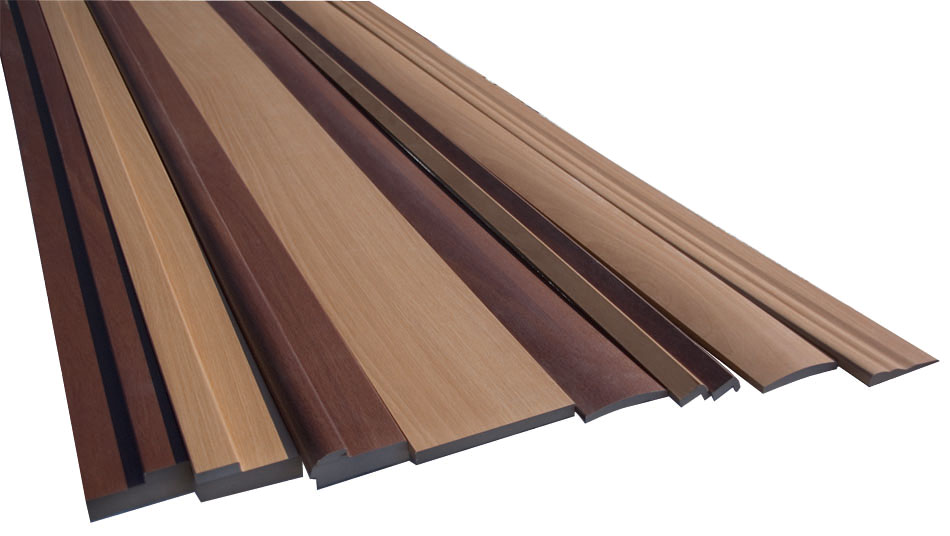
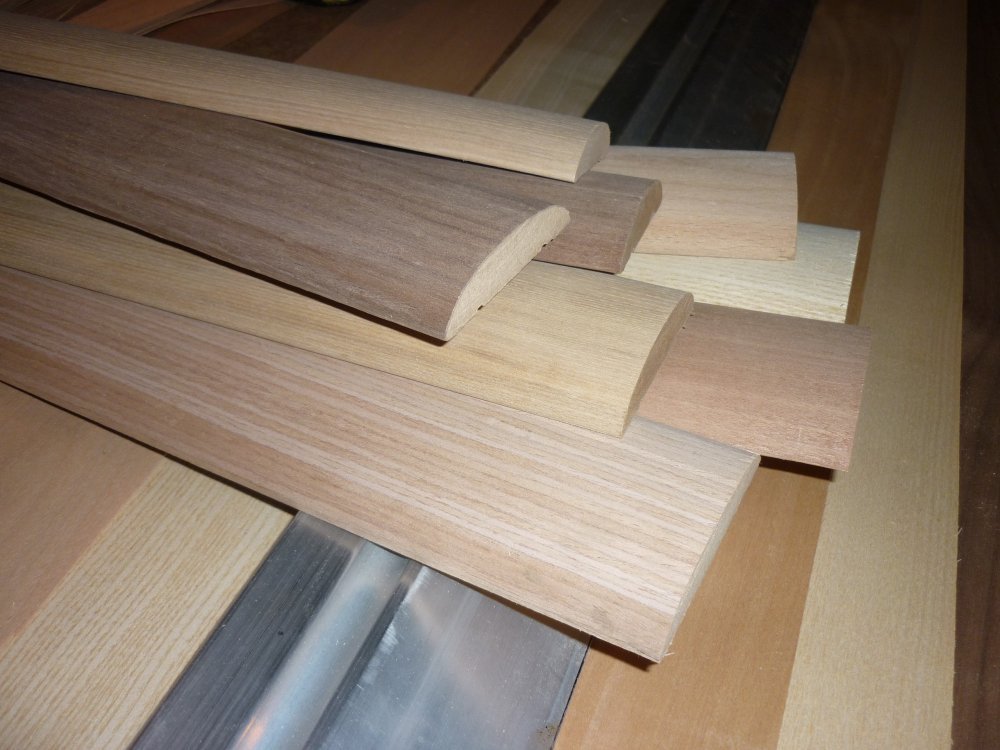
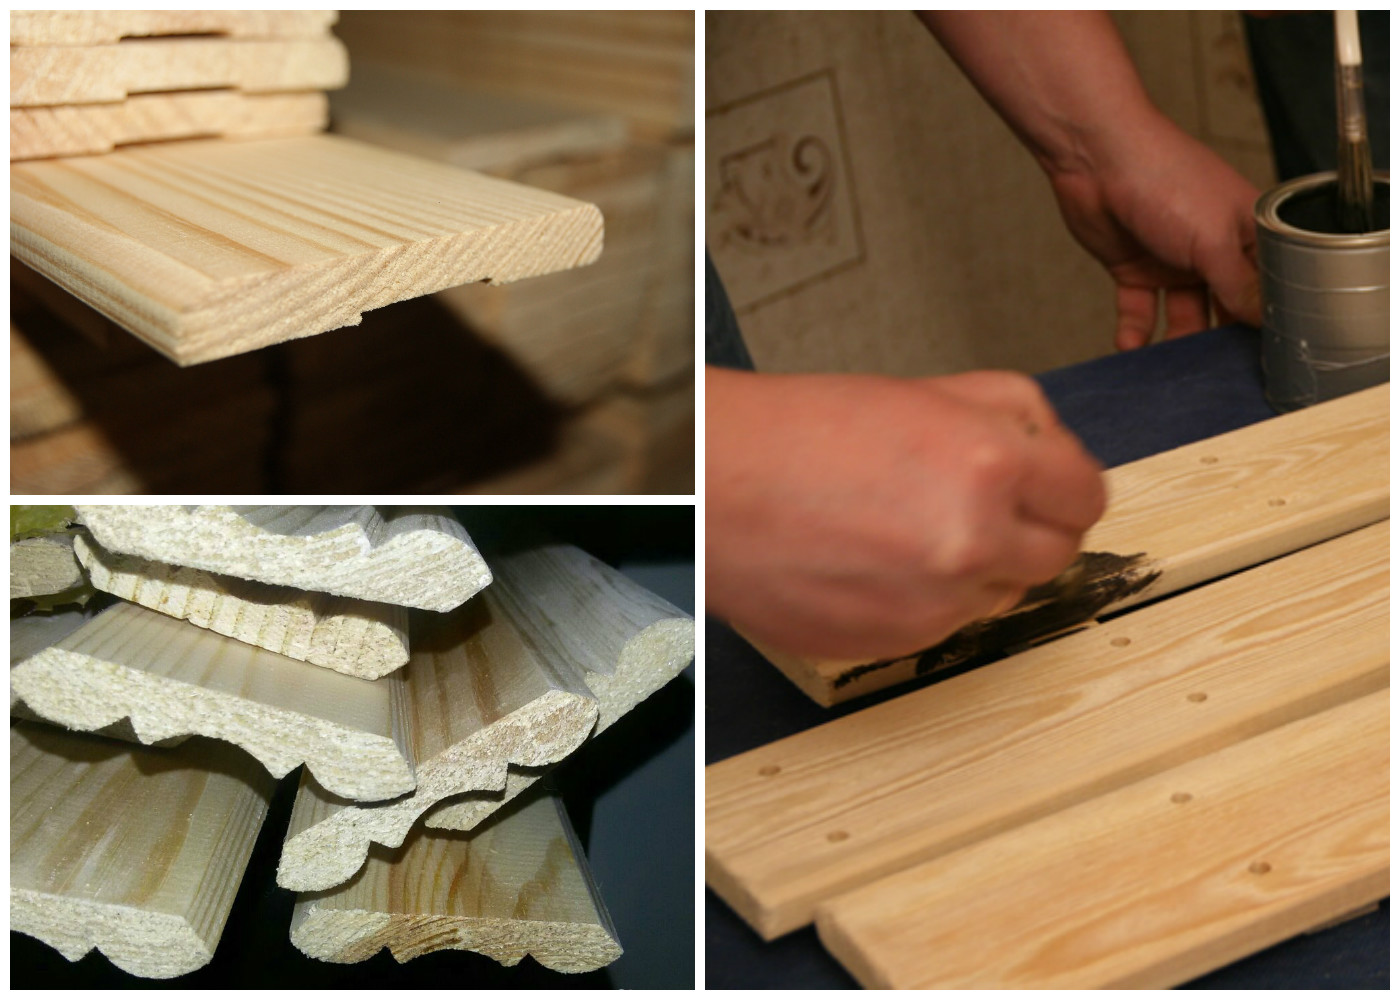
Platbands can be made of wood, plastic, fibreboard (MDF), metal.
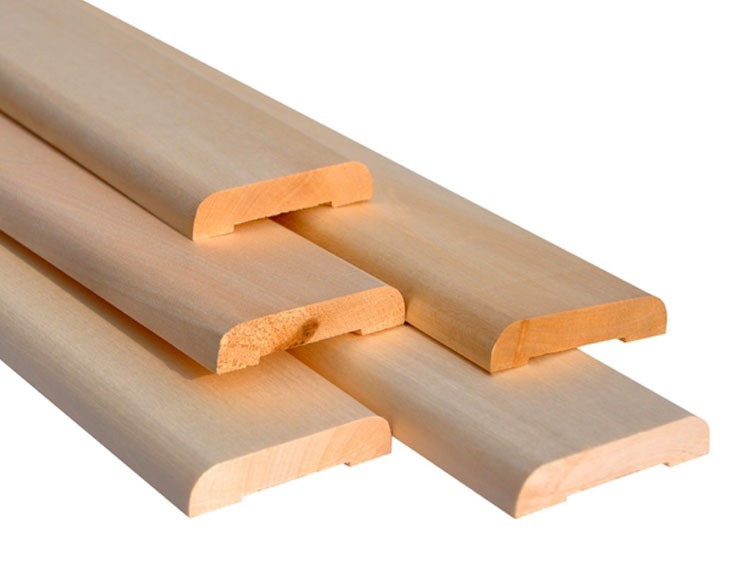
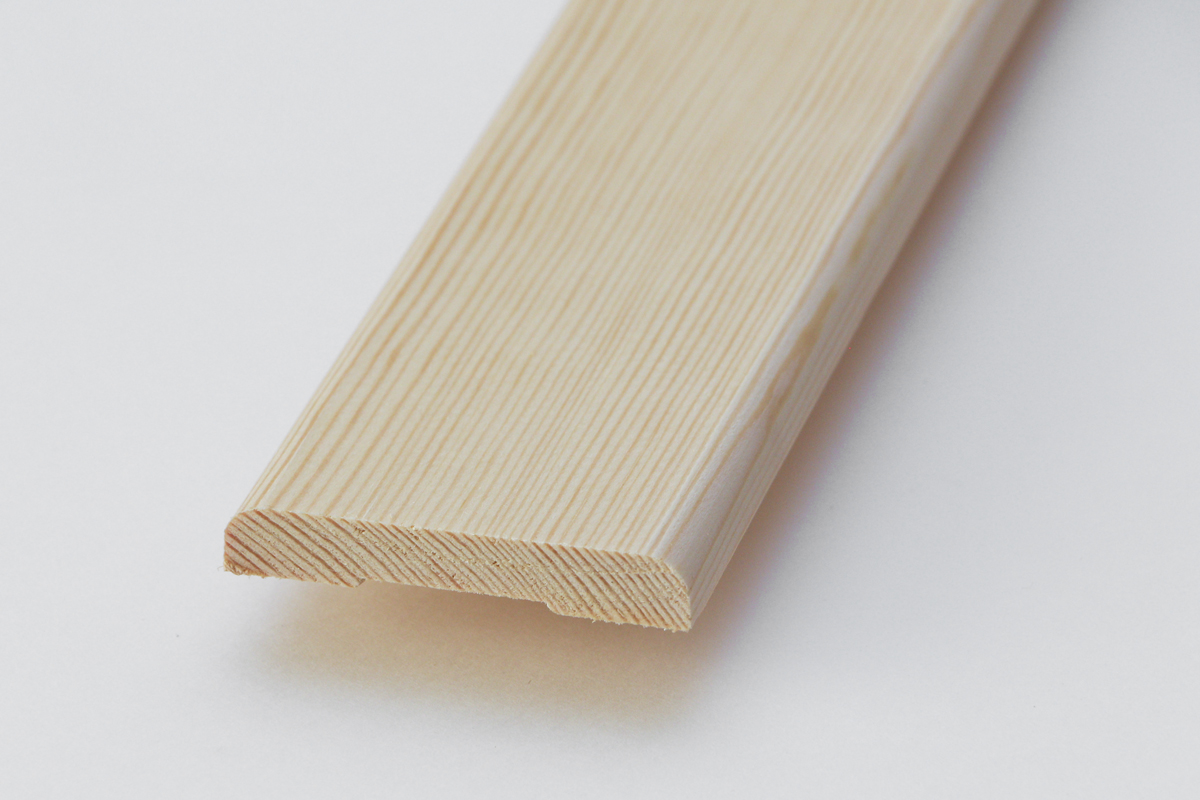
Wood is the most eco-friendly material. For the manufacture of platbands use different tree species. Budget models are most often made of soft woods such as pine or linden, and for the more expensive segment they use oak, beech or wenge. Wooden planks belong to universal products: they are suitable for almost any door panels, the main thing is to choose the right tone using paint, wax or stain. Wooden platbands are easy to install and can last for quite a long time if properly cared for.

But the tree has its drawbacks: wooden products do not tolerate temperature fluctuations and excessive air humidity, without treatment with special means the wooden surface absorbs a large amount of moisture, which leads to rotting processes and ultimately to deformation of the product. In addition, the raw surface of the slats often darkens, losing its original tone. But in fairness it should be noted that the material is still amenable to restoration.To return a presentable look, the cracks can be puttied, the darkened areas can be cleaned, the surface treated with an antiseptic and covered with any paintwork material.

The second most popular material is a fiberboard (MDF). The surface of the carcasses of MDF in appearance is very similar to the structure of the tree, so the strips of this material are in great demand compared to other types. This is not surprising, since MDF plates are environmentally friendly materials: when gluing fibers, substances of natural origin are used: paraffin and lignin.

In order to trim the MDF coincided in tone with the door frame, canvas, dobori and other elements, they are revetted.
The front surface of the slat is either laminated or veneered. Lamination is the process of wrapping MDF blanks with PVC film, and pasting with a thin section from the wooden massif of the front side is veneering. Laminated types have good wear resistance, and veneered frames are not inferior in quality and appearance to wooden models.
The material MDF has only one drawback - it is poor resistance to moisture. As a rule, the trim from this material is not installed in rooms with high humidity and is not used for facing openings of entrance doors.
To fix the frames from MDF using glue, liquid or special nails.
Plastic is one of the most practical materials used in the manufacture of platbands. The service life of plastic panels is much longer than that made from MDF.
It is resistant to temperature extremes, which means that the strips are not subject to deformation processes. The surface of the panels does not fade in the sun, their color throughout the life cycle remains unchanged. Plastic refers to moisture-resistant materials, which means that the panels will not rot and will not be covered with mold fungus. Caring for them is simple: just wipe the product with a damp cloth.
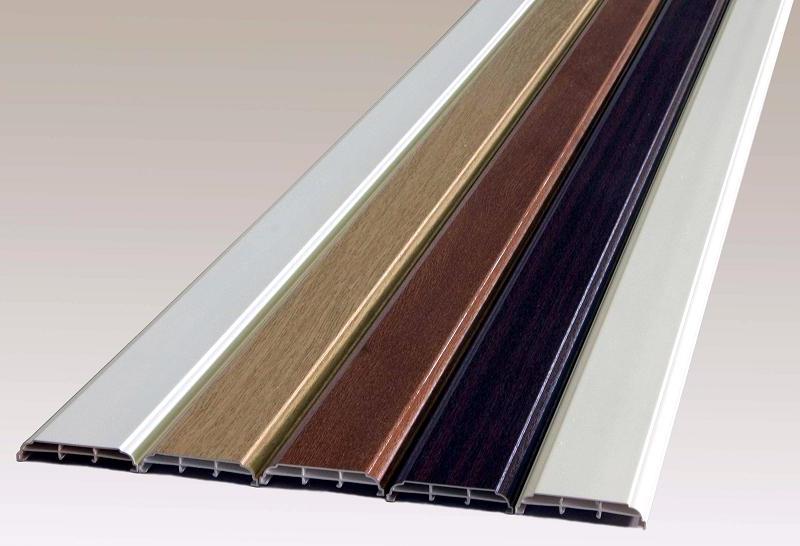
Plastic platbands, in difference to products from MDF, can be installed outdoors: they will perfectly withstand all atmospheric phenomena.
Plastic panels of good quality in appearance do not differ much from similar products from MDF, but they are sold for a lower price as compared to MDF panels.Installation of plastic platbands is simple and affordable even for beginners.
For fixing plastic products, liquid nails are most often used, since a violation of the structure of the material with ordinary thin nails can lead to cracking and delamination of the product into small pieces.

Practical metal is less common than other materials used for the manufacture of trim. Metal strips differ from the above materials with increased resistance to mechanical stress, so they are used in the installation of input structures. Entrance doors, as a rule, are also made of metal, when installed, the platbands as separate elements are used extremely rarely - their function is performed by the door frame.
Metal is not afraid of moisture, does not fade in the sun and even significant temperature fluctuations are not able to deform the slats.
Dimensions
There are four significant circumstances affecting the size of the casing: the size and location of the opening, the shape of the slats and the size of the gap between the wall and the box.
Manufacturers produce trim with different widths is not accidental, but rightly so. The dimensions of openings in different apartments and even more so in private houses may differ significantly from each other, which, respectively, affects the size of the door panels, the box itself and, of course, the size of the trim. For standard door panels (80 * 200 cm), the casing width is between 6–10 cm.
The optimum width is 6.4 cm (64 mm): it is enough to close the gap and revet a small part of the wall. Slats having a width of more than 64–70 mm with the standard dimensions of the door structure look a little rough, therefore manufacturers make most of the trim models of this width.

The size of the gap between the wall and the box is an important indicator when choosing the trim in width. When mounting a door of standard dimensions, it is not always possible to install slats with a width of 64–70 mm — you have to choose narrower models. The reasons for this may be several:
- closely located furniture;
- the door structure is smaller in comparison with standard dimensions;
- the location of the doorway (the door box on one or both sides is close to the perpendicular wall located);
- the design of the door structure (the set of decorative elements located on the canvas excludes the use of a wide slat in the frame, and the narrow platband in this case performs only the function of masking the gap).
In any case, the width of the casing should be several millimeters larger than the width of the gap. According to SNiPs, it is 30 mm. As a rule, 40 mm is enough to hide the details of the structure and beautifully framing a part of the wall.
The width of the strip depends on the shape of the casing: for flat models it is 64 mm, for products with a semicircular surface it is 70 mm, and for figured platbands with a relief surface, the width varies from 85–150 mm.
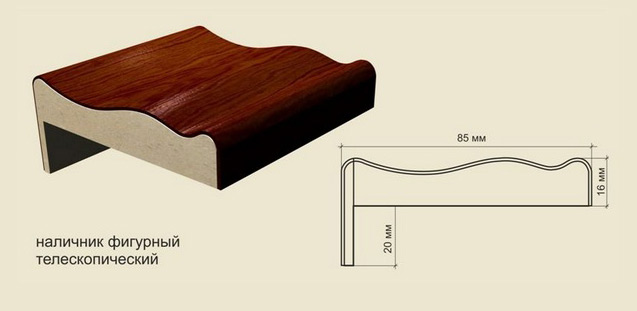
For telescopic platbands, the width parameter is in other limits: the standard width for such models starts from 60 mm and ends at 80 mm. The optimum width is 75 mm. Due to the structure of the telescopic platbands, in addition to the width, there are other parameters: the thickness of the strip and the length of the mortise element.

Telescopic trims are manufactured by manufacturers of various sizes. For models with a flat surface type, this is:
- 75x8x10 mm;
- 75x10x10 mm;
- 75x8x20 mm;
- 75x10x20 mm.
For slats with a drop-like surface:
- 75x16x10 mm;
- 75x16x20 mm.
The first number indicates the width of the plank, the second - the thickness, and the third - the length of the mounting rail.
Design
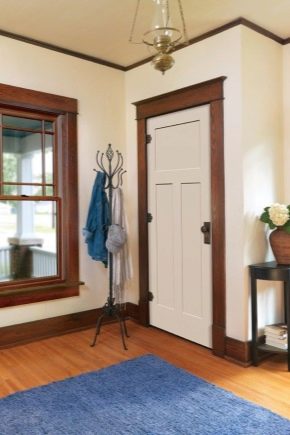
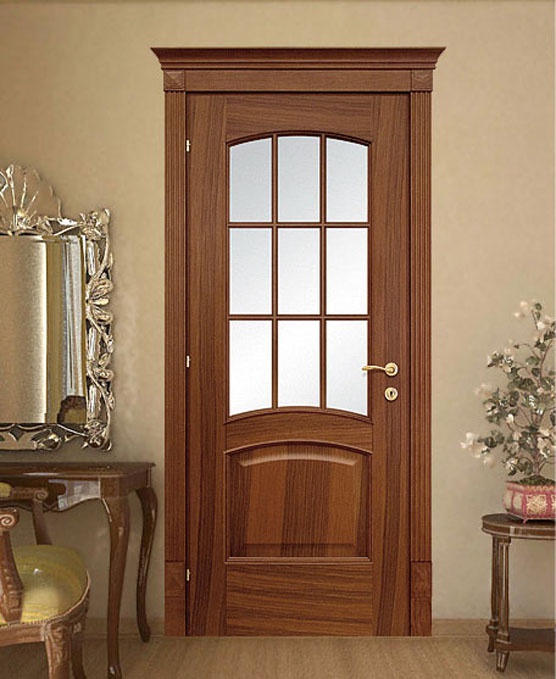
When buying a door, every person wants the opening in which the structure will be installed to look perfect: the box with the canvas stood exactly, and the trim frames beautifully framed the entire structure. Someone does not tolerate excesses, and he likes simple door designs with flat or arcuate platbands around the perimeter of the aperture, and someone wants to emphasize their individuality by installing doors with beautiful figured platbands.
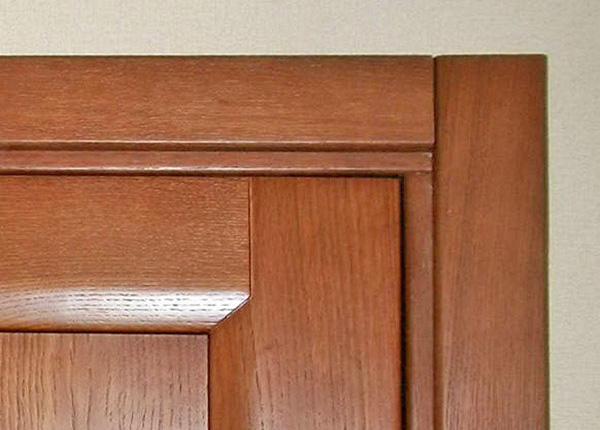
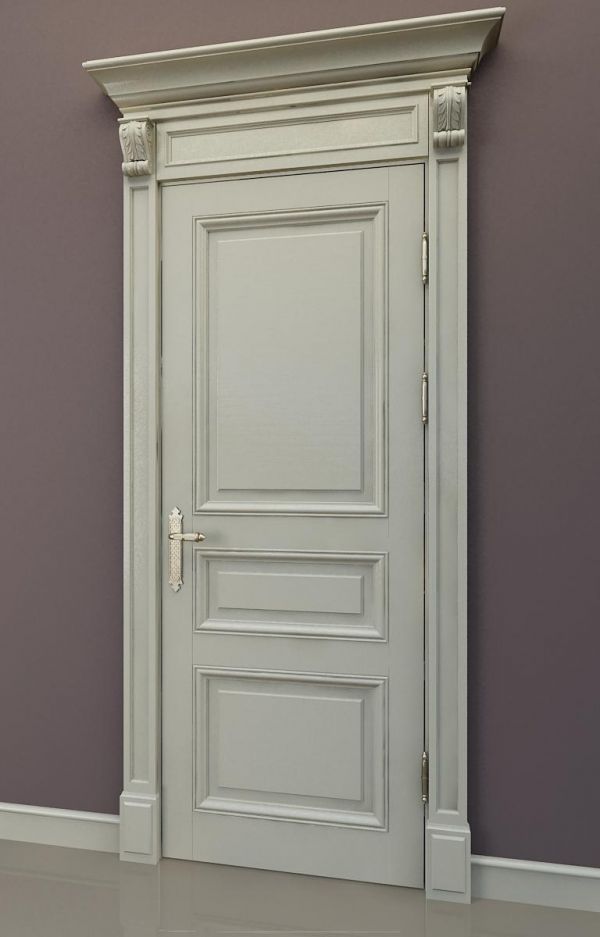
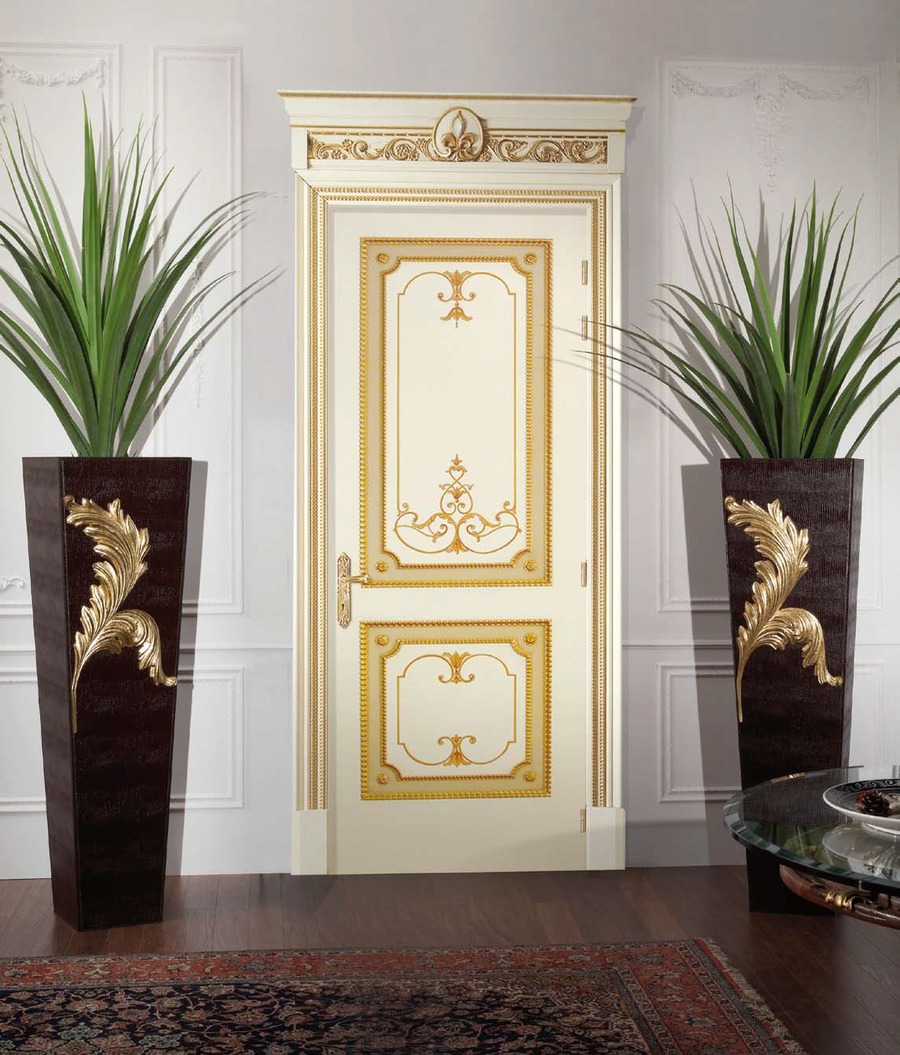
But figured trim - not the only way to help emphasize the feature of the door structure. There are other methods by which you can transform the door leaf. Very often, as a decor, additional elements in the form of overlays are used, which are located in the upper part of the casing - capitals.
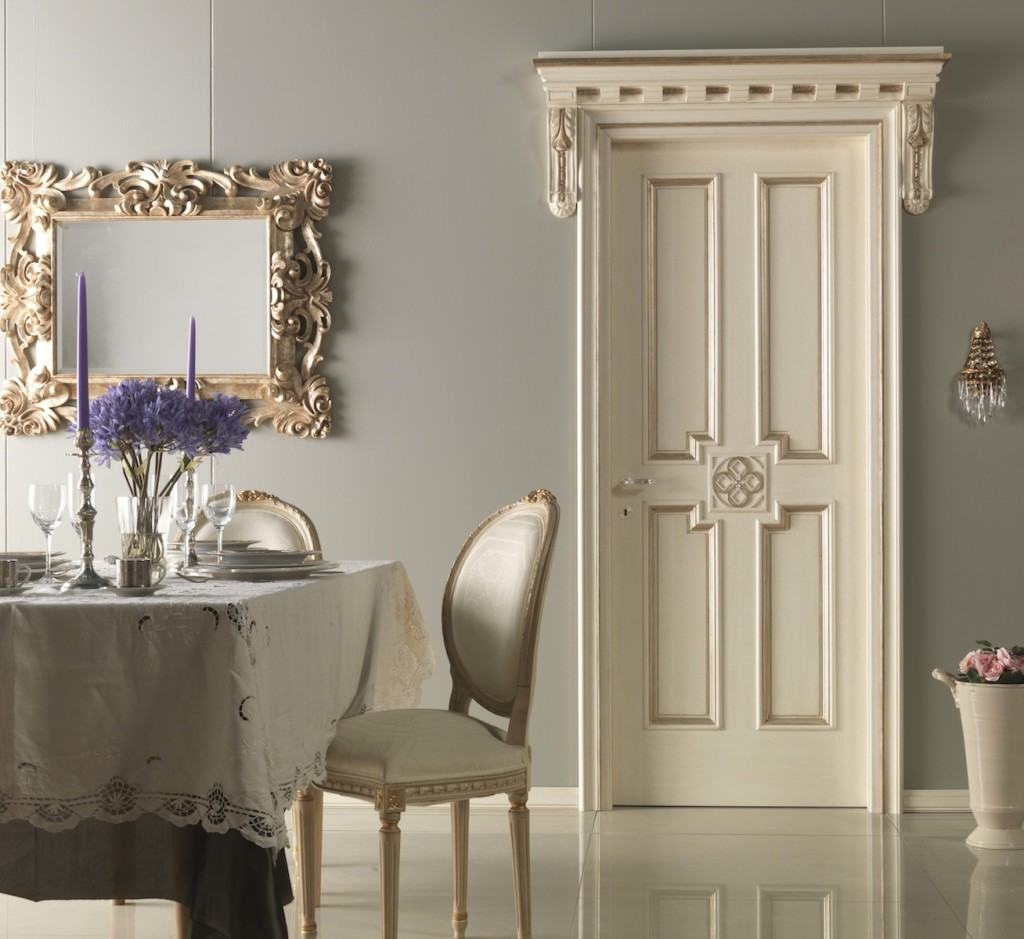
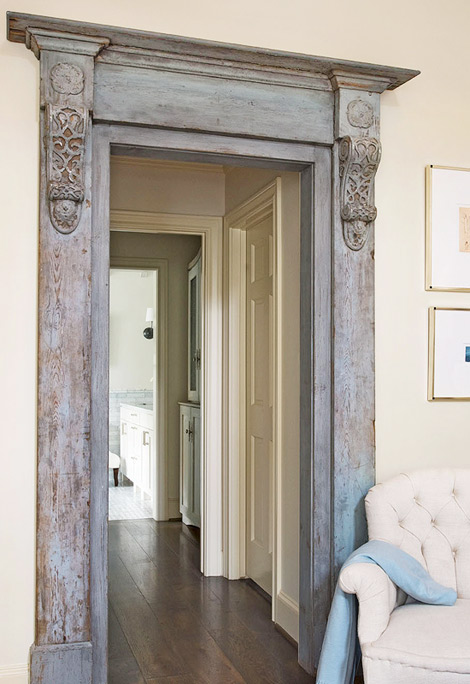
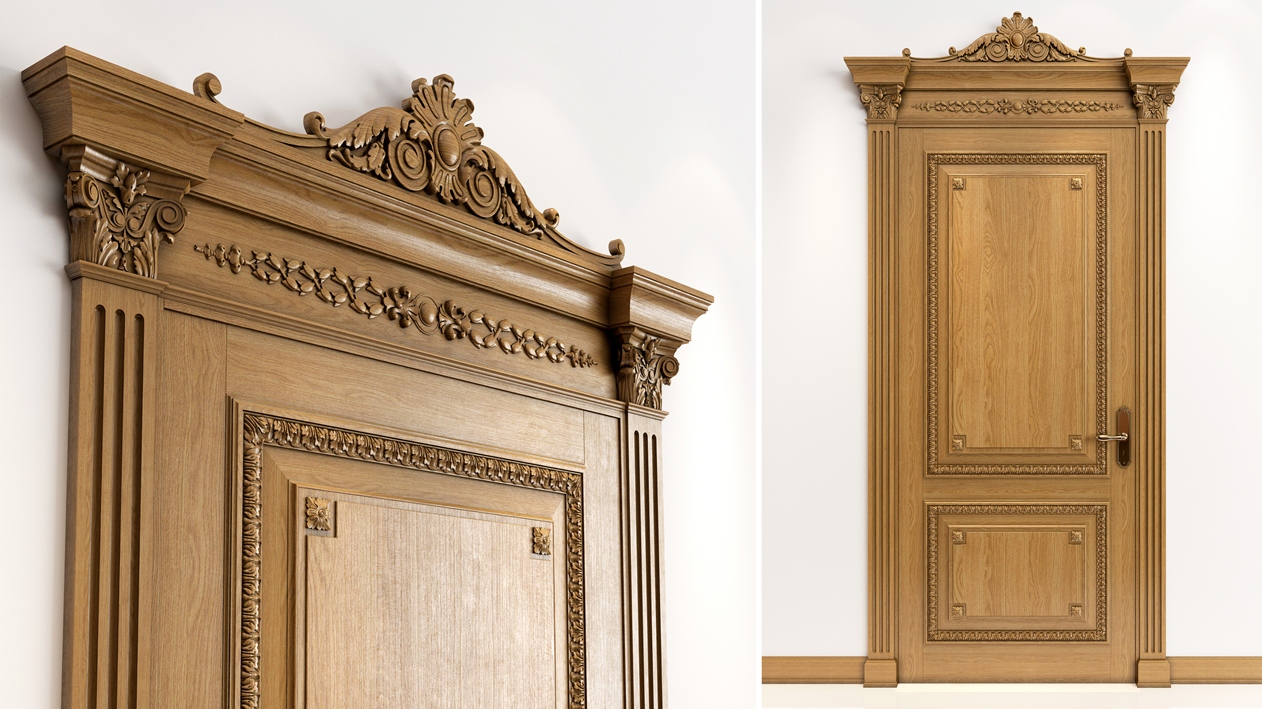
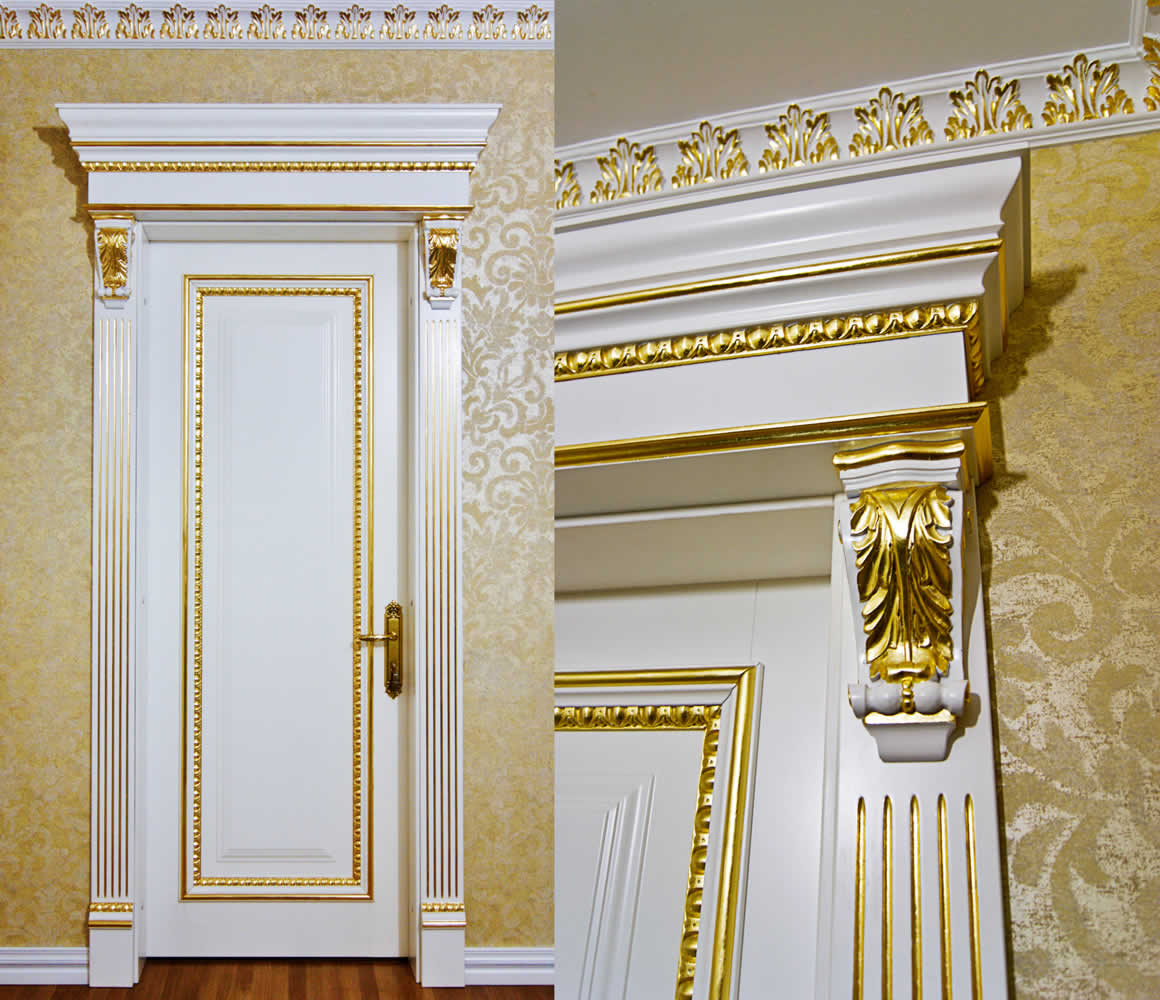
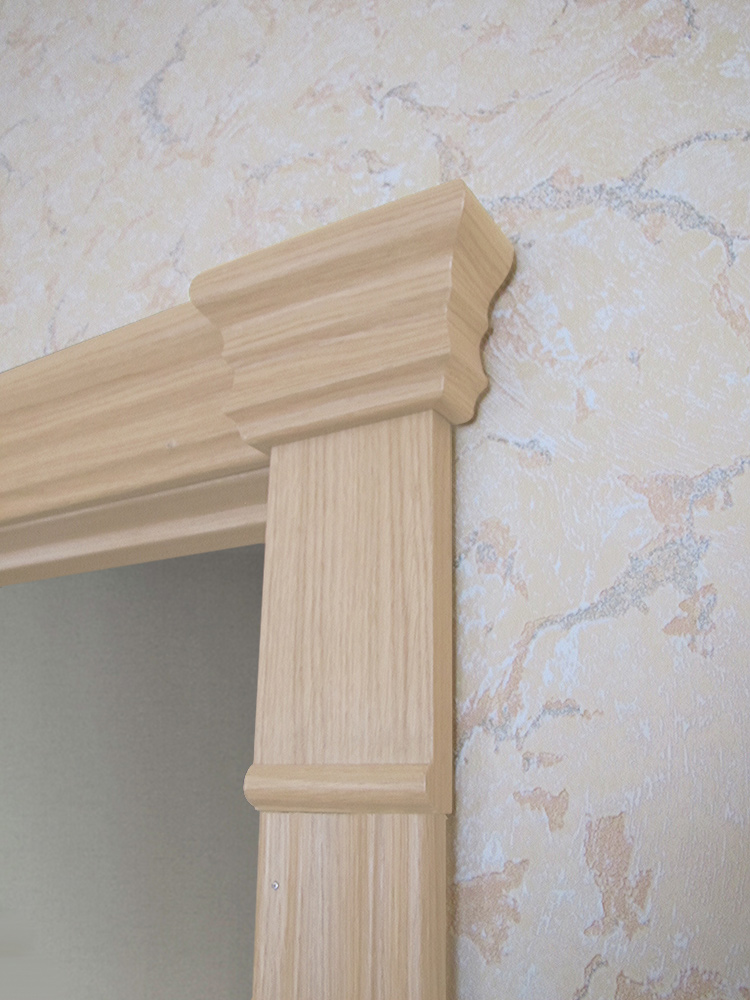
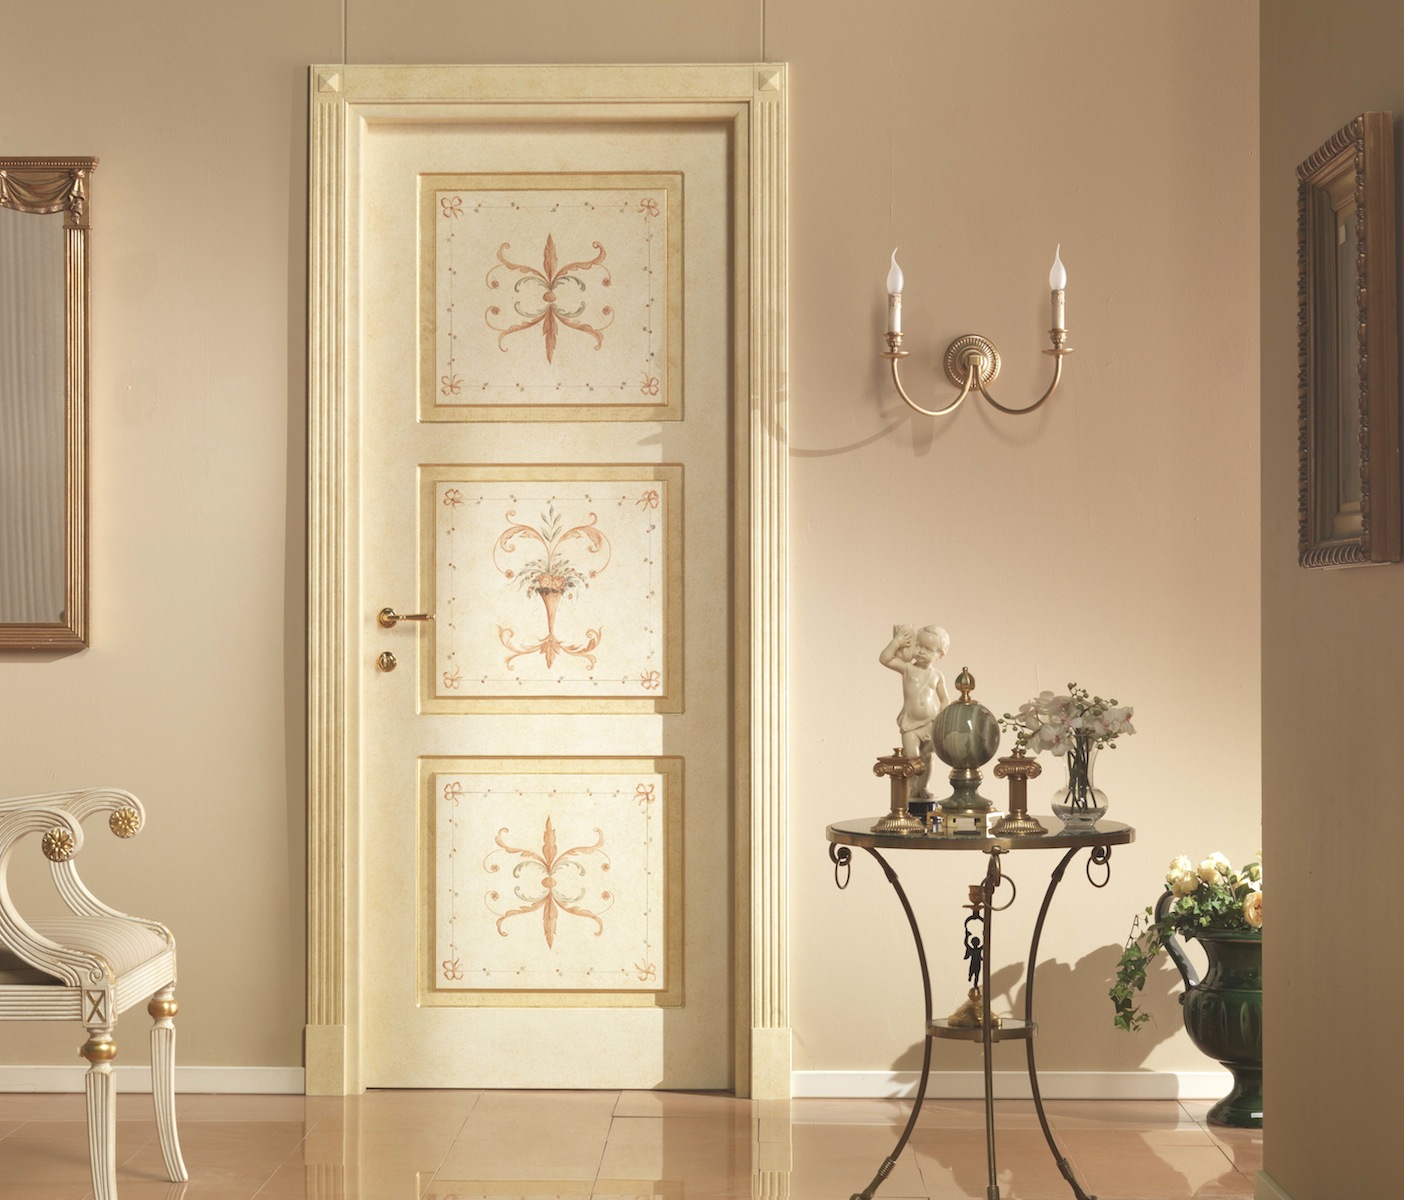
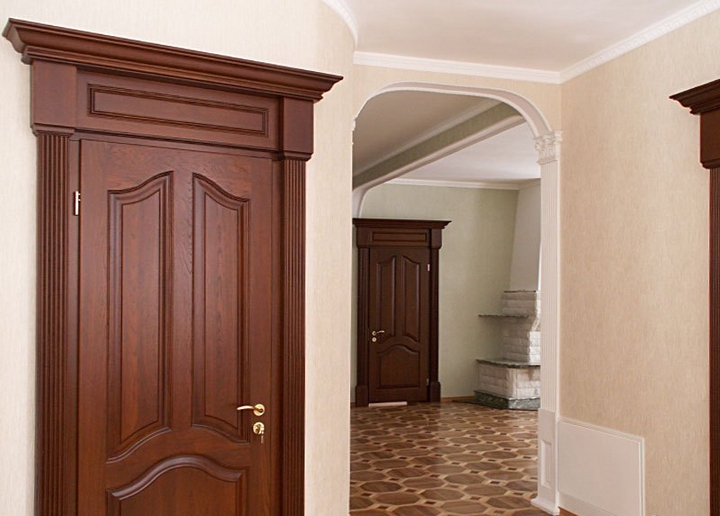
Capital as a decorative element has been known since ancient times. In fact, this is the upper part of the column, stylized by elements (flowers, leaves, curls) characteristic of a certain architectural style.In modern design, this decorative element is actively used in the transformation of door designs in a classic style.
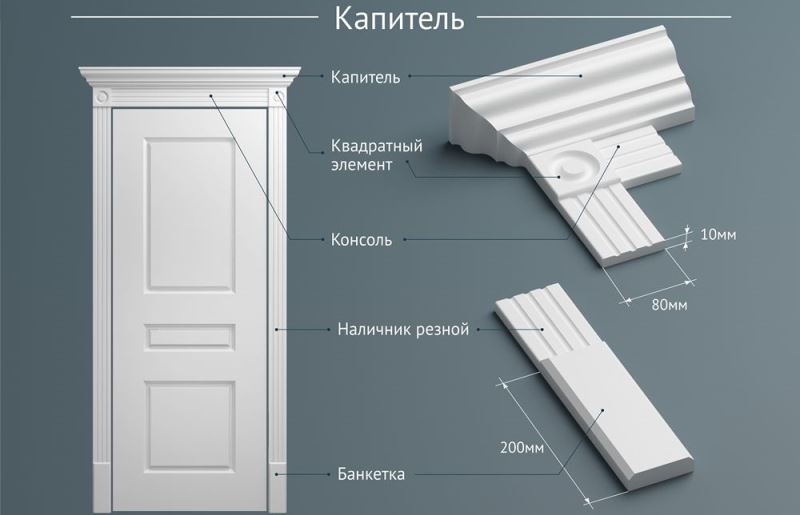

Capitals, which are diverse in shape and figured carving, allow visually increasing the height of the aperture, while adding solidity and high prices not only to the door structure, but also to the aperture. They are installed, as a rule, only from the front part of the opening - on the other side of the casing, without them.
In appearance, the capital with platband resembles an ancient column. Pads are located in the upper part of the vertical bars, forming with them a single composition. Between capitals there is a casing similar in drawing. Sometimes, another decorative element is added to the upper plank - a cornice. This element of the decor has a beautiful figured ledge that resembles a visor in appearance. The cornice is perfectly combined with capitals, but even without them in the frame of simple slats it looks no worse.
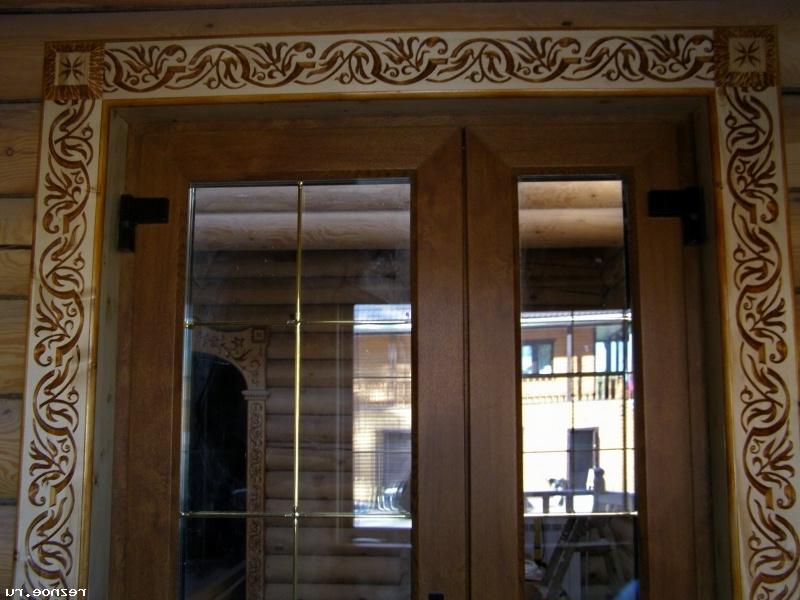
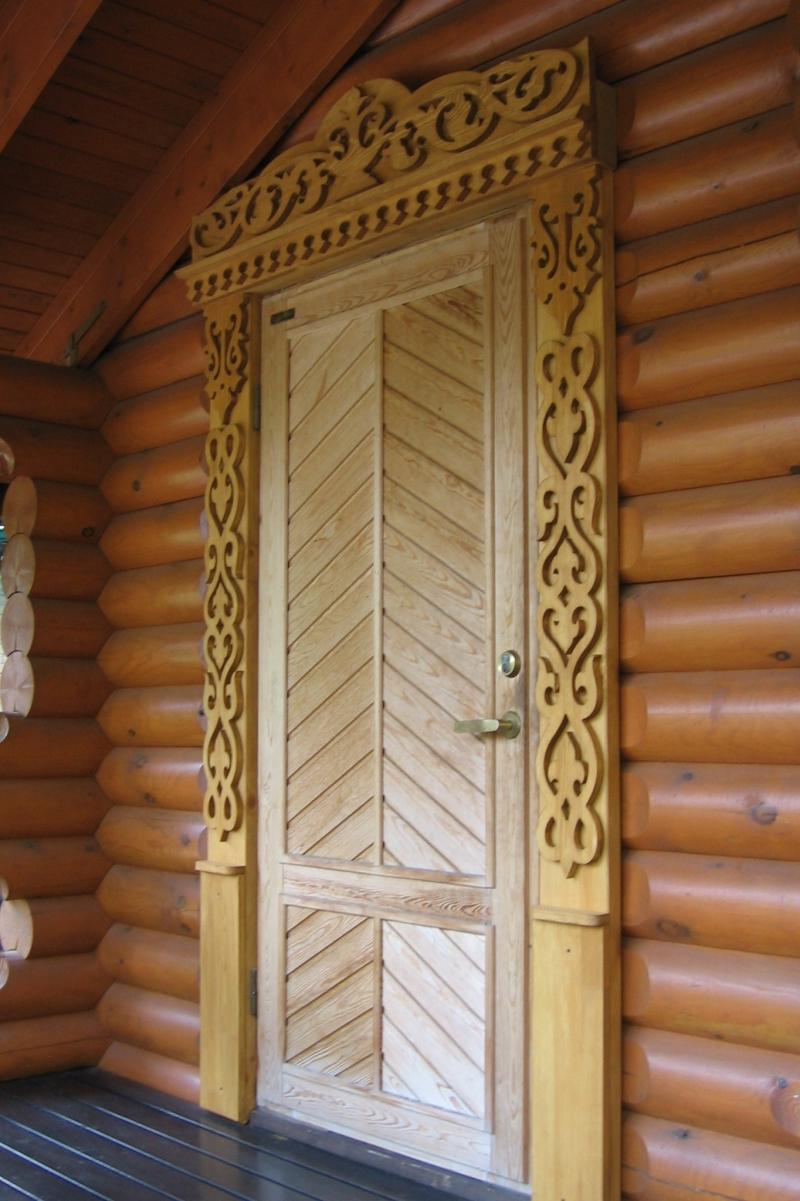
Not only with the help of capitals and the eaves, you can decorate the door structure, there are other decor techniques. One of these techniques is the framing of the door with the help of carved platbands.
Carved platbands are wooden planks that are flat or convex in shape, with rounded edges and decorated with a carved pattern across the entire surface.
In addition to the usual pattern, applied with a sharp tool, on the surface of the slats there may be a pattern made using the burning technique. Such platbands are usually more expensive than usual, but the price for such beauty is quite justified. Using carved frames in the house, you can create your own unique style, as well as add a special atmosphere and comfort to the room.
How to choose?
Many manufacturers produce door designs with pre-fabricated frames, which allows us not to think about the compliance of the door slats. But this is not always the case. Sometimes, due to various circumstances, selection has to be done independently, and in order to choose the right slats that fit most naturally into the existing interior, it is necessary to take into account some nuances.
When selecting the trim, first of all, you should think about the size. Wide platbands should be chosen if it is necessary to hide around the perimeter of the box large defects in area that arise not only during the installation of the box, but also during the wall decoration.

Very often, when replacing old strips with new models, it is not possible to purchase frames of similar width due to the fact that the wallpaper cut does not reach the wall border or the gap between the wall and the box is much more than 30 mm. In this case, there are two ways out: either to finish the walls again, which is not very profitable, especially if the repair was not included in your plans, or to buy wider strips than before.
But it is worth remembering that the slats with a width of more than 100 mm can visually make the structure heavy and even ridiculous, so you should opt for the standard dimensions of the slats.
Purchase slats with a width of less than 64 mm can be justified only by a narrow door leaf or design features. The closer the doorway is to the perpendicular wall or furniture, the narrower the bar should be. A wide bar with such a layout will only visually reduce the space, especially if it is installed end-to-end.
Not only the width, but also the length of the slats must be considered when choosing the trim. In order to correctly calculate the length, you need to know the parameters of the door frame. The slats should be 10–15 cm longer than the vertically mounted elements.As a rule, in construction stores you can see strips 215–220 cm long. For cladding a standard door construction on both sides you will need 5 strips: 2 on each side are installed vertically, and the remaining bar is divided in half and set each half in the upper part of the opening.
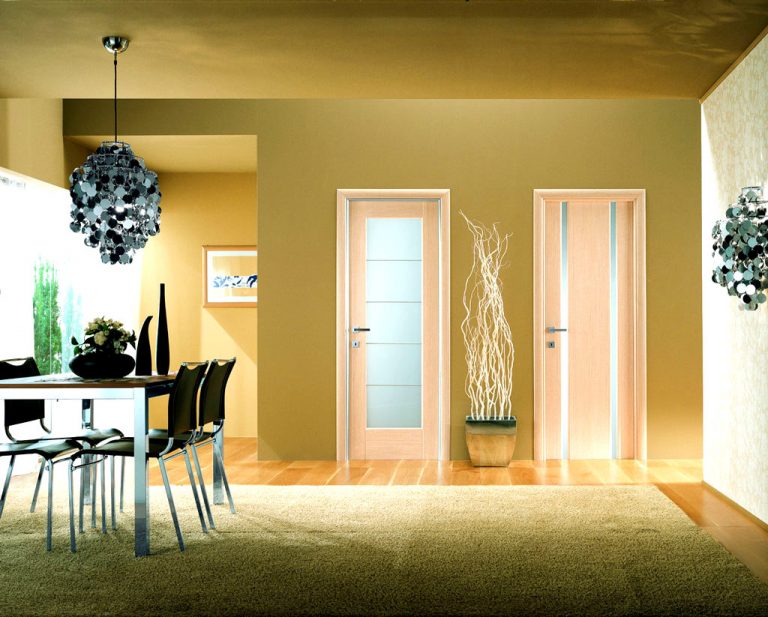
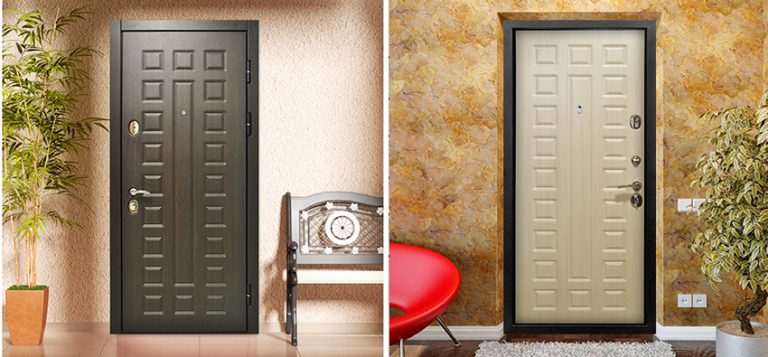
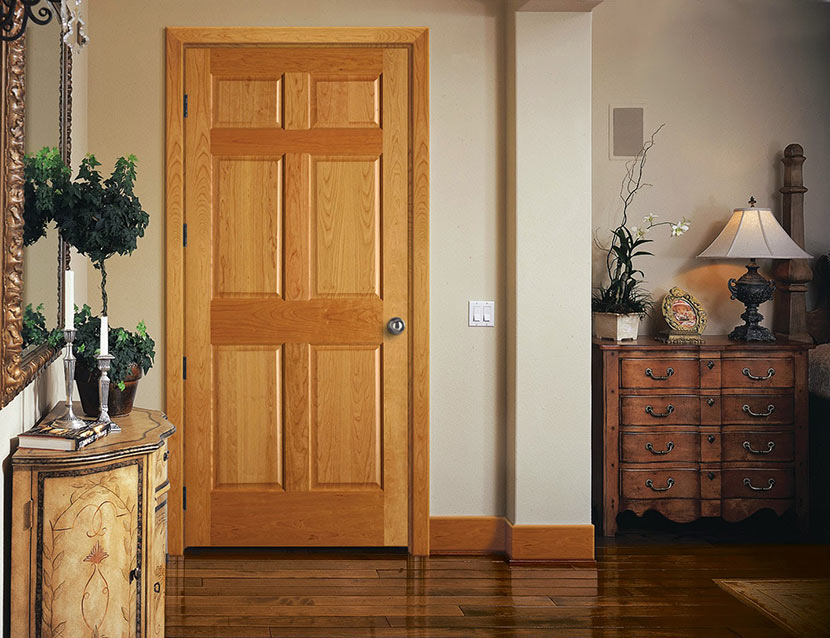
It is equally important to choose the trim in the light of the material from which they are made, and colors. The material and color of the trim should coincide completely or be as close as possible in structure and tone to the door leaf and baseboards, otherwise the design will not look very organic. It is also possible to choose contrasting door leaf and baseboards colors.

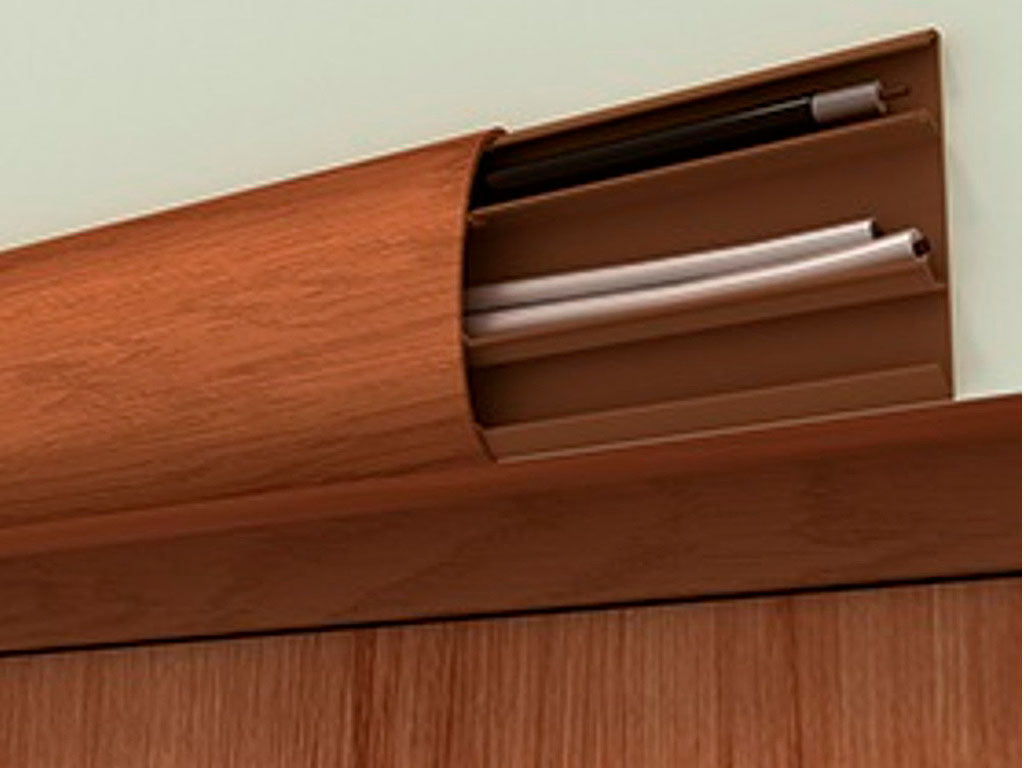
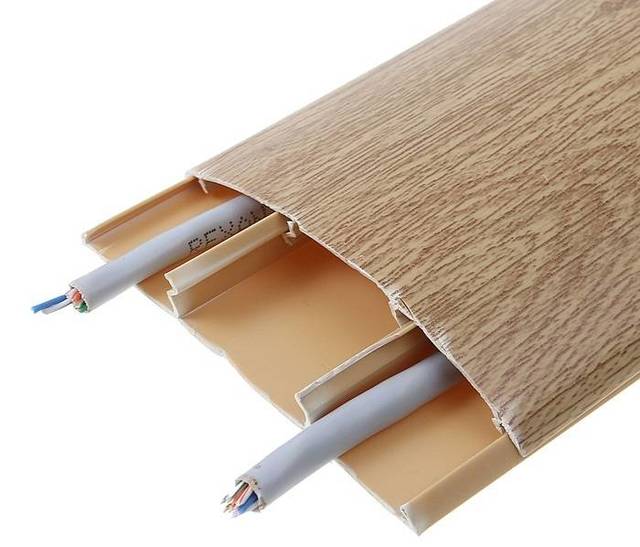
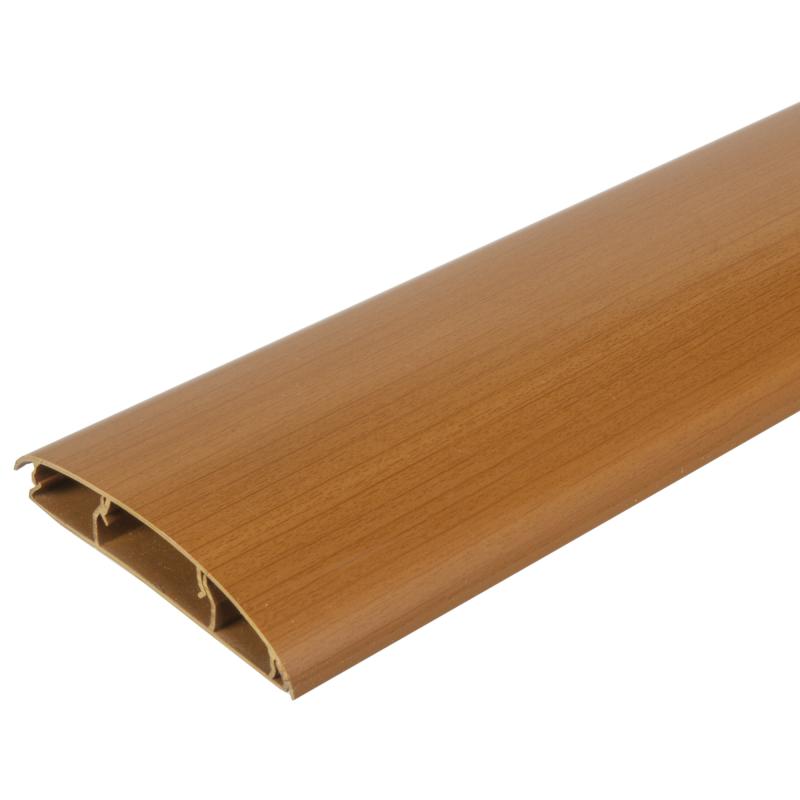
If you plan to stretch the cables through the door, then plastic platbands with cable channels located on the inside of the planks will be the best option.
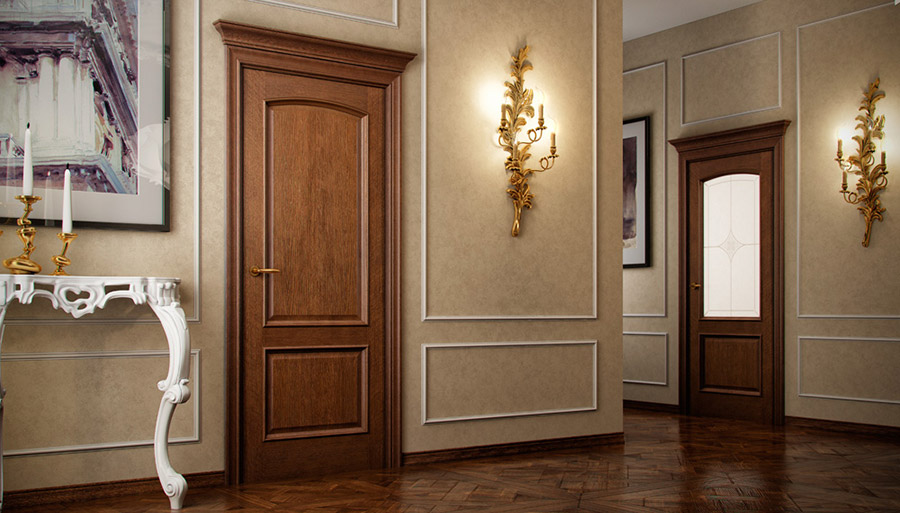
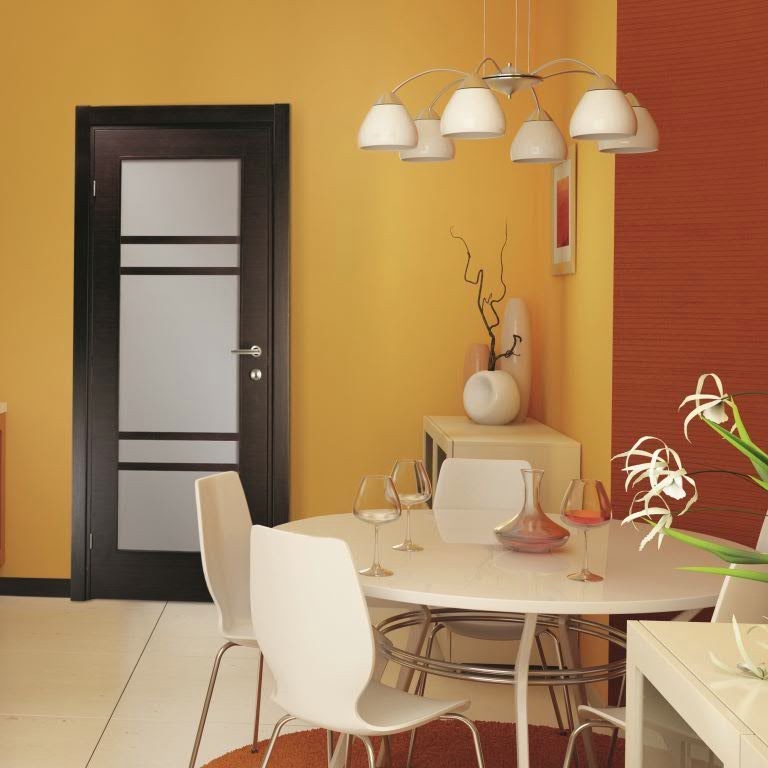
The choice of platbands on the material should be justified by the style of the room. Wooden platbands and MDF panels will look good in rooms with a classic style, and practical plastic panels are more suitable for rooms decorated in modern style.
The type of room also affects the choice of trim.Practically all materials are suitable for rooms with moderate humidity. For entrance doors it is better to use metal platbands. The facing of the kitchen and bathroom apertures can be decorated with ceramic frames, especially if the adjacent walls are decorated with the same material.
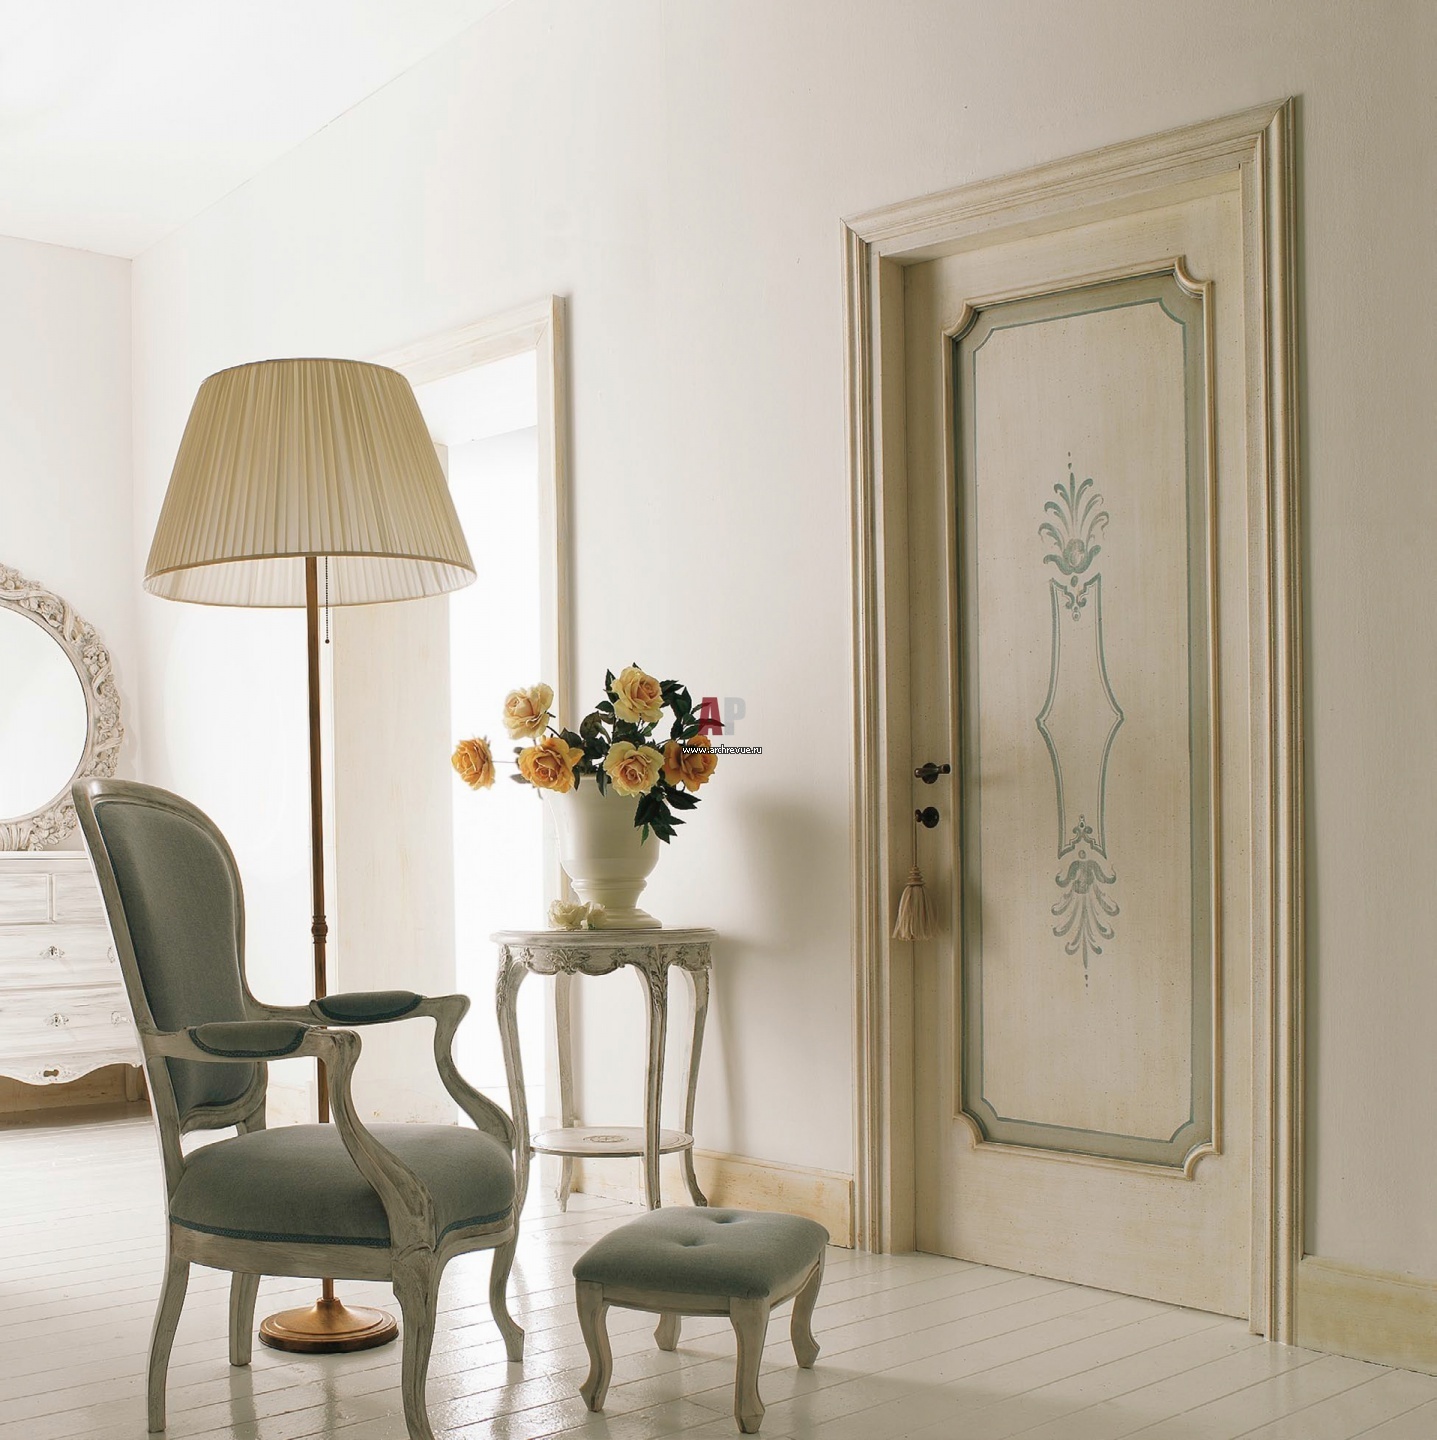
The choice of form depends on the design of the room., matching the door leaf and the preferences of the owners. The more the door is decorated, the more modest the shape of the slats should be.
For interiors decorated in Baroque and Provence styles, the best option would be wide (from 90 to 120 mm) shaped trims with a well-viewed pattern.
Installation
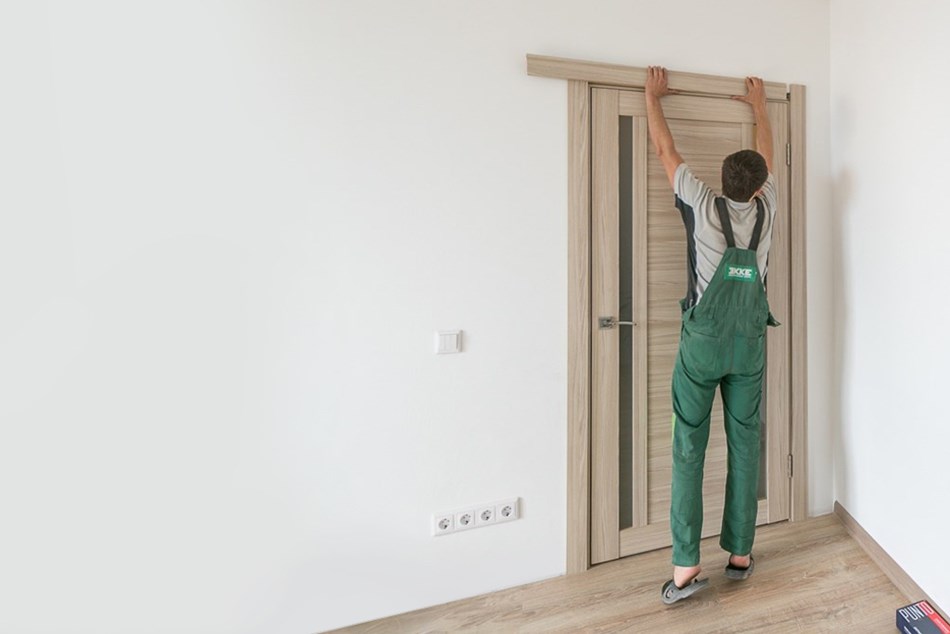
In order to install the trim with your own hands, you need the accuracy of measurements and knowledge of some of the nuances of installation. With free time and patience, the installation will be easy, the main thing is to properly prepare the place and the bars.
Any installation, including installation of platbands, requires some preparatory activities. In this case, it is the preparation of the surface of the doorway.

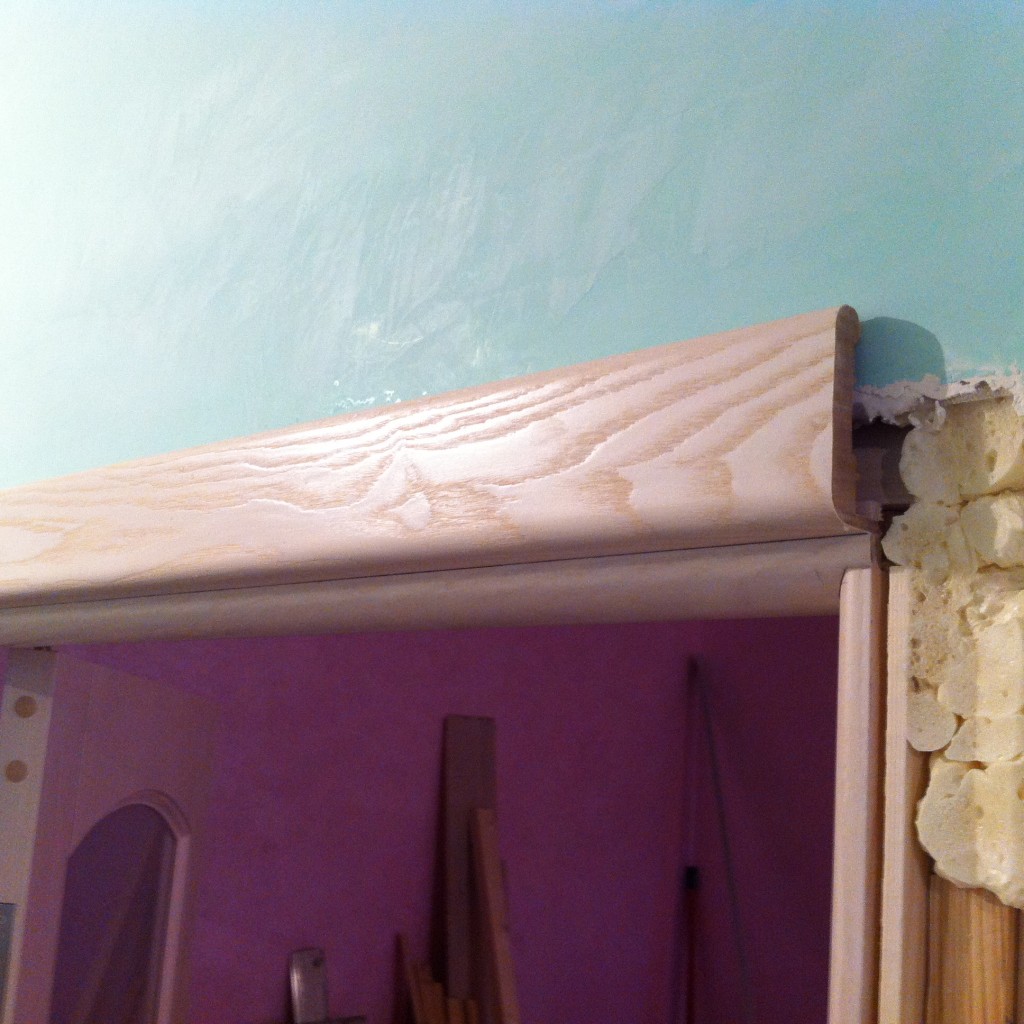
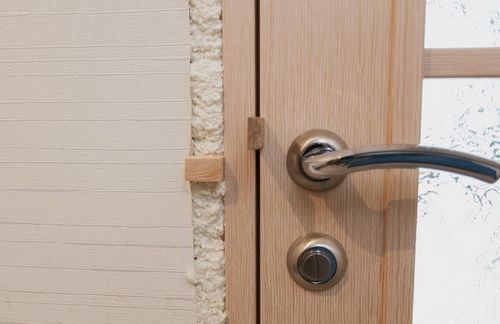
An assembly foam is always used between the installed door frame and the wall to close the voids.After solidification, it happens that it protrudes slightly above the surface. To fit the plank more closely to the surface, it is necessary to cut off these protruding parts as close as possible to the surface of the wall and the box. They should be cut as carefully as possible, without touching the visible surface of the box.

Sometimes it happens that the surface of the wall and the box are not in the same plane: a difference of more than 3 mm has formed between them. Such a discrepancy will have to be eliminated, otherwise it will not be possible to install the frames as precisely as possible.
There are two ways to solve this problem: slotting the wall under the niche for the casing or reducing the thickness of the strip.
The first method is suitable if the design box is strongly recessed into the wall.
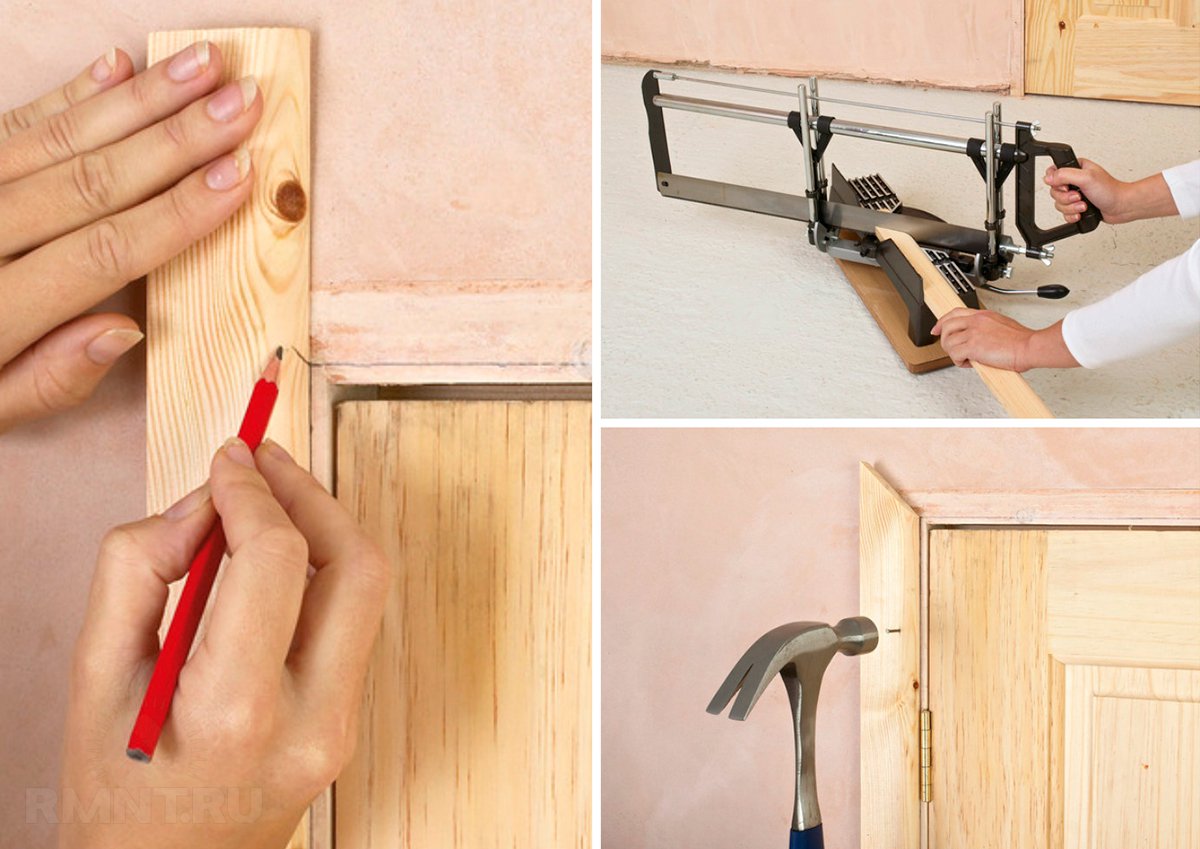
- First you need to attach the casing to the surface of the box and outline the line of junction of the plank to the wall. Then, using the appropriate version of the tool (its choice depends on the material of origin), make an undercut along the box.
- On the planned line with a grinder or chisel to make a recess under the bar.
- To control the depth of the groove, the bar should be applied to the wall from time to time.
- Places where the grooves turned out more than the intended rate, you can cement or use another suitable composition.
- To check the bar, you need to attach it to the wall in almost a few seconds, until the composition is completely dried up and the amount of depression can still be adjusted.

The second method is suitable for those cases where the casing is made of wood and the bar has a decent margin of thickness. For this work, you have to arm yourself with a plane, with which you need to remove a layer of a few millimeters from the back side. This should be done carefully and slowly, since the removed extra millimeters will not be possible to recover.
Preparing for installation requires not only the surface of the wall, but also the casing. Often, during transportation or unsuccessful storage, damage may occur at the ends of the slats; to eliminate them, you just need to trim the ends by a few millimeters. Trimming is carried out only with the part that will come into contact with the floor.
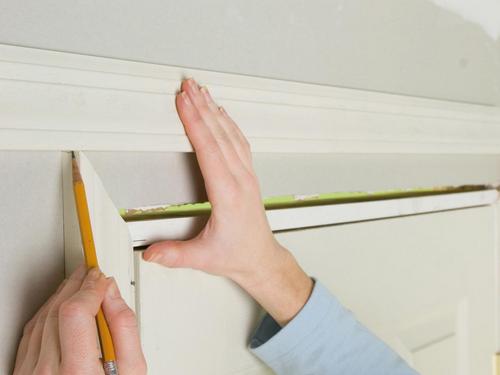
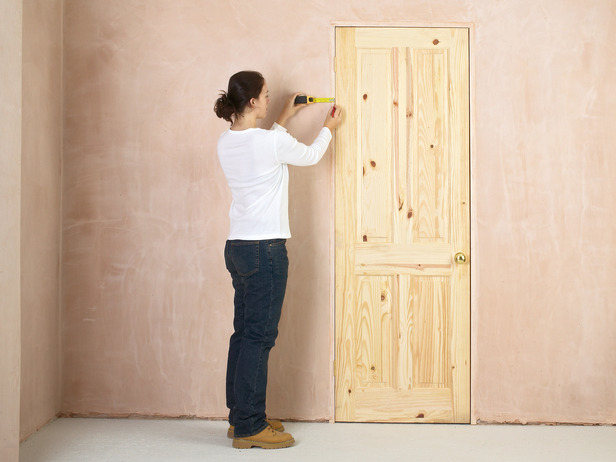
After preparation, you can proceed to markup. In order to correctly mark the length of each strip, it is necessary to attach them to the place of installation.The mark of the desired length depends on the angle of the undercut and the location.
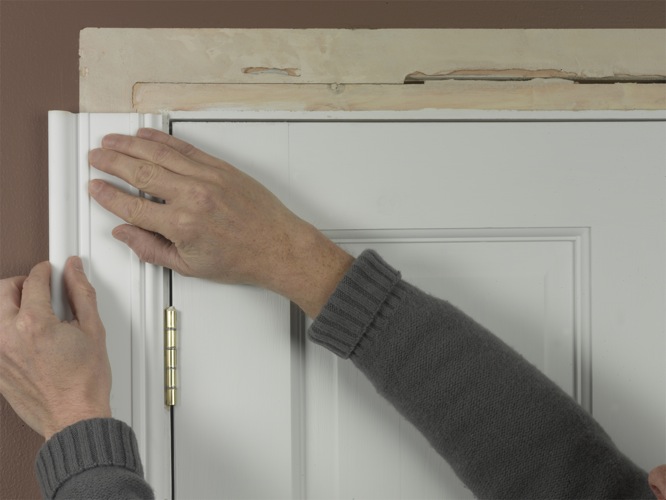
First of all, it is necessary to make a mark on the bar installed from the hinge side. Apply the bar to the surface of the wall and the box should be indented by 3-4 mm. This is necessary so that when the door is operated, the hinges do not touch the strip. On the side of the lock, the bar is also applied with a small indent from the rounded corner of the box. In the presence of dobori applied to the bar with them on the same level.
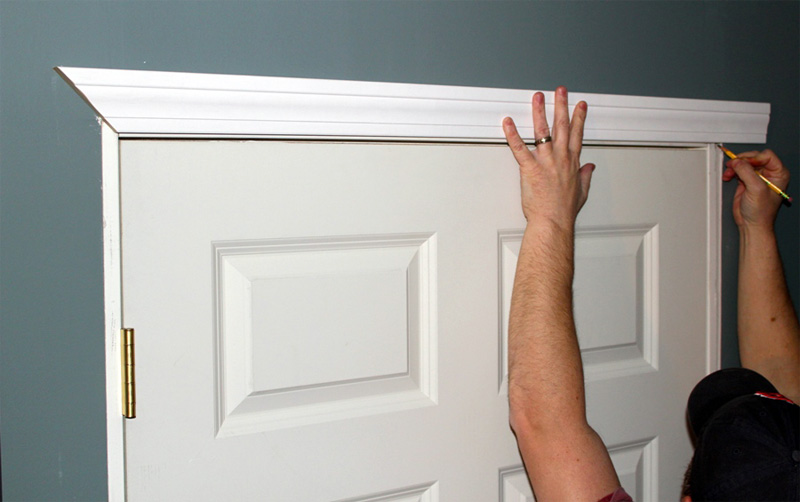
The length of the vertical slats is measured simply. It is applied to the location and from the point of intersection of the inner corner of the box with the bar add 3-4 mm upwards. To match the planks at an angle of 45 degrees, this mark is final - it is from it that gash is done. If you plan to dock the ends at an angle of 90 degrees, then you need to add the width of the plank to the resulting length. To determine the length of the horizontal bar, it is also necessary to attach it to the surface and make marks on each side, departing from the inner corners of the box, the same 3-4 mm.

It must be remembered that marks for cutting lengths should be made on each plank at the place of its specific installation. Thus, the level of the floor in different areas may vary within a few millimeters, and in some cases centimeters. In addition, in order not to get confused about where the bar is getting up, they are numbered.
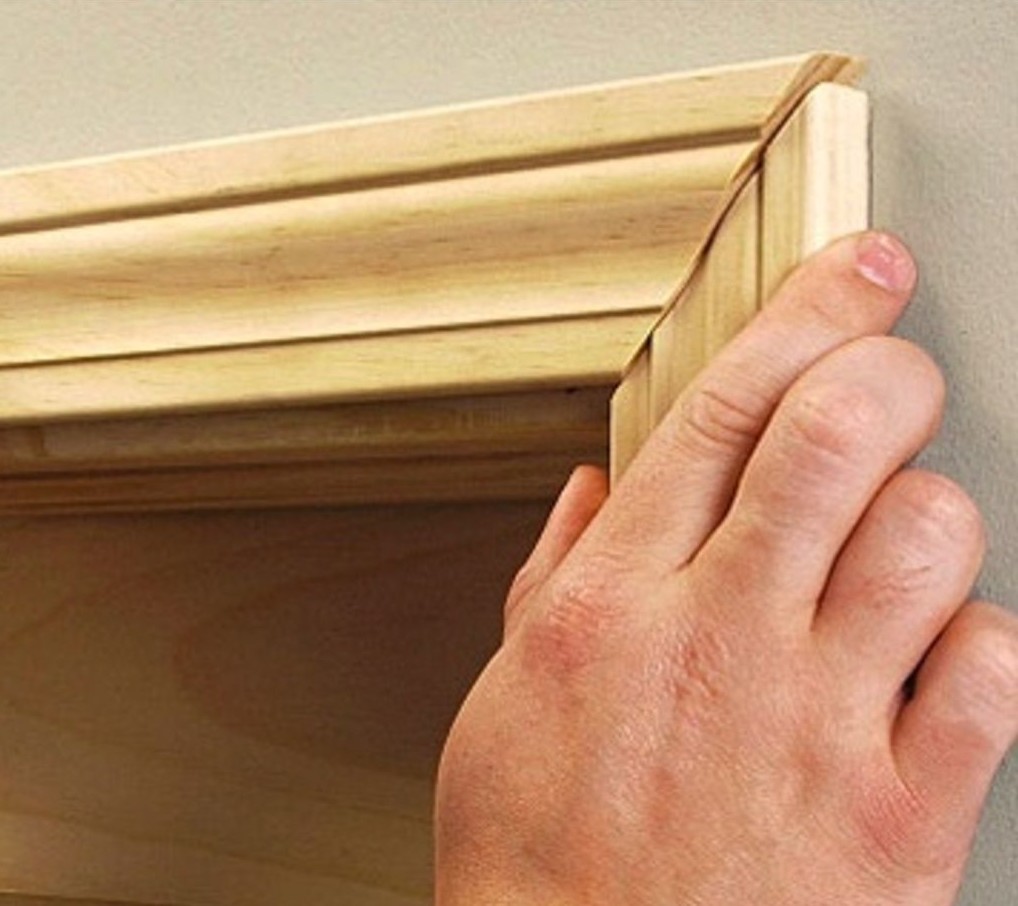
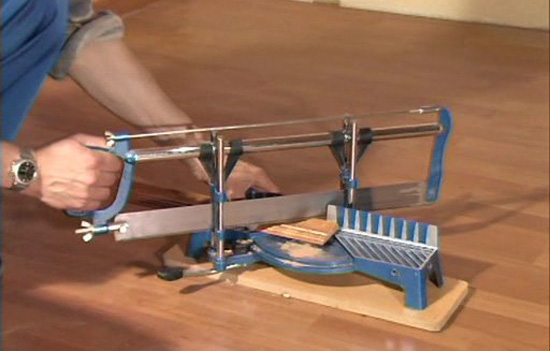
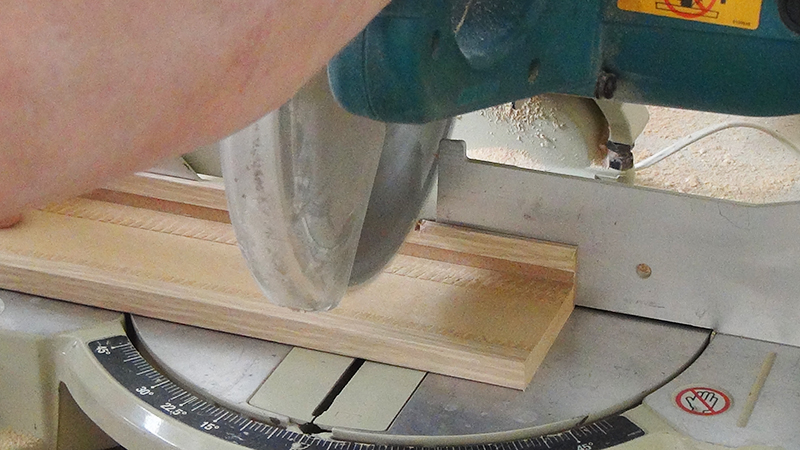
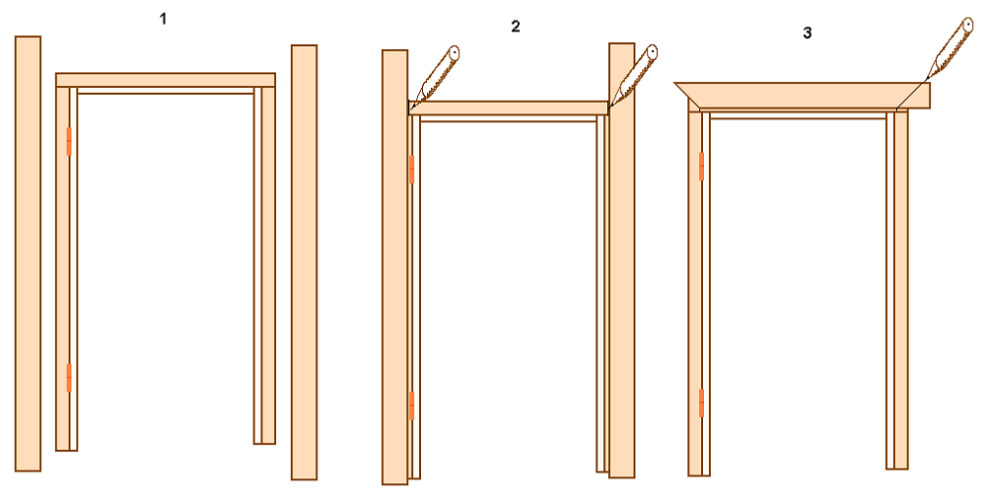
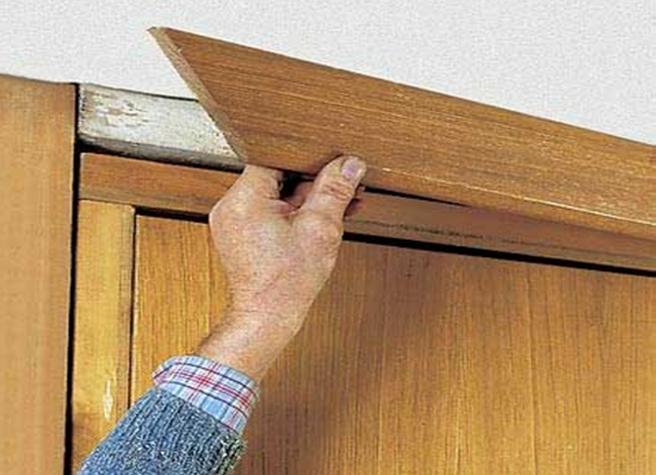
After marking all the strips, it is necessary to file them at a selected angle. This can be done with the help of different tools: miter saw, moulder, jigsaw or saw with small teeth. Regardless of what tool will be used for work, it is necessary to make a small indent from the label, and only then make a cut. This measure is associated with such a feature as the width of the cut: its value depends on the type of tool and is in the range of 1-3 mm.

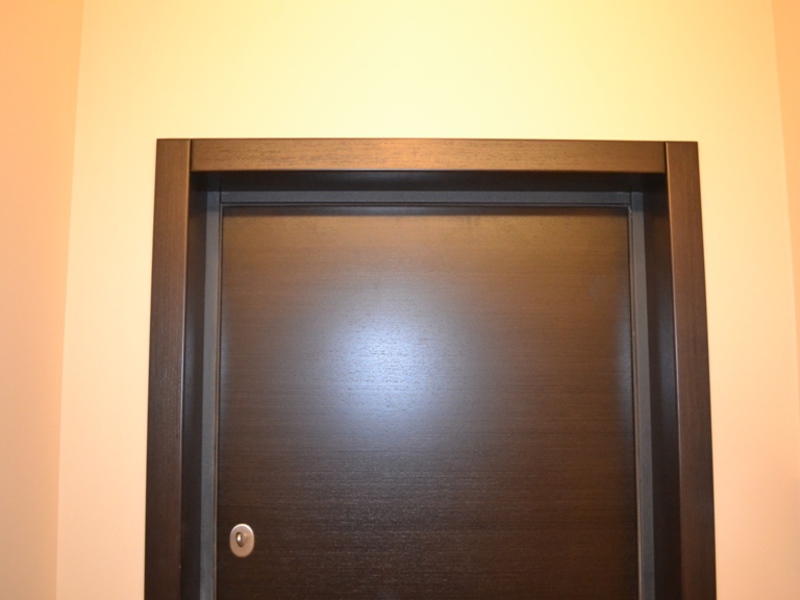
For the trim which is cut at an angle of 90 degrees, the best option would be to leave the ends of the vertical slats open. With this method of undercut, the vertical strips close the slices of the horizontal platband on both sides, and their open ends are located at the top and are almost imperceptible to the eyes.
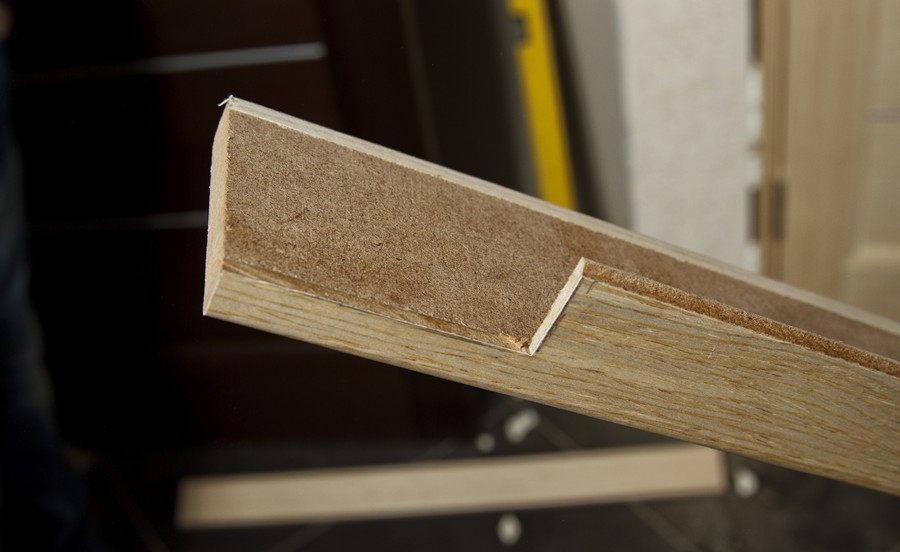
For telescopic platbands, in addition to the main undercut along the length, one more is made on the side of the location of the element entering the slot of the dobor or box.The undercut in the side allows the top of the plank to snug against the surface of the box and the wall.
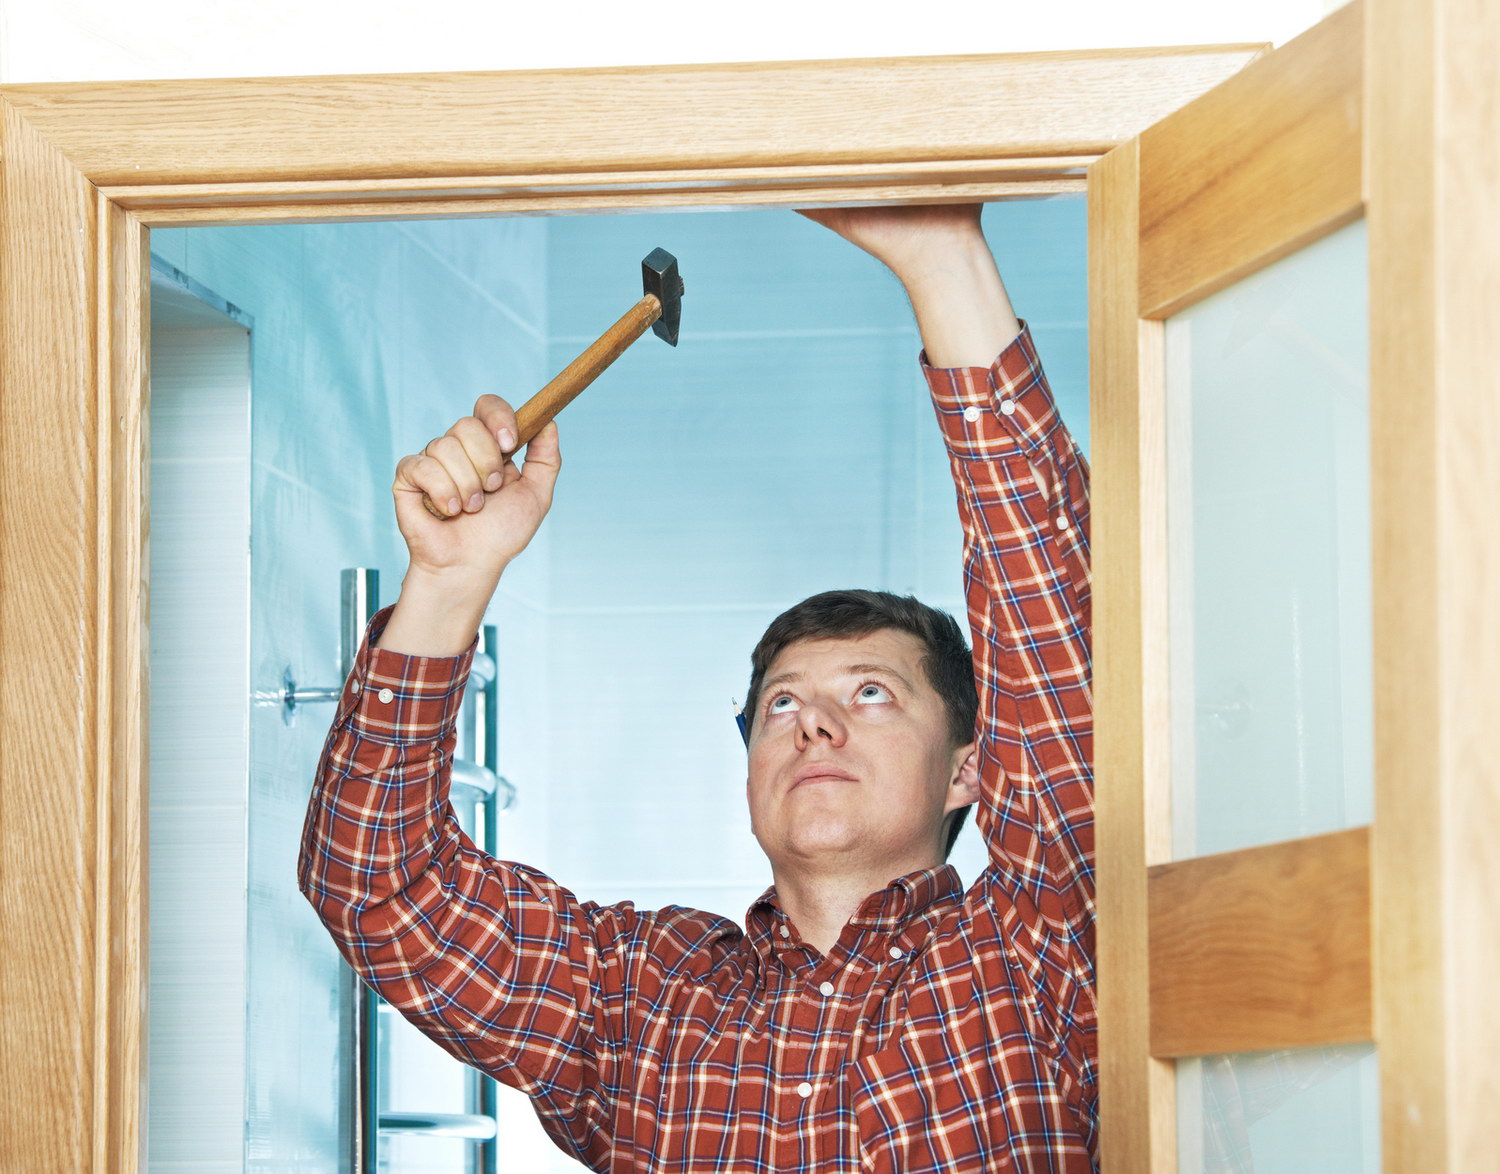
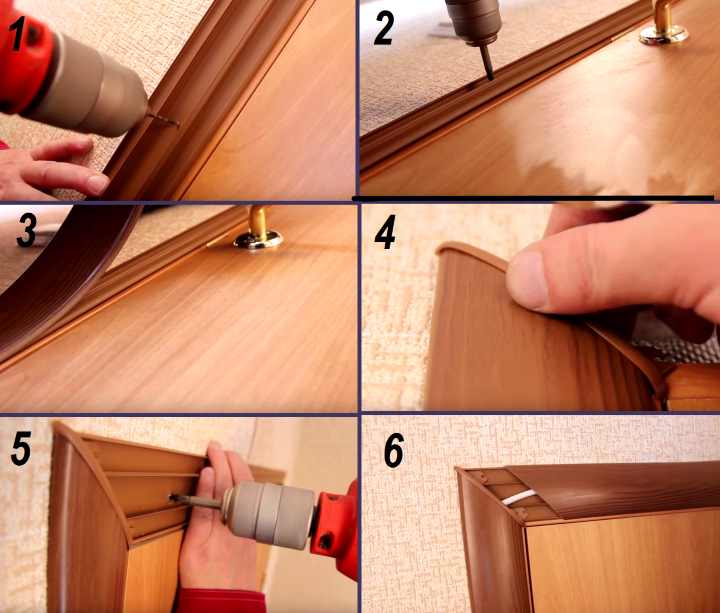
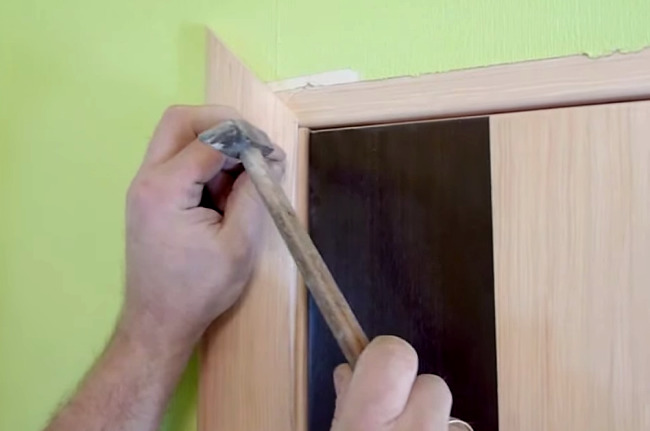
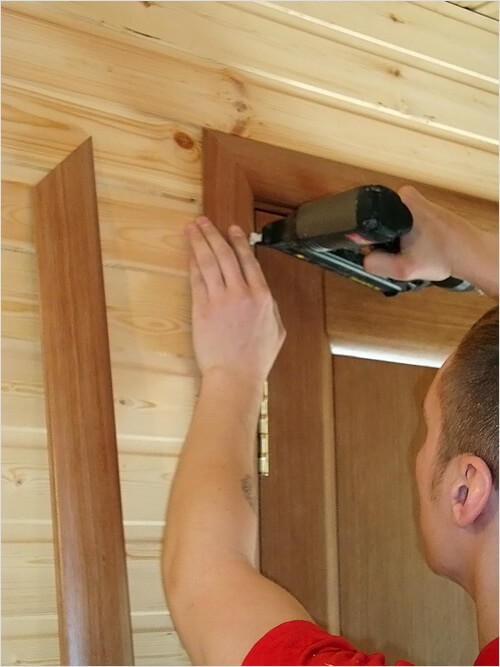
After all the preparatory work, you can begin to mount the frames. The method of installation is selected depending on the material of origin of the slats.
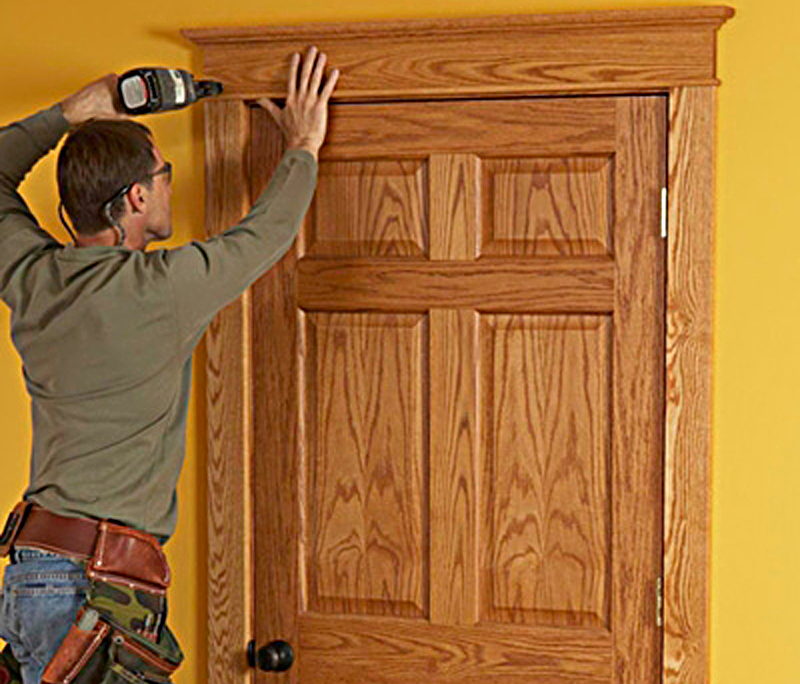
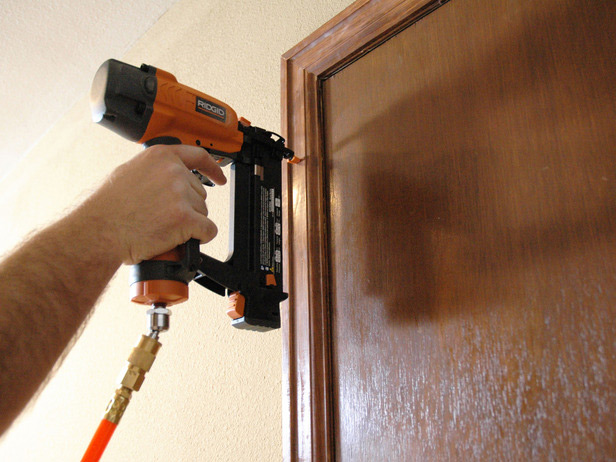
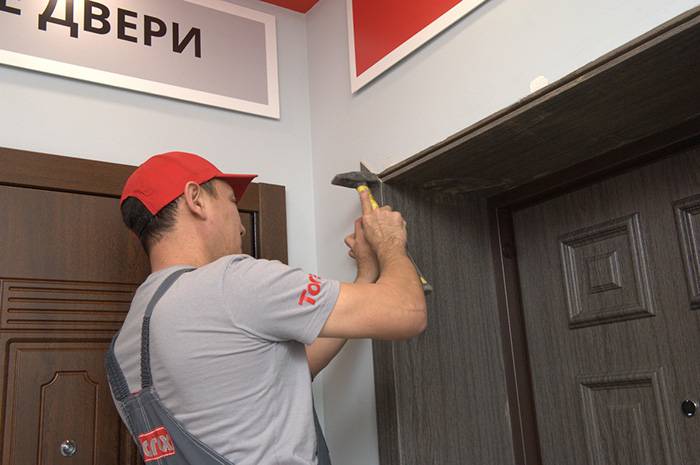
It is possible to fasten wooden and platbands from MDF using thin studs, special studs or self-tapping screws. Installation must begin with vertical strips and according to previously put marks on them. In order for the plank to keep well, the distance between the nails (screws) must be within 50 cm. With intensive use of the door, the distance is reduced to 15–20 cm.
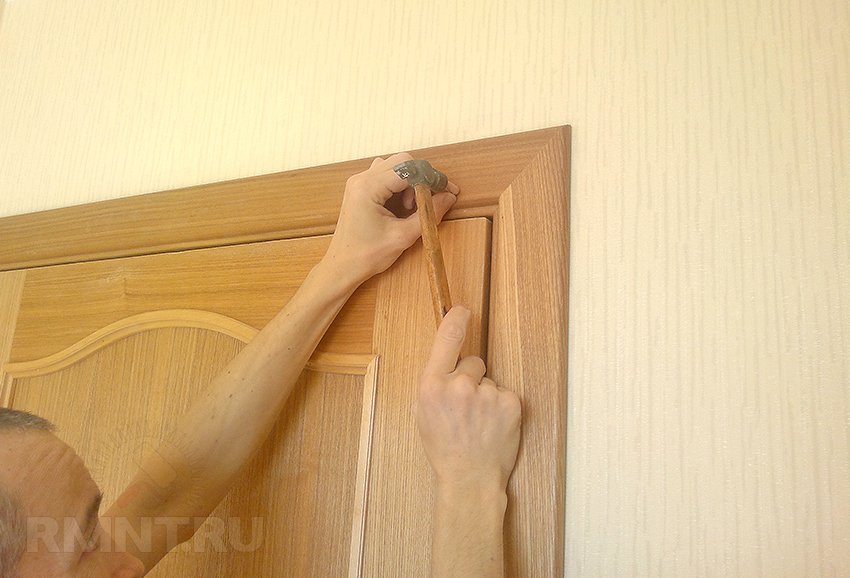

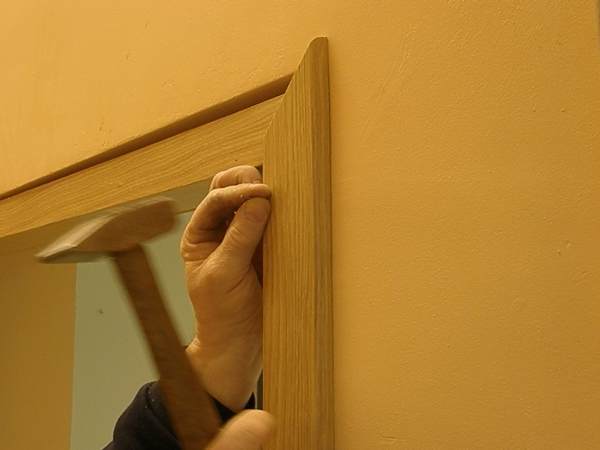
In order to nail the planks correctly and have the opportunity to correct the casing in case of an error, it is not necessary to hammer all the studs at once - it is enough to fix the plank in the center and at the base, without hammering them to the end.
The second vertical plank is installed in the same way, followed by the horizontal platband. After adjusting the butt joints all the straps are fixed permanently.

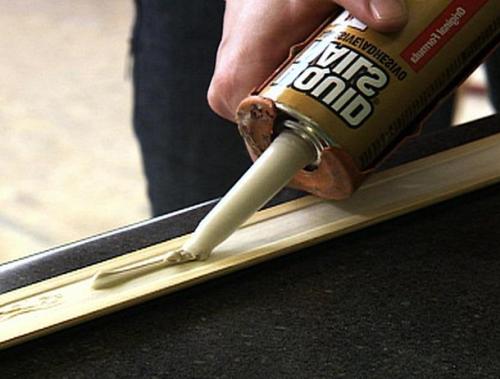
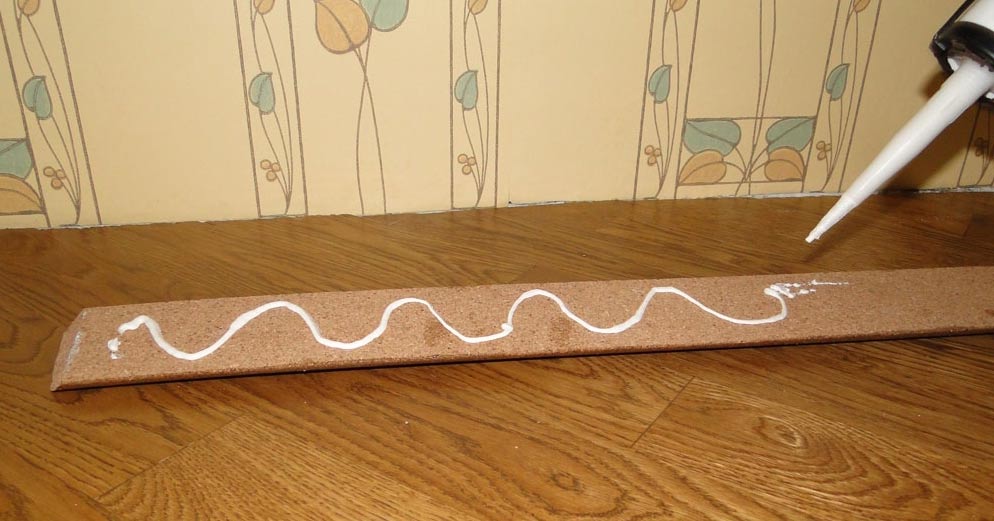
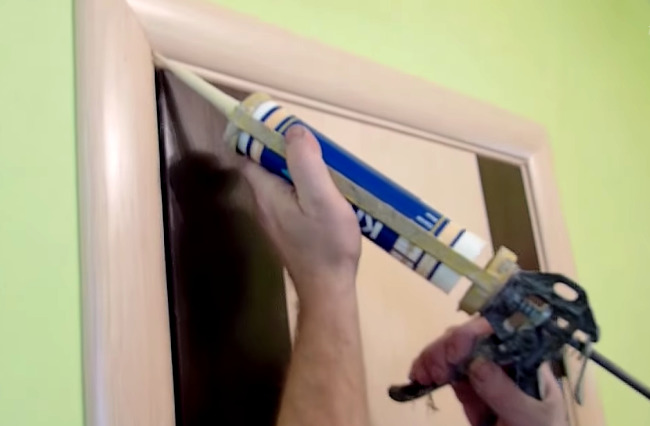
Fix the trim can not only with nails or screws, but with the help of liquid nails. This method of fasteners is suitable if the walls have a perfectly flat surface.
The composition is applied to the inner side of each slat over the entire surface. For fixation, clypeus tightly pressed to the surface for 1–2 minutes. As a rule, this time is quite enough for the plank to stick well.
The method of fastening the plastic casing is slightly different from all. In order to fix them on the surface, you must first install the mounting profile around the perimeter of the box, fixing it with screws, and only then insert the upper part of the casing into the grooves. The butt joints in the corners are closed with special decorative elements.
Tips
Installing the trim is simple, but requires a sufficient amount of time, effort and skill. It is difficult for beginners to take into account all the details, but there are standard tips that make installation of casings possible with minimal errors or even without them.
- Installation of platbands is better to make only after gluing wallpaper (painting) on both sides of the aperture and in the absence of baseboards. Skirting fit only after the installation of slats, and not vice versa.The lower part of the plank should not be supported on the baseboard - only on the floor.
- Joining the side parts of the casing and skirting depends on the material of the latter. In plastic models, the side part is always covered with a figured cap, so only the length of the product is cropped. With wooden plinths it is a little different: they do not have plugs, therefore, the side of the plinth adjoining the plank is 45 degrees.


- The most difficult moments in the installation are marking marks, on the accuracy of the application of which the general appearance of the structure depends, and washed down the bars at an angle of 45 degrees.
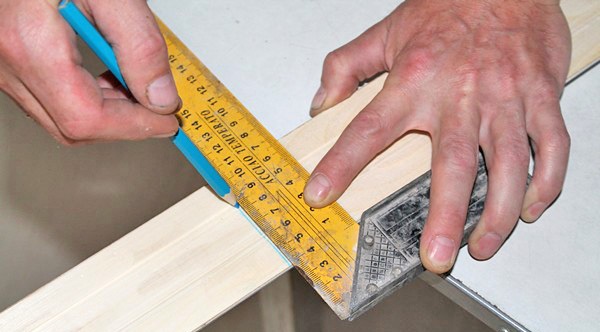
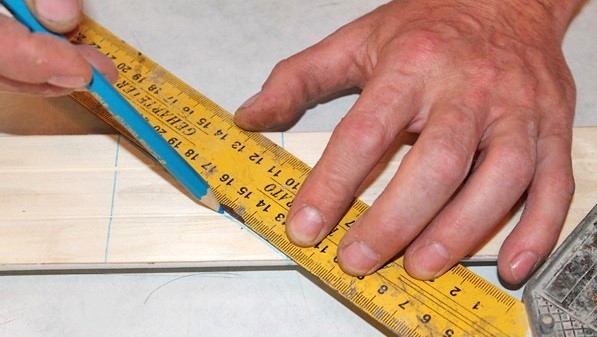
- Not always at hand are the tools with which you can precisely cut an angle of 45 degrees, so in this situation, you can use a simple square and a pencil.
- On the back side of the plank you need to draw a transverse line from the mark. At a distance equal to the width of the plank, another line is drawn. In the resulting square, you need to draw a diagonal, along which to cut off the extra part of the bar.
- I washed it down with a flat surface of the walls; the main thing is to accurately mark the place of the undercut. But ideally smooth walls are not everywhere,and therefore even a correctly made undercut will not save from the gap between the joints of the two slats.
- The problem can be solved in a simple, but at the same time effective way. To determine the value of the wall differential, you need to tightly attach the casing to the box. If the gap width is no more than 2–3 mm, then the situation can be remedied with a lining of the same thickness. It is used only during the sawing angle to raise one side of the bar. The cut is obtained at 45 degrees, but has a slight slope to the surface, which allows the ends to be joined without a gap.

- Sometimes it is impossible to completely get rid of the gap, and there is neither strength nor desire to reinstall the slats. In this situation, the best option would be to use a suitable tone sealant. With it, masked and the entry of the nails, if they are used as a method of fastening the slats.
- Sections of MDF and wood planks should be sanded using sandpaper for processing. It is necessary to act extremely carefully, as there is a risk of damage to the face of the plank. After sanding, the sections are painted over with joiner's markers, matched to the color of the slats.
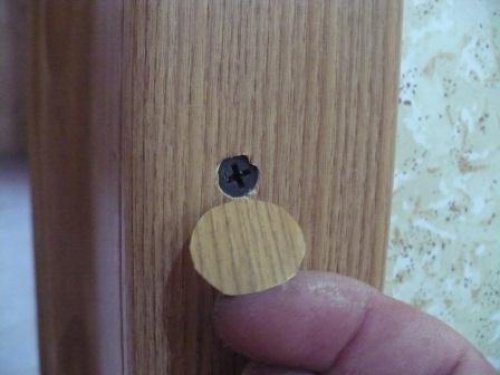
- If the frames are attached to the surface with nails, then for convenience, you can pre-drill holes in the plank with a diameter of 1.5 mm. The nails themselves should have a diameter of not more than 1.4 mm, and their length should not exceed 40 mm. To ensure that the nail entry points are not so conspicuous, the caps are removed using a side cutter. This tool is also used in case the nail has not fully entered the surface of the plank and, in addition, is still bent. Such a nail should not be pulled out, since it is also impossible to drive another one with a high degree of probability. You just need to break off the bent part and nail the new stud next.
- When used as fasteners for self-tapping screws, the diameter of the bore holes should be no more than 6 mm. Attachment points in this case are masked with decorative hats to match the color of the platbands.
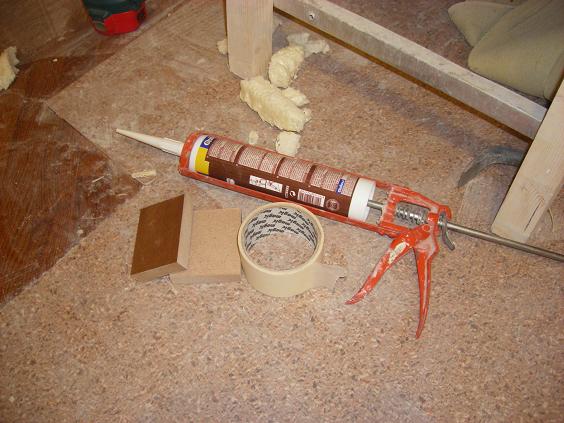
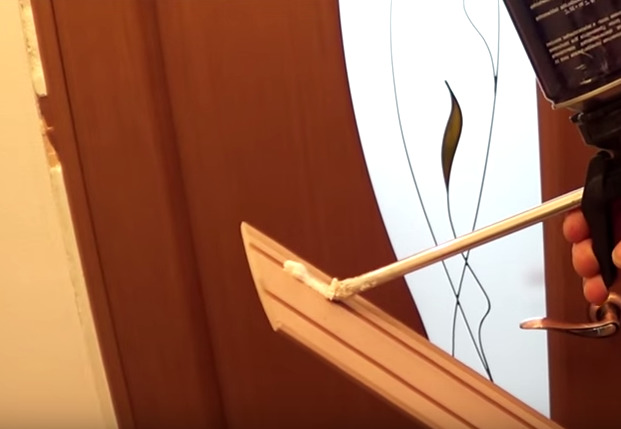
- The aesthetic appearance of the whole structure depends on the density of the fit, therefore very often an assembly foam is used as an additional measure to increase the adjacent capacity of the bar. It is applied from the back side of the strip along the entire length in a narrow strip, and give time for drying. 4-5 minutes is enough for the grip to occur, which is then installed using the chosen mounting method.Do not be afraid that the foam will increase too much in volume and raise the bar, because if you press the bar strongly, the foam will not increase in volume.
Knowing all the details of installation and preparing the necessary tools and materials, you can install almost any trim, the main thing is to have time and desire to do this work with your own hands.
How to install the trim on the door, see the following video.


