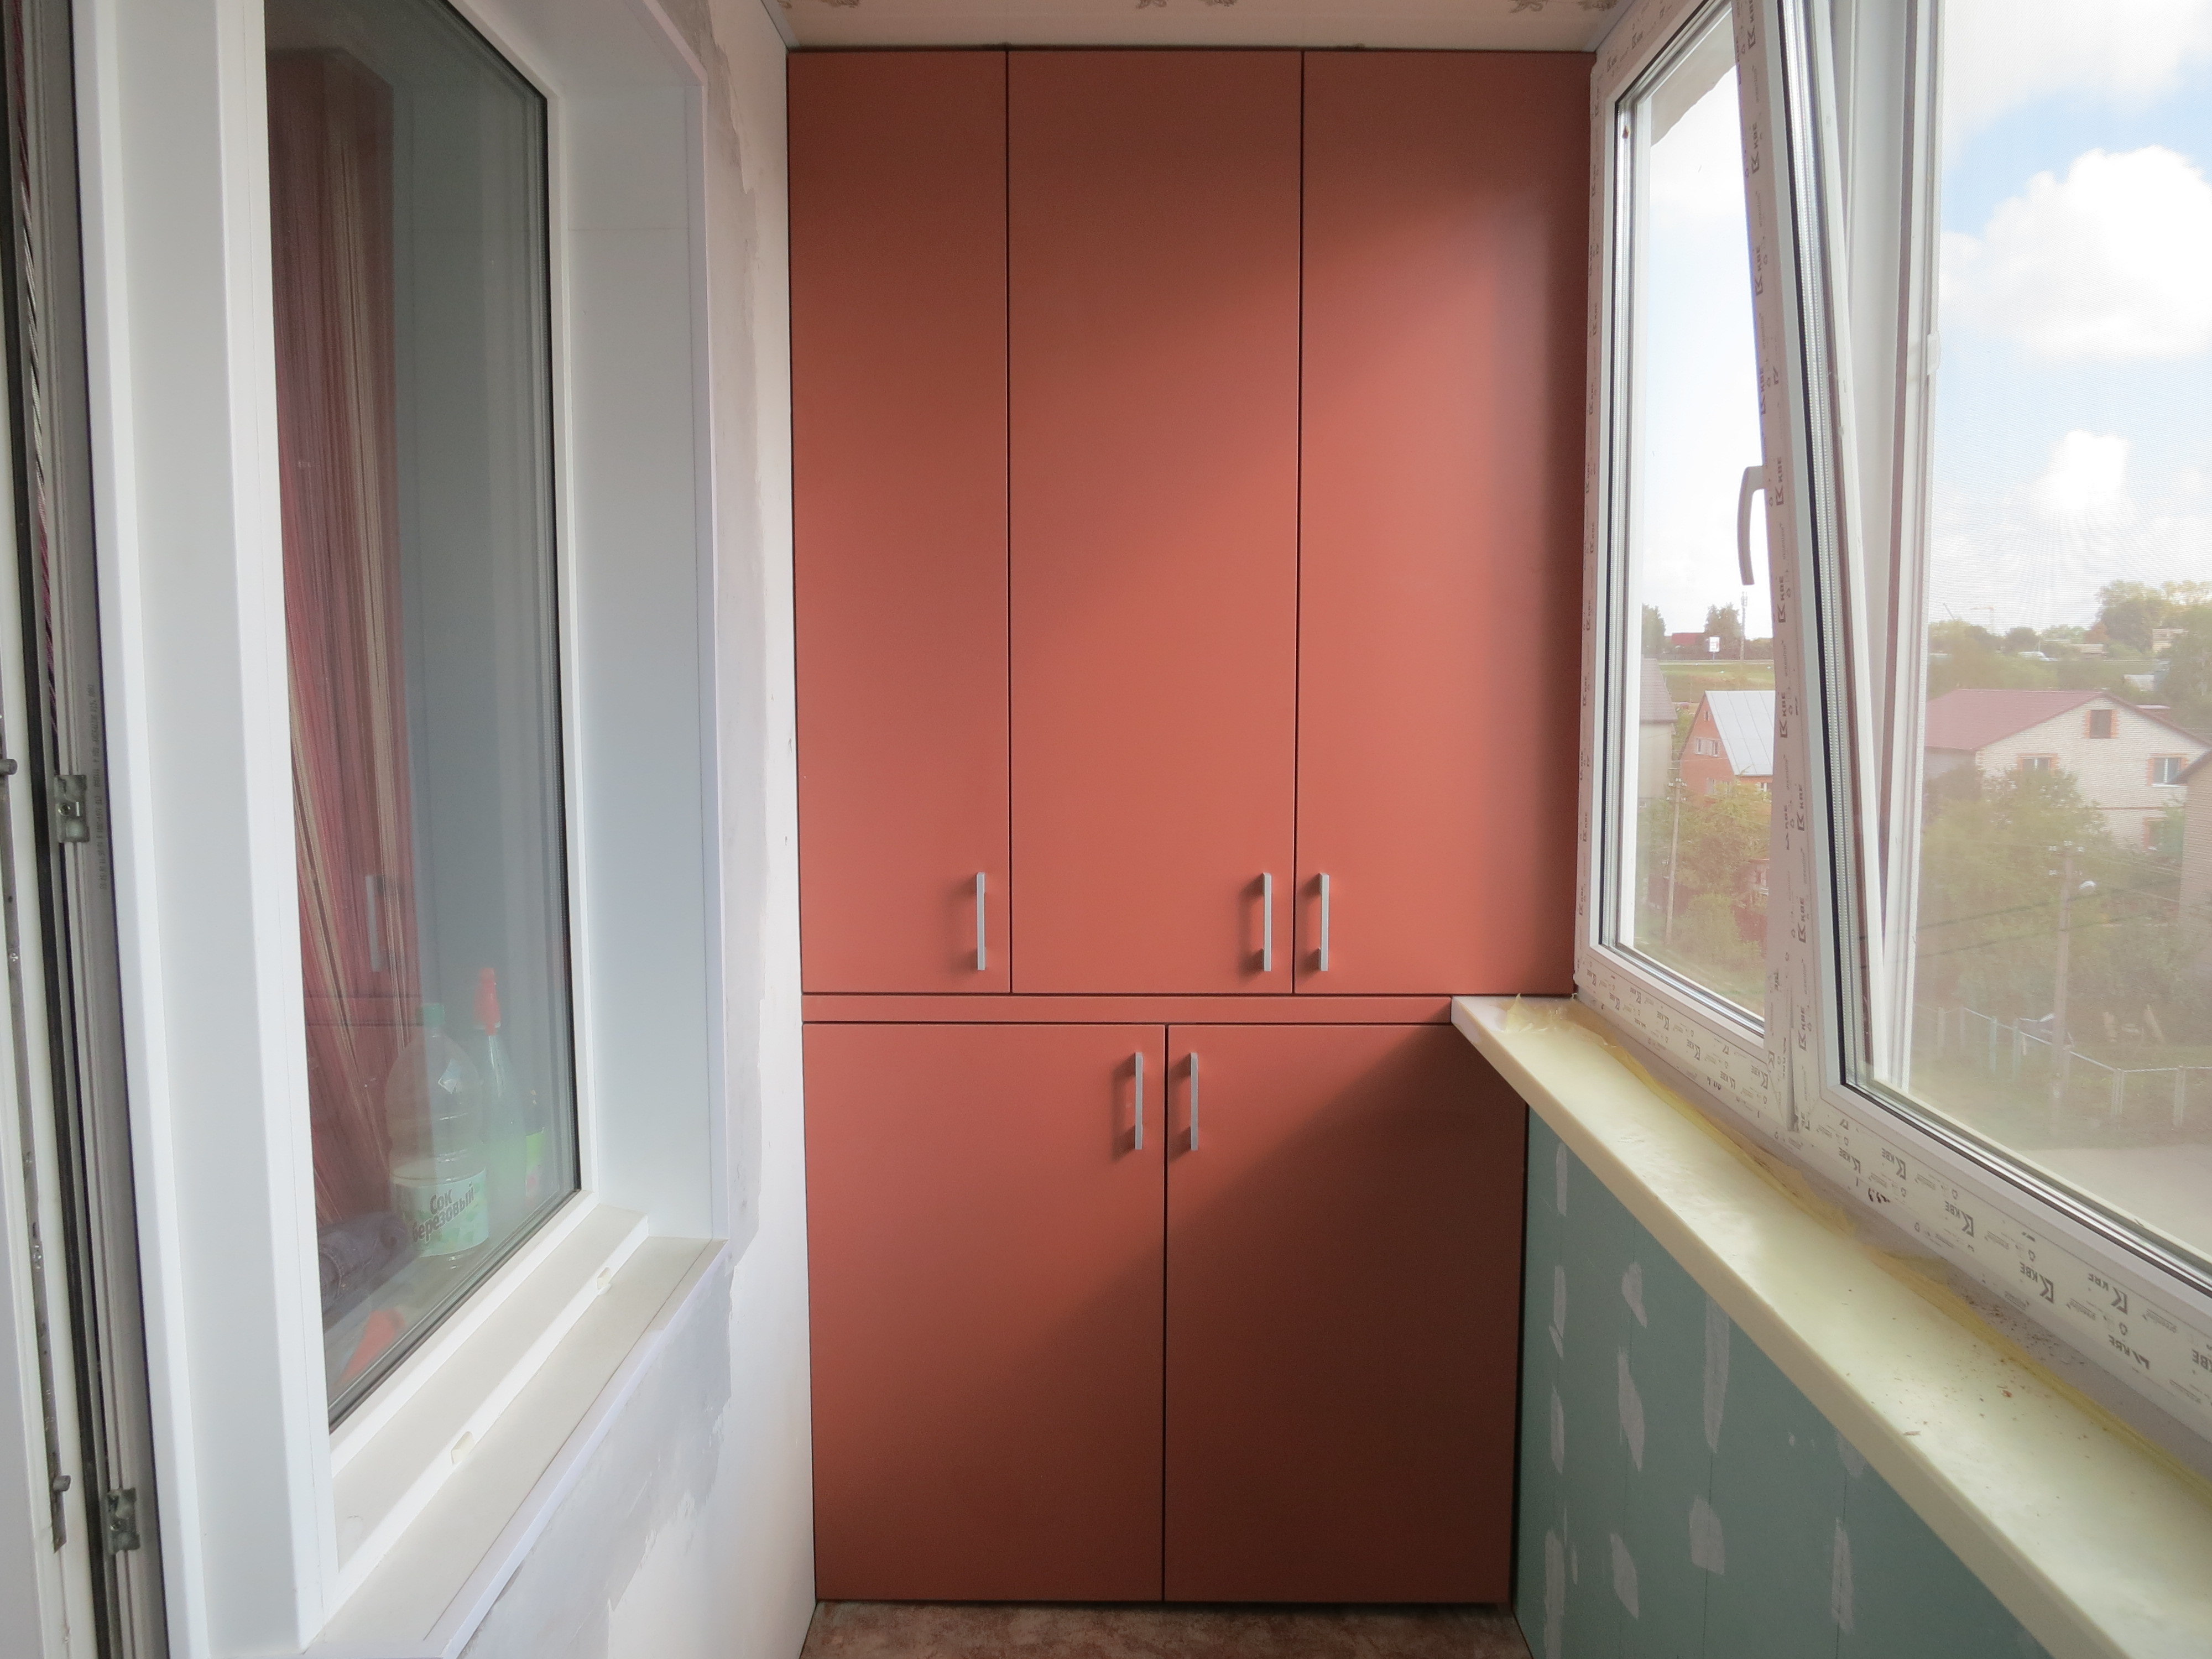
Wardrobe on the balcony or loggia do it yourself
Furniture for the balcony can be made independently using a minimum of tools and materials. A wardrobe made by yourself will be fully consistent with the design idea of the owner of the loggia. In addition, it serves as a guarantor of the quality of the finished product, since the process of creating furniture is controlled from beginning to end.
What can you do?
The design of the cabinet depends on the chosen interior of the room. When a workshop is located on the loggia, the furniture should be spacious, have many shelves for storing small items, but less attention will be paid to aesthetic characteristics.
In contrast, when the balcony is arranged in a vintage or modern style, the appearance of the cabinet will come out on top.
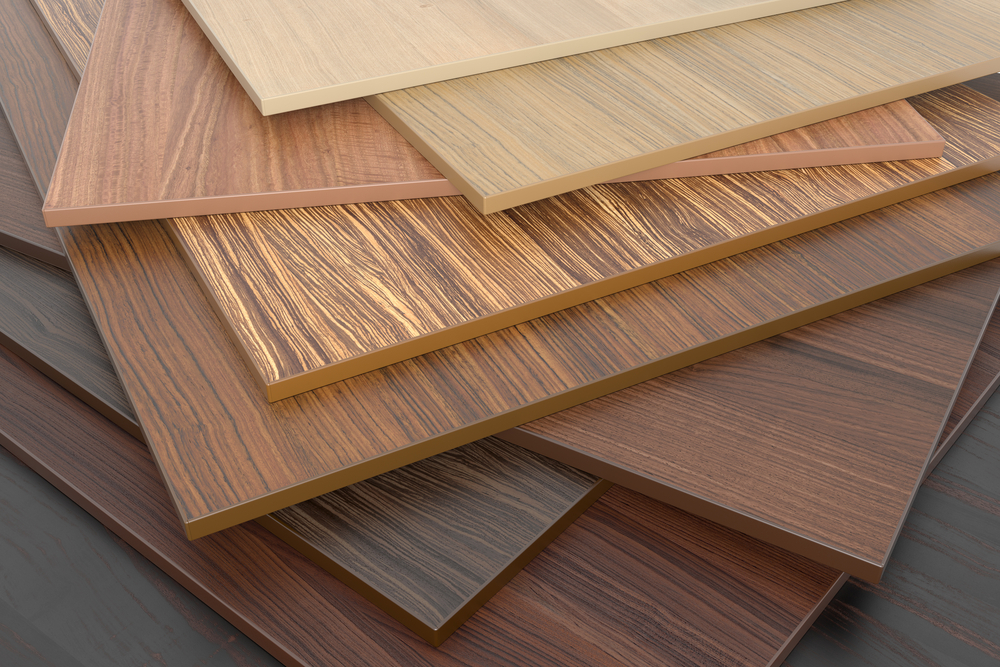
For the manufacture of furniture using different types of materials that will depend on the functional features of the product, its color, texture and durability. The most noble and solid furniture looks natural wood.
The budget option would be a wardrobe, particleboard or plastic.
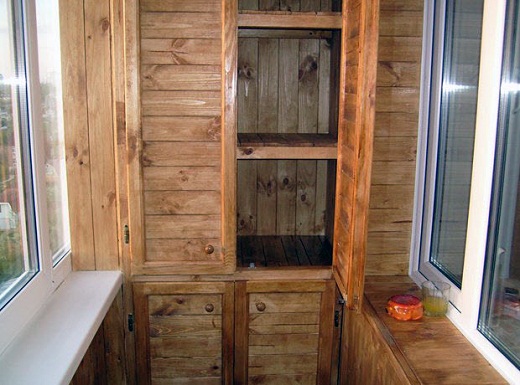

Wood
The material has the best performance and lasts longer. The tree is environmentally safe, does not emit harmful substances into the air. Due to the excellent appearance of the board does not require additional processing, will look good even without paint or varnish. However, the material has several disadvantages. These include high cost, massiveness, a lot of weight. The tree burns, swells under the influence of moisture, mold can appear on it.
Drywall
Simplicity of installation is one of the main advantages of the material, allowing to realize complex design solutions. Drywall bends well, because it is suitable for creating furniture with rounded corners or cylindricalelements of decor. Sheets weigh a little, because they are easy to carry, and you can move the finished furniture without any problems. The cost of the material is lower than that of wood, so it is popular with consumers.
The disadvantages include low strength fasteners and the relative fragility of finished products.

Plastic
This artificial material has a rich color range, can be decorated with patterns and drawings. Plastic is pliable for processing, it bends easily, it is easy to assemble, therefore beginners can cope with it.
The practicality of the material is expressed in low weight and ease of maintenance: when dirt appears, it is enough to wipe the furniture surface.

Modern plastic is resistant to ultraviolet and retains a saturation of colors even under the influence of sunlight. The material is not afraid of moisture, it does not leave scratches with minor mechanical effects. The advantage is the low weight of the finished furniture. Plastic cabinet can be easily disassembled for transportation to another place.

Chipboard
Slab consisting of sawdust, shavings, chips. The advantages of the material include strength, reliability and density.The panels are easy to install, in addition, they have a low price. The special structure of the plates allows you to create furniture of any shape and size and a unique design. Products made from this material are easy to transport, they take up little space during storage. The panels are resistant to temperature extremes, exposure to humidity and sunlight.
Building materials that are not as combustible as natural wood guarantee good sound and thermoregulation.
Plywood
Building material consisting of several layers of wood with a thickness of 0.5-10 mm. There are several types of plywood, depending on its performance and the specifics of the manufacture of panels. In particular, they emit moisture-resistant, laminated and bakelite building materials. Due to its structure, plywood is resistant to external influences. It is easy to work with panels: the same tools that are used for natural wood are suitable for their processing. Parts of any size and shape are cut out of plywood; if necessary, it can even be bent.
The material is resistant to high and low temperatures, it is not afraid of exposure to moisture.
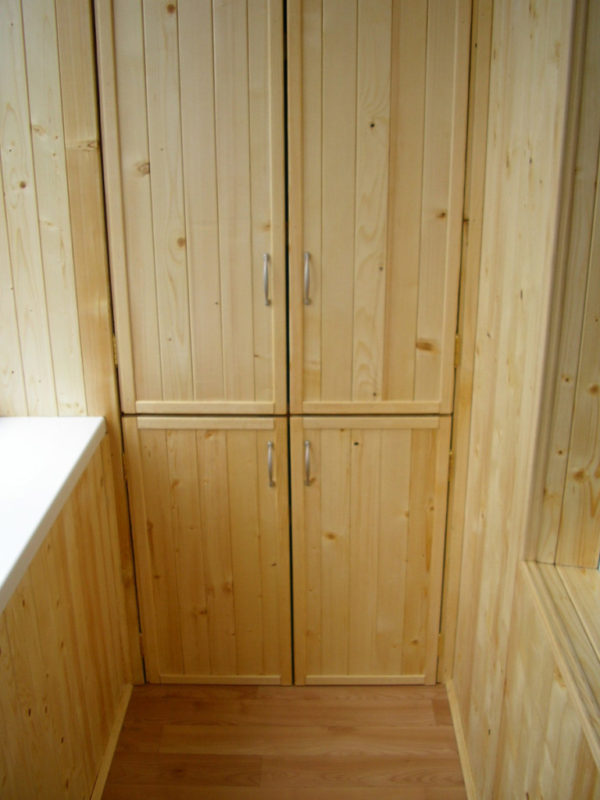
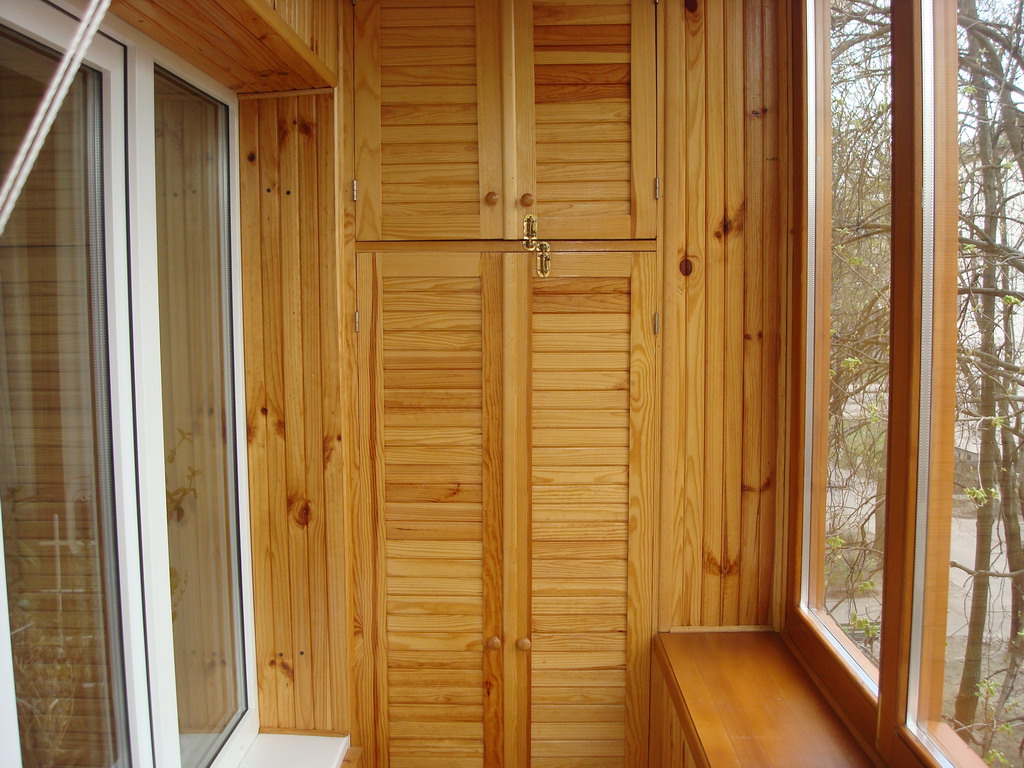
Clapboard
First of all, it is used to finish the interior and exterior, however, the material can be used for the manufacture of furniture. In this case, a wooden frame is made, which is lined with clapboard. The advantage of the panels is the strength and high aesthetic characteristics. Wooden lining looks good even without paint and varnish, therefore it is possible to save money at the stage of finishing works. So that the material is resistant to humidity and temperature, it is covered with special solutions.
When creating furniture, it is permissible to combine different materials. The basis can be taken wood or chipboard, which complement the glass shelves and inserts. This option is also suitable for plastic - it can be decorated with metal elements.
Preparatory stage
Before proceeding to the manufacture of the cabinet, it is necessary to assess the general condition of the loggia and pre-plan its layout and interior. If the room will be used as residential, it is pre-warmed, sheathed, make the finish.
Furniture is created only after the completion of repairs: they are determined with the model of the cabinet,acquire materials and prepare tools.

What equipment is needed for the manufacture of furniture on the balcony:
- building level;
- hammer drill, jigsaw, hammer drill;
- drill;
- hammer, hacksaw, screwdriver;
- fasteners;
- furniture fittings;
- tape measure, measuring tape, pencil.

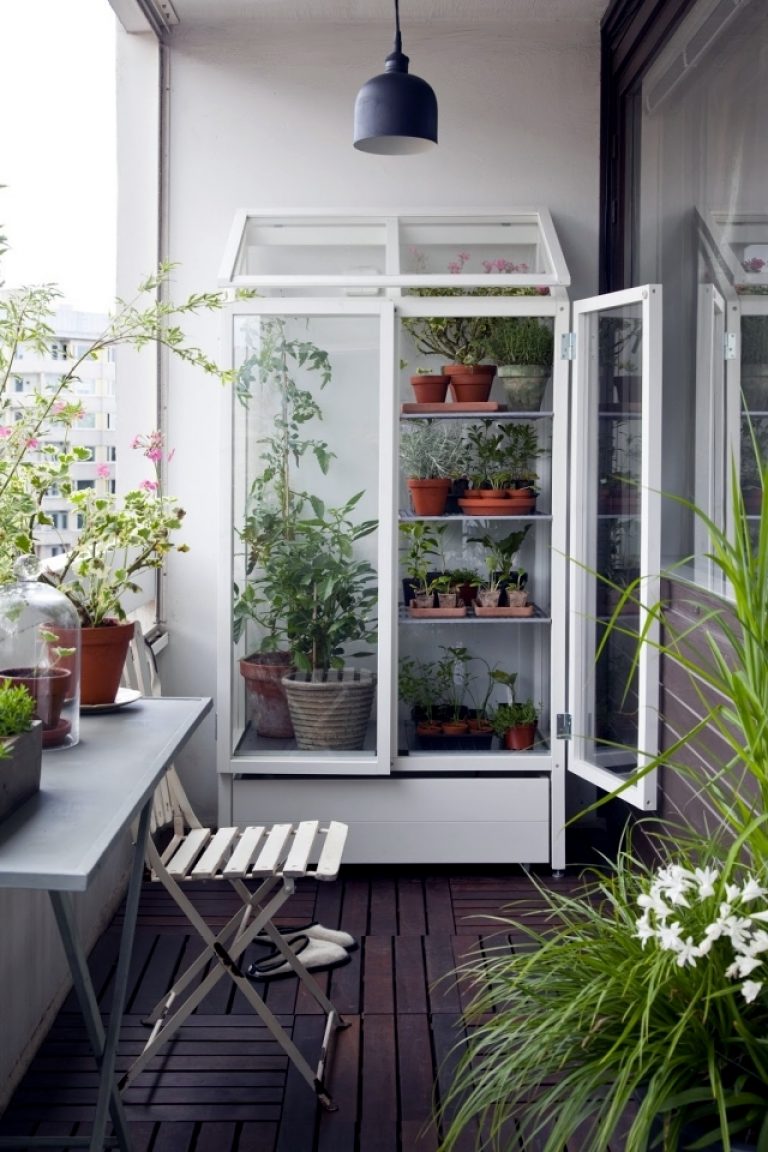
Development of the model of the future cabinet is consistent with its purpose, on the basis of this, functional and decorative elements are selected. If you plan to plant flowers and seedlings on the balcony, some of the shelves are made open, because the plants need the sun. For the workshop fit a simple wardrobe with a minimum of decor. The practical component is also important in the case when the loggia is combined with the dining room: the furniture will become part of the kitchen unit.

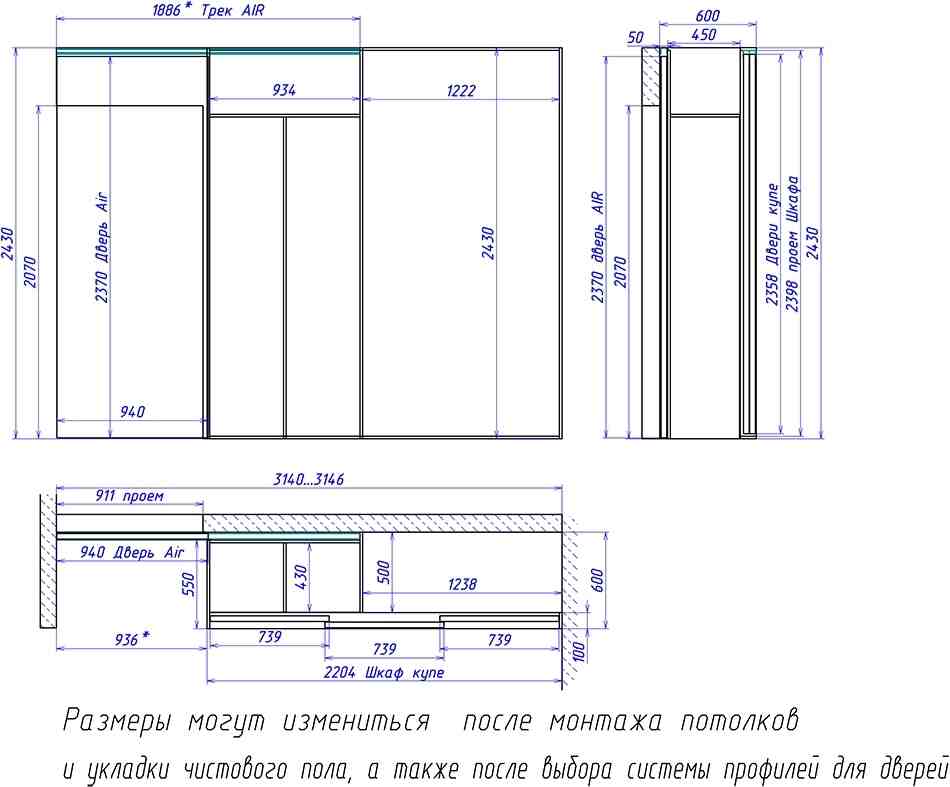
We make measurements
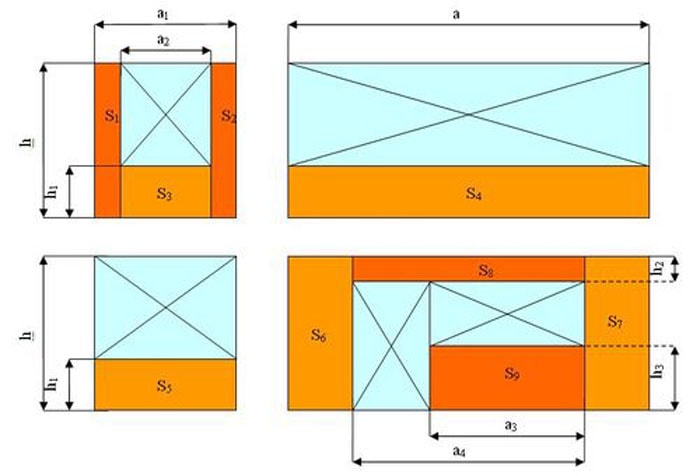
Buying building materials begins with the measurement work. You need to decide on three values: the height, width and depth of the cabinet. For these purposes, the area of the balcony is measured using a ruler, pencil and tape measure and deciding which part of the loggia the future product will occupy. The depth of the shelves should also be taken into account: the capacity of the piece of furniture depends on it.
If there was another closet on the balcony before, you can take its dimensions as a basis.

At this stage, the list of fasteners, their number and size are also determined. Accessories, as well as materials, are sold in hardware stores. If possible, it should be indicated on the diagrams in order to properly assemble the cabinet afterwards.
Door options
Furniture on the balcony can be open or equipped with doors. The last elements occupy the entire height of the cabinet or only a part of it. Sometimes sashes are located only in the lower part, and fans of modern style and non-standard forms may prefer asymmetric doors. Based on the design features they are divided into several types:
- Swing. The cheapest and most common option. For the manufacture of these parts is enough to take directly the doors and hinges with fasteners, which will be installed sash.
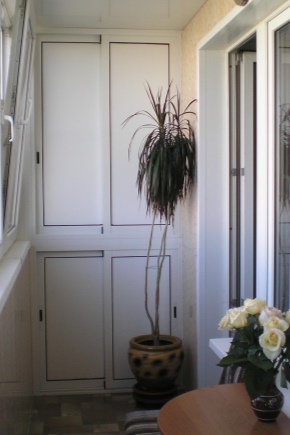
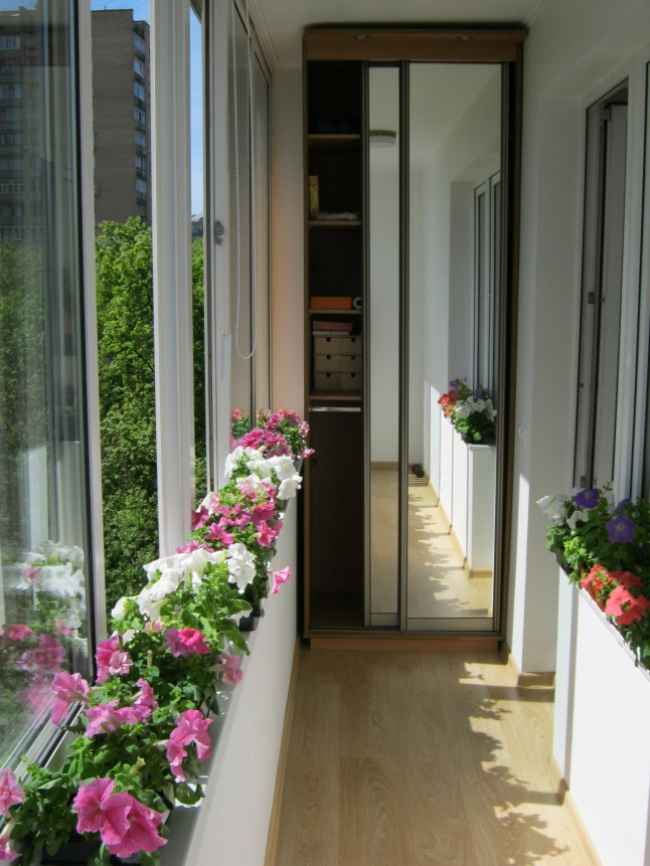
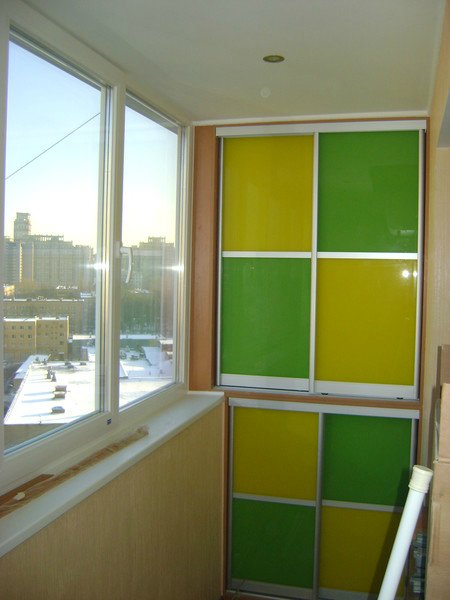
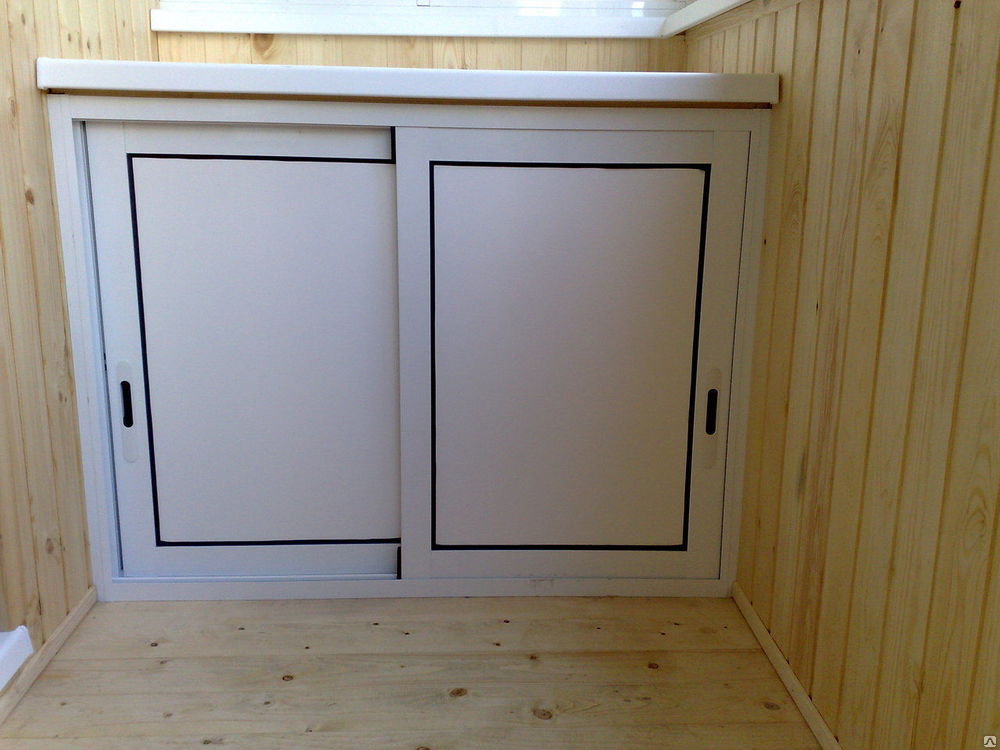
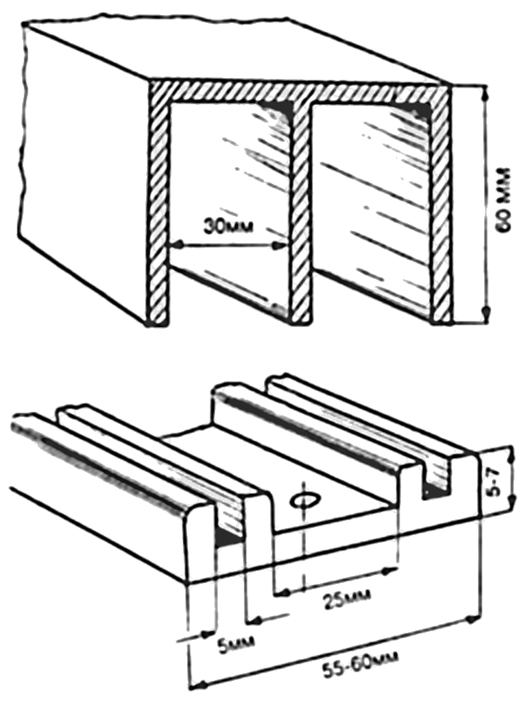
- Sliding. Doors of the type that are used in wardrobes. They are moved apart, which makes access to the content easier. If you plan to make a dressing room out of the loggia, you can place a mirror on the doors.To install the doors, guides and rollers are required, which are installed in the upper and lower parts of the cabinet.
This design saves space due to the fact that the sash does not block the passage.
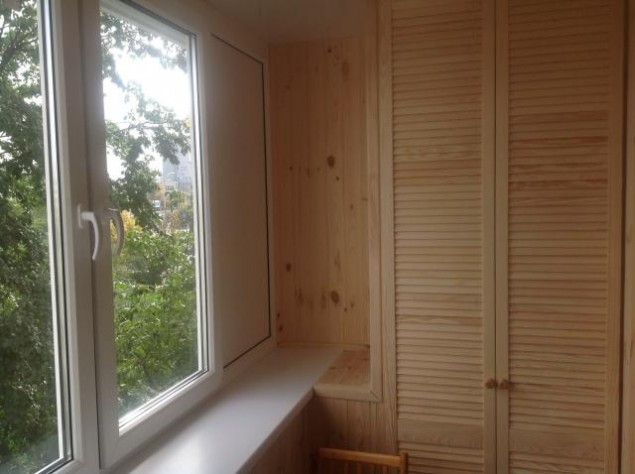
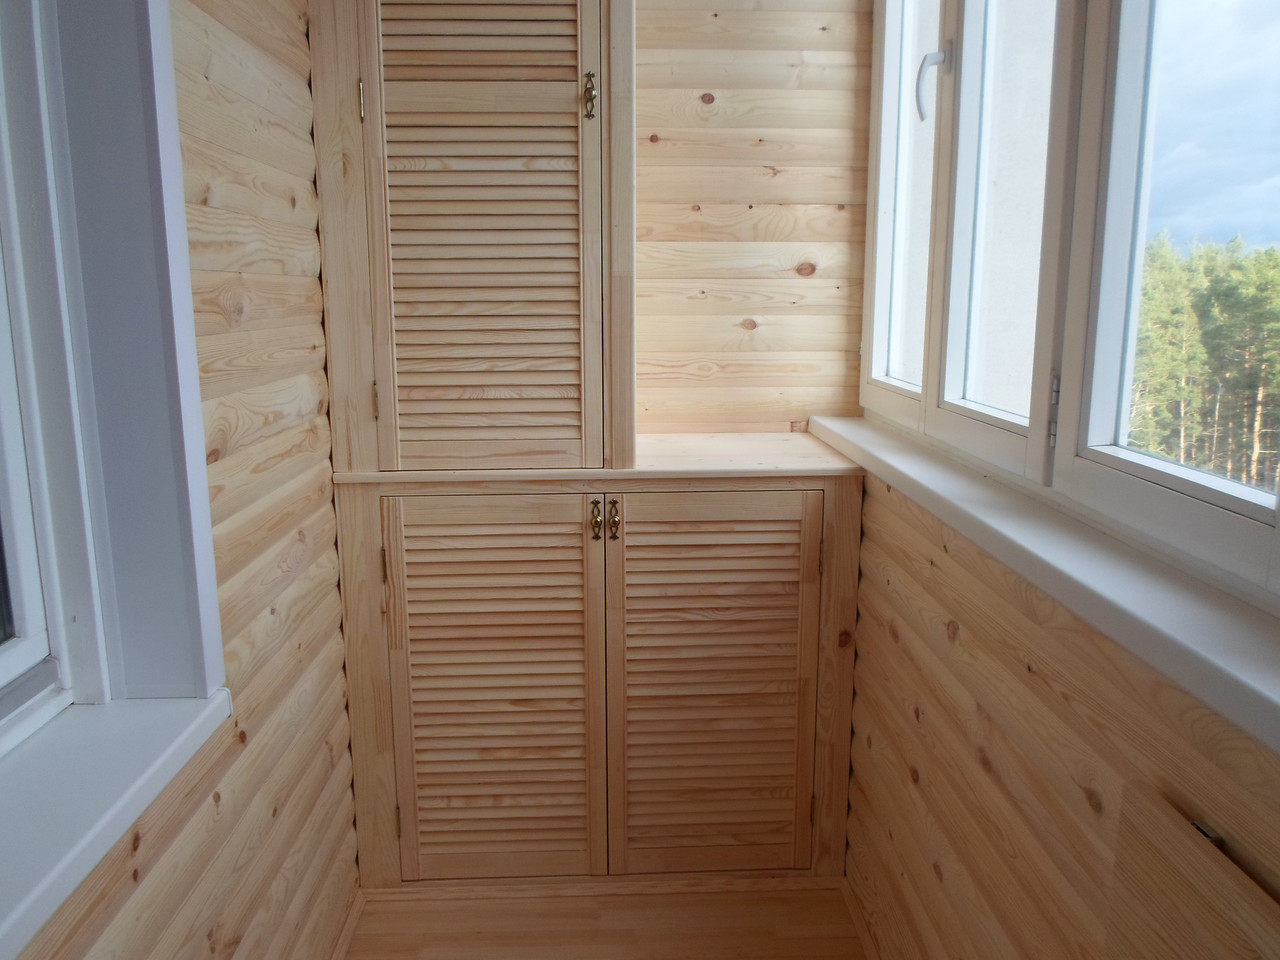
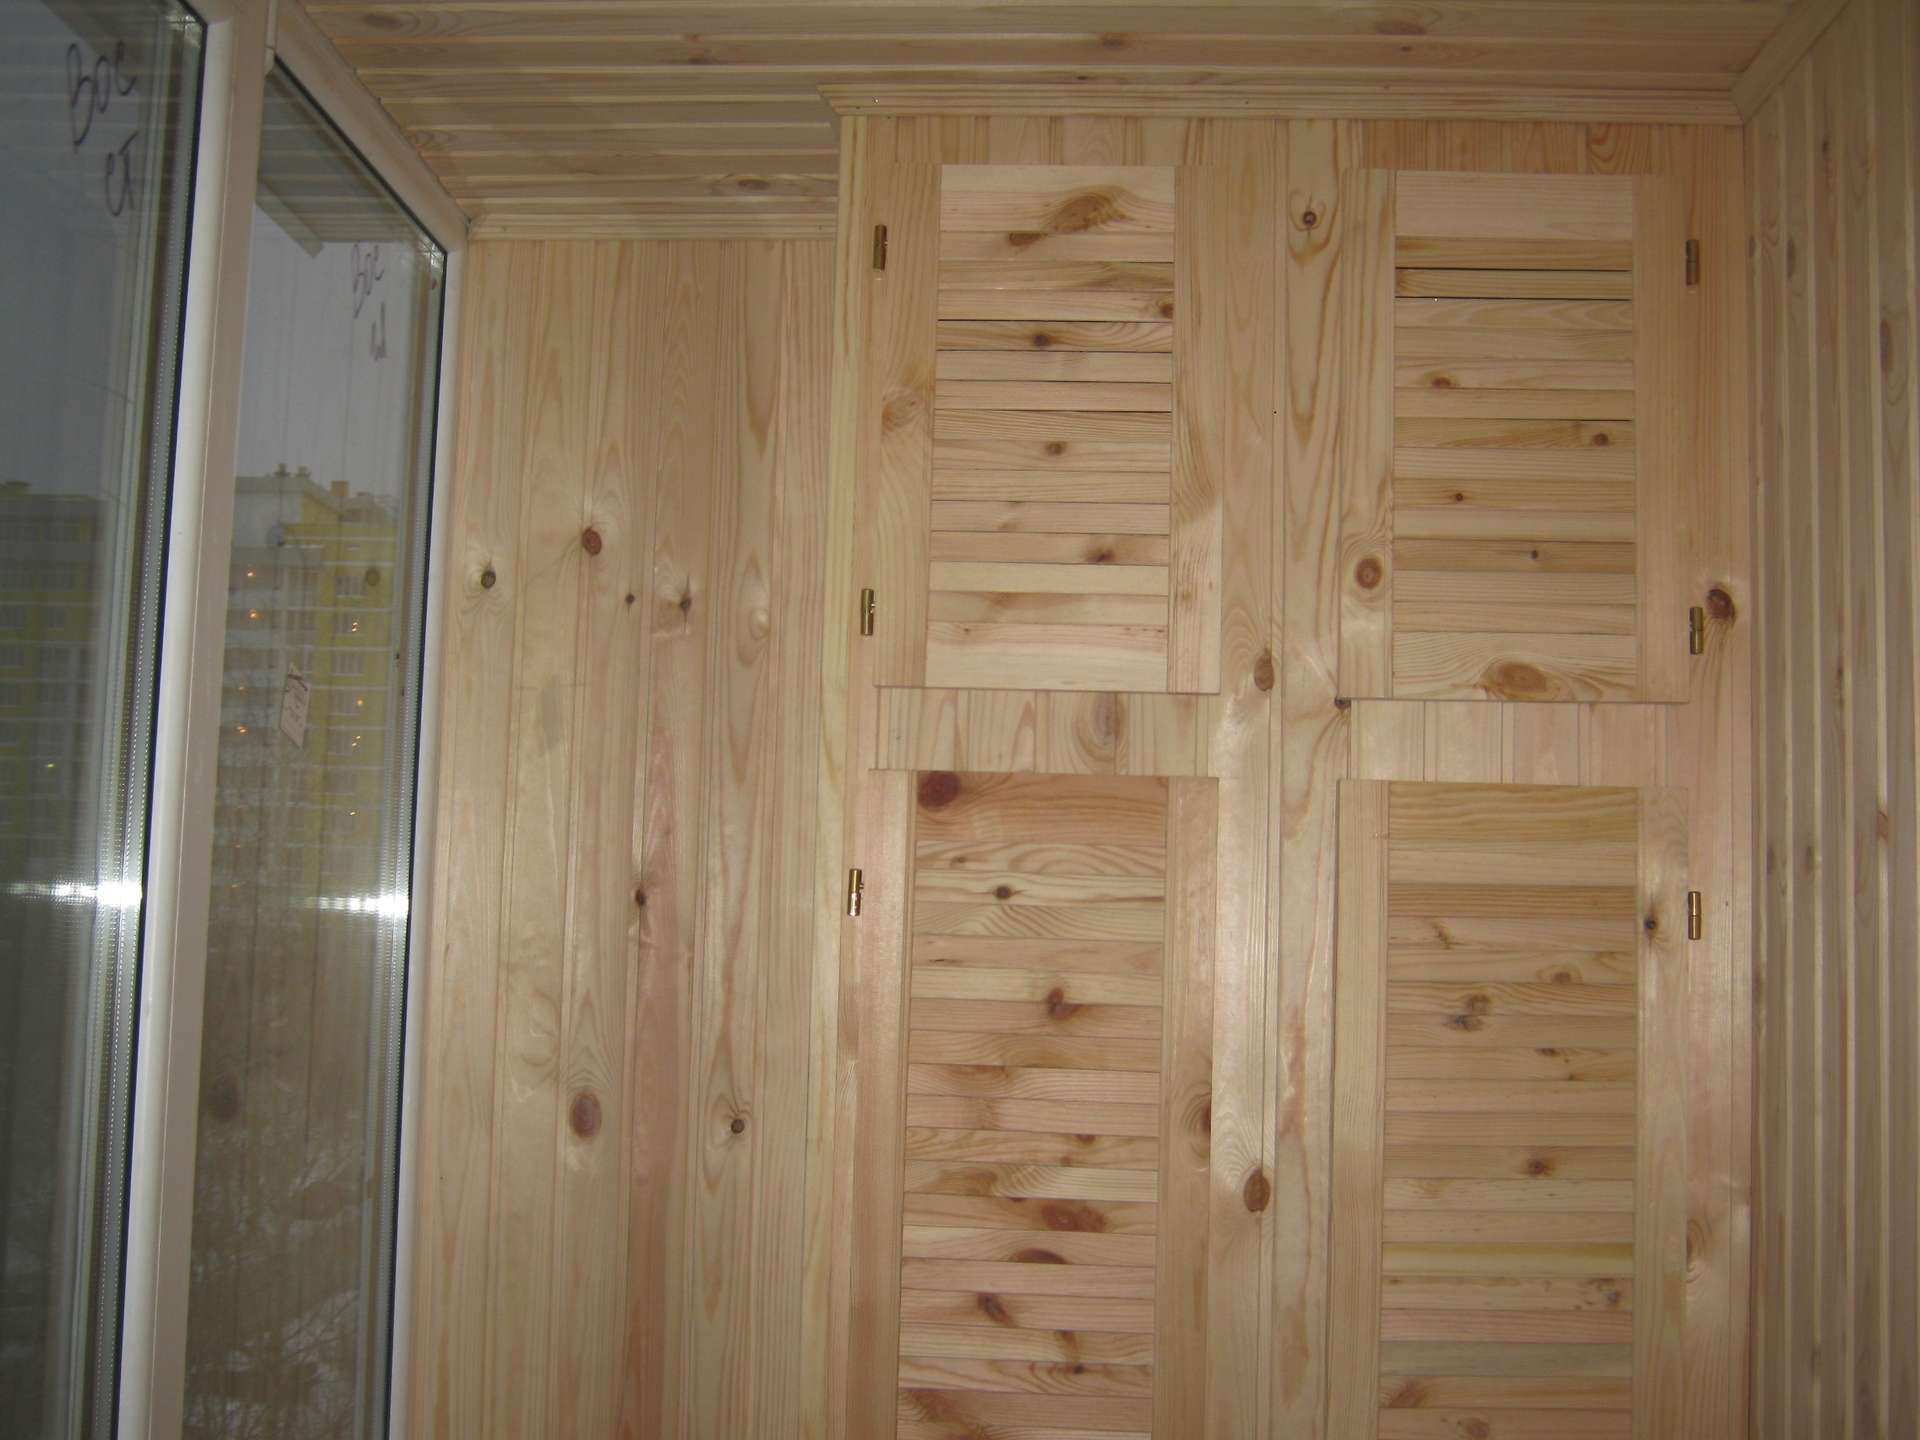
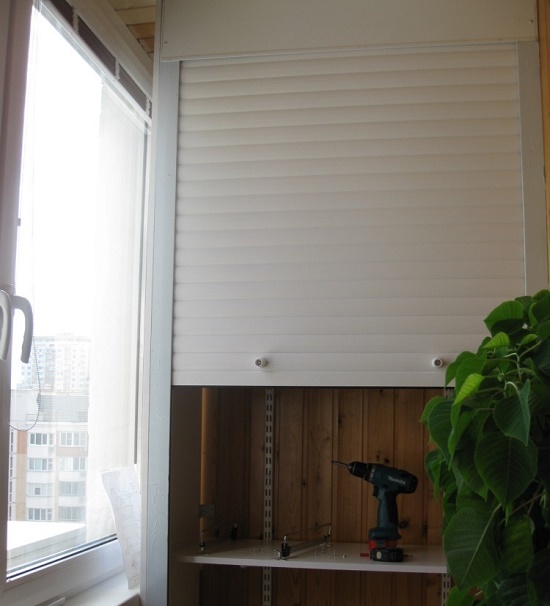
- ShuttersThe type of blinds, one of the most expensive options. They are made in the form of a roll, guides and plates. These doors are a complete set, so that the owner of the balcony does not need to independently acquire all parts and fasteners.

Material for doors can also be different:
- Shutters made of chipboard, plywood and wall paneling are lightweight, it is easy to cut square, rectangular or even oval parts of them, so you can choose the original furniture design.
- Doors made of natural wood are characterized by massiveness, durability, give the cabinet a nobility, but such elements will be heavy and not the most practical.
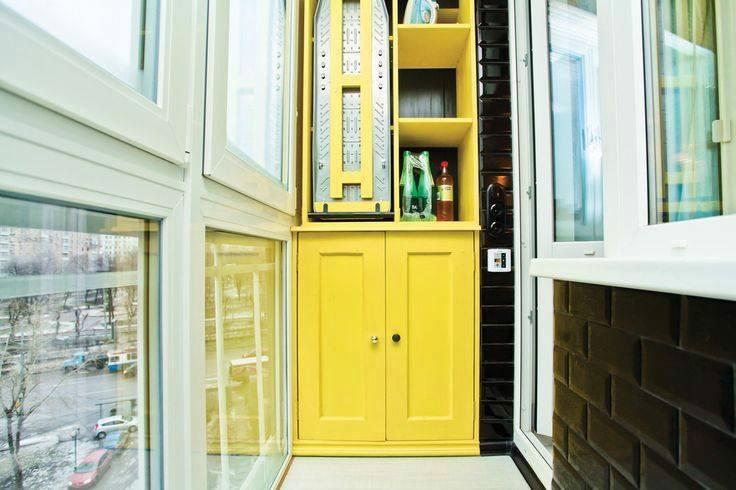
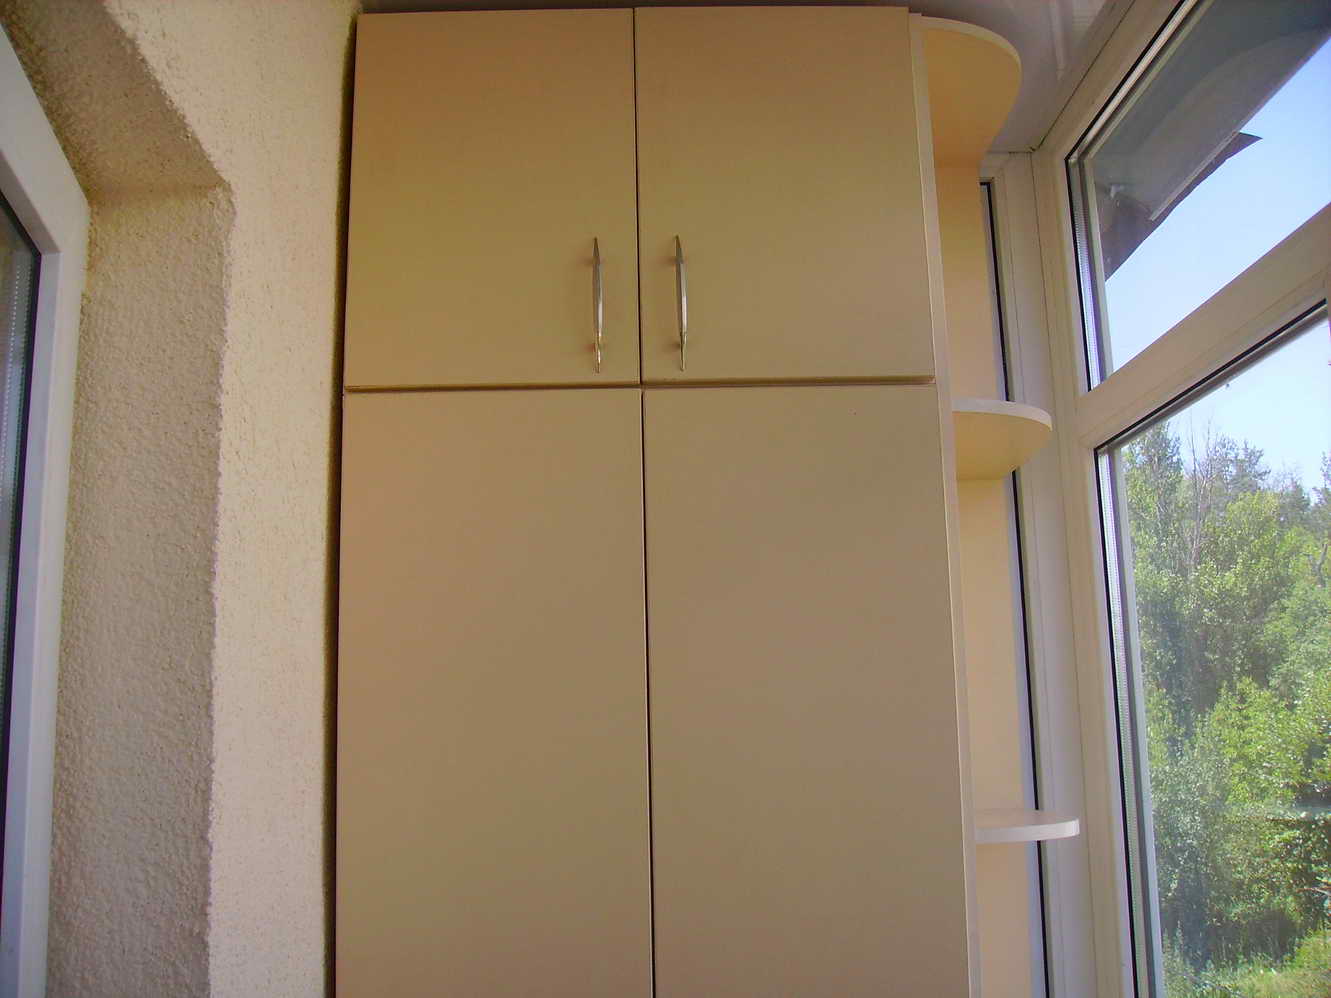
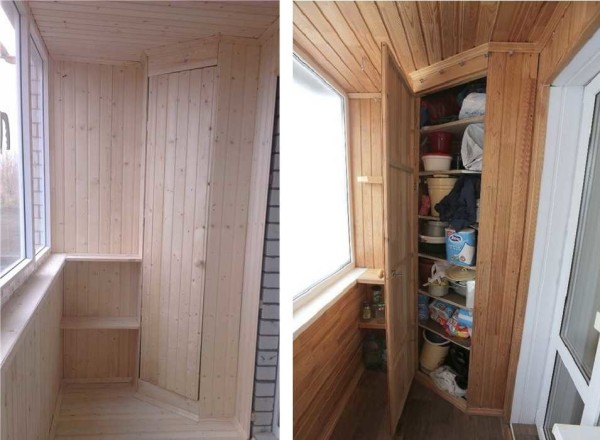
How beautiful to make the most corner locker?
In conditions of limited balcony space, every centimeter is taken into account, so you have to give preference to compact furniture. Corner cabinet will save space and does not occupy part of the window opening.The advantage is the fact that there will be more light in the room.
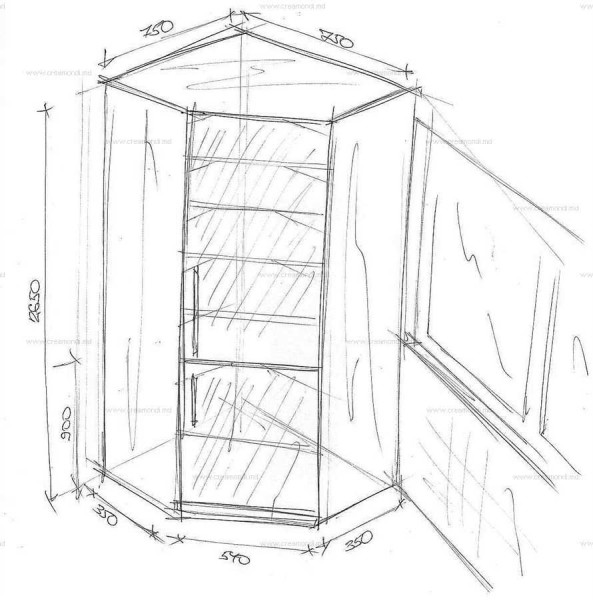
Corner furniture has a non-standard form: on the one hand the model is narrower than on the other. You can make a wardrobe in the shape of a triangle, a polyhedron or a square with a beveled side. The wide part is located near the wall, narrow adjoins the balcony facade. The winning option would be to equip the cabinet with sliding doors, as it will save even more space.
Stages of the corner cabinet:
- Creating sketches of future furniture. When the owner of the balcony has no experience, it is better to take the existing models as a basis and modify their dimensions depending on the space available.
- Determination of the number of accessories, fasteners, hardware. For fixing the shelves it is recommended to use the corners and screws.
- Conduct measurements. At this stage, measurements are taken from the floor to the expected height of the cabinet, determine the width. When calculating the elements of the frame, the dimensions are reduced by the thickness of the lining; they constitute a place for gaps.
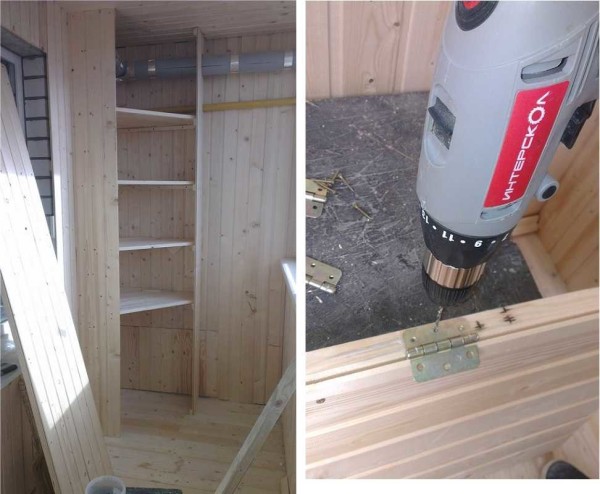
- Build the frame. The first step is to install the upper and lower bars - they must be completely identical. Installation is carried out with the help of corners.The length of the screws is chosen such that would guarantee the strength of the connections and, at the same time, did not deform the details of the cabinet.
- Installation of vertical parts. It is most convenient to work on a flat surface and only then place the frame against the wall. At this stage it is important not to make mistakes. If the parts are mounted crooked, they must be fixed on the new, otherwise the finished product will be fragile.
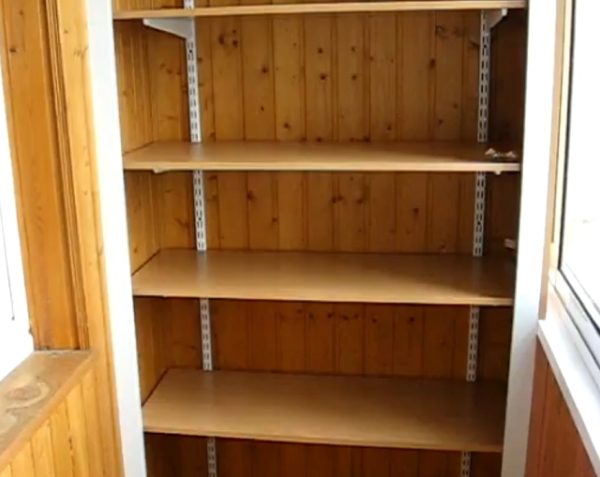
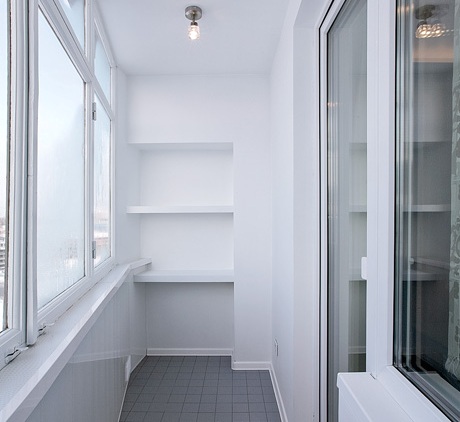
- Install shelves. The distance between them may be the same or different. In the latter case, it will be possible to store both small and larger items.
- Sheathing the cabinet and installing doors. Details of the top, bottom and sides should be related in size to the frame. In the lower part you can position the legs or do without them if the cabinet will stand directly on the floor. The selected type of sash set with fasteners.

At the last stage, the selected type of sashes is mounted; if necessary, the surfaces are painted or varnished. It is recommended to use special impregnations to make the furniture resistant to high temperatures and moisture.
Master wardrobe
The system of sliding doors saves space, allows for efficient use of niches and recesses. In preparation for the creation of the cabinet, the same operations are performed as in the manufacture of other pieces of furniture: they carry out measuring works, draw a diagram, determine the exact number and size of parts. Making the frame, its trim and the installation of shelves are also done in a similar way.
There are three options for installing door leafs:
- upper rail. The solution is highly durable. In this case, the profile is located at the top;
- lower guide. Easy to implement system. When choosing rollers take into account that they will take the maximum load;
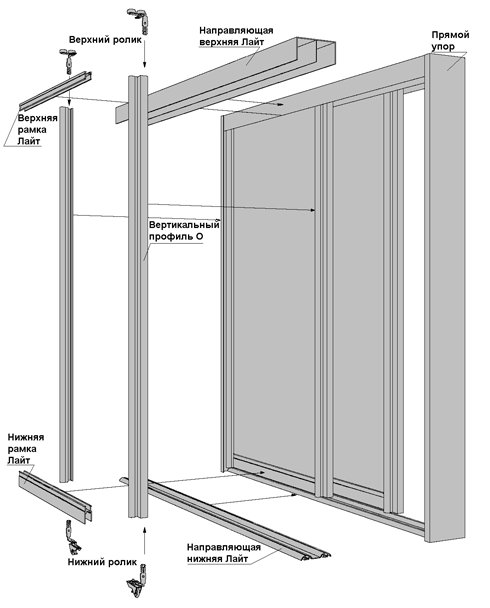
- monorail. One of the most durable options. For each sash uses their own guides, they are fixed both at the top and bottom.
Door panels are fastened to the chosen system, after which finishing works are carried out. When raw materials have been used, they are ground, laminated or pasted over with decorative paper.
A more detailed process of making closet on the balcony can be viewed in the following video:
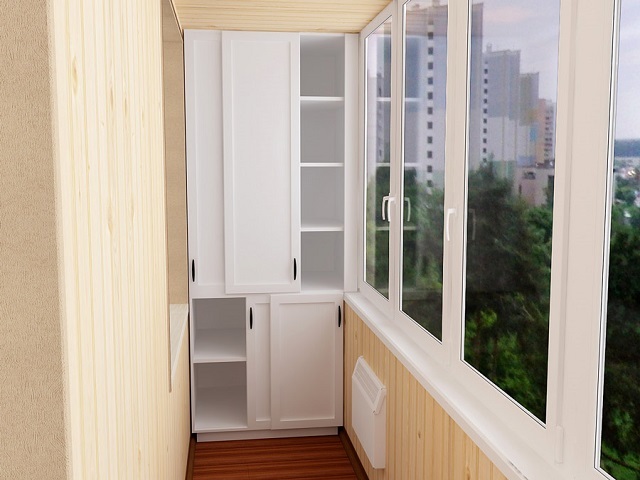
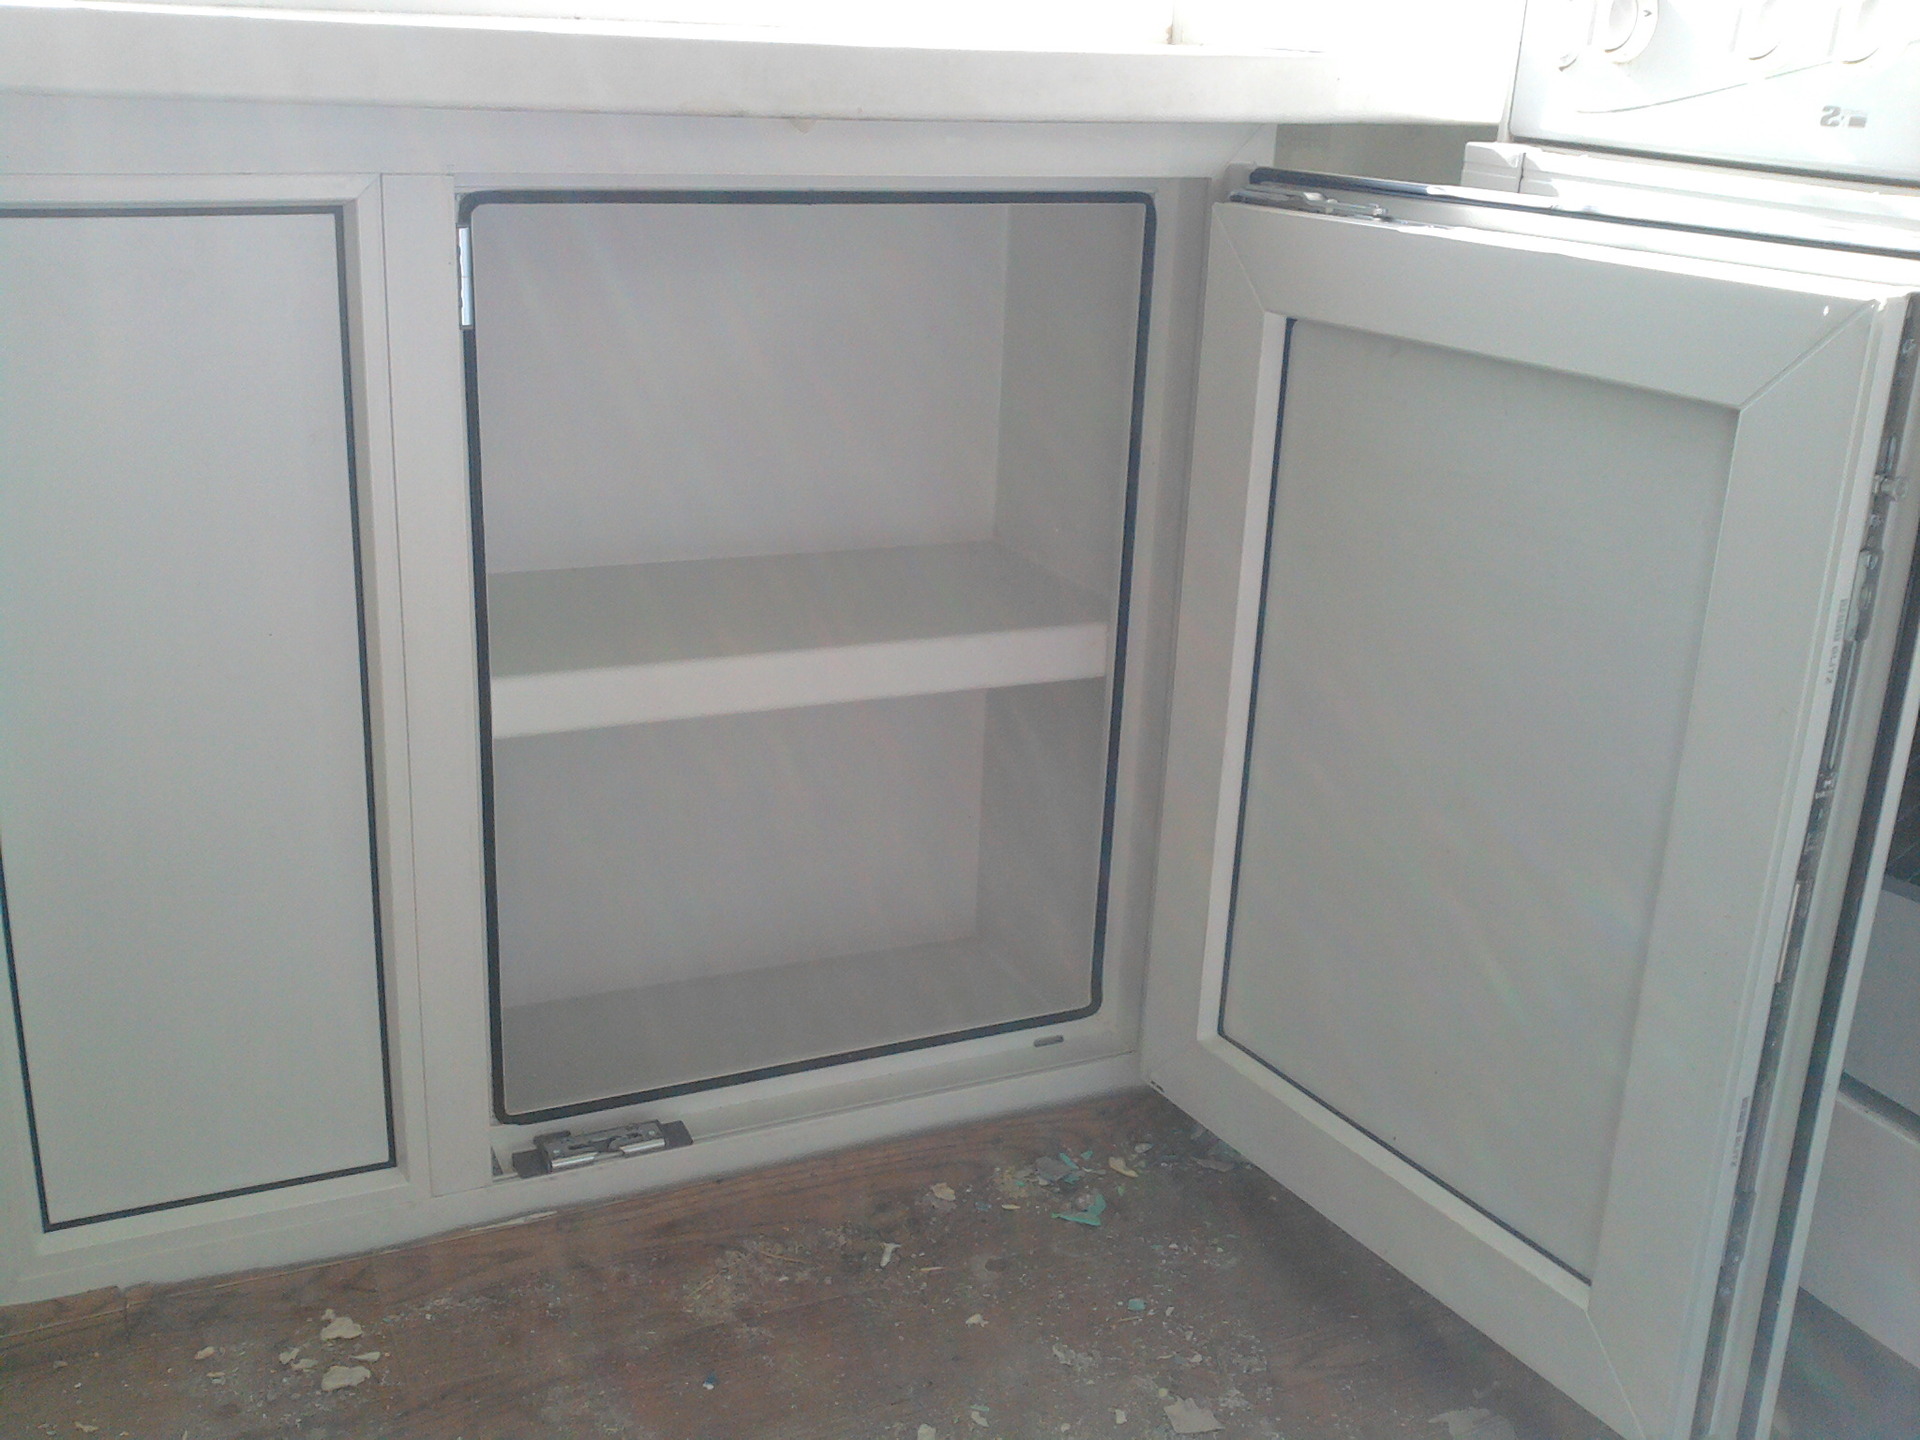
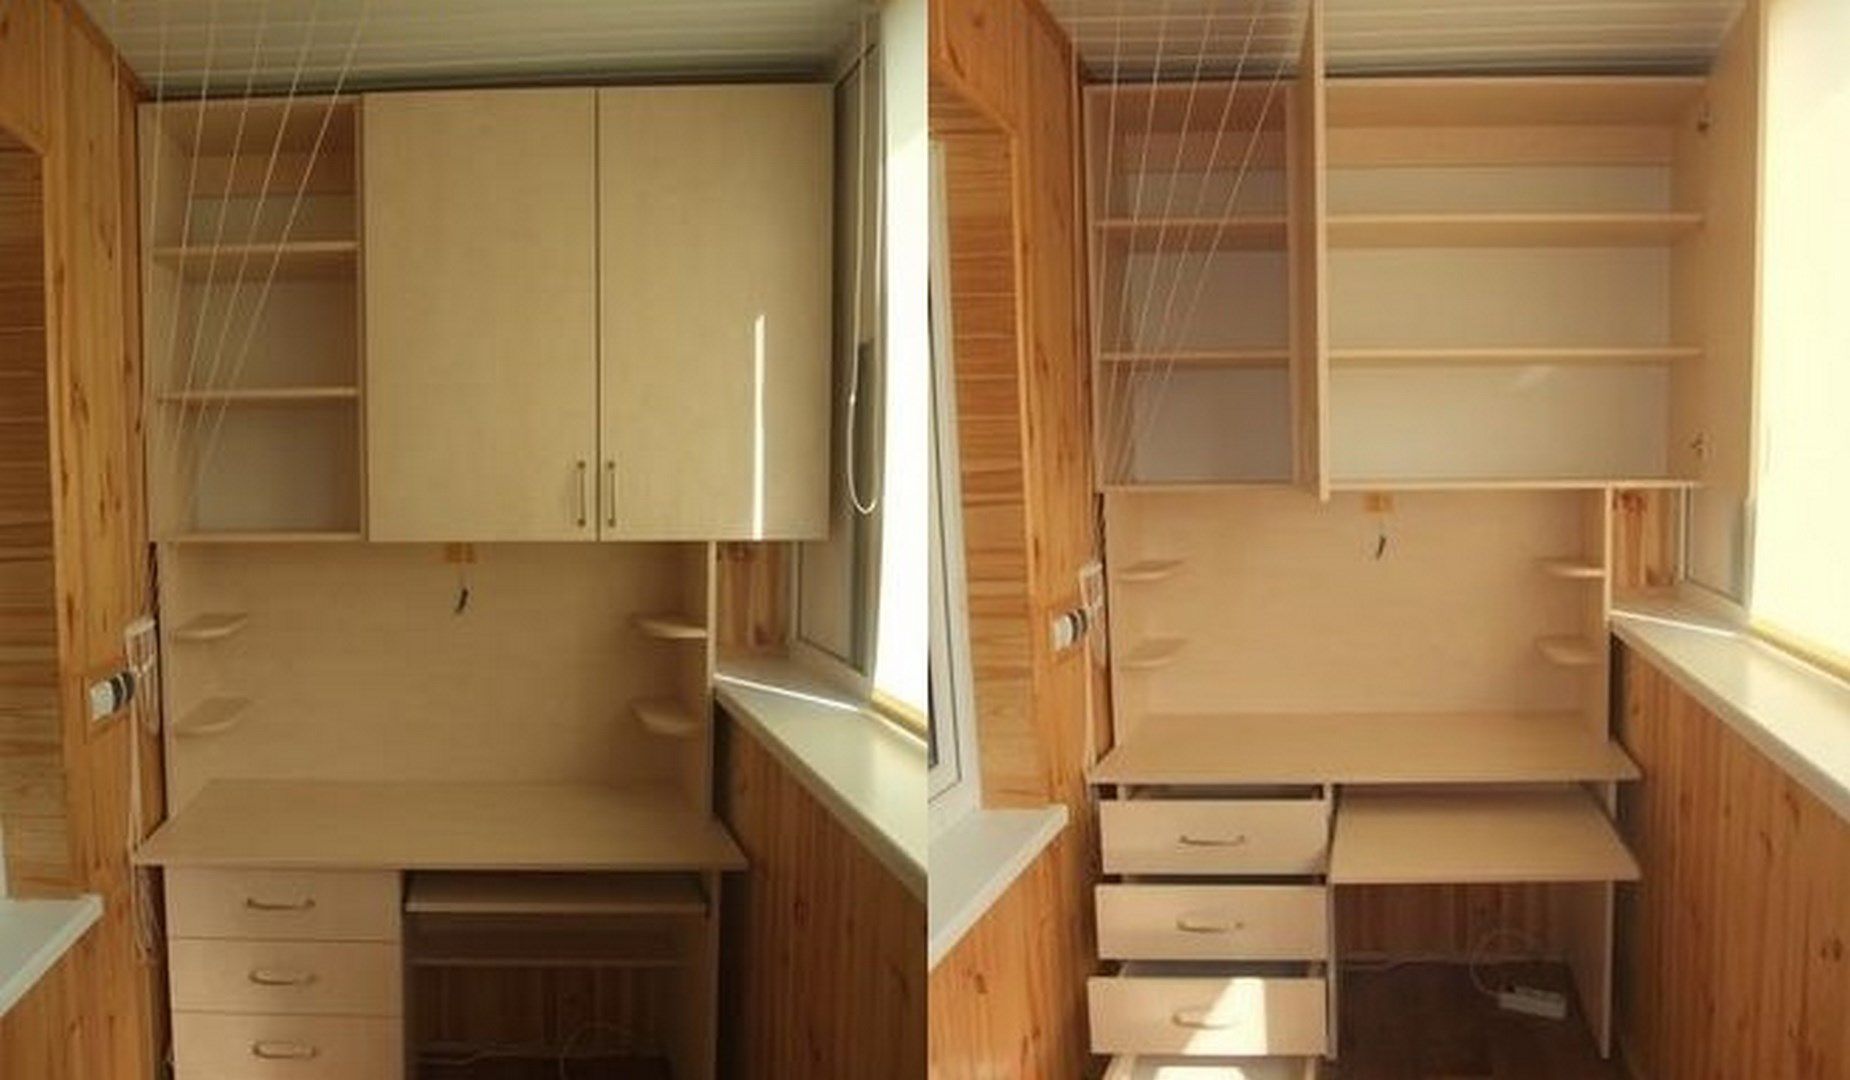
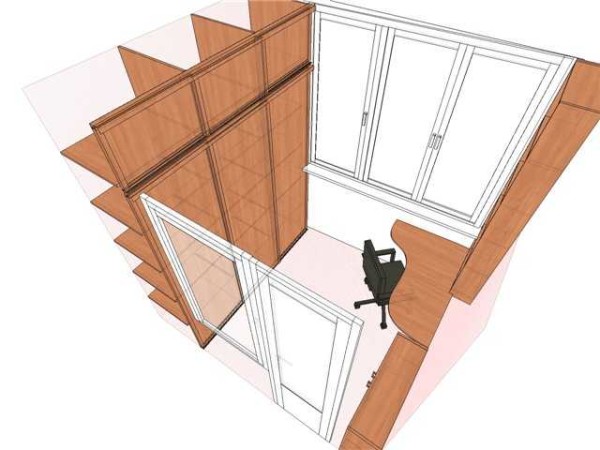
We do the built-in model
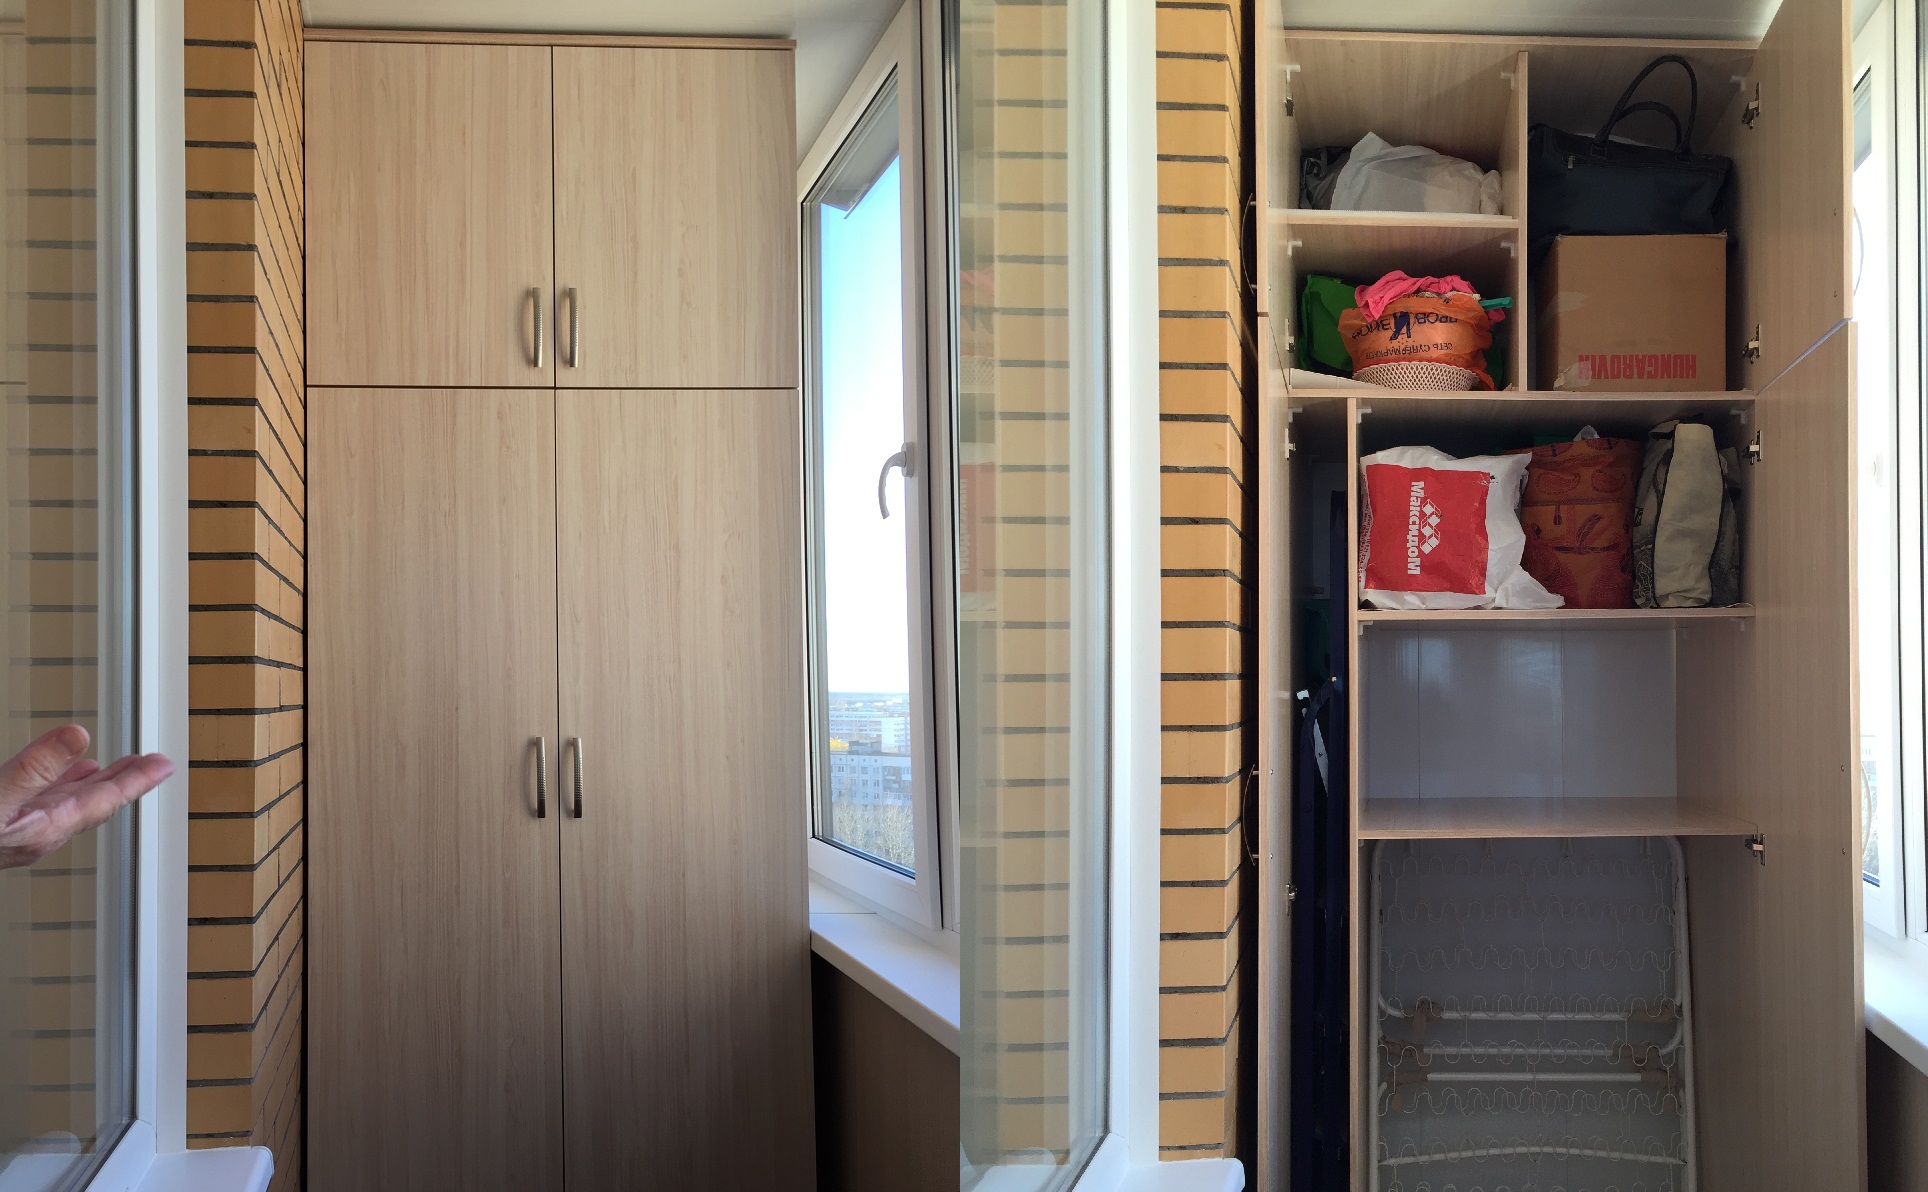
One of the most practical and simple to manufacture pieces of furniture are built-in wardrobes. Their creation requires the application of a minimum of effort, since it is required to install only racks, shelves and doors. The advantage of the model is its compactness. Located in a niche or across a loggia, the cabinet does not take up space in the aisle, it serves as a functional extension of the wall.
Preliminary work is carried out the same as in the manufacture of the above-mentioned versions of cabinets: we make measurements, drawing, etc. Next, set the frame. A wooden bar with a section of 40x40 or 50x50 mm is suitable for this purpose. You can use and profiles of drywall, metal elements.
The latter are characterized by maximum strength, have a corrosion-resistant coating and a long service life.


For the shelves mainly take sheet materials from which it is easier to cut parts of the desired dimensions. The elements are attached to specially prepared places with screws or dowels. For installation can be used corners, which are attached directly to the wall.