We make the floor in the bathroom: the rules of laying ceramic tiles
The ceramic tile is a popular finishing material which possesses excellent operational characteristics and attractive appearance. Many owners prefer just such a lining, decorating the bathroom. Today we will talk about how to properly lay ceramic tiles on the floor in such premises.
Special features
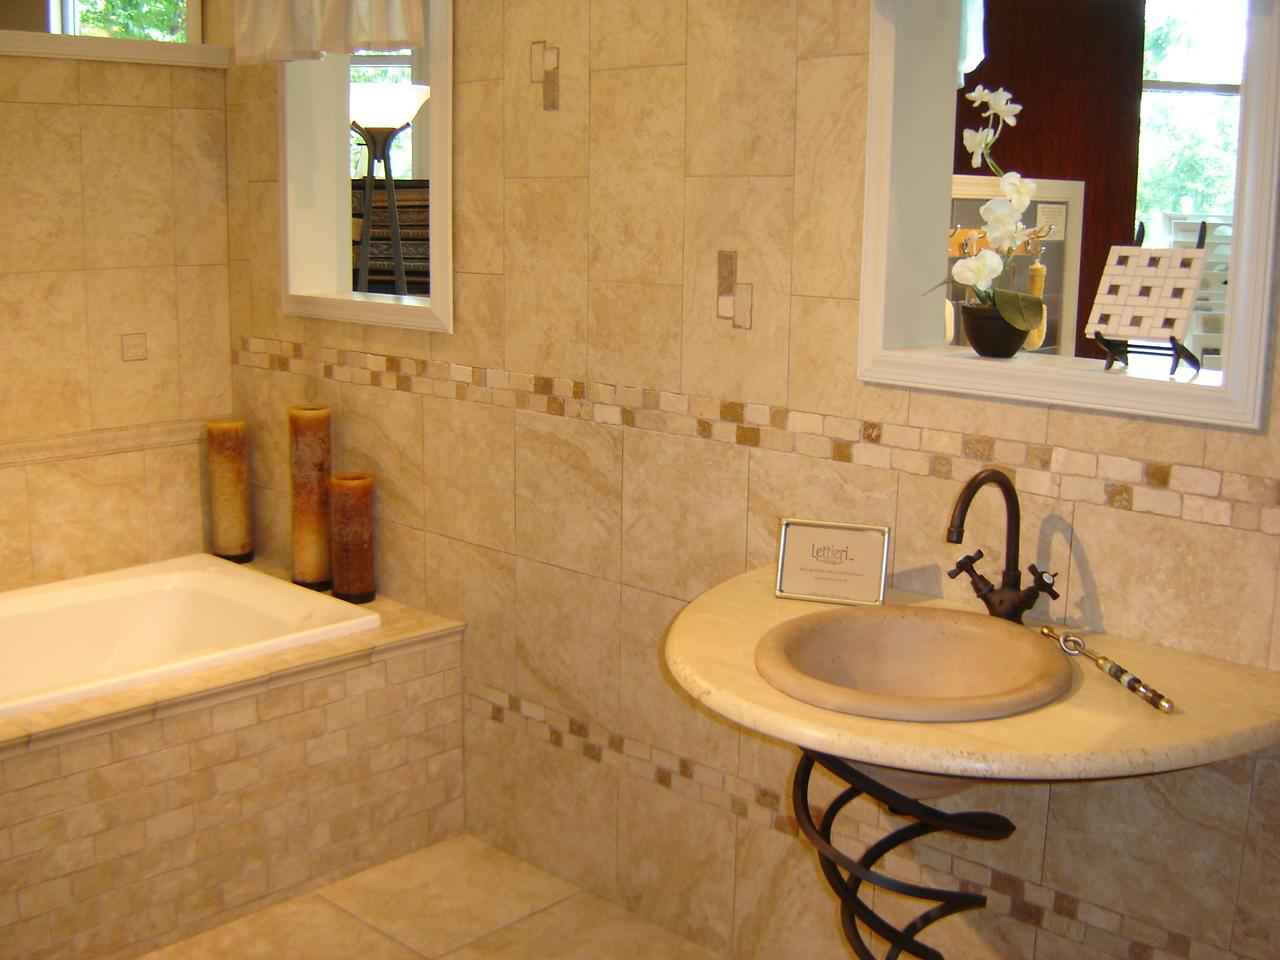
For finishing the bathroom and bathroom ideal materials are different types of tile coatings. With their help, the rooms are given a well-kept and aesthetic look. In addition, such coatings are not afraid of moisture, and not every finishing material can boast of this feature.
Ceramic tiles today is rightfully recognized as one of the most popular finishing materials. Its demand is due to high wear resistance and durability. It should be noted that the installation of such material can be done by hand. Of course, for this you need to have on hand detailed instructions and adhere to all phases of work. If you did everything right, the result will not make you disappointed.


Decorating a bathroom with ceramic tiles is an excellent solution if you are looking for an eco-friendly and safe material that does not cause allergic reactions. Such lining will not harm the health of residents, even in conditions of high temperatures, which remain indoors for a long time.
Floor ceramic tiles are chosen because of its simplicity. Such material does not require complex care. Any dirt from its surface is removed quickly and seamlessly.
Another feature of this material is that before laying it is necessary to carefully prepare the base. Some home masters neglect this rule,which negatively affects the quality of the finish. Do not install ceramic tiles on an unprepared base.
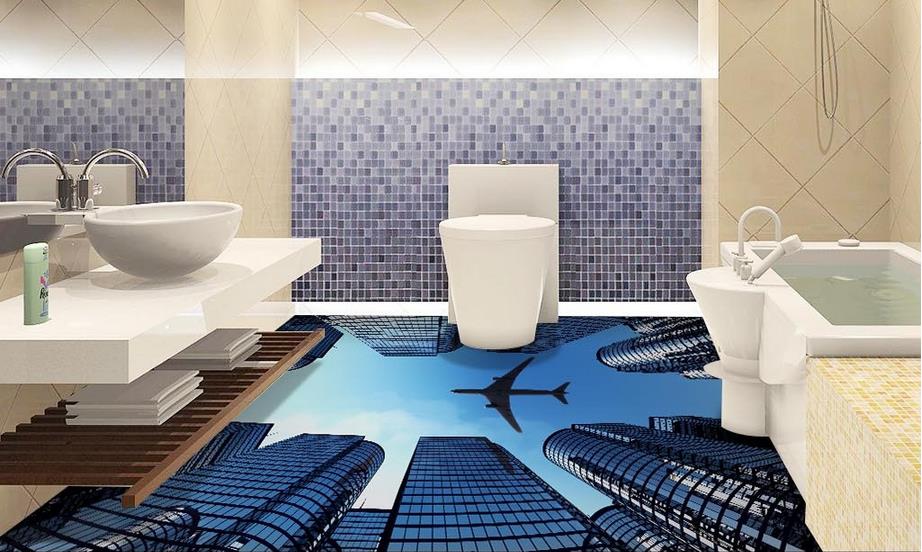
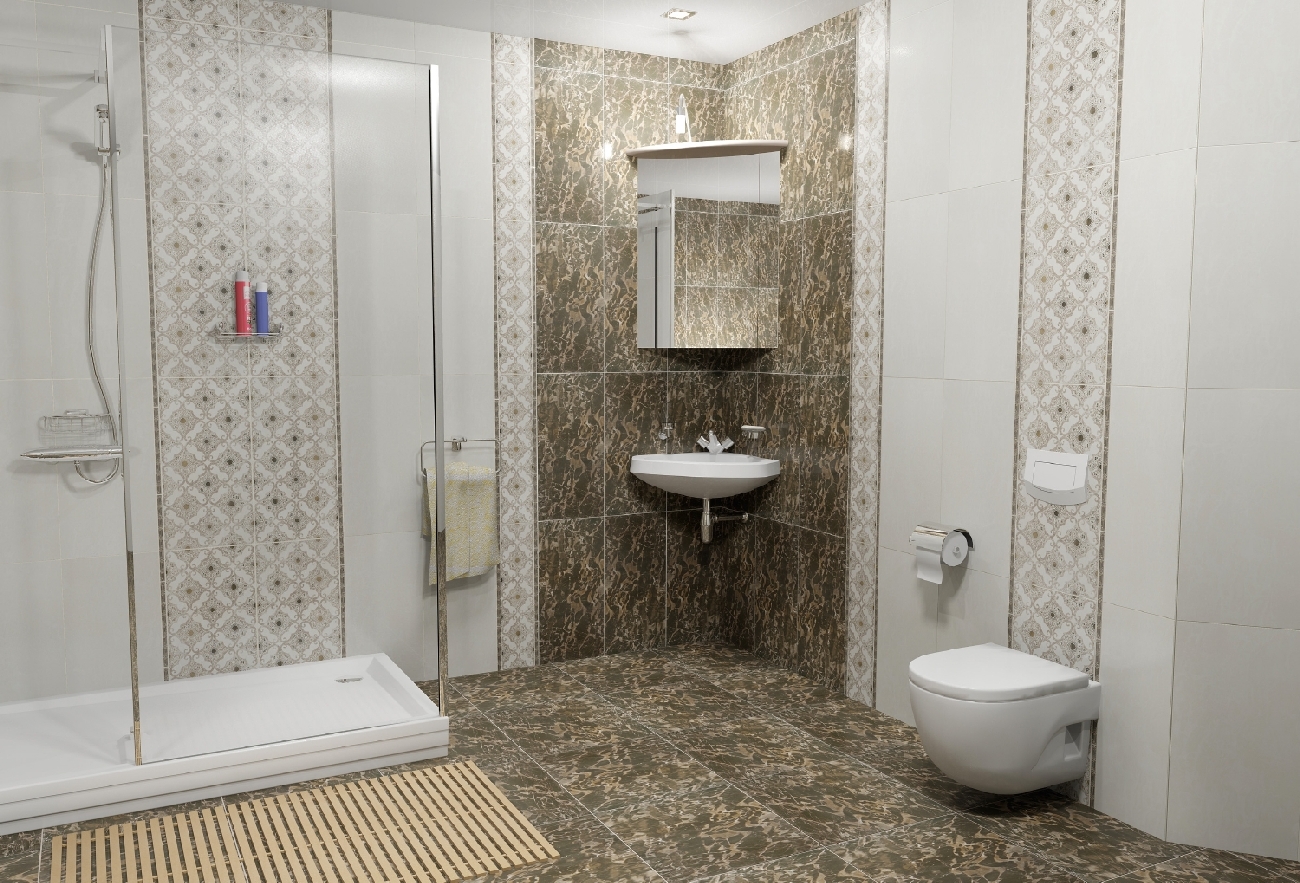
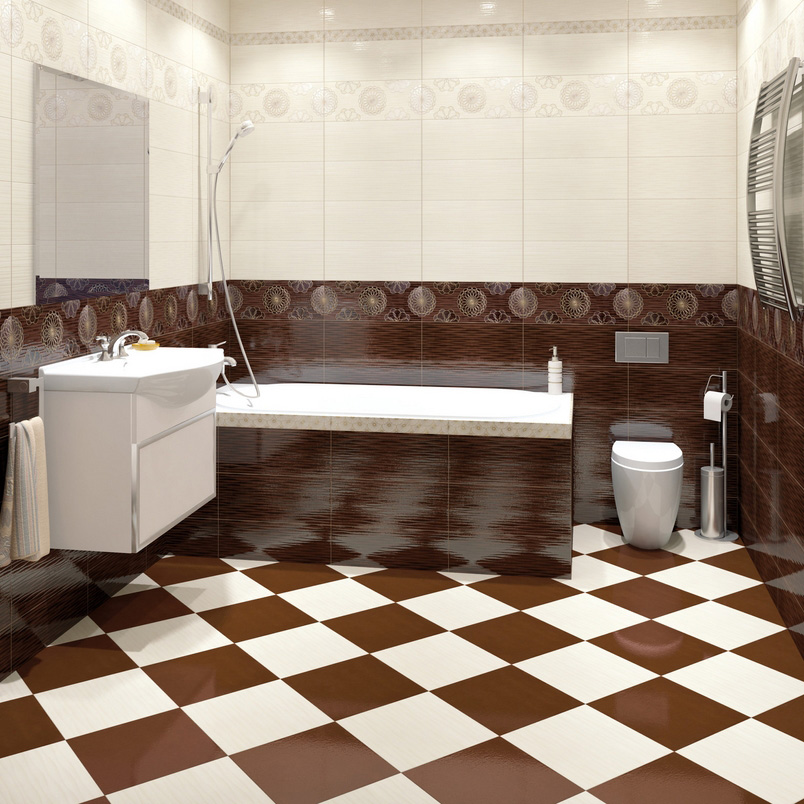
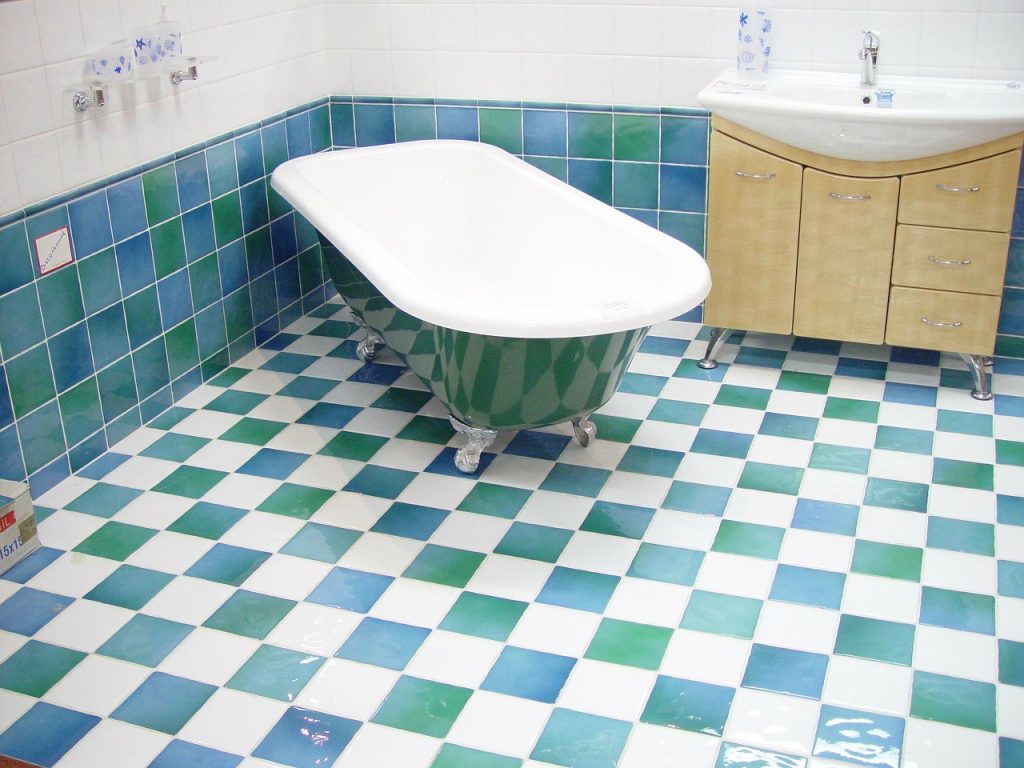
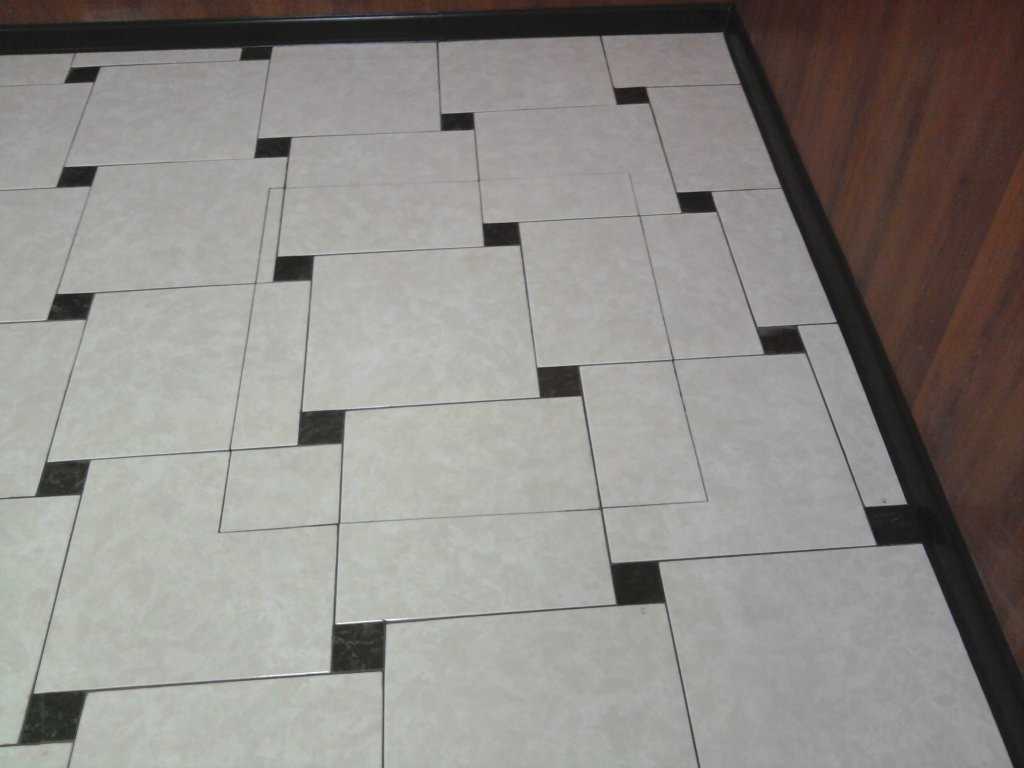
There are several options for laying ceramic floor tiles. With each of them on the floor looms a certain pattern, for example, a tetrad cell or a chessboard. These layouts look very interesting and neat. Unusual installation methods are most often used by users who want to refresh the bathroom with interesting design solutions.
A distinctive feature of ceramic cladding is its high strength. Such tiles easily withstand impressive loads. Its not so easy to damage or split. For this reason, people often choose ceramic tiles to decorate the floor in the bathroom.

As many know, almost all types of tiles are rather slippery, which negatively affects their safety. Ceramic materials can be purchased with special non-slip surfaces - such specimens are most suitable for bathrooms because it is more difficult to slip on them.
Types and methods
Tiles can be laid on the floor in the bathroom in different ways, each of which has its own characteristics. Let us consider in more detail how it is possible to lay out such a floor facing.
Parallel
Many owners choose tile laying in a parallel way. The material laid out in this way is very similar to a tetrad sheet in a cage. This similarity is especially noticeable if a grout of a contrasting shade was used for the finishing of the seams.
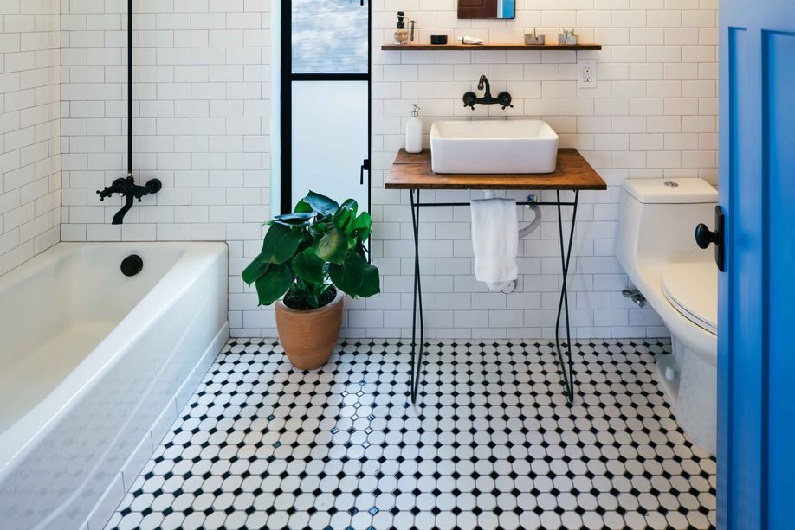
Experts recommend referring to this method of laying, if you purchased a rectangular or square tile. It will not be difficult to install such materials, even if you have never encountered such work before.
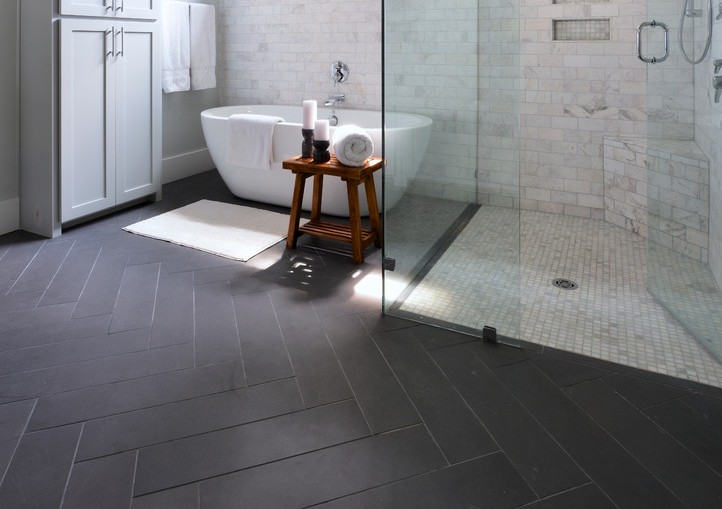
"Herringbone"
This is another interesting way of laying ceramic tiles on the bathroom floor. The material at the same time put, like a floorboard. It is recommended to apply to herringbone facing if you decide to decorate the floor in a room with rectangular tiles. But it is worth considering that the conduct of such work requires the care and accuracy of the master. In addition, it is very important to conduct all calculations and measurements correctly.
Staggered
No less popular is this method of laying ceramic tiles. In this case, you should act as if you are laying a half-brick wall. The result is very interesting and stylish compositions. However, be aware that laying out floor tiles in this way is more difficult. If you doubt your abilities, then it is better to turn to experienced craftsmen for finishing the bathroom floor.
As a rule, for the decoration of this kind is used rectangular tiles. According to the technology, it should be laid out very carefully in a staggered manner, which is not easy for all owners. However, the result usually causes delight and admiration of the household.
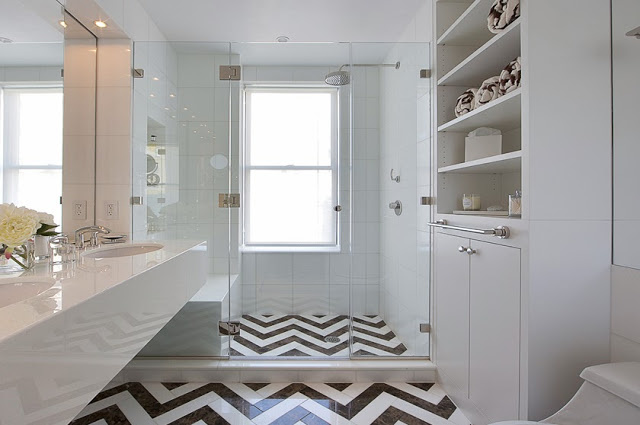
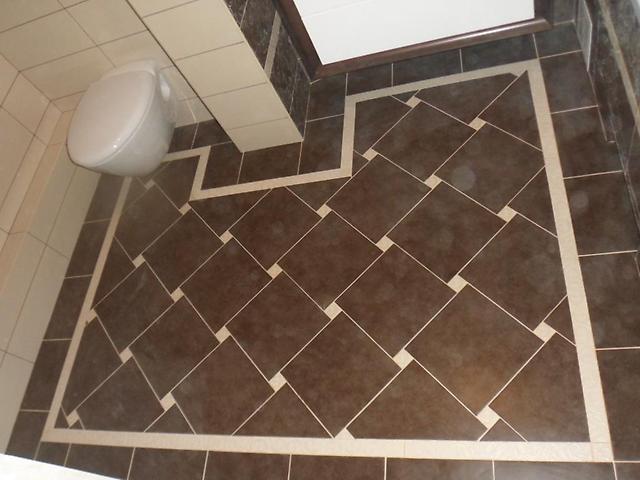
Diagonally
Also attractive in the bathroom looks the floor, tiled on a diagonal. Usually, square materials are used for this. Since the laying of the coating is carried out diagonally (from one corner to the opposite), the squares look like diamonds. It is necessary to take into account that with this method of laying tile consumption increases, because due to trimming and fitting in the course of work, about 30% of tile residues that are unsuitable for installation are lost.

Such a bathroom flooring looks stylish and elegant. That is why today many owners prefer this method of finishing.
Mosaic method
If you want to transform the bathroom, giving it an original look, then you should refer to the mosaic method of laying ceramic tiles. Fortunately, modern manufacturers produce entire collections of materials from which you can create spectacular patterns and designs. Of course, such a finish is more expensive than other options, but it also looks appropriate.
It is recommended to contact such a lining if your bathroom has an area of at least 20 square meters. m This requirement must be taken into account, since it is unlikely that a beautiful pattern can be laid out in a too small room, and it will not be seen so well.
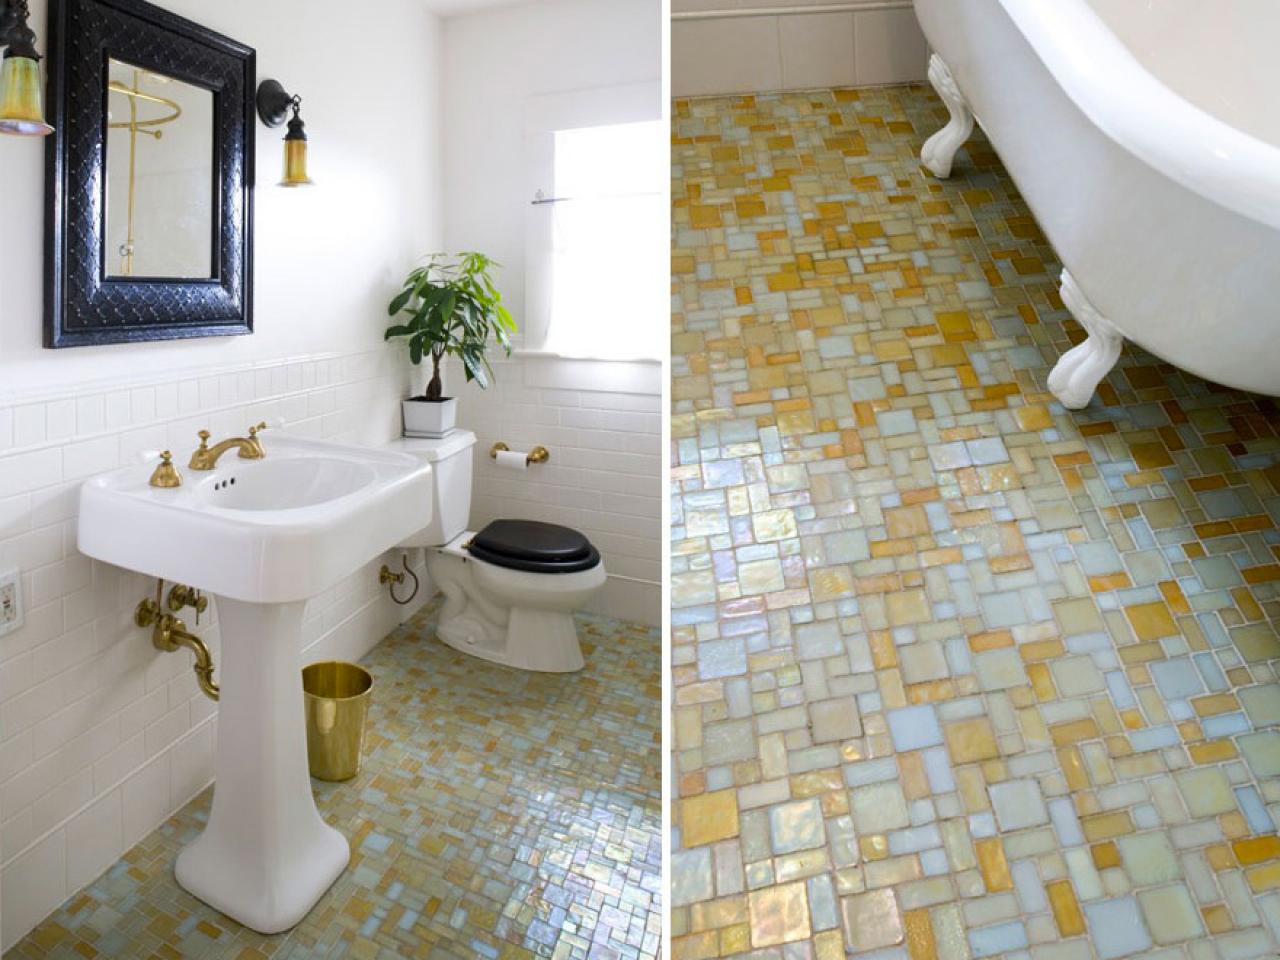
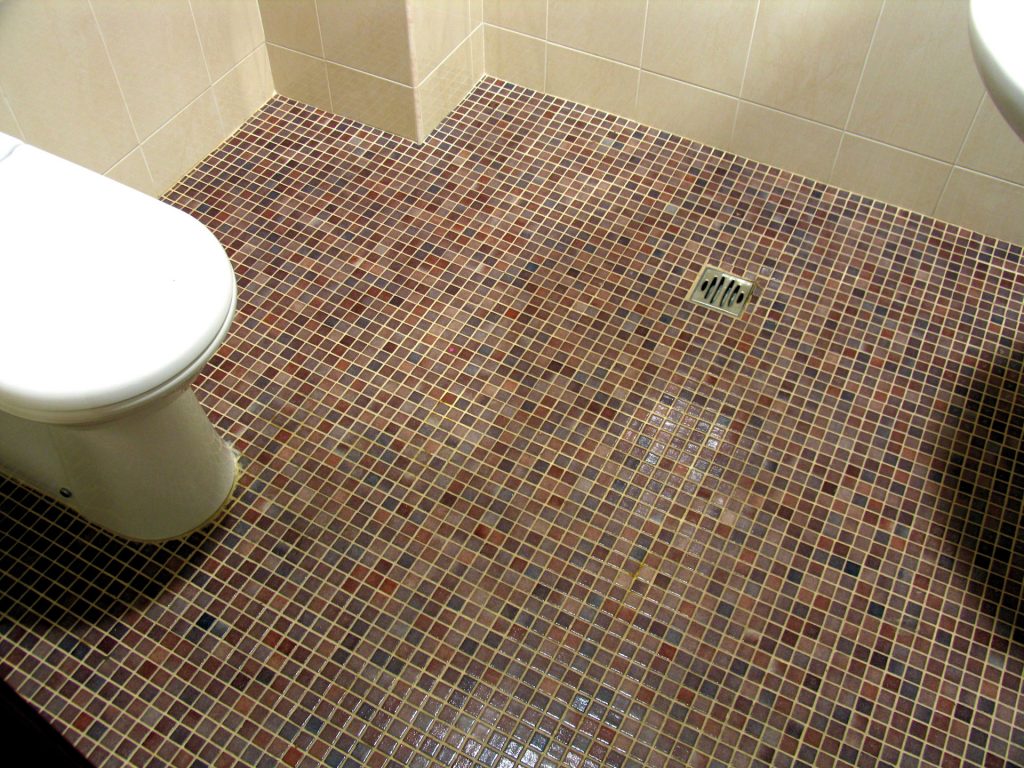
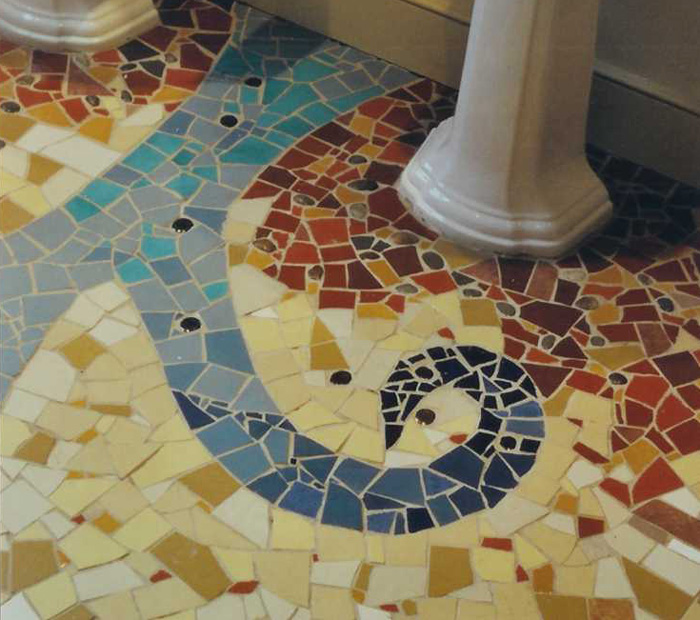
If you decide to put the bathroom floor in a mosaic way, then you should be patient and free time - such work is quite laborious. In addition, the mosaic tile is not cheap, so most of the owners turn to the services of experienced masters in facing the floor.
Modular
This type of lining is carried out with the use of tiles having different sizes and shapes (square and rectangular). To put these materials, you must very carefully approach the selection of the pattern and correctly make a reliable scheme, indicating the dimensions of individual parts, as well as noting the seams.

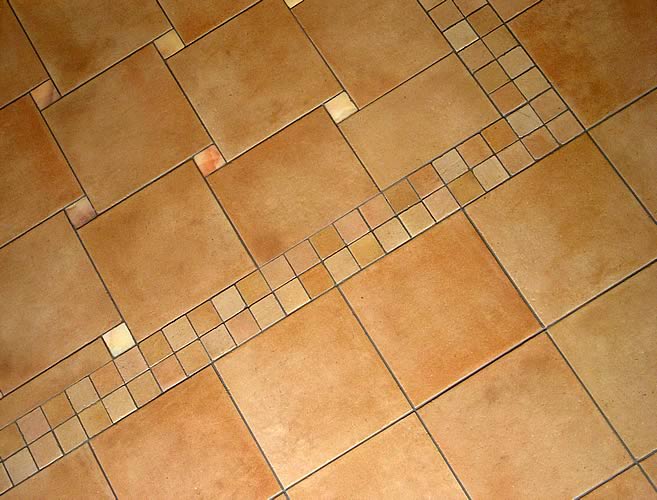
This method of laying tile is very attractive and bright, but also more time consuming. To cope with such work, you need to have some knowledge and experience.
With a shift
With this arrangement, each individual tile moves both vertically and horizontally at the same time. Appeared gaps overlap tiles that have more modest dimensions. The result is a very neat and beautiful floor finish. However, in carrying out such work, it is important to pay due attention to the exact fit of all parts.
Materials and tools
To lay the floor ceramic tiles need to proceed prepared.
You should definitely stock up on such tools:
- construction mixer;
- rubber trowel;
- trowel with teeth;
- glass cutter;
- masking tape;
- building level;
- rubber mallet;
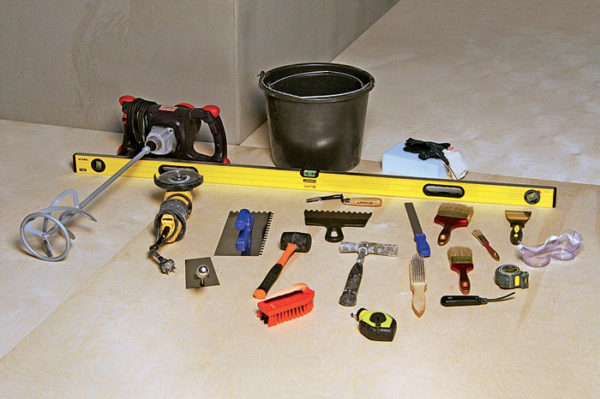
- special adhesive composition for tiles;
- grouting;
- primer;
- plastic crosses;
- clean mixing tank;
- water;
- rags.

And also need to purchase suitable materials.
Experienced experts recommend buying ceramic tiles that meet these requirements:
- its thickness should be from 9 to 12 mm;
- it is necessary to choose tile of class 2 (or higher) of resistance;
- materials must have durability and abrasion;
- must have a moisture protection category of AA;
- tiles must be resistant to aggressive chemicals.
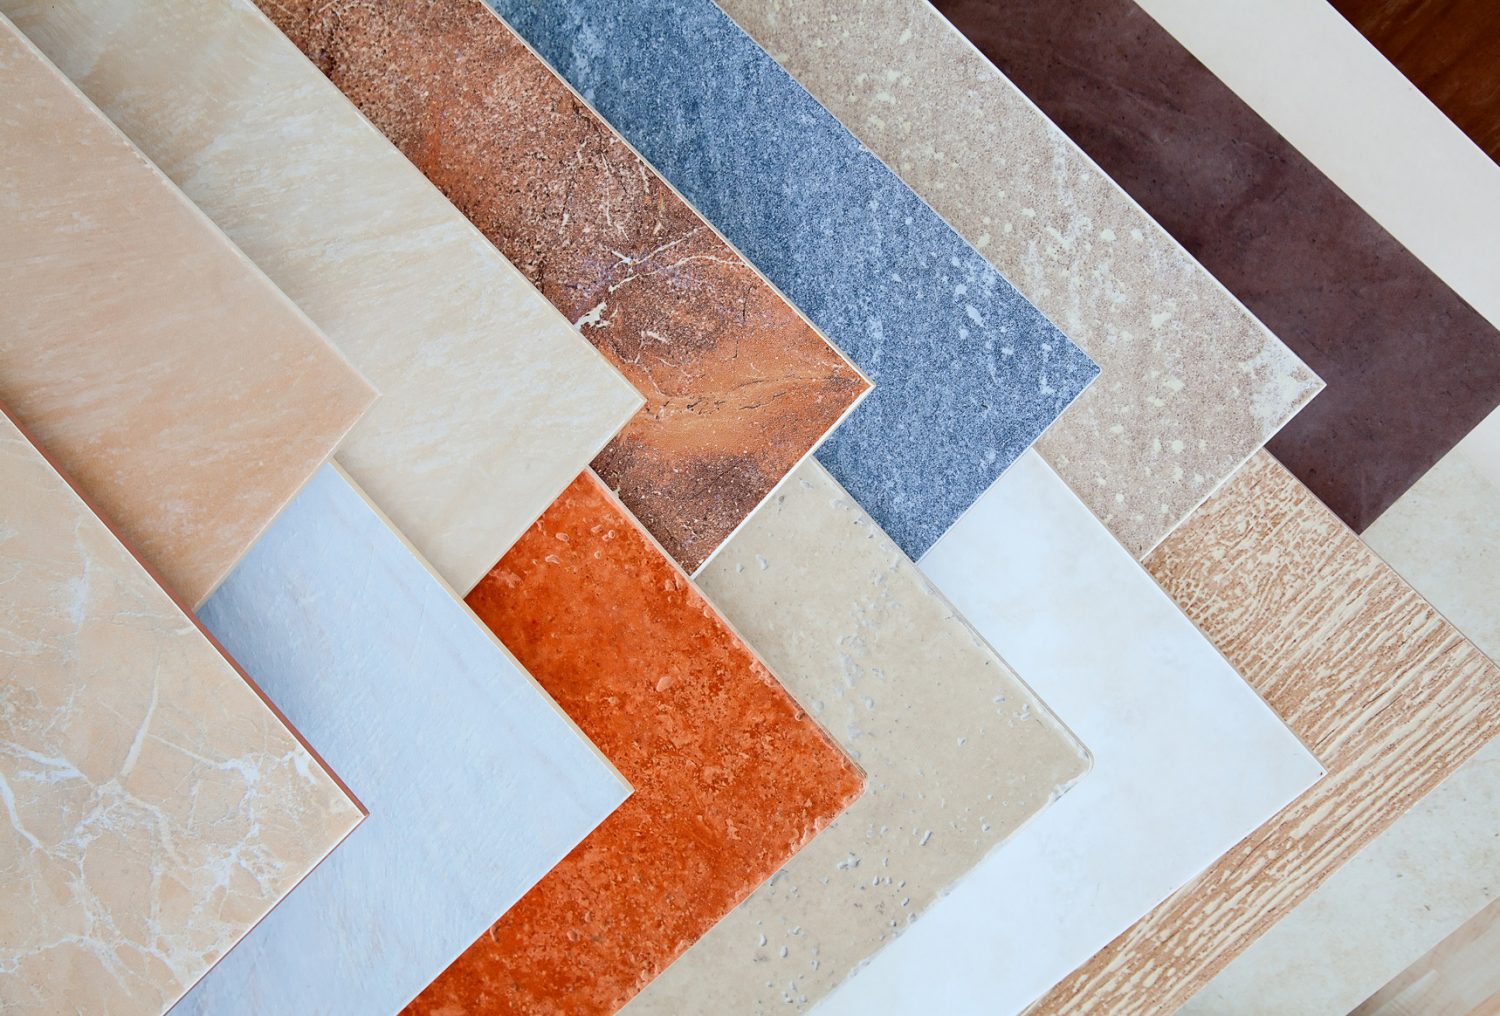
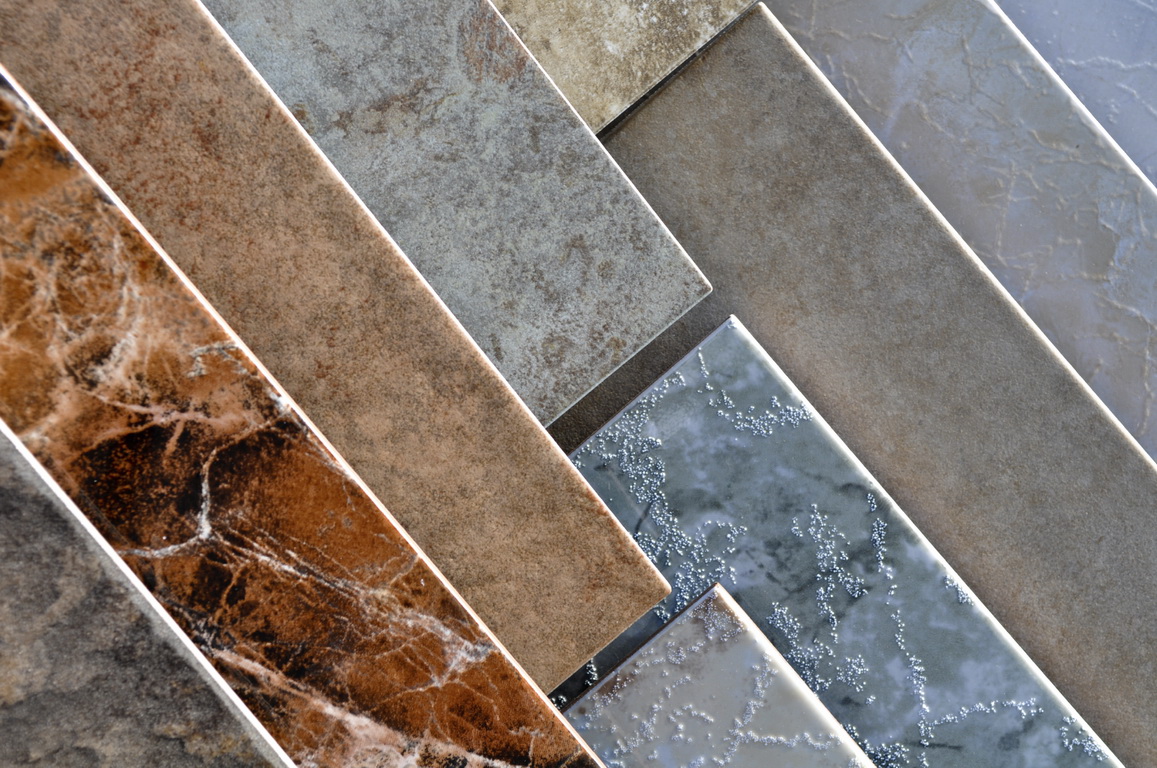
It should be noted that a large tile, especially one that has a dark shade, visually reduces space. For this reason, it is recommended to give preference to medium-sized materials having a shade suitable for the shade of wall coverings.
If you have purchased all the necessary components, you can proceed directly to installing the tile on the floor in the bathroom.
Preparatory work
As mentioned earlier, the floor is very important to prepare well for tiling.
To this end, you should perform the following steps.
- First you need to remove the old floor covering, screed and waterproofing layer. It is advisable to clean the floor to the ground.
- It is necessary to level the base, based on the level indicators. It is necessary to carefully pour chips and cracks with cement.
- After that, a fresh layer of waterproofing should be formed using mastic or special material in bitumen / rubber-based rolls.
- The next step is to fill the screed. It should be noted that the largest thickness of the leveling layer should be 1.5 cm.
- We must wait until the screed is completely dry. After that you need to remove dust and dirt from the floor.
- Now it is necessary to impose a primer on the base, using maklovitsy. This should be done by rubbing the primer into the base. When white foam begins to form on the floor, the primer can be considered complete - the concrete has absorbed all that is necessary.


As a rule, the primer dries over several hours. It is better to carry out such work in the evening in order to begin laying tiles on a ceramic base in the morning.
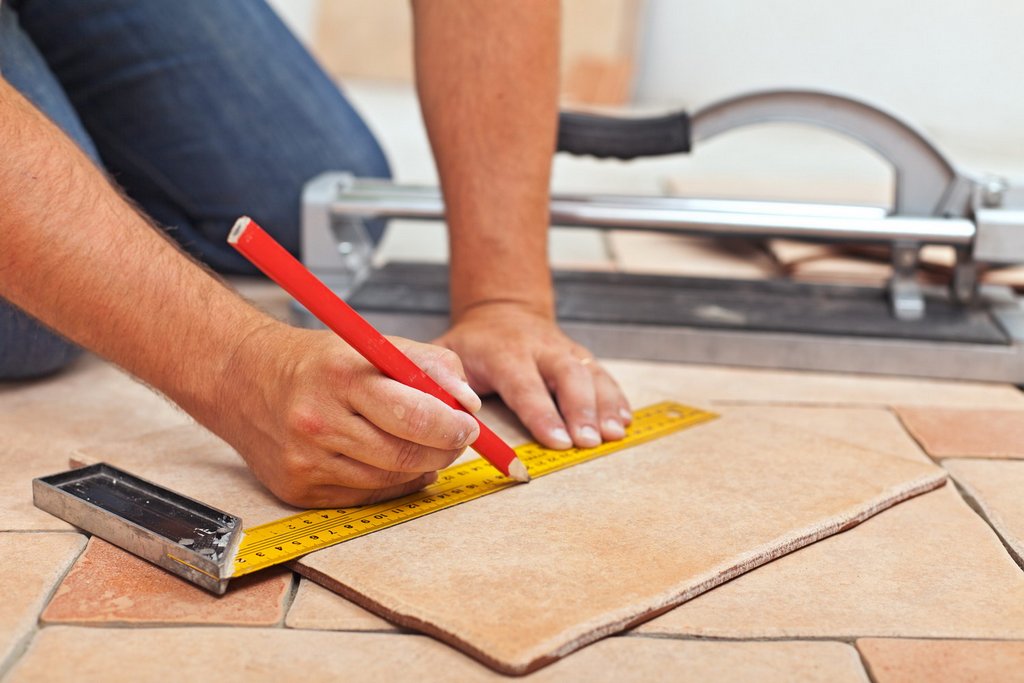
How to make markup?
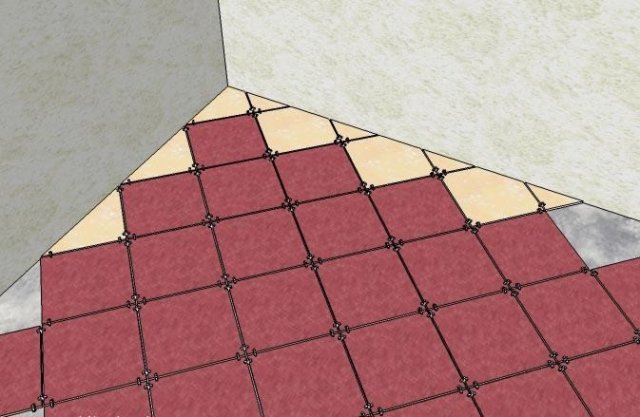
Installation of ceramic tiles is not the floor is recommended to start with markup.Thanks to this step, it is possible to calculate the exact amount of material required. Keep in mind that buying tile is important with a small margin - 15% for bathrooms of complicated layout and 10% for ordinary rectangular areas.
We need to know the width and length of the bathroom. The resulting figure must be divided by the size of the tile and added to the total number of widths of the joints between the individual elements. As a result, you will find out the number of whole tiles in all rows. The remainder should be divided by 2. The resulting result will indicate the number of incomplete tiles that should be located around the perimeter of the base. Such a markup will provide an opportunity to draw a smooth edge of the trimmed elements.

Next you need to find the center of the bathroom. To do this, connect the opposite corners with the help of lines. Arrangement of rows of finishing materials should be made, starting from these lines. Before laying ceramic tiles it is important to make sure that all calculations and measurements were made accurately.
At the end of the markup, you should have an even square / rectangle with the sides lined with whole tiles - these elements will need to be fixedthe first.
Subtleties of the process
If all of the above steps are completed, then you can start laying the tile on the floor.
Let us consider in more detail the sequence and order of execution of these works.
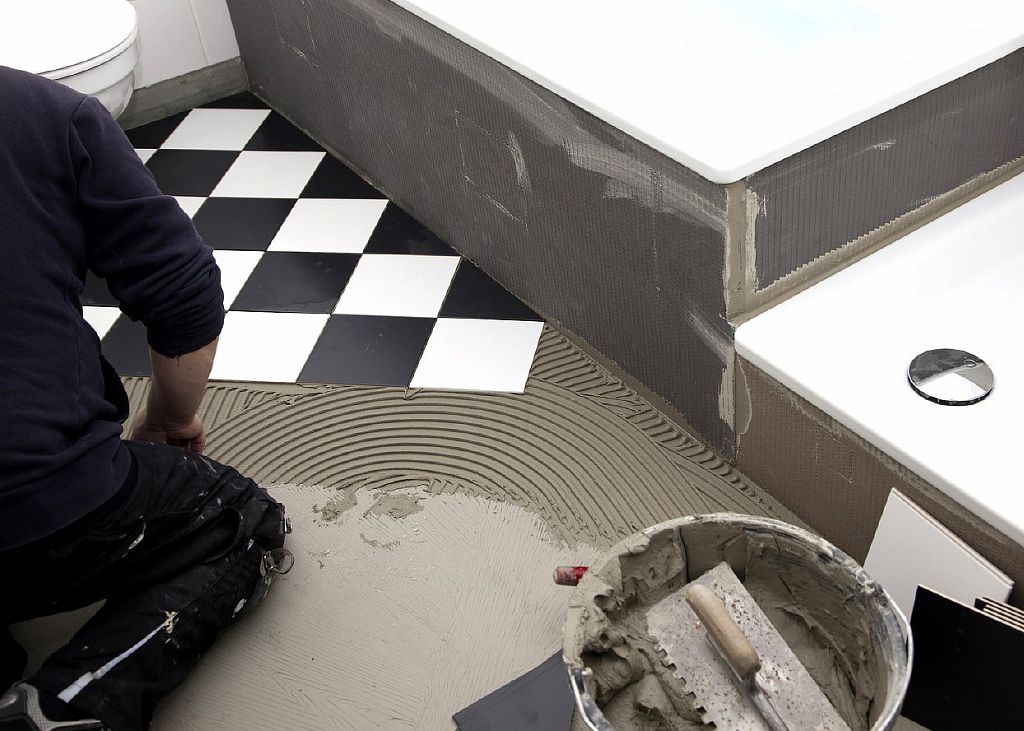
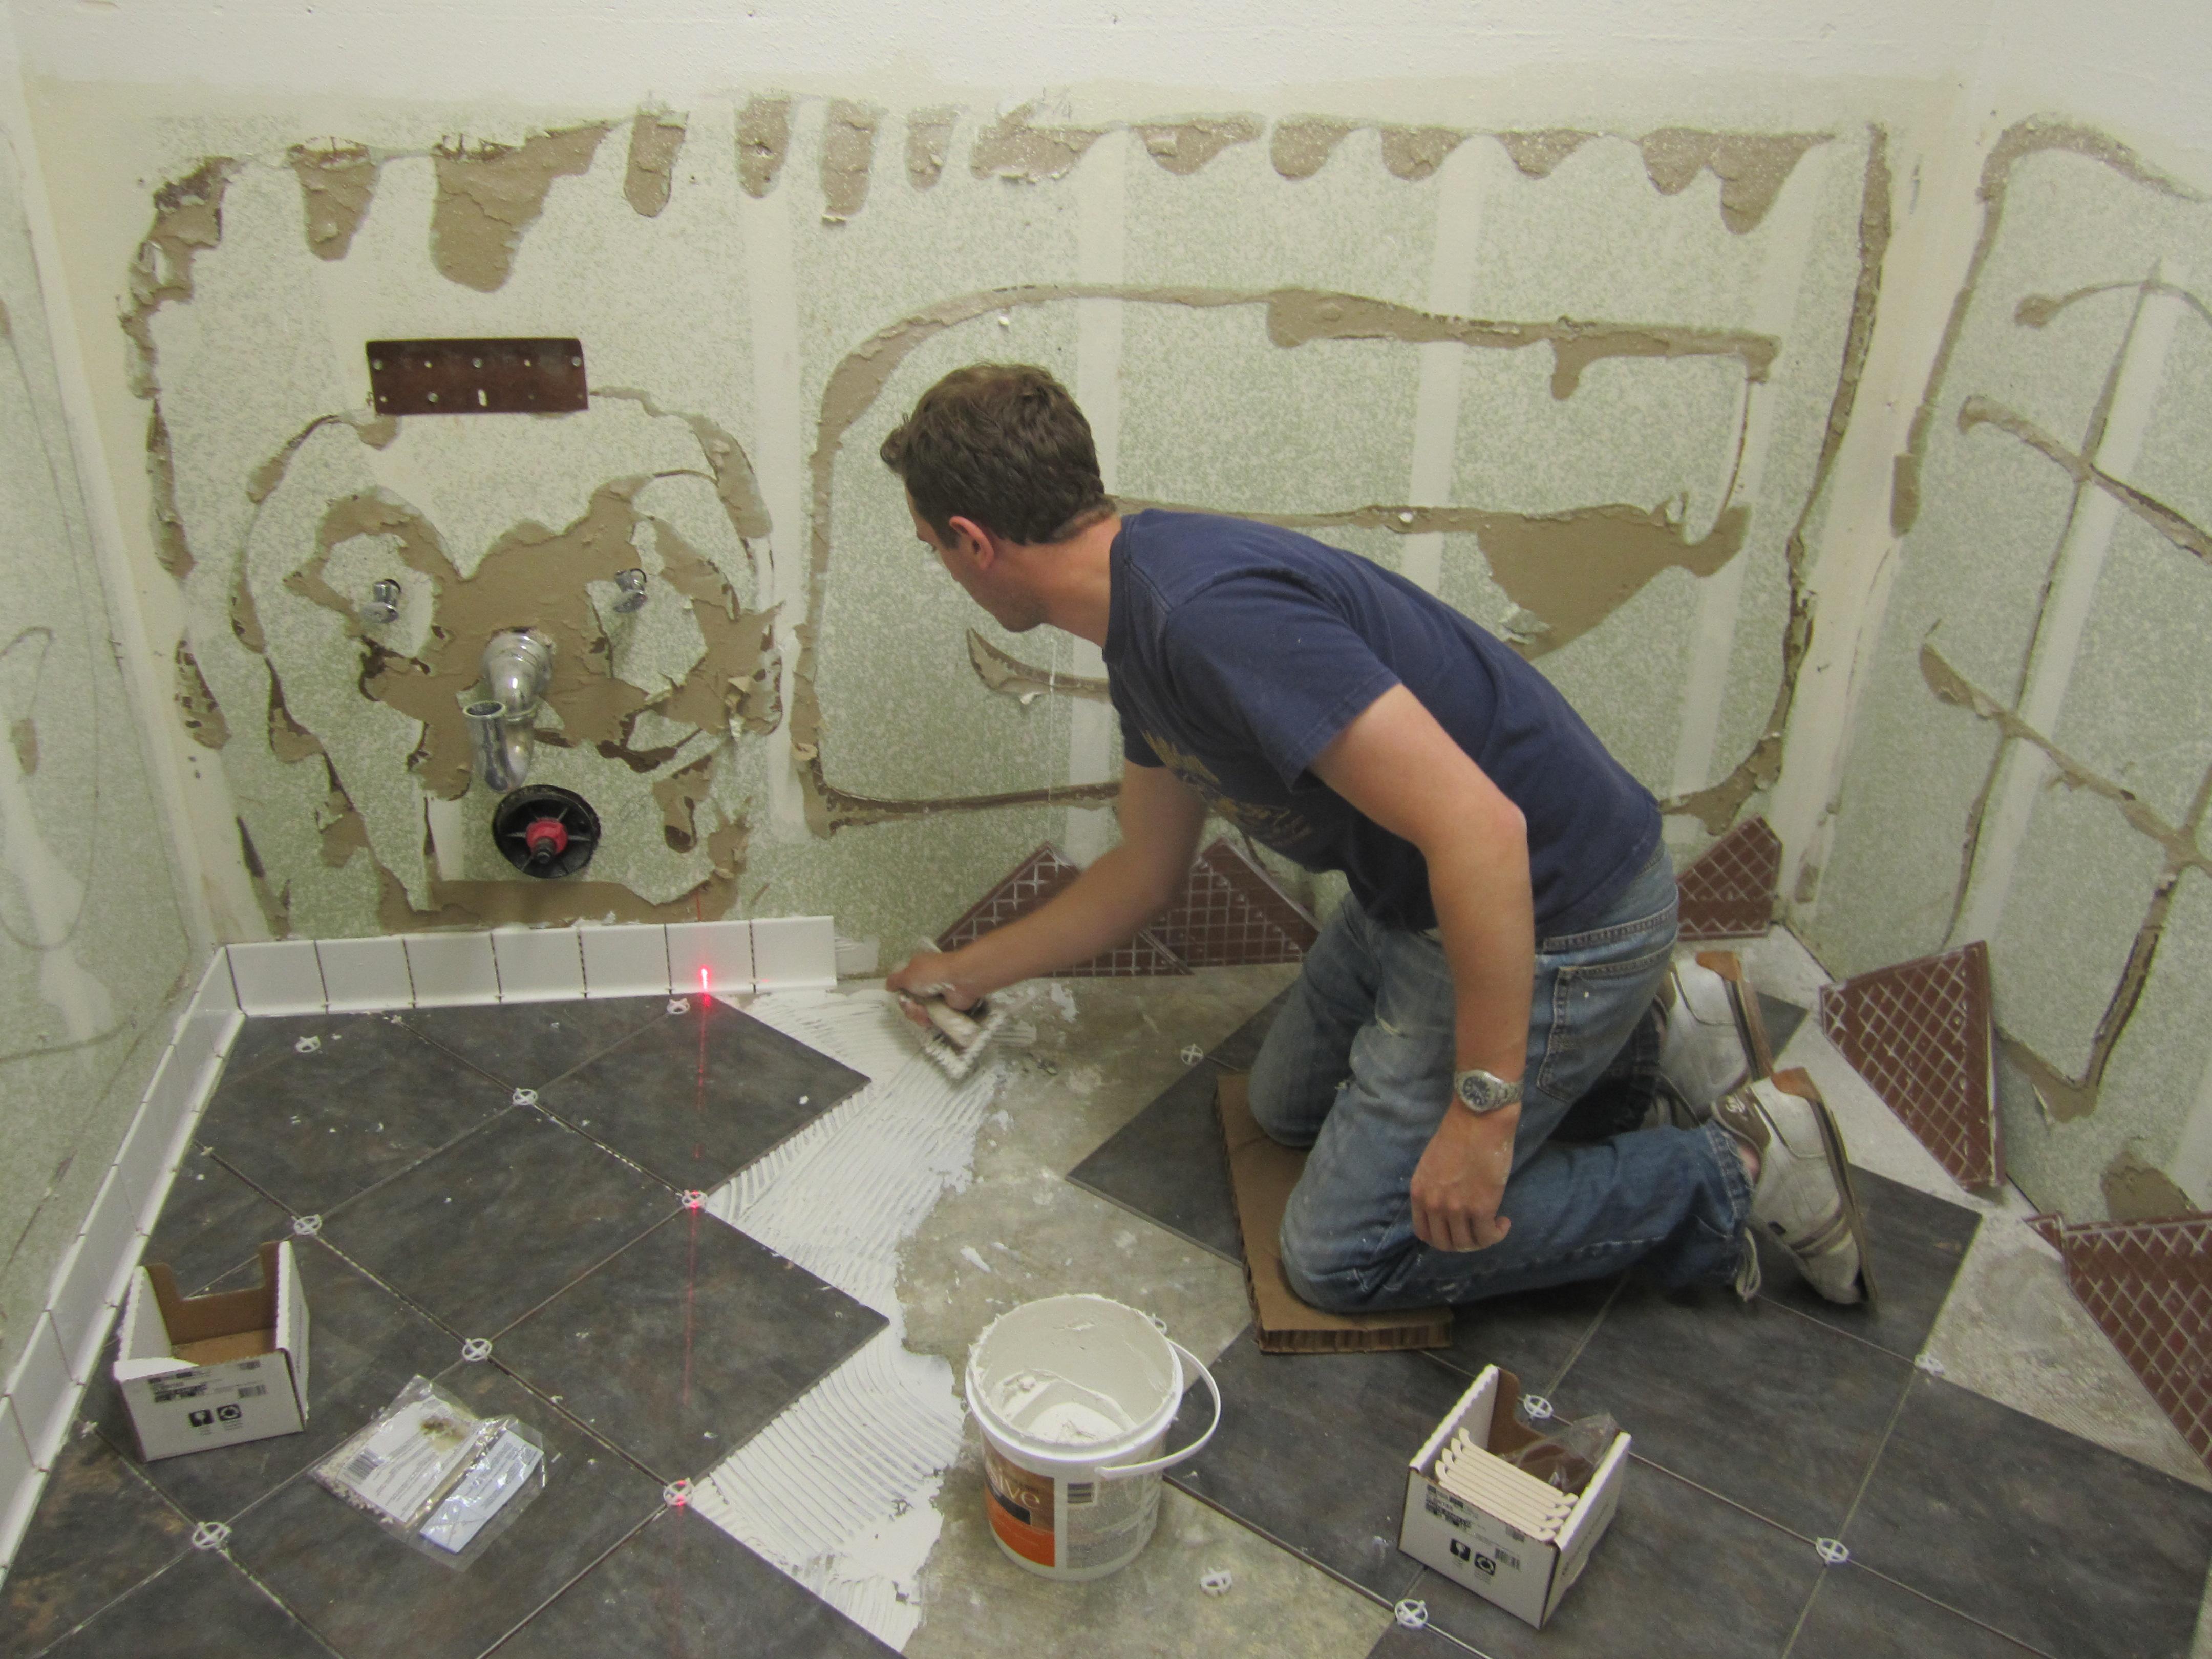
- First you need to carefully prepare the tile adhesive. As a rule, it consists of a dry mixture, which simply needs to be prepared for direct work. To do this, pour the contents of the package into a clean container with water, and proceed to mixing after 10 minutes.
- After that, the bathroom floor is primed with the resulting tile adhesive - it is laid with a thin layer. This is necessary to provide a more secure grip between the base and the floor tile.
- Next, glue is applied to the floor surface using a notched trowel. In this case, it is important to do all the movements in the direction in one direction, so that the layer is even.
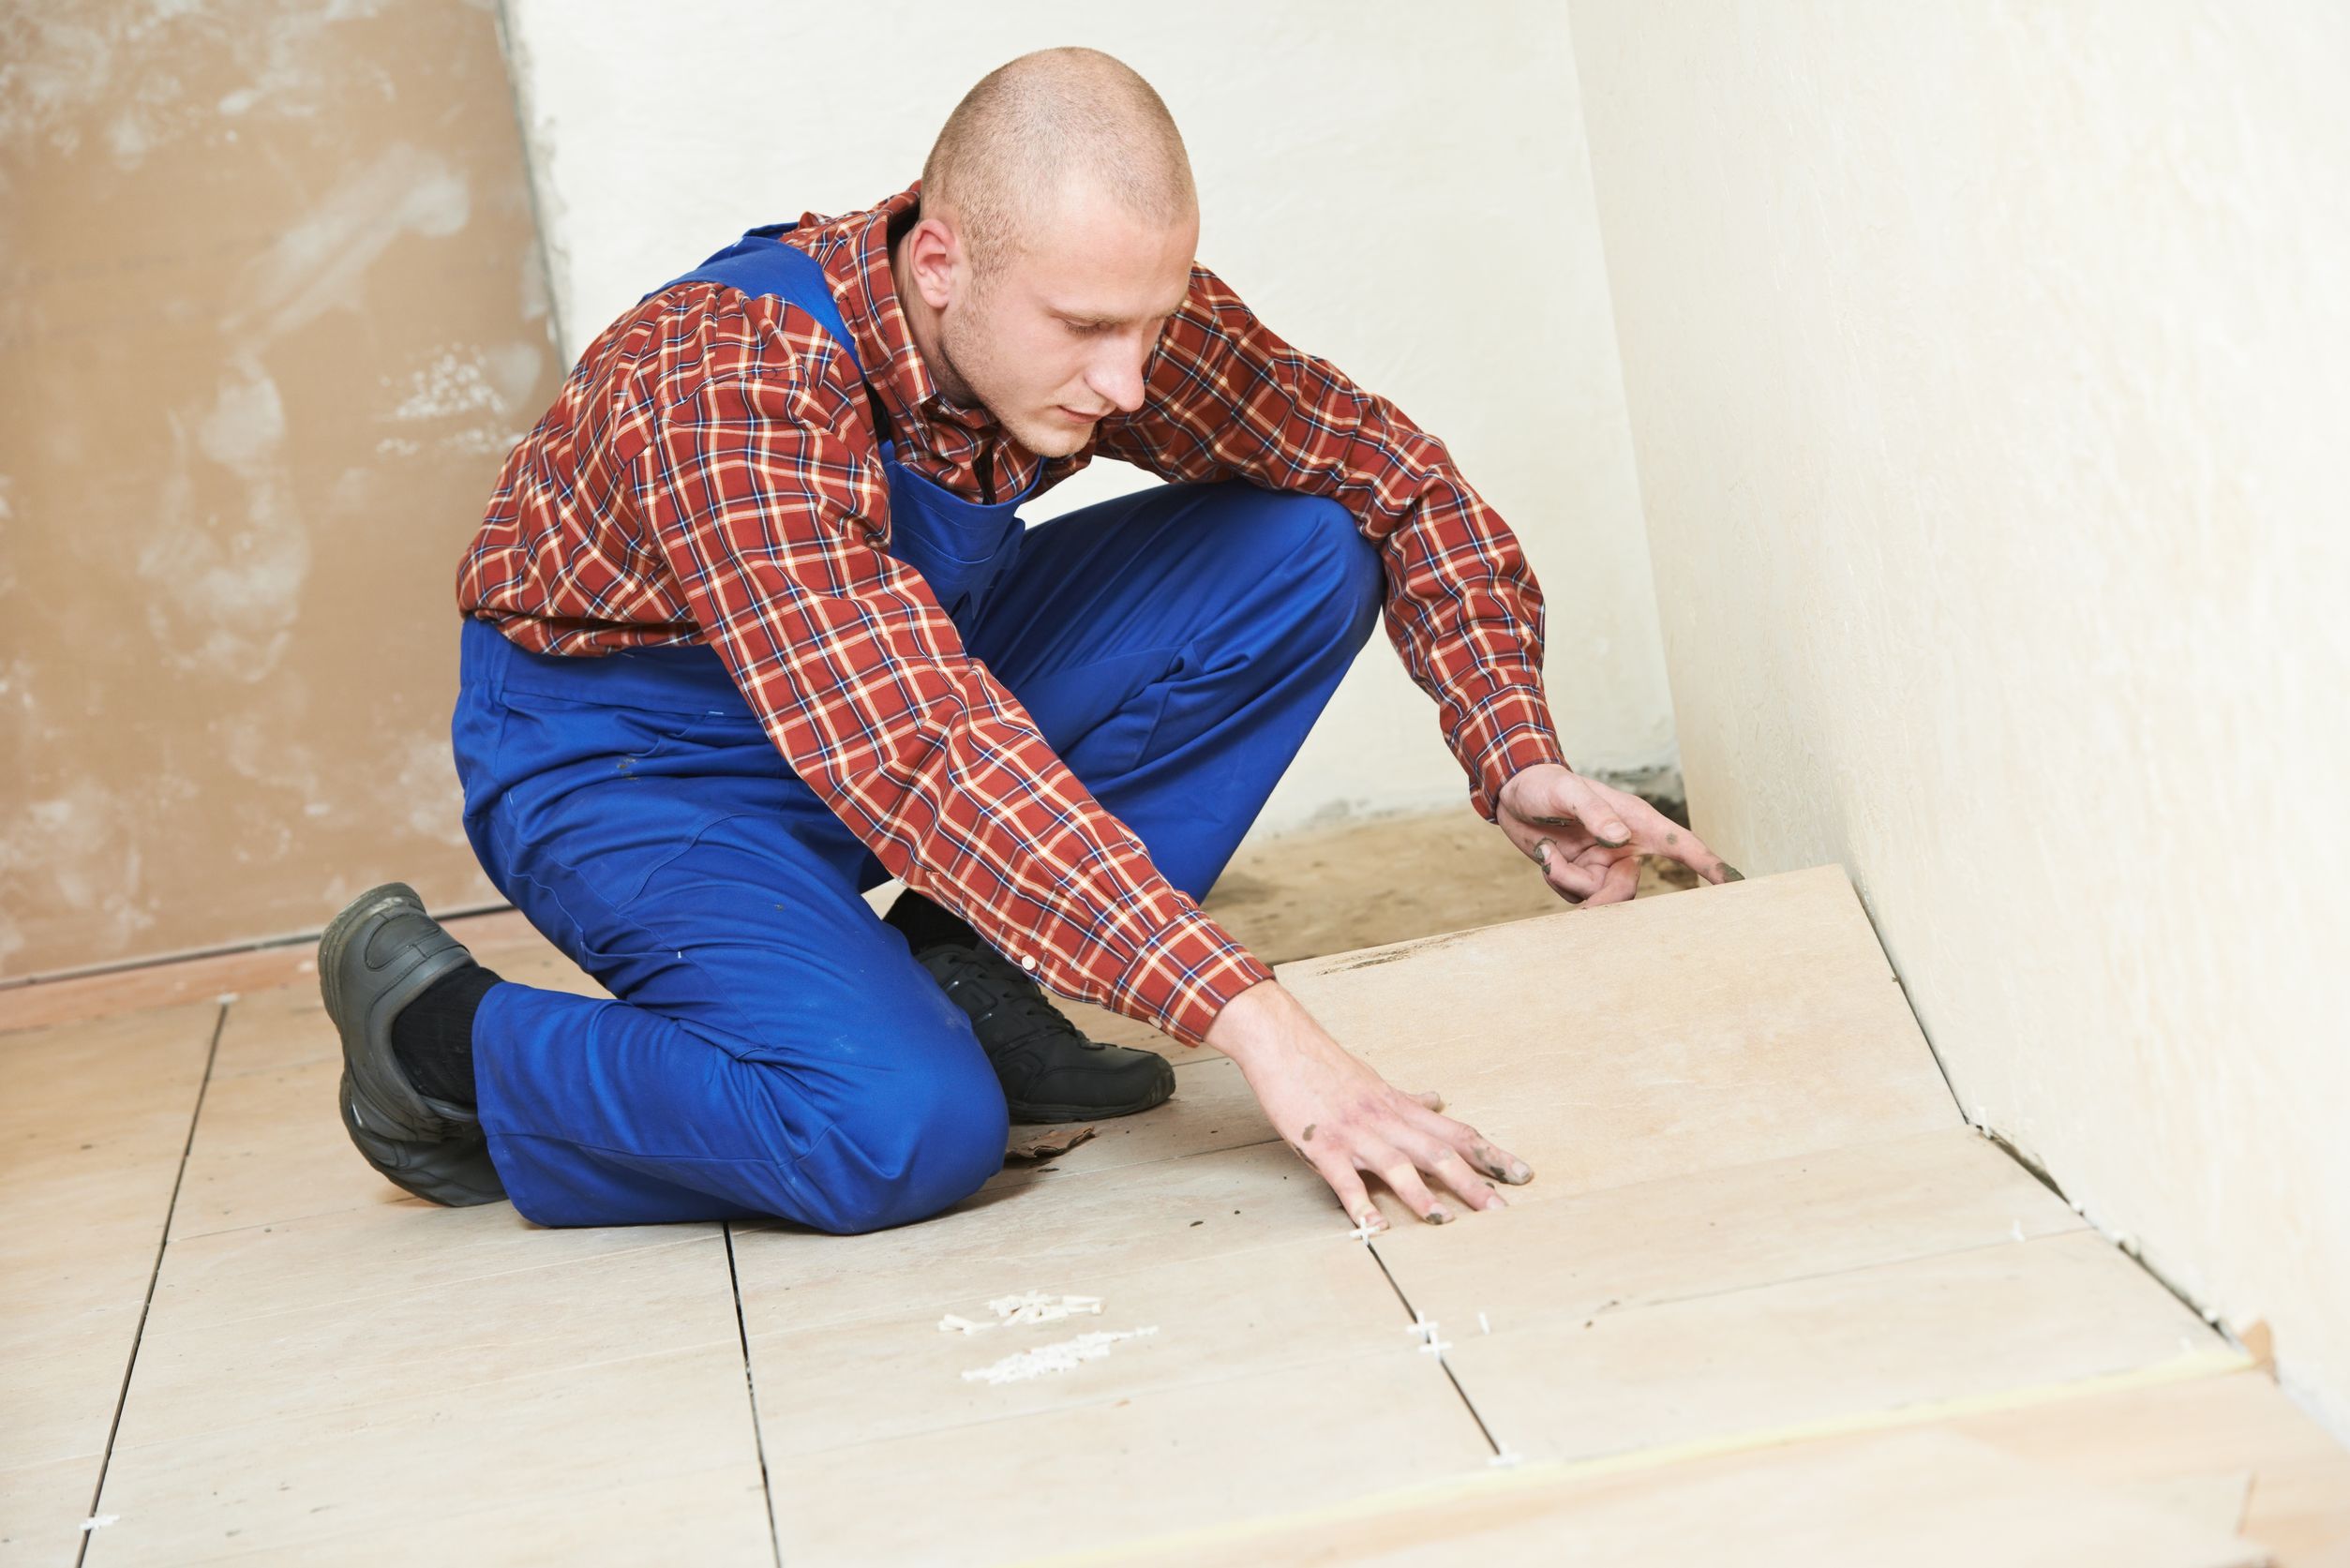
- Now you can put the starting row of tiles. Before this, it is also necessary to apply a thin adhesive layer. Details must be firmly glued to the floor so that air bubbles do not remain - such trifles can adversely affect the durability of the finish.


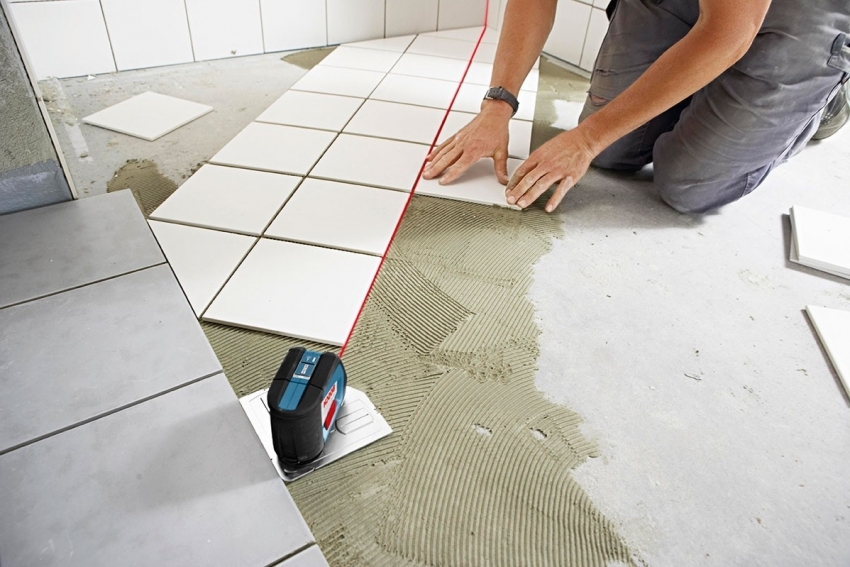
- Make sure that the lining is correct with respect to the walls and the horizon.To do this, use the building level.
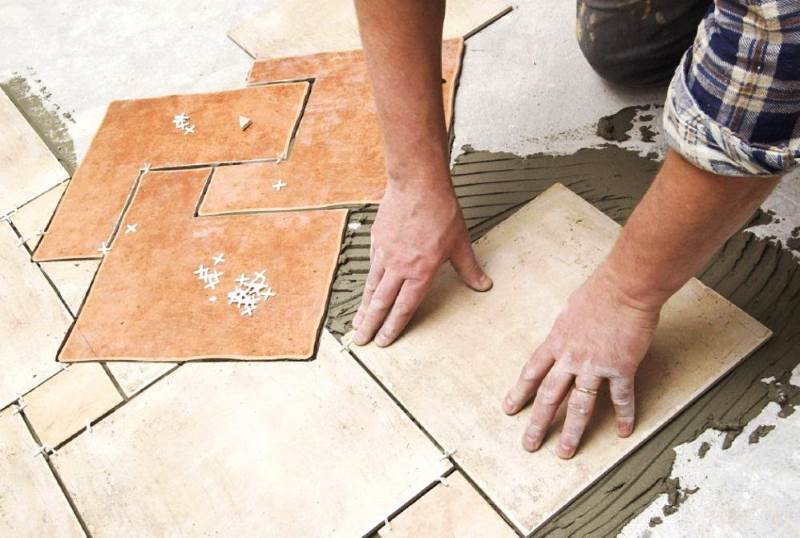
- When you put the first elements, you need to attach a plastic cross to the corner to form even and neat seams. Only then can other tiles be fixed. Pressing the next part to the floor, gently knock it with a rubber mallet on its side.
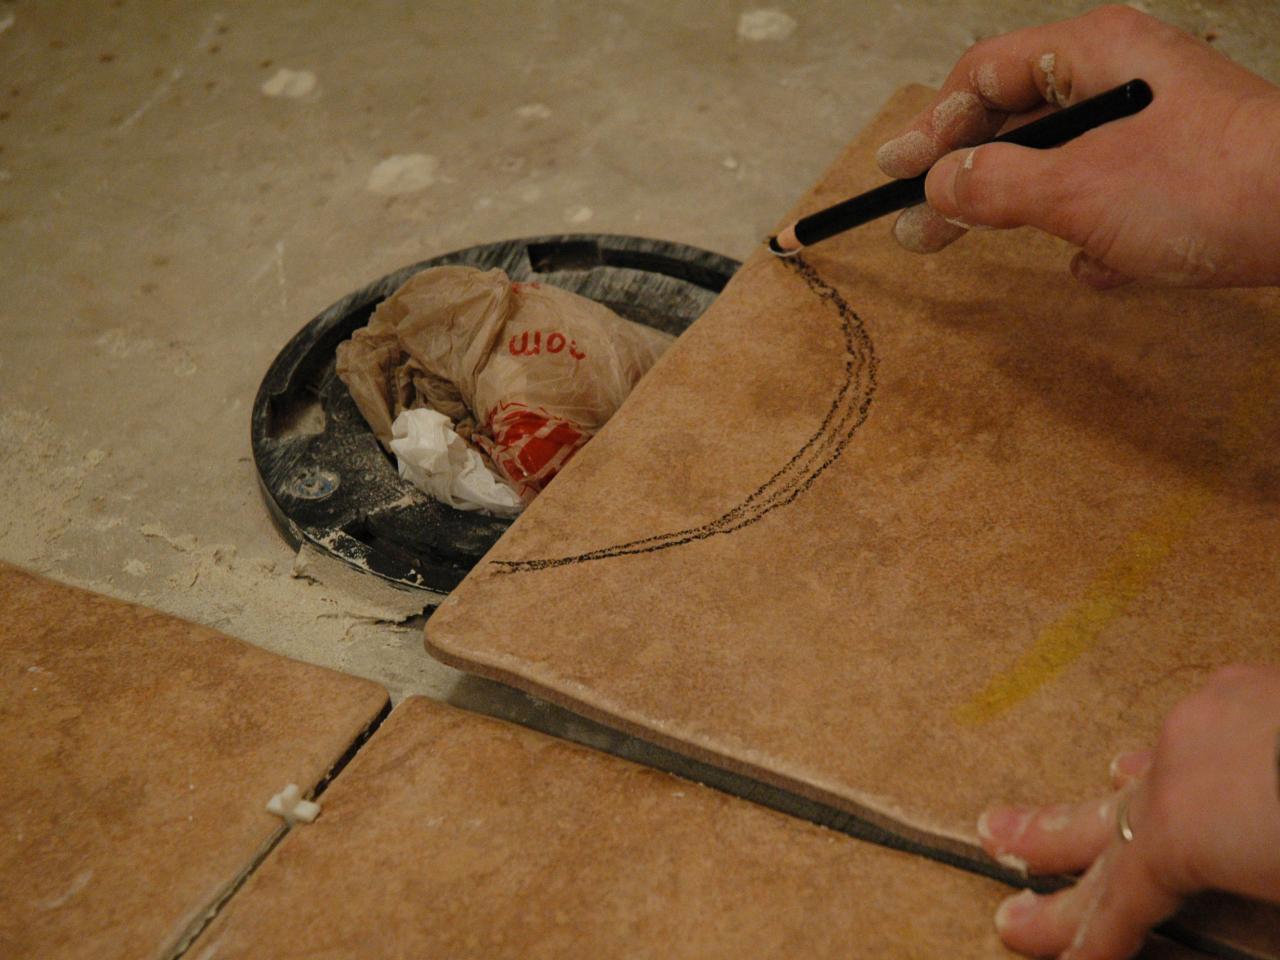
- When laying the tile with it you need to remove excess glue. If the tiles need to be cut, you should use a glass cutter.
Stitching
After completing the flooring in the bathroom, you need to leave the room for a day - during this time, the adhesive compositions will harden to the end. After the specified time, you need to very carefully and carefully remove the crosses from the cladding, as well as remove the excess mortars that remained at the joints between the tiles.
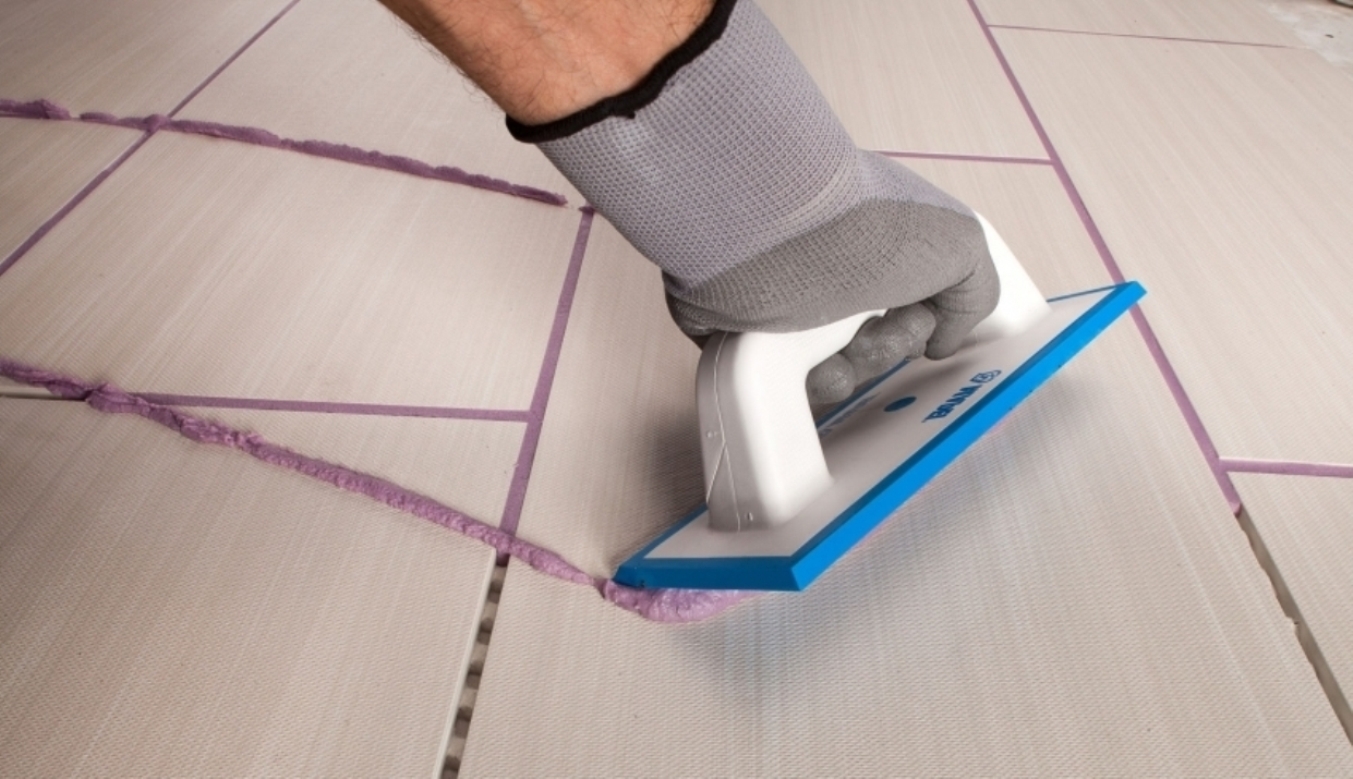
After that, you can proceed to the grouting of joints left between the individual tiles on the floor. Otherwise, this work is called fugovaniem. The grout mix is laid using a rubber trowel. To do this, dial a small amount of grout, and then gently distribute the entire length of the inter-tile joint. In the grooves, the mixture should be rubbed a little harder.To carry out these works, you need to slowly, filling all the voids. Do not forget to immediately remove excess grout from the lining. In addition to the interlayer tile joints, such a mixture needs to finish the joints along the perimeter of the sewer passages.
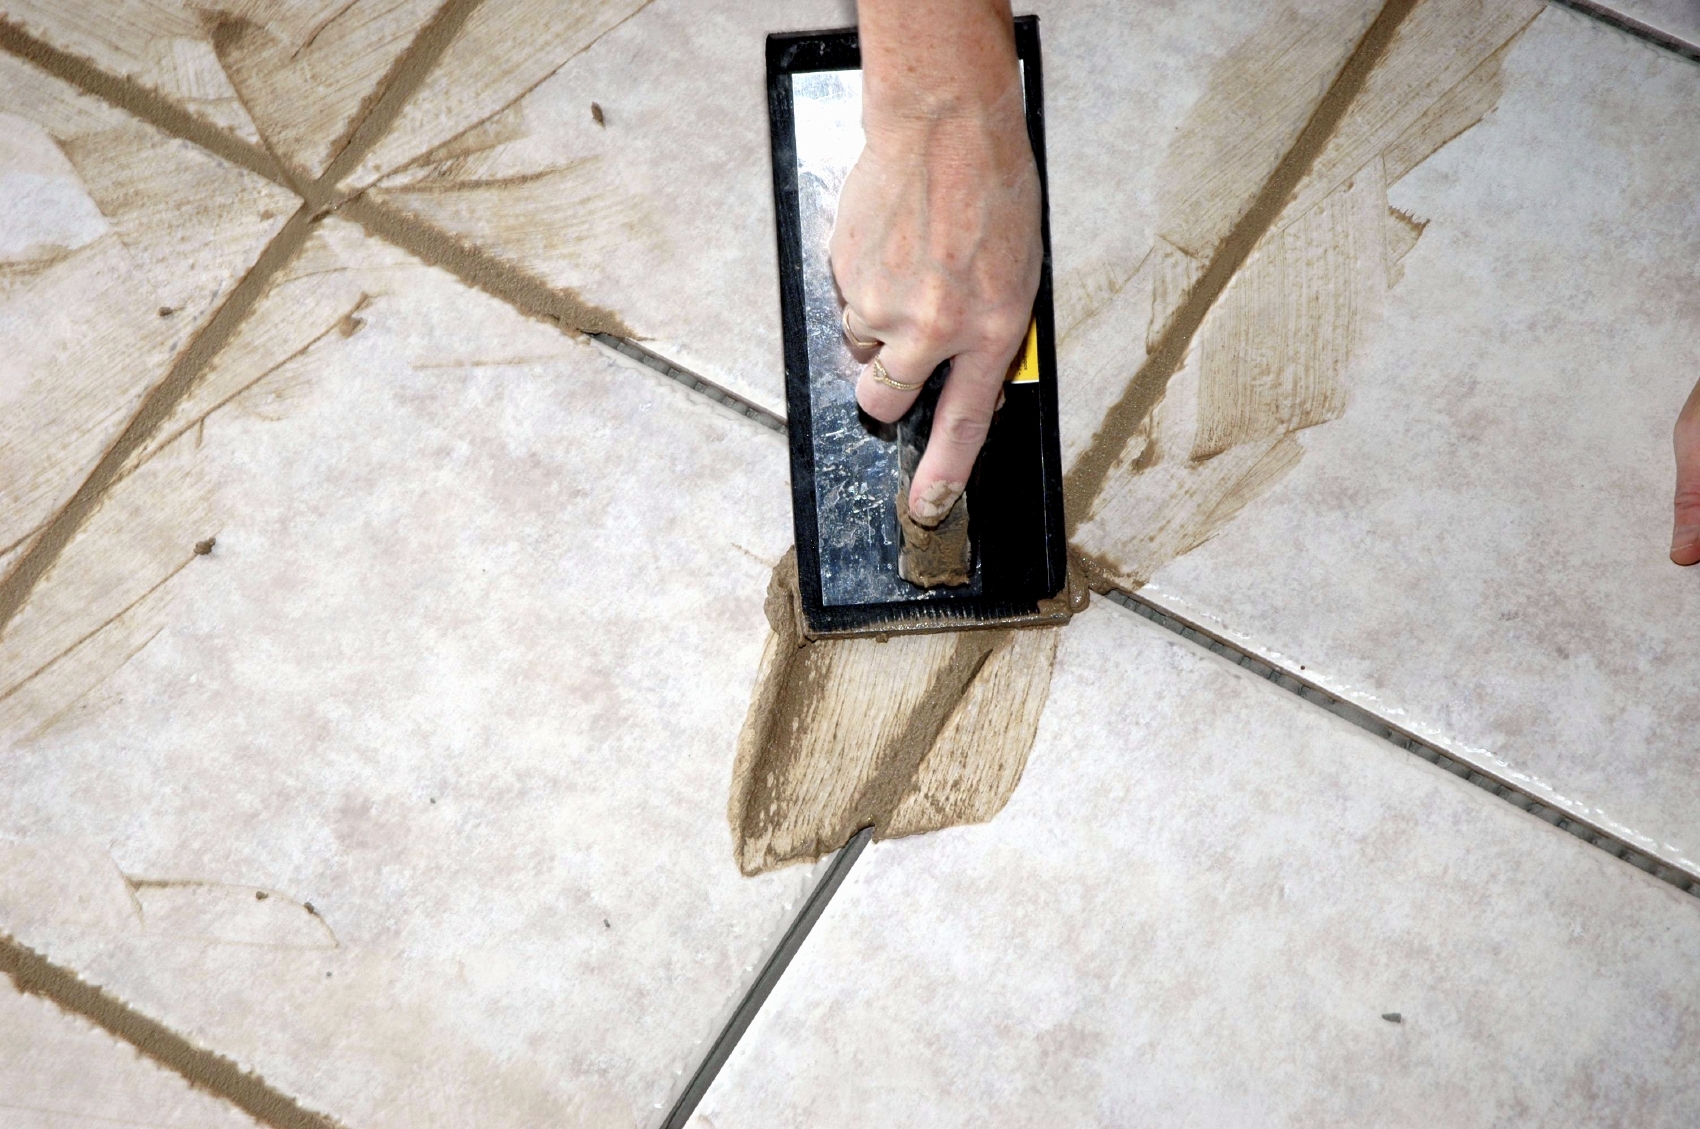
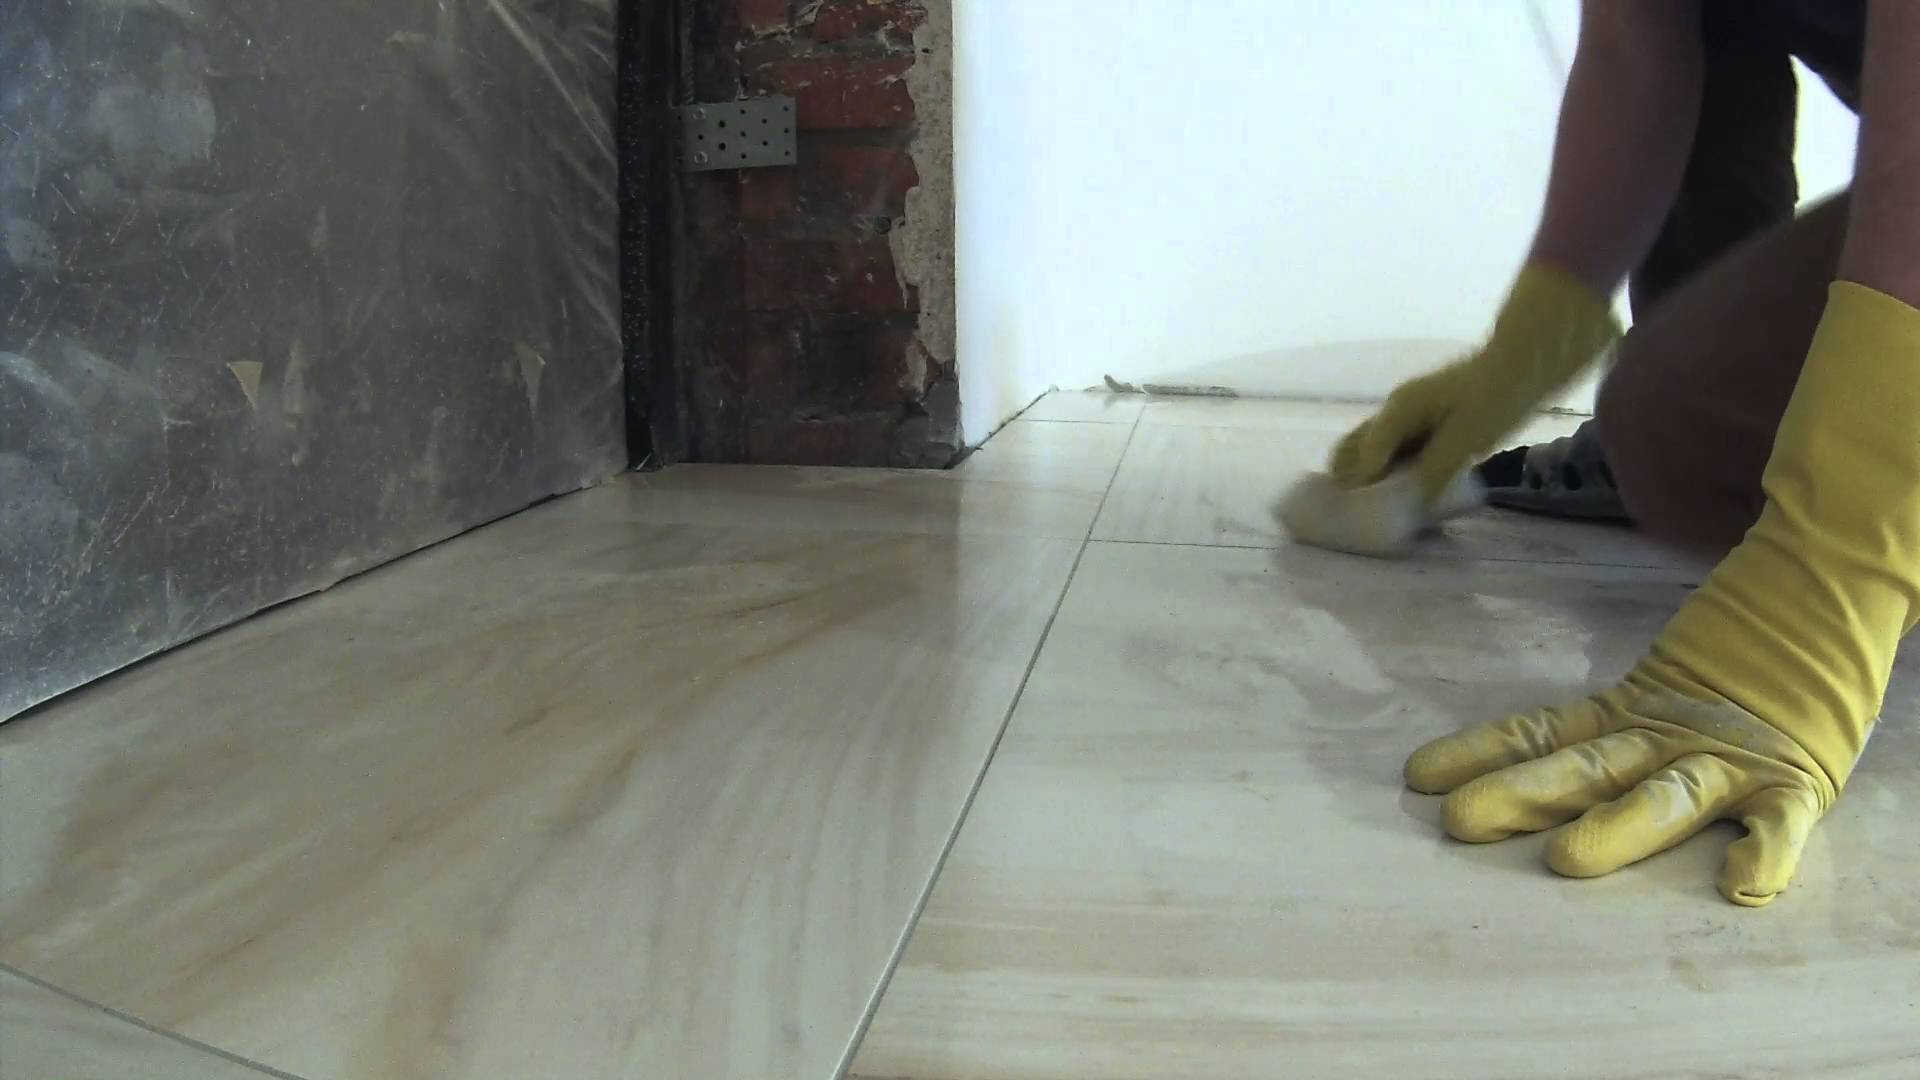
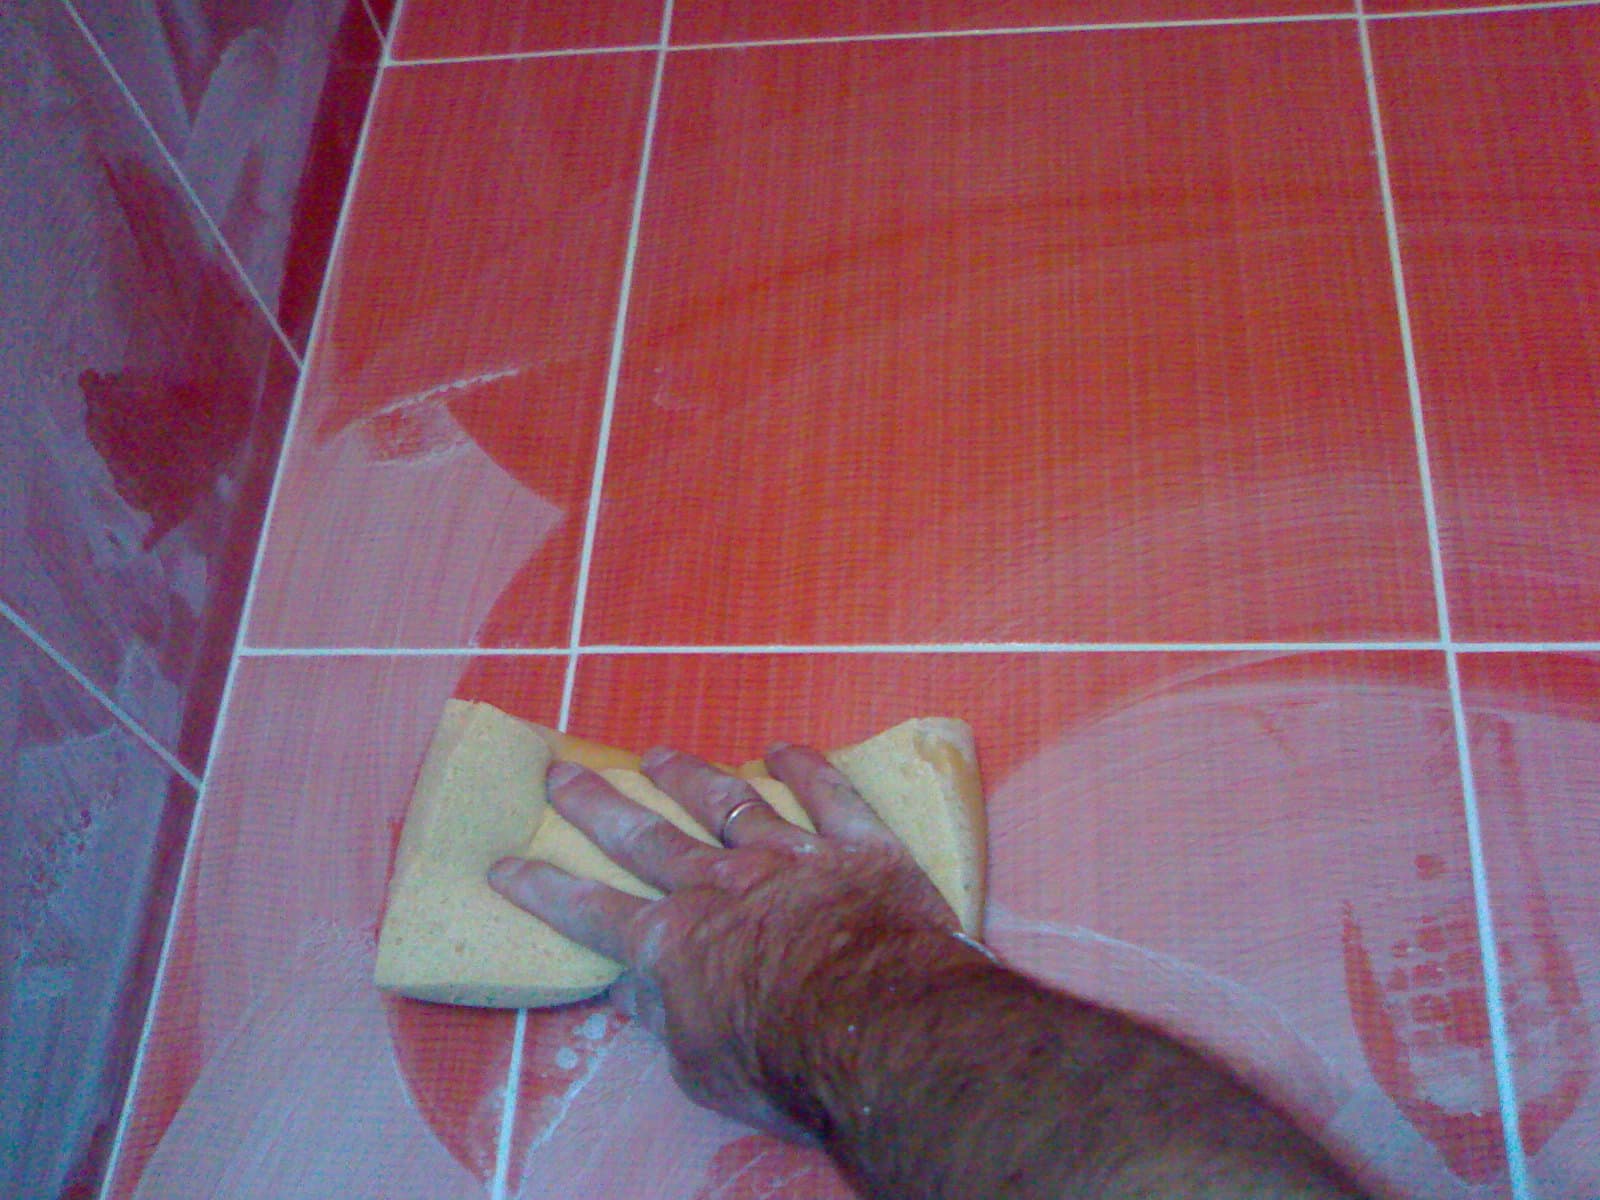
Next, the treated seams need to be wiped with a damp sponge to wash the remaining solution. You should proceed to this step no earlier than 10-15 minutes after applying the grout. It is necessary to carry out such work until the trowel is completely dry, since after that it will be very difficult to remove the surplus. When cleaning such a floor covering, you need to rinse the sponge as often as possible, as well as change the water. Otherwise, visible lamination, spots and stripes will remain on the facing.
After a couple of weeks, the seams can be additionally smeared with a special waterproof compound. It should be laid on top of the grout.
Tips and tricks
As you can see, putting the ceramic tile yourself on the floor in the bathroom is not so difficult.
However, in any case it is worthwhile to listen to a number of tips and recommendations from specialists.
- If you are laying tile on a rough wooden floor, then it is very important to check its strength.If some floorboards are rotten, they need to be replaced with new ones. To even such a basis, usually use sheets of chipboard or plywood.
- If you are going to cut the tile, then before that it should be wetted with water. Use a special tile cutter, not a grinder. Wear safety goggles when cutting material, as there will be a lot of dust.
- Adhesive solutions are best prepared using a drill and a special nozzle. Thus, you save time.
- Do not put too much glue on the substrate. In this case, it may dry out too quickly.
- Before you press on the tile laid on the base, you must make sure that there is no air accumulation under it. Otherwise, the lining will not last long.
- You can lay the glue on the base with any tool. Leveling the composition is better with knives spatulas.

- Make sure that the width of the extreme parts is not less than ½ of their size.
- In addition, the extreme tiles must be laid so that there is a small distance between them and the walls (neat seam) - you cannot fix them close to the floor slabs.
- Please note: if, when processing a grout, it stretches after a wet sponge, this means that the solution has not yet dried to the end.
- If necessary, it is permissible to put a floor heating system under ceramic tiles.
- For finishing work, it is recommended to buy only high-quality tools and materials from reputable companies. With such components there will be no problems in the process of facing the floor.
- For the bathroom it is recommended to buy tile with non-slip surface. With such material use of the room will be safer.
- When choosing a tile, pay attention to the integrity of the pattern (if there is one on it). On the floor covering there should not be faded areas or unfinished images - such elements will spoil the design of the bathroom.
- Some people argue that ceramic tiles can be laid on the same tile in the bathroom. However, this method of installation has a serious disadvantage: the new lining may simply not mate with the old one. In this case, the tile will not hold on the floor as tightly as necessary.

- In the bathroom should do waterproofing the floor. Many owners neglect this work, but experts advise to install waterproofing materials in all areas where there are heating systems, water supply or sewage systems.
- Experts recommend the use of coating waterproofing when laying tiles in the bathroom. Instead, it is permissible to refer to the impregnation options. Such compounds are applied seamlessly and provide good protection against moisture and moisture.
- During finishing works, constantly check the flooring with a building level - the lining should be smooth, without differences.
- Preparing a grout, pay attention to its consistence - it has to remind thick sour cream.
- If you decide to put the original floor in the bathroom like a mosaic or "chess", but you do not have the appropriate experience, then you should turn to the services of experienced craftsmen. Difficult types of tiled masonry require certain skills and knowledge that not every owner possesses.
- First, ceramic tiles should be placed in the place where there will be a bath.
How to arrange the bathroom floor, see the next video.


