Wall decoration with laminate do it yourself
Finishing the walls with laminate will undoubtedly add charm and originality to any room. This is a fairly simple process, and it is quite possible to do it yourself, without the help of experts.
Advantages and disadvantages
The use of laminate for wall decoration has its pros and cons.
The advantages include the following parameters:
- excellent strength of the material (the panels can serve for more than a decade, while maintaining the aesthetic appearance);
- environmental friendliness;
- a light weight;
- a huge selection of colors and textures;
- price (cheap panels can be purchased for the walls);
- the possibility of finishing the walls with their own hands, without hiring craftsmen.
The disadvantages of the laminate wall decoration a bit:
- overestimated requirements for the preparation of walls before the coating of laminate.The walls must be perfectly flat, or installation of the batten is necessary;
- low resistance to temperature and humidity.
How to choose?
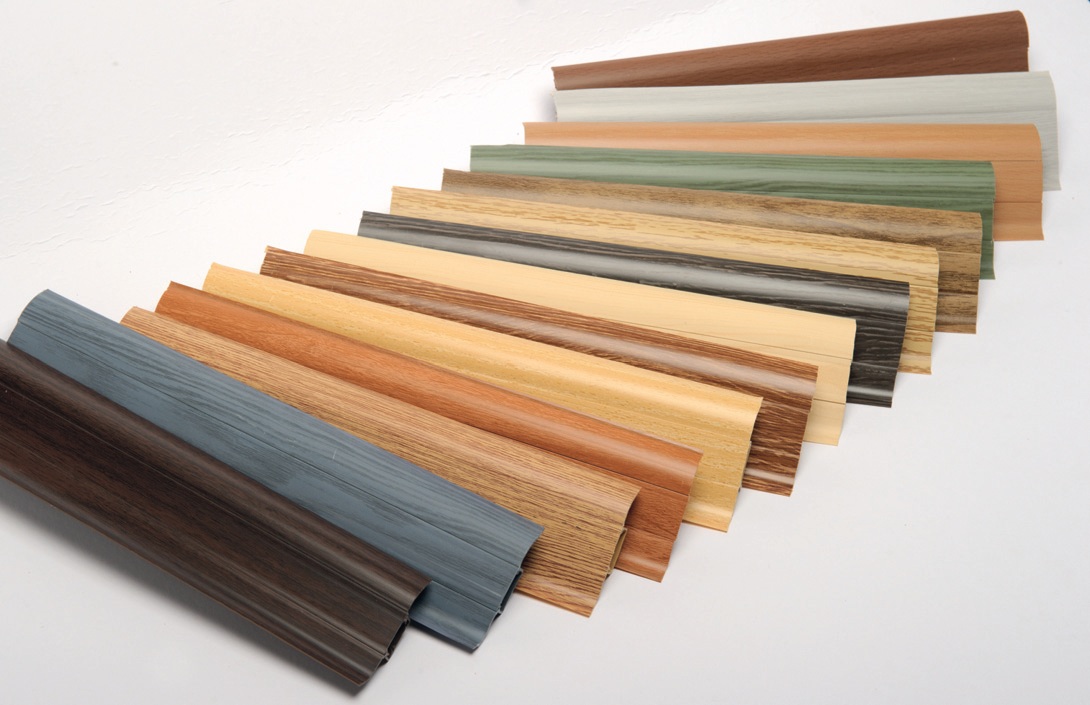
Due to the variety of choice of colors and textures wall laminate for interior wall decoration can be used in any room.
When selecting a material, it is necessary to decide what functions, besides decoration, will be performed by wall covering. As a rule, this alignment of the wall and the creation of a stylish updated design.

To cover the walls suitable laminate from 21 to 34 class resistance. It is better to select the material in accordance with the functional purpose of a particular room.
If there are pets in the house, then it is recommended to purchase more low-end models, so that in case of damage to the coating there is an opportunity to replace it.
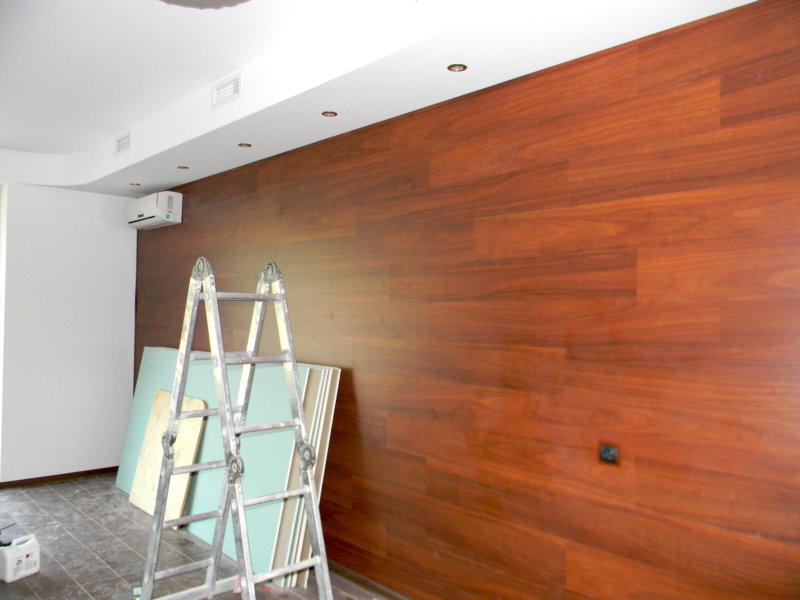
Laminated panels should be matched in style and color to the interior of the room. For small and narrow rooms you should not choose a dark covering of the walls, it is better to focus on light shades. For example, a white coating will refresh the room and make it visually more spacious. A light wall laminate is recommended to be combined with a light floor covering.
Ways
Once the color of the material is chosen, it is determined with the method of fastening. The most common ones are:
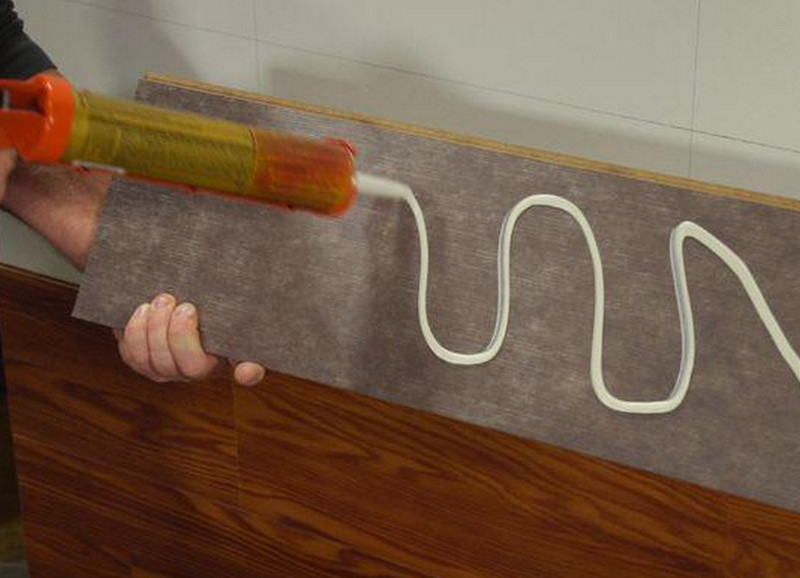
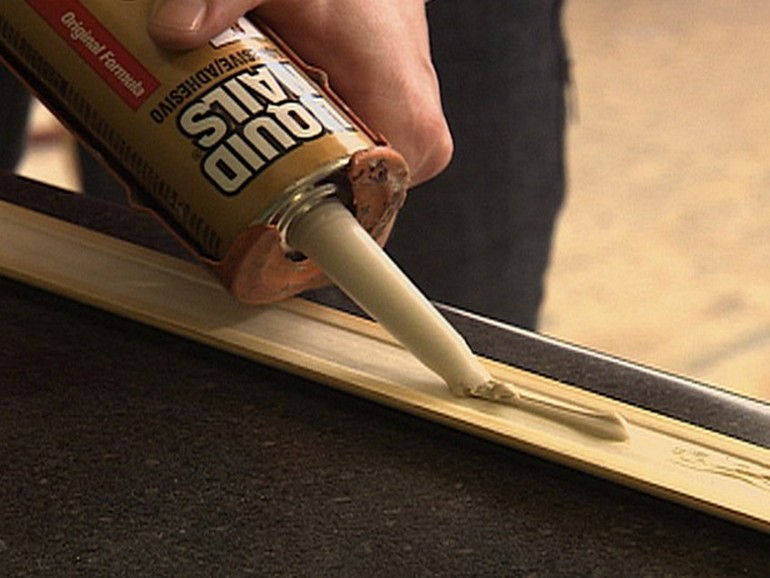
- With glue. The panels can be glued with liquid nails or silicone glue to the surface of the wall. Glue you need to choose high-quality, to securely hold the panels on the wall. This is the easiest mounting option;
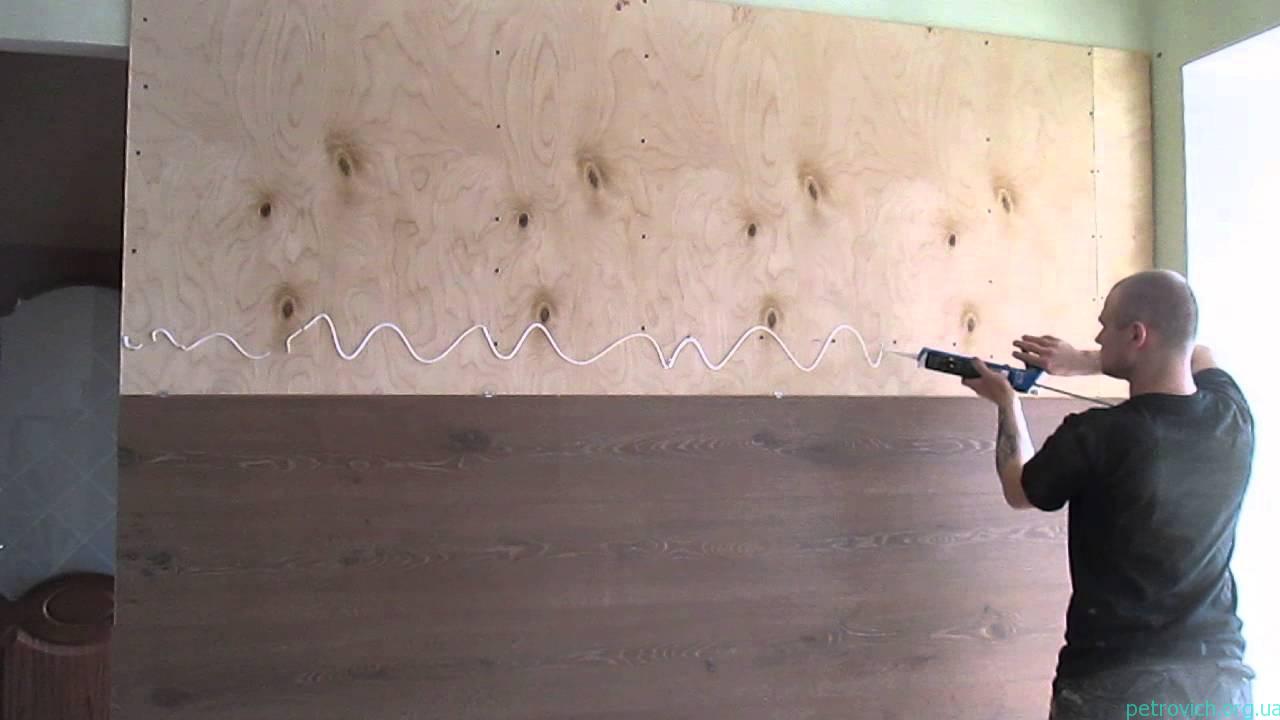
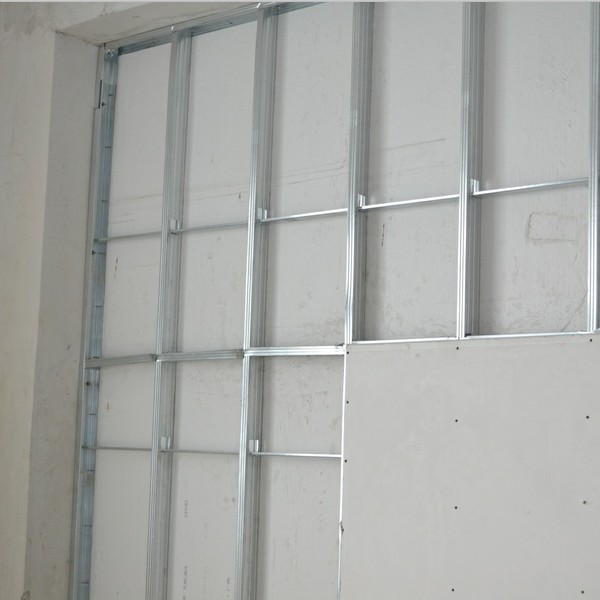
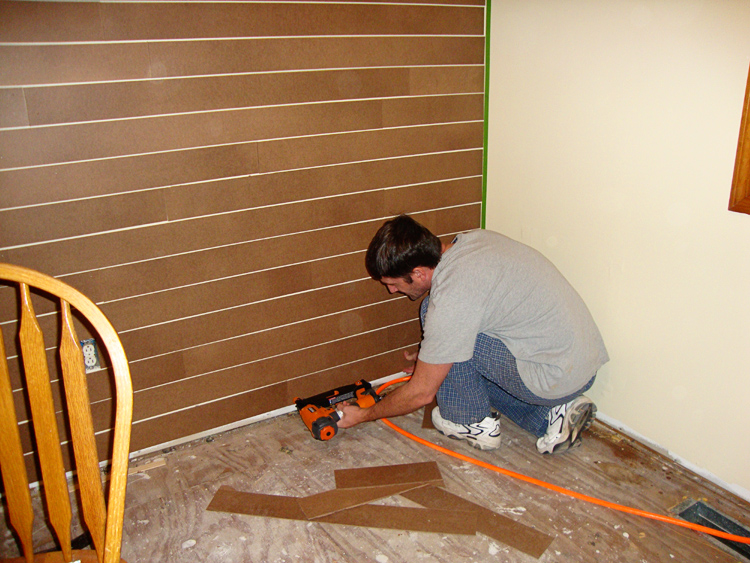
- Frame method. Installation of laminate carried out on a wooden crate. Wooden slats should be 4 * 4 cm. The gap between the guides should be no more than 6 cm. The slats should be located perpendicular to the slats.
Frame method is the most reliable, but time consuming. It does not require prior preparation of the wall. This type of attachment is also suitable for situations where you need to disguise electrical wiring, pipes or other communications under the wall covering.
How to fix?
Fastening is possible not only by the previously mentioned methods. There is another fairly simple method - laying with the help of klyimer. These are special brackets for mounting laminated strips on walls. Klyimery come in two varieties:

- With serrated protrusions. They are mounted directly on the board;
- With a flat ledge.Need to press the click lock.
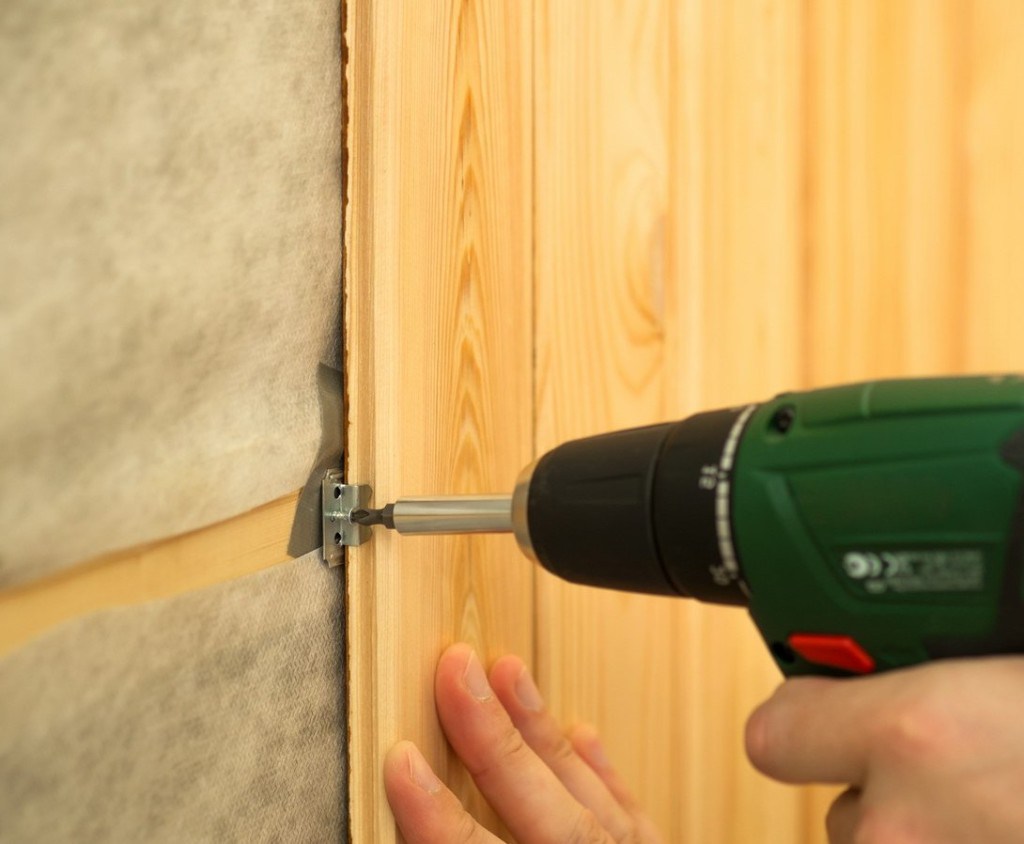
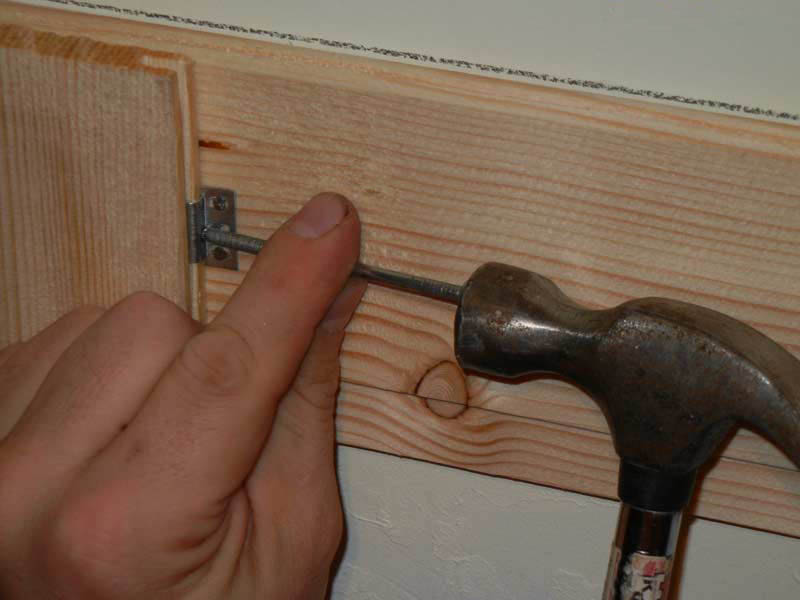
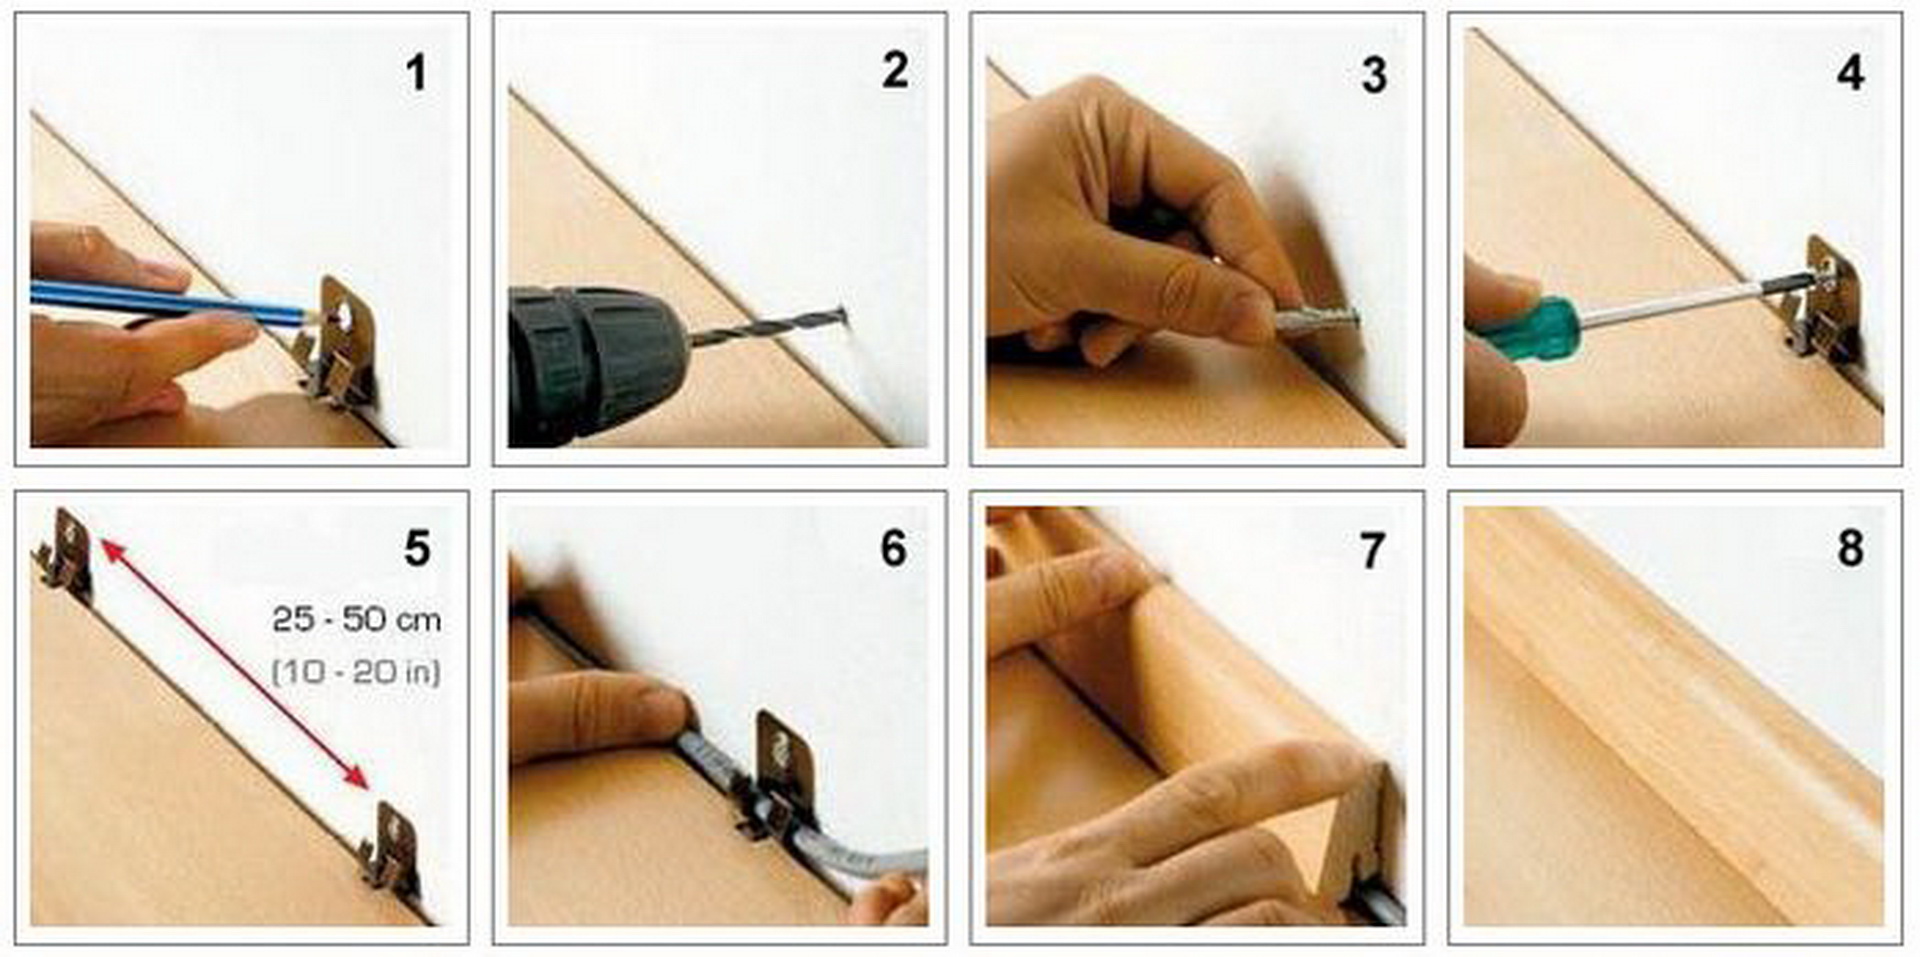
In the frame method of attachment used nails, staples and metal clips. If the perimeter of the coverage area is small, then the first two options can be used. If the area is large, then it is safer to fasten the panels with clips, as over time the laminate may change sizes.
Installation
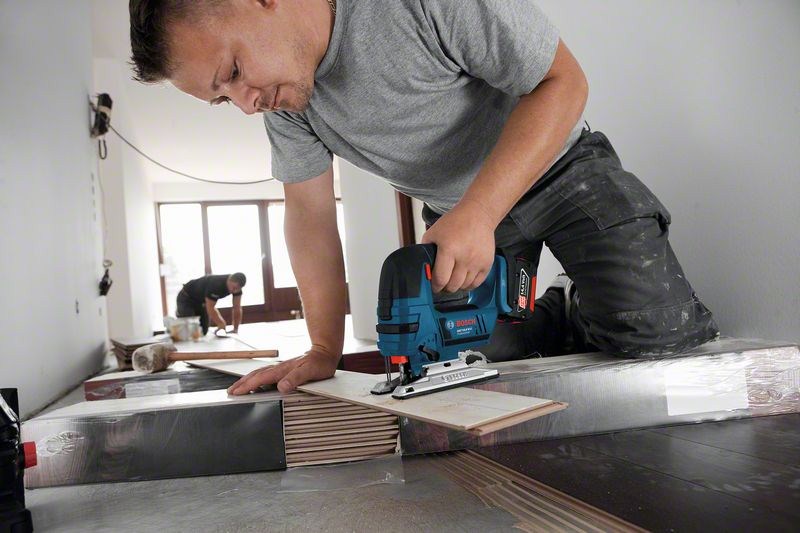
The following tools will be useful for installation: electric jigsaw, tape measure, construction level, trowel, wooden bars, hammer.

The technology of decorating walls with their own hands:
- Calculate the required amount of laminate, it is desirable to purchase with a margin;
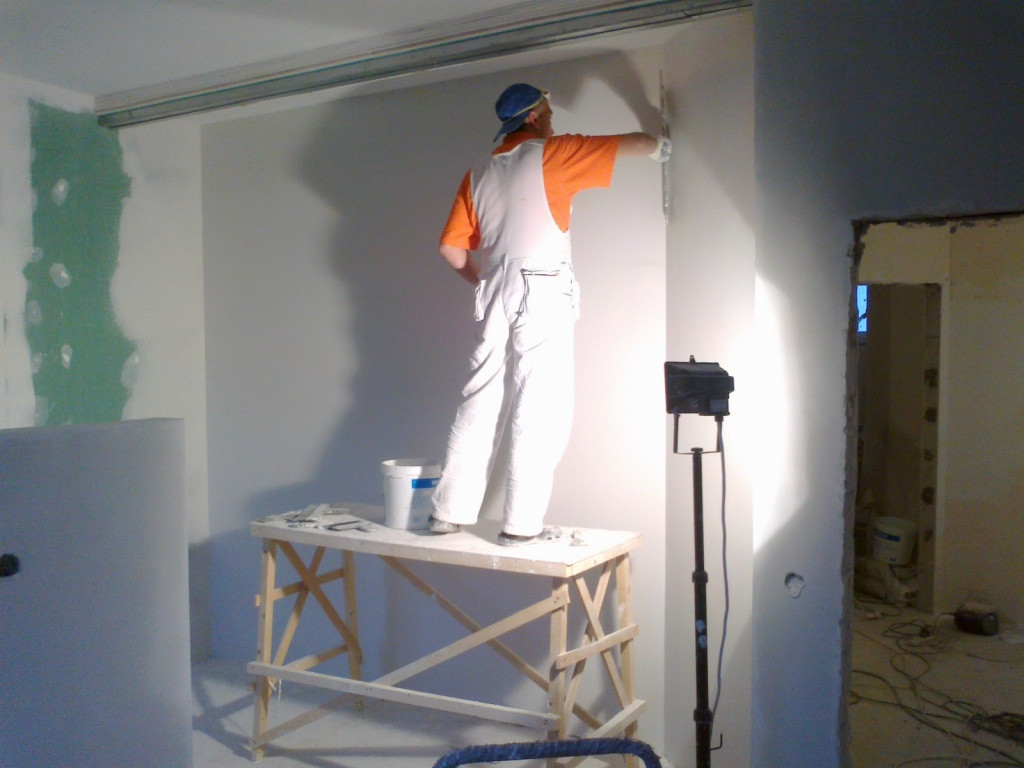
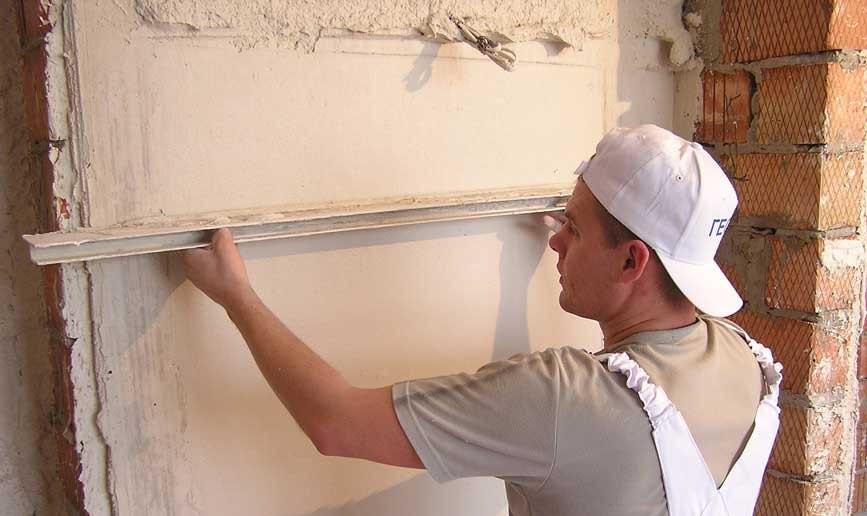
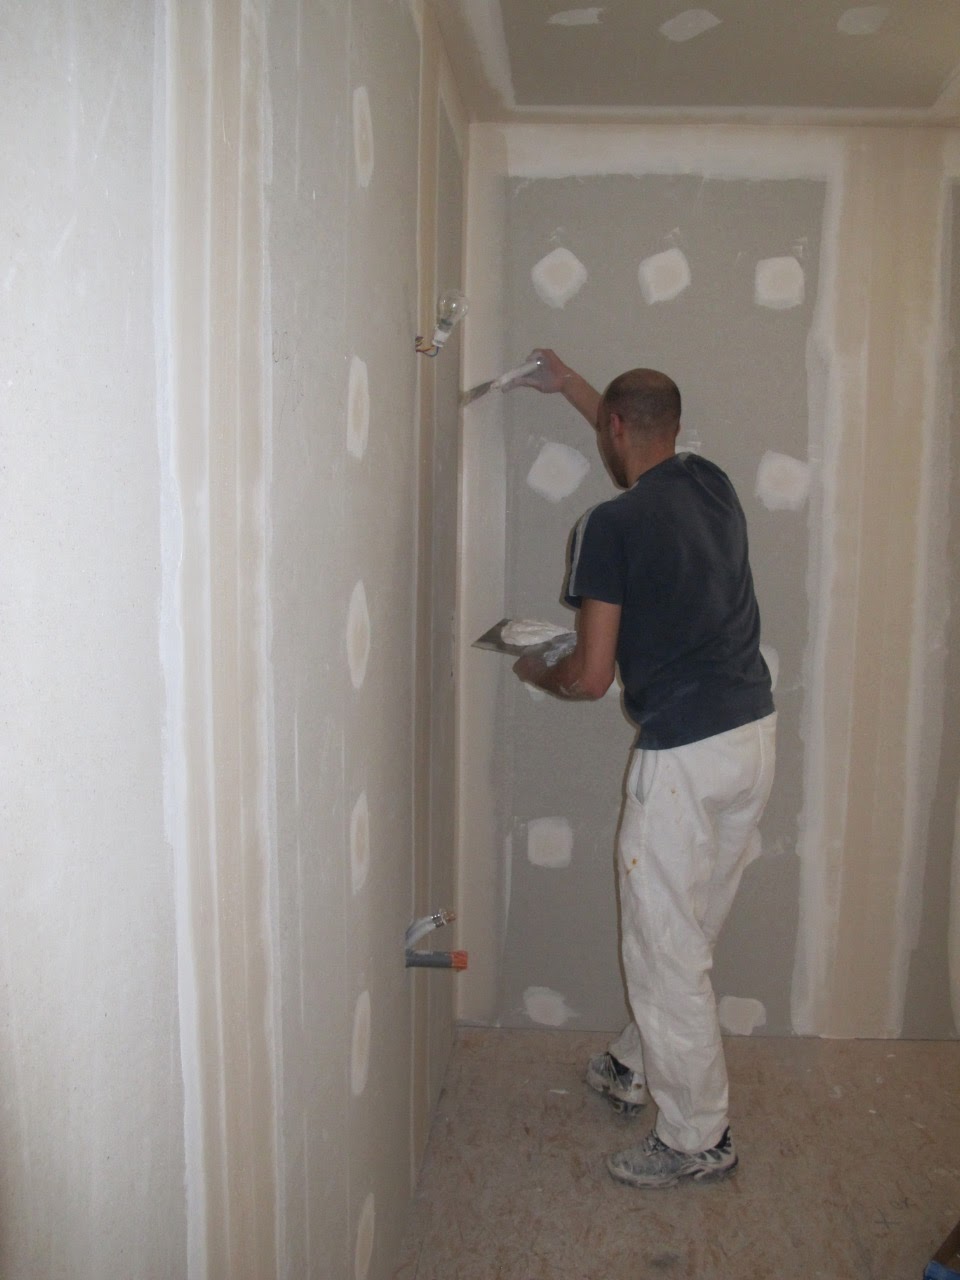
- You can not make the installation process on the curves, uneven walls, so they are pre-cleaned, plastered, dried. Or prepare the crate. Also another possible option - laminate put yourself on the wall of plasterboard. Drywall at the same time must be securely connected to the wall.

- Determine the place from which to start laying the first laminated panel. As a rule, this is the upper left corner.
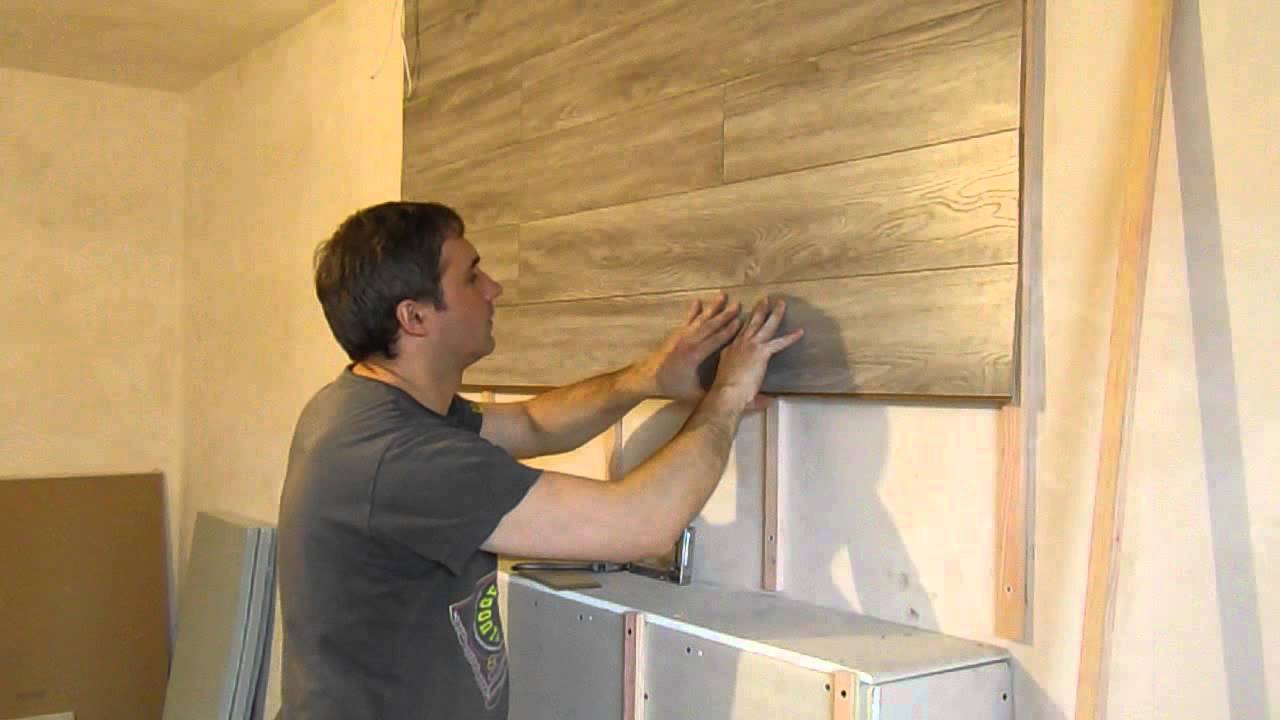
- Conduct directly the installation of the panels. If the glue method is chosen, then liquid nails or silicone glue is applied on the back side of the plank and fixed by pressing for a short period of time.If the frame method is chosen, the fixation is carried out with the help of nails or cleats.
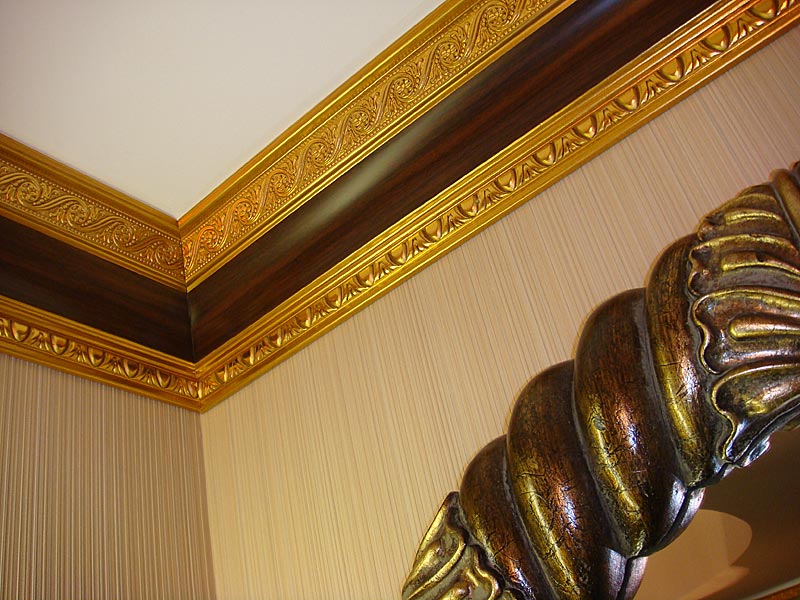
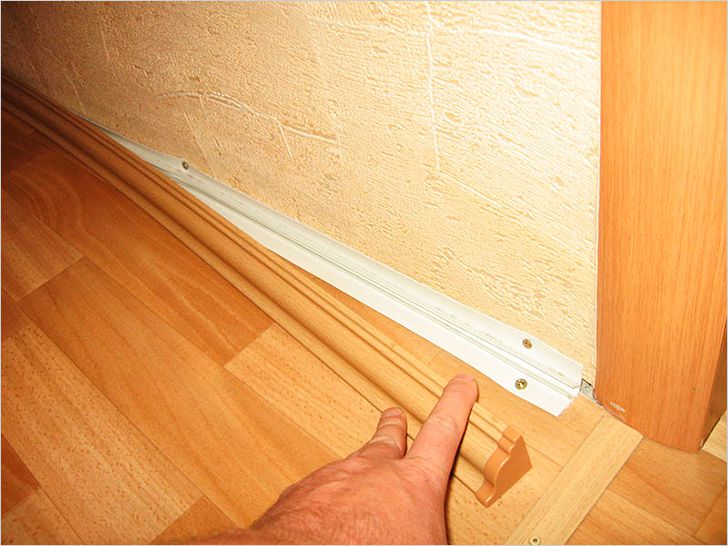
- After installation of the laminate install decorative plinths. They cover the distance between the wall, ceiling or floor.

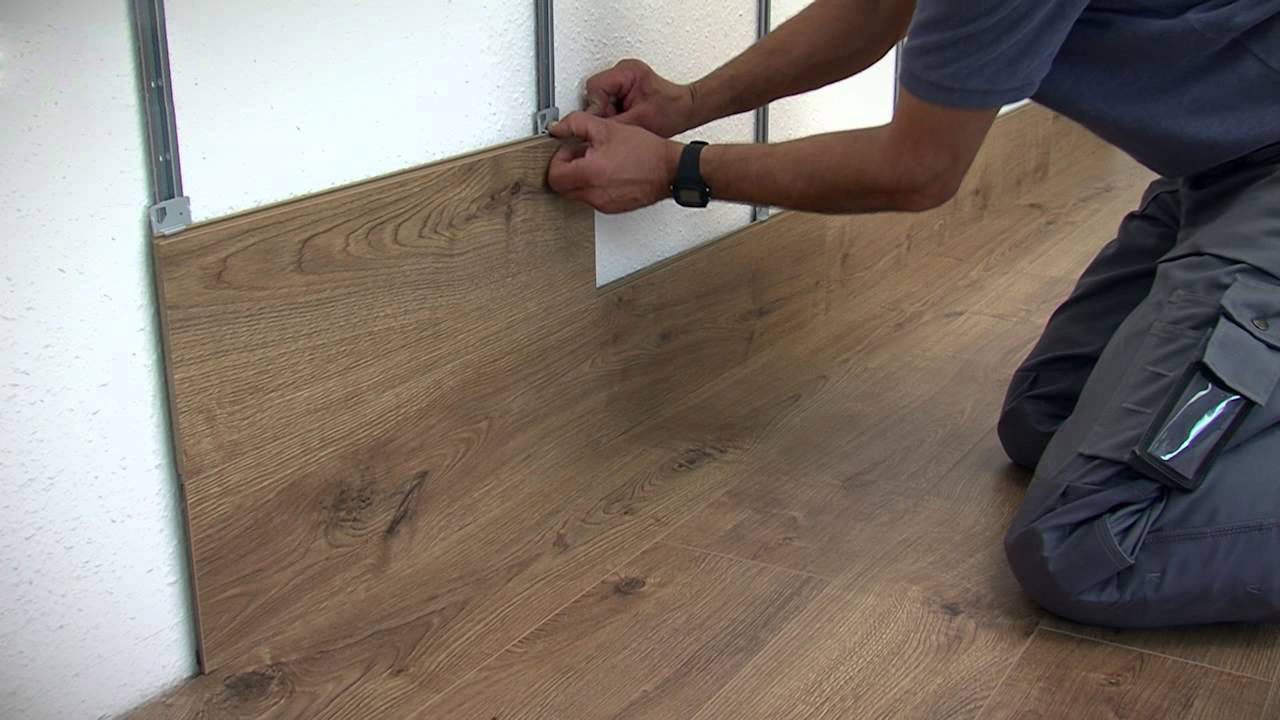
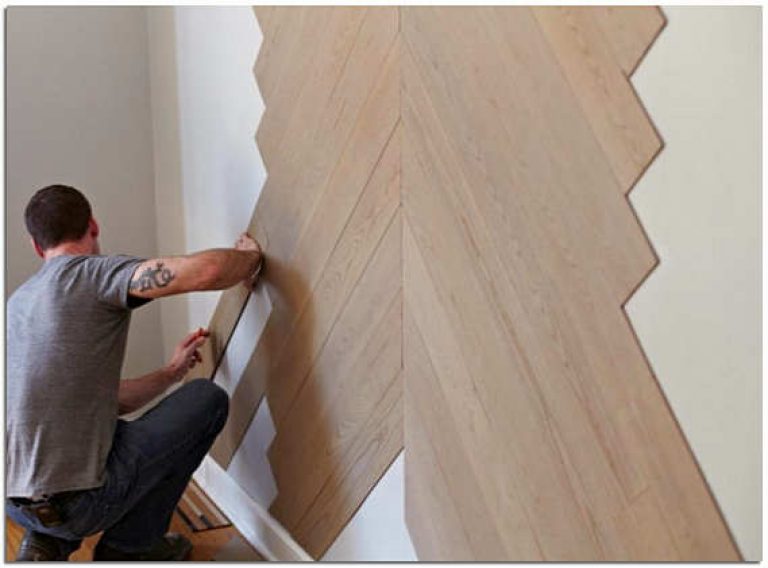
Laminated panels are attached to the wall horizontally, vertically or diagonally. Choose one of these options is possible, based on the design features and complexity of implementation.
The horizontal method is ideal for narrow rooms and is able to visually expand the space. Looks beautiful when combined in two colors. If you vertically sheathe the wall, this way you can increase the height of the room. This method is suitable for apartments or houses with low ceilings.
A diagonal wall paneling option will make the room stylish and unusual. But this method is the most difficult and requires a greater consumption of boards.
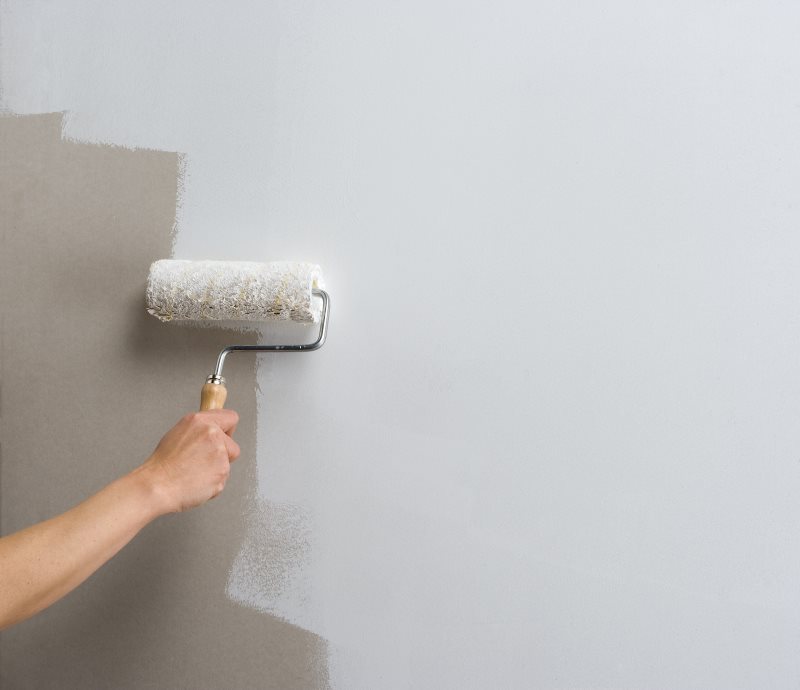
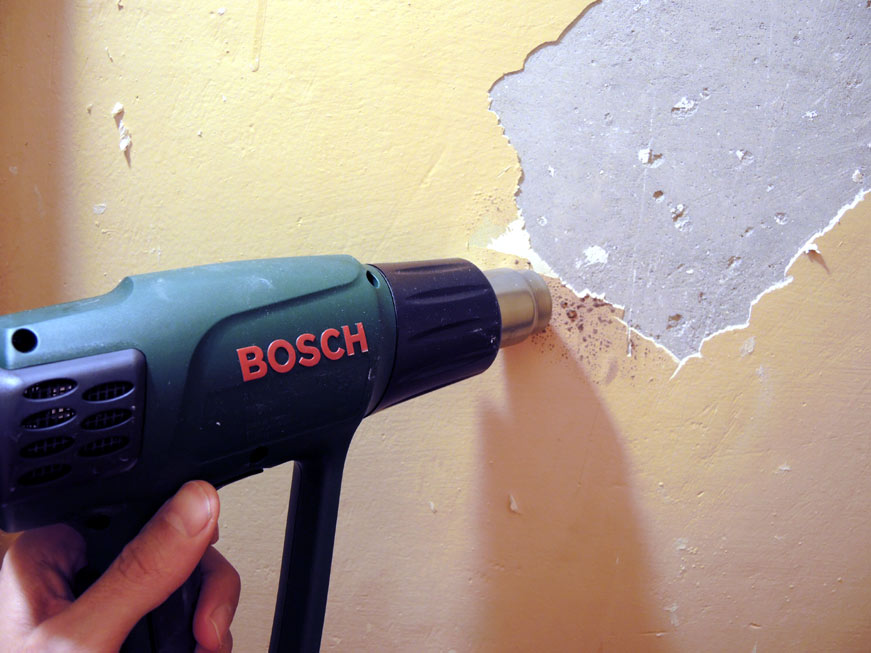
In that case, if you decide to lay the laminate on a concrete wall painted with a water-emulsion layer, there is a risk that the laminated strips will loosely hold and will disappear after some time. Therefore, it is recommended to pre-clean the old layer of paint, putty and plaster to remove, and primed.
How to trim?
In order for the laminated coating to blend harmoniously into the interior of the room, it is important, in addition to observing the laying technology, to know how and what to cut the laminate. For example, using an electric jigsaw, you can simply cut the panels. The main thing is to choose the right file for it.
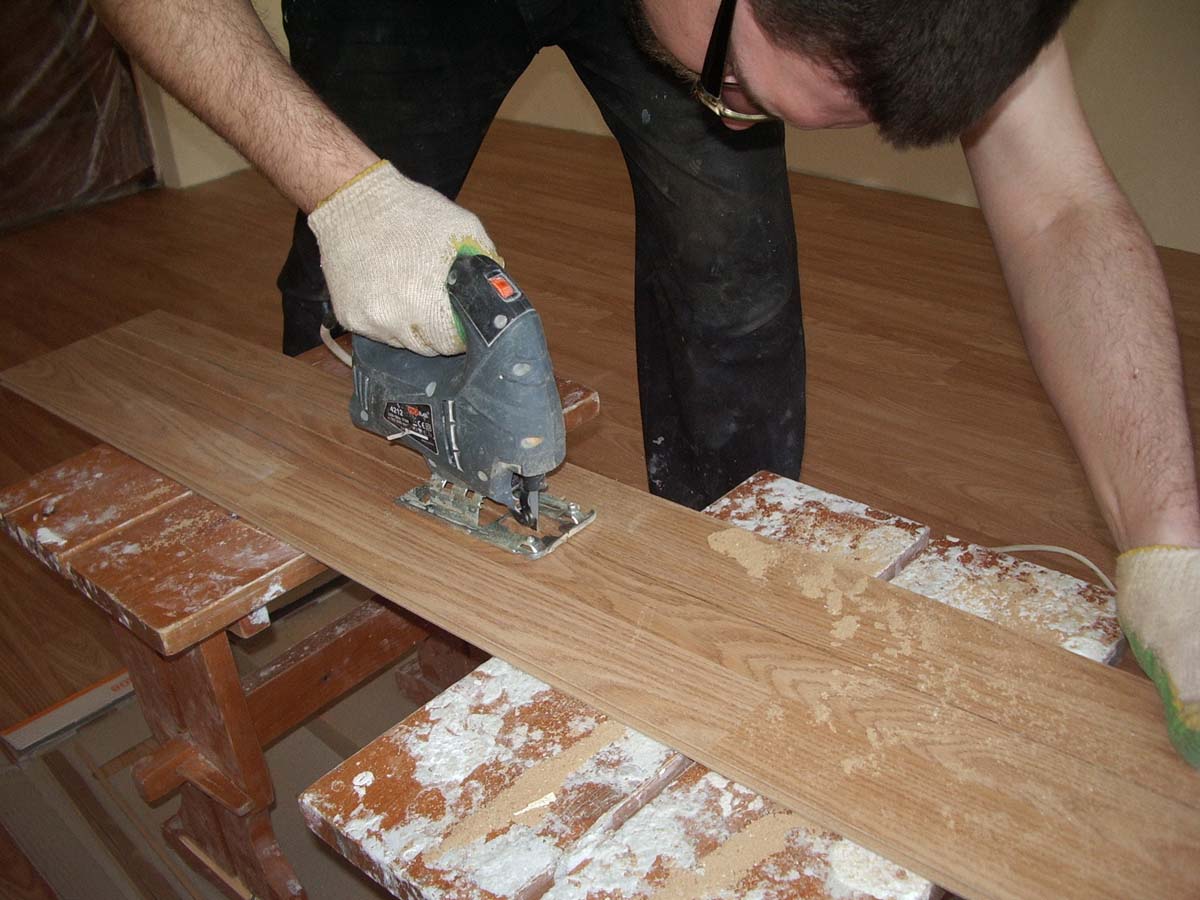
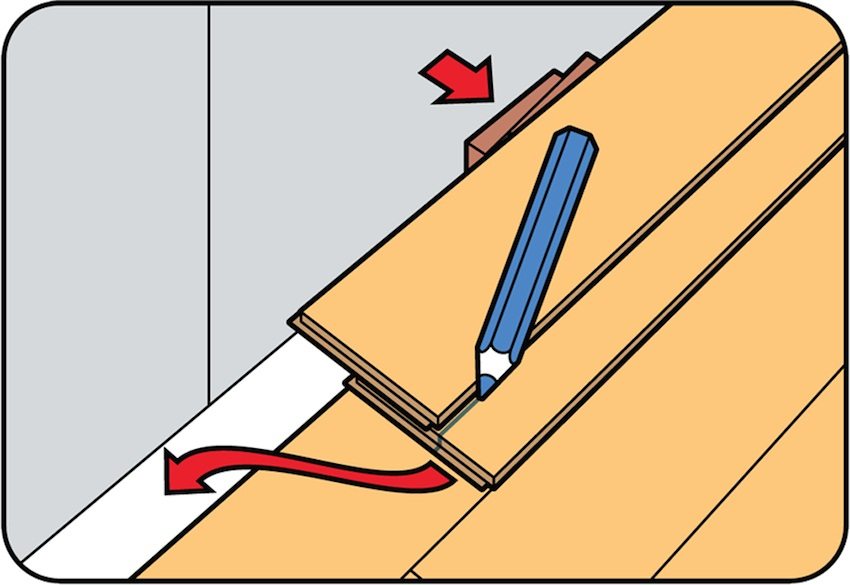
There are several rules for cutting laminated boards:
- From the back side a line is drawn with a pencil in the place of the cut;
- Next, put the product on the table in such a way that the part that will be cut off is on the weight;
- Then firmly fix the board and saw off in the right place.

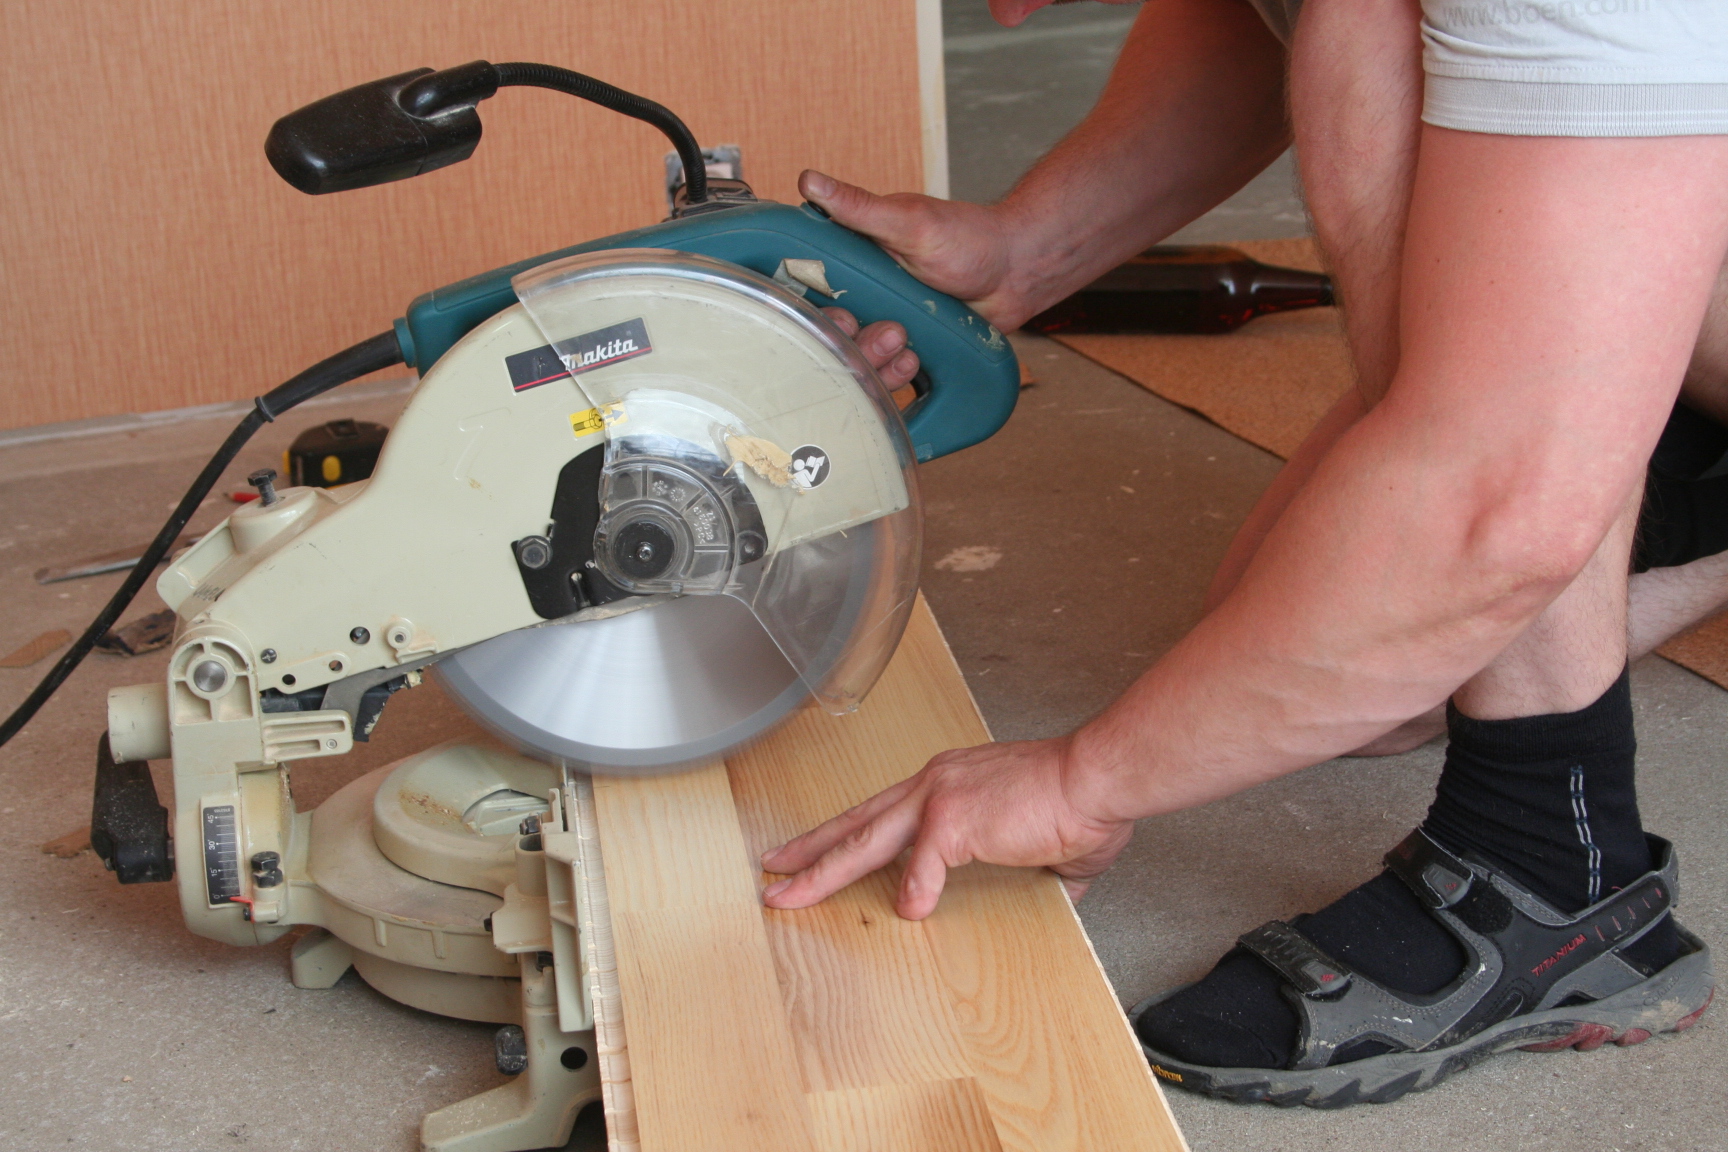
The cutting of the material can also be carried out with a circular saw, but at the same time it is the disk used for working on metal. It’s harder to work with this tool than with a jigsaw. When sawing, the laminated coating is placed on the front side.
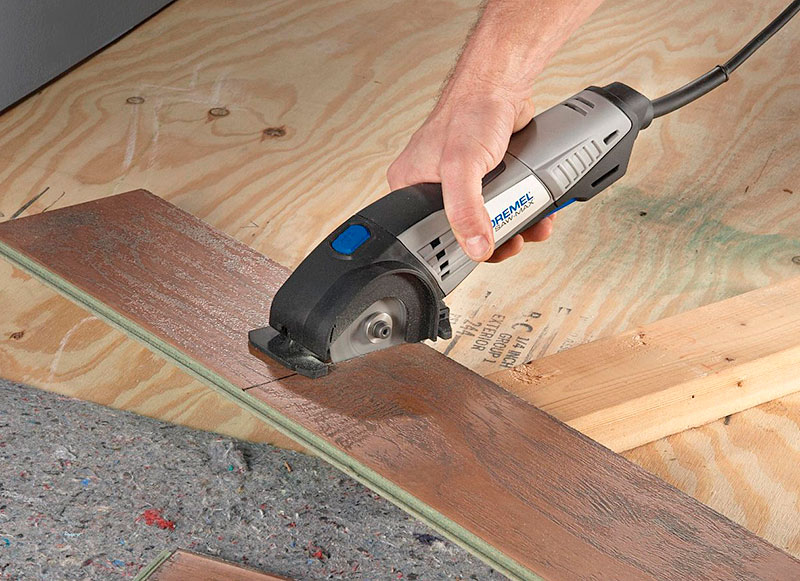
Such a tool as a Bulgarian, there are many owners in the pantry or utility room. Bulgarian successfully used for cutting laminate. The only drawback with this tool is the appearance of a large amount of dust during cutting.
How many retreat from the wall?
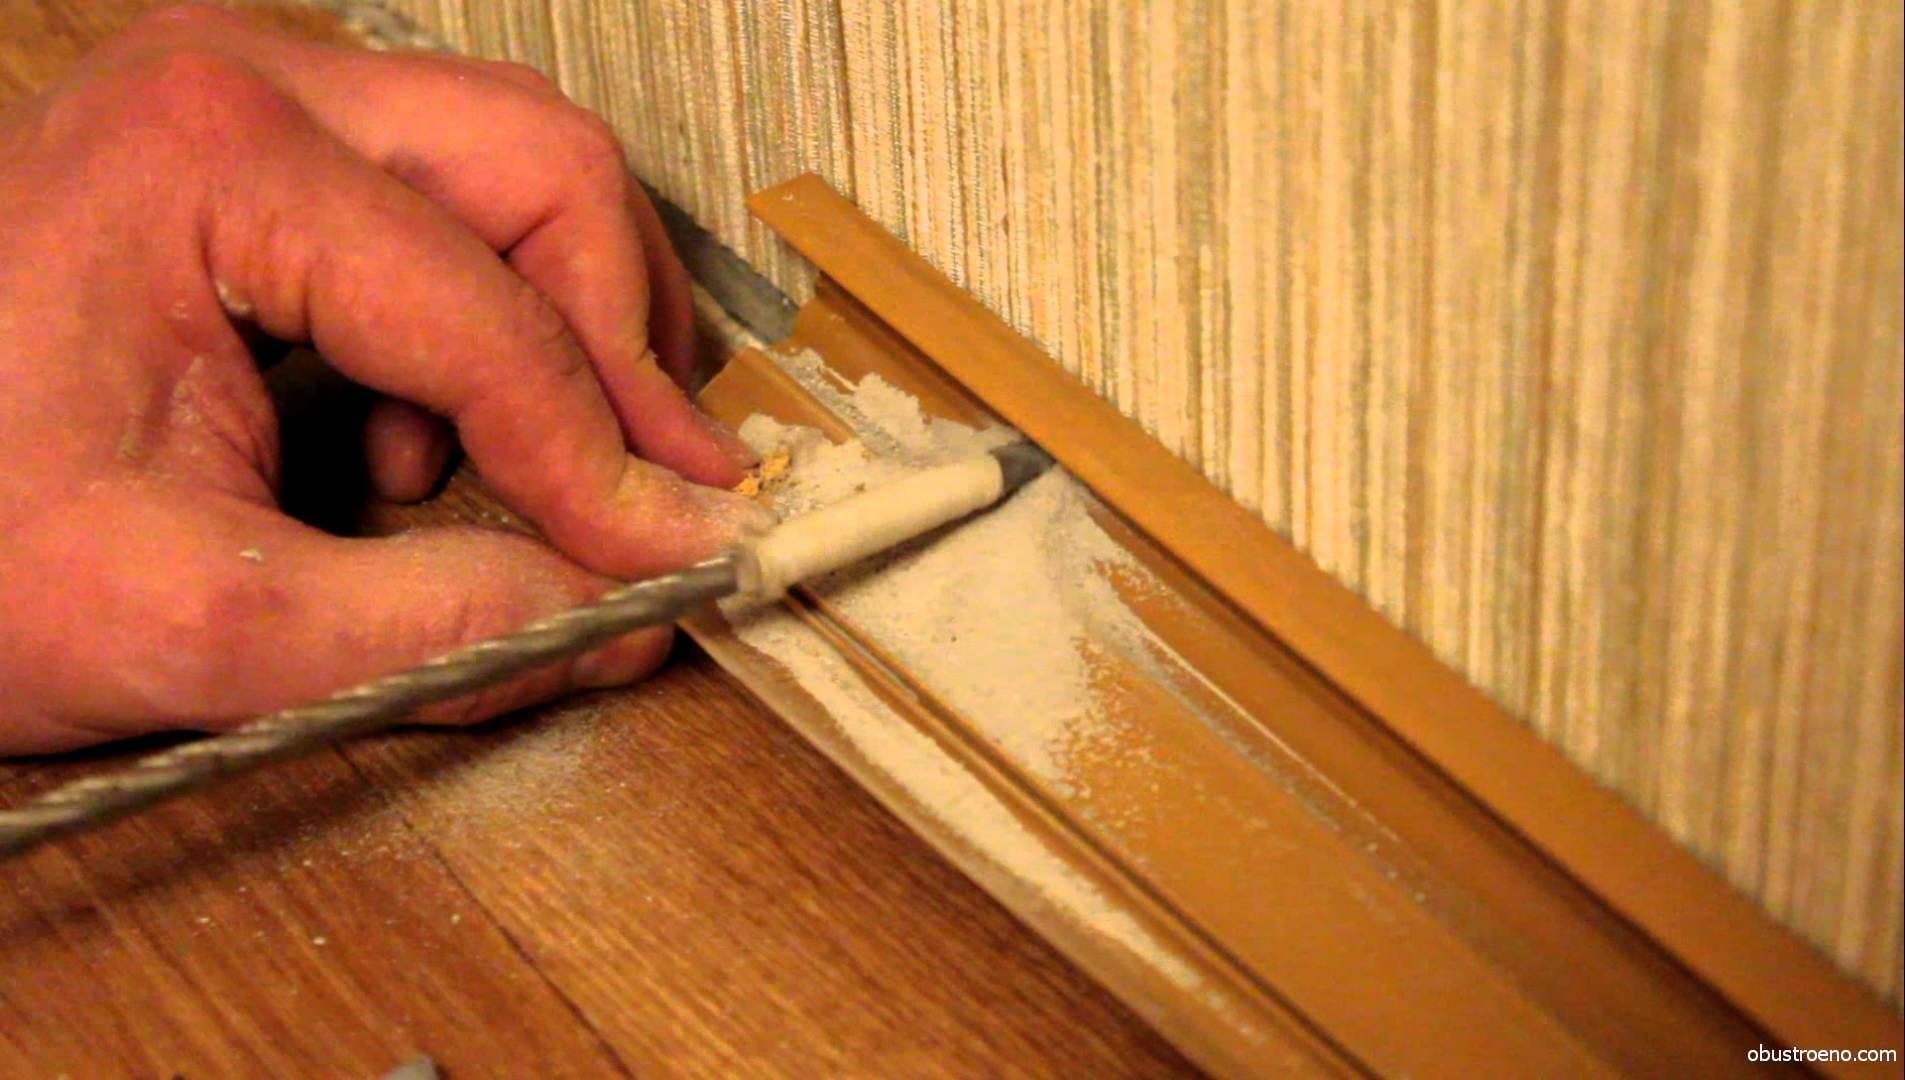
Laminated products tend to increase in size when in contact with humidity and temperature changes, so when installing you need to leave a gap from the corners of at least 1.5-2 cm.To keep such a distance when laying with spacer wedges is rather difficult, therefore you can place a board or other material at hand of a similar thickness below. In the case of mounting on glue, the board is wrapped in a layer of special film, and wedges are used on the sides. After the end of the installation, indents are closed with baseboards.
Which side to put?
To fix the laminate is recommended, starting from the left side of the wall, which is opposite the entrance, and from it move to the right. Thus it is convenient to dock the material. But if the installer is left-handed, then the installation starts from the other side of the room.
How to seal the gap near the wall?
There are cases that when finishing between the laminate and the wall gaps are formed.
There are several ways to remove a large gap:
- Purchase a wider baseboard at a hardware store or do it yourself;
- Disassemble the cover and slide it;
- Cut a thin strip from the same laminate and seal the gap;
- Bend the existing plinth.
But the last option should be used with extreme caution so as not to damage the baseboard.
Corners
When laminating the wall, where there is an opening in the door,then the trim should be removed before installation. When laying the product its edges should not come into contact with the corners of the walls, floor and ceiling, but there should be a gap. External corners can be closed with decorative corners.

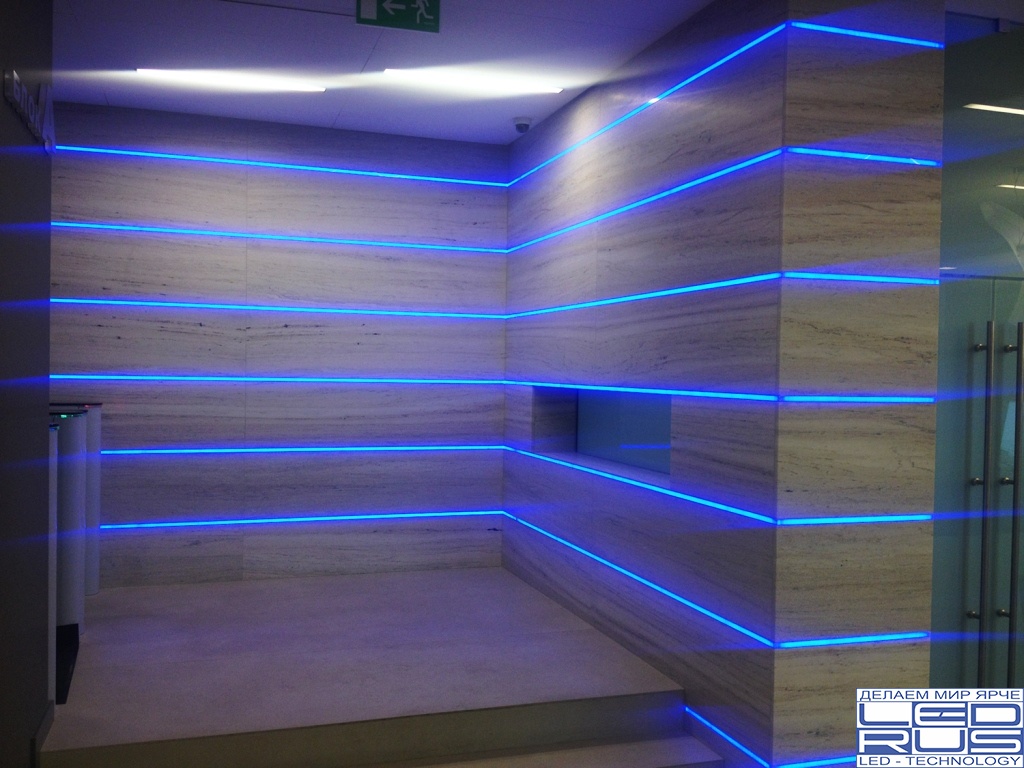
How to make the backlight?
Highlighting the walls is an interesting way to create a unique indoor design. Lighting for the walls can serve as an independent source of lighting, and additional. Installation of lighting wall covering can be done by hand. It is quite fast and not expensive for the budget.
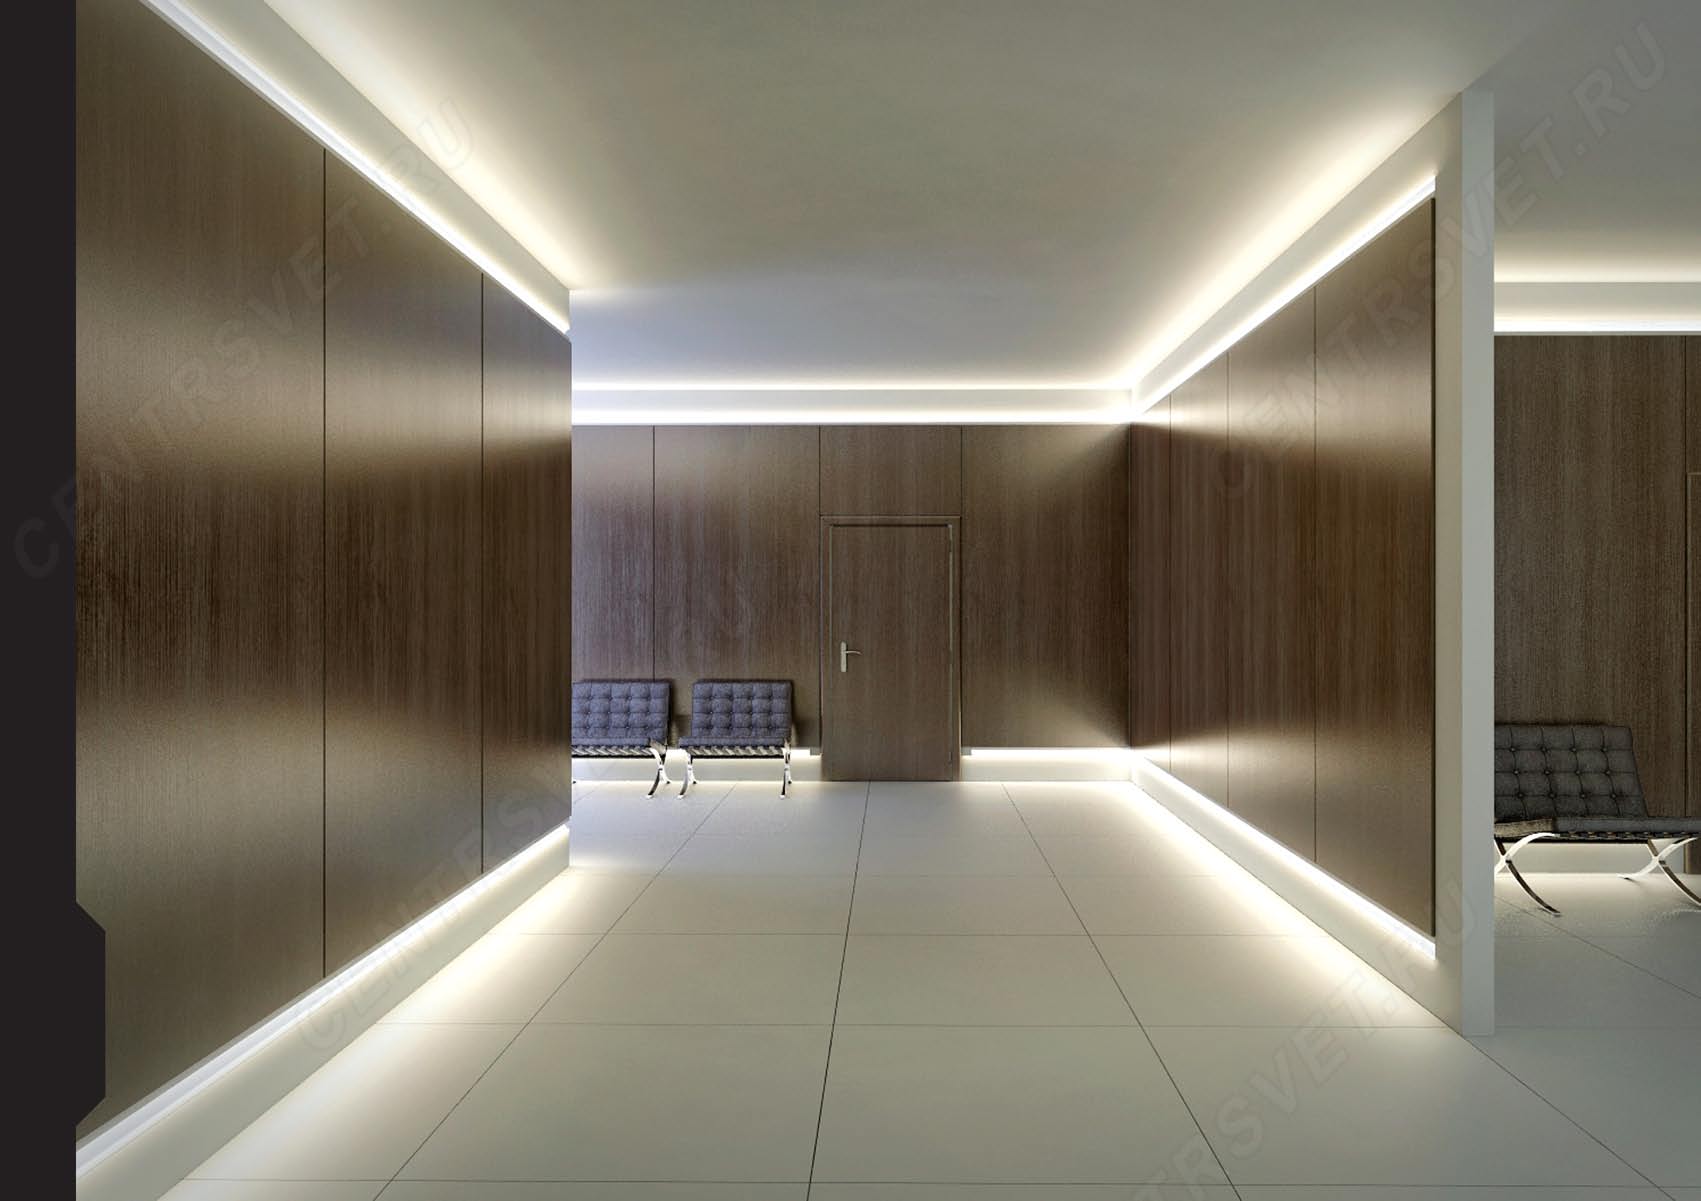
To install the backlight you will need: laminate, LED lamps, screwdriver, building level, jigsaw, glue, fasteners, adhesive tape.
Backlight installation steps:
- First of all, it is necessary to note the location of the lamps on the wall. You need to think out the layout so that only the light is visible, not the wires.
- Next, hold the cable according to the scheme, securing it with holders. The cable is recommended to carry from the outlet to correctly calculate its length.

- Now install LEDs, laminate. The slats are divided into pieces and glued in a bottom-up direction.The top panels will press on the bottom, so you need to wait for the glue to dry. To fix them will help tape and other fasteners.
- The next step is to connect the power. At this installation of the backlight is completed.
How to lay the last row?
In order to lay out the last row of laminate correctly, it is necessary to mark the place for drinking, saw and insert with a comb into the panel installed below, and fix the top edge with liquid nails or silicone onto the frame.
How to close the butt?
In order to close the butt when finishing the walls, you can use aluminum laminated corners. They act as a protection against damage, and as a decorative element. Corners are made in a wide range of colors, so finding the right shade is not difficult. Attach them with elastic glue.

How to attach the plinth to the floor?
The plinth is considered one of the main details in an interior. Thanks to the plinths, you can hide the defects and gaps on the floor. Currently the most common are plastic and wooden baseboards.
Wooden models are environmentally friendly, but their lifespan is short.Plastic can serve for many years, while maintaining an aesthetic appearance. For laminate PVC skirting are ideal. They are easy to cut, they are durable and moisture resistant and are inexpensive at the same time.
You can fix them in several ways:
- With the help of liquid nails. This is the best way for rooms with even walls and corners. If the corners are uneven, the plinth will not hold;
- With clips. This option is suitable for any rooms. The only drawback of the clips is that in case of dismantling the baseboard, you need to buy new fixtures, since the clips do not withstand repeated installations;
- Mount directly. Skirting fasten screws. Attachment points are masked with plugs matched to color. This method of installing skirting the most reliable.
Installing the plinth is the final stage of finishing. Skirting should be chosen for the design of the room. It is important to try to minimize the number of joints. The gaps must be sealed to reduce the risk of dirt and dust.
When working with baseboards, the parameters of the grooves in the connecting parts must be considered in order to correctly determine the size of the slats.Attachment points must be chosen so that there is an absolute fit to the wall.
Interior design options
A wide choice of laminated products allows to realize completely different design ideas for rooms.
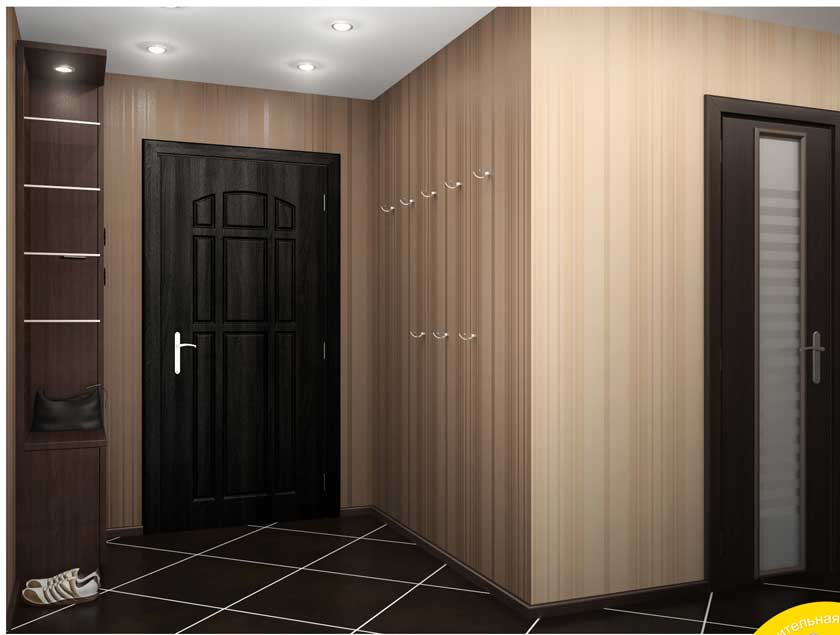
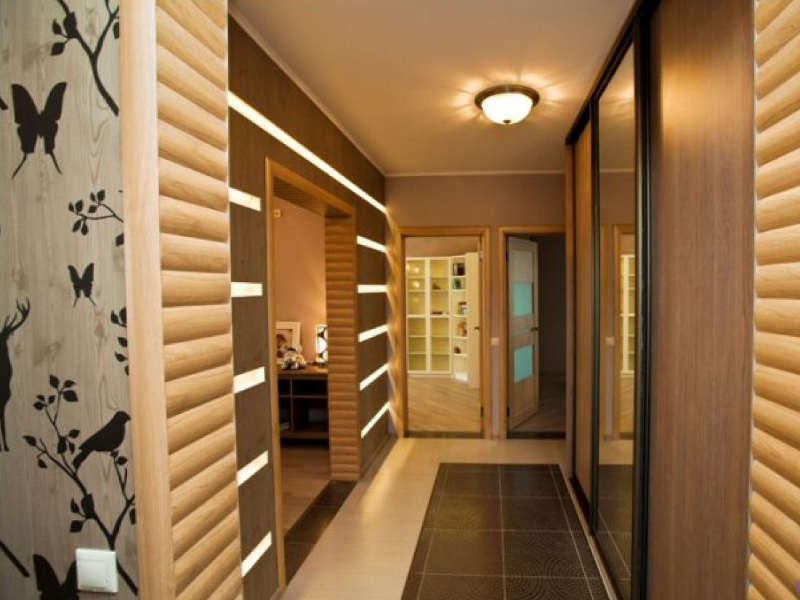
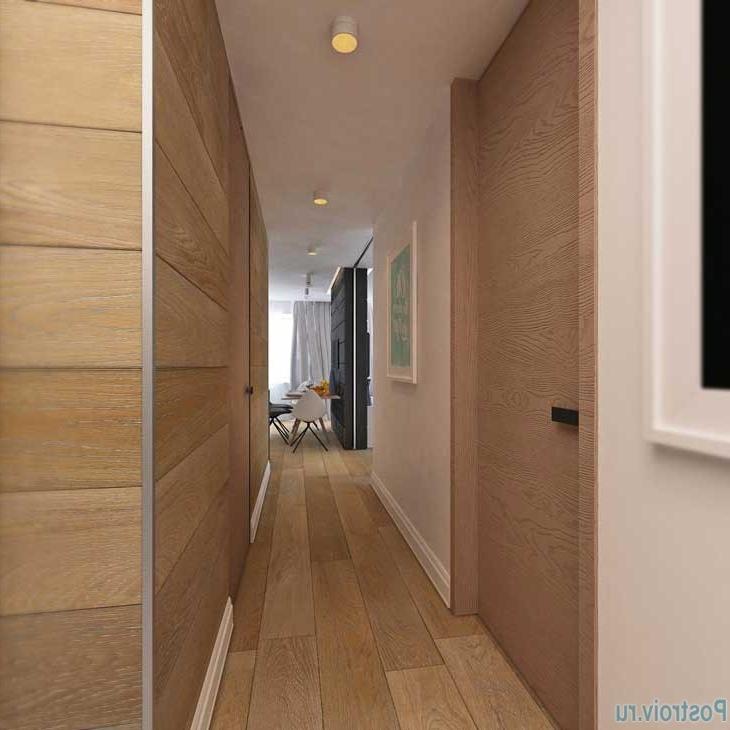
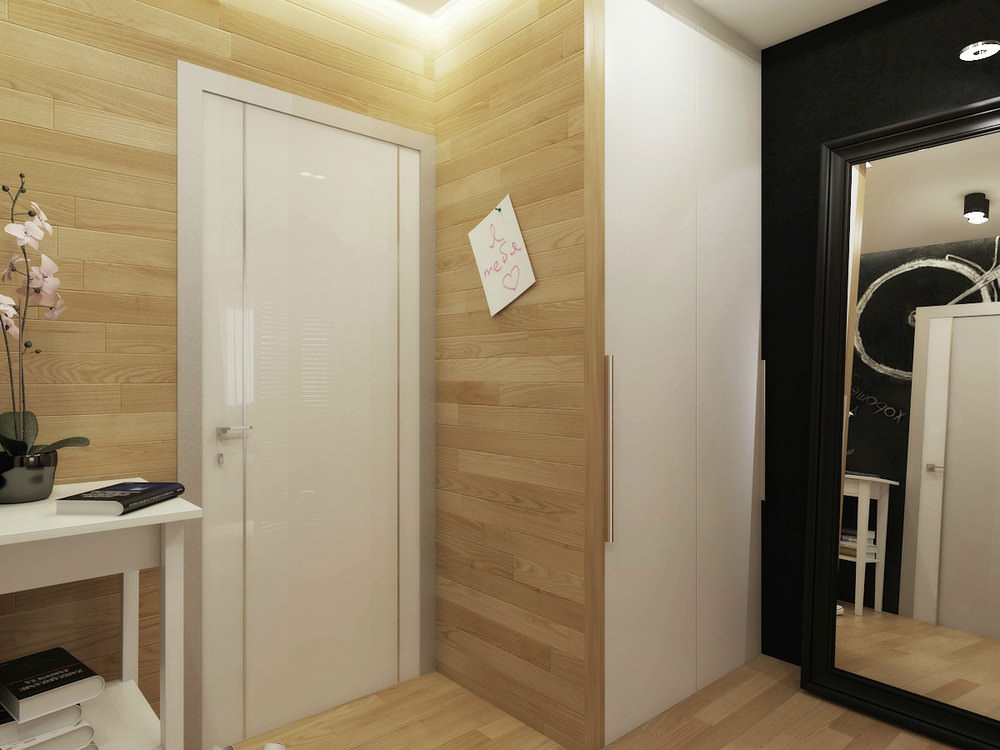
For example, the use of laminate in the hallway as a finishing material for walls will improve noise insulation. This material is perfectly cleaned from traces of dirt, which is very important for the corridor. The lining of the corridor laminate became popular and because of the durability and wear resistance of the material.
In the corridor, you can select individual zones using different shades or create a contrast between the wall and the ceiling. Fully wall laminate, as a rule, do not sheathe.
If you decide to finish the walls with laminated panels inside the balcony and loggia, then you need to remember about humidity and temperature changes. Therefore it is necessary to opt for a laminate with a high class of stability. They can be sheathed completely all the walls, and can be combined with other finishing materials.
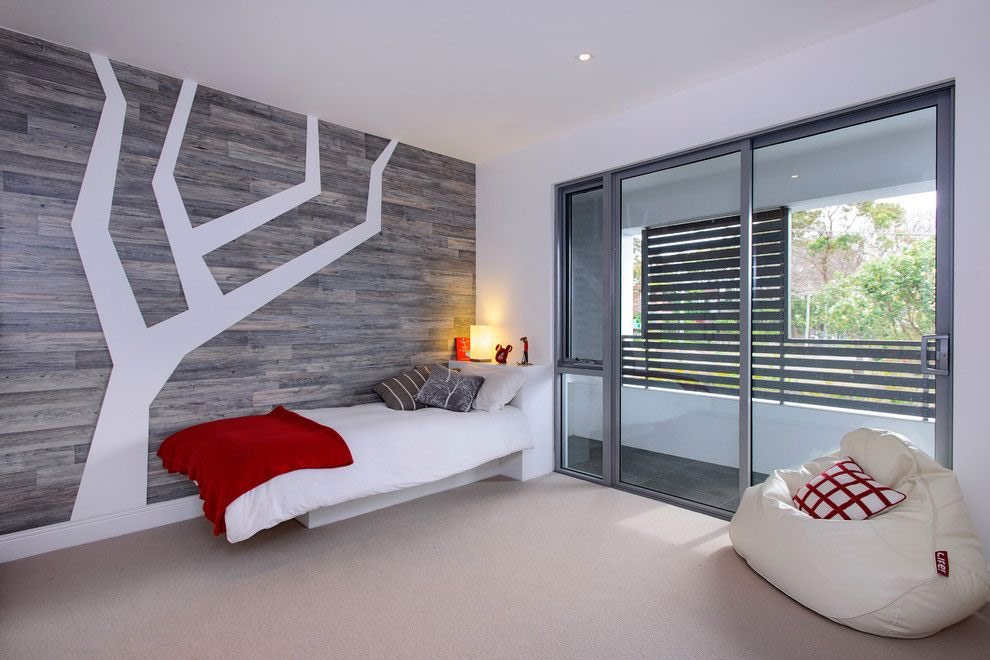
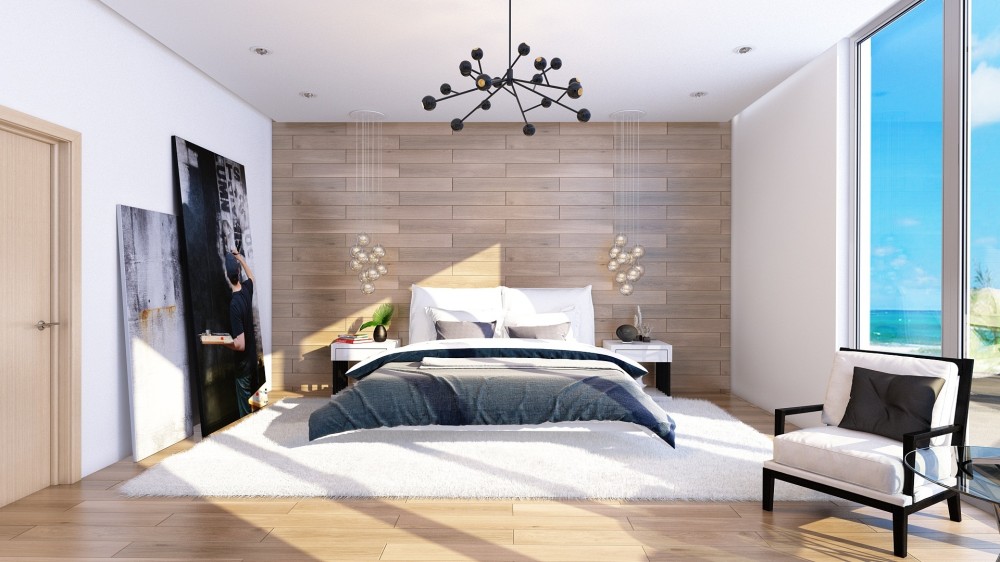
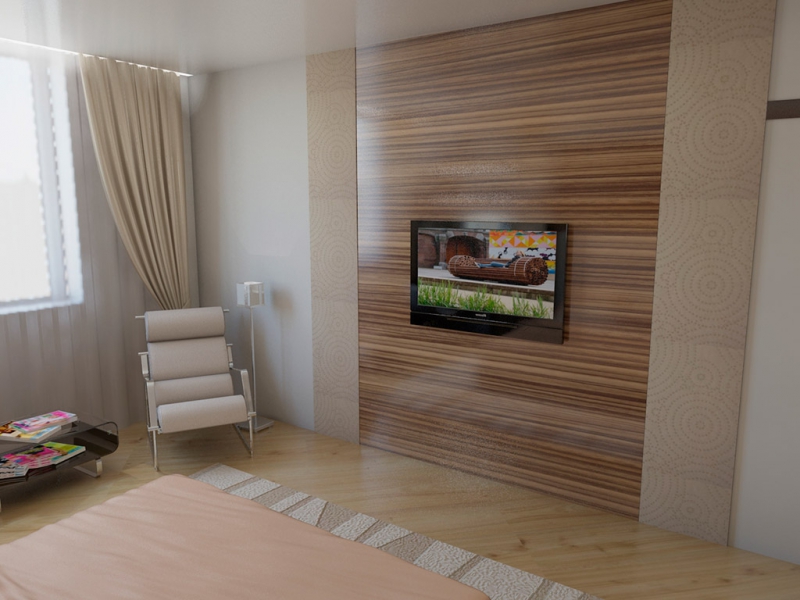
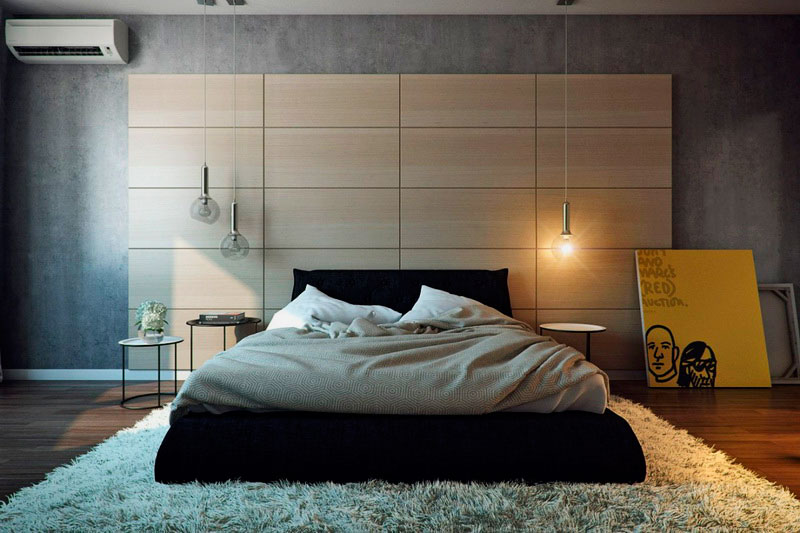
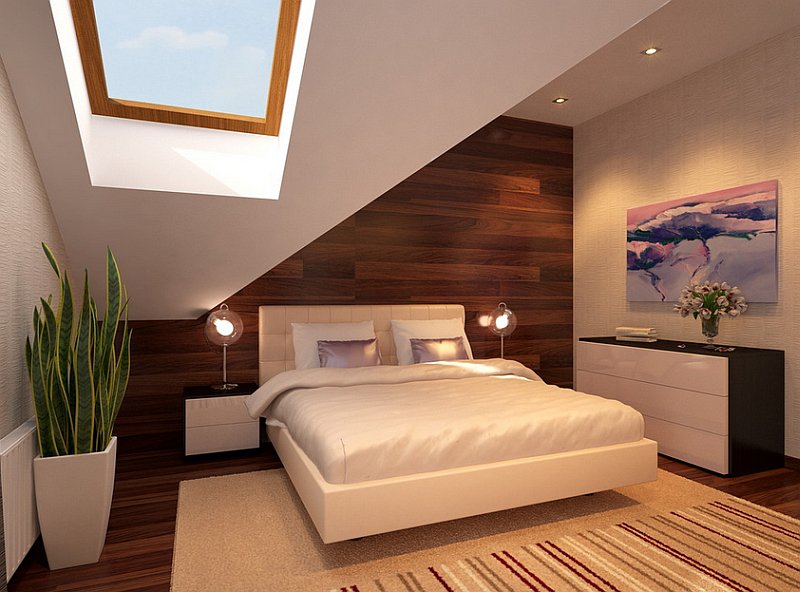
Another original solution is to use the laminate finish at the head of the bed in the bedroom.In the bedroom, you can use the material of any class, since there are no strong temperature differences.

The material will look harmoniously if you choose textiles for the bedroom of the same color. The design of one of the white laminate walls in combination with light brown flooring looks beautiful. Installing lights on the wall at the head of the bed will also add zest to the interior. Laminate, moving from wall to ceiling will transform such an important place in an apartment or house as a bedroom.
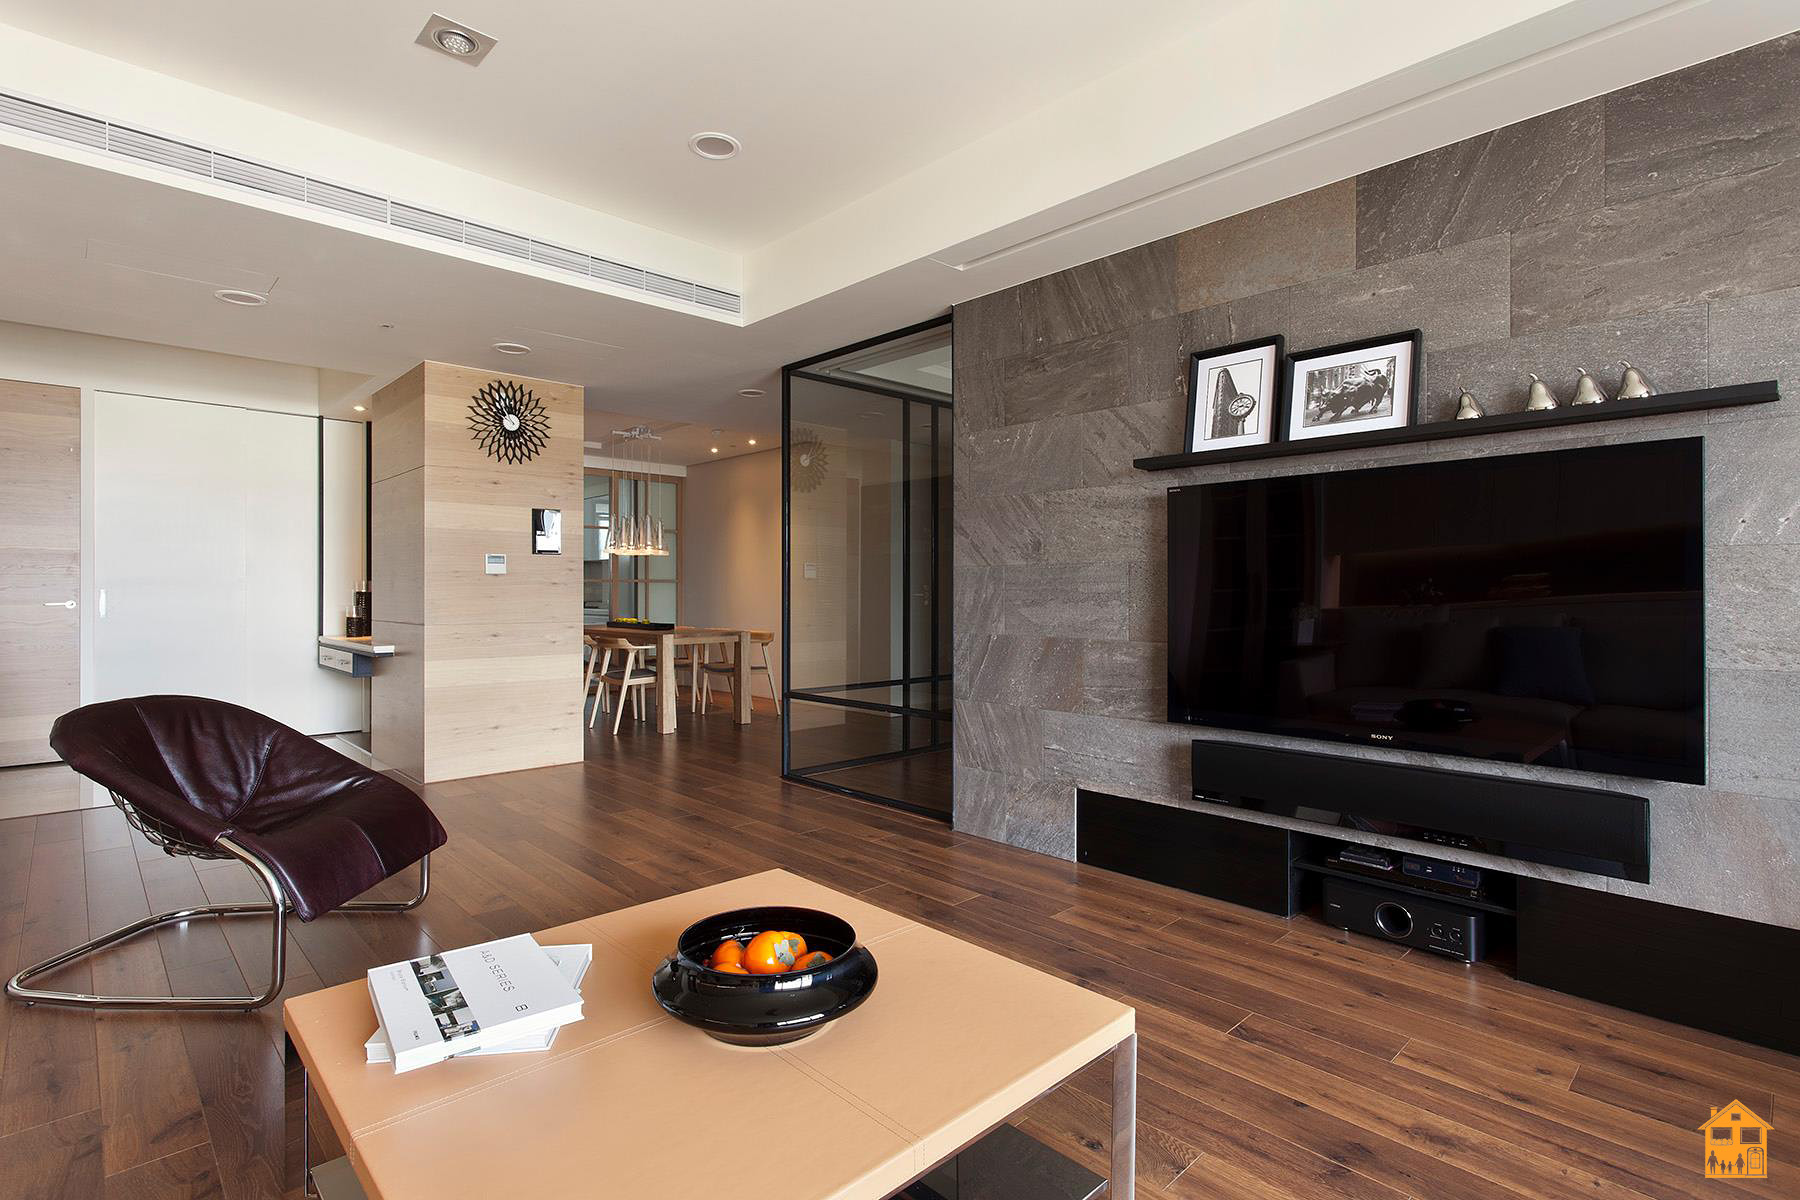
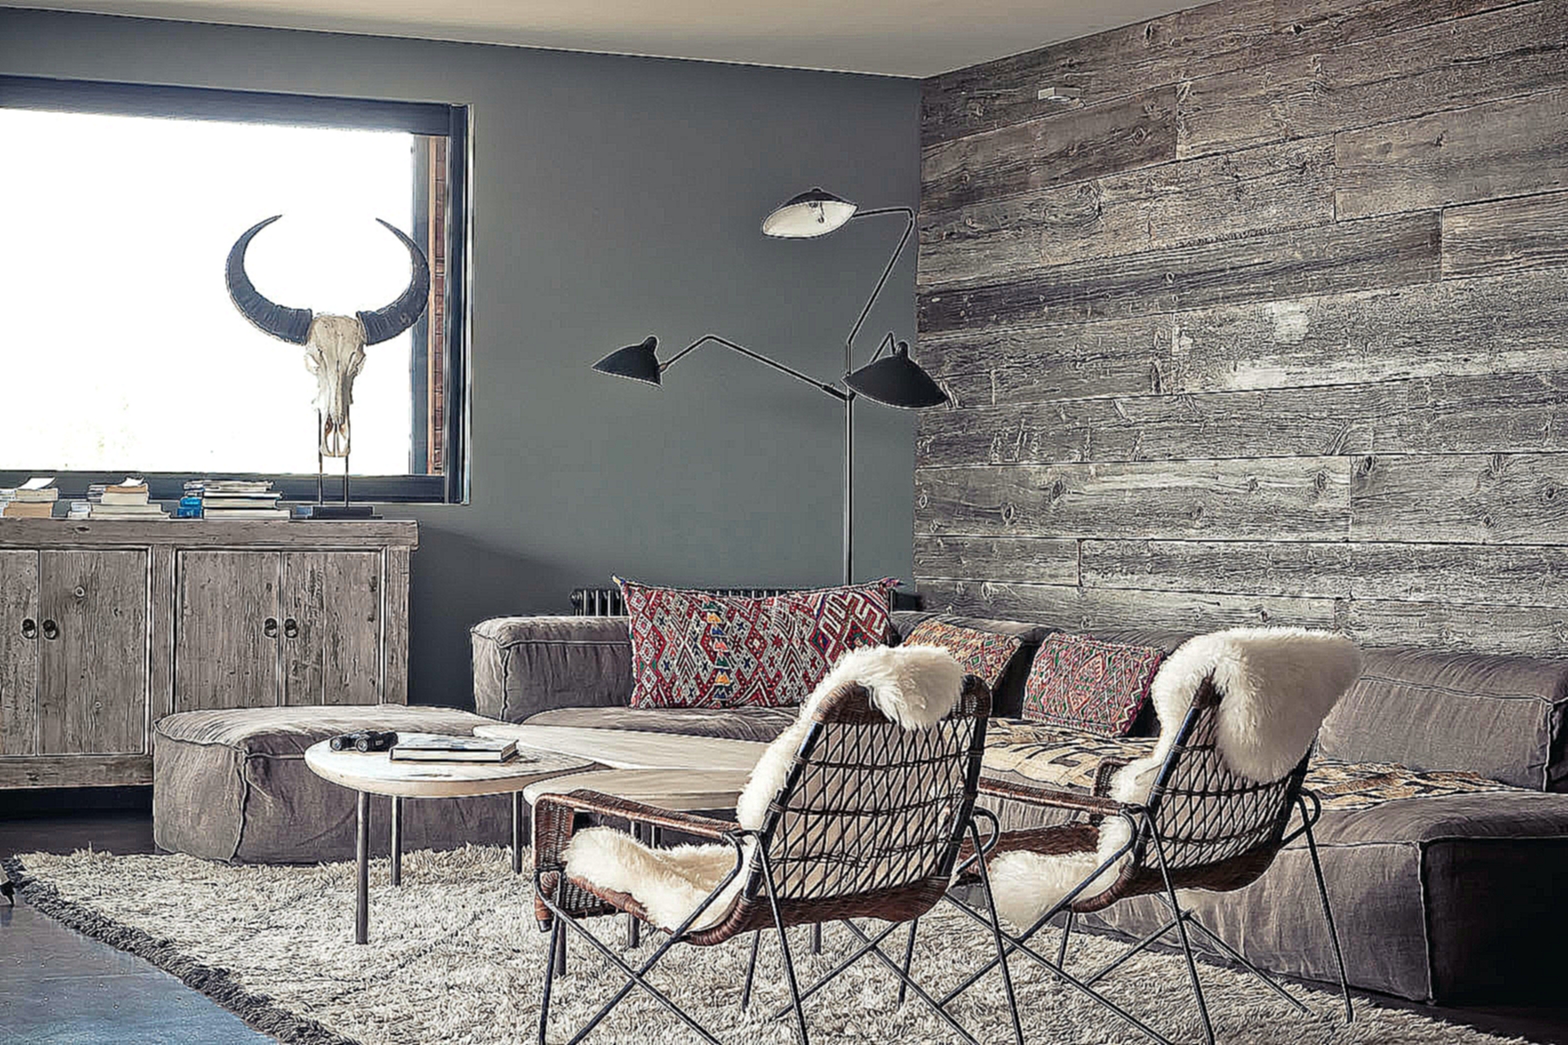
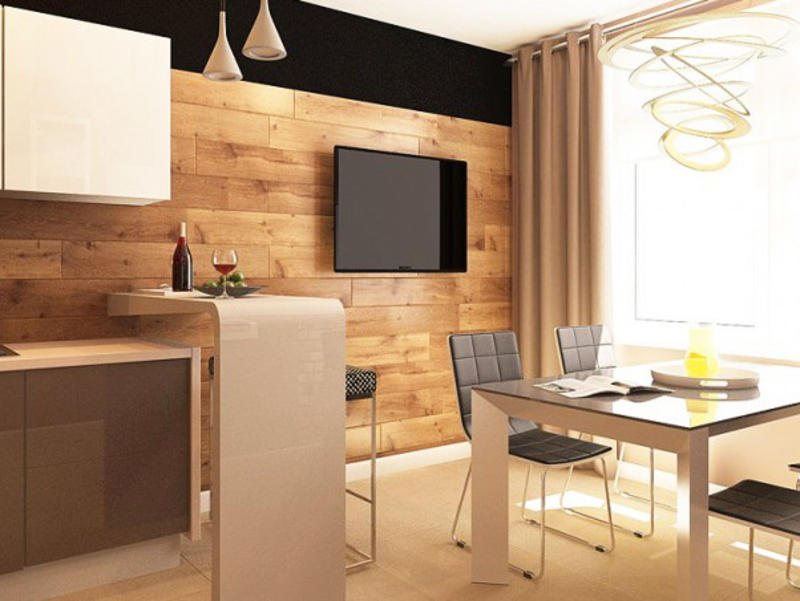
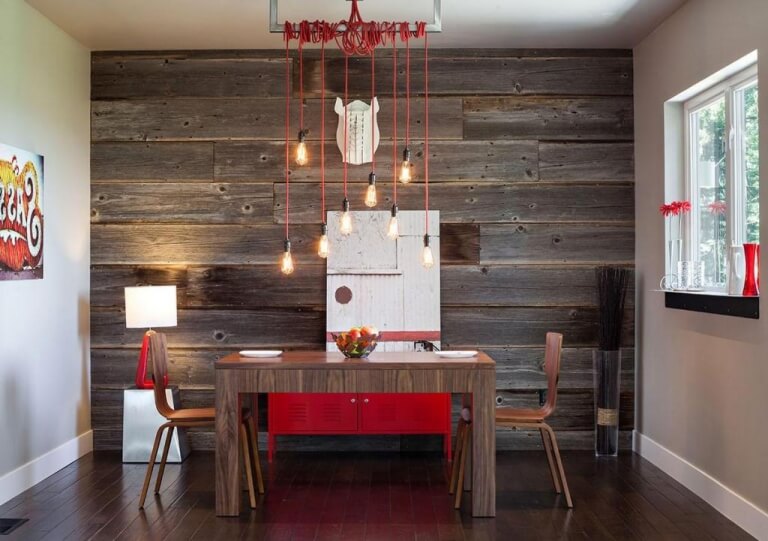
In the living room in the apartment is also widely used the use of laminate for wall covering. They can allocate a certain part of the room or, for example, only a zone under the TV and fireplace. Elegant living room, in which combine laminate and other coatings, such as stone. You can use gray shades of aged wood.

A wide range of laminated panels makes it possible to use them in the bathroom. Due to the constant humidity and temperature fluctuations, it is recommended to give preference to a waterproof laminate. In this room you can use absolutely any color palette.An interesting option is to make laminate the shortest wall in the bathroom.

Finishing the attic laminate - the best solution. Most often it is an unheated room, so it is important to install thermal insulation when installing walls. If you install the backlight in the panel, then, in addition to the interesting decor, it will be an additional lighting for the attic room.
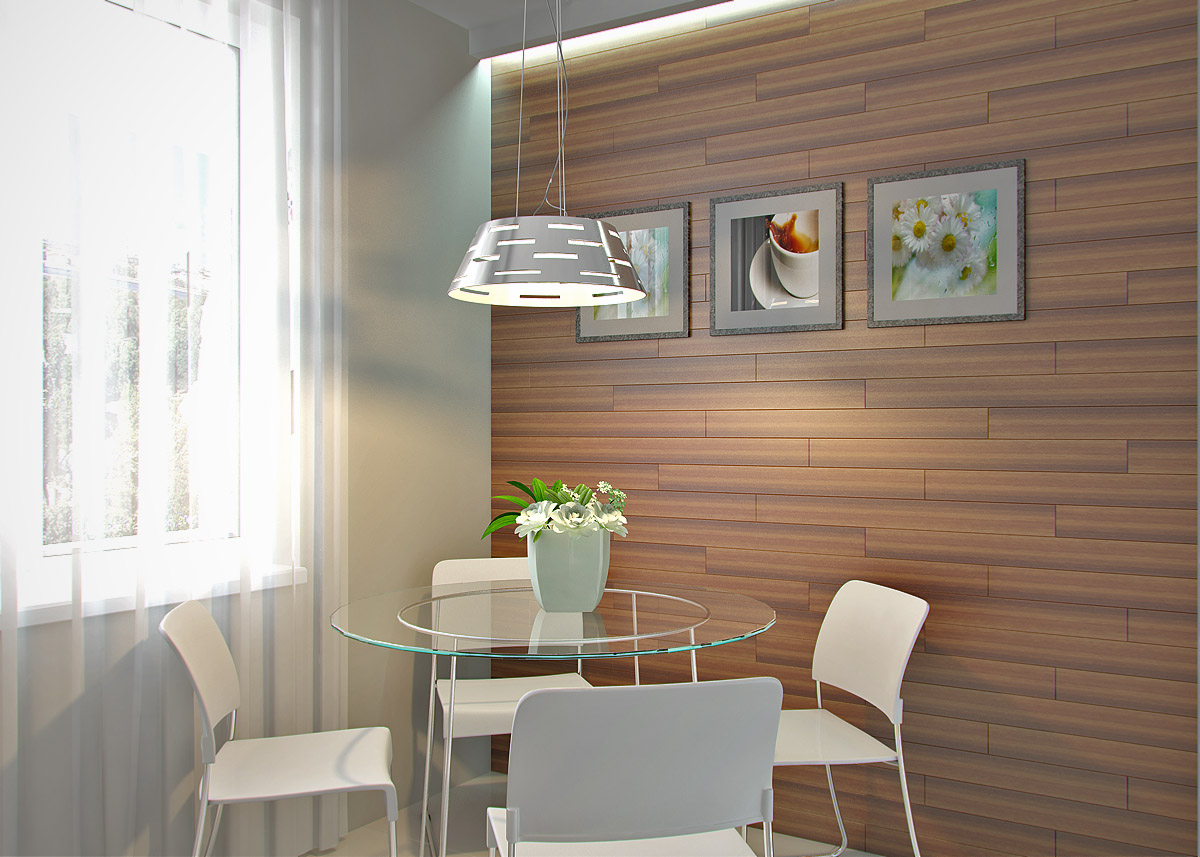
In case you have chosen to finish the walls with laminate in the kitchen, then you should opt for panels above class 23. Design options in the kitchen room a huge amount. You can buy a coating under the stone or wood. Usually, a kitchen apron or one of the walls is covered in the kitchen. You can also decorate the ready-made cover with accessories, for example, with a clock or a picture.
How to lay the laminate on the wall, see the following video.


