Wedges for laying tiles: features of use
Ceramic tiles are very popular among many owners of private homes. This material is durable, durable, and that is why many choose it.
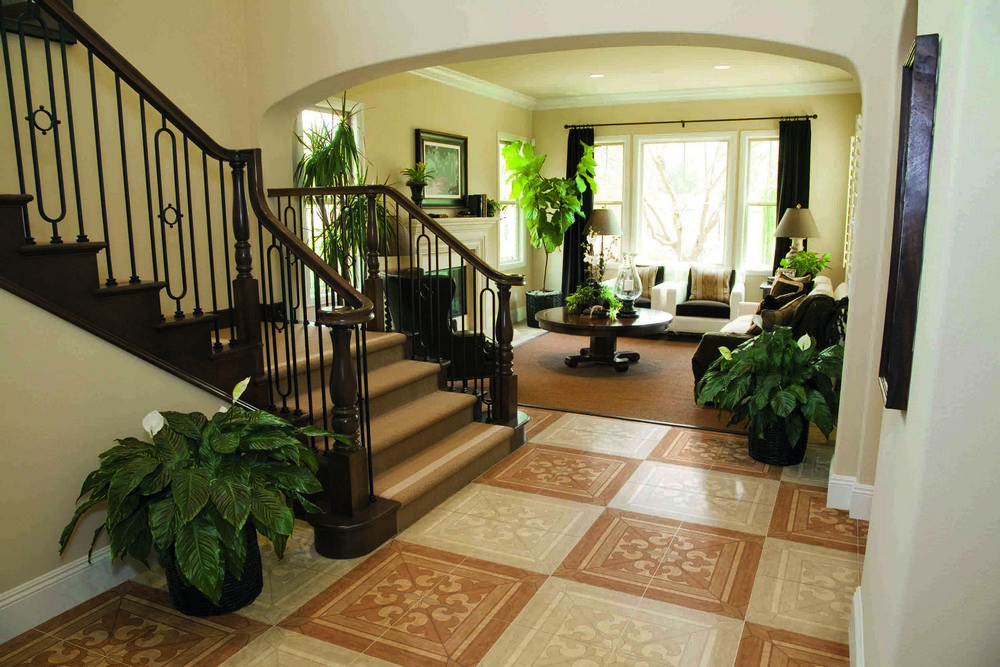

However, such coatings must also be properly used: to get a beautiful surface, you should carefully align the elements. To ease this task will help the wedges for laying tiles. After reading this article, you will learn about the features of the use of such elements, their pros and cons.
Basic concepts
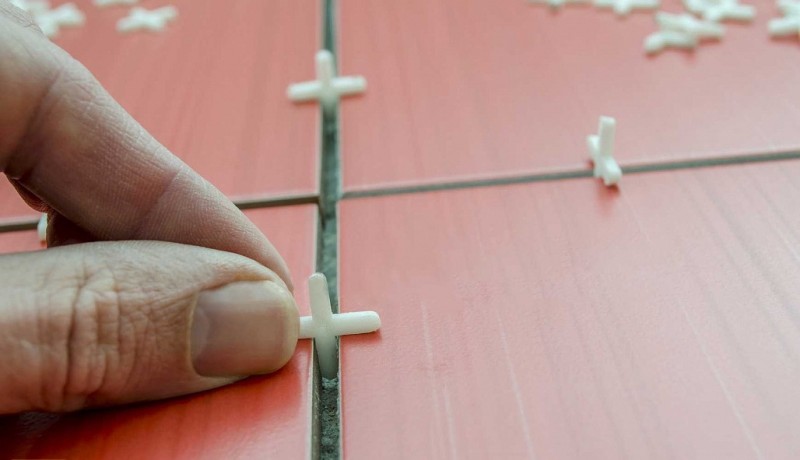
In the past, plastic crosses were used for tiling, which were inserted between adjacent elements. The disadvantage of this system is that crosses only affect the seam distance, but they do not allow to level products in the horizontal plane.

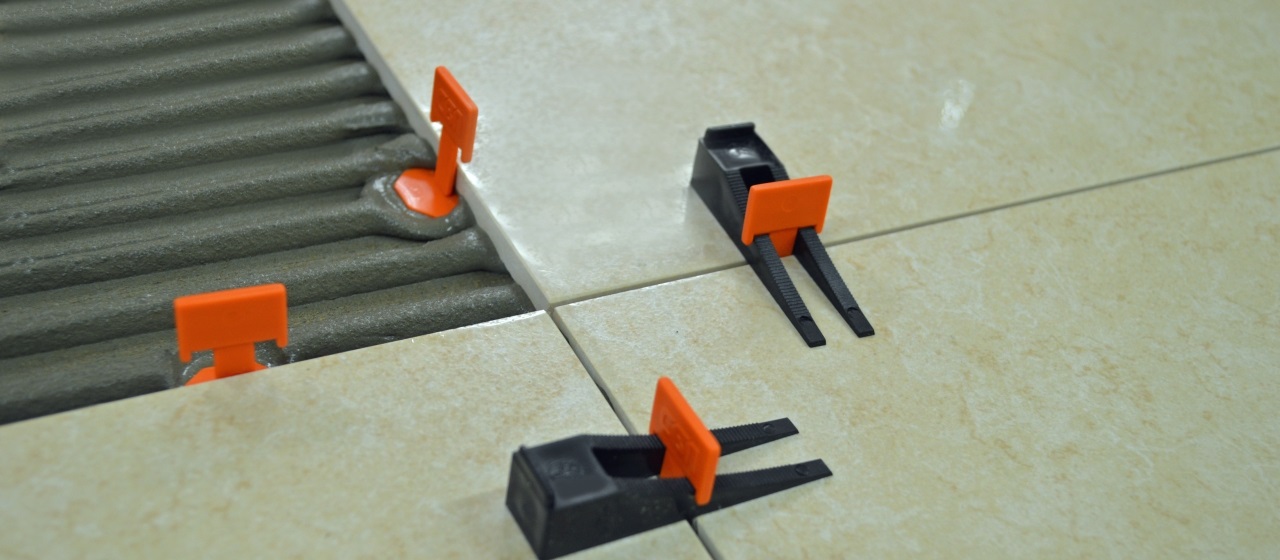
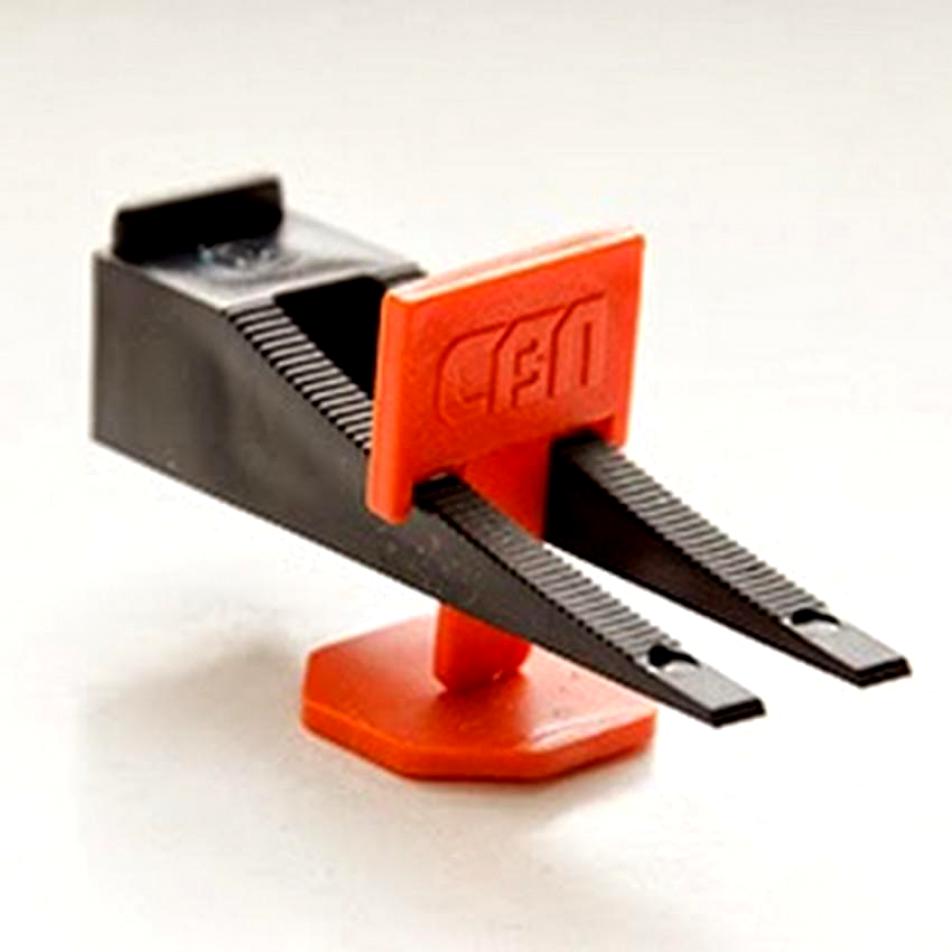
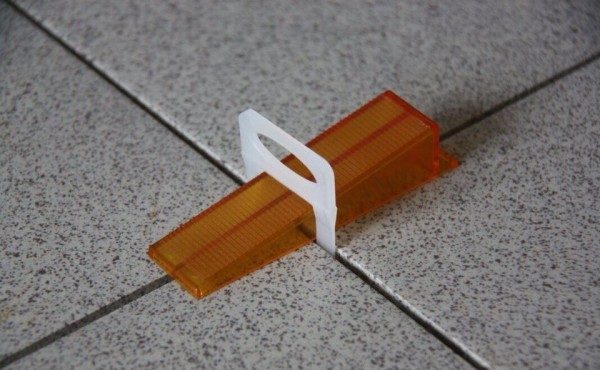
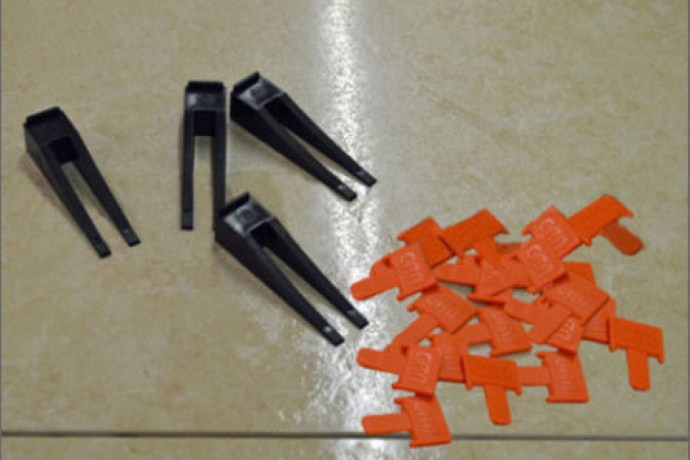
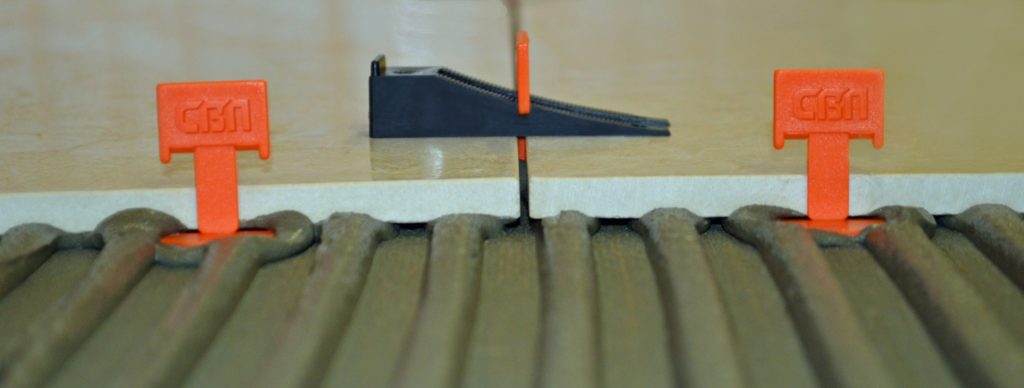
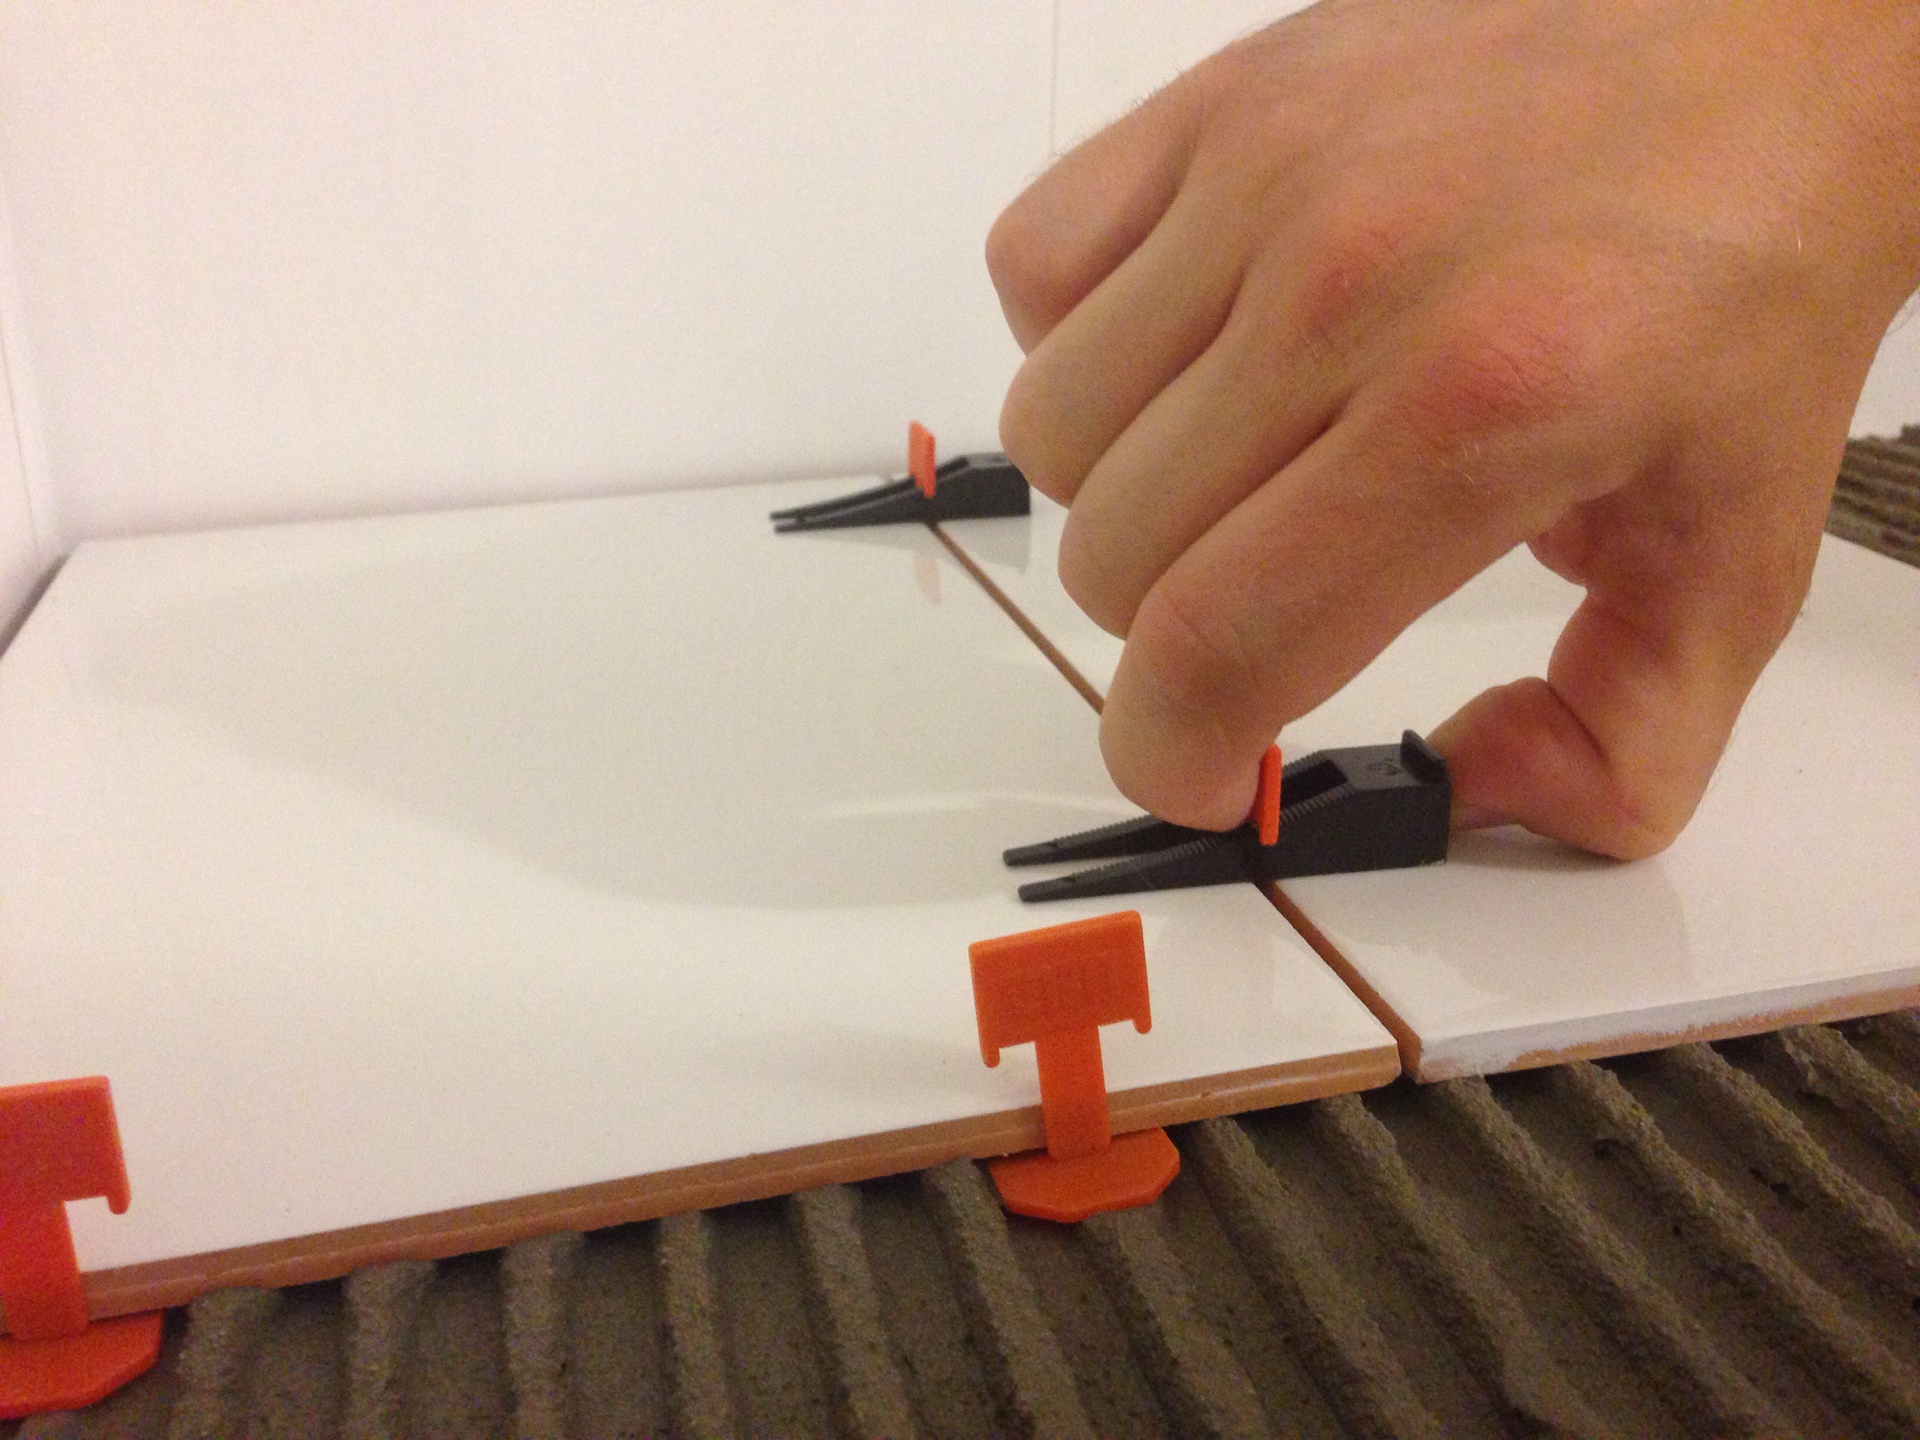
Today this task is solved with the help of special wedges that are included in the tile leveling systems. Technically, these elements themselves can not affect the material, so they are used together with special clamps. Wedges resemble peculiar forks, which consist of two guides.
On the surface of these products there are small notches that allow you to securely and reliably fix the clamp and ceramic tiles.

Depending on the material used for manufacturing, these elements can be divided into 2 types:
- Plastic. Wedges of this type are made from various types of polymers. This allows you to make them strong and durable. Quality products are great for multiple use.
- Metallic. There are not so often, as they are set higher prices. They are used by professionals who are engaged in laying tiles constantly. The metal can withstand loads much better and can last as long as possible.
Advantages and disadvantages
Tile leveling is a laborious process that requires a certain amount of experience.With the help of a set of wedges and clips, even novices can carry out installation of products.
Such elements are distinguished by certain advantages:
- Elements can be used with almost any horizontal incline. The main thing here is to exactly align the first few plates, which you will then be guided by during the installation work.
- Clamps used in conjunction with wedges act as crosses. They also line the seams. If you need to increase the distance, additionally insert auxiliary crosses of the desired size between the elements.
- The use of tile leveling system allows you to evenly distribute the adhesive under the surface of products. This advantage is noticeable on substrates that are not specifically leveled for tile laying.
- Minimum subsidence of elements. The material is securely fixed, which allows the glue to harden in the desired position. For this reason, during use, the tile will not drain and will not break.
- Wedges securely fasten the elements, which eliminates their displacement during the drying of the glue.
However, the use of such products is not always justified.
This is due to several of their drawbacks:
- Placing wedges takes time. The same can be said about the removal of these elements from the surface.
Experienced specialists in such cases use the level and the usual crosses.
- The wedges take up relatively much space, so cleaning the seams during laying is much more complicated.
- The cost of such systems is much higher than the price of ordinary crosses. If wedges are needed only for installation work alone, it is impractical to acquire them.
- Such alignment systems are used only in rooms where the temperature exceeds +10 degrees.
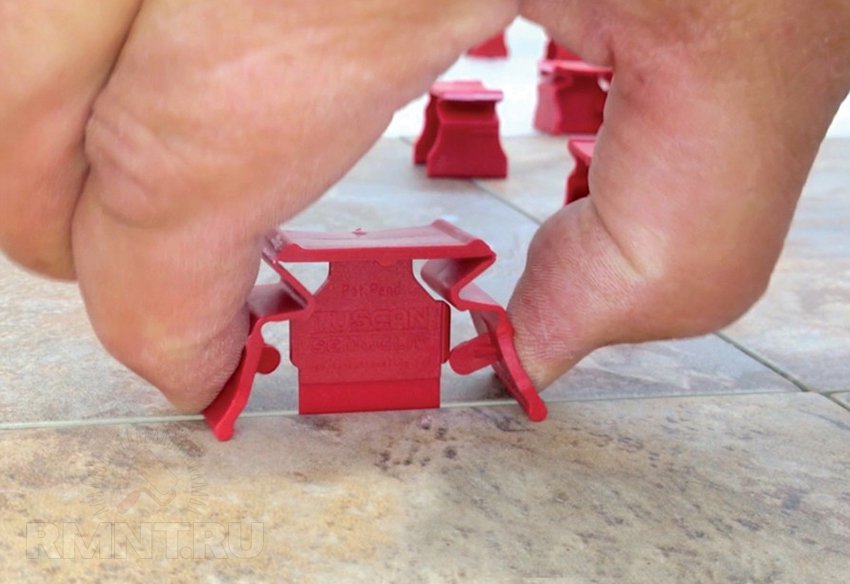
Another disadvantage is the impossibility of removing the clips. After removing the wedges they are broken, which also takes time.
Species
Leveling systems are widely spread today.
There are several types of wedges on the market:
- Wedges with serrated bevel. These are the simplest options that allow you to control the leveling process well (with minimal effort). To simplify the work, manufacturers can complement them with special tools.
- Wedges with screw tensioner. Alignment is carried out using a special nut, which tightens the upper and lower supports under the tile.
- Latch wedges. The principle of their work is quite simple.They combine a clamp and a wedge, and lateral supports are used as the last element. When combined, the design is compressed, which leads to the alignment of the tile surface.

And the next video discusses the comparison of SVP systems for laying tiles.
Installation
The technology of laying tiles using the leveling system is quite simple.
You need to take into account certain rules and perform the following sequential steps:
- First you need to prepare the base for the tile. To do this, use screed, primer and other standard options.
- After that, an adhesive is applied to the surface of the wall or floor with a notched trowel. Its thickness depends only on the material of the tile.
- Then you should lay the tile on the mortar and level it in a horizontal plane. This concerns the first few elements that you will be guided by later during the installation work.

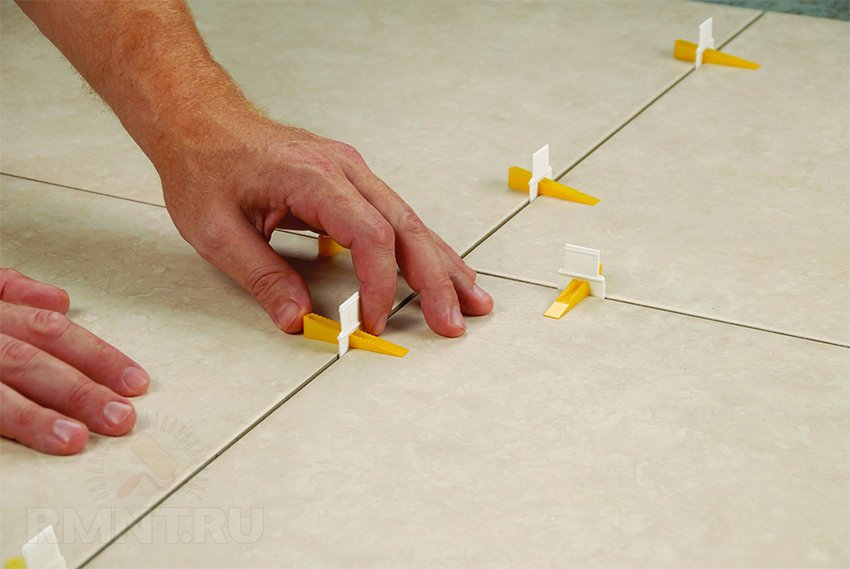
- After that, you need to install the clamps under all sides of the tile that will be used during installation. They are located at a distance of approximately 5 cm from each of the corners. Do not mount one detail in the corner itself, as this will not give the desired effect.The best option - 2 clips on each side.
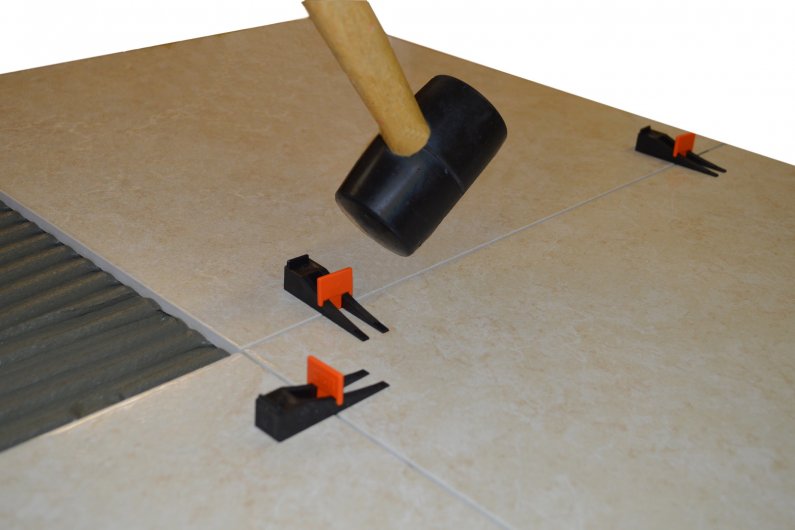
- The second tile should be carefully placed over the clips. At the same time it is aligned with the help of crosses and level. When everything is ready, wedges are inserted into the clips.
It is very important that the system reliably fixes both elements. There should be no minimum clearances or that the elements dangle.
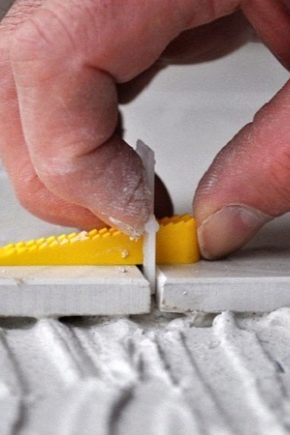
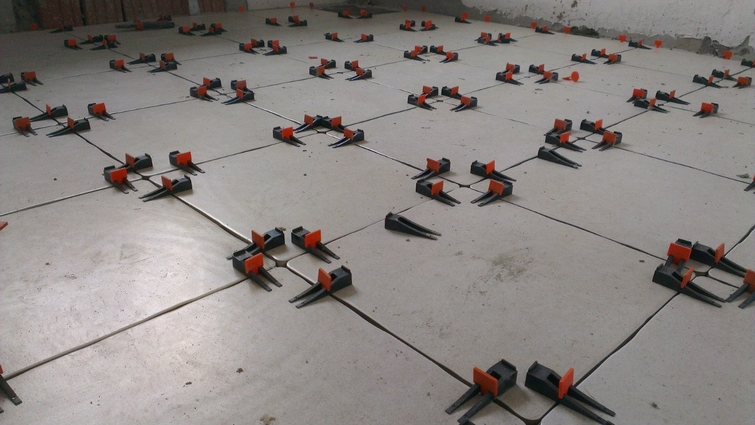
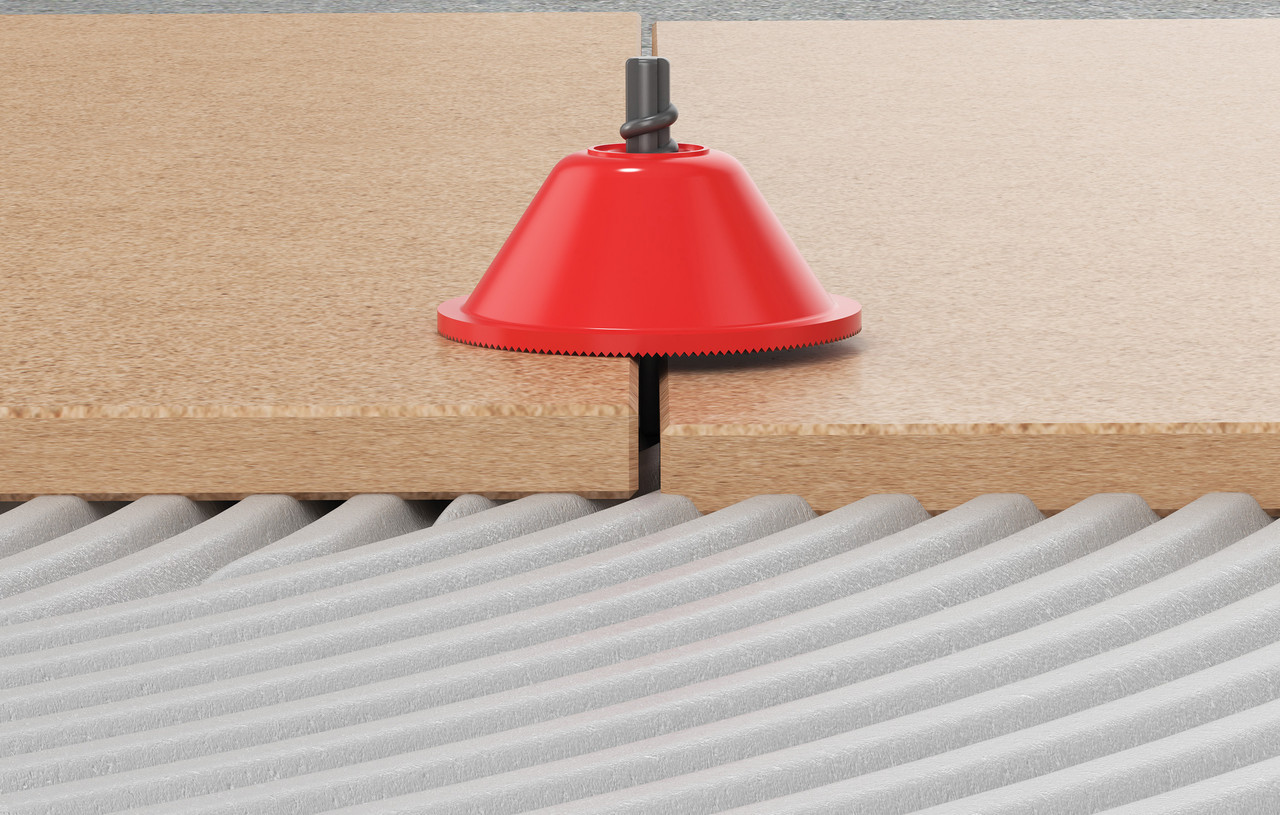
Installation of all other elements occurs on the same principle. When the glue is dry, wedges will need to be removed. Some experts recommend using a kink for this, which you just need to beat on the clamp itself so that it breaks off. Then it will be much easier to get the locking element itself.
The technology of using wedges when laying tiles is relatively simple, this process requires only accuracy, as well as compliance with simple rules.


