Features of making greenhouses from scrap materials
With the onset of spring, every gardener wants to quickly get a harvest in the form of a fresh bunch of dill, radishes and fragrant cucumber. The weather is unpredictable now, so lovers of vegetables and berries are trying to solve the problem on their own. Greenhouses - ideal for small gardens. The question arises - what to make a heat-saving structure? In the course are available materials that will be found in any farm.
Features and types
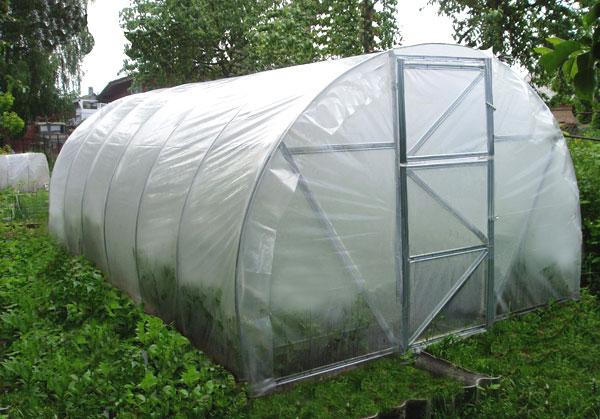
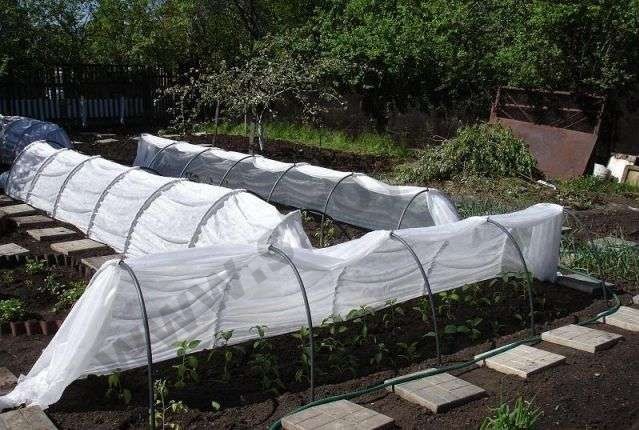
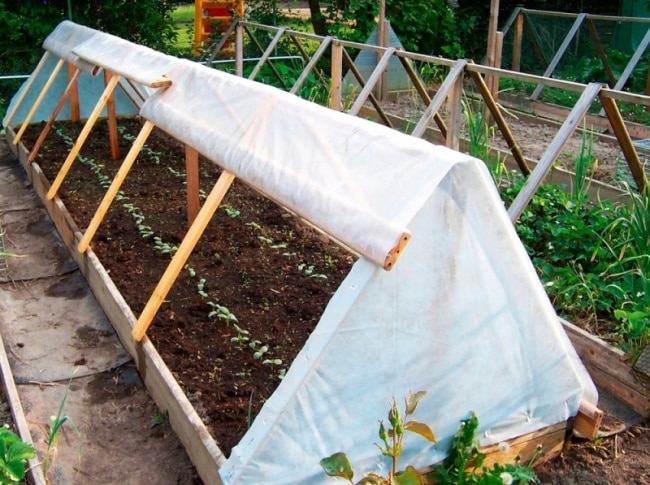
Greenhouse is placed on the garden bed. Sometimes a foundation is made for it. Above its surface are metal flexible rods. They stretch the plastic film. It looks like the most common design.
A simple parnichok allows you to save the crop in frost down to minus two degrees.
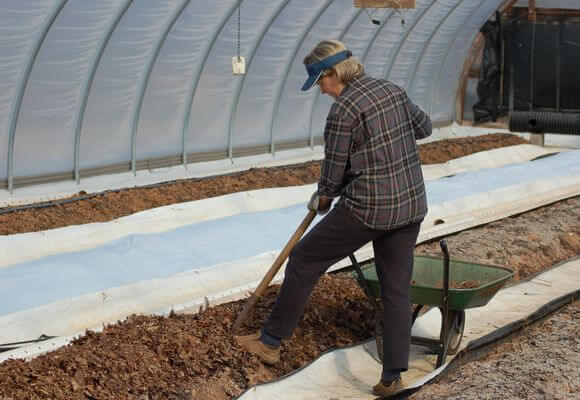
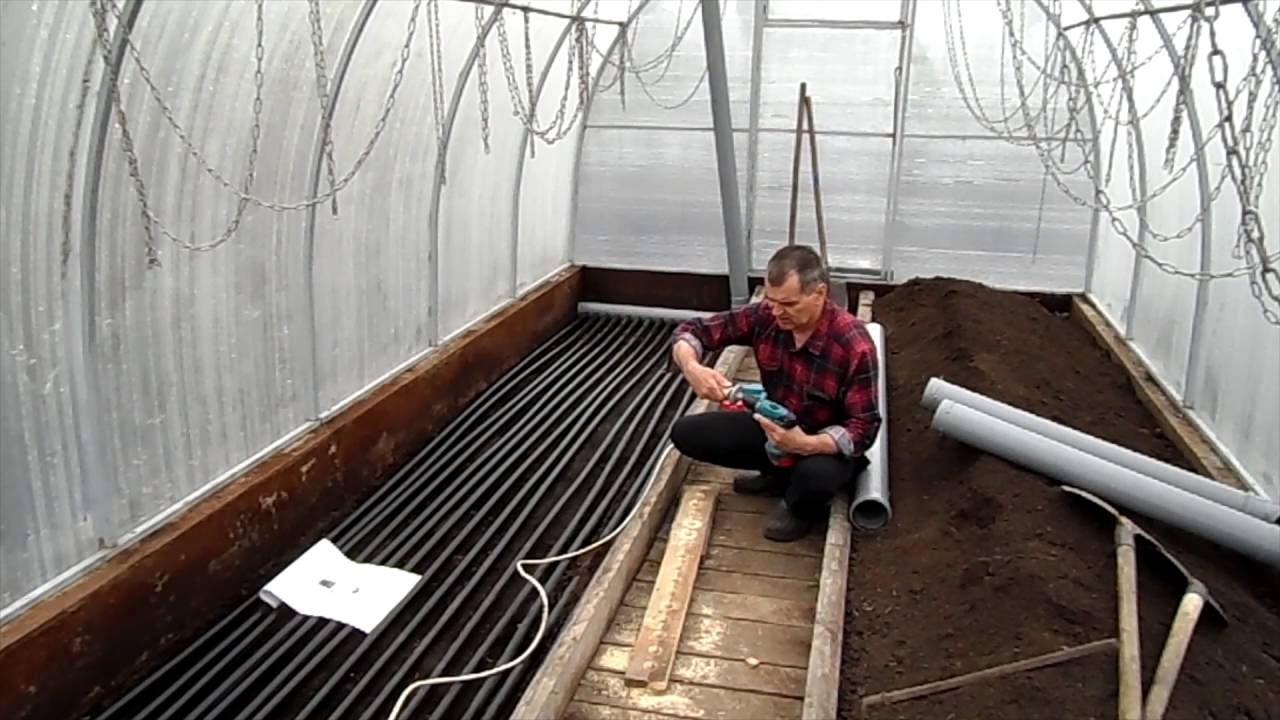
A large role is played by sunlight, from which plants receive the necessary heat. And what if it is not enough? The rise in temperature in the greenhouse is carried out through the use of biofuel. It is very important that it is not rotted manure. It is buried in the soil at a depth of 20 cm, is filled with soil from above. When overheating, the slurry gives off heat. This type of greenhouse has a small height and is usually used for growing seedlings. In its construction also used a metal frame and film.
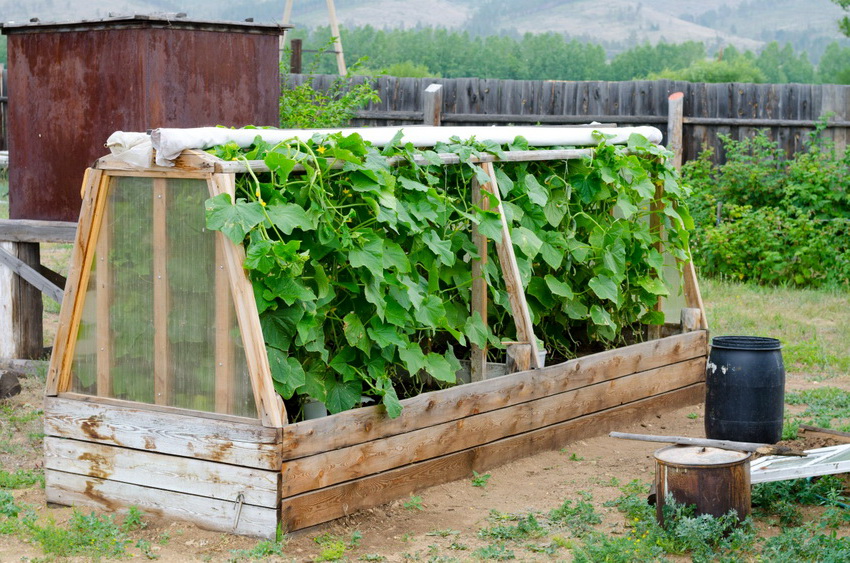
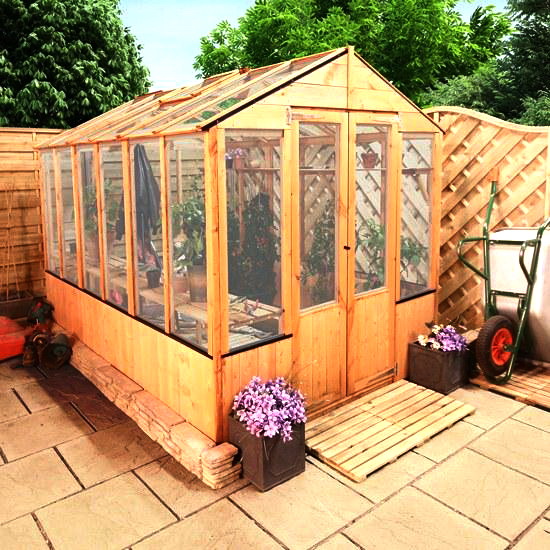
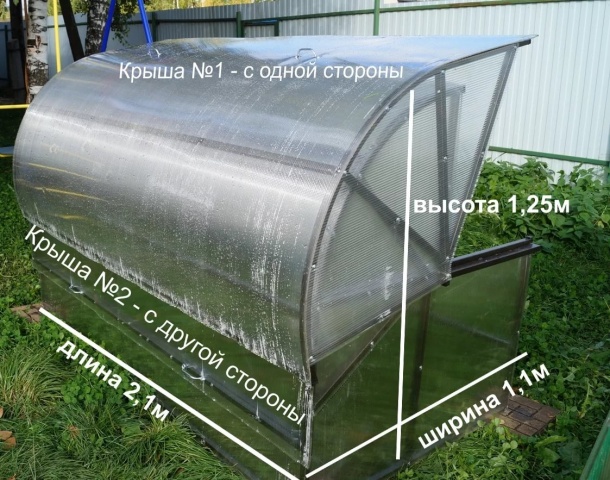
The next version of the greenhouse can be called a mini-greenhouse. A wooden frame is used as the base. The frame here can be made of wood or metal. Glass, spunbond, polycarbonate, film surface is used as a covering material. Its height is over a meter and is used for ripening vegetables.
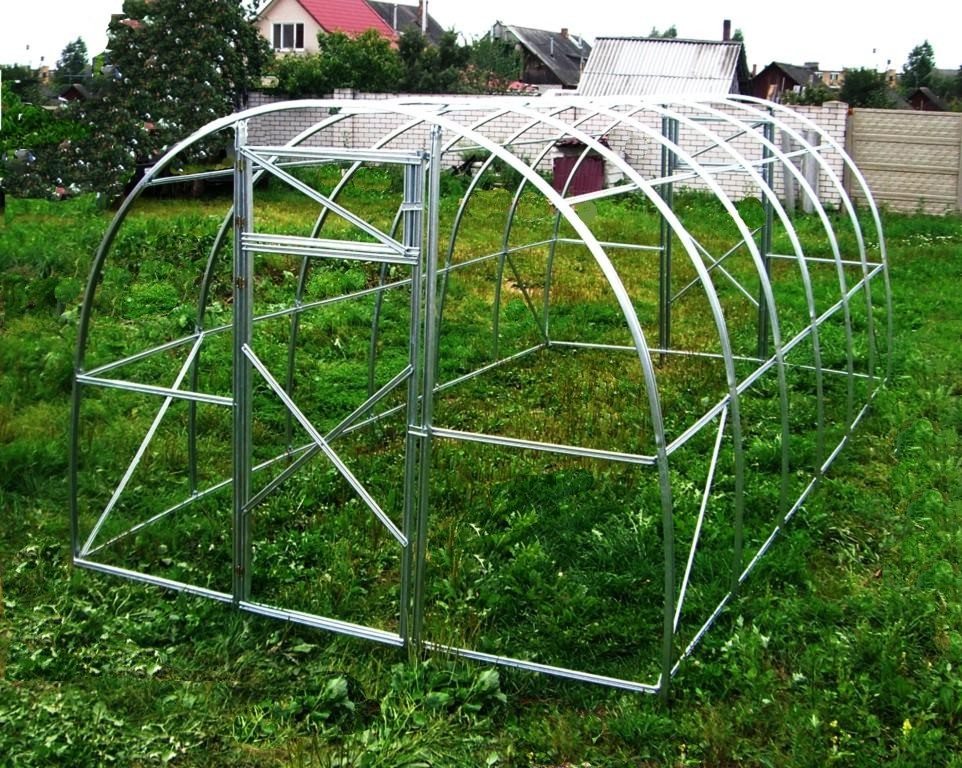
Greenhouses are divided into forms on the following types: arched, gable, sloping, recessed.
All options perform one function - quickly grow the first crop, save the seedlings from low temperatures and spring precipitation.
Advantages and disadvantages
Greenhouse can be made by hand from scrap materials. This allows you to save money and create small stable structures on any site. Compared with greenhouses, this is one of the main advantages. Greenhouses are easily cleaned, which is very important with the onset of a hot period of summer. Cheap materials, in the case of their damage, are easily replaced by others.

The main disadvantage remains in its size limit. The number of seedlings is determined by the size of the bed. The height of the greenhouse can reach a height of 1.2-1.5 meters, which creates an inconvenience for the gardener when caring for plants.
This is a seasonal design and is used only in early spring and autumn, when the day warms up the air before the first frost. At temperatures below zero, their use is impractical.
The difference between greenhouse and greenhouse
A greenhouse is easily assembled in a matter of hours with the help of available tools.
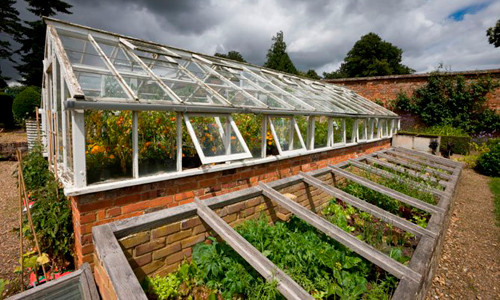
When building a greenhouse, a layout is developed taking into account the tasks that are assigned to it. It is a fixed structure with fixed walls and roof, often heated.
In comparison, greenhouses look at their size. Greenhouses are used only at certain times of the year.Only one person can work in a greenhouse. But in a greenhouse a couple of people can come to the rescue of a gardener.
And if the greenhouse for agricultural needs, then it is placed and technology.
Selection of materials
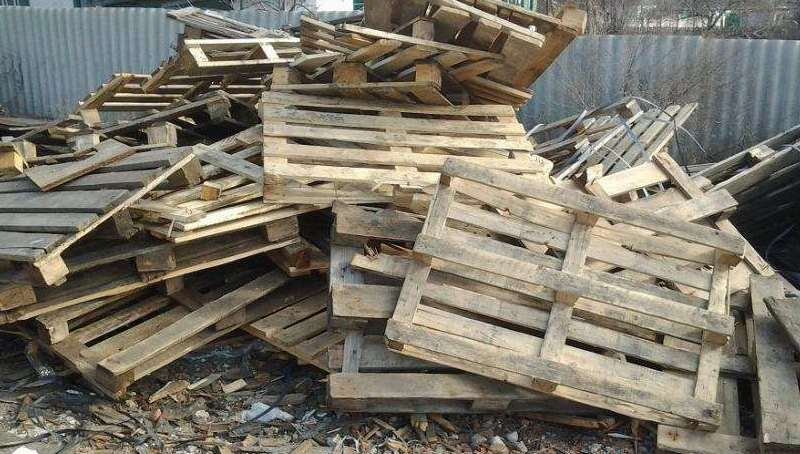
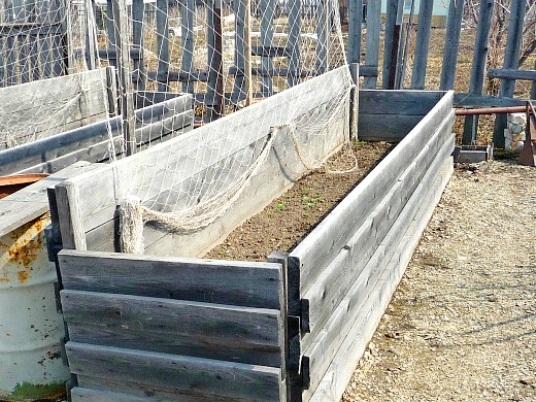
In any economy there will always be something that will create the basis for a future greenhouse. For example, pallets. Build one greenhouse is quite simple. It is necessary to select the right amount, disassemble them into separate boards and assemble the frame with the roof.
Inside, the frame is reinforced with a working grid or a conventional mounting grid. For plating used thick film. The advantage of this material is a long service life, cheap materials, the sunlight passes well. There are also hazards in the form of mold and beetles - bark. Polyethylene loses its strength from atmospheric exposure. For wooden material you need to constantly care for: soak from parasites and often tint.

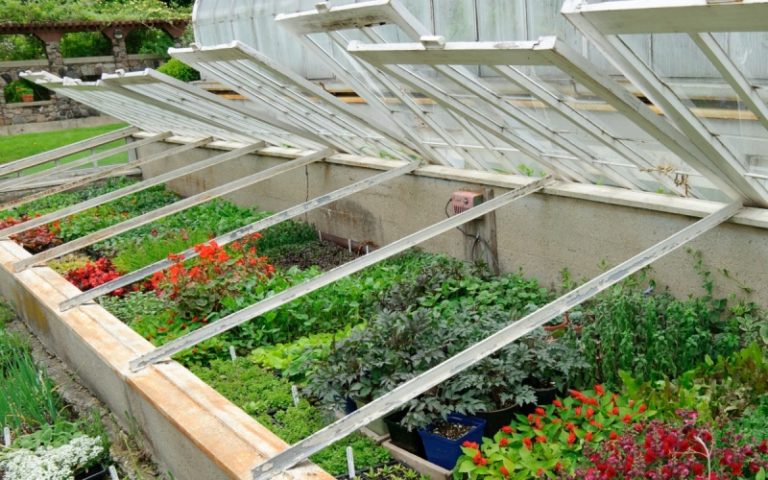
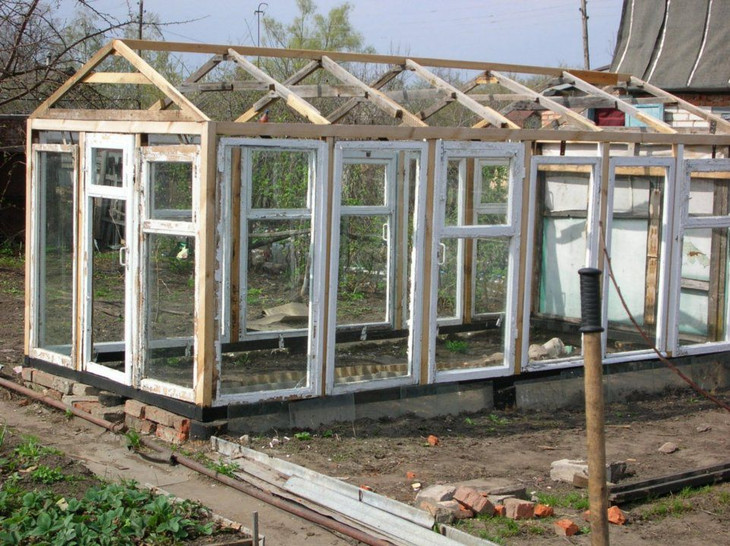
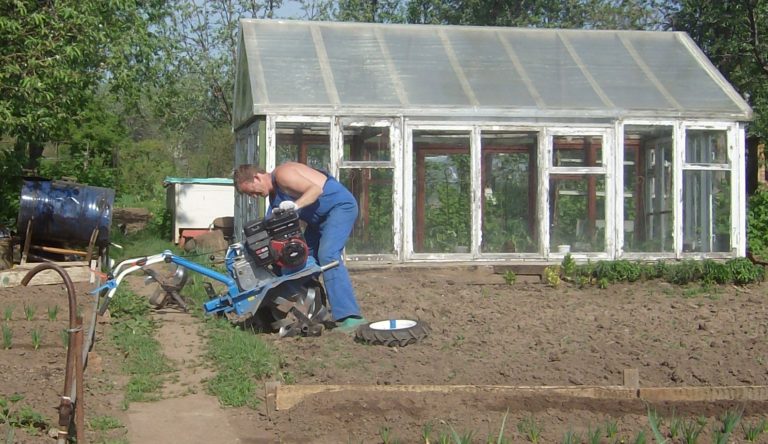
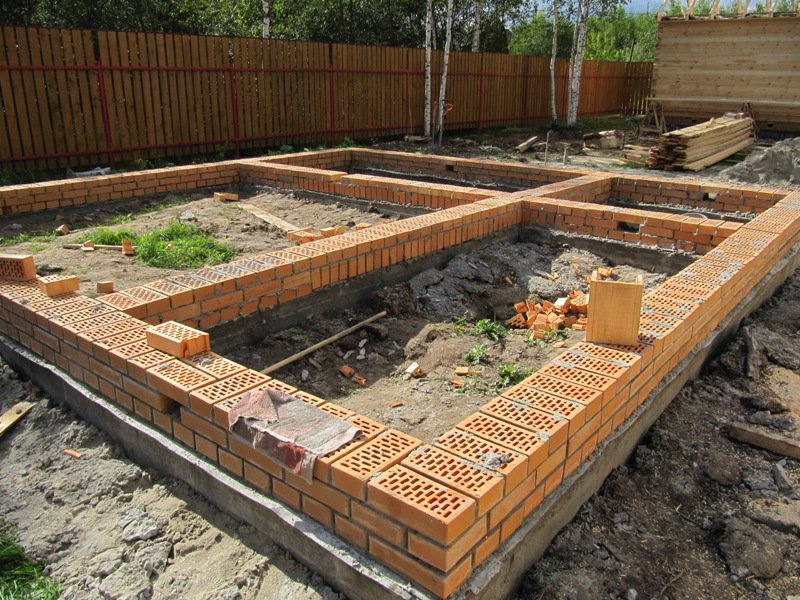
Window frames are another budget option. But for such a greenhouse will need to build an additional foundation. Here, too, you must constantly monitor the condition of the wooden base. At the same time window frames can last for a very long time.The design will be different strength, excellent light transmission and keep warm well. The biggest disadvantage of such a greenhouse - fragile glass.

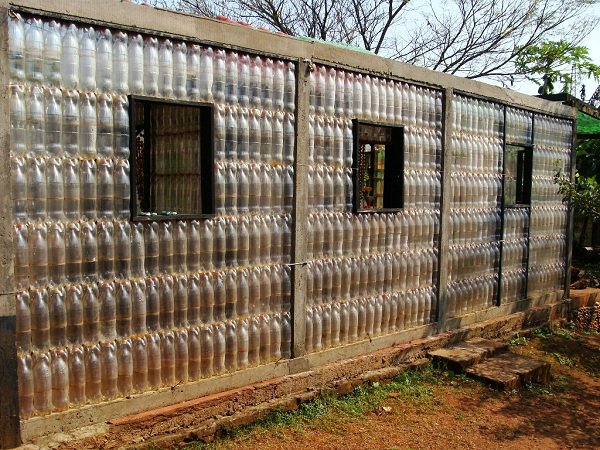
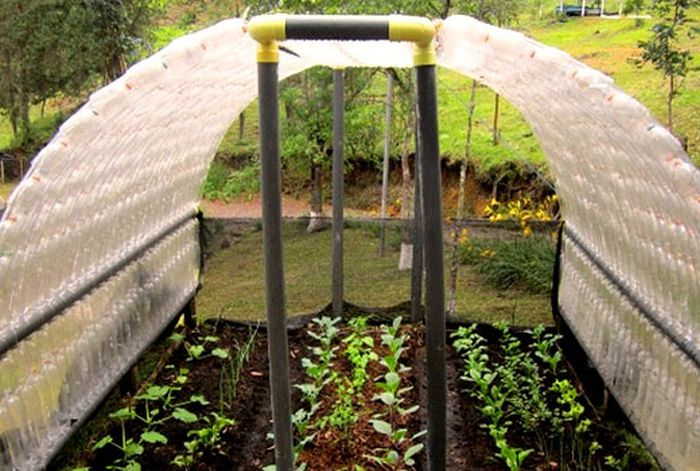
The cheapest and most popular material is plastic bottles. With them you can beat different forms of greenhouses - square, semicircular. They pass light well. Prevent the penetration of cold and wind. Plants can be grown in such a greenhouse from early spring to late autumn. Plastic is a fragile material, so when building greenhouses from this material it is not recommended to use construction filaments.
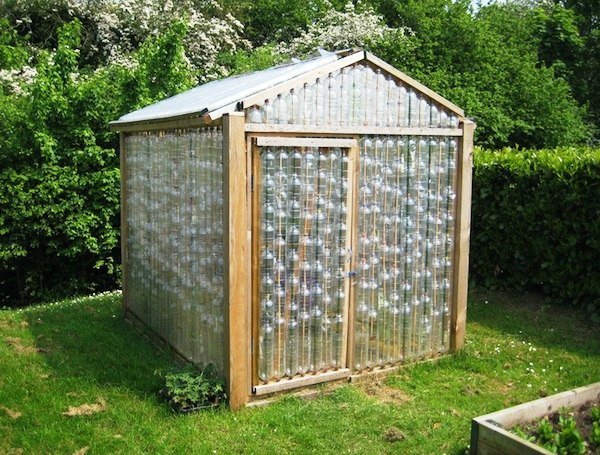
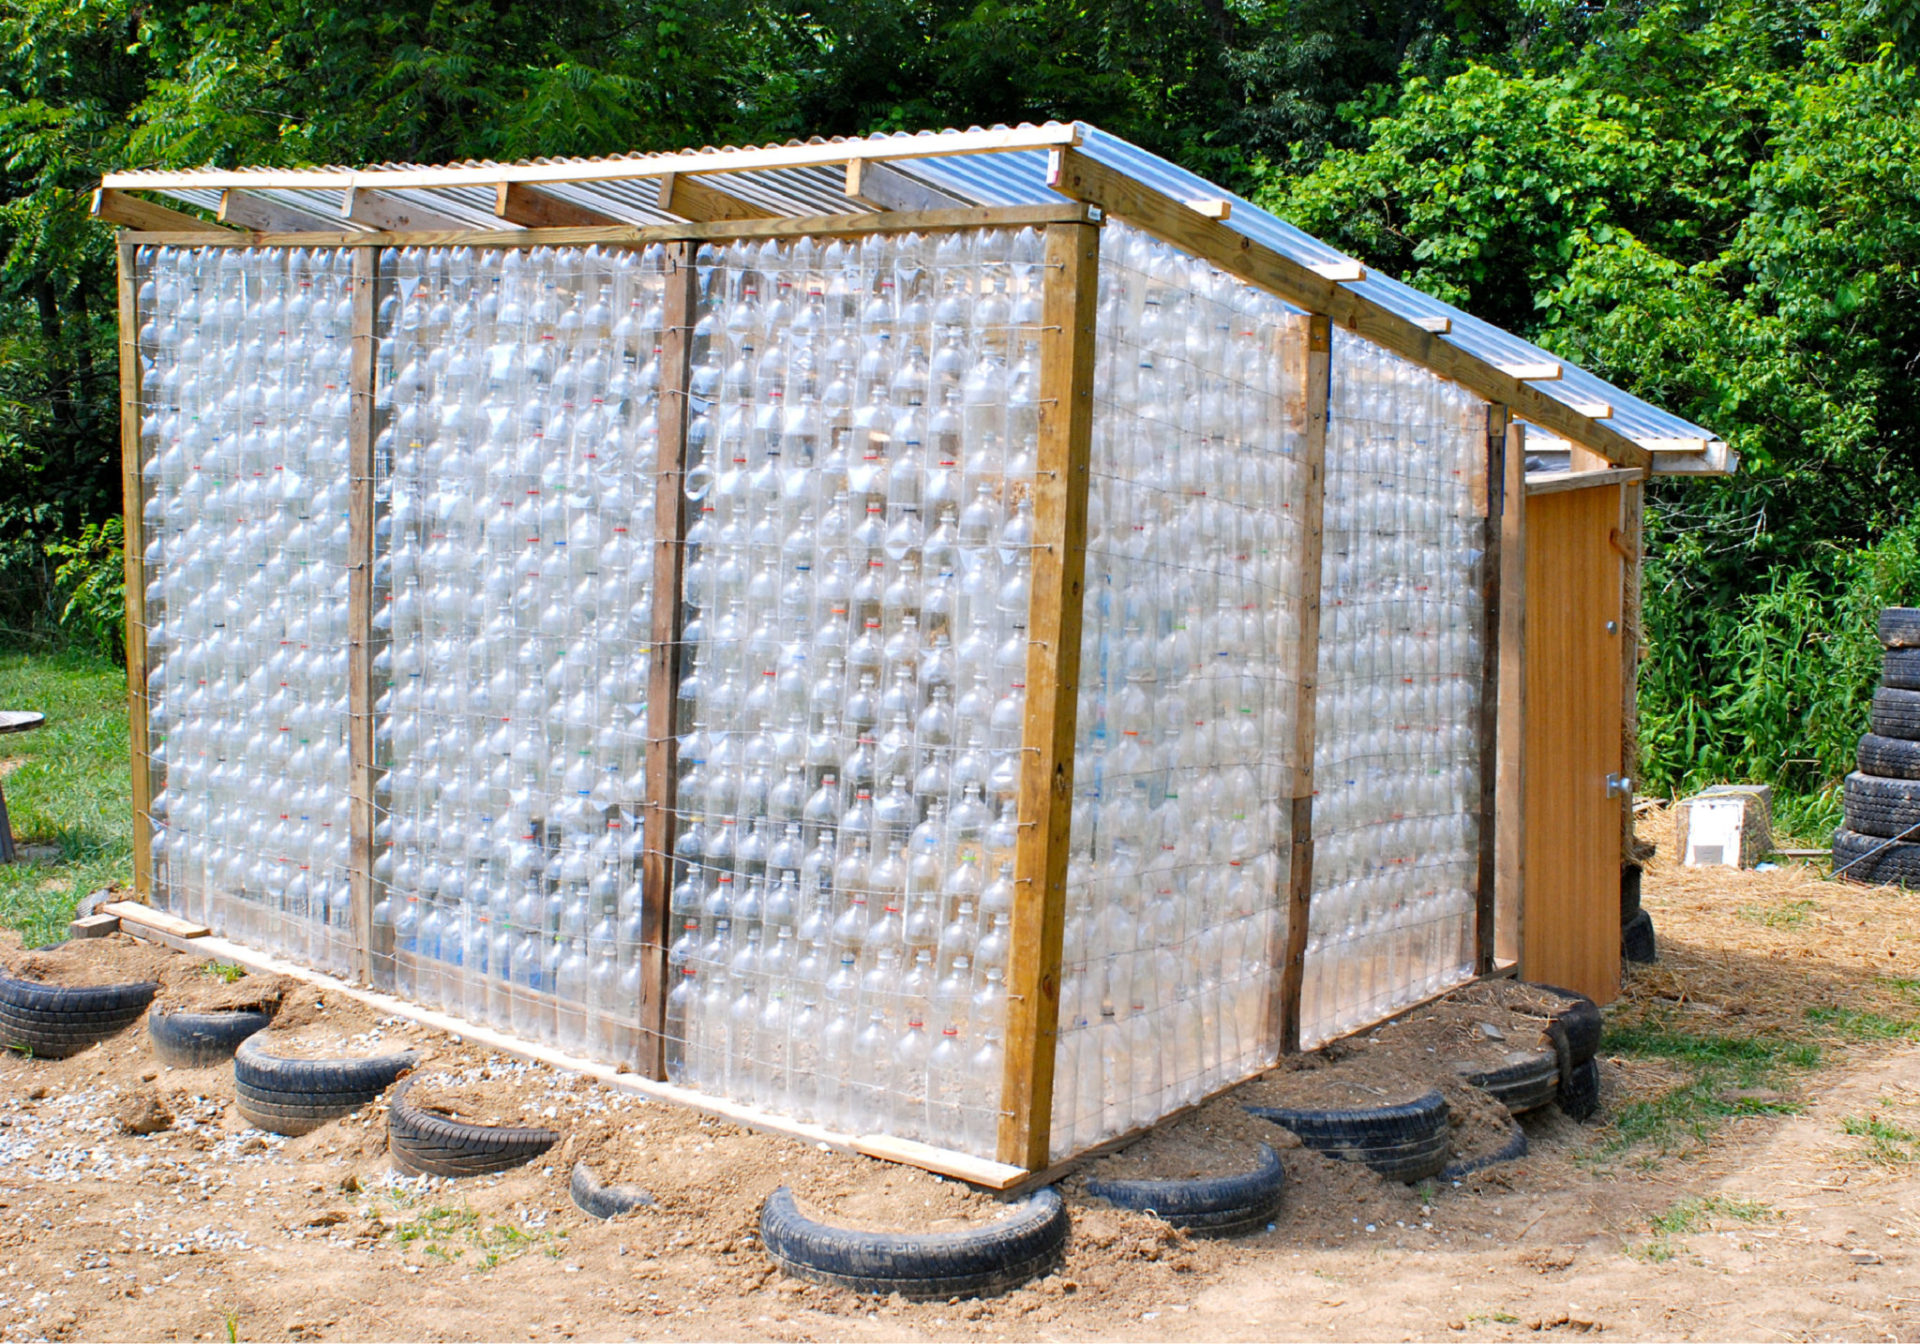
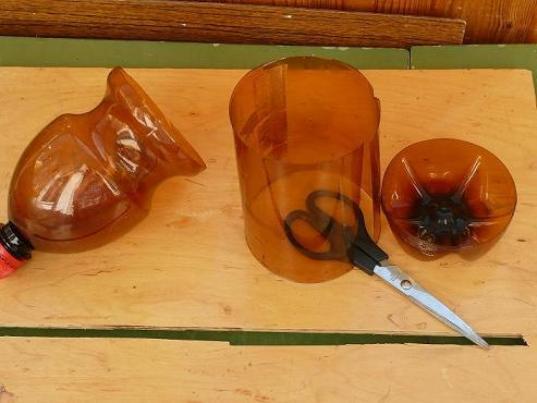
Bottles can be used in two versions. In the form of columns with cut off the bottom or sheets glued from the middle part of the product. Both options are good. In the first case, the bottles perfectly keep warm even in light frosts. But when collecting greenhouse it is necessary to monitor the packing density. In the second case, the structure will be more hermetic, but you will have to tinker with the material during their cutting and gluing. Only one greenhouse will have to collect more than 600 pieces. Its dimensions will be 3 meters by 4 meters in length and in width, height 2.4 meters. Transparent and colored bottles are required.In any case, preference is given to large plastic bottles. From two-liter fastest you can make the necessary size of the canvas. It is recommended to use colored plastics on the north side of the structure.

Often, a five-liter bottle make a mini-greenhouse. The bottom of the container is cut off, and the top is used as a greenhouse. She covers the seedling. This method is often used for growing watermelons.

Metal mesh or netting - another simple option for the construction of a greenhouse. The basis used boards or supports on which the material is stretched. On top is polyethylene. This is one of the fastest ways to build. It is necessary to consider how the basics will be fixed in the ground. The design is very light and breaks easily with strong wind or rain. Such a greenhouse quickly loses its appearance due to the loss of the appearance of the film and rust on the grid.
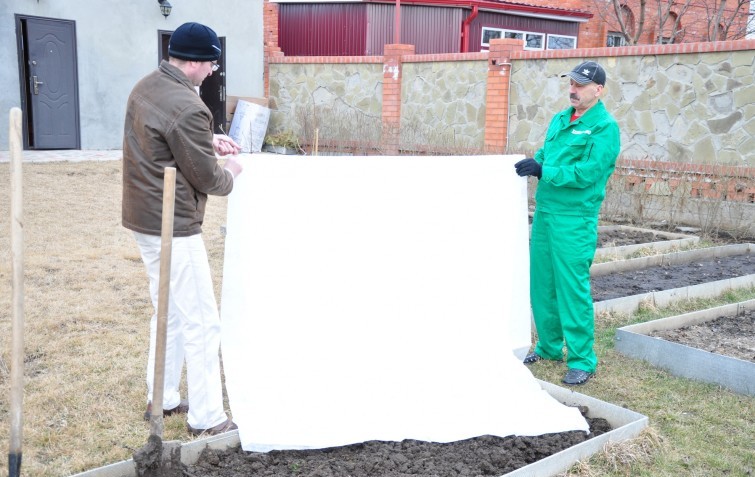
A nonwoven membrane can be used as a skin. Fabric well protects plants from low temperatures, is easily repaired, well passes air. But afraid of the claws of animals. Therefore, when using this material, it is necessary to additionally sheathe the greenhouse with a fine-meshed net.
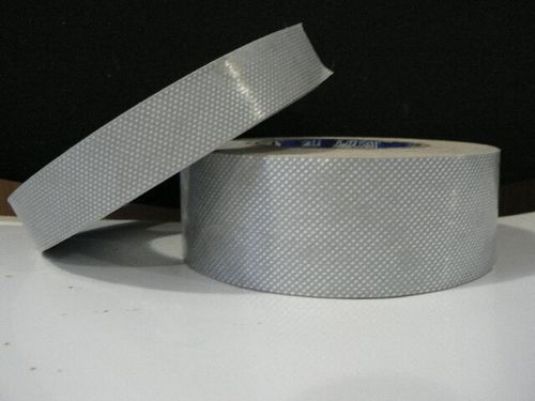
Each material requires a suitable method of sealing the joints.The film can be further sealed with tape. Non-woven membrane is fixed along the entire length of the lap. And polycarbonate will need an adhesive tape made of foamed polymer.


To enhance the fixation of materials, you can use the neck of a plastic bottle. In small greenhouses, the cucumber network is very well suited. The clips for PVC pipes proved to be excellent. Also, the clothesline, wooden plank, fishing net made of synthetic threads can act as clamps.
For calculating the amount of materials, especially for complex polycarbonate greenhouses, special services can be used. They are publicly available on the Internet. It is enough only to type: a drawing of greenhouses and the calculation of materials.


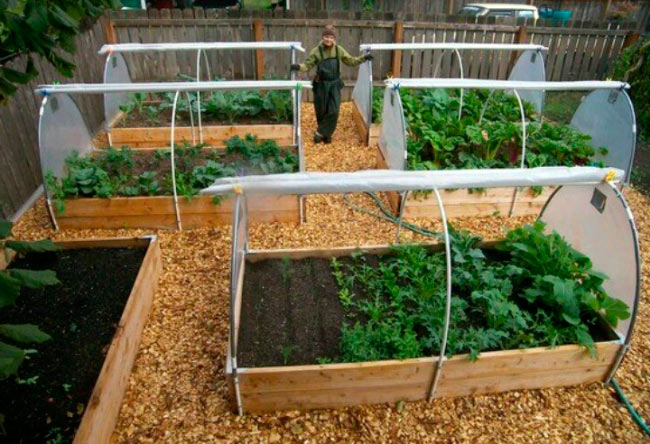
Experienced gardeners are advised to have several greenhouses on their plots. Each culture has its own requirements - someone loves more moist, someone on the contrary, water is destructive. You should not try in one greenhouse due to the expansion to try to plant all the plants. Varied in structure and properties, the types of shelter materials will allow for the selection and creation of seedlings of favorable conditions.
Creation rules and preparation
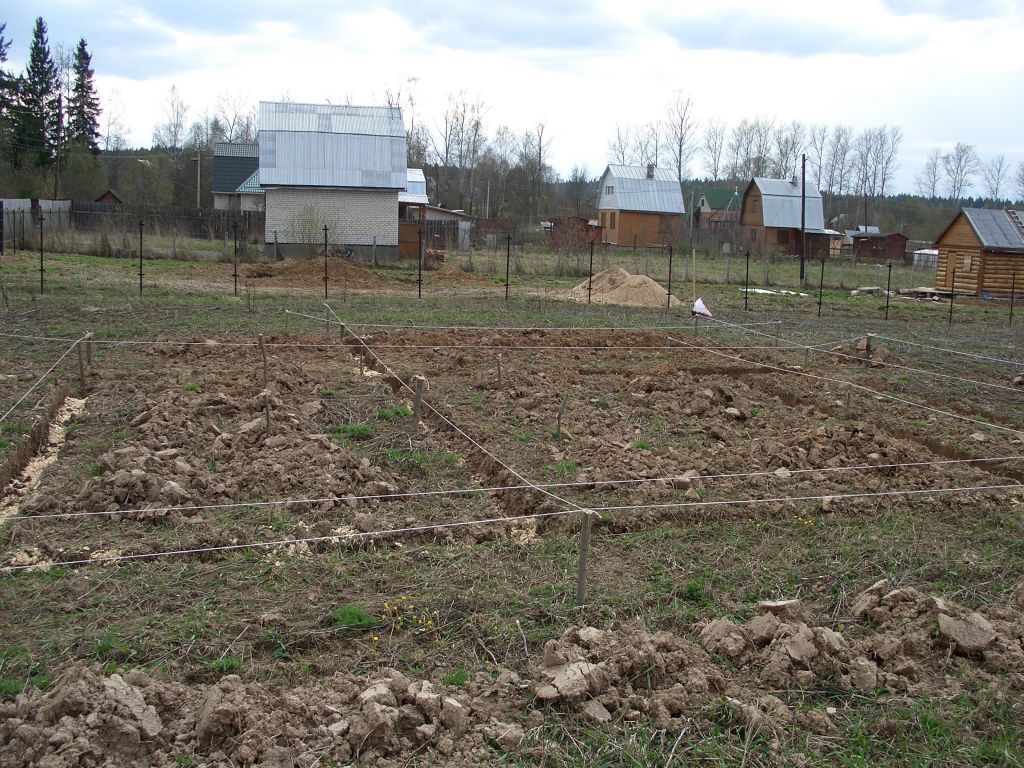
Before you start building a greenhouse, determine its location and determine the parameters. The structure should face south, face north. Due to this, the side part will receive heat from the east, and in the evening from the west. In this way, the plants will receive uniform heat throughout the day.

Microclimate in a greenhouse depends on the wind rose. Flows of cold air will blow out the degrees of heat that plants need. Draft easily reduce the temperature by 5 C. Therefore, when installing a greenhouse, you should try to locate it near buildings where it blows less. Or consider some kind of protective screen. It may even be planting bushes. Most often, gardeners do it easier - they cover the sides with cragis or regular boards.
The height of the greenhouse is usually about a meter, the width of a little more than a meter. It is not recommended to make the structure too long.
The most optimal length is no more than 4 meters.


You need to know the features of your site. This is especially true of groundwater. With high water plants can rot the roots.For some crops, abundance of water is destructive. You need to know the type of soil. The ideal option is sandy soil. If clay was suddenly discovered, then a number of preliminary works are to be carried out. To begin with, it will be necessary to dig a small trench, place evenly gravel, then a layer of sand, and therefore lay a fertile layer.
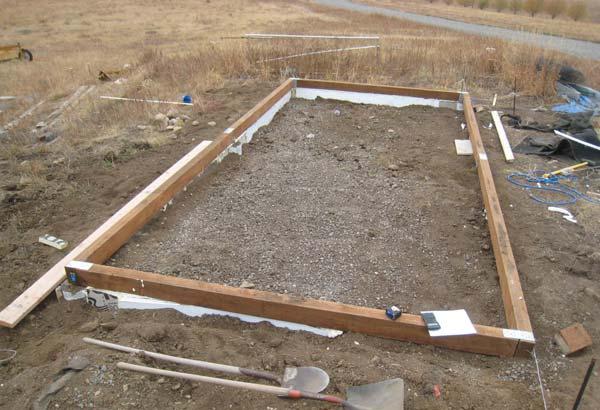
The future site needs to be cleared of stones and garbage. Measure its boundaries to count the amount of material needed. To properly build a homemade greenhouse, a drawing is needed. If it is made of windows or planks, then it is necessary to provide ventilation and not forget about access to ensure work with plants.


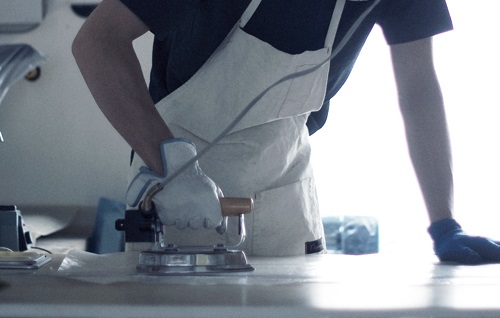
Preparatory work depends on the material of the frame. The simplest is metal arcs. They can immediately stick into the ground every half meter. But it is permissible to install them through the meter. When using window frames, it is necessary to treat the material with a parasite agent. Then you can proceed to the layout of the film. If it suddenly became necessary to glue two pieces together, then the fastest way to do this is with an iron. The material lies on the rubber and covered with tracing paper.
After passing through the iron, a strong seam will appear on the film.
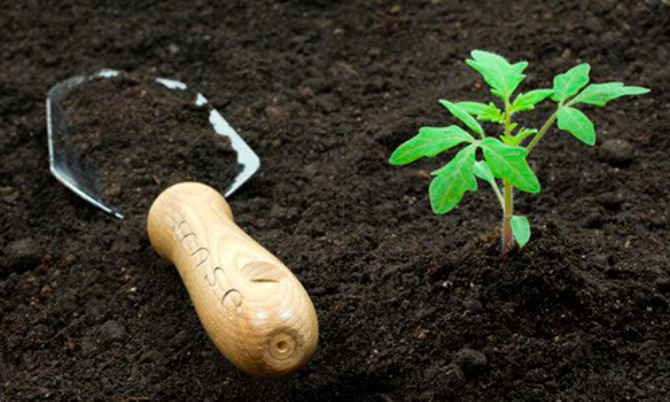
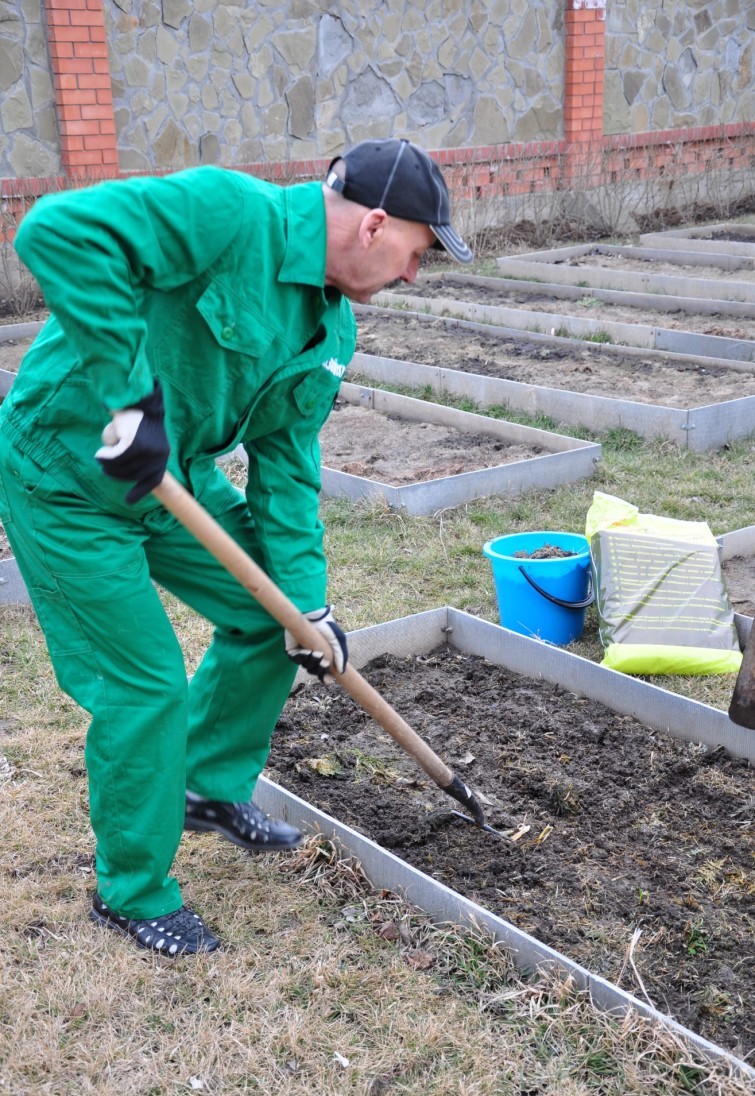
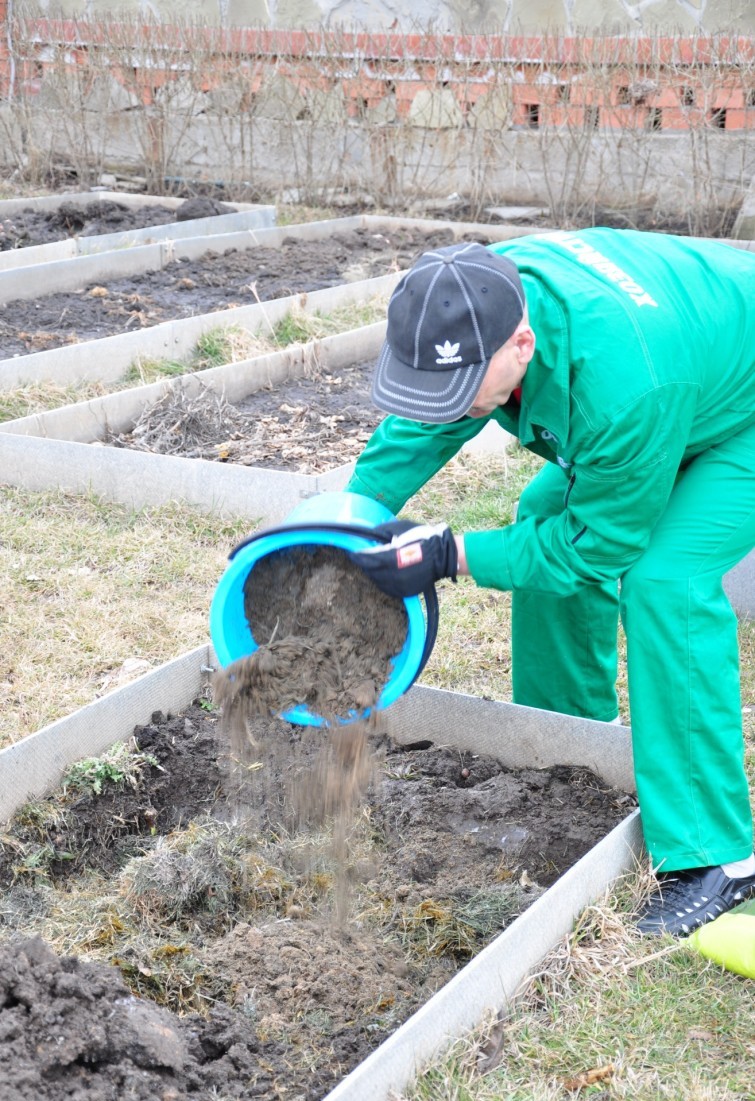
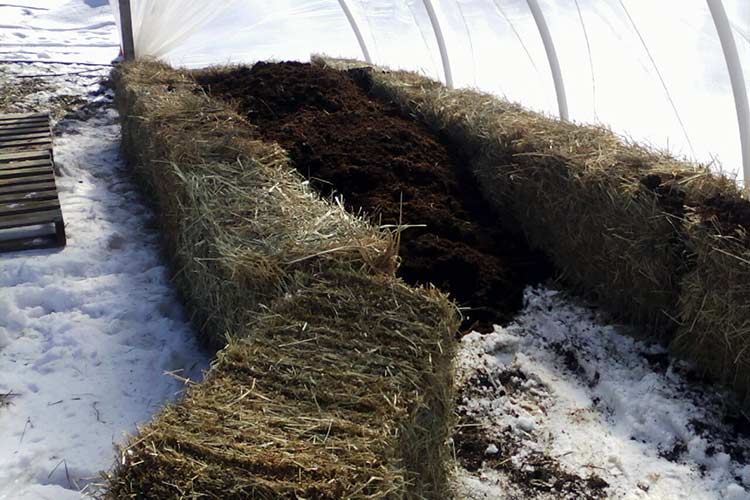
When preparing a greenhouse with biofuels need to prepare two cavities on both sides along the entire length. The first layer is straw, top manure. Stick the arc and cover the film, which will need to prikopat and fix the edges of the stones. Then it remains to wait for the soil to warm up and start planting seedlings.

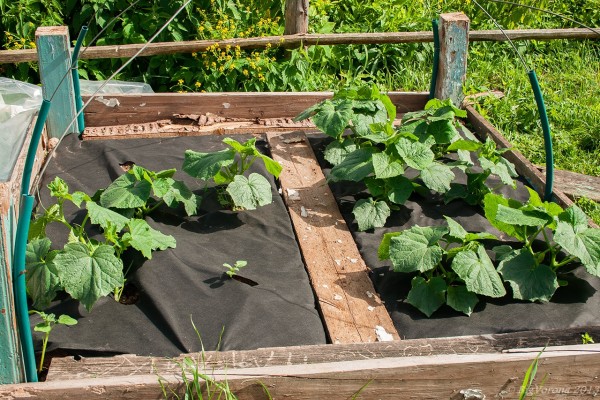
For cucumbers, who are very impatiently waiting for summer residents, you can make a small greenhouse yourself. It is necessary to make a drainage layer of gravel. Then close the biomass of manure and a layer of soil. Then the arcs are stuck into the ground, the upper part and the side are fixed with wire. When the cucumbers begin to grow, the film can be removed as the seedlings grow. Then the frame remains for weaving the plant.
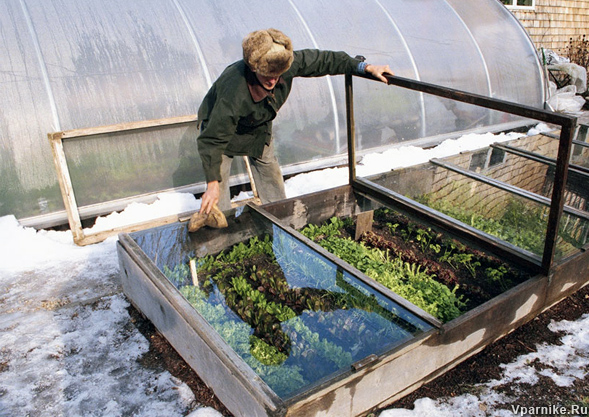
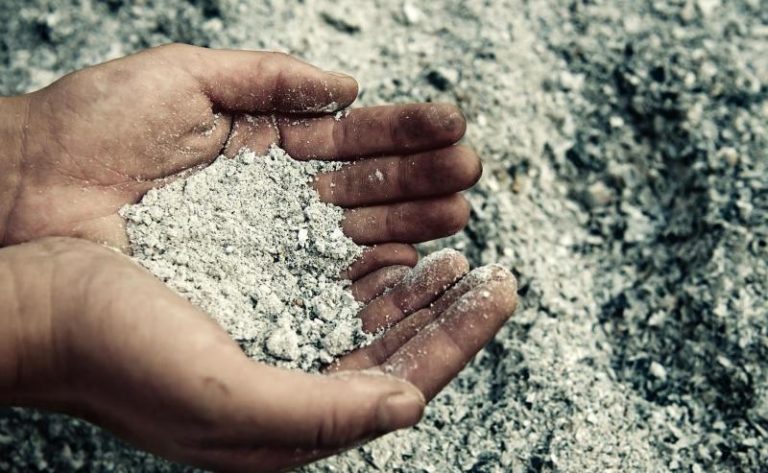
For a quick shoot of seedlings it is recommended to use organic matter as a heat source. But to warm the soil, it is necessary to sprinkle snow with ashes in early spring. It is also recommended to use peat. Black color intensively attracts sunny color and quickly warms the earth. After the snow melts, ash or peat will remain in the garden as a fertilizer for plants.
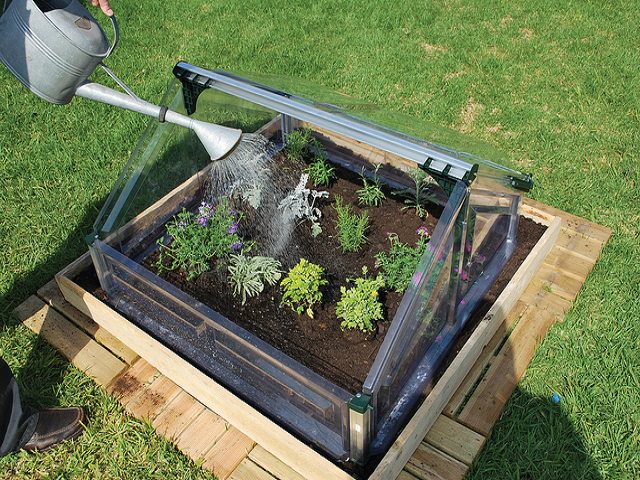
Do not forget that some types of seedlings die at a temperature of + 5. These can be cucumbers, tomatoes, peppers. But for such delicate plants it is worth preparing a mobile greenhouse, which can be brought into heat. It is made from the usual box to which you can attach handles for transfer. It is covered with film or glass. Later, later, when the seedlings become stronger, they will perfectly feel themselves in the street greenhouses.
Not high stationary greenhouse suitable for cabbage, carrots, dill, etc. Sun will be enough for them. Heated greenhouses will be an excellent home for tomatoes, eggplants, peppers.
For crops that like to grow tall, for example, cucumbers will require a tall greenhouse.

Production: options
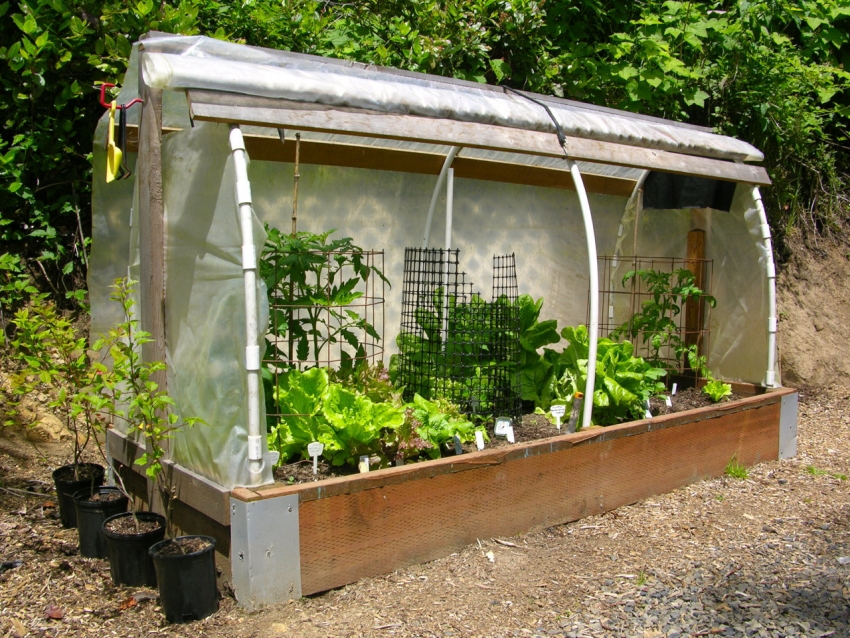
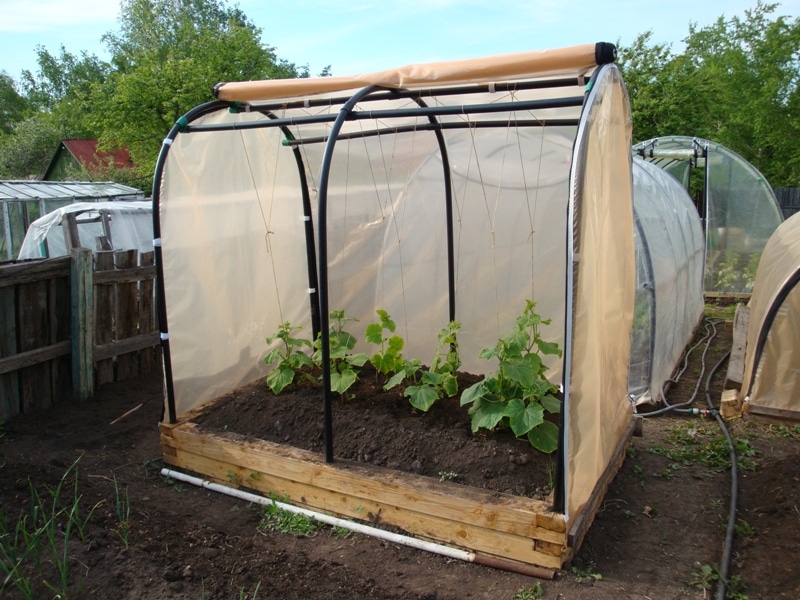
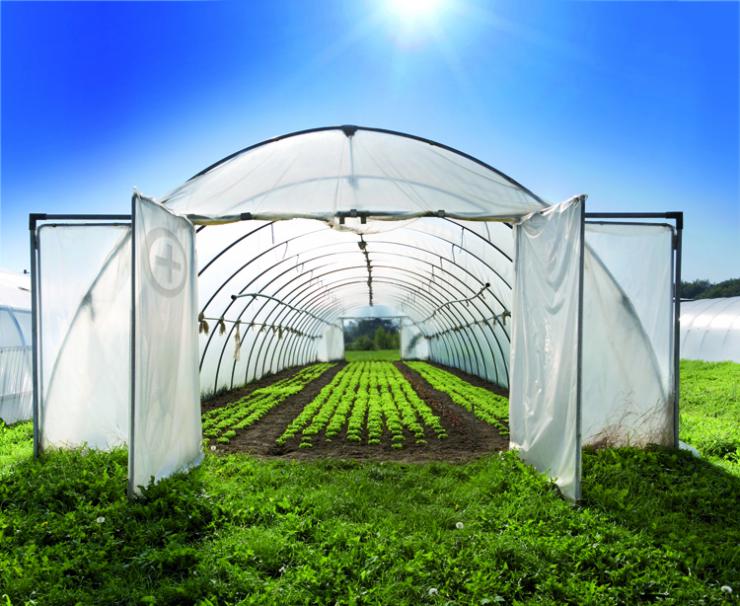
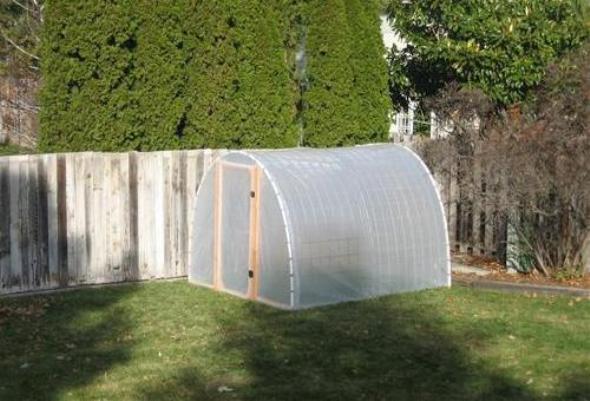
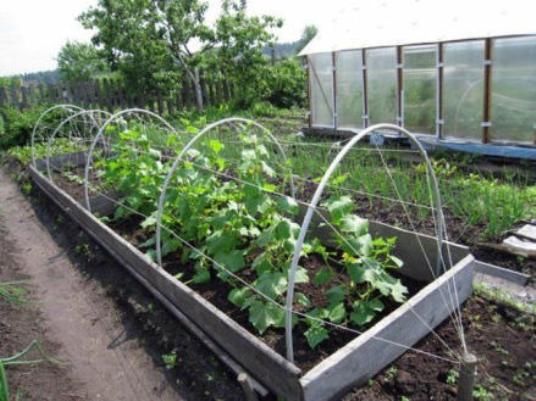
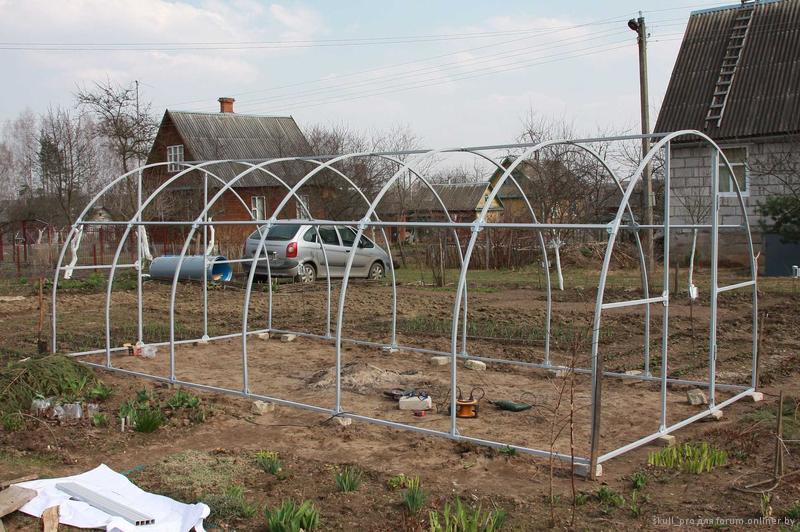
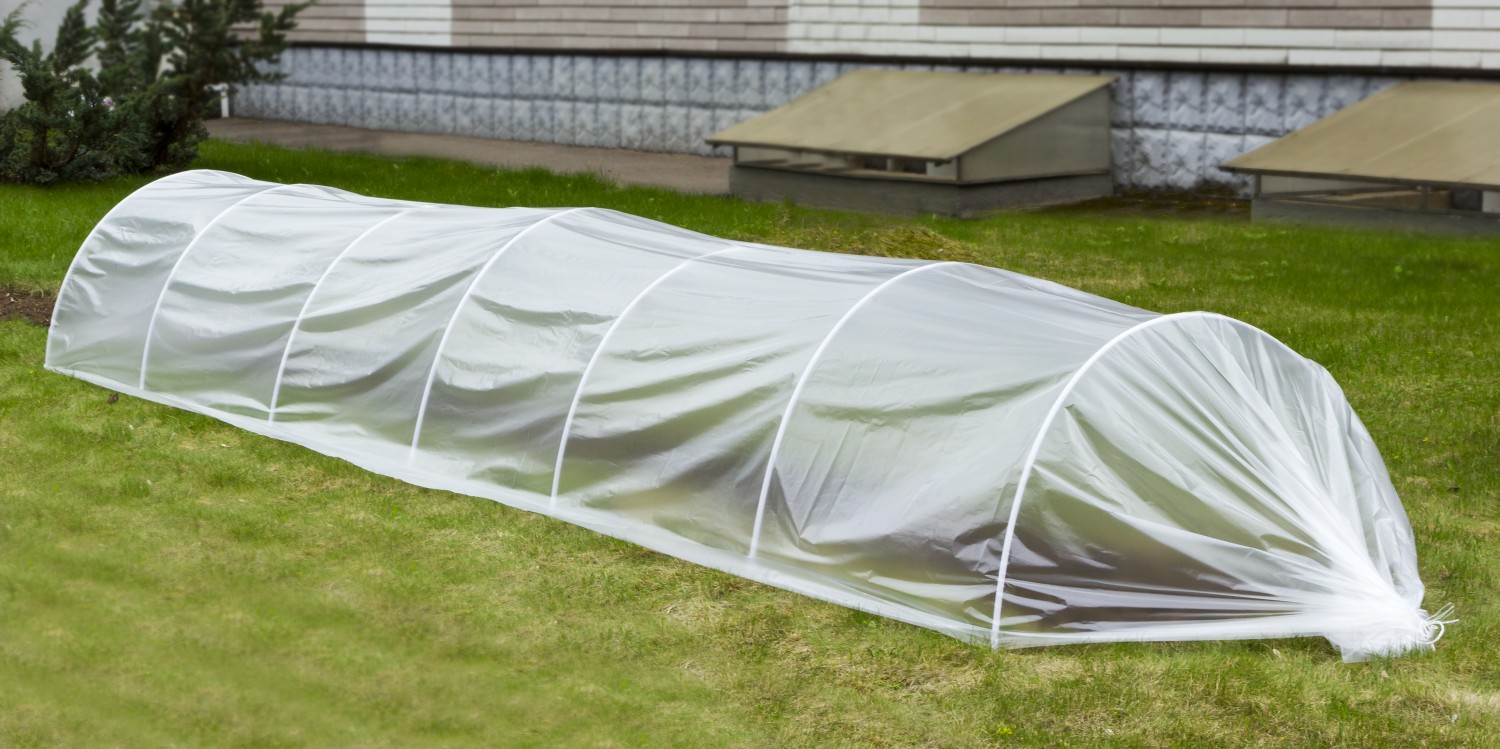
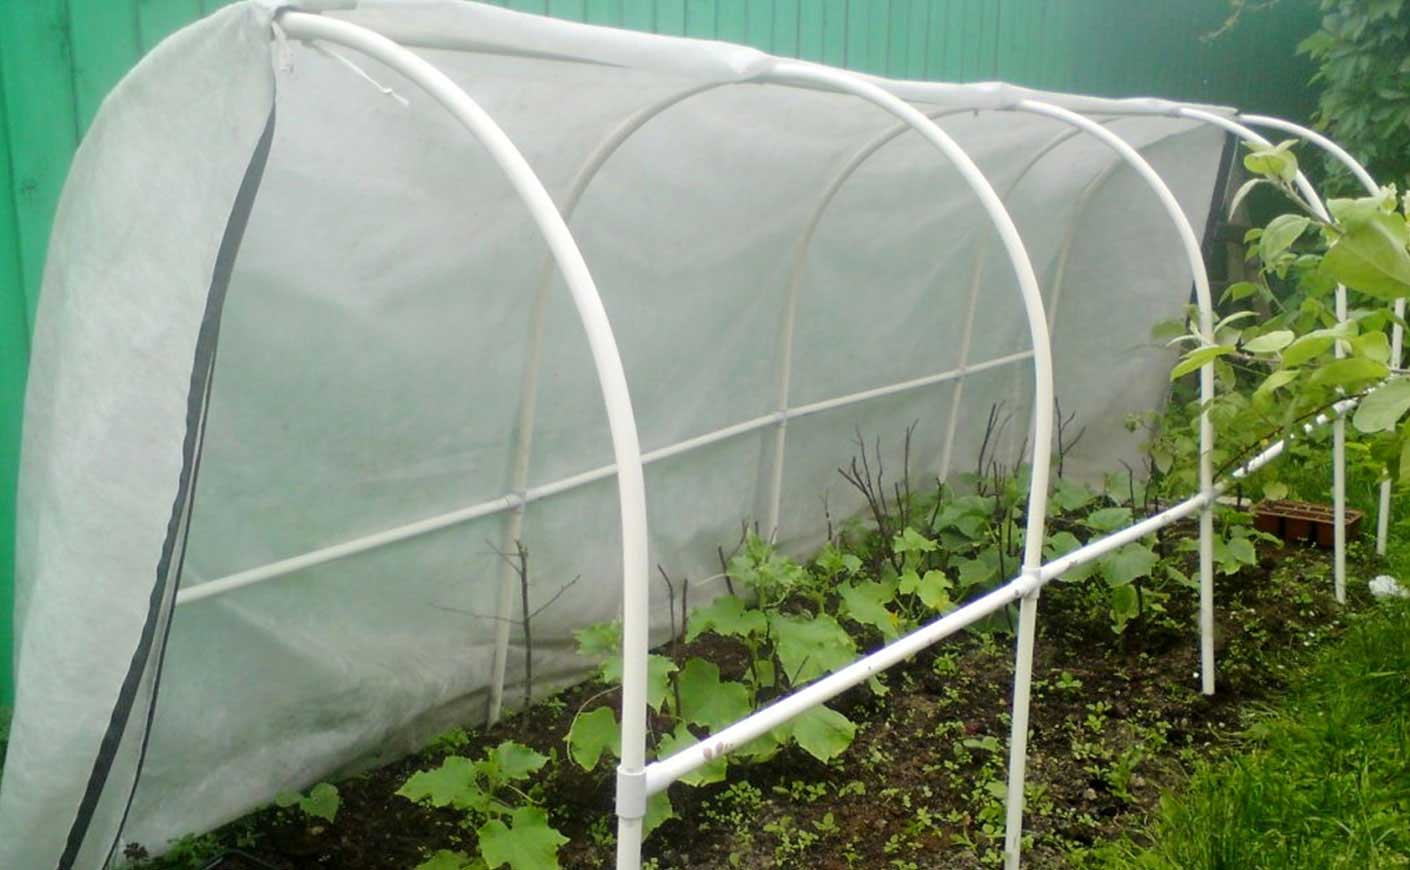
The greenhouse in the form of an arch is often called a tunnel because of its similarity to a long tunnel. The basis for its shape is an arc stuck into the ground. This is one of the easiest ways to do it yourself. If it is necessary to strengthen the structure, then plastic pipes or steel bars are used as the base, which are inserted into the watering hose. At the very beginning of the work it is necessary to consider how to provide access to the plants. To do this, raise the side film and fix at the top.To the material was tightly stretched at the bottom of the rail.
If it is necessary to ventilate the space, the film is wound onto this wooden base and the collected rolls are attached to the upper part of the arc.
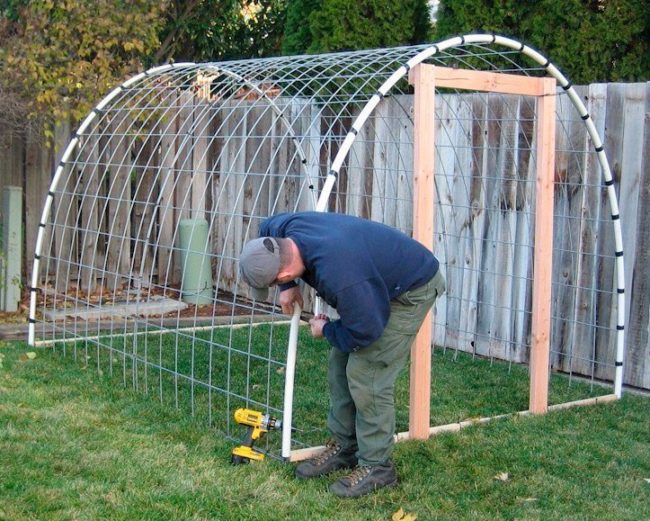
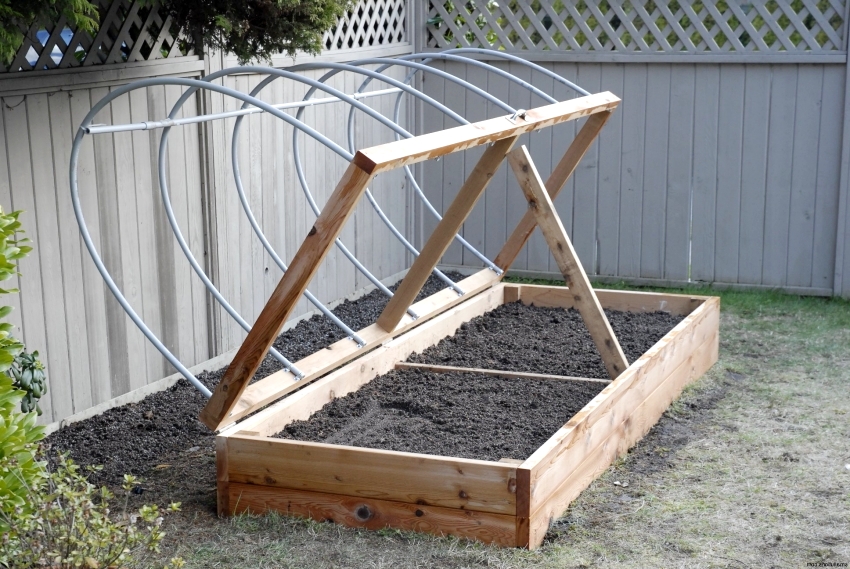
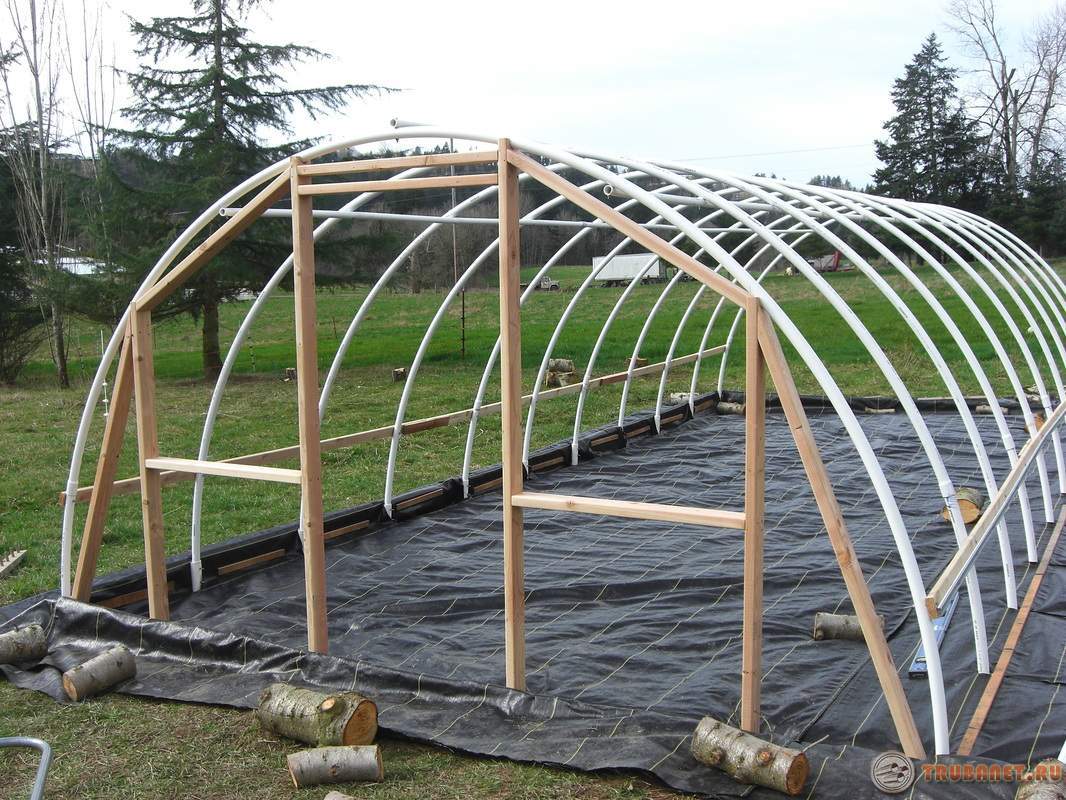
For the manufacture of arched greenhouse from wooden boards, a box is needed. Its sides will allow you to make a warm garden bed using biomass, arcs can be attached to the box. To protect against rodents, the future landing is protected by a metal grid. To the sides of the box are attached segments of tubes into which metal arcs will be inserted.
It is not necessary to fasten an arch from a plastic pipe. Keep it will pieces of reinforcement, hammered from the long sides of the box. The pipe is cut into the desired size pieces and inserted into the workpiece. Arcs with a height of 1 meter must be reinforced with a jumper. It can be exactly the same pipe. The finished structure is covered with the material and the edges are nailed. You can start landing work.
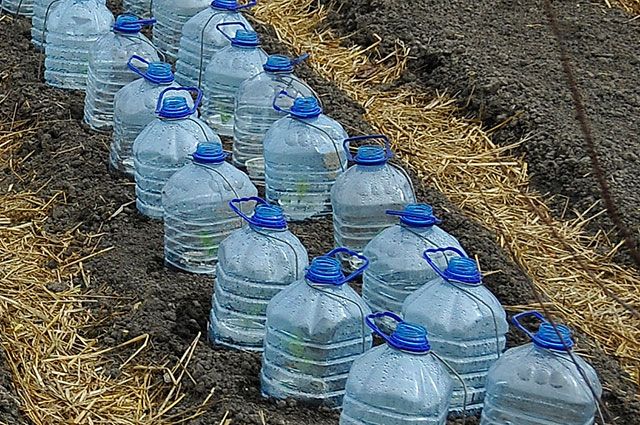
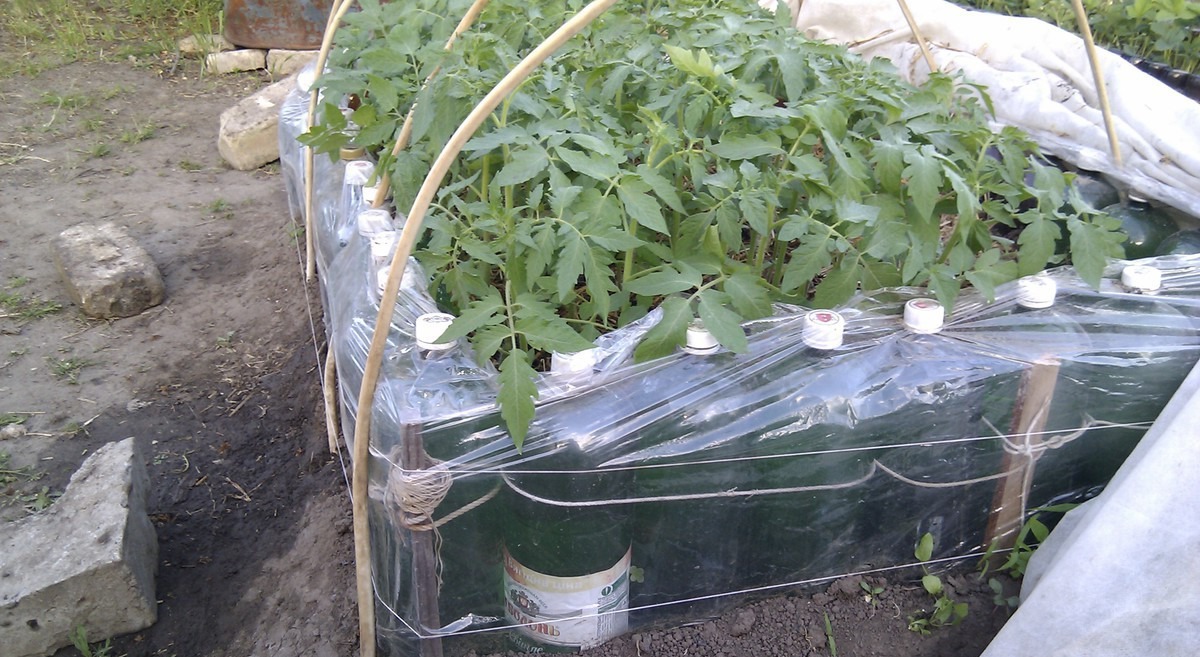
For warming an arched greenhouse, plastic bottles are used in which water is poured. These should be green or brown containers with a volume of two liters.The dark color of the bottle will allow the water to warm up more during the day so that at night the heat is evenly transferred to the soil and seedlings.
Water bottles are placed tightly around the perimeter of the beds, dropping them into the ground for stability. Then they are wrapped together with a duct with a tight rope.
At the bottom of the beds spread black polyethylene, which protects plants from cold soil. Fertile land is filled up and covering material is fixed on top. To protect against frost is best suited non-woven tightly.
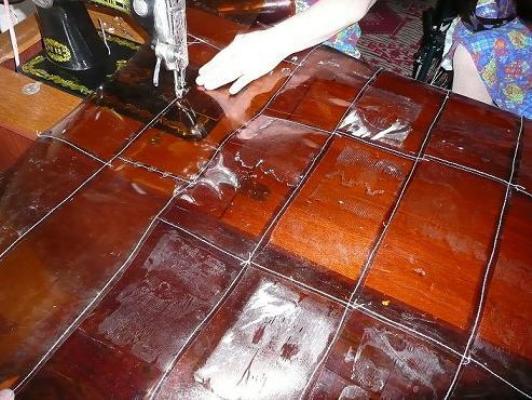
For the manufacture of greenhouse from plastic bottles, you need a frame made of wooden slats. A gable roof is recommended, since water does not linger on it in case of rain. It is best to pick up a transparent bottle. After cutting the bottle neck and bottom, a rectangular fragment should remain, which will become the basis of the future wall. All rectangles must be sewn to the desired size. Plastic is attached to the frame with building brackets. It is best to insure the roof with polyethylene to prevent the leakage of moisture.
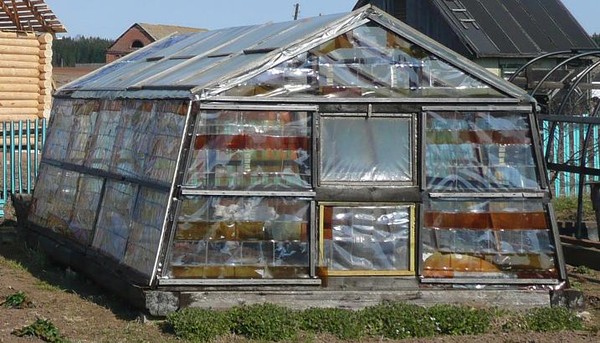
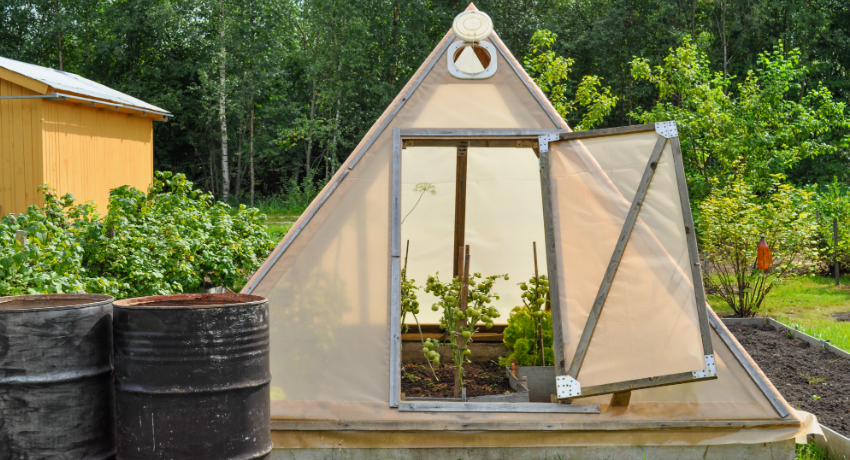
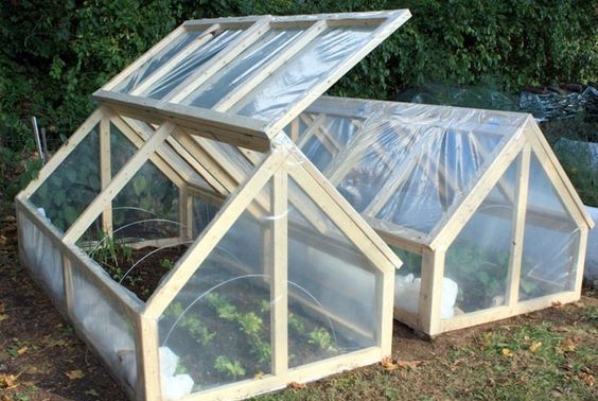
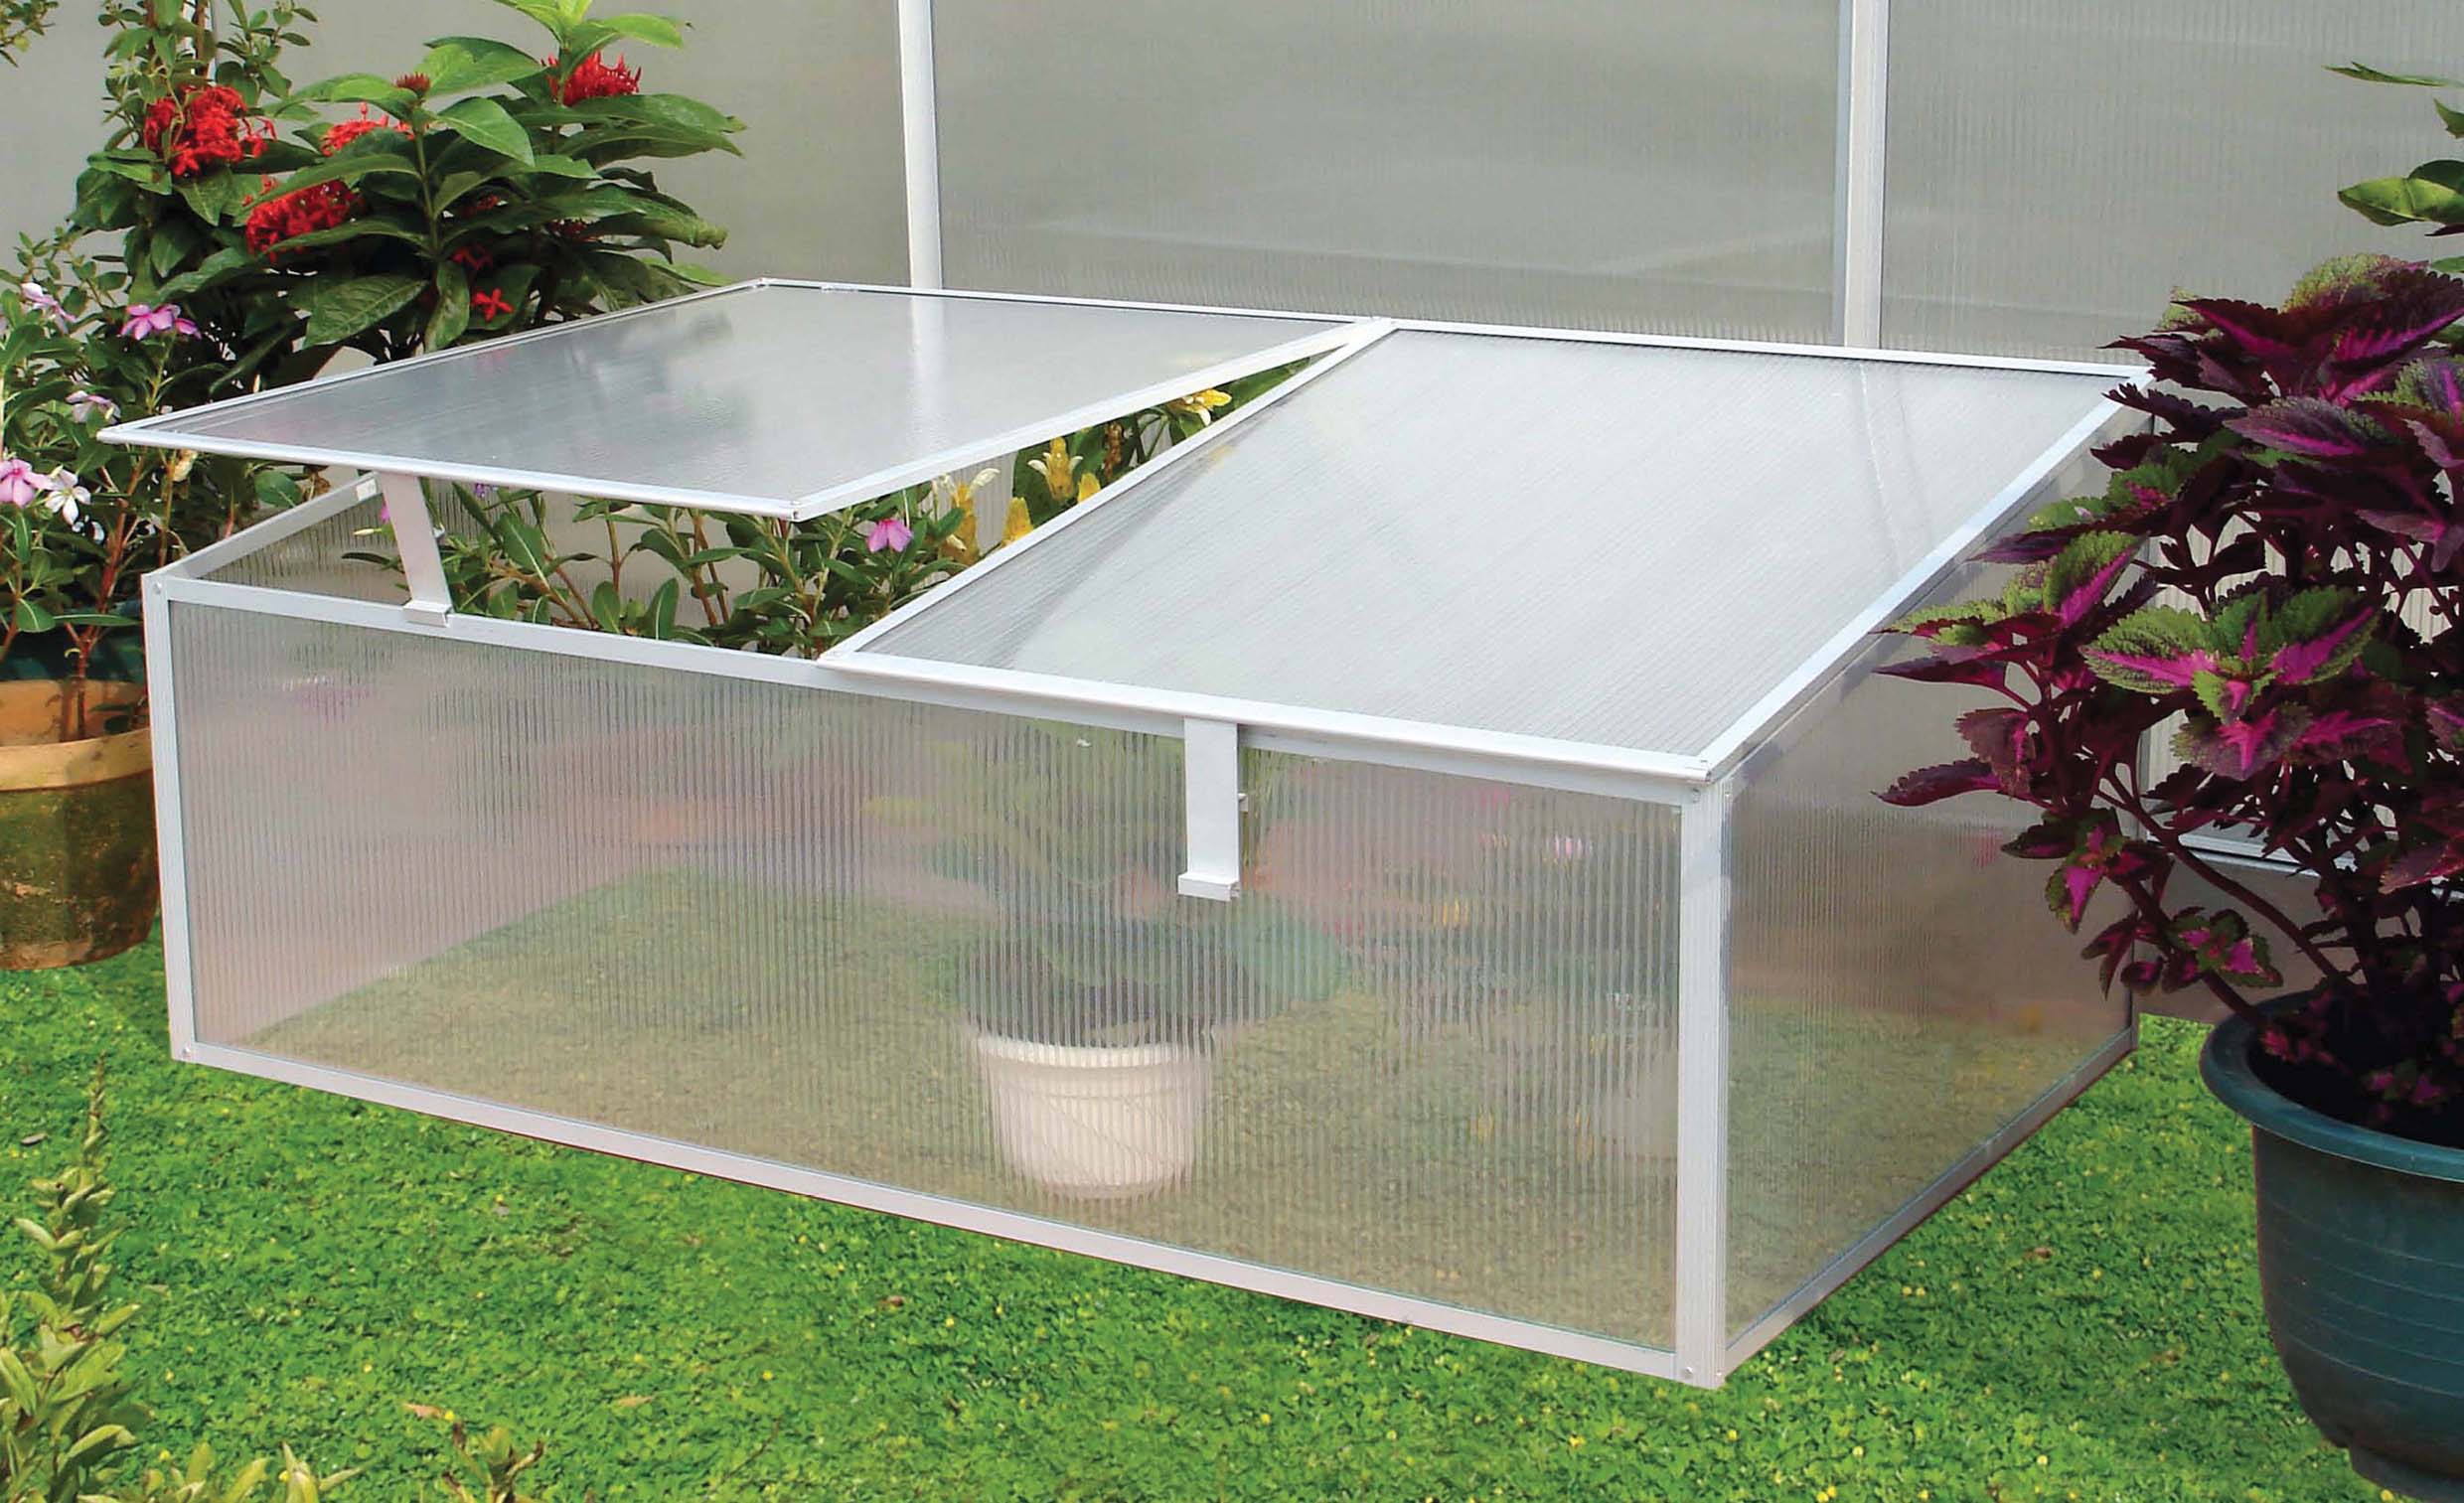
Window frames are considered the best material for making a greenhouse. Solid bases allow you to assemble the structure in a very short time.This can be a fully transparent box, which opens the top. The most important thing to observe the slope of the cover for the runoff of rainwater - at least 30 degrees. After preparing the space for a greenhouse, going to the box. The wood must be treated from rotting and insect parasites.
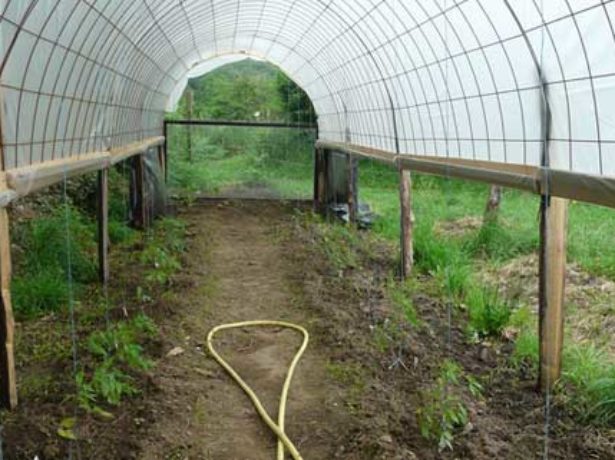
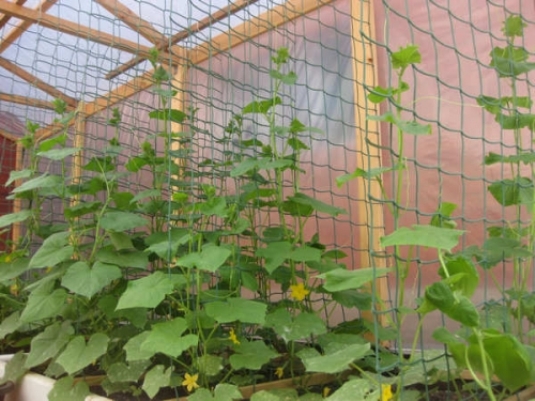
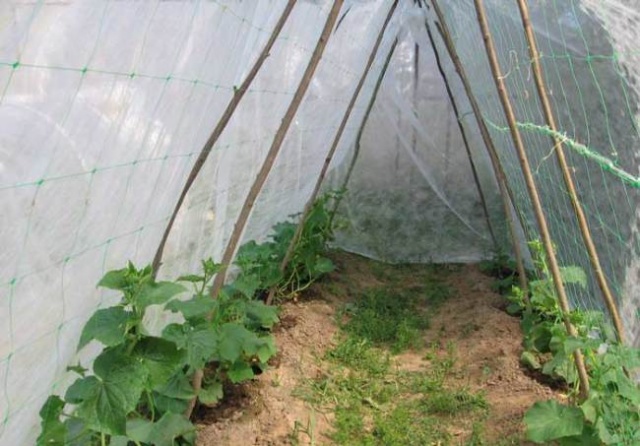
For cucumbers is a separate greenhouse, taking into account their height. It is recommended to make it in an unusual form - in the form of a hut. To the box is fixed at one end with a beam of 1.7 meters in size, with a section of 50x50 mm. Each part is mounted under a slope so that the bars eventually come together on both sides converged at a sharp angle above the middle of the box. The supports are fastened with transverse planks. The frame is covered with a film and fixed it. You can strengthen its position with thin strips. In the hut itself, the garden net for growing and weaving cucumbers is stretched.
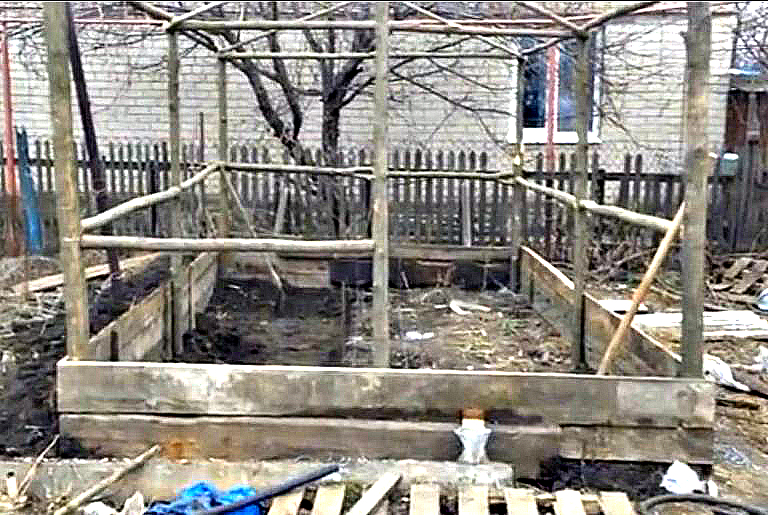
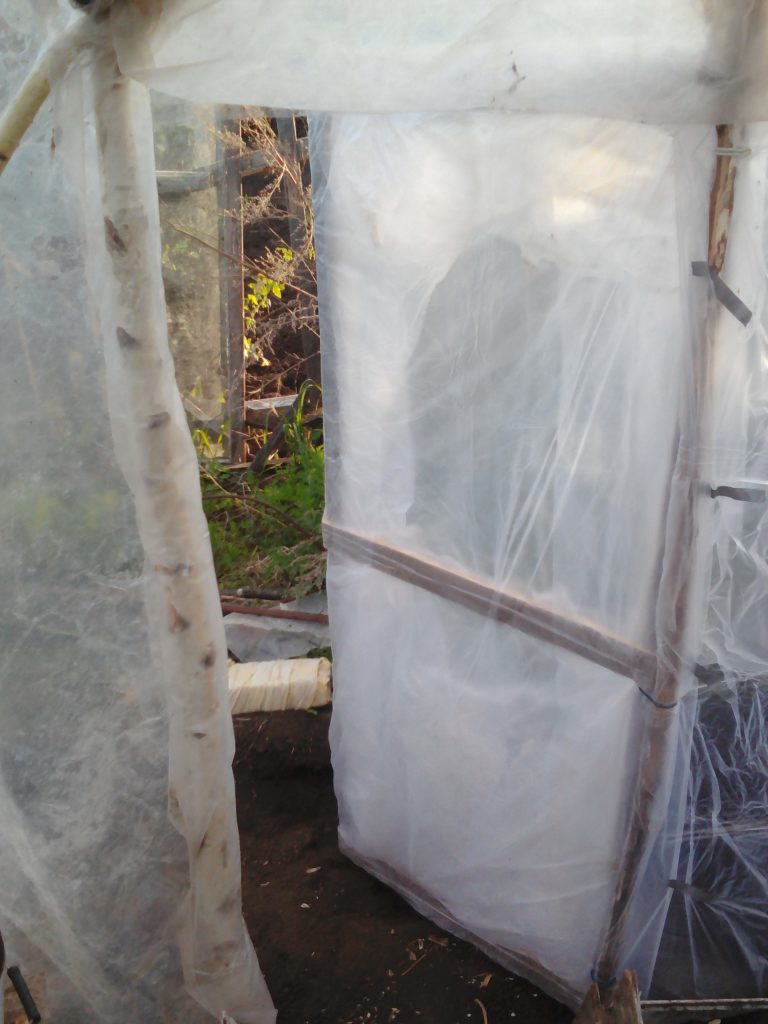
You can build a greenhouse using ordinary branches and store packaging film. Trees are better to pick thick, not less than 5-6 cm in the cut, so that they cope with the challenge of strength. By itself, the film is well breathable, it must be wound in several layers. To do this, it will be necessary to prepare a manual holder to simplify the task of working with the material. Enough two big rolls. The film will well protect plantations during light frosts.For the construction of the construction, 6 pillars with a height of 2.5 meters, 3 meters by 3 meters and 2 meters by 6 meters are required.
The bottom of the greenhouse must be protected by boards from animals.
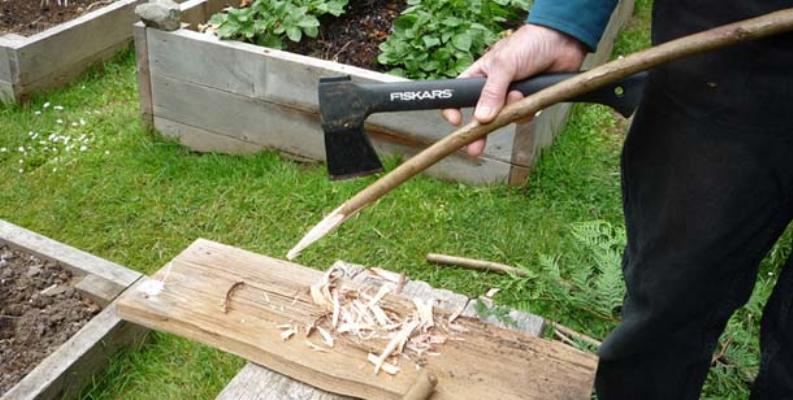
The branches need to be processed by removing the bark, processed to smoothness or wrap tape. This is important because during winding the film may break on the roughness.

The framework is under construction according to the scheme. Winding the film around it is not necessary to leave space under the door and window. This is done later. The best way to winding at least three times. The roof is covered with a thicker film. Joints are closed with scotch tape. Along the contour of the future greenhouse will require additional fixation in the form of a slat. The film is mounted on the frame with the help of construction brackets. It is recommended to use rubber tubing as a gasket. Then a door and a window are cut. Their shape will be held by the remaining branches. The slice and the threshold must be further processed, strengthening the film. The door can be insulated with foam tape.

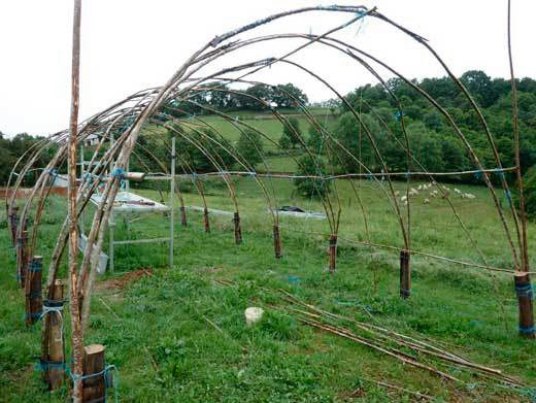
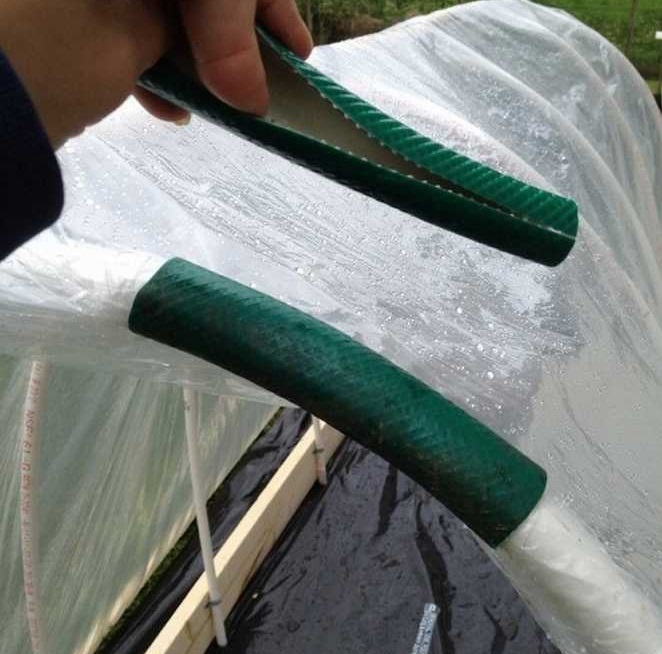
One more not difficult option can be made of a rod and a watering hose. For the manufacture of arcs you can use the branches of the vine. They should be about 10 mm thick. The length of the rods comes from the size of the width of the covering material.For example, if the width is 3 meters, then the vine should be exactly two times smaller. Prepared branches are cleaned of bark. The hose is cut into pieces of 20 cm each. The vine is inserted into the workpiece from two sides and thus a single greenhouse arch is obtained. After all the parts are assembled, the arched frame is assembled. After stretching the covering material, you can do the next stage of garden work.
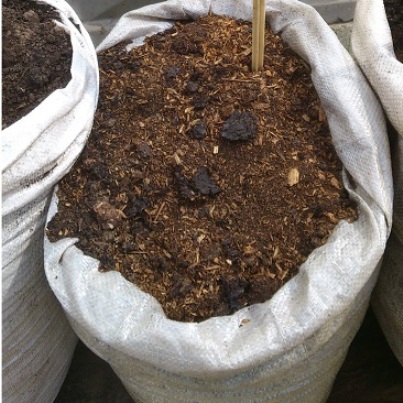
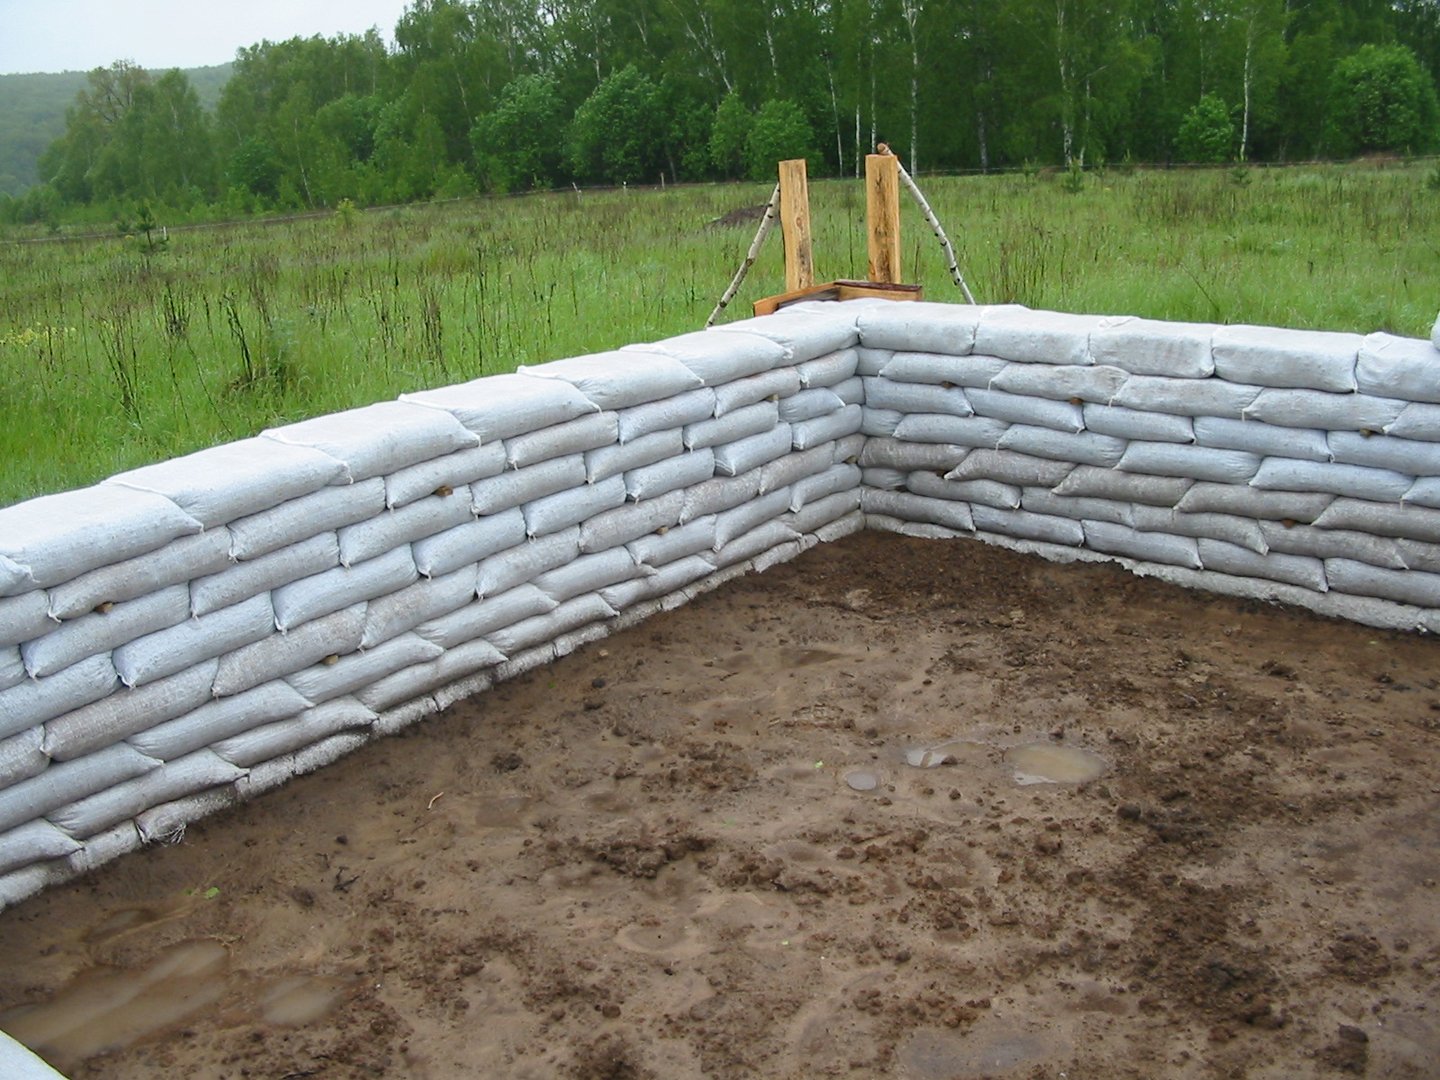
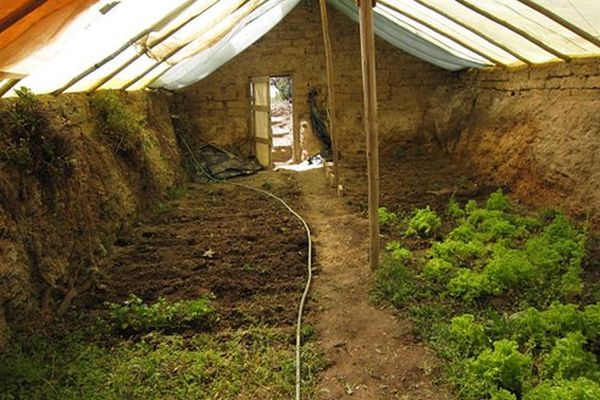
You can return to the forgotten method - making greenhouses from bags with the ground. It is considered the most environmentally friendly. Plastic bags are filled with moist soil and stacked on top of each other. A kind of buried structure is being built, in which the wall becomes thinner closer to the top. As a foundation used bags of gravel. The walls must be plastered, the door and windows are made. The roof should be transparent, polycarbonate is recommended. Such a greenhouse will stand for several years. But it will require a lot of labor during its construction.

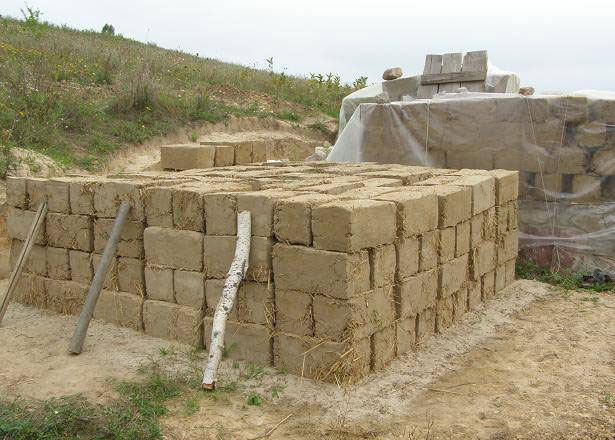
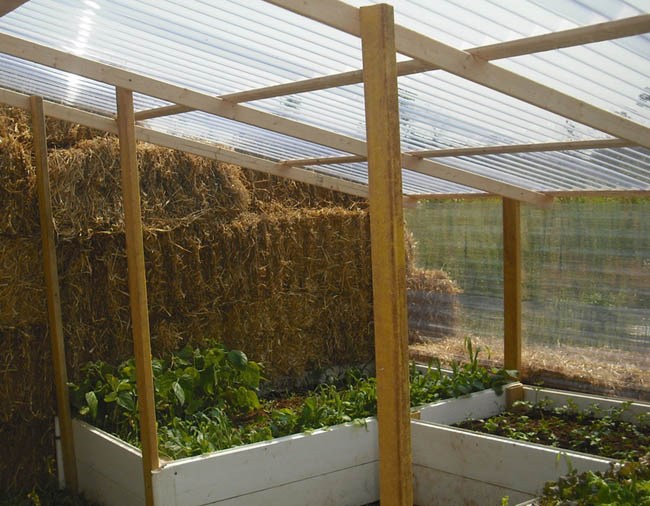
Another eco-friendly option of greenhouse from straw blocks. Straw keeps warm well. The blocks are placed on each other and fastened with reinforcement rods. Transparent ceiling will give the necessary light for plants.A greenhouse can serve for many years, but for this it is necessary to make a foundation. It can be wooden trim from uneven bars.
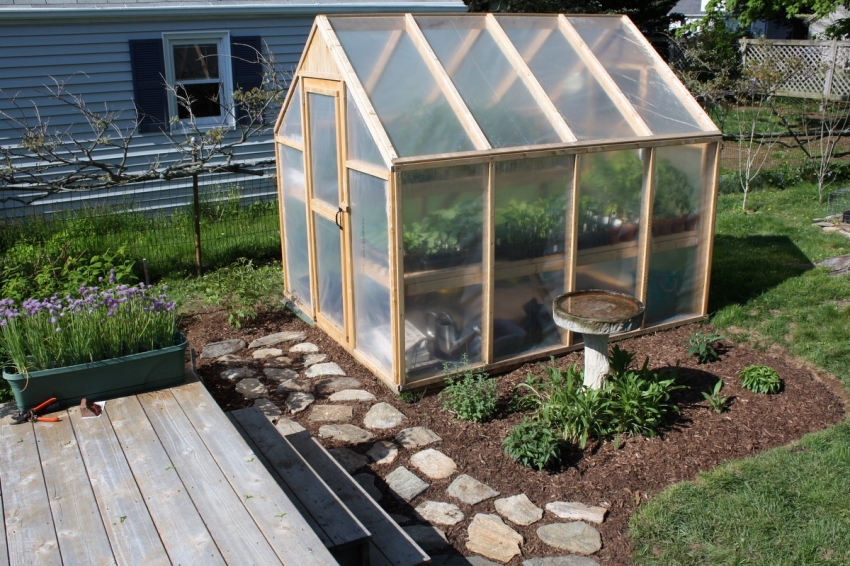
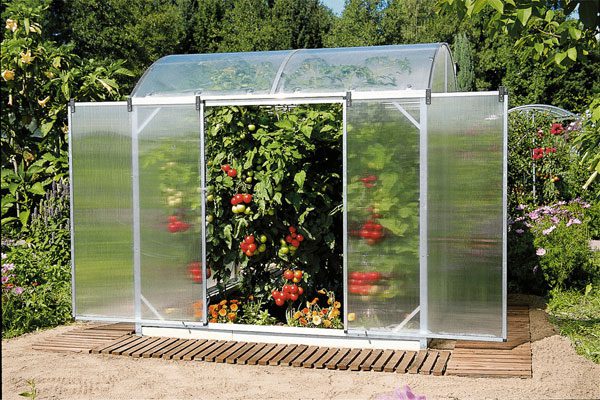
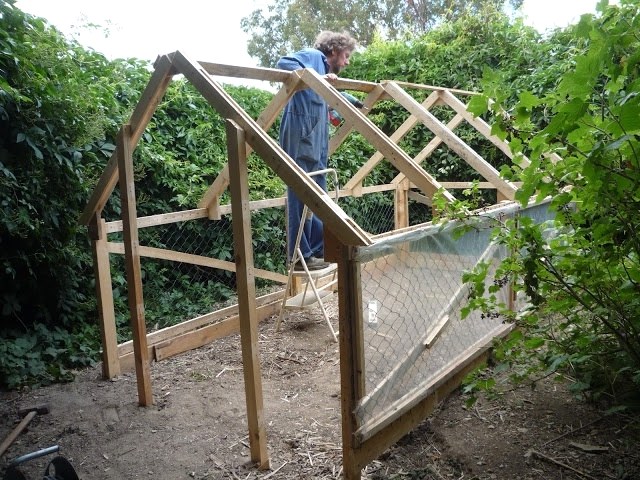
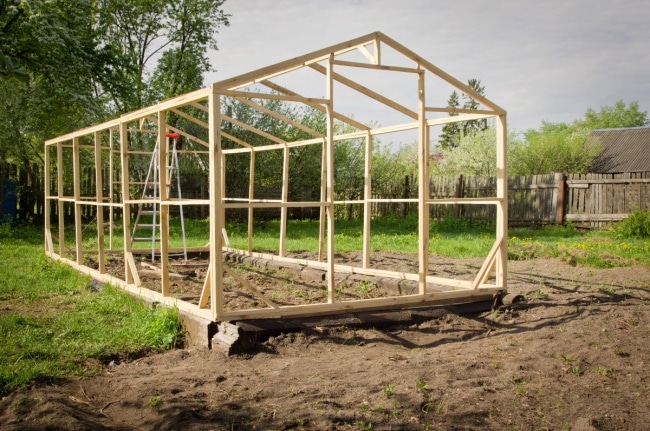
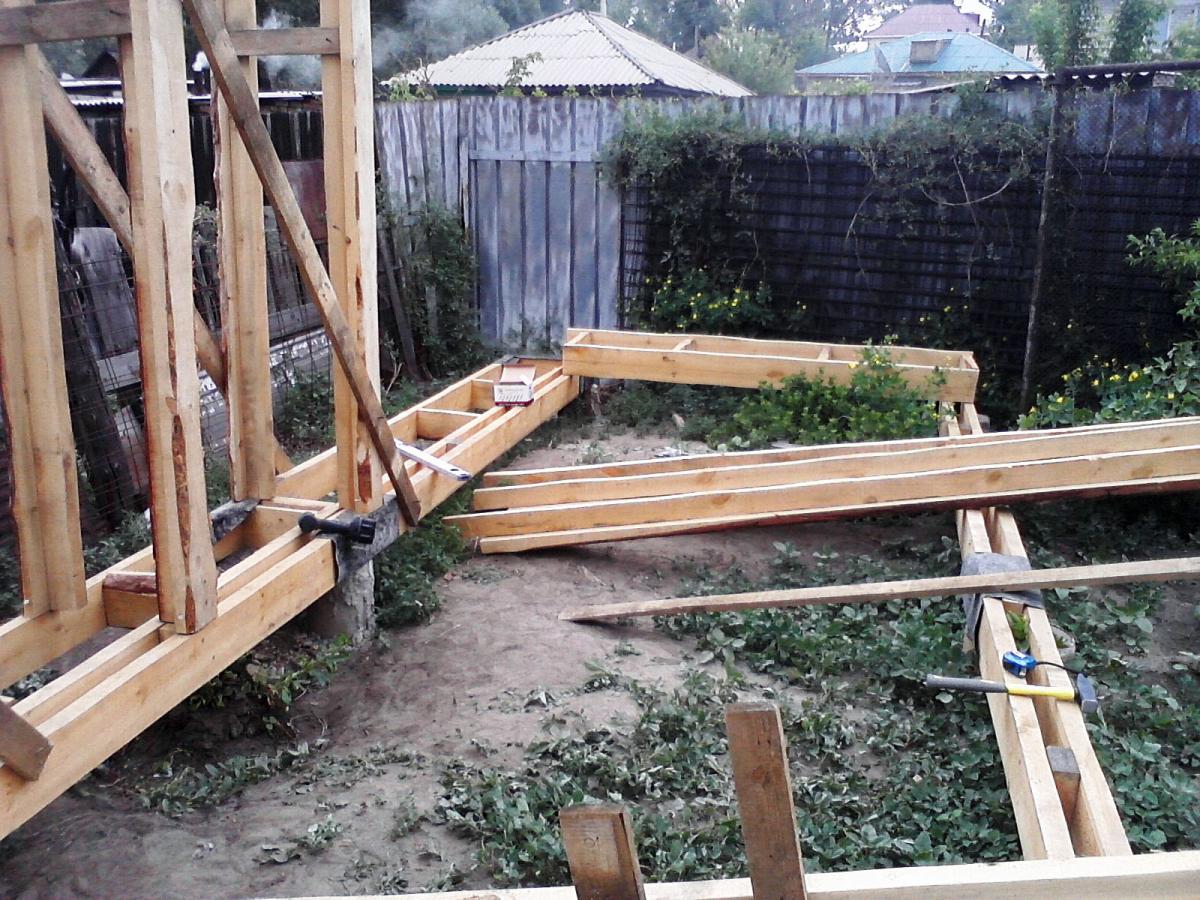
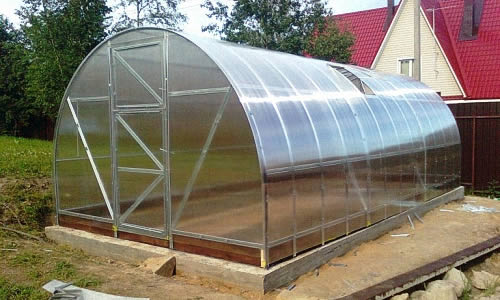
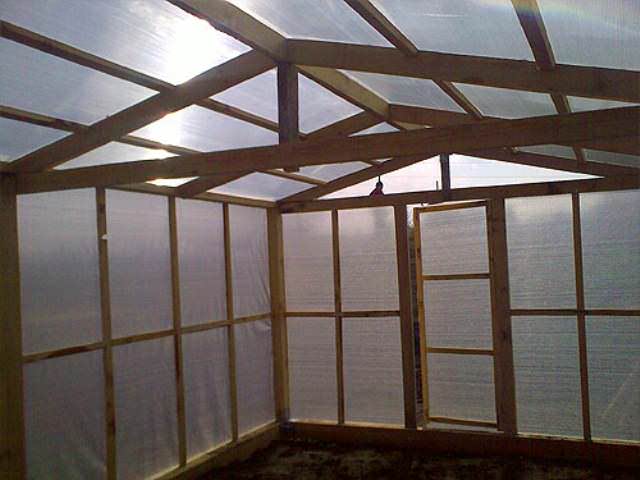
A greenhouse on a wooden frame looks quite interesting. This is a whole construction of glass or polycarbonate with a single-pitch roof. Most often located next to the wall of the house. For the manufacture of the wall greenhouse will need a bar for the box, a bar for the frame, materials, tools, tape, tape measure.
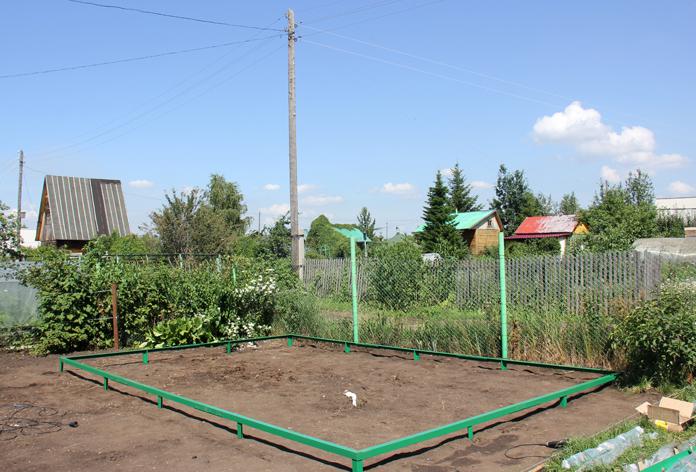
To begin with, the location is determined, the soil is prepared, the size is calculated, a drawing is made.
Work begins with the assembly of the frame. The frame is made, which will become an additional box - the base. The bar is fastened with screws. Then put the corner posts. In size, they must match the size of the greenhouse. Usually, the upper slope reaches one meter, the lower one is two times smaller. Then comes the mounting of the upper frame. For mounting covering material installed intermediate rack.
Be sure all wood is covered with a protective agent against parasites.

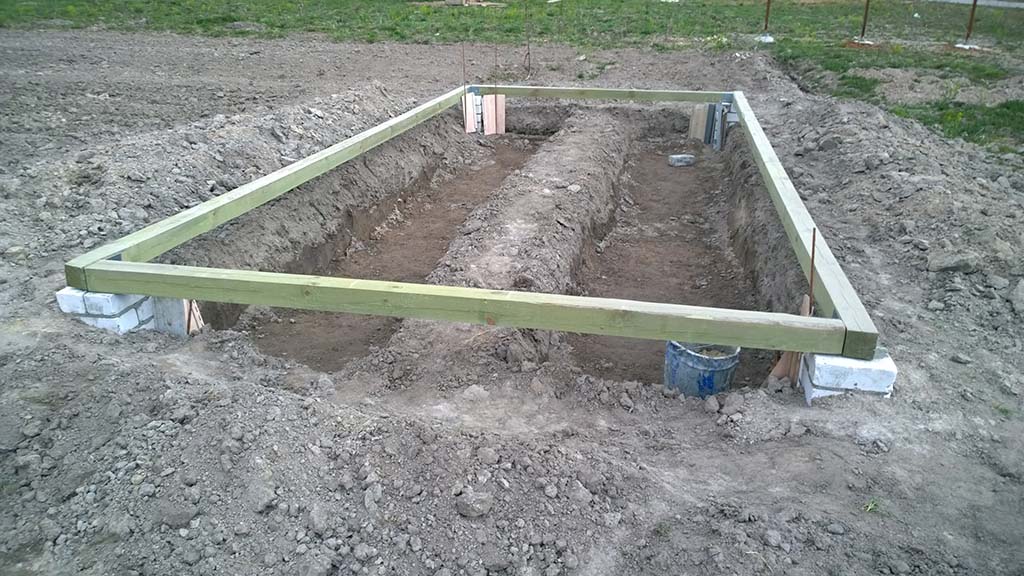
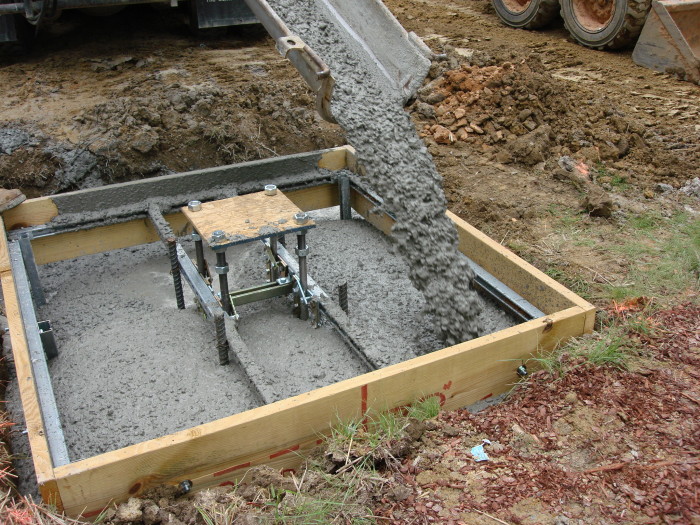
Another important step is to make a foundation of concrete or brick. But allowed a wooden box. It is mounted as well as for the arched greenhouse.It needs to be treated with stain, varnish - so it will last much longer.
The base is located on the bed and a frame is installed on it, which is attached with screws and corners.
Polycarbonate walls must be cut to the desired size. The ends are closed with tape and fastened to the frame with screws.
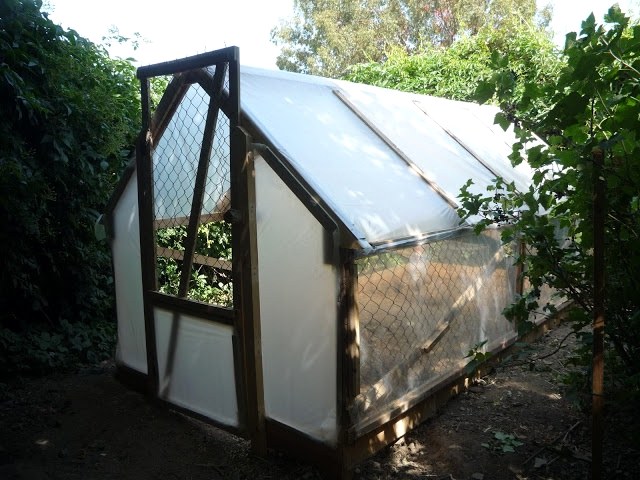
Fastening the covering material is another next step to the result. Reinforced film is recommended. It will be mounted on the top ramp beam. Coverage is measured with a margin on both sides to each side, front and rear. This is done in order to have access at any time to the contents of the greenhouse. The lower part is fixed between two thin bars, which will now be convenient to wrap when opened into a roll.
On the Internet there are many videos with detailed assembly of any kind of greenhouse. After a master class specialist to collect this will turn out at any.

How to make a greenhouse with your own hands, see the next video.


