Subtleties installation rack ceiling
The variety of materials for finishing ceilings is great in the modern market. They differ significantly among themselves by features, advantages and disadvantages, price. You can choose the most budget option for finishing work: whitewash, glue with foam plastic or, conversely, spend a considerable amount on fashionable 3D compositions. This article describes the original way to finish the ceiling - rack.


Special features
The appearance of slatted ceilings is designated quite recently, but they have already won the love of many Russians. The explanation for this is their high strength, simple operation, durability, which makes the installation of ceilings accessible to all.

The advantages of slatted ceilings include:
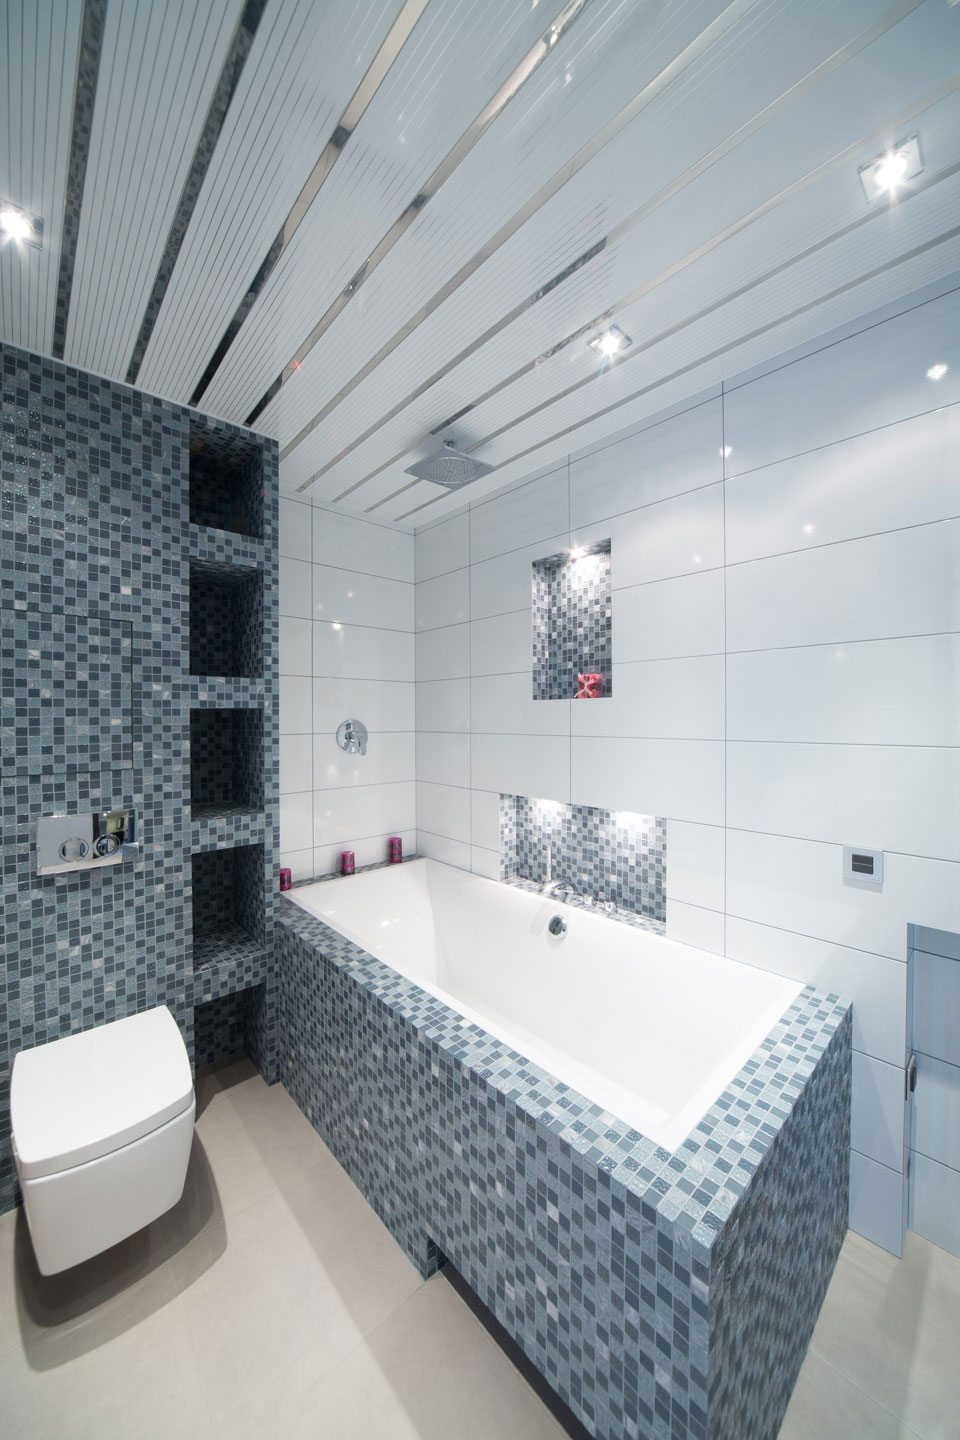
- moisture resistance that allows you to install them in the bathroom, bath, laundry, kitchen, where often there is high humidity;
- due to the use of non-combustible materials as a coating, ceilings are protected from fire;
- Saving electrical energy: since the surface layer of slatted ceilings reflects light, therefore, it is possible to use lighting of lower power;
- environmentally friendly materials, therefore no hazardous substances are released into the environment;
- simple care for ceilings. For cleaning, wiping with a damp cloth is sufficient;
- the strength of the materials used, so that they are suitable for outdoor applications;
- ease of installation;
- aesthetic ceilings;
- durability - the lifetime is up to 50 years, and the warranty period is only 20 years;
- it is possible to replace damaged areas without dismantling support parts;
- false ceiling looks attractive and stylish.
It should be noted that the rack structure is a suspended structure. This makes it possible to level the surface of the ceiling without the use of special compositions, for example, plaster.
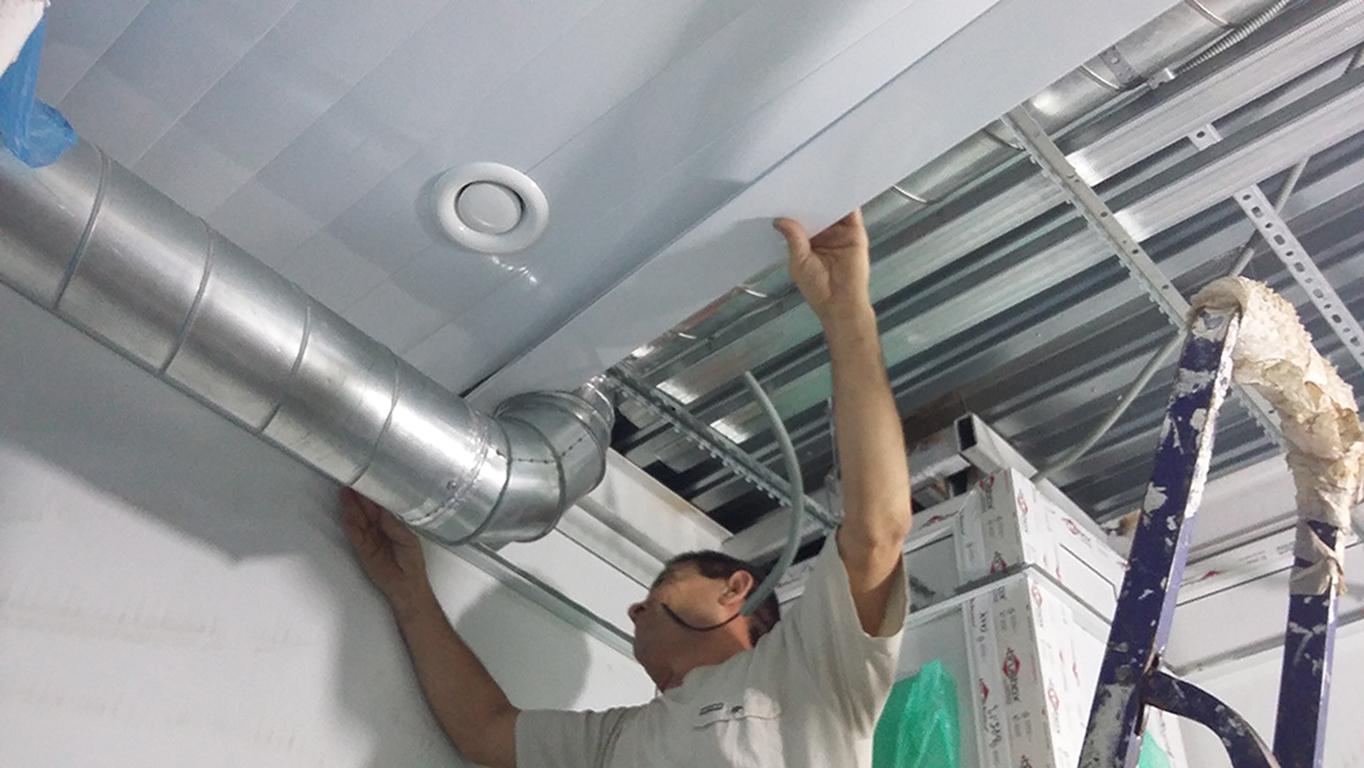
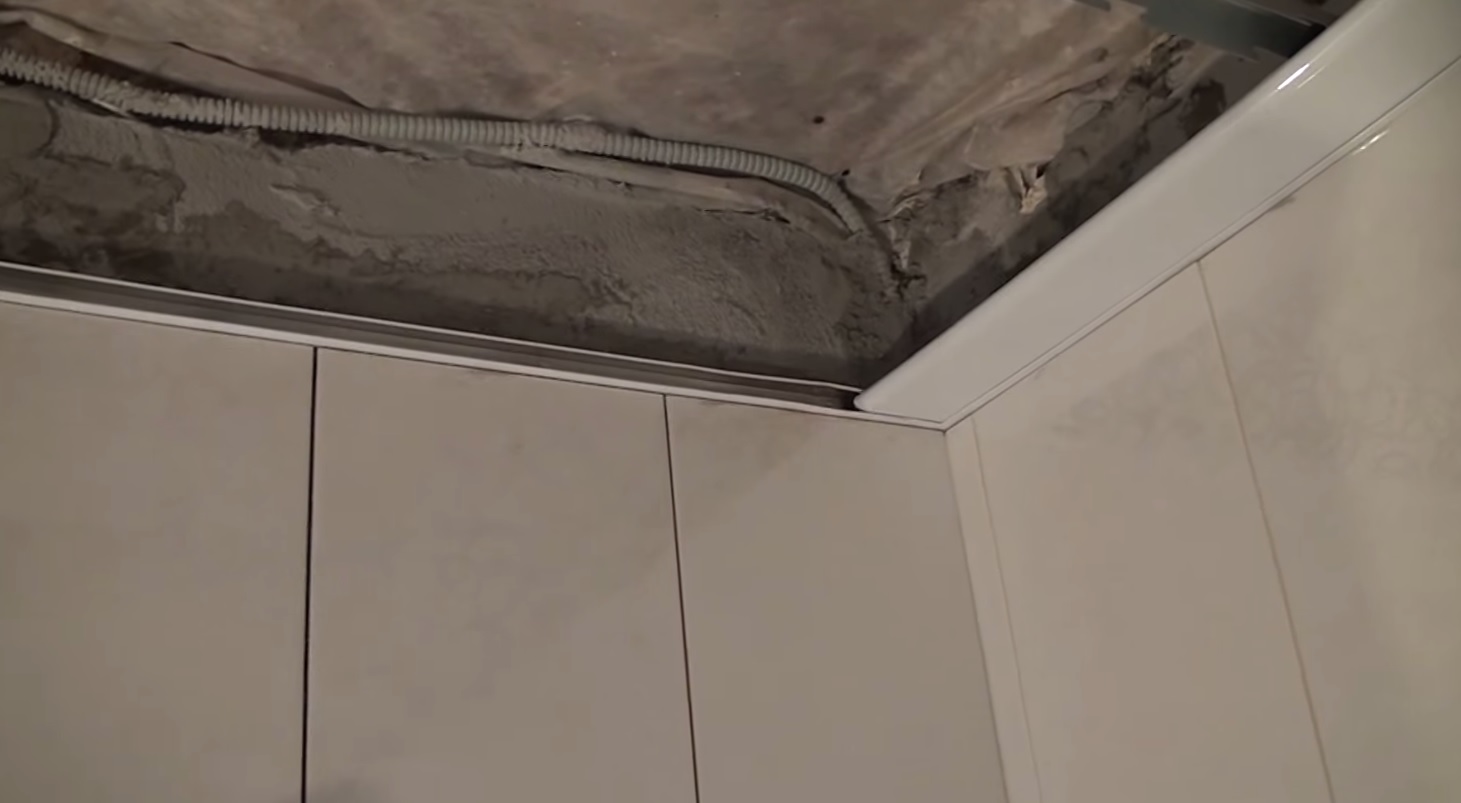
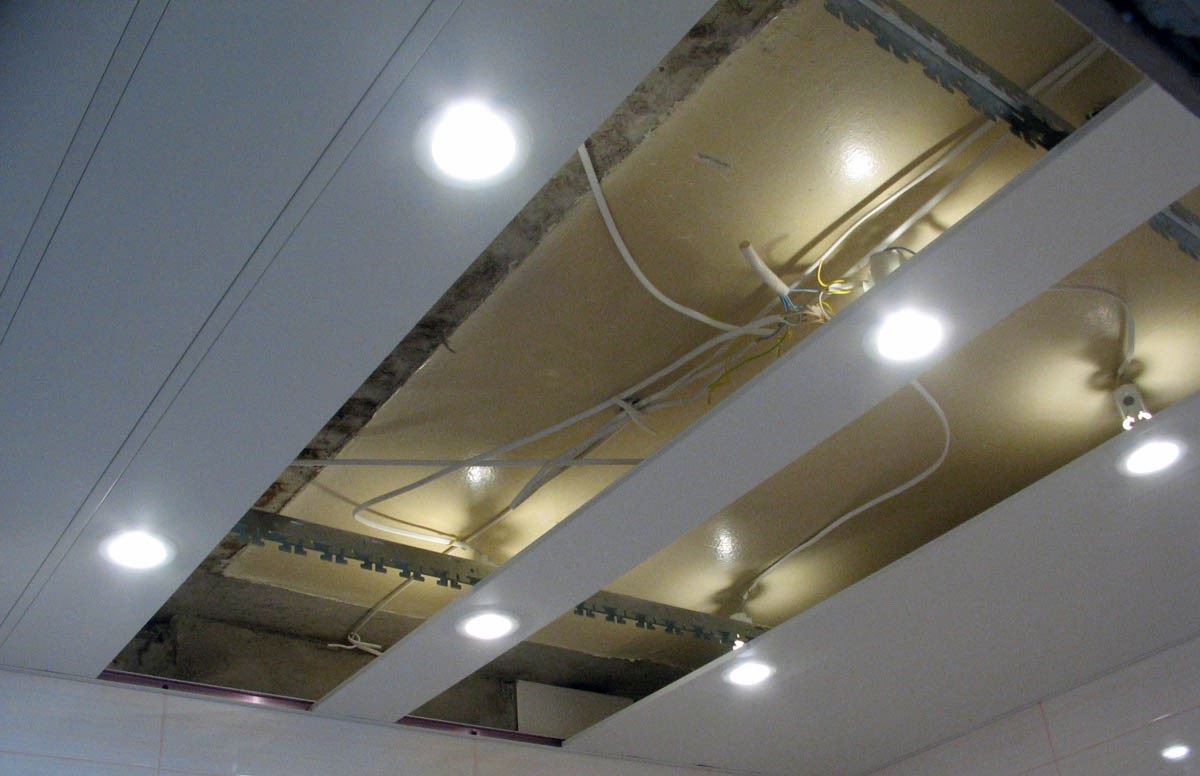
Also under such a ceiling you can easily hide the home wires, and this is an important moment.
There are practically no drawbacks in rack structures. These include only the fact that repairs are not done in a very practical way. If one panel fails during operation, then the entire coating will have to be disassembled to replace the defect. Another disadvantage: when installing a slaty suspended structure in any room, its height will slightly decrease. This is an inconsequential minus, if you do not place any engineering devices under the structure.
Device design
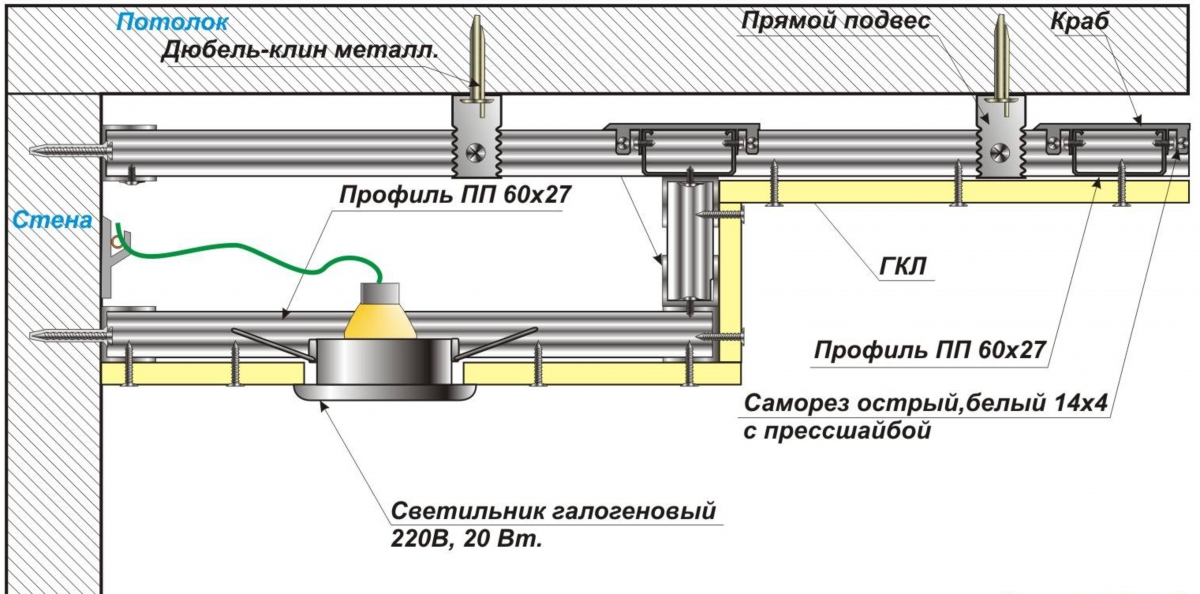
The design of a suspended aluminum ceiling allows you to securely fix the device and fix it on the ceiling tiles.
The ceiling consists of the following main components:
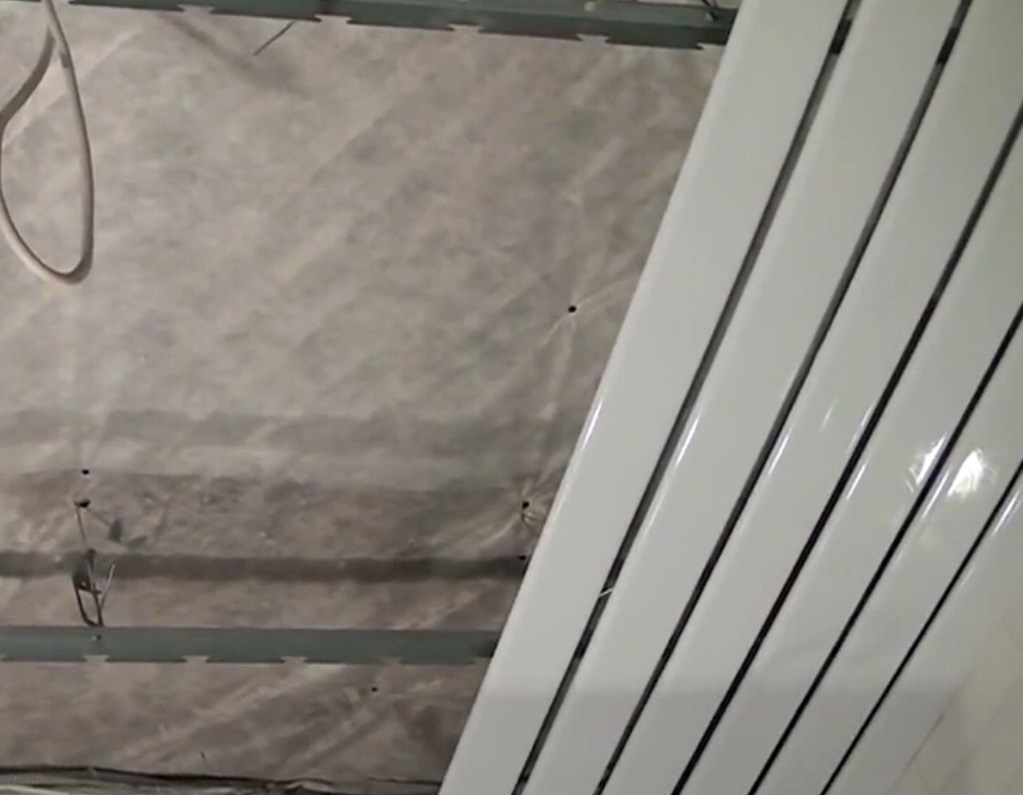
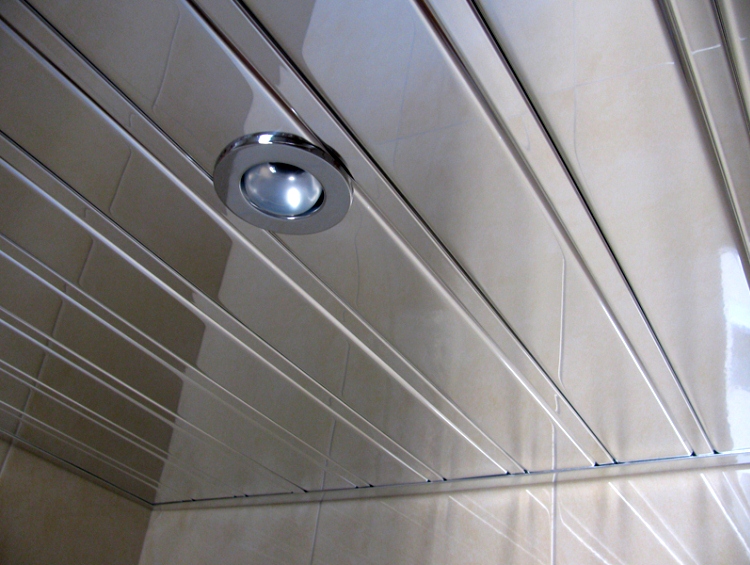
- Metal alloy rail is a front surface finish. The springy design of the rails contributes to the formation of compounds that are durable and reliable;
- Comb (traverse, stringer) looks like a bent channel profile with teeth. Small elements of the strap pass through the groove, and the comb is attached to the suspension springs through the profile. It is made of aluminum and steel, 1.5 mm thick;


- Interstitial insert is used to seal the slats. It is chosen in tune with the rail or with a contrasting performance, thanks to which the possibility of applying design work during the design has appeared;
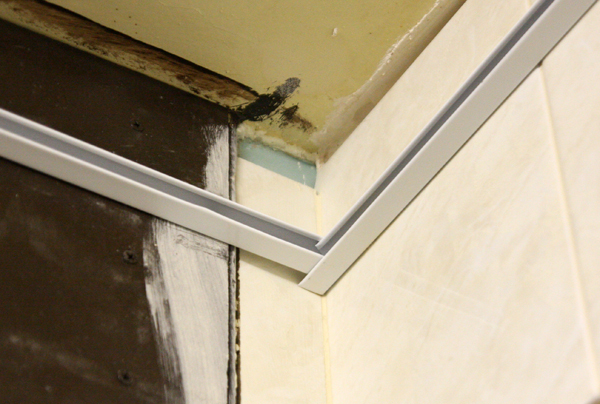
- Corner wooden profile is used to design the ceiling around the perimeter. In length, it is not always possible to precisely cut off the rail, and sometimes it is still possible to trim parts in width. To conceal irregularities and inaccuracies, decor is often used; it is fixed on the wall.

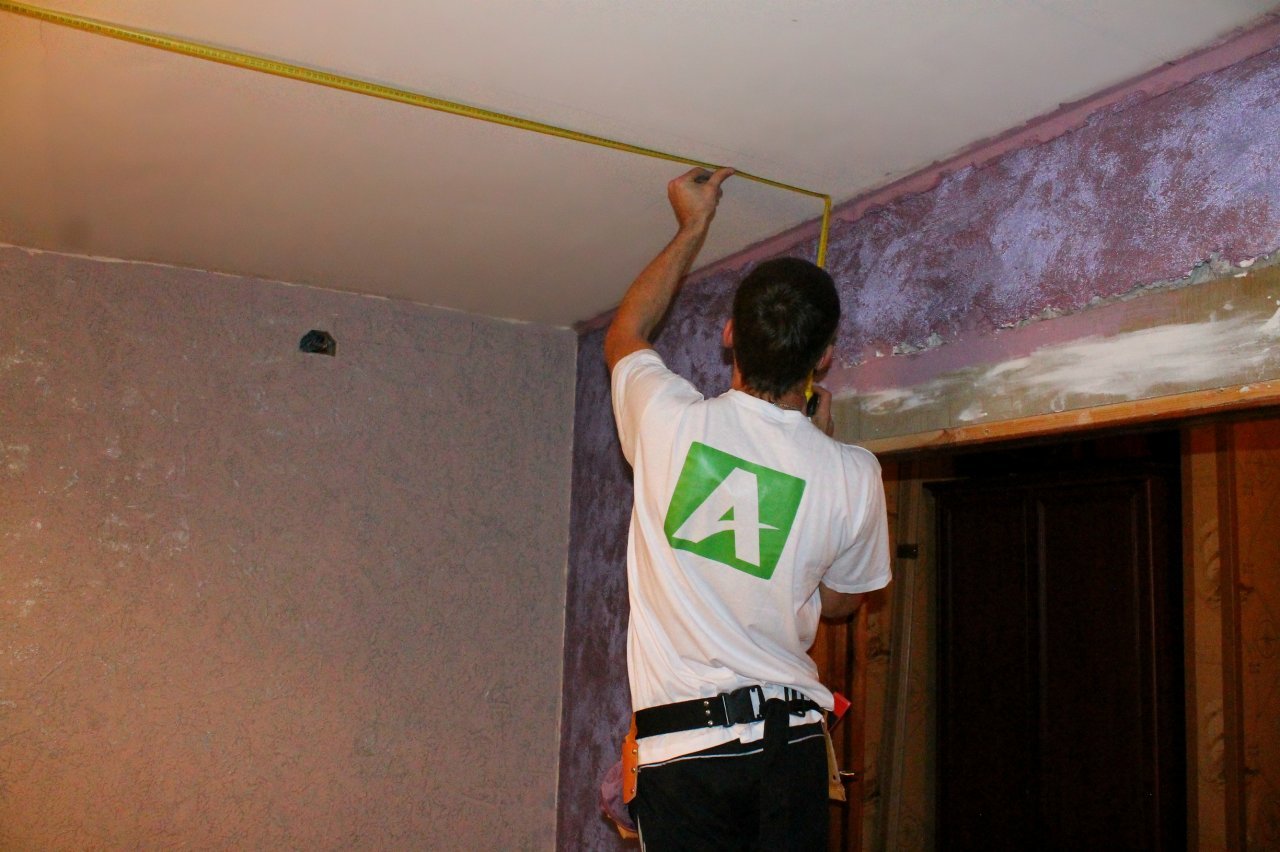
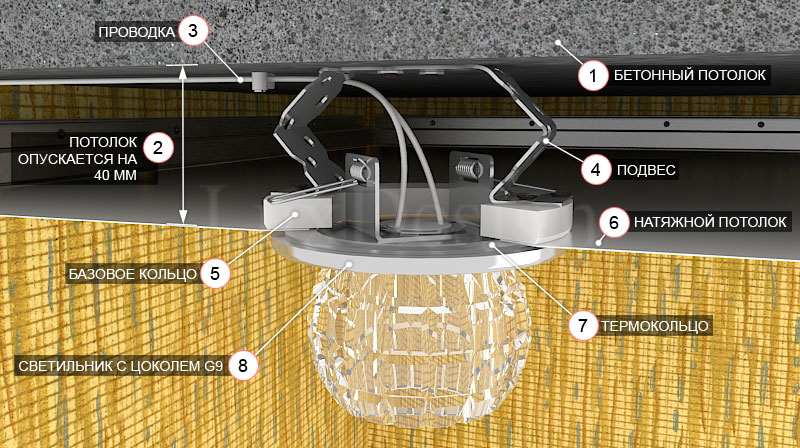
Proper installation includes drawing up the layout of the room and determining the type of lighting. Suspension installation directly depends on the height of the lighting device. Most often, the suspended surface is a couple of centimeters lower than the lighting fixtures used.
After drawing up the scheme, it is necessary to calculate the volume of materials for the installation of ceiling panels. Here the important role is played by the correct calculation of the length of each rail, with which the coating will be mounted. Usually manufacturers offer products of 3 and 4 meters. To cover the ceilings in a small room, a 3 m long rail is perfect. In this case, repair work will be performed with a minimum amount of waste.
For a room with a large perimeter, slats with a length of 4 m are used. By making a room plan in advance, you can determine the required number and length of parts.
The calculation of the suspended ceiling includes measuring the perimeter of the room, which corresponds to the entire length of the profile.


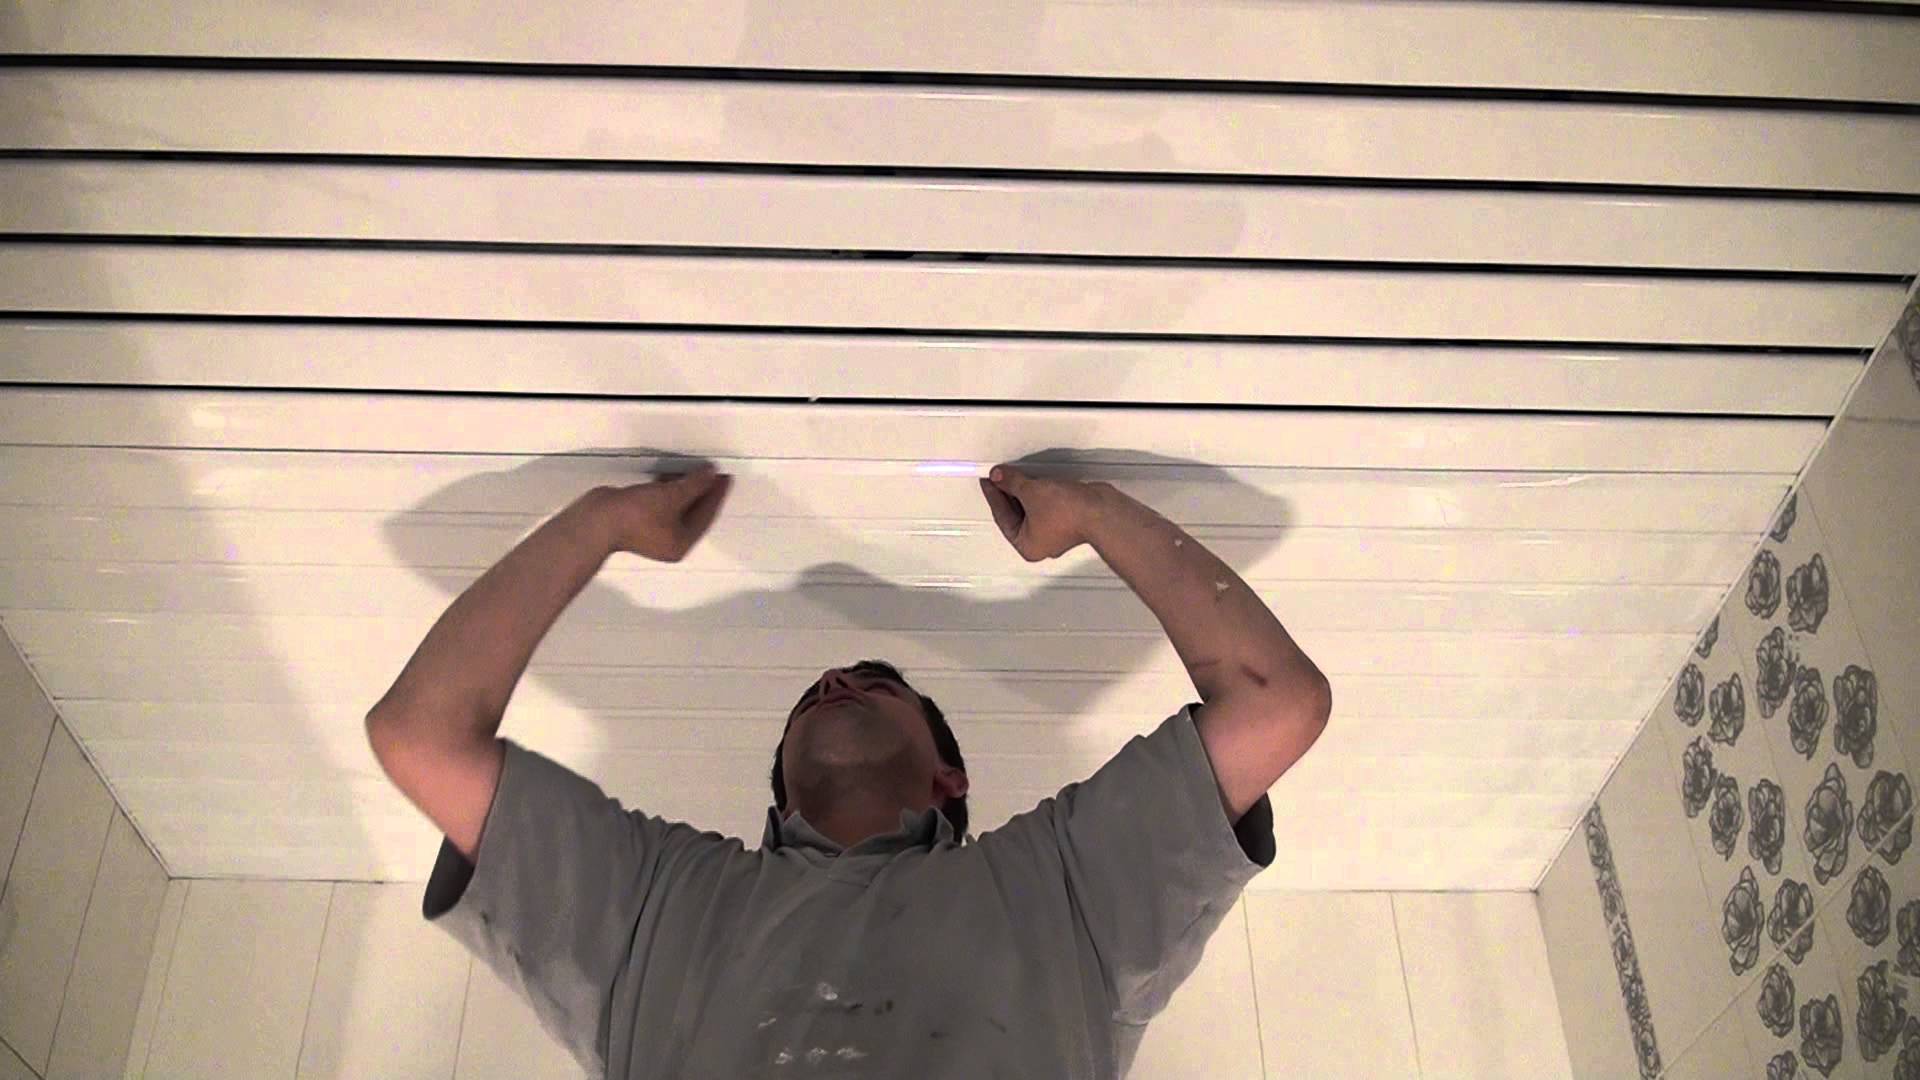
Step by Step Installation Guide
After all the calculations made and the purchase of necessary materials to install the ceiling should be armed:
- construction knife;
- a hammer;
- drill or perforator;
- screwdriver;
- pliers;
- level;
- scissors, hacksaw;
- a pencil;
- tape measure, square.
In addition, the necessary dowels, clothing, goggles and gloves.

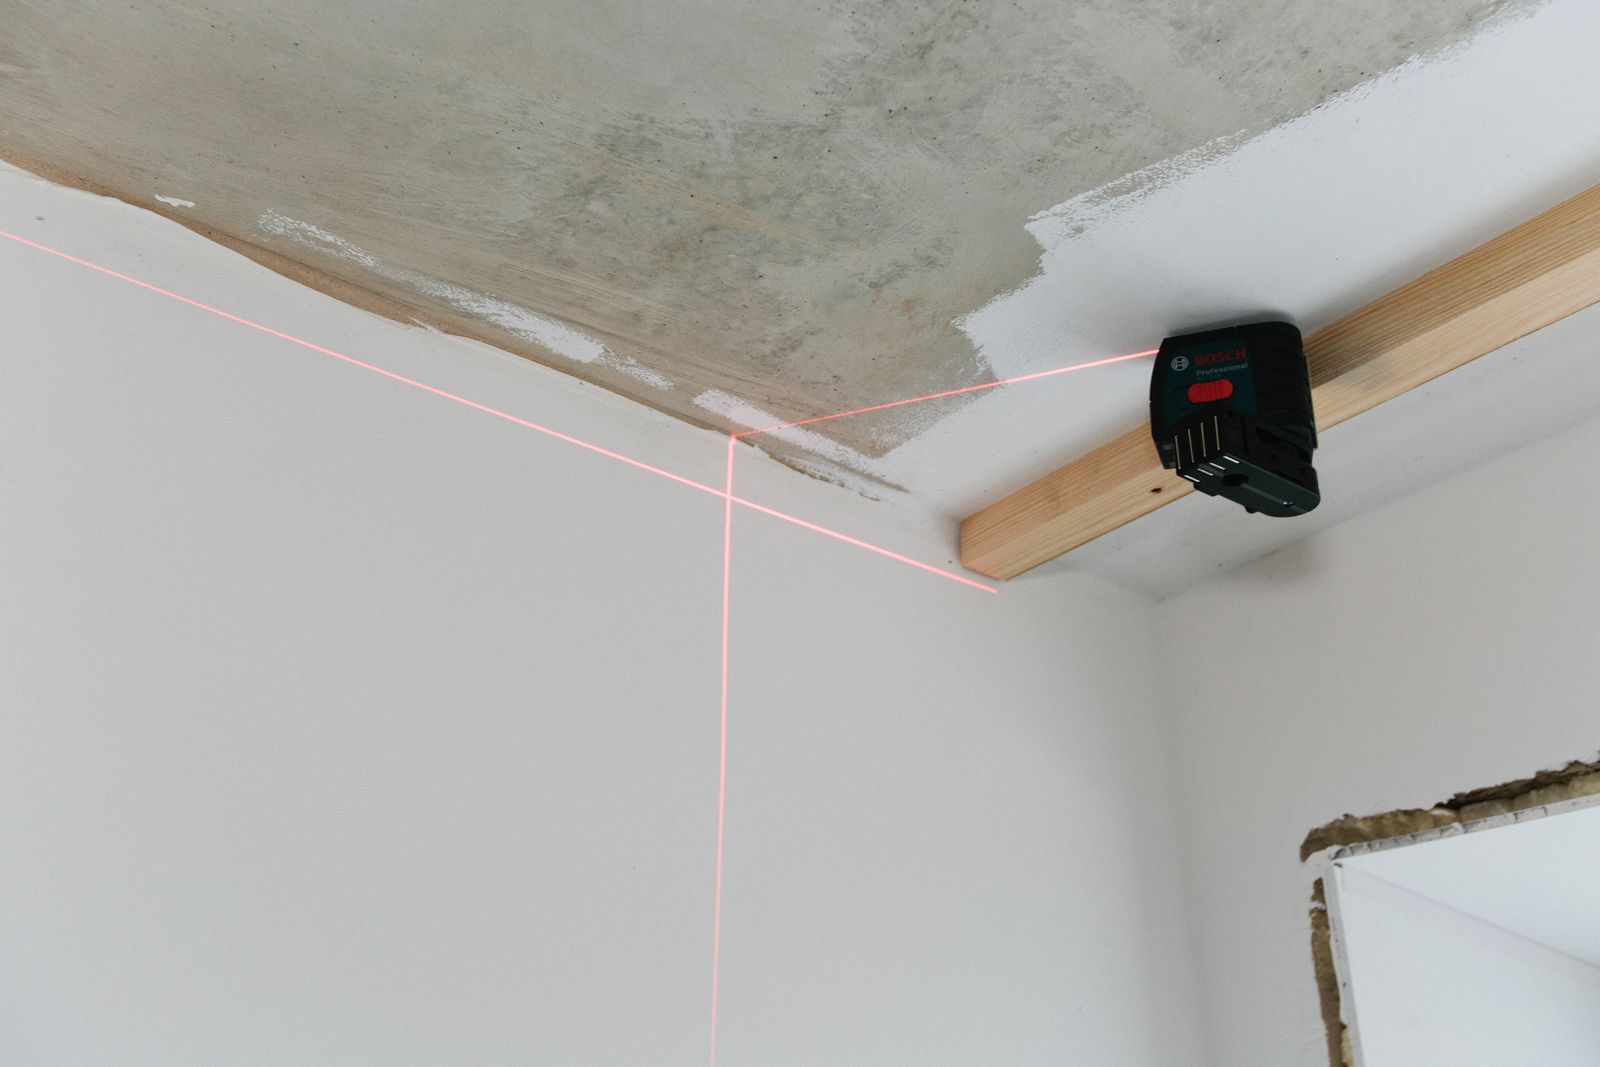
For mounting the rack with your own hands, you need to make a ceiling layout. To do this, just draw the perimeter for the profile surface. If the ceiling is horizontally, then it is necessary to mark the line horizontally. Here will be installed comb.
For the installation of complex multi-level structures calculations are performed more complicated. In this case, a laser level is used instead of a tape measure. The probability of making a mistake here is excluded.
Mounting technology:
- cut the metal parts into the necessary cuts;
- drill holes in the profile coating, if there are no ready holes on the profile for fixing the product.
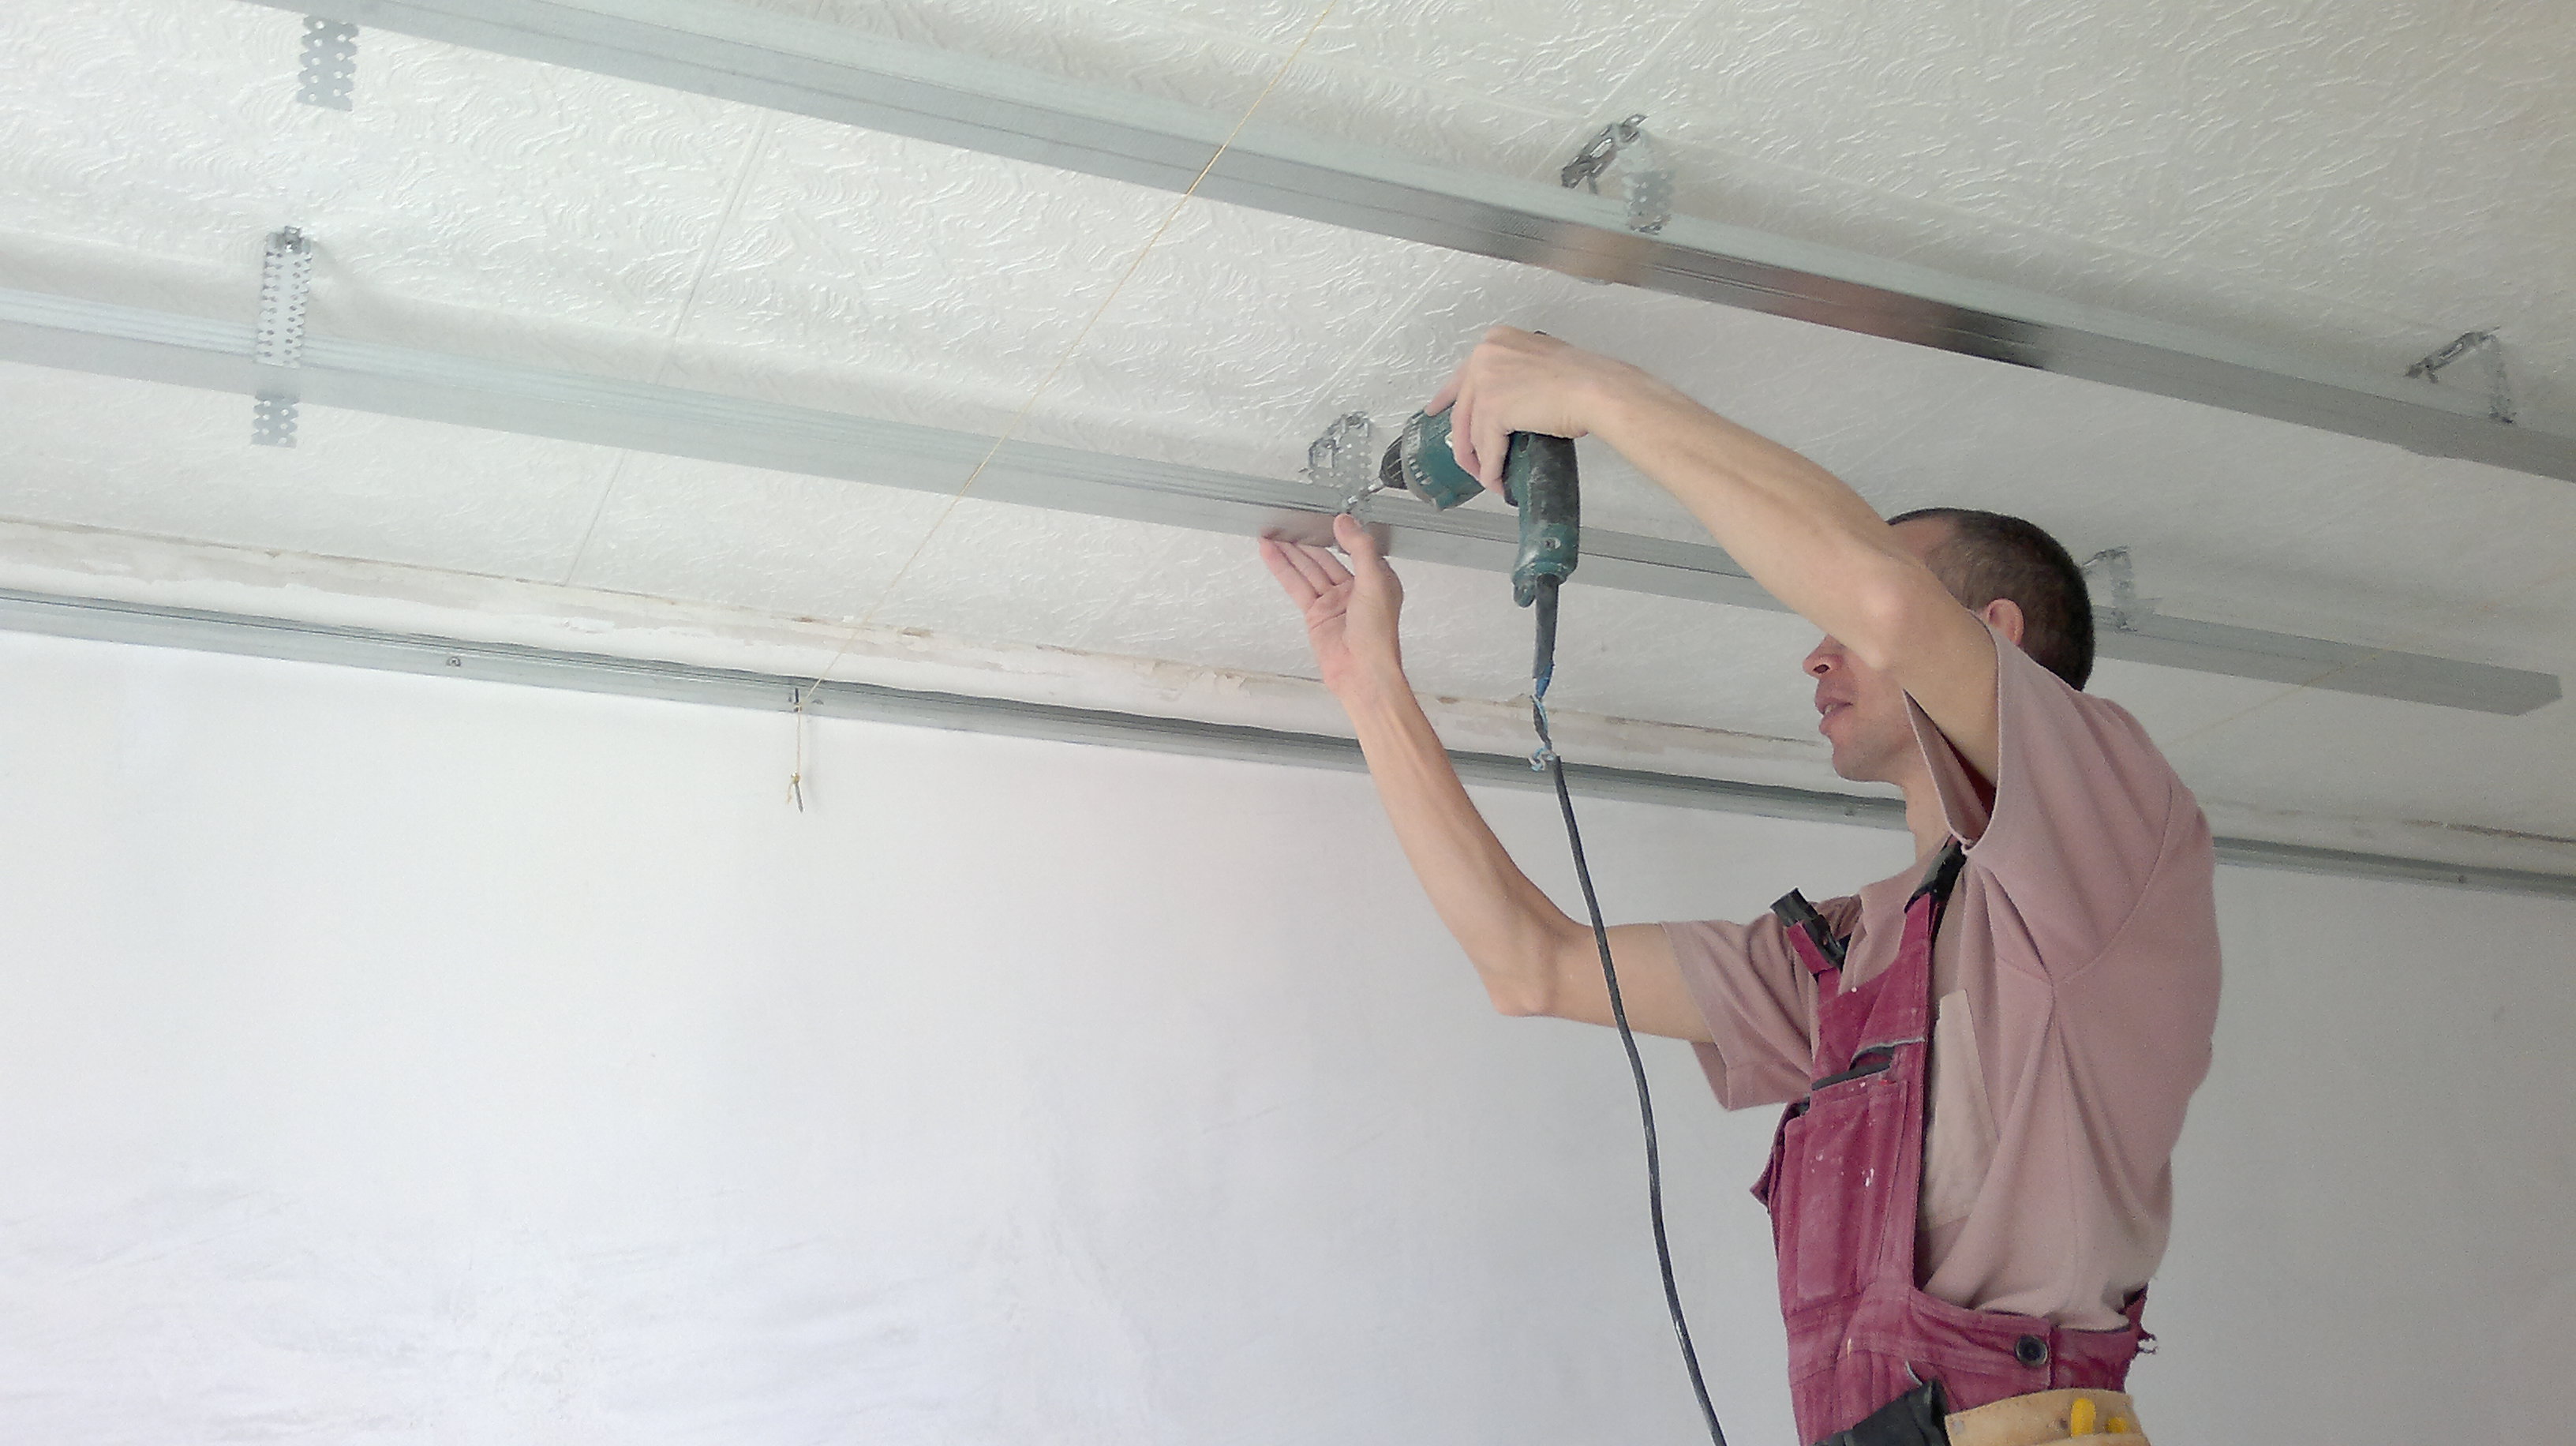
Fixing holes must also be made in the wall. For this useful drill, punch. Then fasten the screws at 45-degree angles for the outer corners and butt - on the inside.
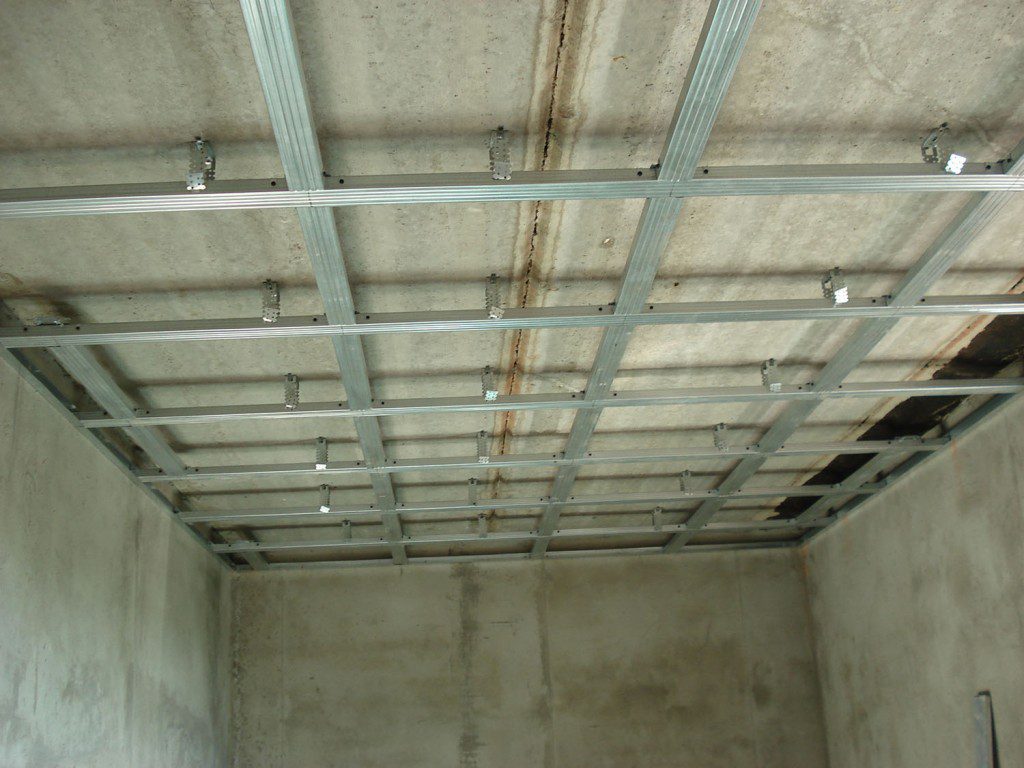
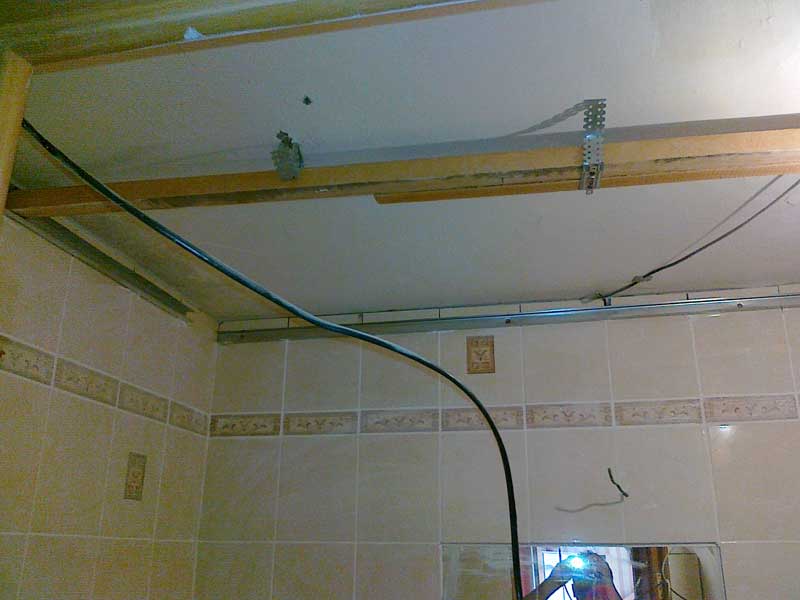
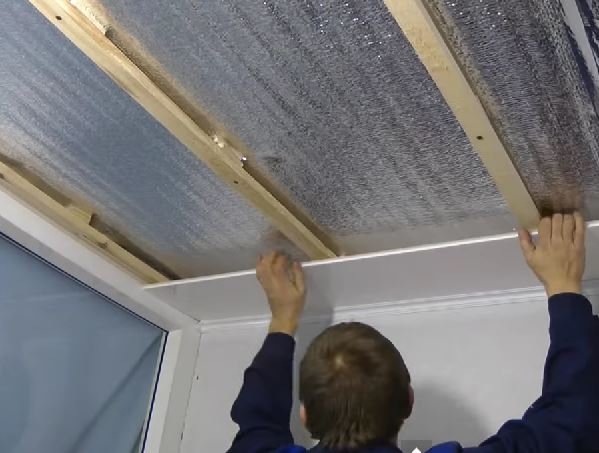
Guides are installed on the surface of the wall, indicating the location of the future suspended structure. It should be lower by 20 cm from the old one. Lines must be horizontal; laser levels are used for this. Profiles will be mounted along these lines.

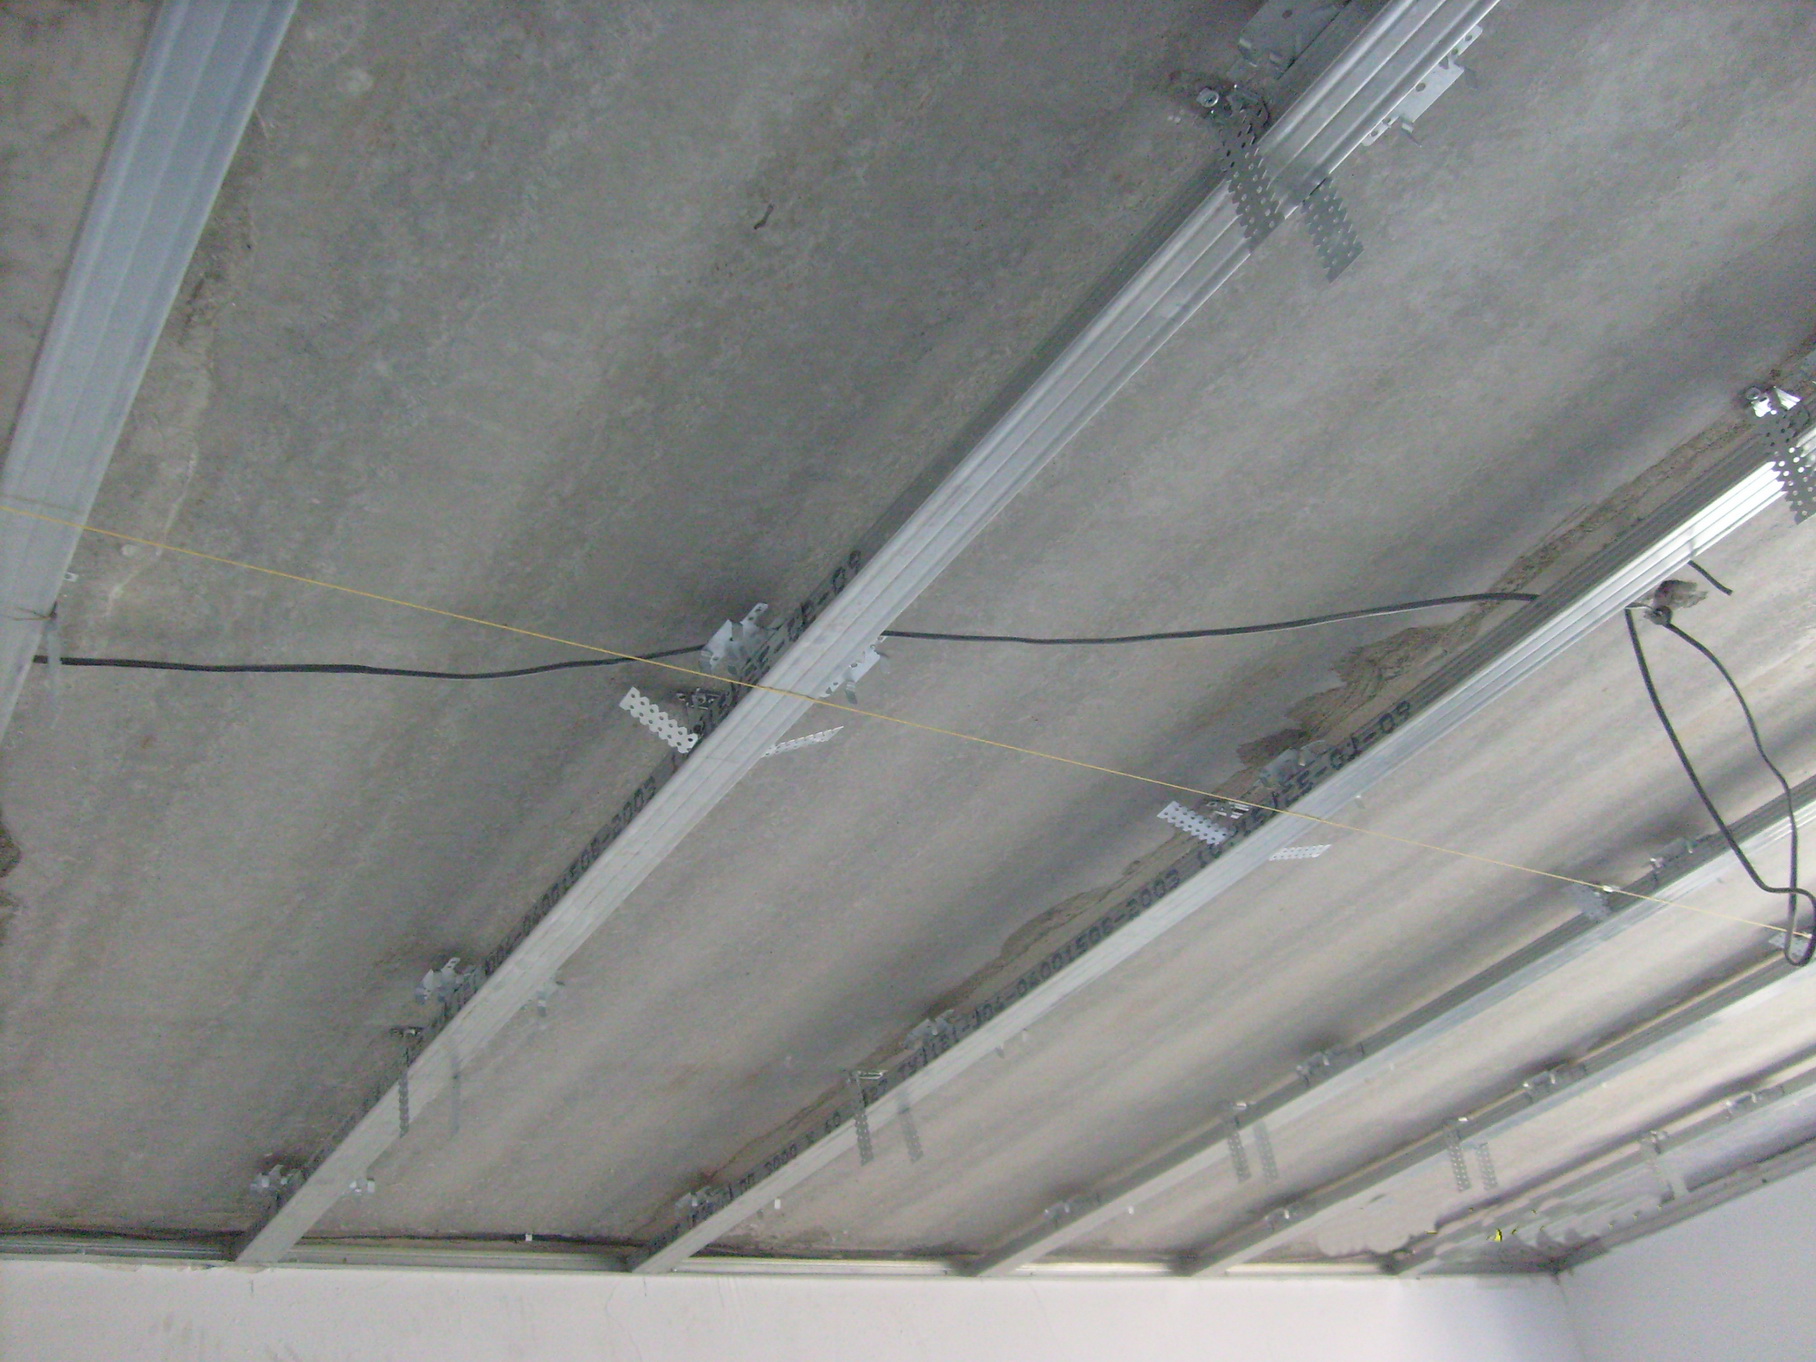
Install the suspension with dowels into the pre-drilled holes. In this case, be sure to check the correct location of the guide parts using the level. After that, you can start mounting panels. For this you need to consistently cut a certain size rail.
A tape measure should be noted areas of the bearing tires.
The first mark should be at a distance of 30 cm from the wall itself, and all the rest should be parallel to each other every 90 cm.
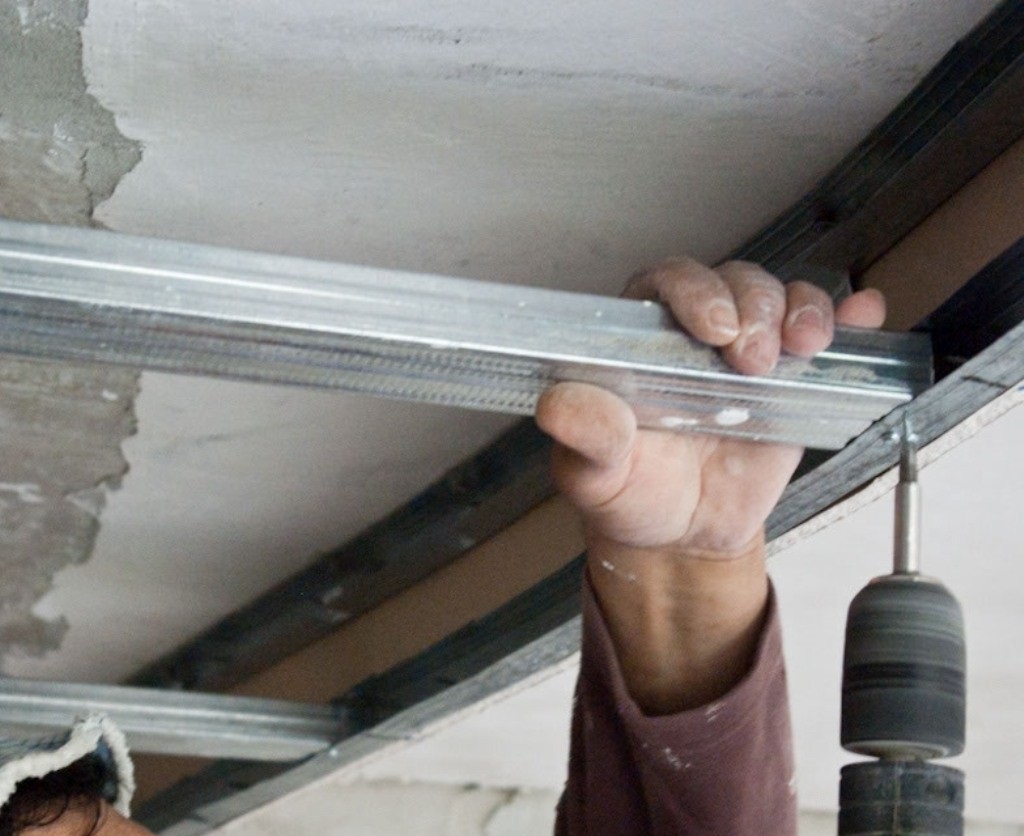
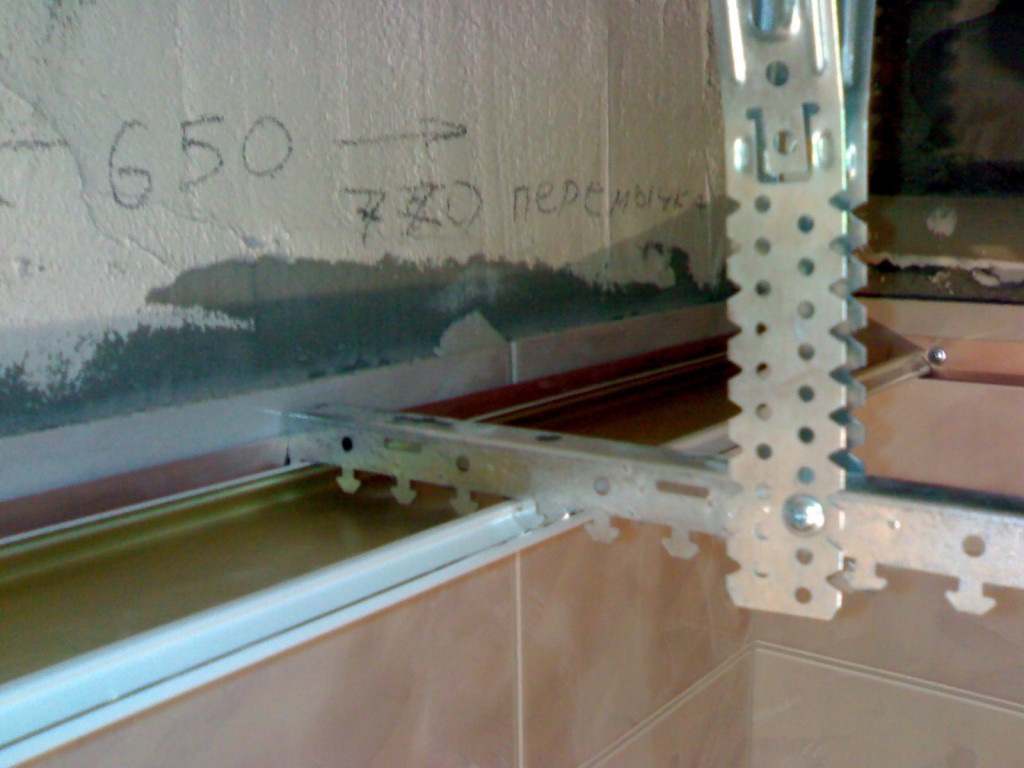
Tire mounting:
- the interval between them should not be more than 1 meter, and they are set at an angle of 90 degrees to the rail;
- using a screwdriver tires must be screwed to the suspension.For the perfect evenness of the design should try not to allow the slightest error;
- the corner profile and the tire must be at a distance of 10 mm. In that case, if the tire is shorter than the specified value, you can simply add, securing the suspension in the subsequent tire.
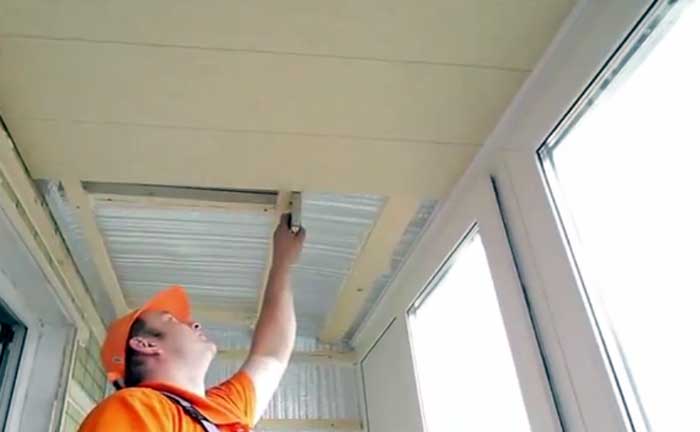
At the beginning of work, a protective film is removed from each rail and cut off depending on the size of the ceiling. The length should be 10 mm less than the distance between the walls.
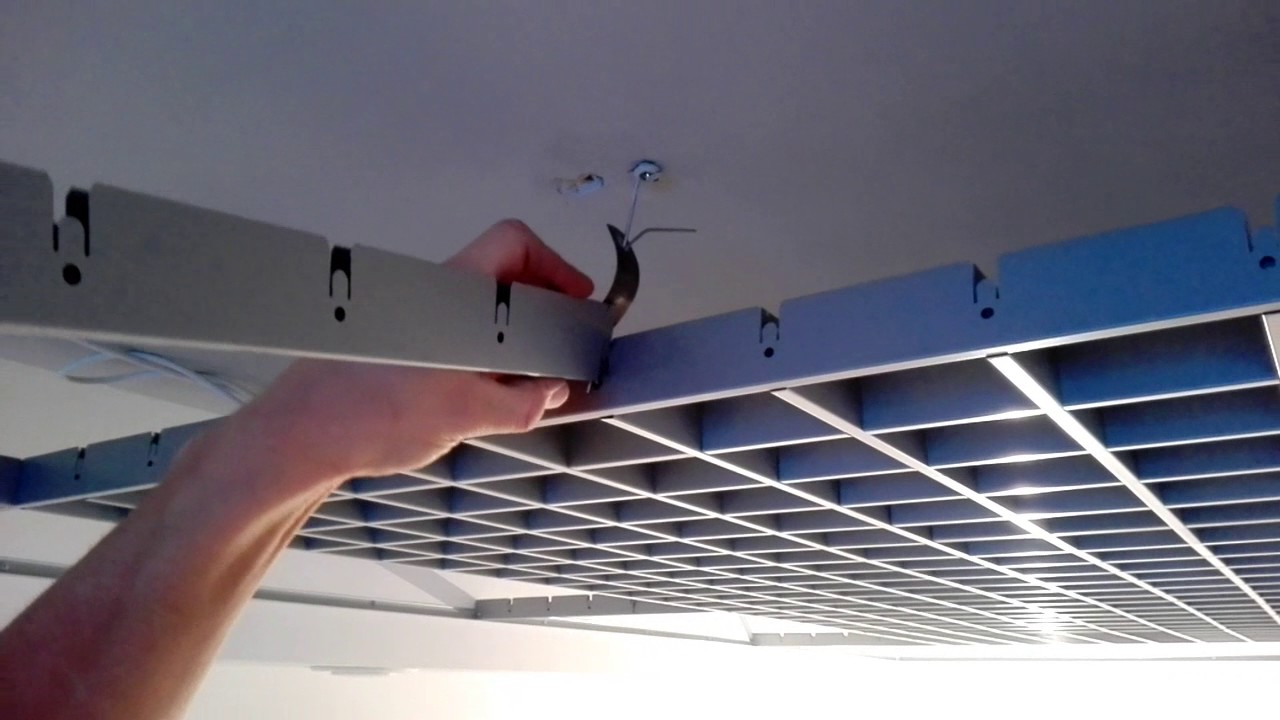
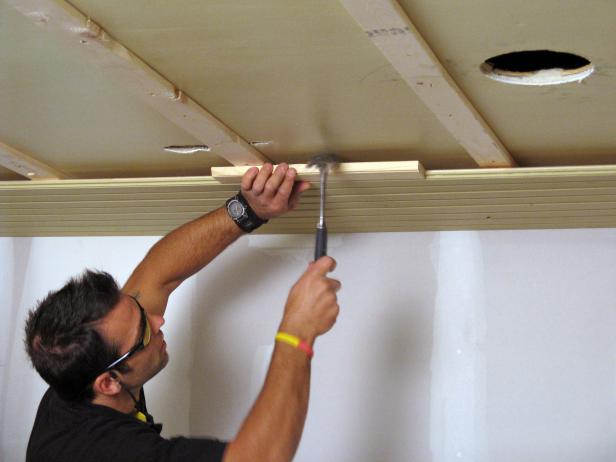
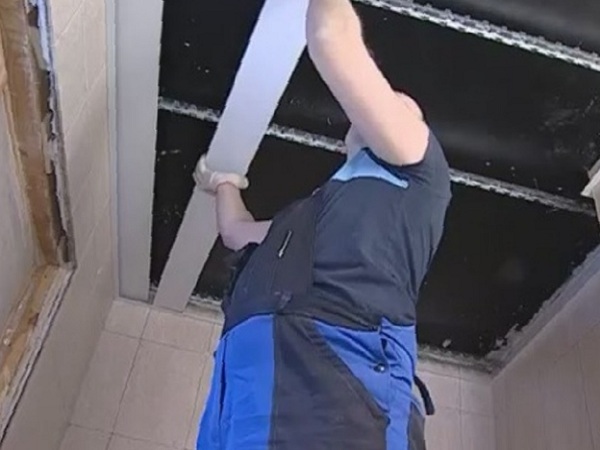
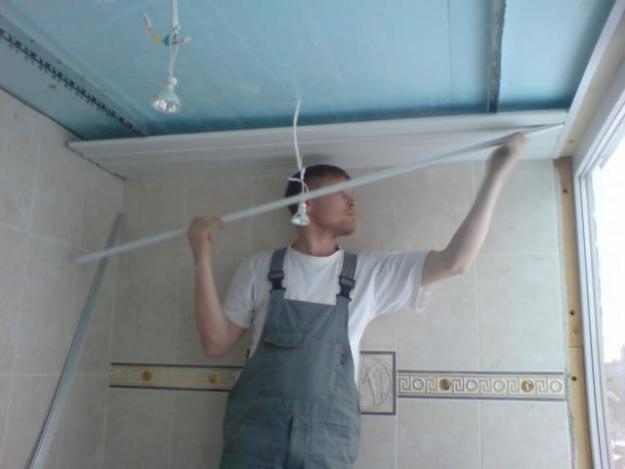
First of all, it is necessary to bend and mount the panel on the corner profile, then straighten it and snap it onto the tire holders. The second rail is installed next to the previous one, and the third is located opposite. The explanation for this is that the first row of the length is much less than the rest, and you will need to repair the slats. This problem occurs quite often. It is possible to adjust the height of the tires by changing the depth of screwing screws. If the width at the end of the rail does not match, then it can be simply cut with a knife. Then you need to cut the rail fix the wooden strut, a piece of the corner profile.
After assembling one pair of panels, you need to install additional profile parts (intermediate). In the future, to collect the details will not be difficult.The main difficulty arises when fixing the most extreme panel. It must be installed very tightly. To do this, we follow one small trick: it is necessary to fix a pair of tree stakes between the end rail and the wall. This ensures sufficient tightness. Stakes can be hidden under the plinth.
Assembling a suspended ceiling with their own hands does not cause much effort, if this is not the work of a complex configuration. Then you should entrust the installation of the construction to experienced and skillful specialists.
Lighting
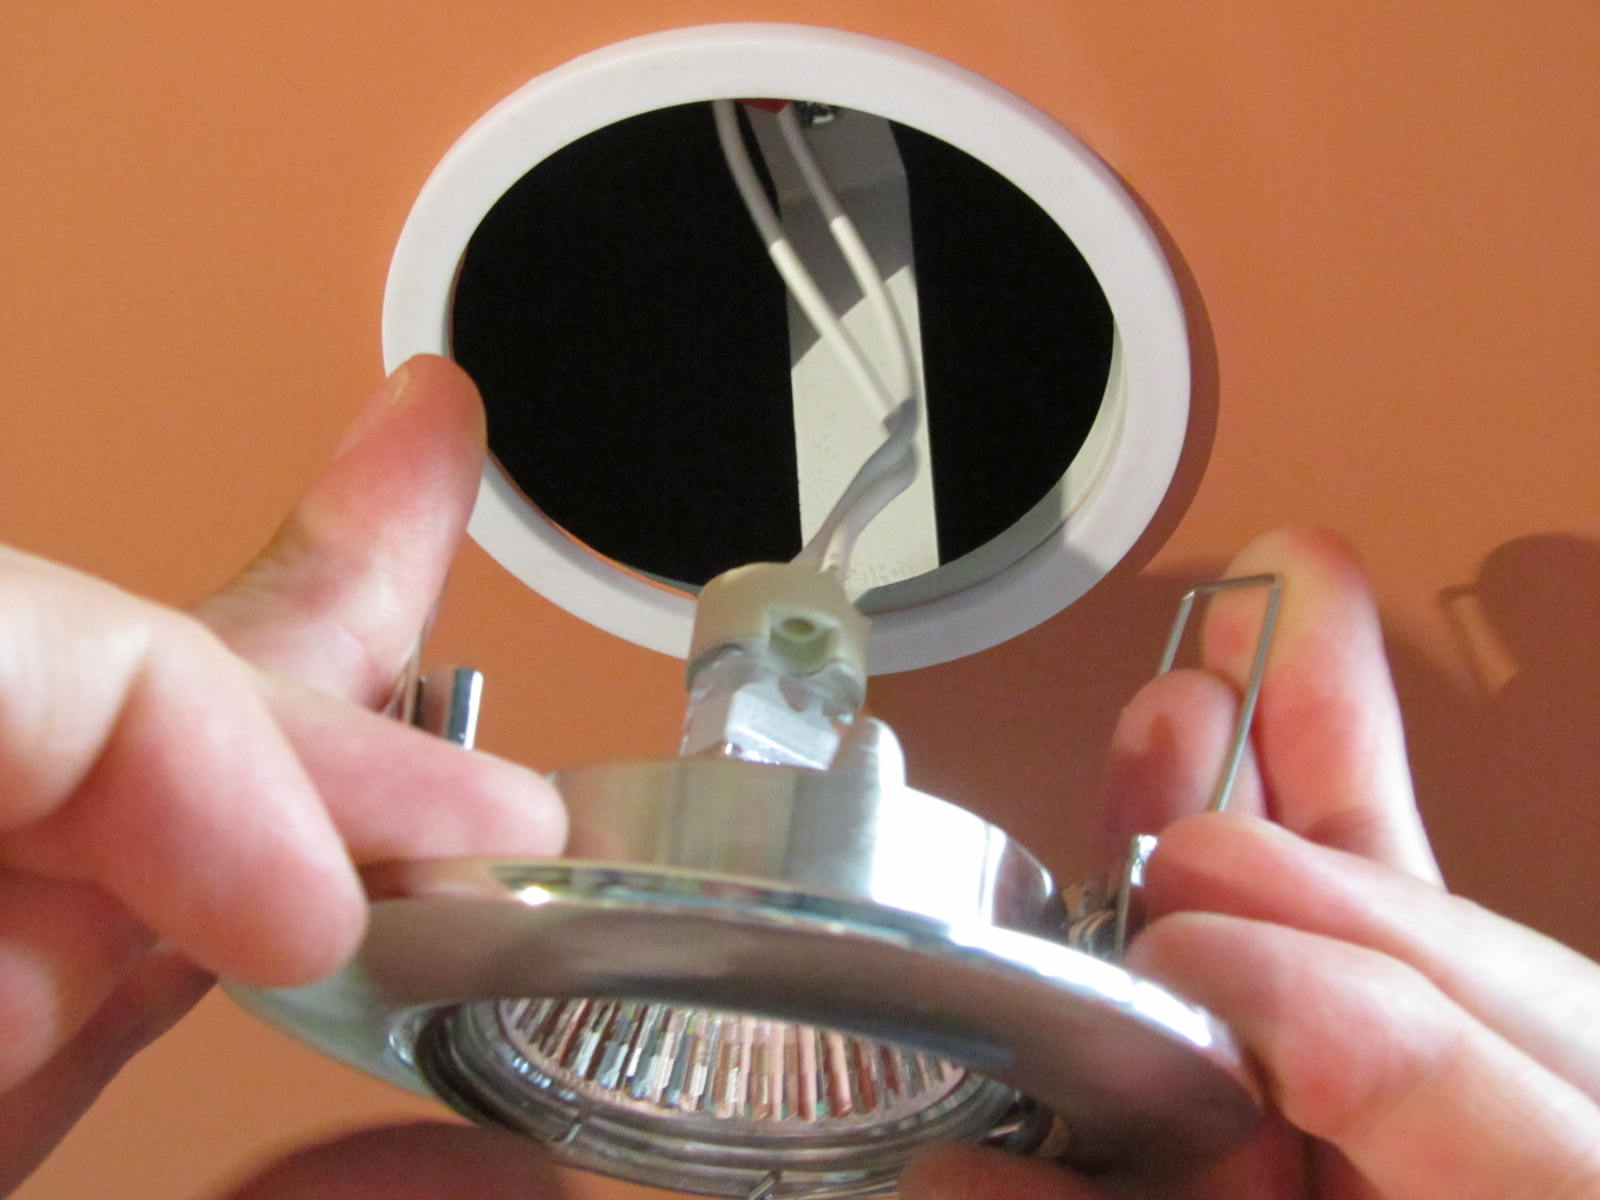
To mount lighting devices is the most painstaking work. Before starting all work, you should consider the location of all lamps, lamps and other devices, depending on the required level of illumination in the room.
As a pendant lighting equipment will be an excellent option:
- LED bulbs. They will illuminate the individual details of the decor, as well as create an atmosphere of comfort and modernity;
- Fluorescent lamps will create lighting in a classic style;
- Small lights will create a warm and homely atmosphere in the room.
Lighting can work in two ways:
- All lights turn on at the same time. At the same time, one wire should be stretched from the switch, and only then from the two-wire wiring are the bends drawn to the places where the lighting is installed;
- Lighting equipment is included in groups. One wire has the number of lived, how many groups are provided for lighting. 2-3 groups are usually applied. In addition, there are used two-key and three-key switches.

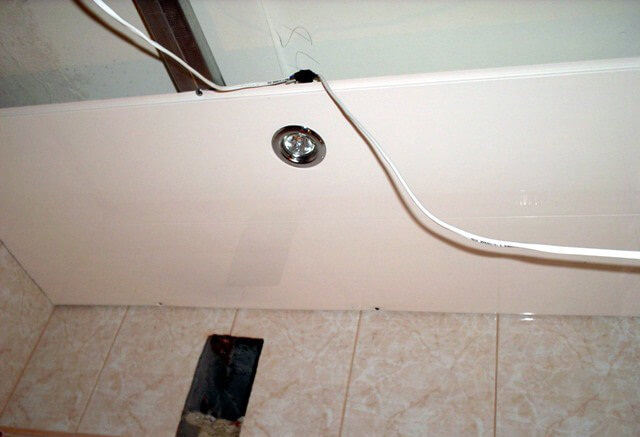
Also, before starting work, you should draw a diagram of the location of lighting fixtures with a specification of the distances between each luminaire. From the electrical shield the wires are bred with special plastic sleeves. At the locations of devices, wires are diverted at a distance of 20–25 cm from the installed rails. Copper wires are used with stranded cross-section corresponding to the power consumption.
With the help of special brackets is produced fasteners to the wires.
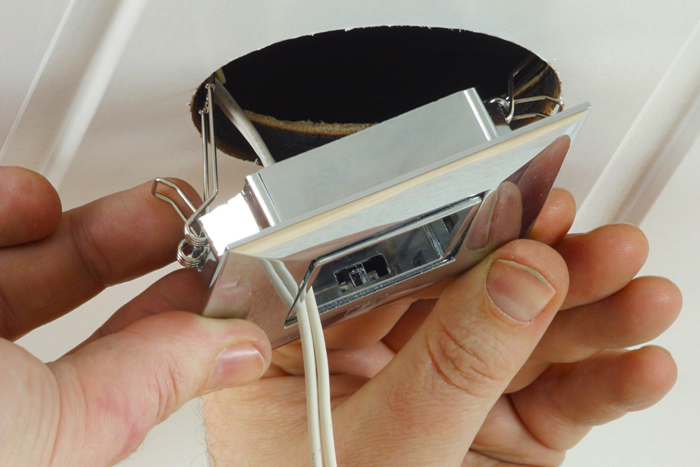
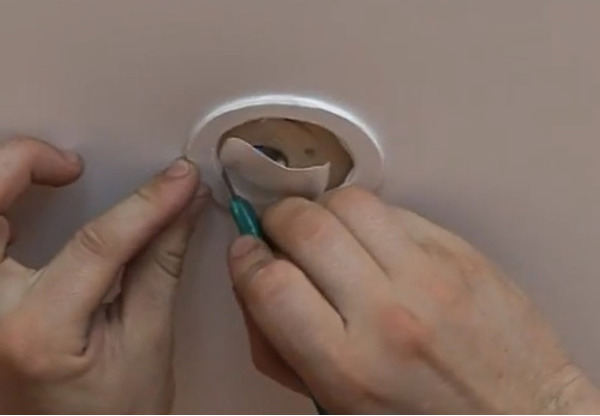
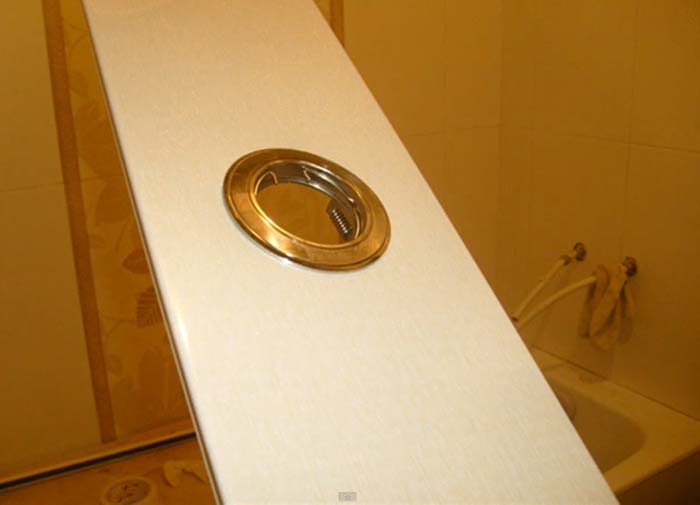
For lighting equipment, slots should be made without burrs. Work is performed at the same time as the slats. It will not be superfluous to check the correctness and reliability of the equipment connection.
Slats should be placed along the line of light. Their direction depends on the features of the incidence of sunlight.
Repair of suspended ceilings involves disassembling the ceiling surface, and in the case of dismantling - only partial. At the beginning, one edge of the ceiling is disassembled - the corner profile must be picked up with a sharp object, then bend the edge so that it is possible to stretch the end of the rail. The extreme part is released from the lock and removed.
The rest of the slats are subjected to another treatment - it is necessary to open all the locks, and the panel moves to the edge. After that, it will be easy to remove from the system of the whole structure.
Operation Tips
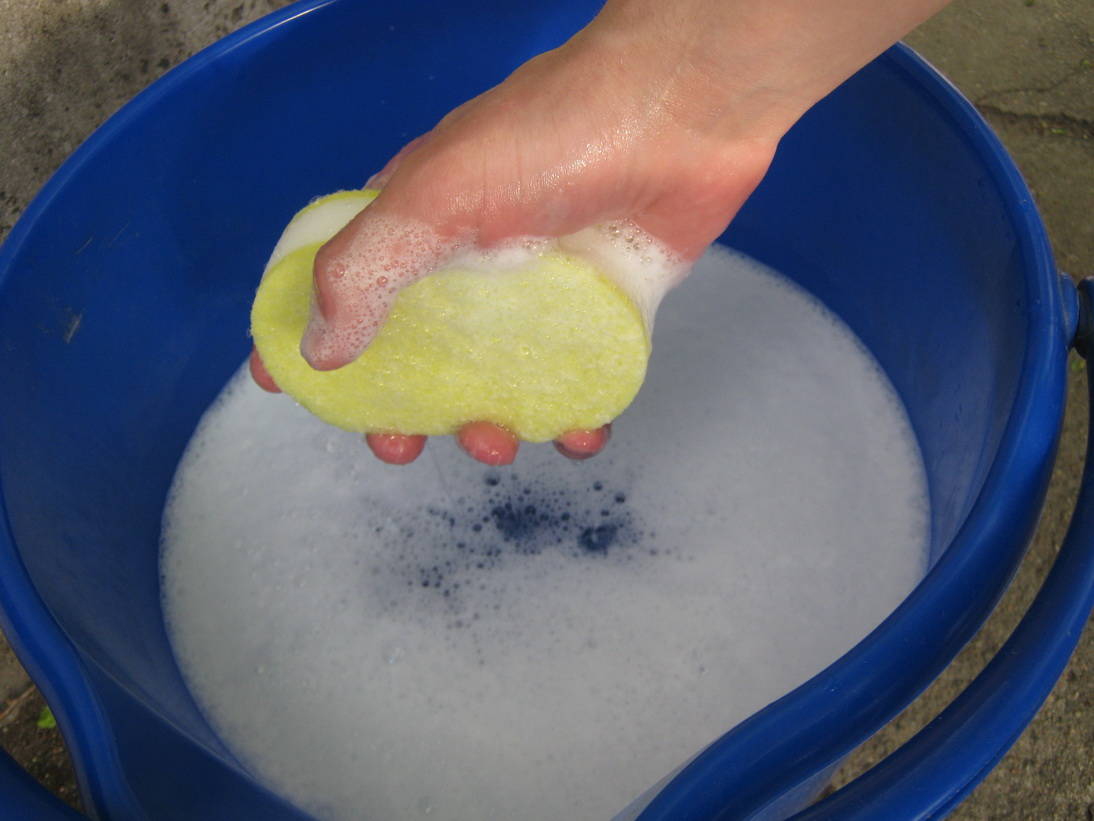
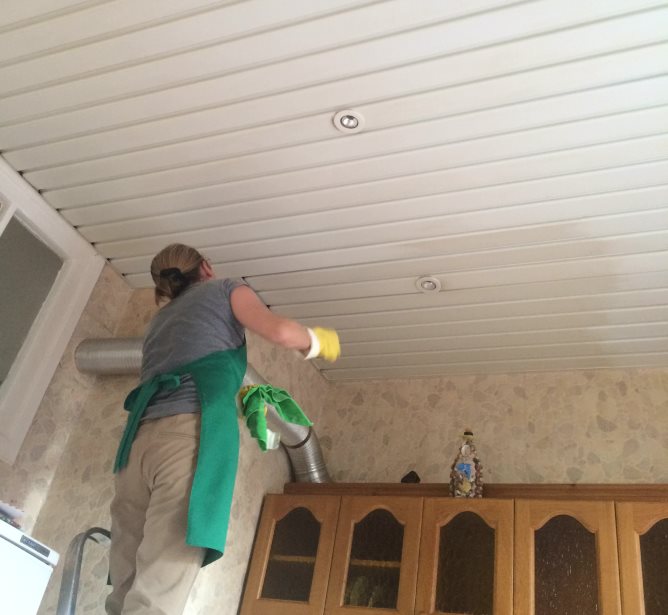
Rack ceilings are quickly able to get covered with dust and get dirty. Care of suspended ceilings is not a big deal. Metal or plastic structures are not afraid of moisture, so they are easy to clean with a damp cloth soaked in detergent.
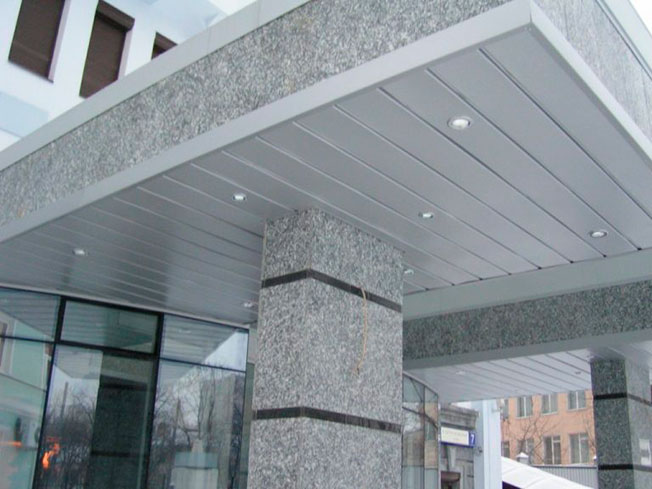
Aluminum suspended ceiling can easily withstand the temperature difference and high humidity, because of this, it will be the best option for the kitchen room.In addition, the installation of ceiling surfaces is simple: there is no need to pre-prepare the surface.
Also, this ceiling has the ability to hide all the imperfections and looks fashionable and modern.
When choosing a ceiling material for the premises, you should prefer high-quality products that are covered with a protective film. The film perfectly protects the coating from temperature extremes, high humidity and dust. Properly installed rack ceiling will allow for many years to keep the original appearance of the structure.
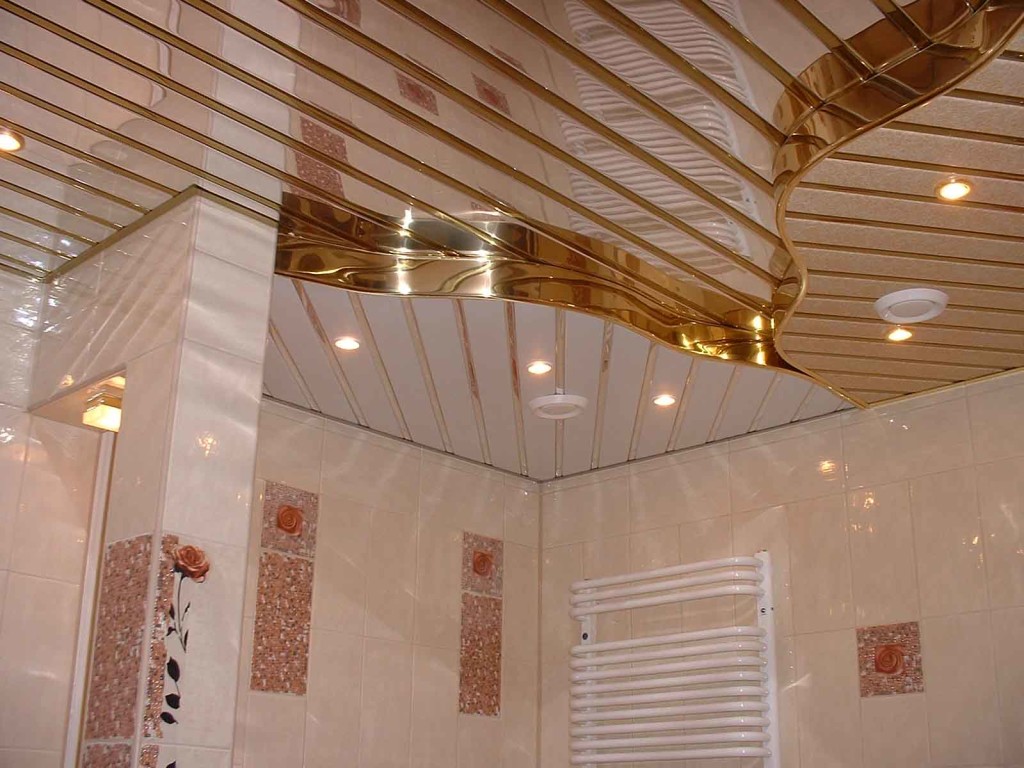
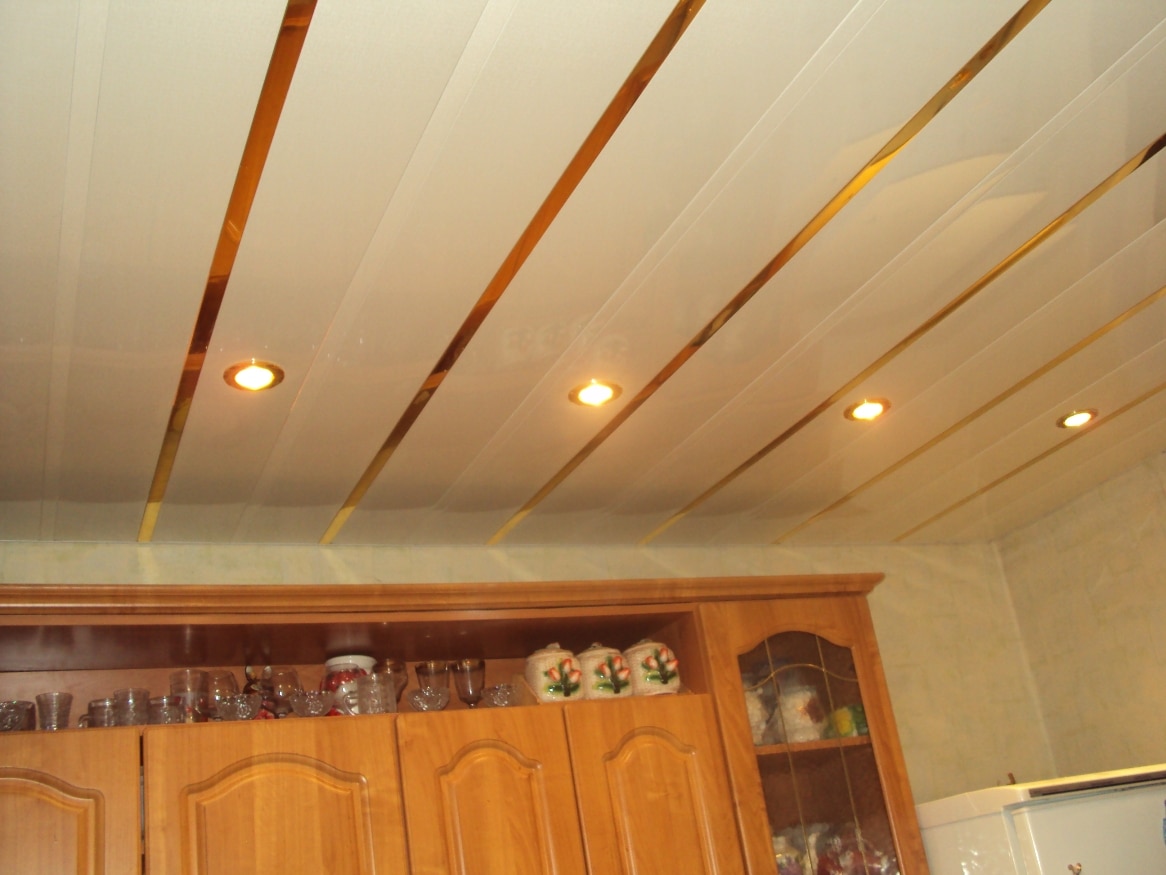
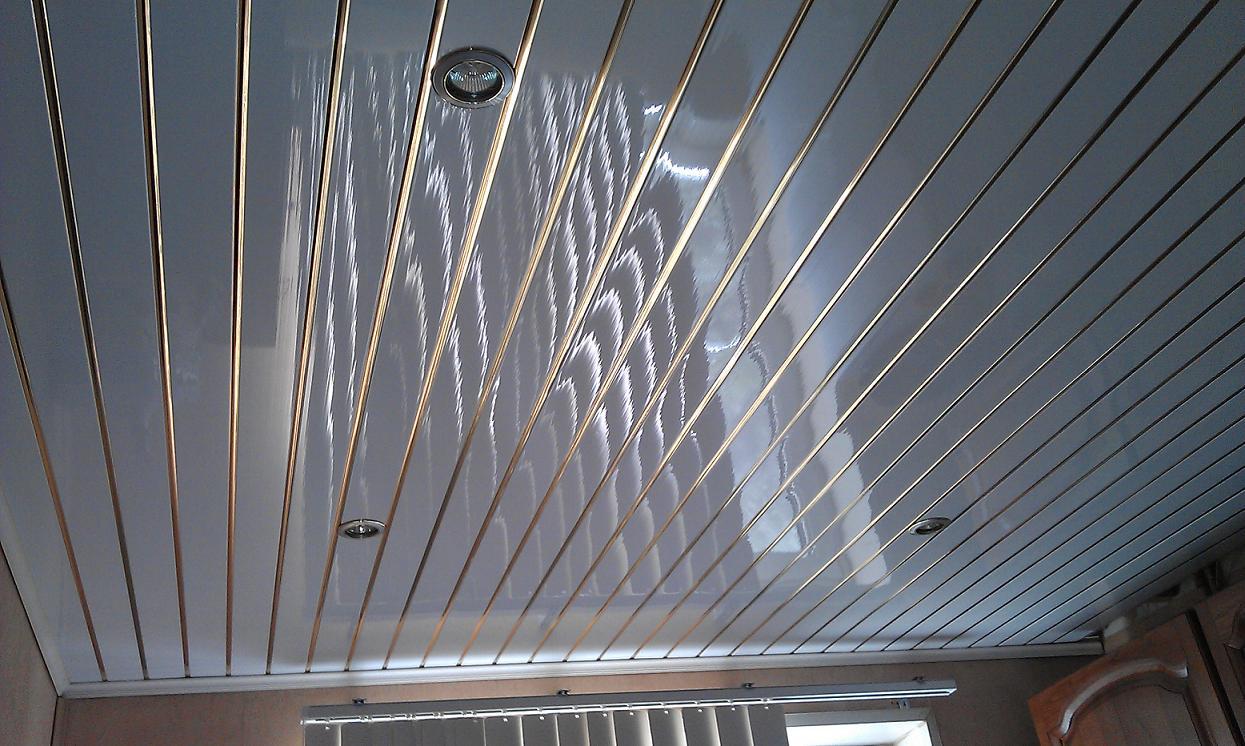
Beautiful examples in the interior
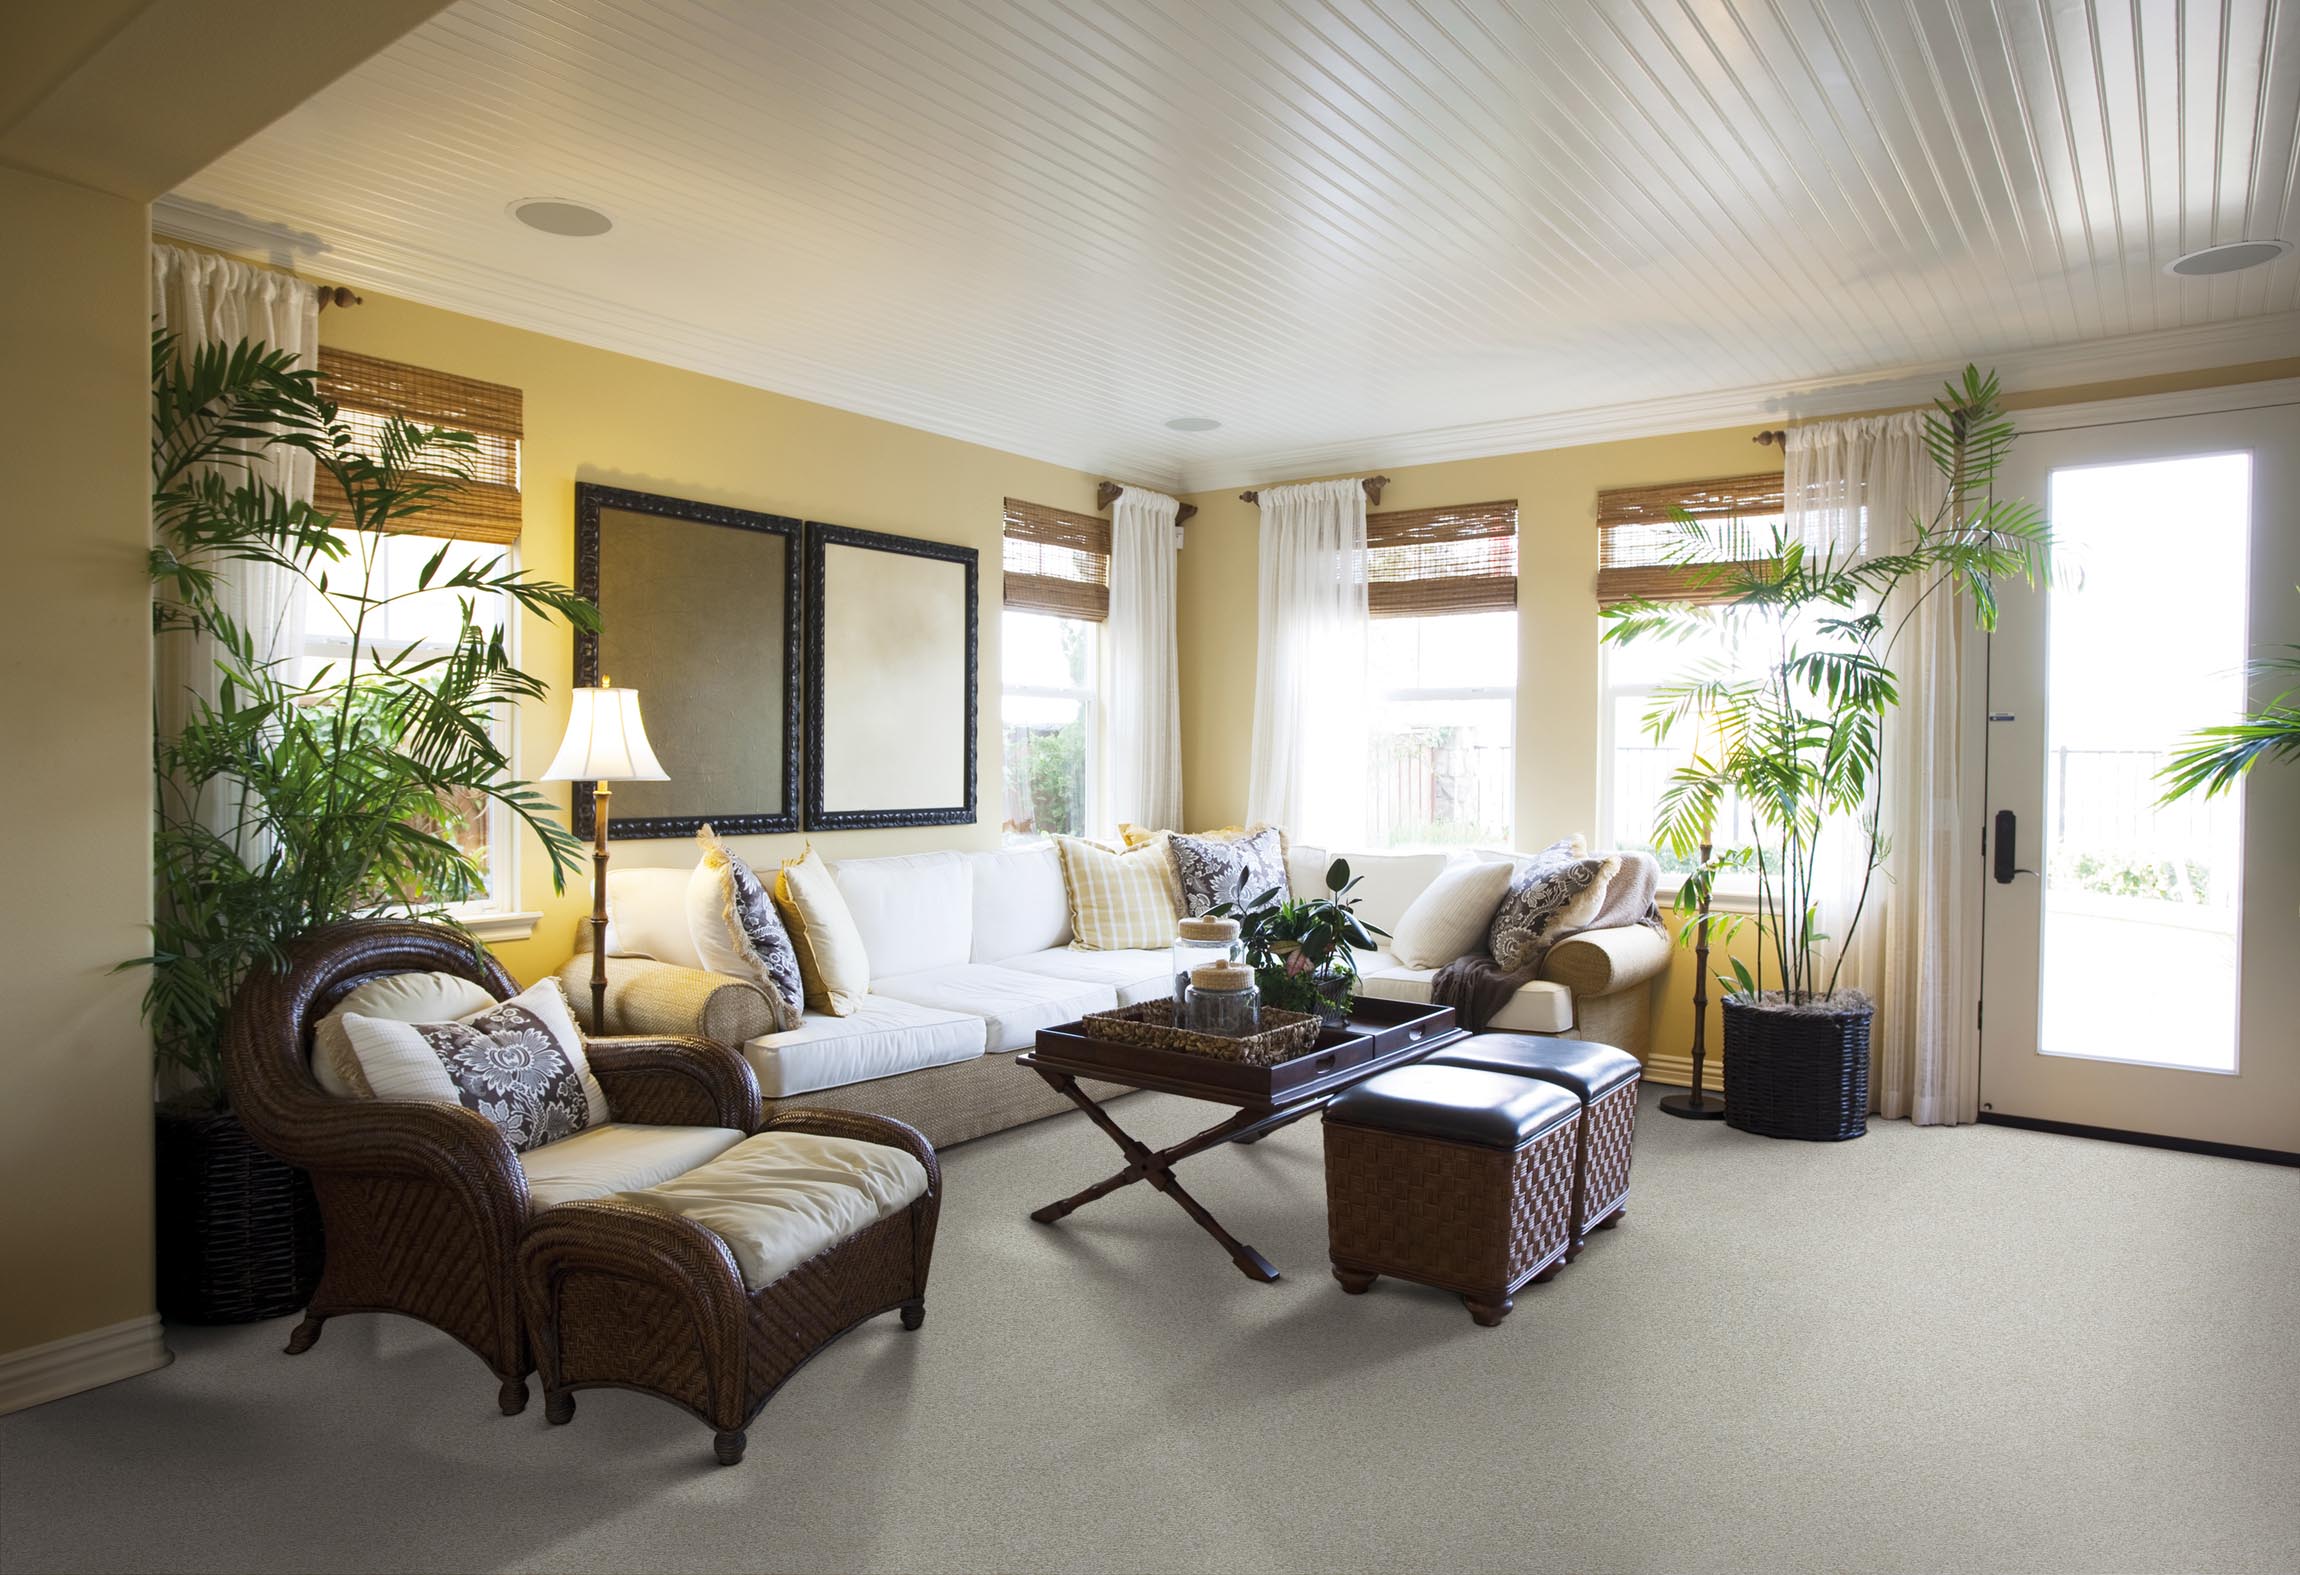
Rack ceilings in the living room look simple and interesting. However, not everyone likes this option of finishing the ceilings, because everyone has their own taste and preferences.
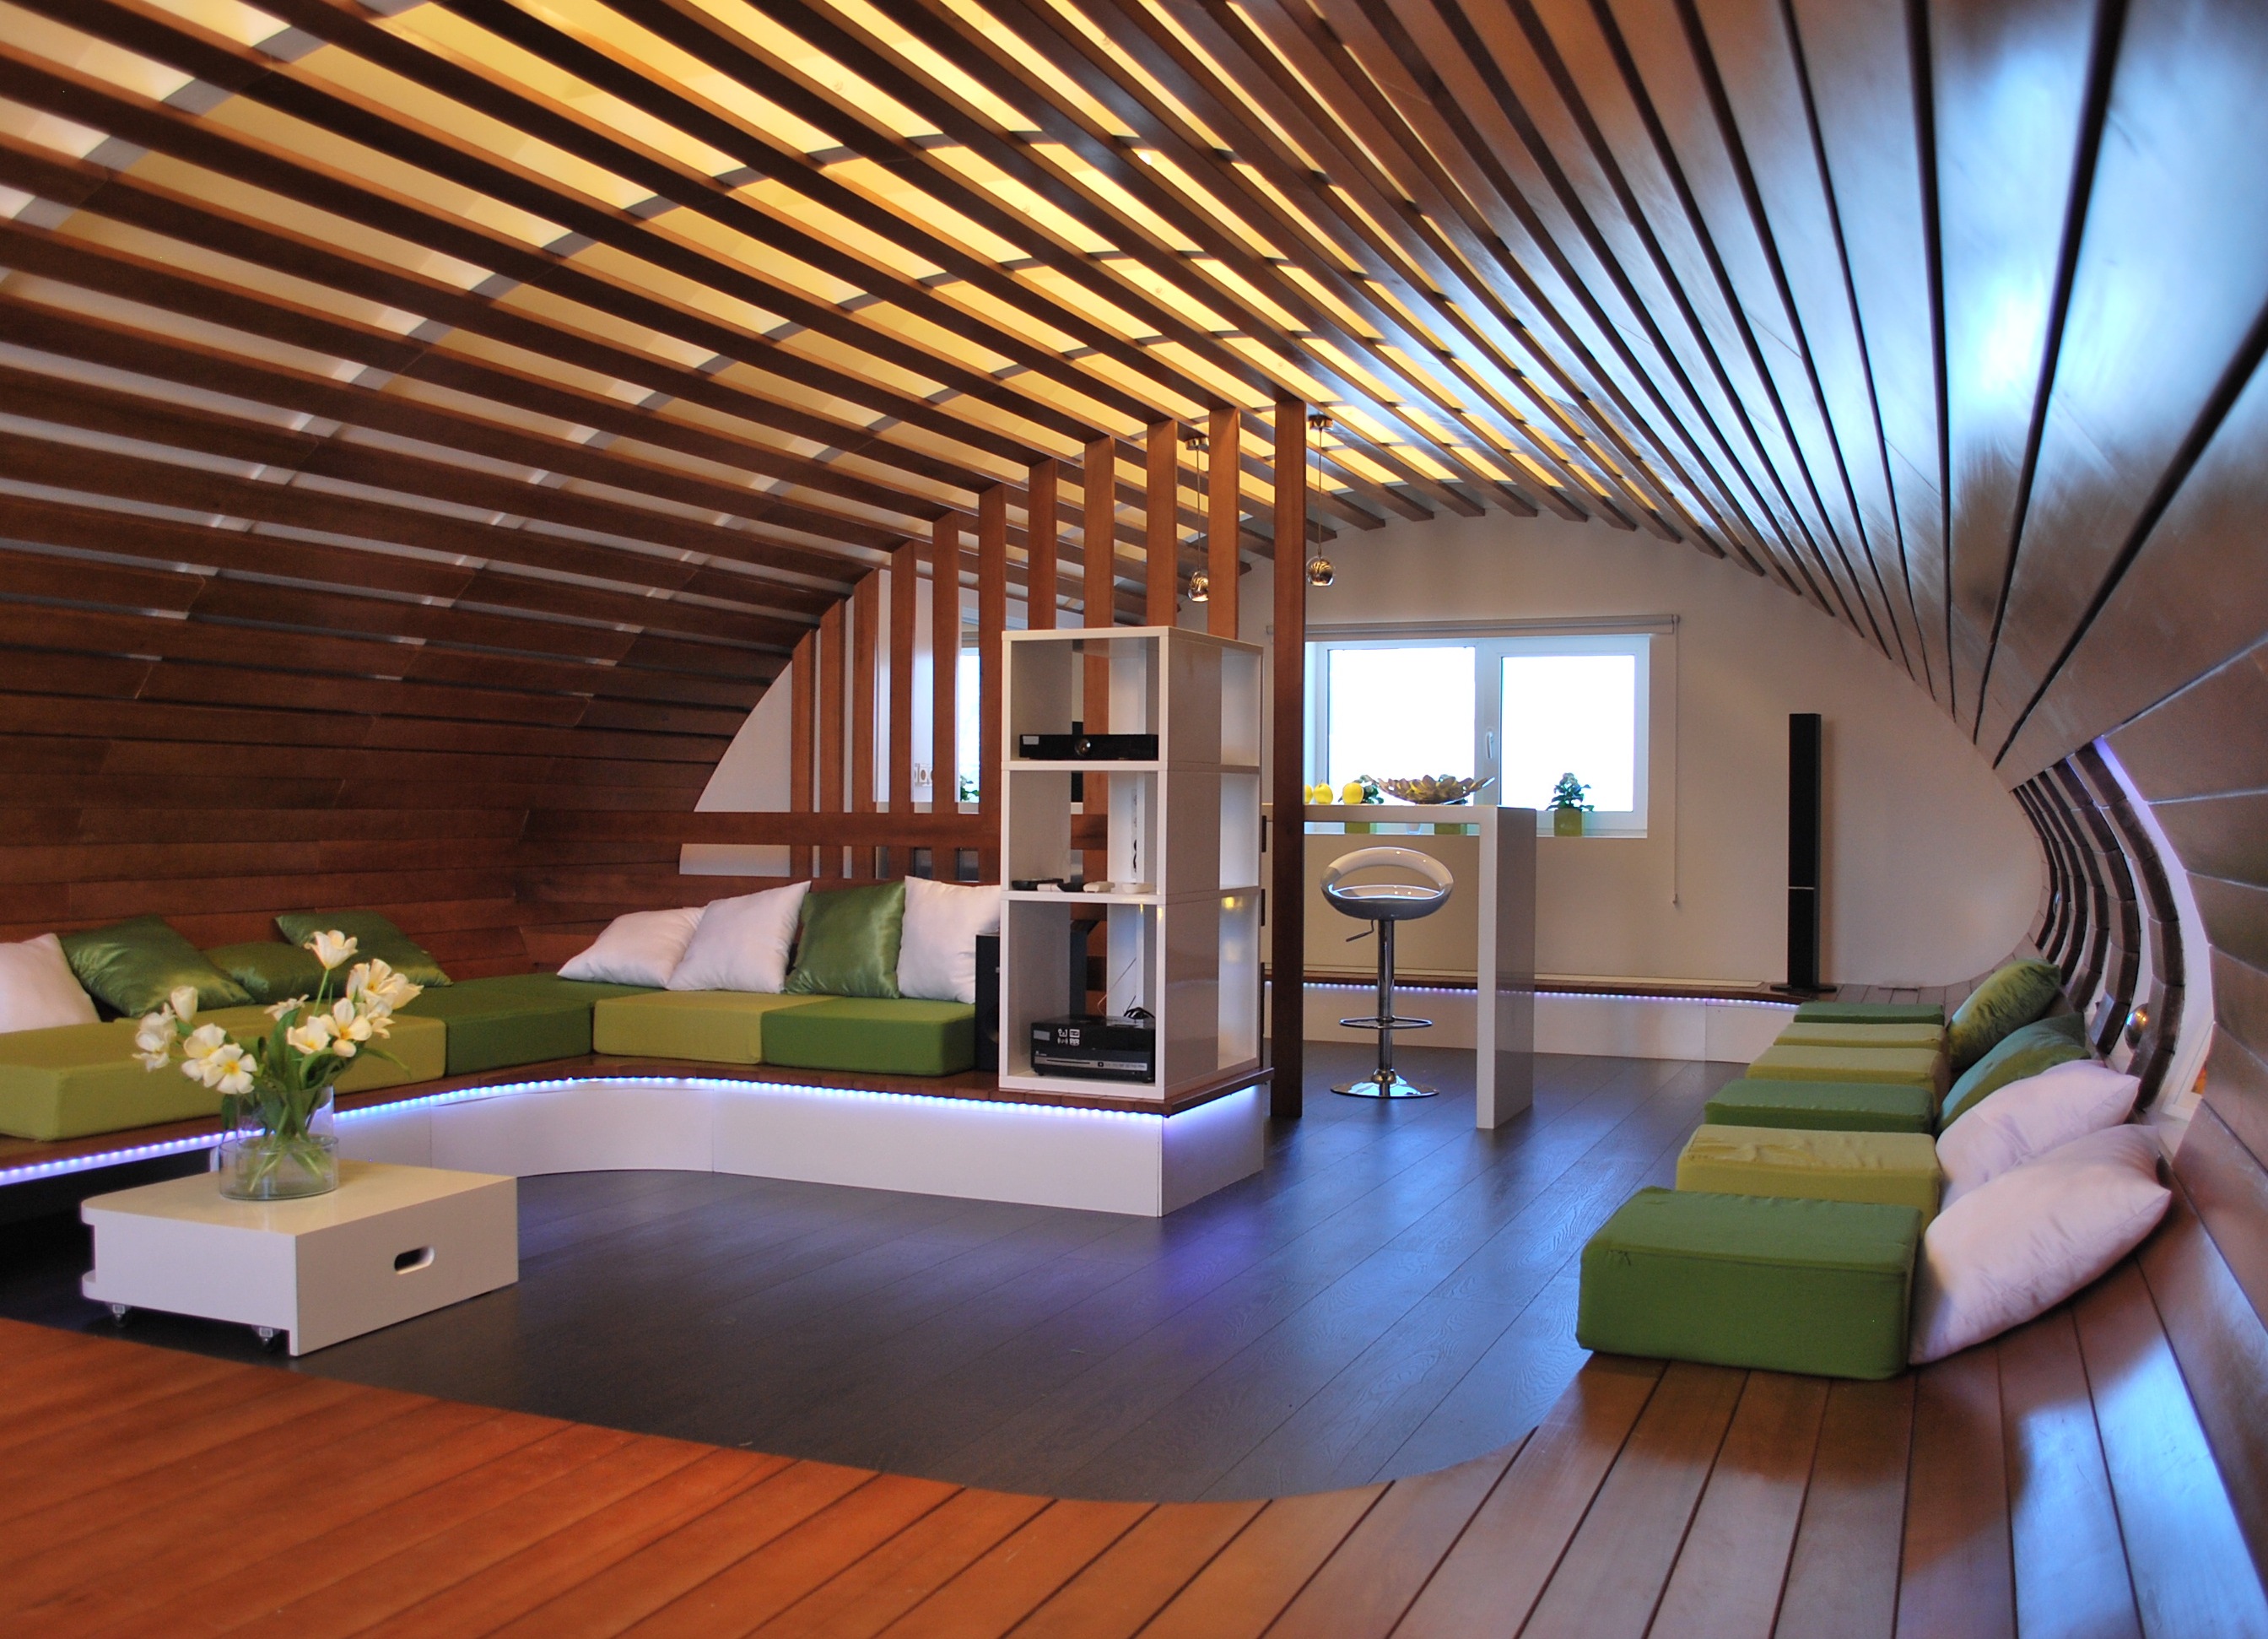
The slatted ceiling and the batten wall look intricately in both the living room and the bedroom. Such an interior will appeal to many connoisseurs of modern interior.
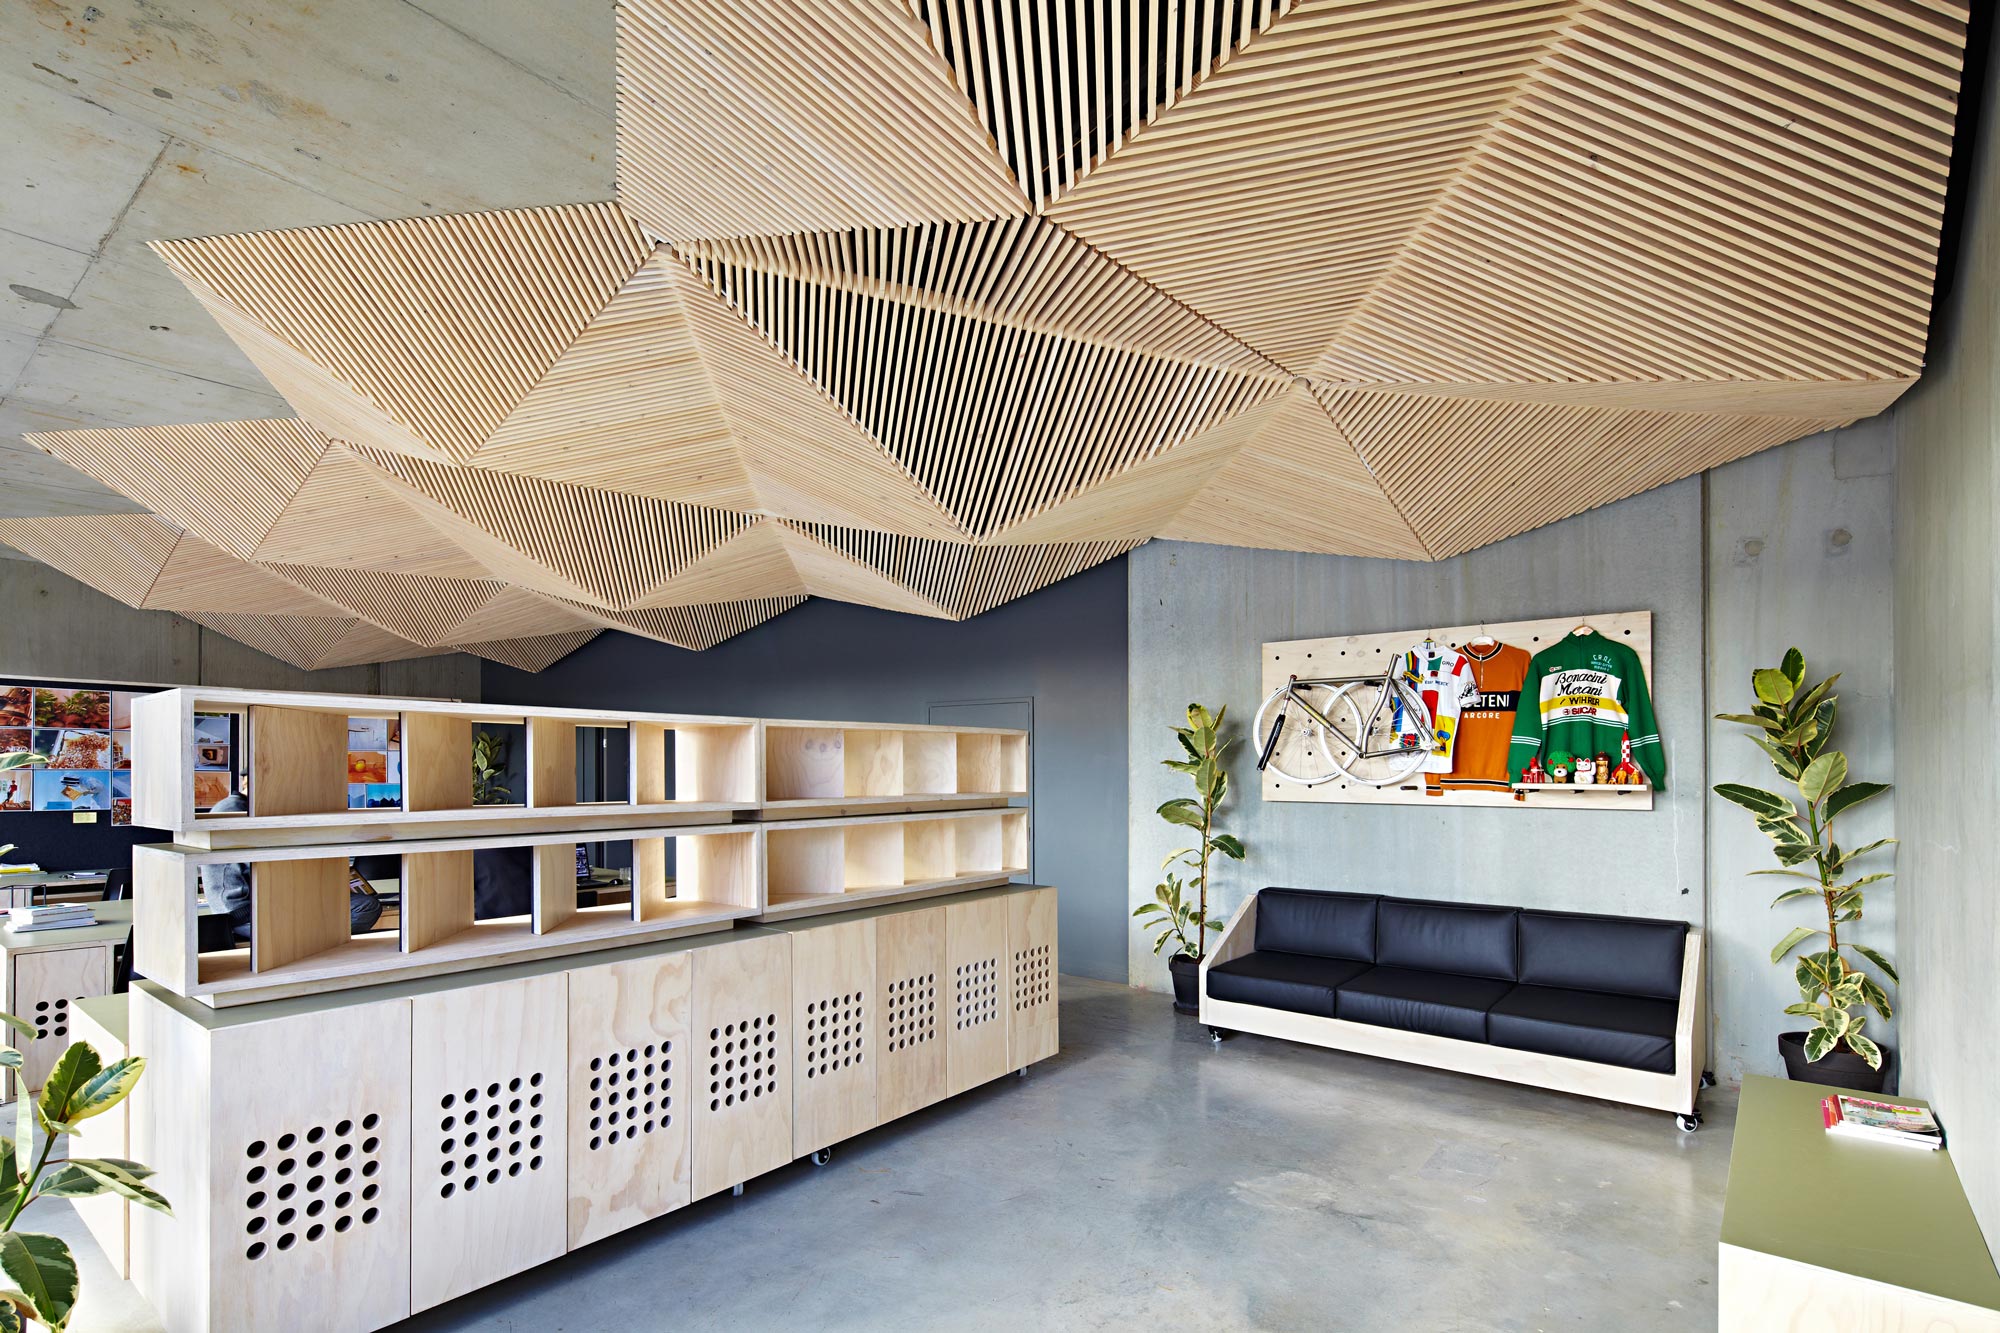
Due to the large range of slatted ceilings, it is not necessary to search for suitable design ideas. The choice of the owner of the apartment - thousands of original models of finishing materials.
For how to install a slatted ceiling, see the following video.


