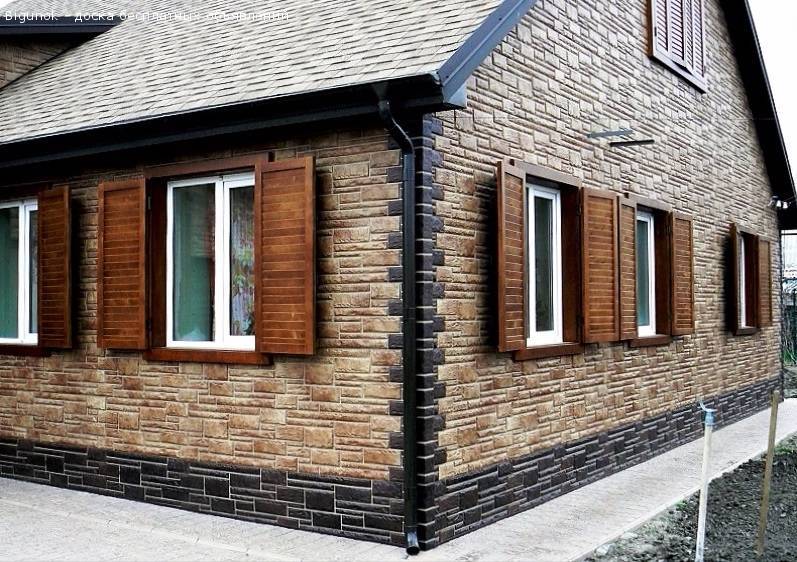
Proper installation of ground siding
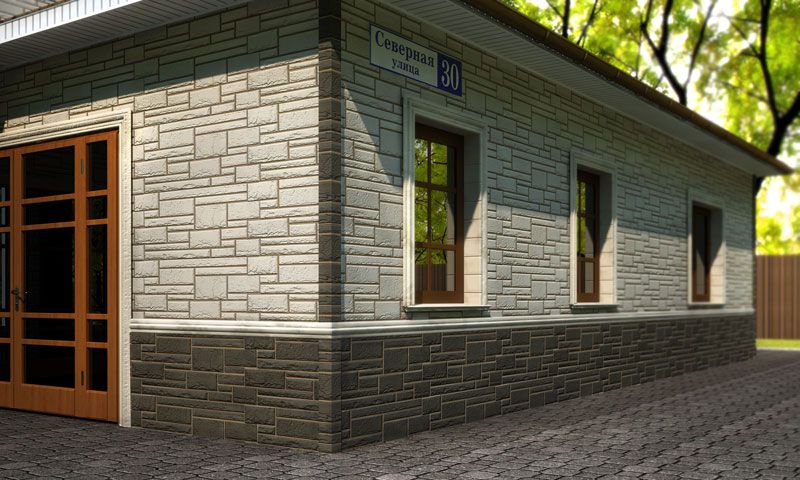
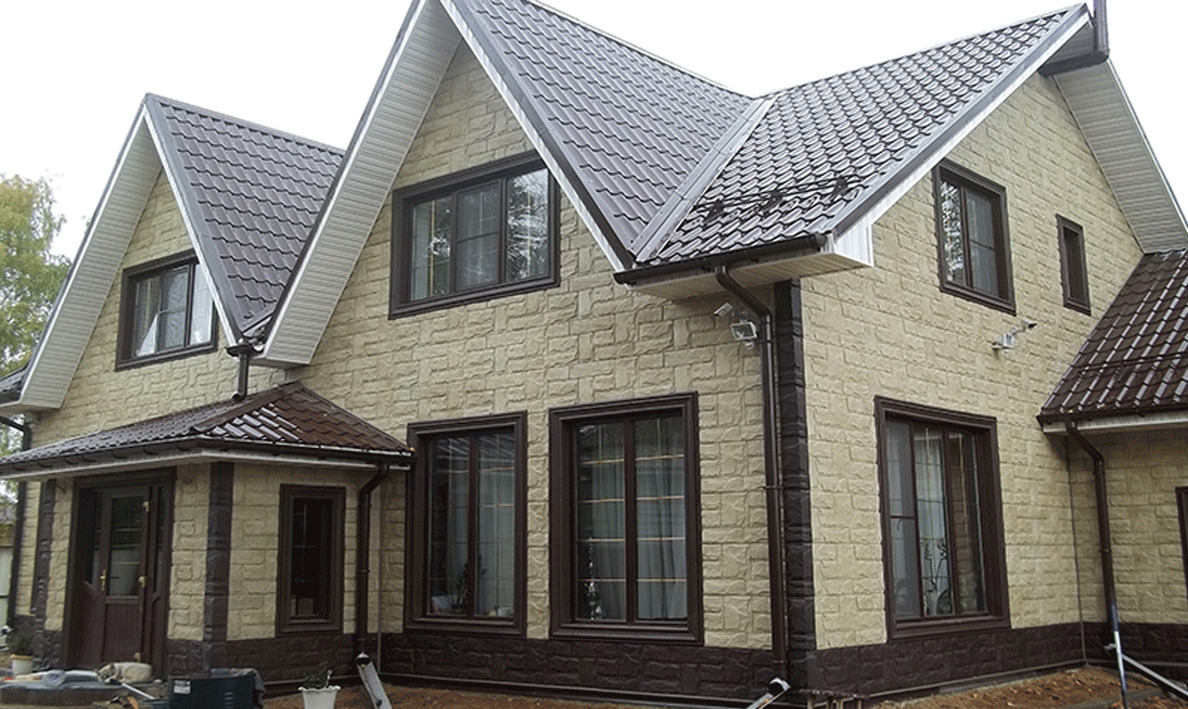
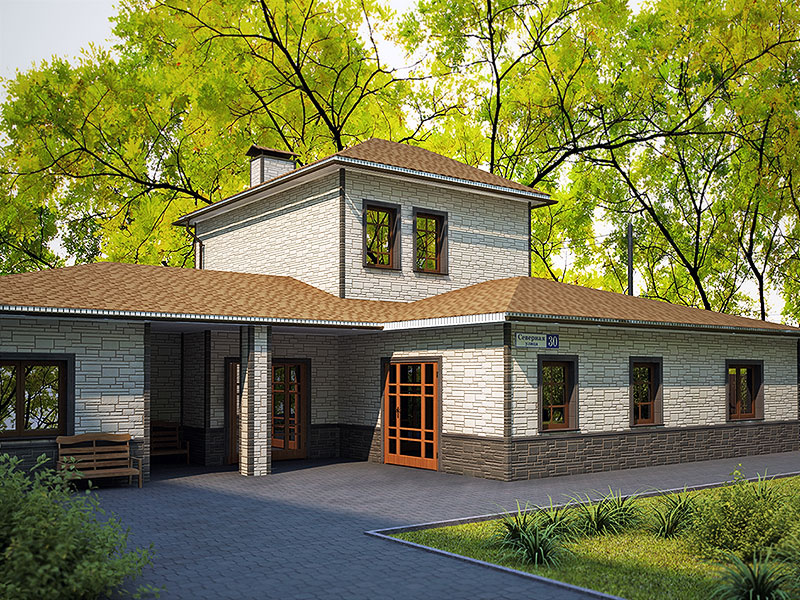
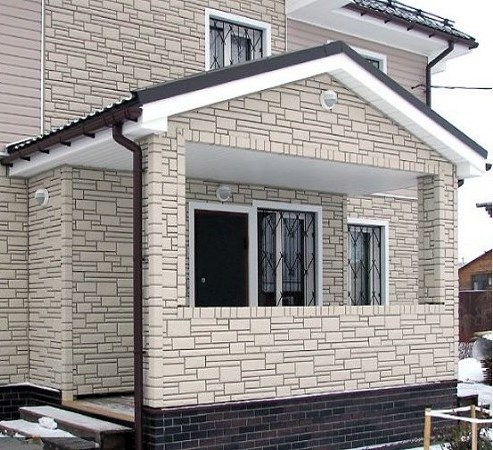
Facing the facade of buildings with tiles, natural stone or wood is now considered to be too time-consuming. In place of complex designs that have natural roots and reduce the amount of these most natural materials, lightweight panels made of plastic, vinyl and metal come. Siding is not only an environmentally friendly type of building decoration, but also very economical. And if you don’t want to revet the whole house, but it’s just necessary to create a firm and solid foundation for the house, an unpretentious but picturesque basement siding comes to the rescue.
Kinds
Facing the basement of a building is divided into types according to two criteria: material and method of installation.
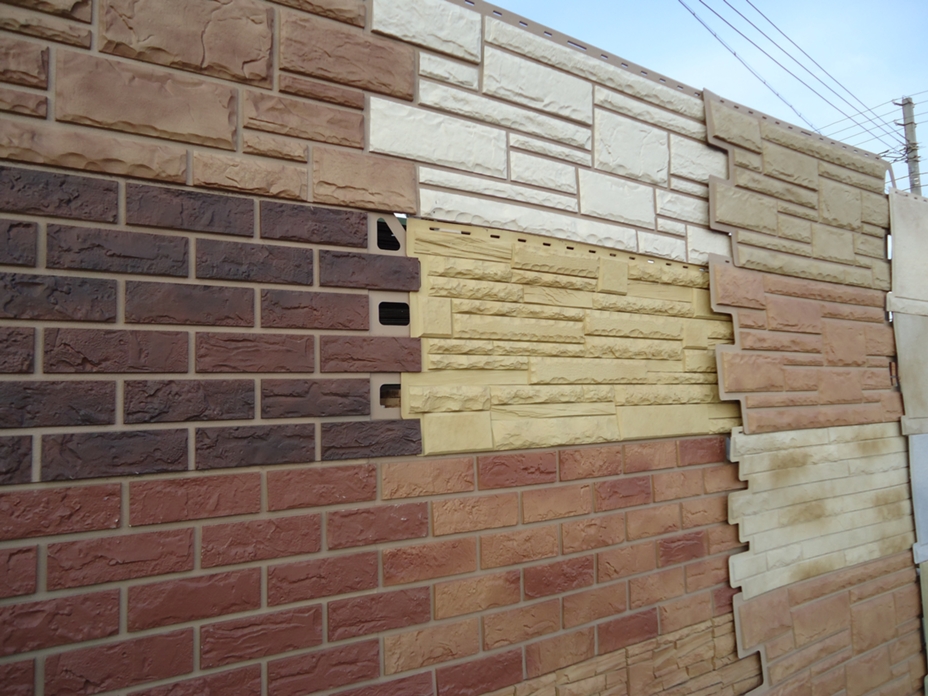
The most common materials for siding:
- polyvinyl chloride;
- vinyl;
- polypropylene.
All of them are universal finish for basement siding, because they have excellent resistance properties: to the effects of ultraviolet radiation, moisture, temperature extremes. Can easily serve for many years. There is, of course, metal siding. But it requires additional processing of the material with anti-corrosion agents and more thorough care.
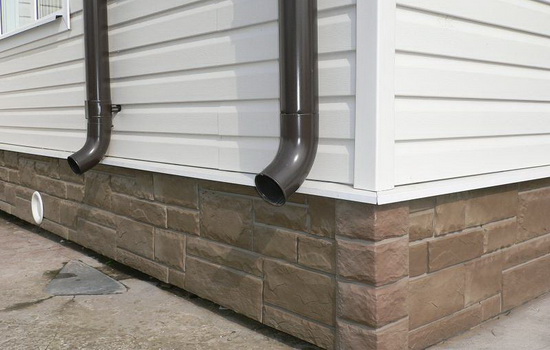

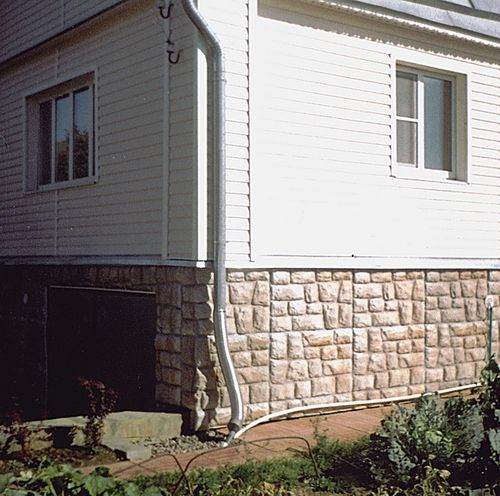
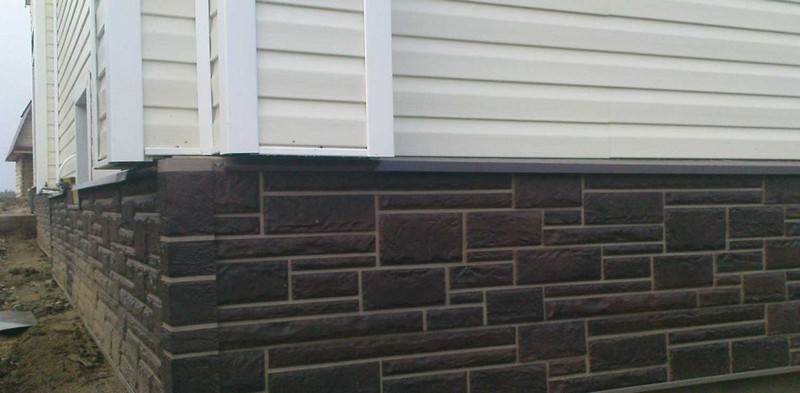
According to the laying method, the types of basement siding can be horizontal and vertical.
Most often, it is for the bottom of the building that the professionals and amateurs of the construction business use horizontal stacking. And in order to maximally easily, quickly and efficiently provide the basement of the house with high-quality lining with his own hands, it is necessary to acquire the basic tools and prepare the foundation of the building for installation.
Preparation and tools
Before proceeding directly to installation, it is necessary to prepare the surface for work.

First of all, attention should be paid to the evenness of the walls. The socle siding will give out with giblets any of your skeleton (read: unevenness).And it should also be remembered that when facing the base of the house with synthetic cloths under them, an excellent environment can be formed for the appearance and spread of fungus, mold and other moisture-loving microorganisms. Therefore, the walls under the plates must be treated with antiseptic or any other impregnation.
A prerequisite before laying the siding plates is to clean the base from debris, dust, cobwebs and other things, so that the surface is perfectly free from foreign objects.
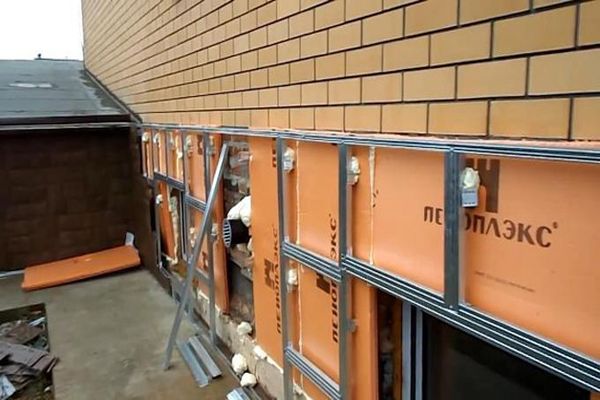
The next step in the preparation will be the solution of insulation or ventilation of the facade. Since both of these phenomena are very common in today's conditions, training should be carried out taking these features into account. With any of these options, it is necessary to make allowances for purchased materials.
For self-installation of basement siding you first need the following tools:
- screwdriver - you can use the old grandfather's screwdriver, but it will take more time for such work;
- screws with a flat cap (a lot of screws);
- water or infrared level;
- hacksaw or jigsaw.


Of course, for each case and for each master is characterized by its own set of tools. This list is designed to start where.
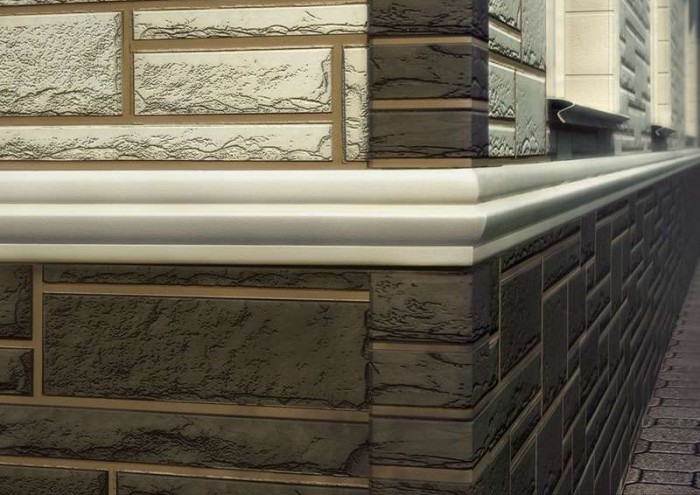
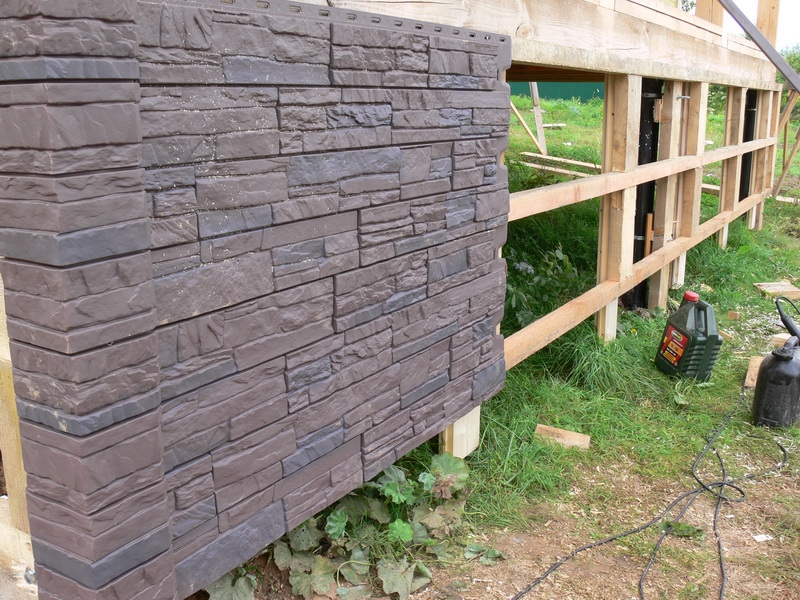
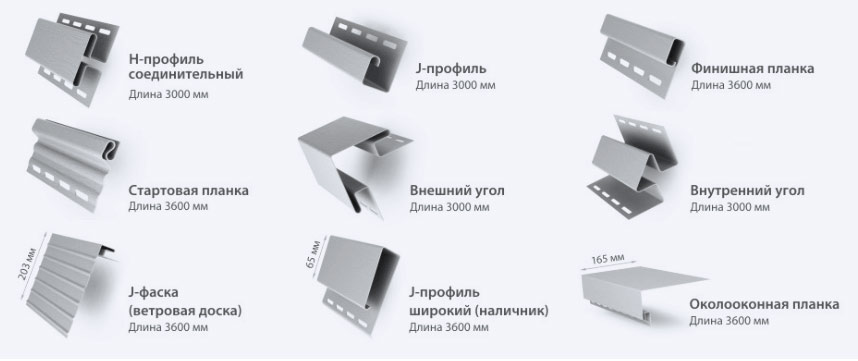
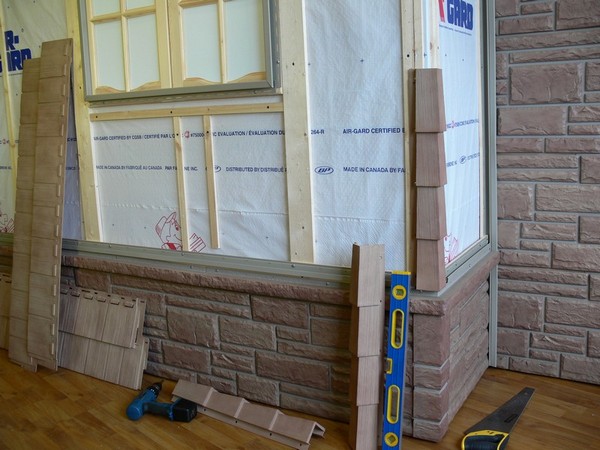
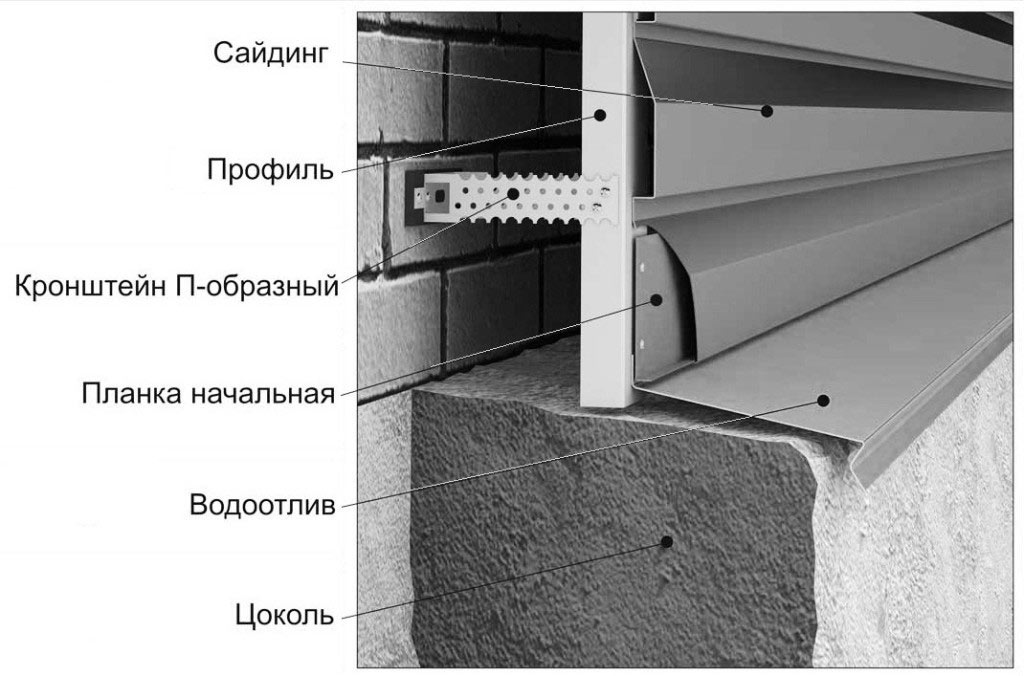
As for the components of the siding, then everything is simple. For installation of the panels on the basement, the following is required: lathing (metal profiles or wooden bars), a starting strip, a finishing profile and a j-profile. This is all that concerns the fastening of panels to the wall of the base. The main parts that make up the siding itself are: trim panels with a selected design and corner panels.
But before you buy these components of the future "person" basis of the house, you should do the preliminary, most accurate calculations.
Calculation of the amount of material
Correctly calculate how much siding is required to finish the basement is easy. But here it is necessary to observe special care. No one wants to go to the store in the middle of the styling process and buy more material. Or, on the contrary, to buy a bunch of panels, and then not to know where to put the rest, and why so much money was spent.
We start to measure the base of the facade of the house. By measuring the width and height of one side, you get the surface area for the lining. Do the same with the other sides of your country or country house.Adding all four digits, you get the total surface area.


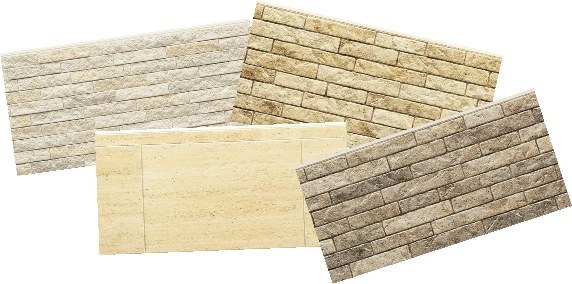
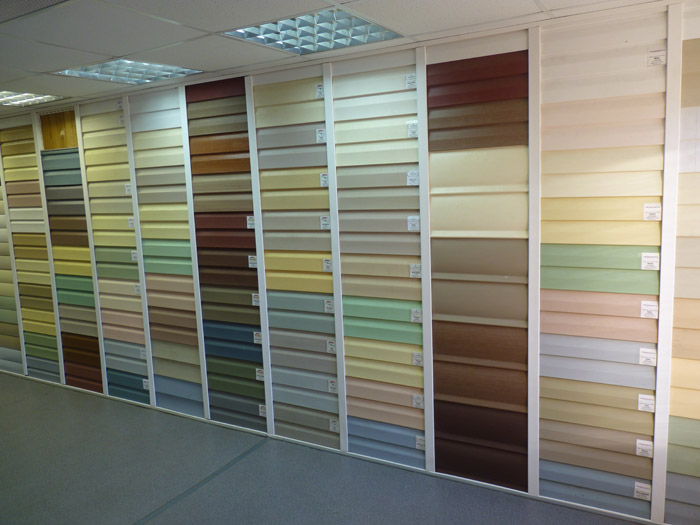
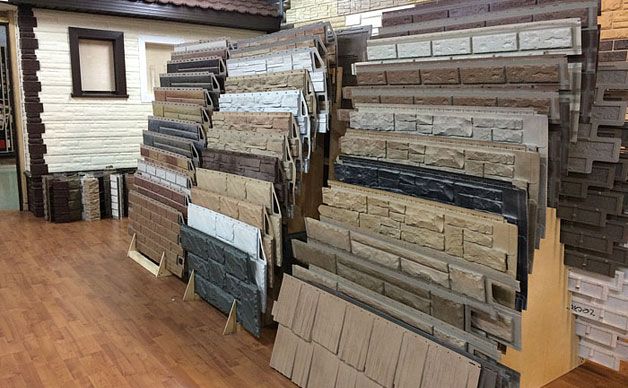
In the building stores today you can find a wide variety of wall panels for siding, different companies and manufacturers. So, you can find different sizes, textures, ways of laying. Some manufacturers produce their products already and with fixtures specifically for their panels. At the same time on each package indicated the exact total area of the panels and the usable area. Pay attention to the first value and count how many packages of this material are necessary in your case.
Be sure to add 10-15% to the resulting number of packages. This will help you to be sure that in case of force majeure you have a supply. At the same time, it is not an exorbitant amount worth crazy money.
With a full set of materials, components and tools, happy, you can proceed to the installation of basement siding.
Step-by-step instruction
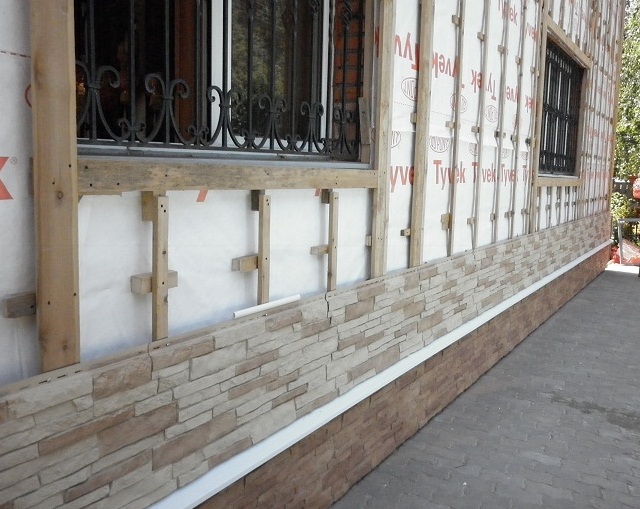
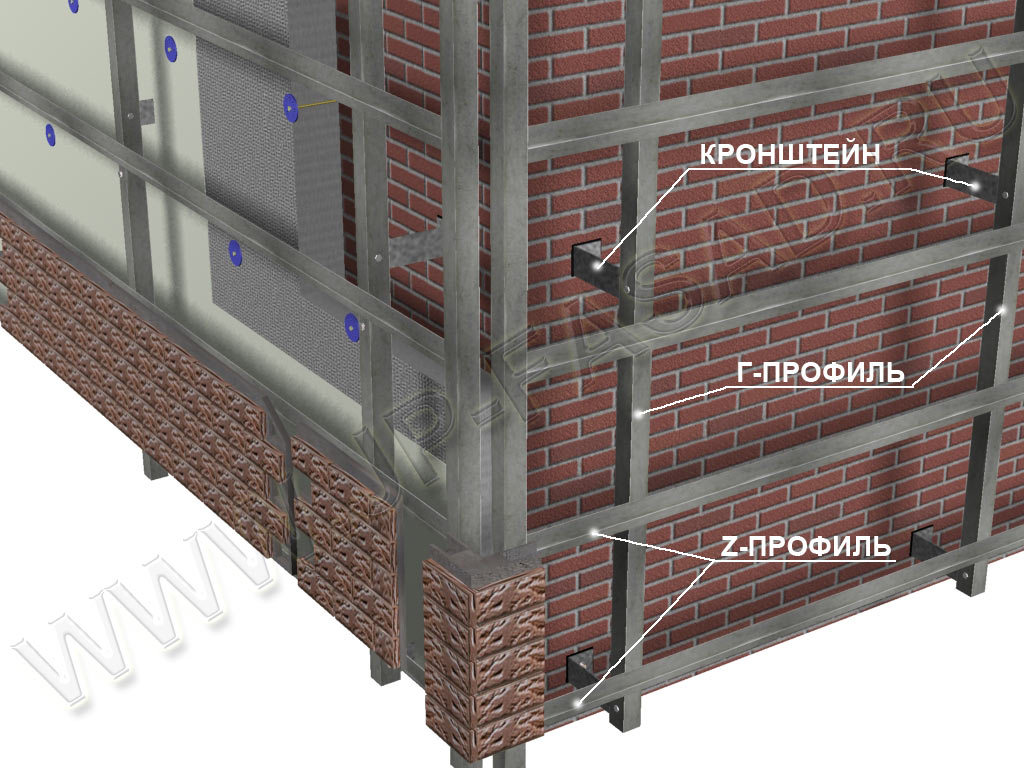
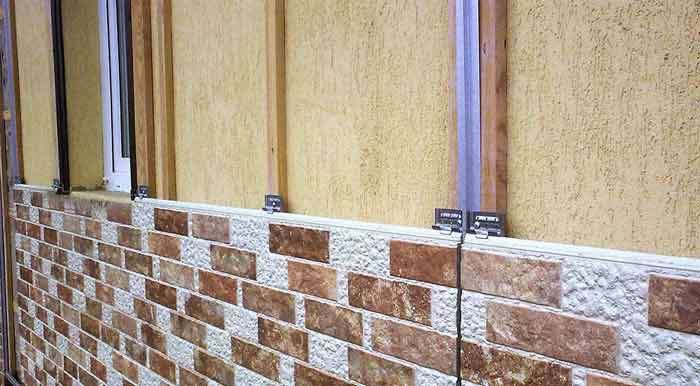
Starting the installation of basement siding with your own hands, you should start with a supporting base. It is worth noting that in some cases obreshetka is not required. When the walls of the house are perfectly flat (made of foam and gas blocks and another), the sheathing as such may not be needed.

The installation of the batten begins with the installation of the slats of your choice: wooden or metal. The next step is the correct location of these slats.
There are three types of installation of crates:
- vertical;
- horizontal:
- combined.

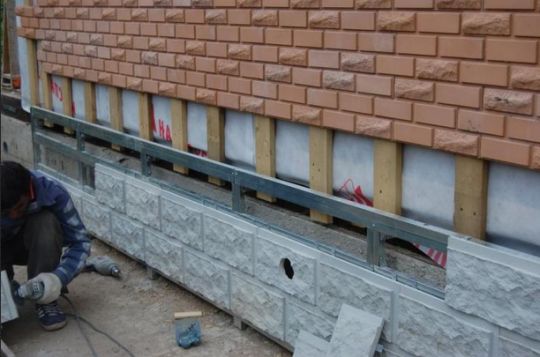
For facing the basement is best suited horizontal, because it is a small area, with virtually no openings. If you decide to sheathe the whole house at once with siding panels, then it makes sense to mount a common vertical or combined crate.
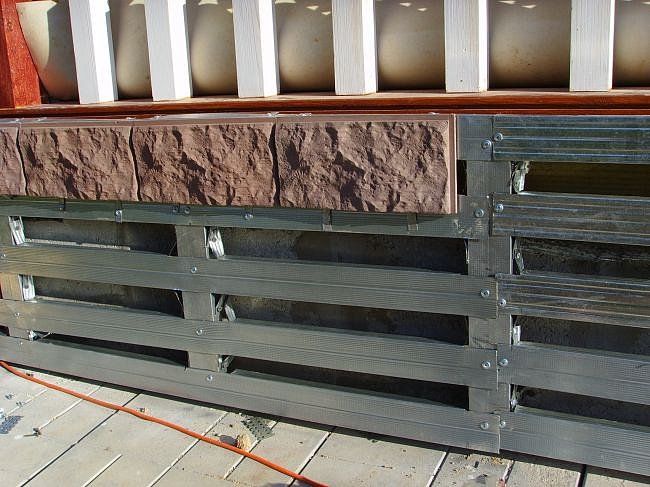
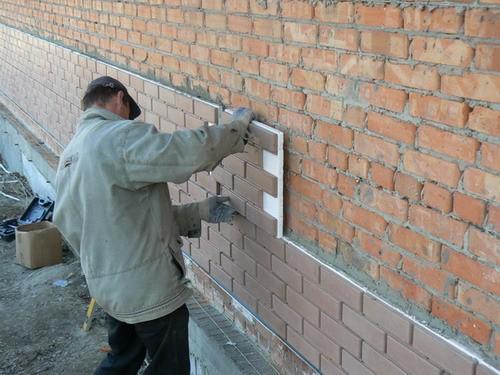
Let's stop on the metal profile. Outside, the profile strips are attached to the base using dowels and self-tapping screws (if the wall material is brick or stone). The important point is to leave the gaps between the cap of the screw and the canvas in one and a half centimeters, to allow temperature fluctuations to make their changes in the shape and volume of all components without sacrificing the appearance of the siding.

For a bar base you can use standard screws or galvanized nails, also remembering to leave a small distance between the cap and the base.
Do not forget, before you install the crate on the base, you must perform all actions for insulation or ventilation of the facade.After installing the supporting structure you will not have such an opportunity.
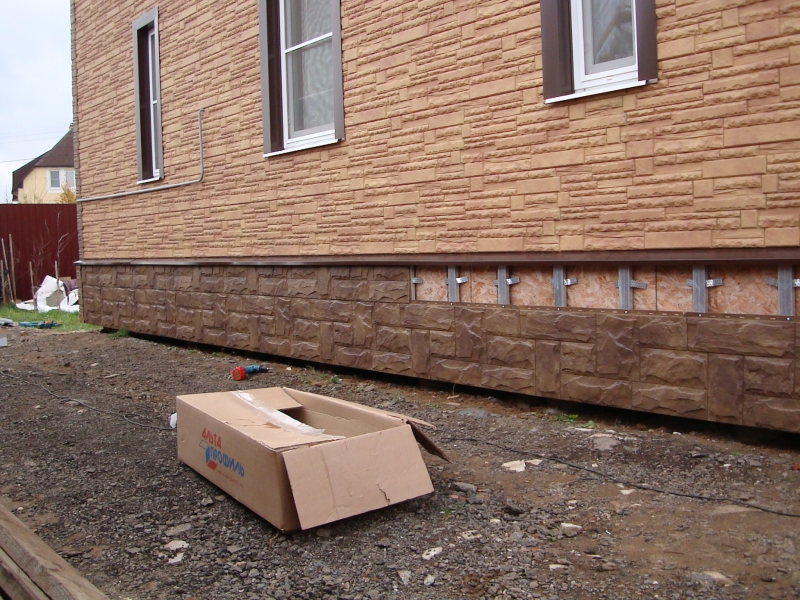

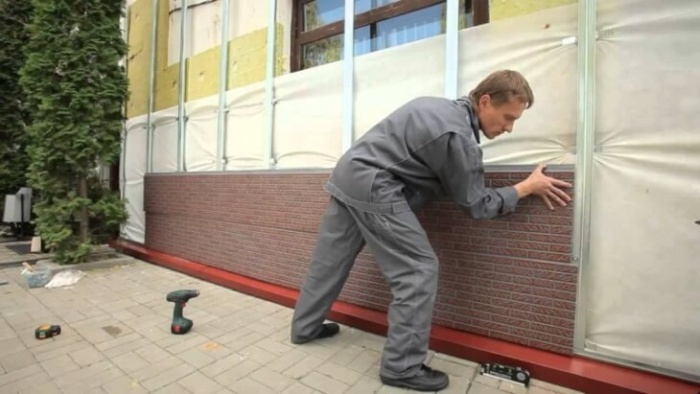
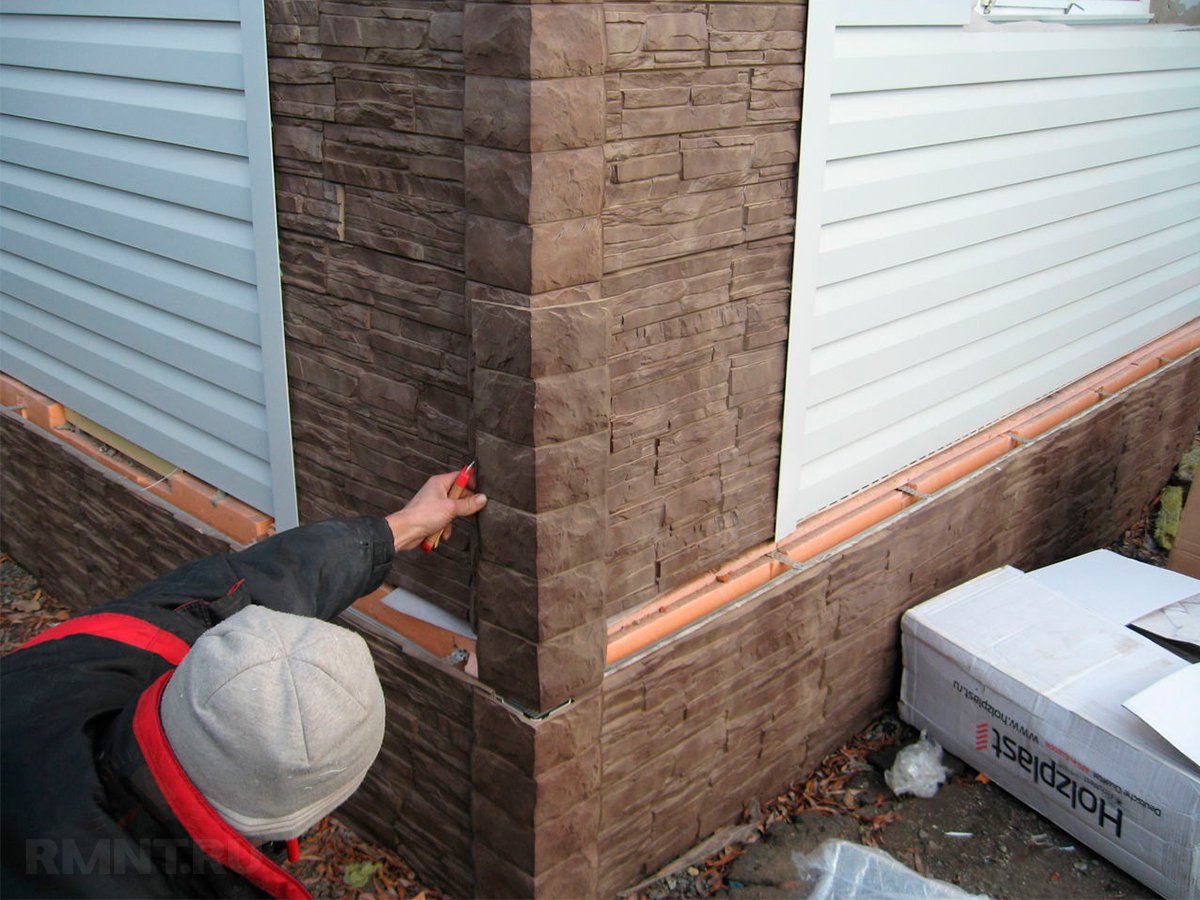
As soon as all the work on the installation of the batten is completed, we proceed to the installation of the siding panels. The first is the starting level, which is a kind of guide, indicating the path of further movement of the entire siding structure. Therefore, it is very important at this stage to use the building level. It happens that the land around the house is not even enough, sometimes even very uneven. Cutting siding panels in such a way that it looks aesthetically pleasing is not possible. Here to help builders come J-profile. This is a metal strap with an external j-shaped hook-harpoon. The profile is installed as close as possible to the ground, and the fixing of the starting bar to it occurs without sacrifice or distortion.
To install the cloths on the base of the batten, you should follow a certain sequence, which will help you quickly and efficiently install all the panels.
The movement of the elements is from left to right and from bottom to top.
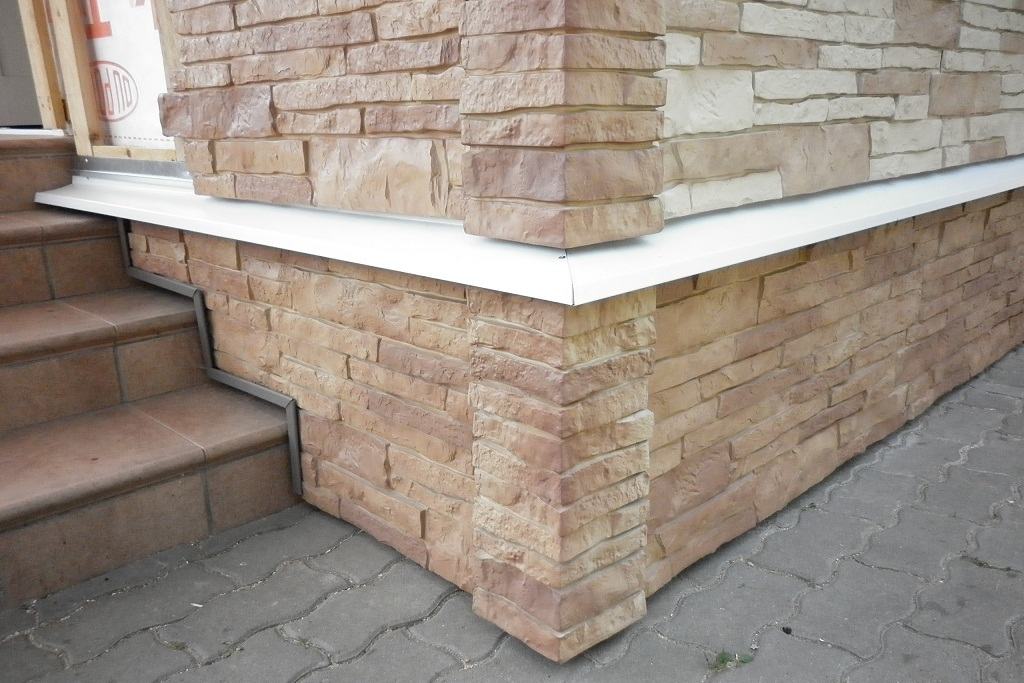
- First set the corner siding element.
- The first part is cut to the left along the vertical to fully align this side. It is put on the starting bar or J-profile and moves as far as possible to the left to enter the groove of the corner element. Do not forget to leave natural gaps between the siding panels.
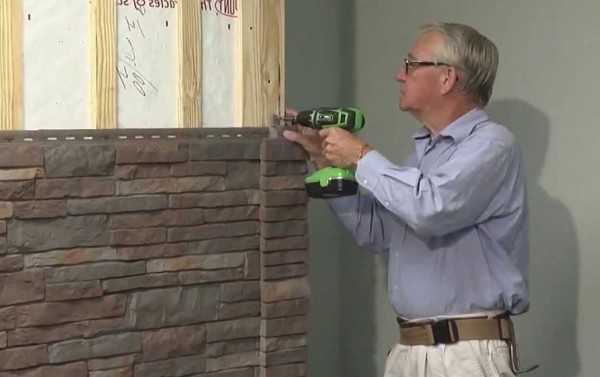
- Carefully measured the level of this part. When it becomes exactly smooth, you can mount it with screws to the crate.
- Continue to install subsequent items in the same way. Each next row is stacked in a staggered order so that the joints do not go a straight line along the entire height of the base.
- Before installing the last row is attached to the finish plate.
Installation of basement siding is not a particularly complicated process, but it requires care and precision, without which it is impossible to achieve a good end result.
I especially want to dwell on the lining of the pile foundation with polyvinyl chloride panels.
Screw piles are used to found the house in places where it is simply impossible to level the surface of the ground, and the owners do not want to mess around and wait long. The main difference of basement siding in such structures is thatthat first of all it is necessary to process the piles themselves with a waterproofing agent very carefully and to perform all the necessary drainage work. Check for debris, vegetation or holes of wild animals under the house. The rest is all done in the same sequence as with a regular base.
Tips
Carrying out the installation of basement siding with your own hands, you can resort to the advice and recommendations of experienced professionals.
- If you wish to recreate curly, unusual angular designs, you can also use a metal profile that takes any form, if you make small cuts in the right places.
- The number of decorative corners of siding is always equal to the number of rows of panels for plinth trimming. Thus, it is easy to calculate their preliminary quantity.
- To fix one corner first, then install the panels, again to cover everything with an angle is wrong. There is a risk of not counting and guessing with grooves. Installation of all siding element must be performed taking into account all the recommendations given in the instructions to it.
- Please note that facing a private house with siding involves the use of a large number of screws ornails. So, for one standard panel can take up to five pieces. They need to be screwed into special holes. At the same time, in order to distribute the load on all panels evenly, self-tapping screws or nails should be placed strictly in the center of the holes of the horizontal panels. As for the corners, here a nail or screw is inserted into the very first lower hole in its lower part, and then also in the middle.

Professionals recommend to pay special attention when choosing panels for siding on some nuances.
- Coloring. The better the products, the more uniform and bright the color of the panels will be both outside and inside.
- Thickness. This parameter should be the same over the entire length and over the entire height of the panel. If you look at it directly, and you see seals, bulges, curvatures, run away from this manufacturer or seller.
- Dimensions. The size information provided by the manufacturer on the packaging must match the dimensions of the panels available.
- Holes. All perforations are of the same size, shape and smooth.
- Appearance. The presence of the slightest surface defects: peeling, blistering, delamination.

In the care basement siding is very unpretentious. Its timely cleaning will extend not only the term of its service, but also your esthetic pleasure. To wash the panels it is convenient to use a hose in which water is supplied under moderate pressure. In hard-to-reach places a car brush can come to the rescue. The main thing is not to use materials with a rough surface and sometimes use classic detergents.
When installing fiber cement siding (or panels under the stone and brickwork) it is necessary to take into account the fact that this material is very capricious and gives a bad shrinkage, it is difficult to react to weather changes. Thus, the approach to this type of facing should also be special, so as not to spoil your mood in case of a sudden force majeure.
Installation of basement siding, see the following video.


