How to install a bath?
Installing a bath with your own hands is a rather complicated process that requires the presence of certain skills and abilities. A bath is a large-sized object that needs careful handling: to spoil the enamel is easier than simple, but to restore it is almost impossible. On the intricacies of this process and will be discussed in the article.
Model selection
If a complete replacement of the bath is intended, it is necessary to immediately make a choice. Only a competent approach will help to buy a plumbing device that will fully meet the needs of all tenants of the apartment. Among the options on the market are the most popular products:
- Steel - differ in reasonable cost and ease in use. The peculiarity of this option is that with certain skills such a bath can be installed by one person. The only drawback is that the enamel of such a product deteriorates extremely quickly, so durability is out of the question. Steel bath is an ideal solution for small rooms where it is necessary to install a plumbing device as close as possible to the wall. This allows you to significantly protect yourself from deformation and the need for replacement in the future.
- Cast iron - are distinguished by a long service life and do not require special treatment. However, such baths are characterized by extremely high cost and complexity of installation, which is caused by considerable weight. It is impossible to install a bath on a ready-made siphon, so you have to attach it to it in advance, which is quite difficult in the cramped conditions of a small space.
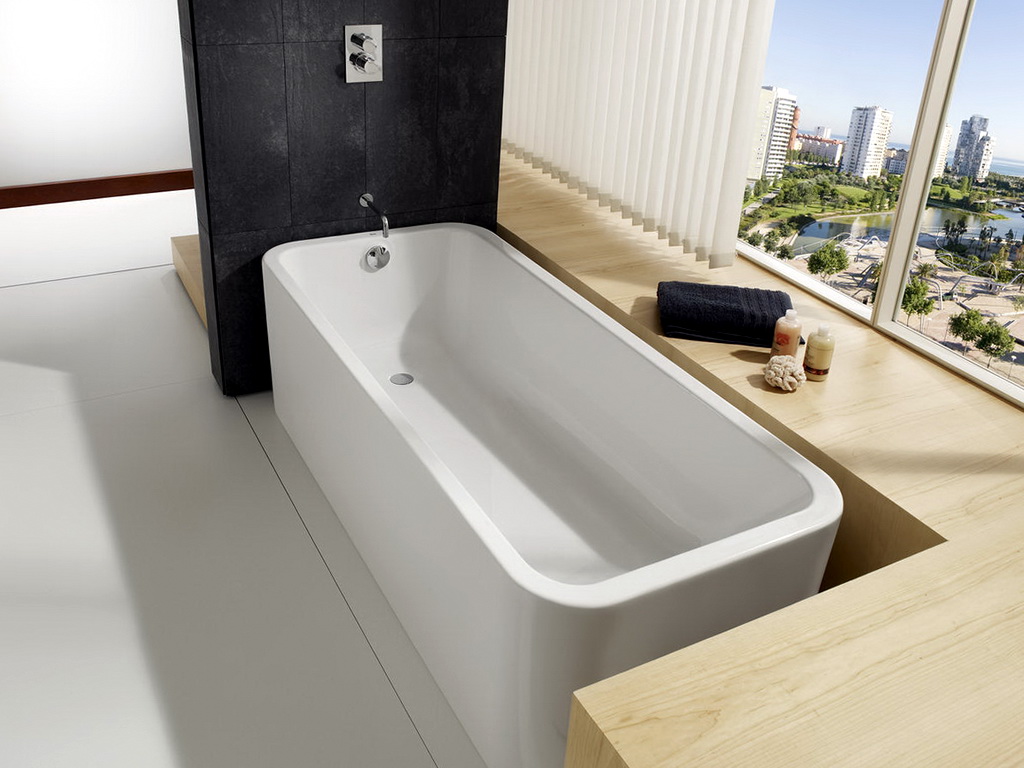
- Plastic - have become very popular lately and can boast of their environmental safety,durability and attractive appearance. Acrylic baths are more expensive than steel, but they are cheaper than cast iron.
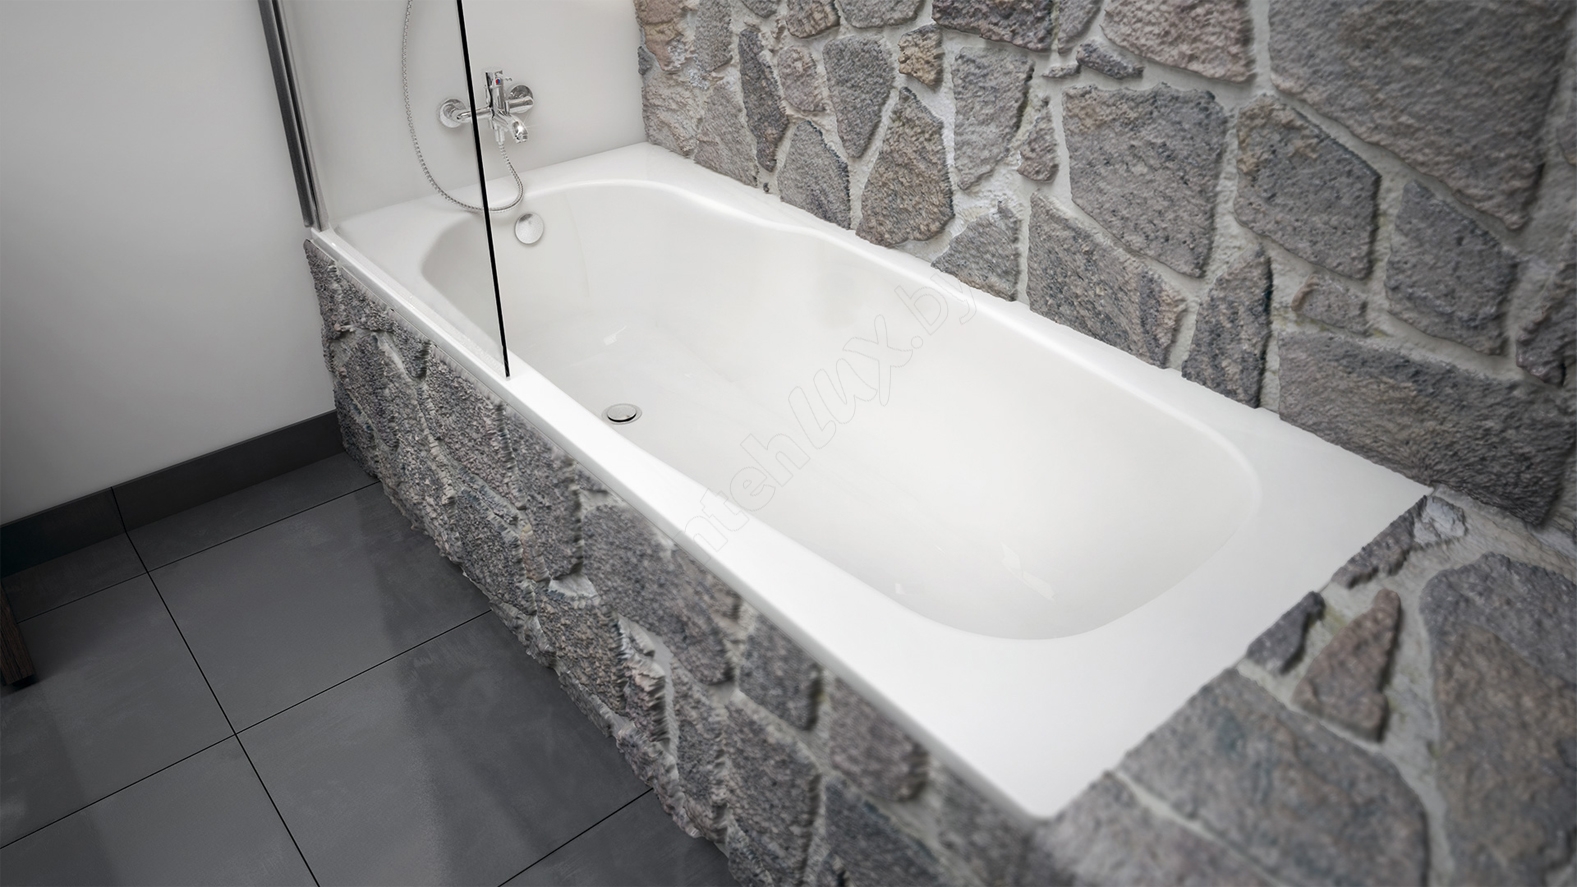

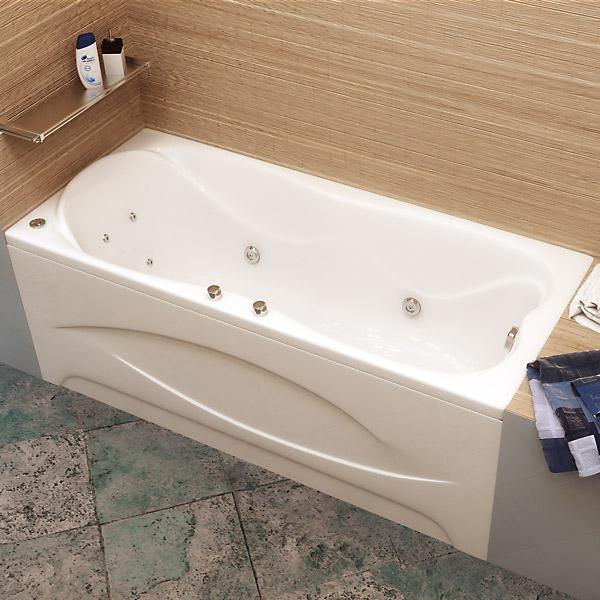
It is necessary to work with such sanitary device very carefully, as it is easy to damage the surface. According to other characteristics, the acrylic version is considered one of the most suitable for modern bathrooms.
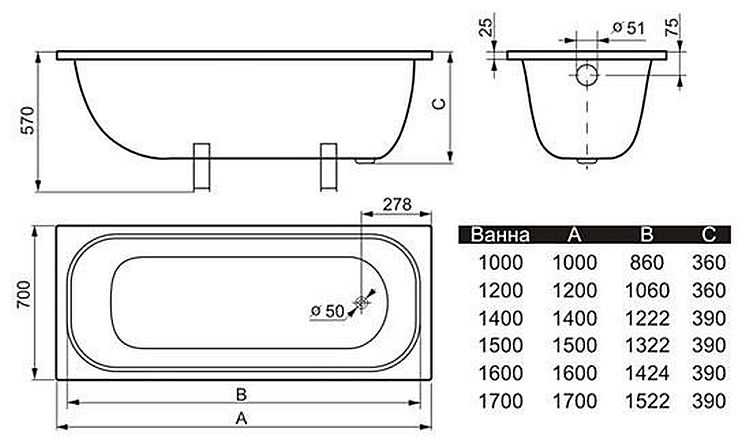
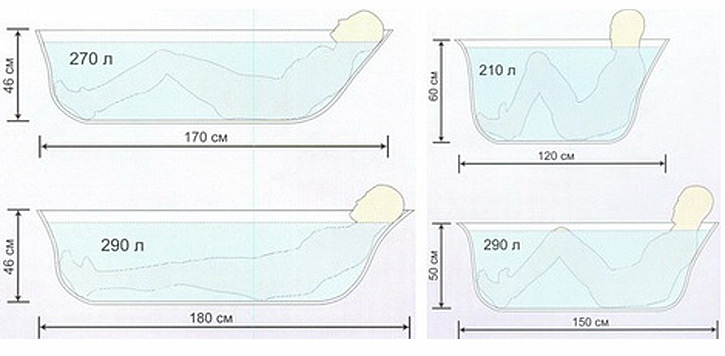
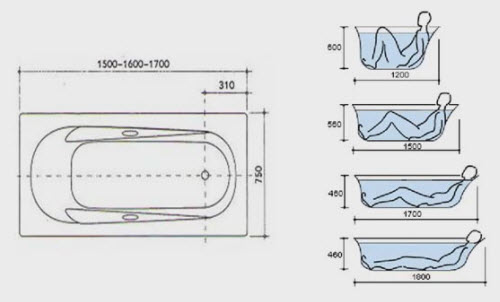
Having decided on the material suitable for manufacturing, you can proceed to the choice of the size of the product. In the process of selection should pay attention to the height of the side, the depth of the bowl, its length and width. The most suitable height of plumbing can be determined by the average height of family members. In addition, be sure to consider the presence of children in the apartment. For adults, a height of 60-70 cm is considered optimal. If there are children, then it is better to choose smaller items.
Each type of bath has its own distinctive features in terms of dimensions:
- Cast iron products are available in two versions: miniature (120x70 cm) and European standard (140x70 cm).
- The length of the steel bath bowl is 150-180 cm, and the width is 85 cm. Sometimes you can find products made of “economy” steel on the market.The length of this model is 120 cm, which makes it an excellent option for a small room.
- Acrylic baths are very different, so there are a lot of possibilities when choosing. On the market you can find models with long and short bowls. It all depends on the overall configuration of the product.
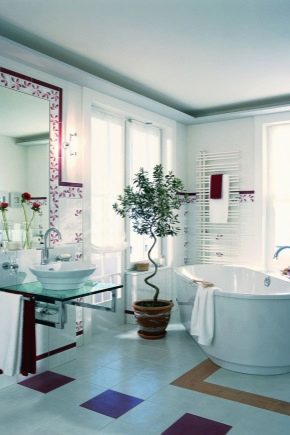
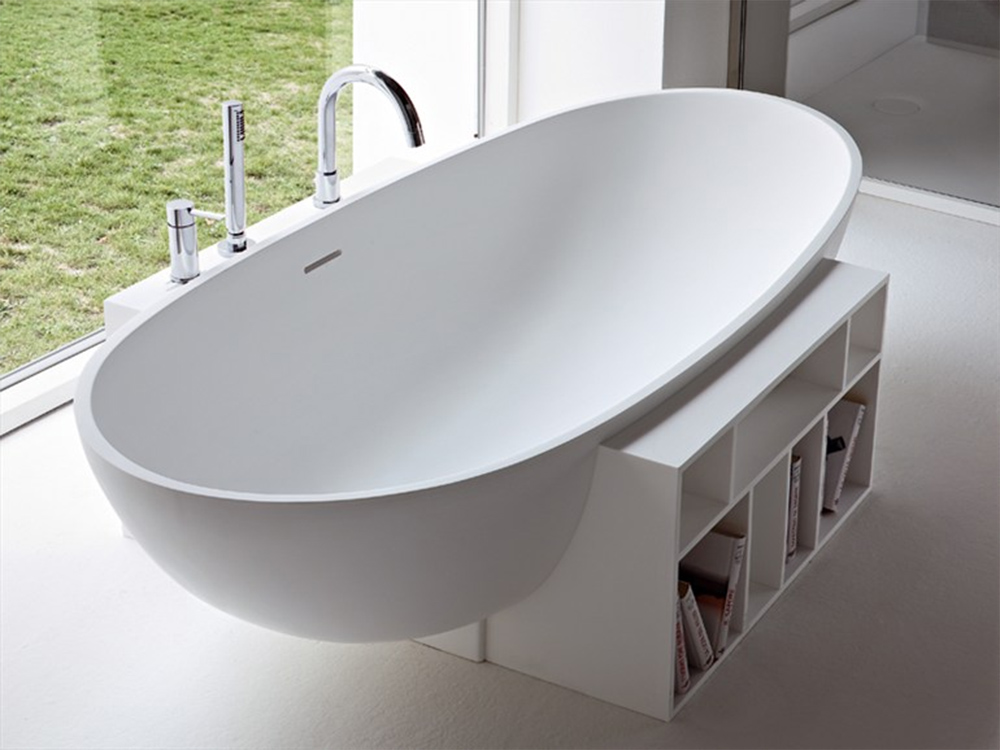
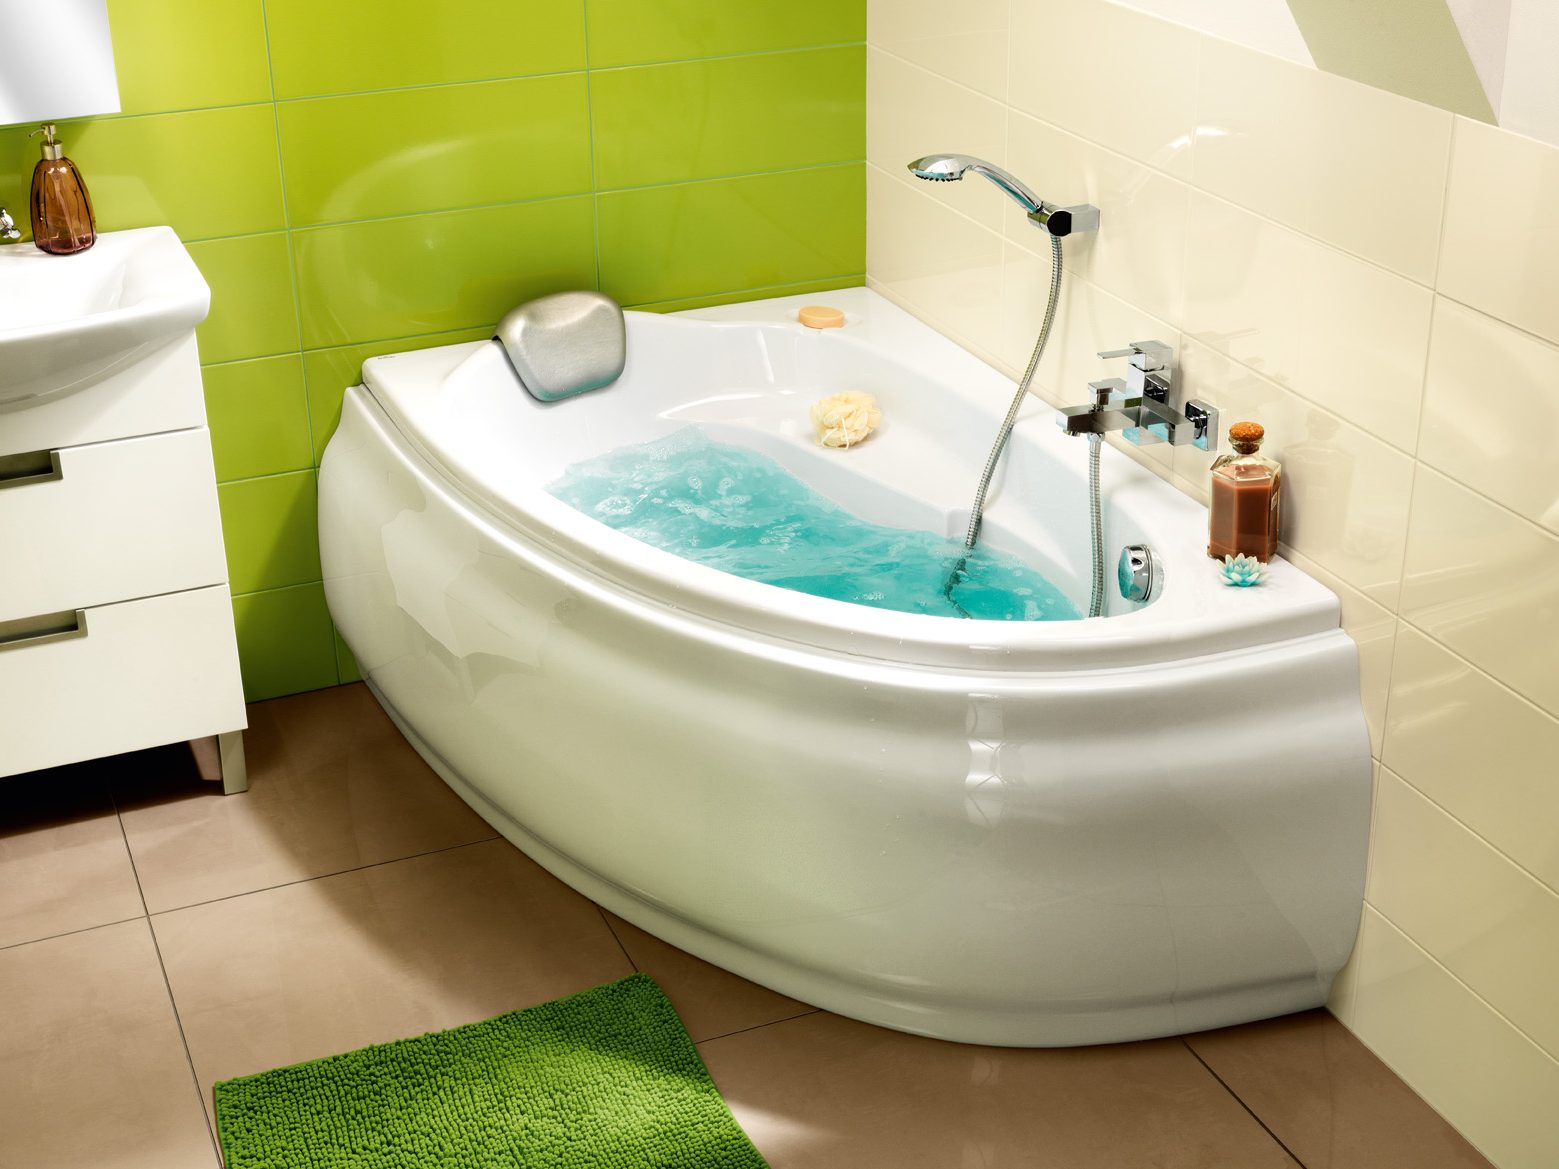
Bath can be wall or corner. A distinctive feature of wall products is that they are mounted as close as possible to one of the walls, while the corner ones are installed at the corners.
Wall baths come in a variety of forms. The most popular is the oval, which looks more stylish and elegant. As for corner baths, they are usually found with the correct geometry, less often in asymmetrical shapes.
When choosing a bath for a city apartment, it is necessary to take into account the available floor space, as well as the minimum set of installed furniture.

Finally, you need to decide on the manufacturer of sanitary equipment:
- Pig-iron baths in the domestic sanitary market are represented by three major manufacturers: Wagon, Roca and Jacob Delafon.
- Among the steel options, products of domestic companies are in great demand.among the foreign ones, the Spanish trademark Roca and Portuguese products can be distinguished. BLB.
- Acrylic baths are presented in the greatest variety. In the market you can find products from European countries, Turkey and China. Among the most famous manufacturers are the Czech company. Ravak Polish Cersanit and Kolospanish Pool spa.
- Currently, quartz baths are made by only one company - the German brand. Villeroy & boch. The fact is that this company is both the developer of the technology itself and the creator of the material, therefore the right to produce products belongs only to it. For this reason, you do not need to believe if someone is trying to sell you a quarian product from another manufacturer.
Bathroom preparation
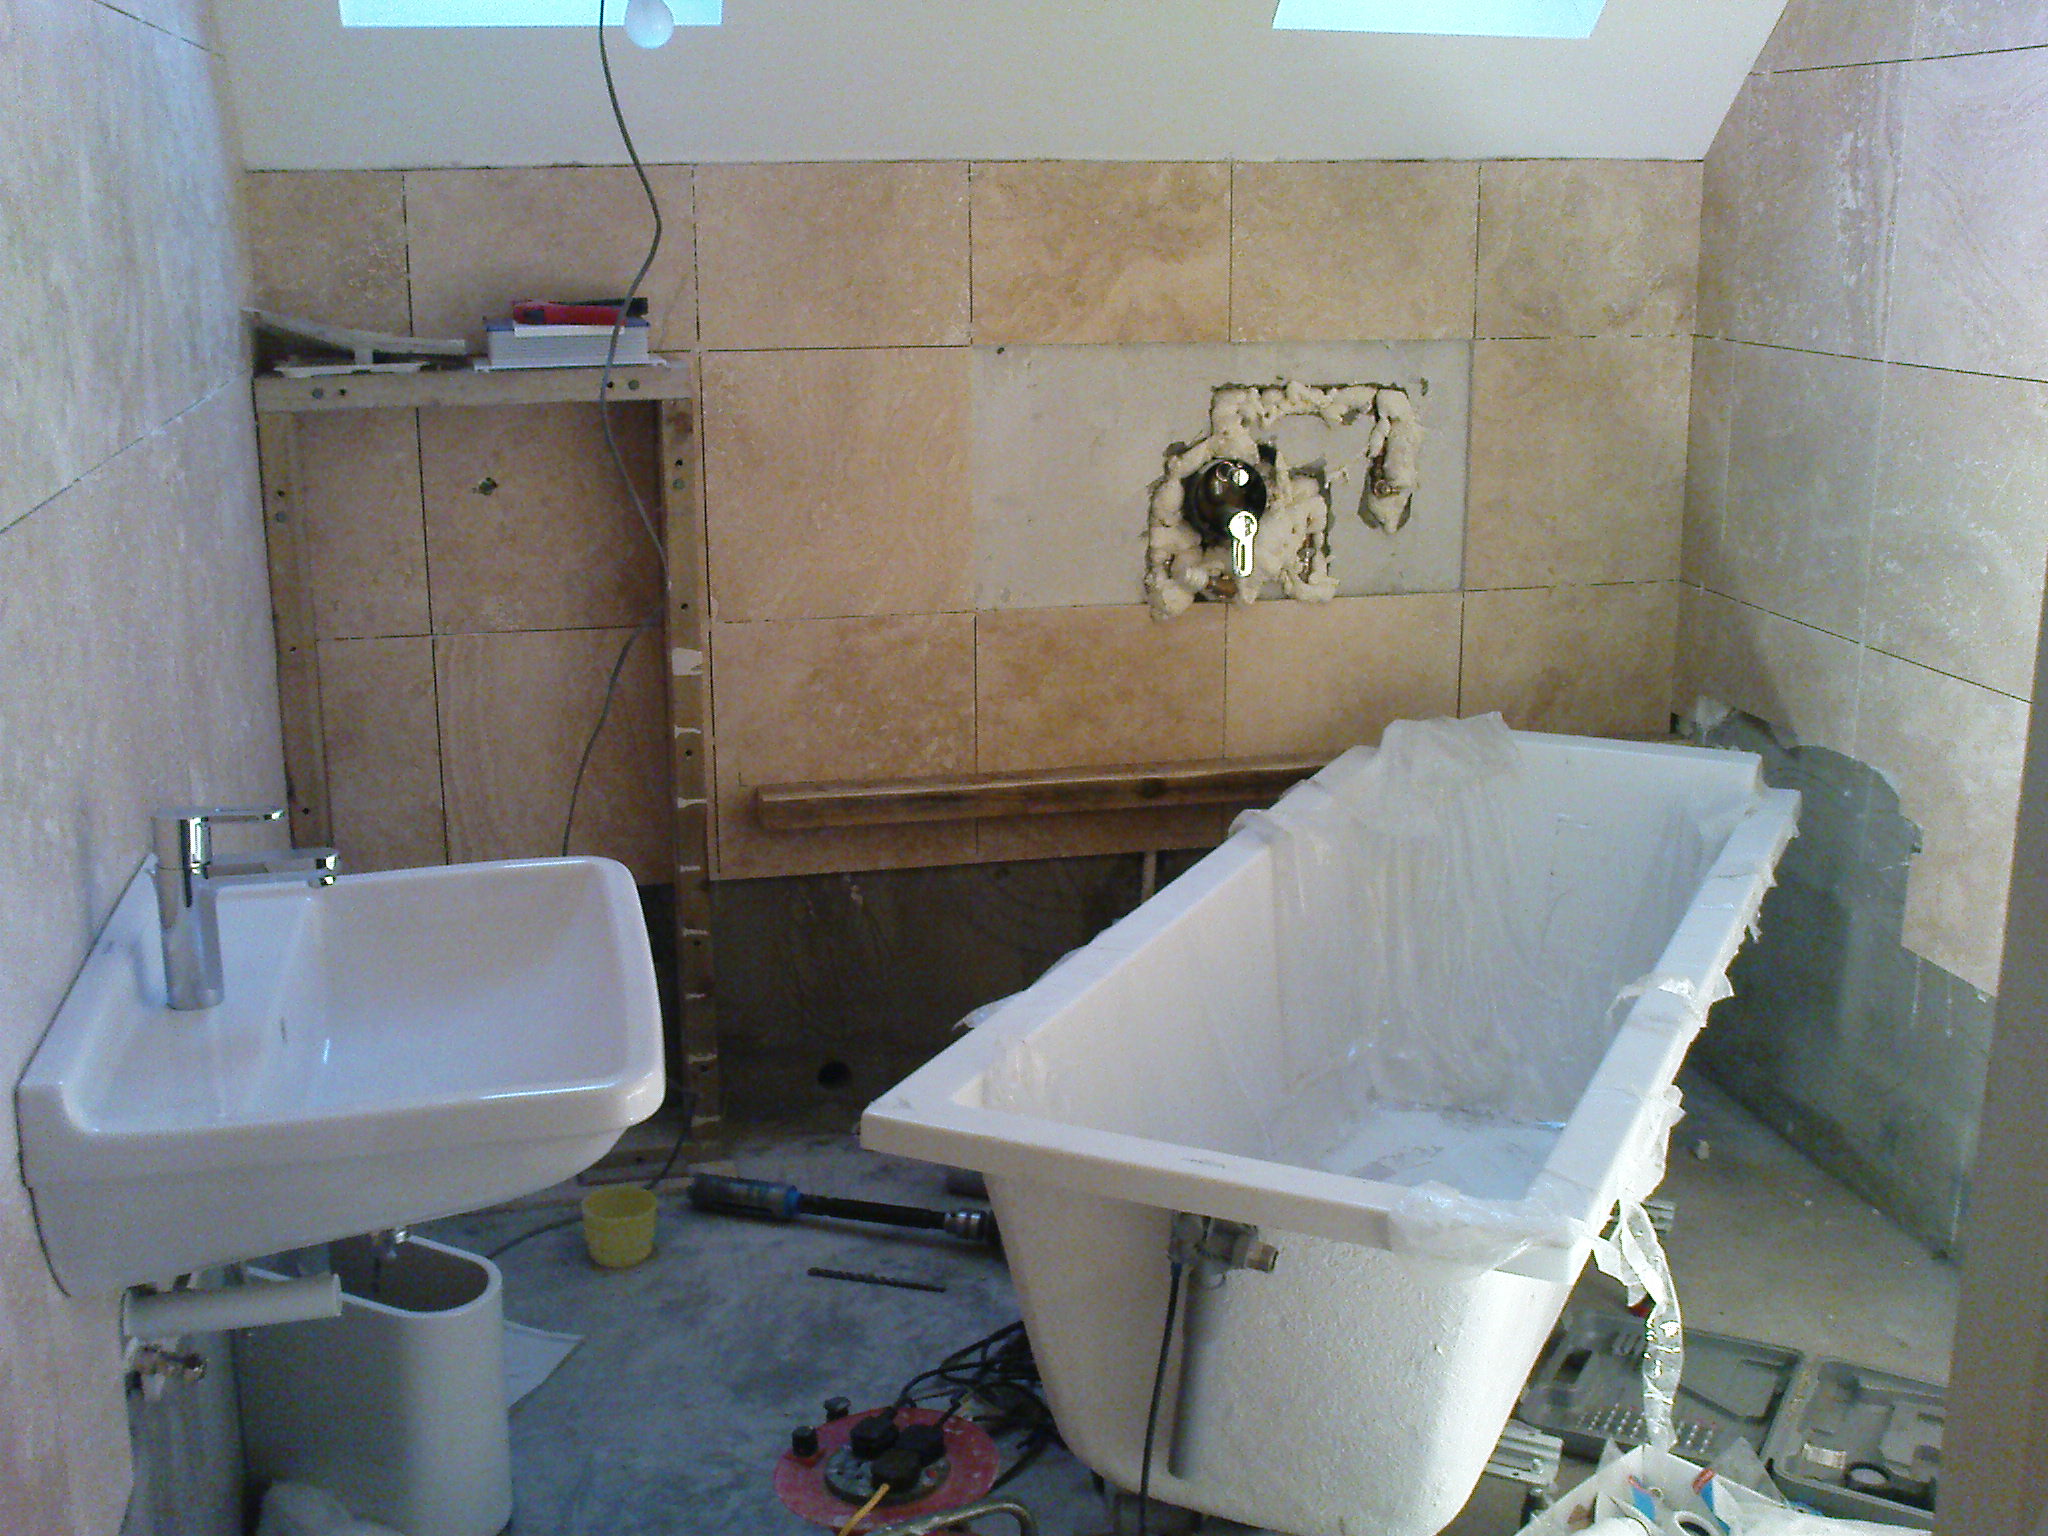
Before installing this sanitary product, it is necessary to prepare the entire room, which will allow proper installation and guarantee the durability of the bath. First you need to pay attention to the walls. If the installation of a new bath is carried out simultaneously with the repair in the room, then the lining should be carried out after installation. If the repair work will not be carried out, then the new plumbing device should be at least several centimeters higher than the old one.Only in this case, you can achieve an attractive appearance, as well as make sure that there will be no gaps.
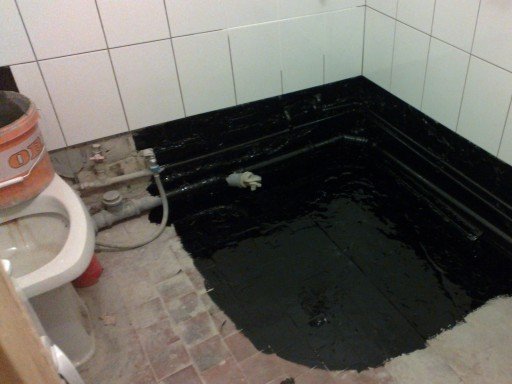
Particular attention should also be paid to the floor, which should be perfectly flat and reliable, without baseboards, able to withstand the weight of the product being installed.
Even an empty cast-iron bath weighs quite a lot, so the base for it must be prepared correctly. Not every tile can withstand such a load. The ideal option is considered if the tile was laid on solid cement, it provides maximum strength and reliability. If there is even a minimal void under the tile, it will immediately crack due to such pressure.
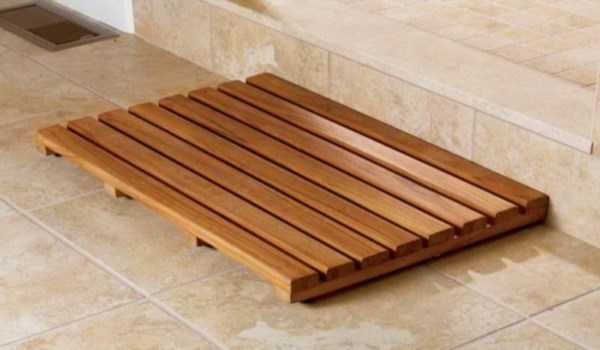
If it is not possible to carry out repair work on the flooring, you can simply lay two solid boards of larch, which will reduce the pressure on the floor and tile.
However, the tree must be pre-treated with fungicides, as the bathroom is a fairly damp room, so all materials should be protected from decay. With the help of a wooden pillow, you can not only get rid of problems with the load on the floor covering, but also solve issues related to the height of the bath.


Installation of different types of baths
On the modern market, a large number of baths are distinguished, which differ from each other in their characteristics, cost, appearance, performance properties and installation features. In order for a mounted sanitary device to last as long as possible and to fully perform the functions assigned to it, it is necessary to take into account its type during installation.
Acrylic
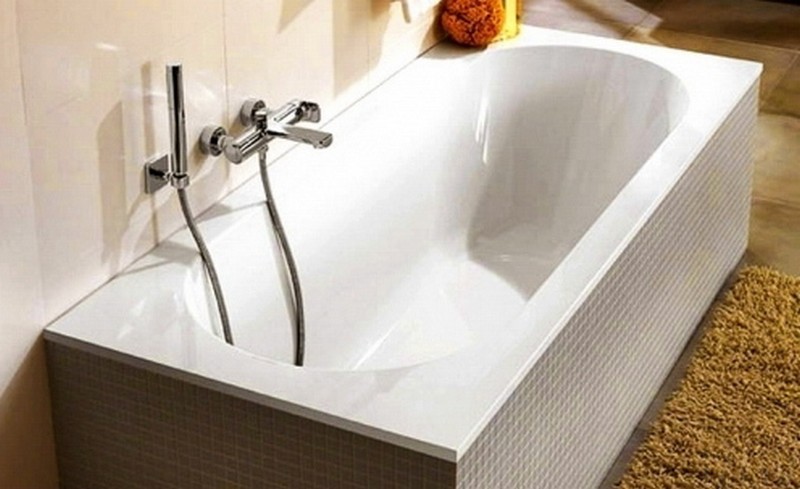
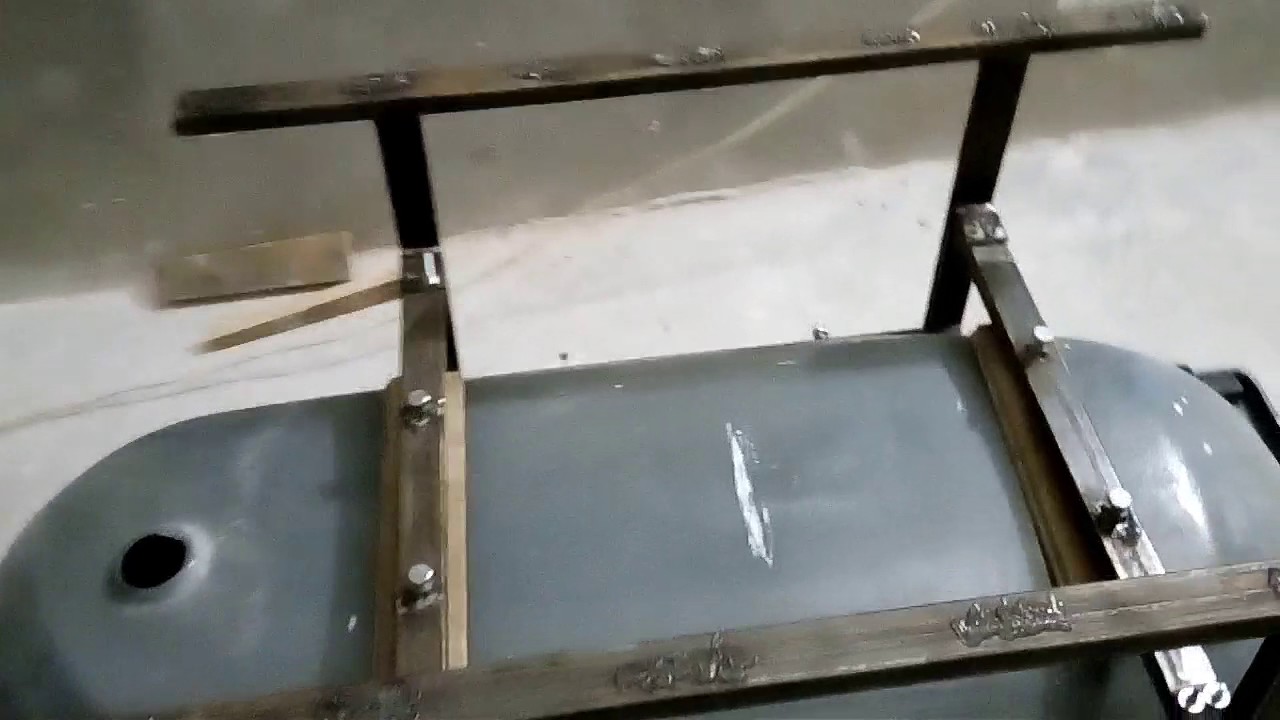
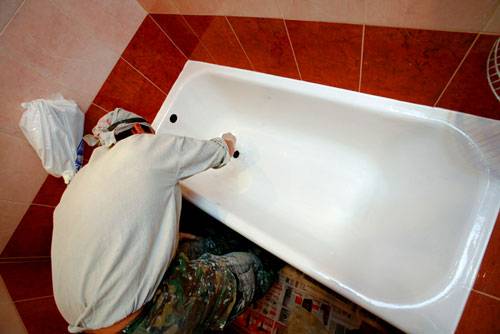
Before installing such a product it is necessary to attach to it all the guides for the legs, which will be installed across - on special screws. Included with each acrylic bath is a special instruction that explains how to mark the fixings. Lodgings should be applied perpendicular to the longitudinal axis of the bath, marking all the necessary places with a pencil. The depth of drilling at the same time can not exceed 25% of the length of the screw.
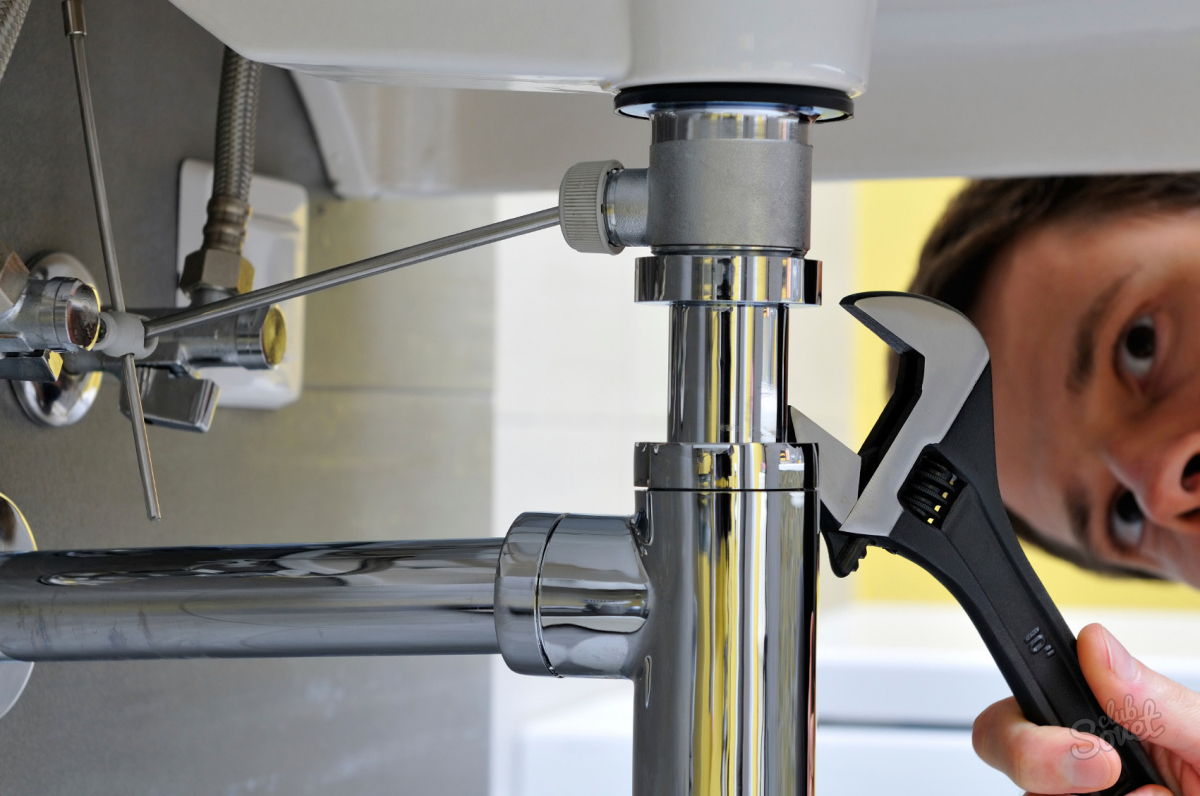
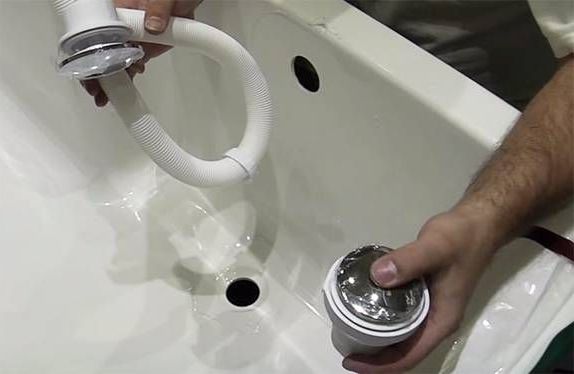
It is necessary to install drain fittings, having turned the bath to the side. To ensure that everything goes as well as possible, you need to adhere to the following recommendations:
- each gasket must be lubricated with silicone before installation;
- installation of gaskets occurs from the outside;
- it is better to choose a conical gasket, which is installed with a tip to the hose, so that in the process of tightening it does not damage the thrust;
- Threaded connections must be tight, but not too tight, otherwise they may burst.
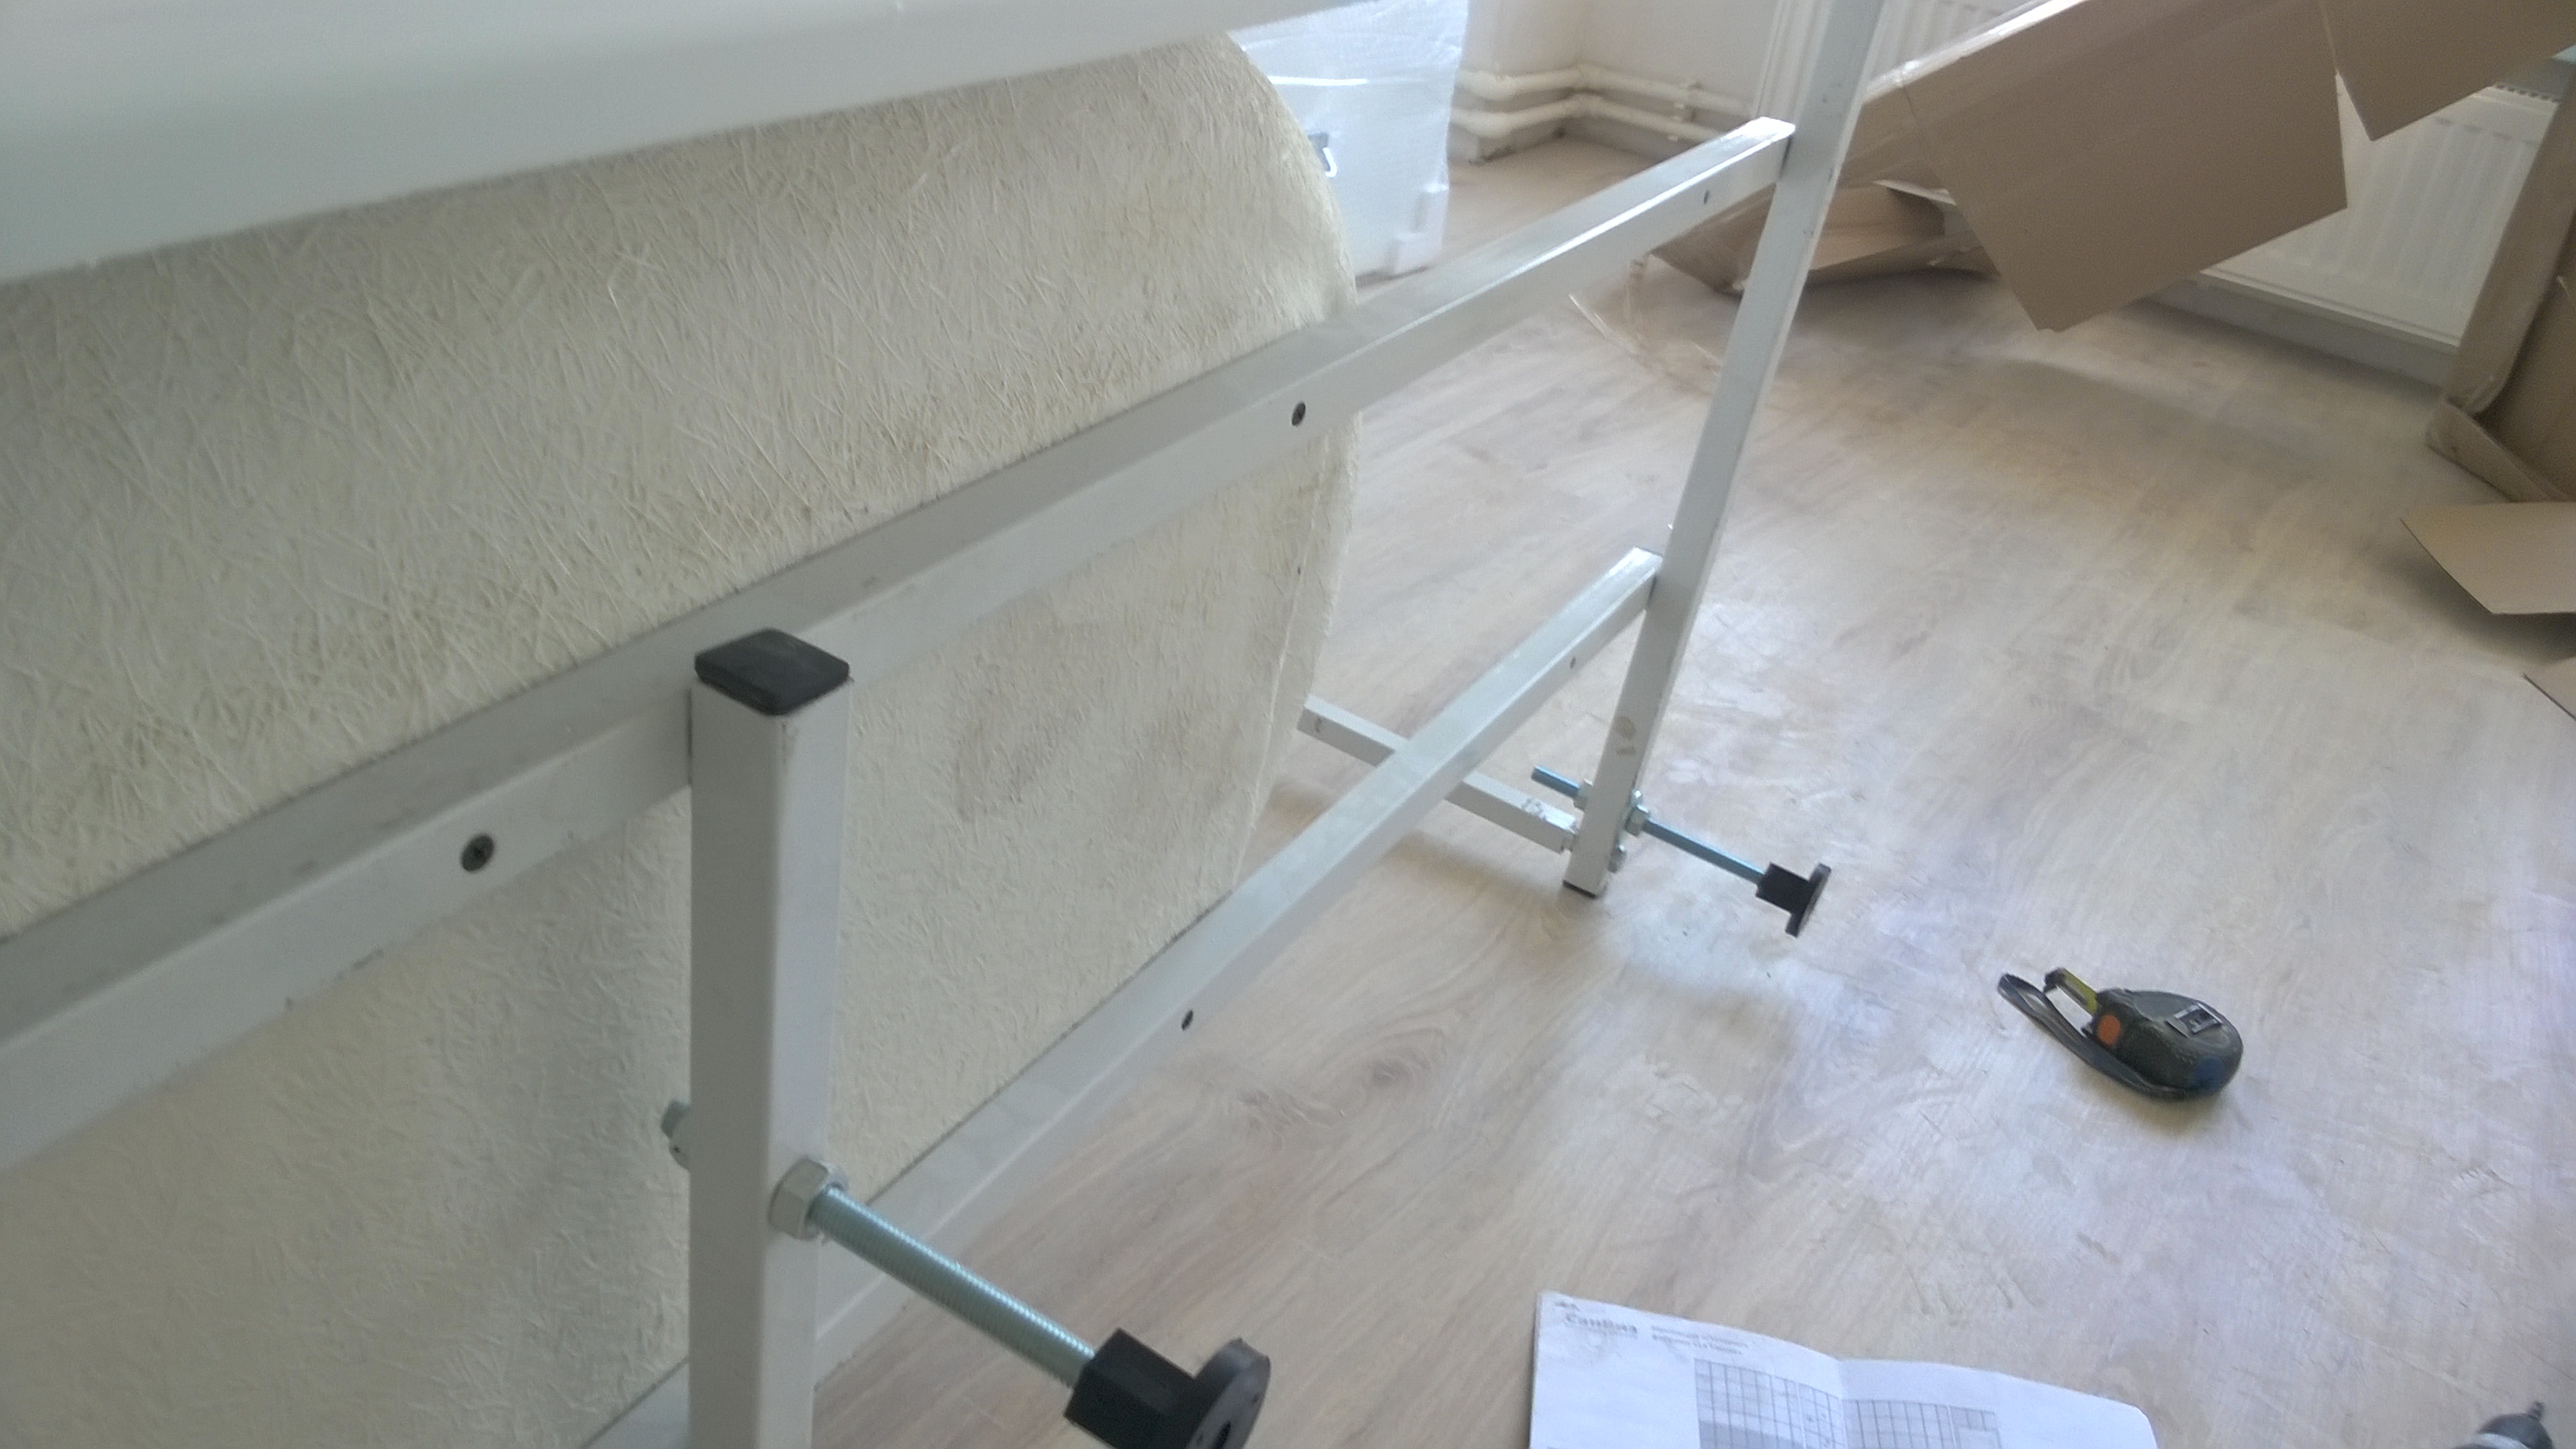

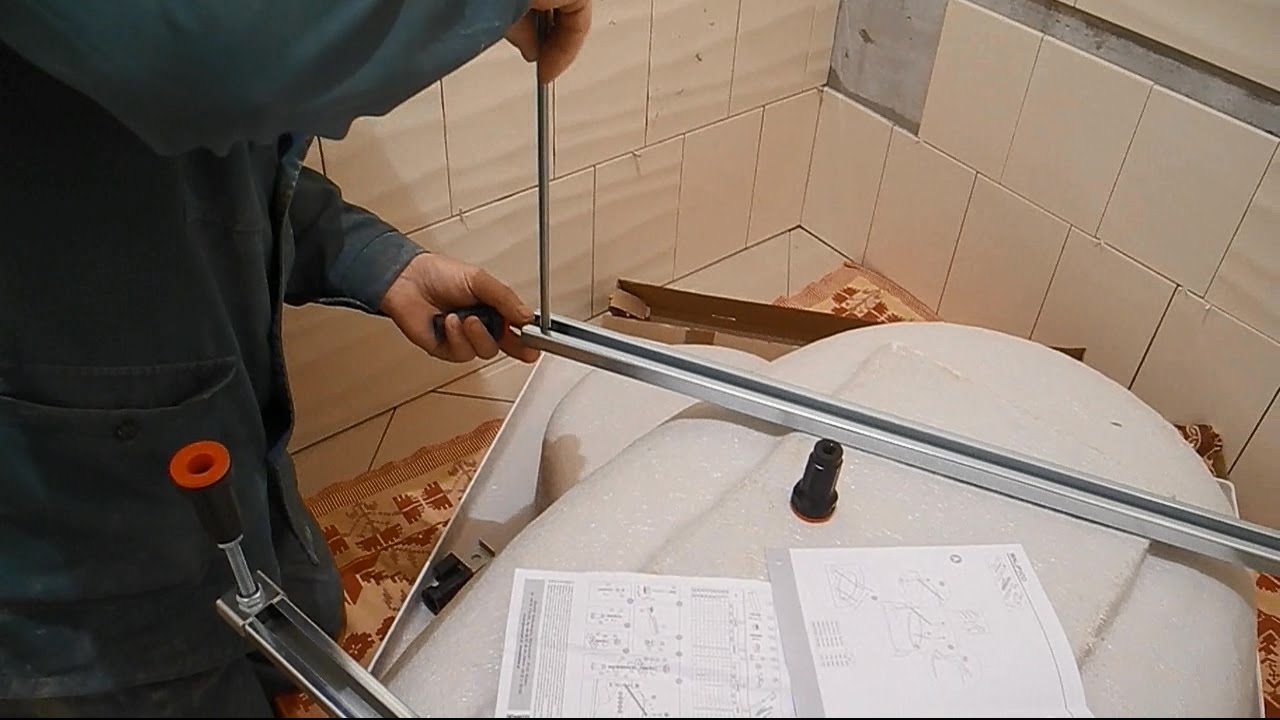

When all this is done, you can turn the plumbing device and install the legs. It should be noted that to cope with the installation of such a product will not work on its own, so you definitely need a partner. A more experienced person should be on the side of the drain to constantly monitor its location and installation.
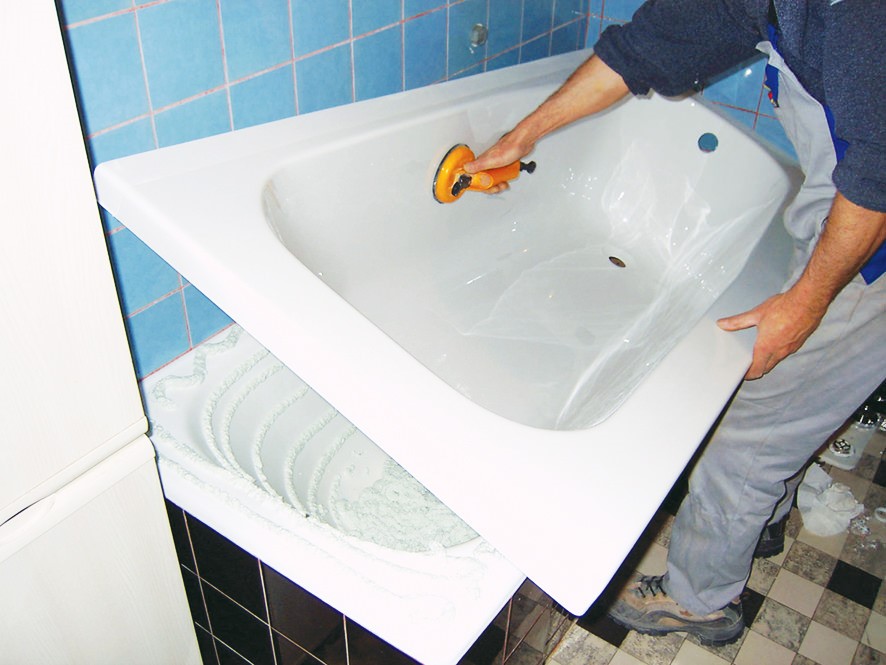
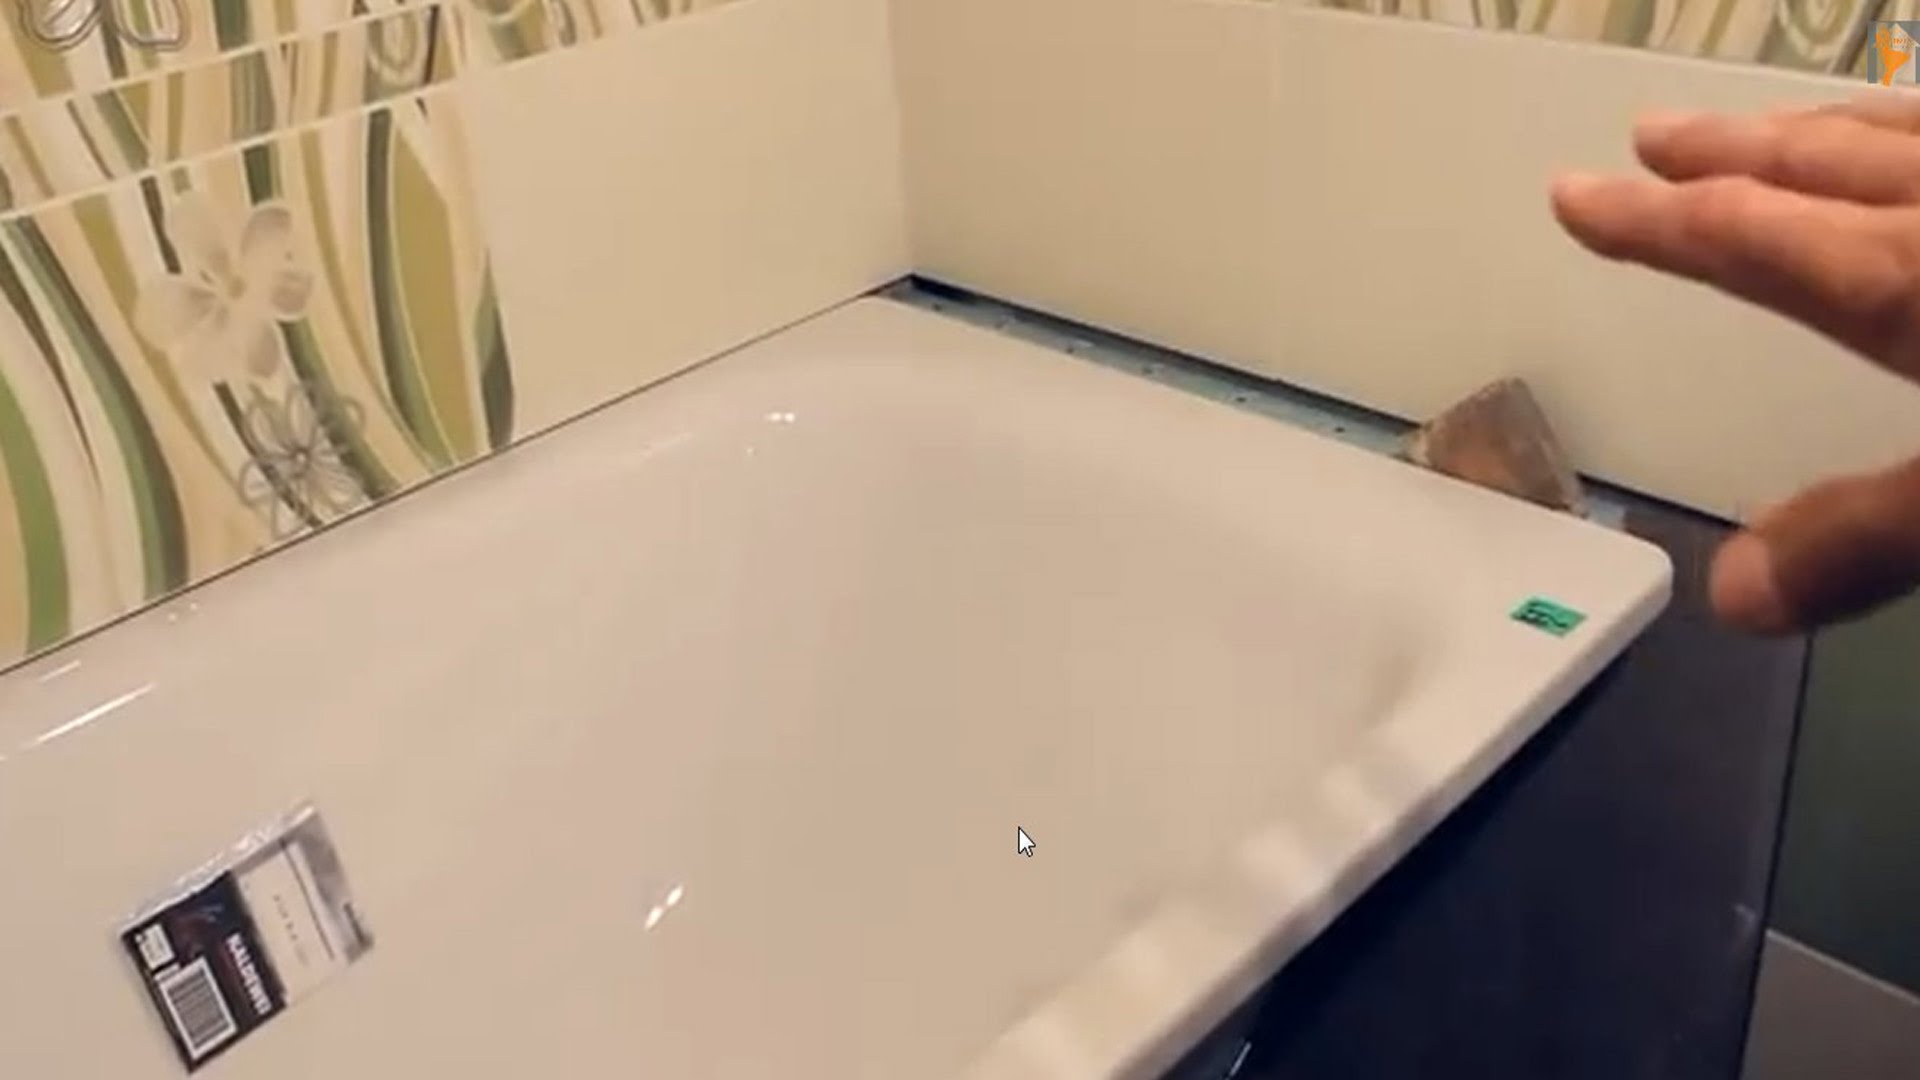
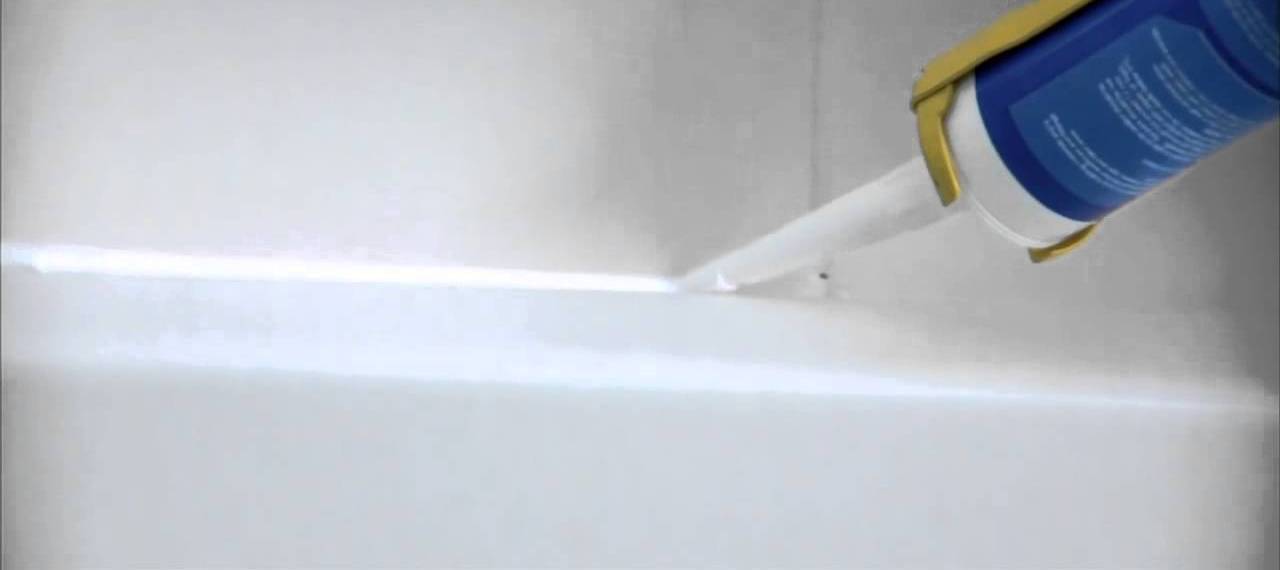
Acrylic bath should move as closely as possible to the wall, which will provide more convenient use and will not allow damage to the product. When the model is installed in its place, leveling and sealing against leakage should be carried out. At first we use sealant, we carry out other works only after it dries.
After the sealant hardens, it is necessary to check for leaks, because after the completion of work it will be extremely difficult to return to the previous stage.If there are no leaks, it is also necessary to seal the gaps between the sides of the bath and the wall with silicone.
Metallic
The installation of the steel bath is carried out in the same way as acrylic. The only exception is to mount the legs, which must be inserted into the fasteners and fixed with bolts and nuts. It is necessary to fix as tightly as possible by tapping them with a rubber hammer. The legs should not stagger, otherwise the steel bath can damage them.
Most plumbers advise installing rubber pieces under the surface of the legs that are in contact with the bowl of sanitary products, which will greatly reduce ringing when filling a bath with water.
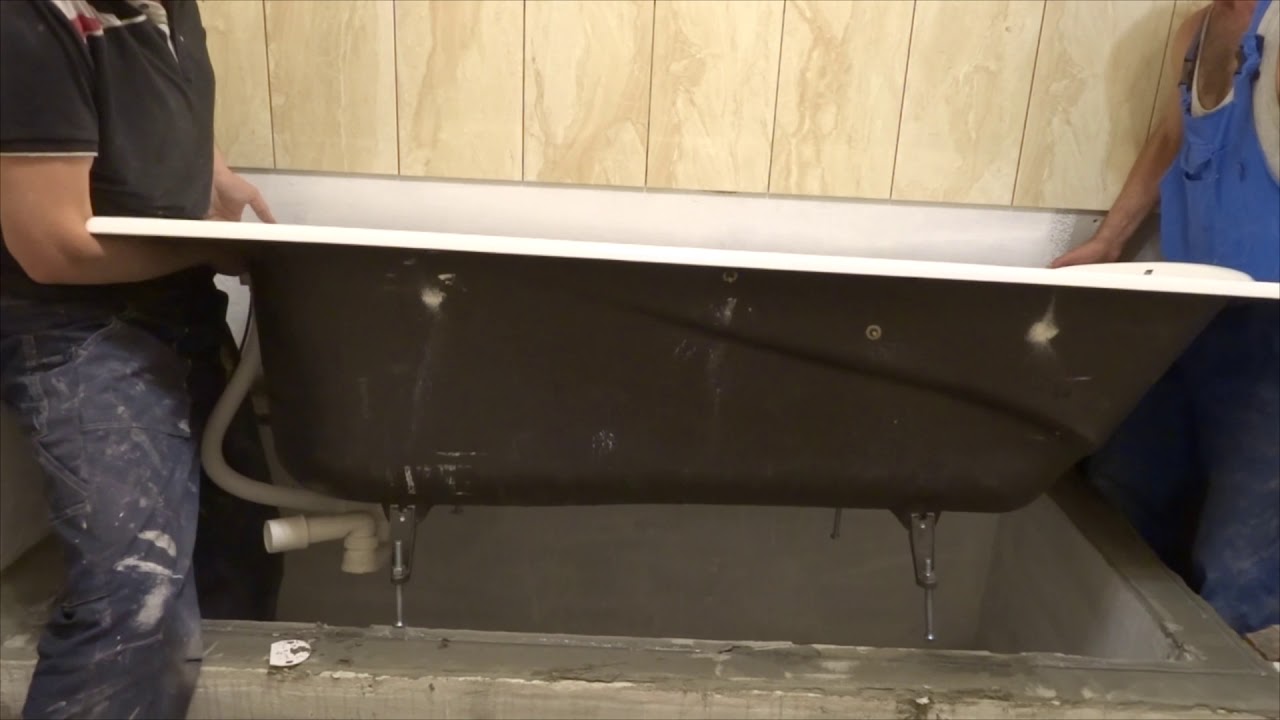
It is most difficult to install a cast-iron bath, which has an extremely high mass, so moving it is very difficult and dangerous to repair the room itself. If the dimensions of the room allow, it is necessary to transfer the product to the bathroom and install it already there. First - the plums and legs, then the alignment is carried out.
If the cast-iron model is equipped with decorative legs, this greatly complicates the installation. The fact is that the installation of such a product is a rather laborious and responsible process that can only be handled by an experienced and professional master. Lining under the legs to install will not work, because it fully destroys the attractive appearance of the product, and the filing is extremely difficult to do, because it requires accurate measurements.
Moreover, each time it will be necessary to turn the bath over, move it or move it to the side, which is extremely difficult, considering its considerable weight. For this reason, to install a cast-iron bath, which is equipped with decorative legs, it is necessary to carry out a preliminary alignment of the floor surface (with the help of materials characterized by increased strength).
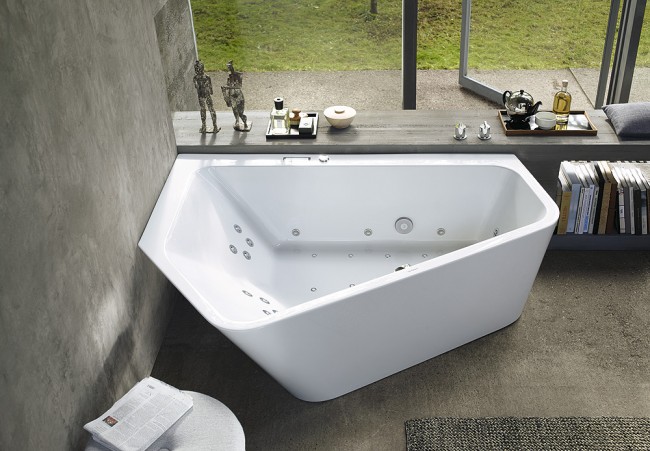
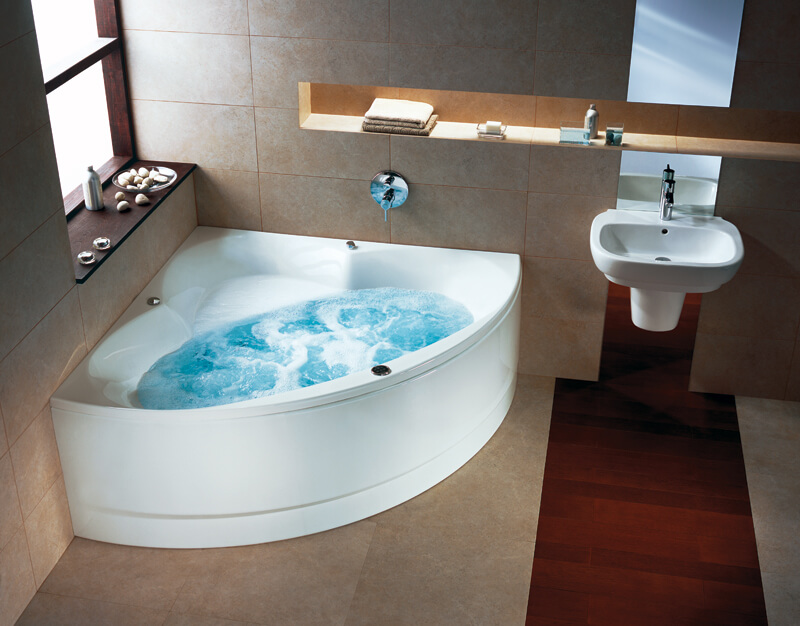
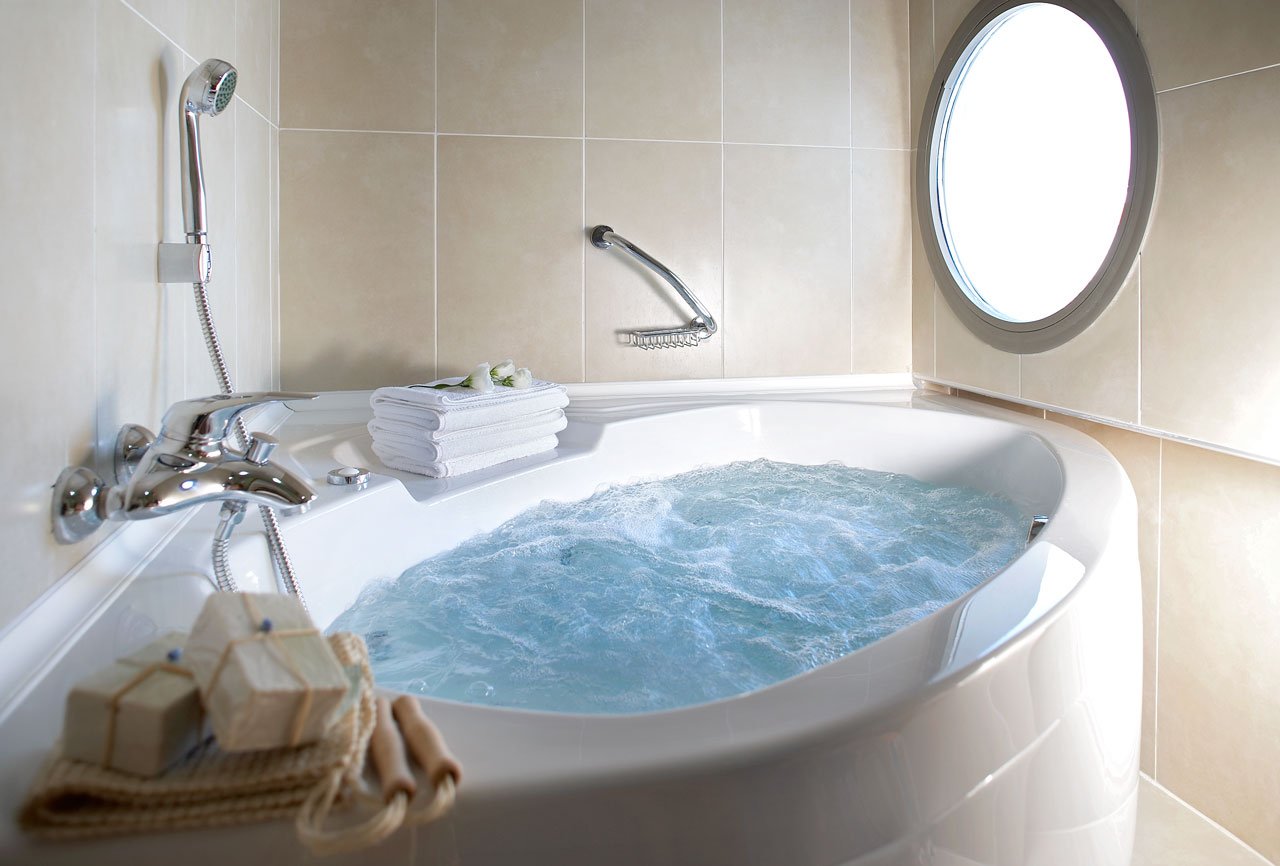
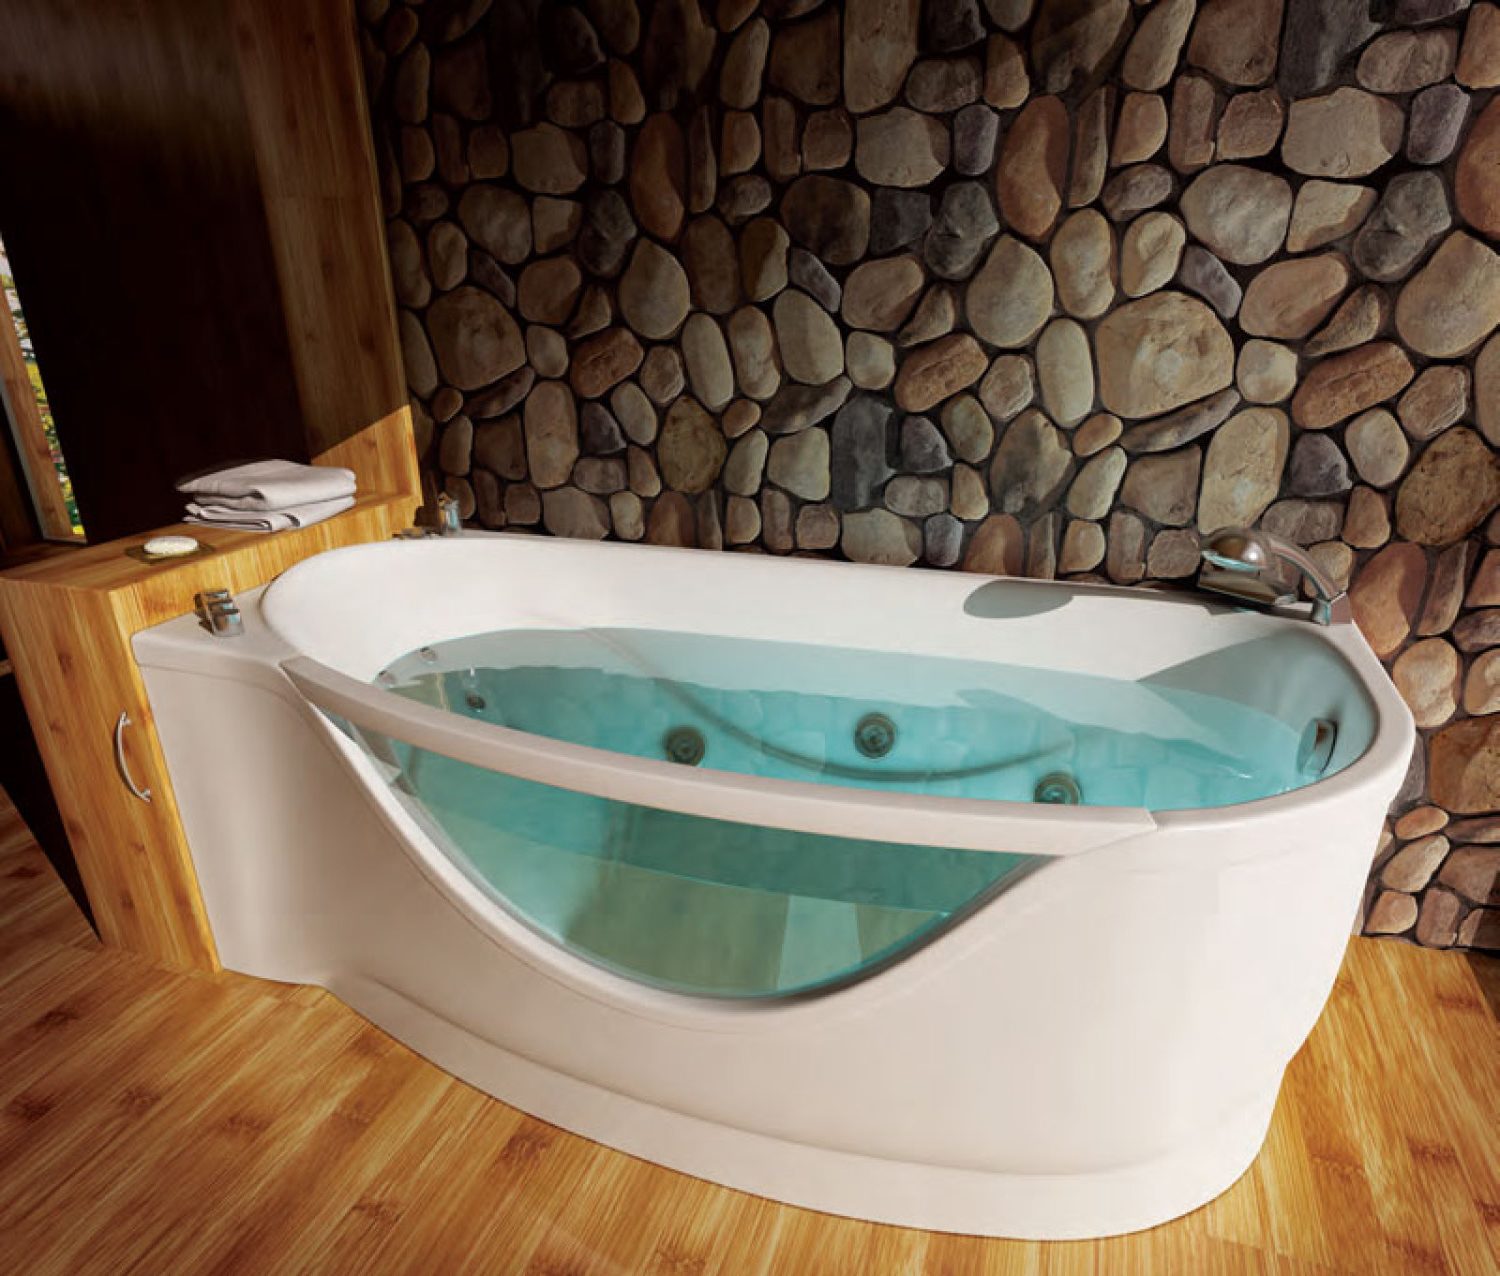
Jacuzzi
Hydromassage baths are quite interesting and useful products to improve the health of people. The combination of water with air bubbles provides relaxing and therapeutic effects. Jacuzzi first appeared in the United States of America, it happened in the middle of the last century. For a long time only very wealthy people could afford a jacuzzi.
Now, manufacturers of sanitary products offer a wide variety of models that differ in affordable price. In the era of high technology in the modern market there are many hot tubs, which are characterized by small dimensions, a wide range of functions and an attractive appearance.

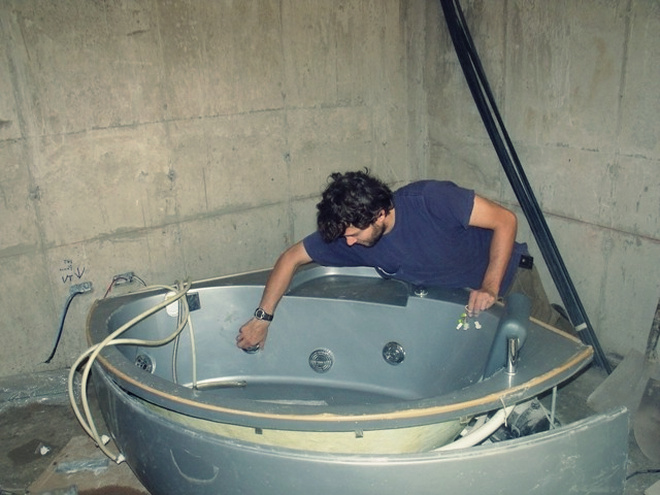
The technology of installation of such models has its own nuances and distinctive features, therefore it is better to entrust the installation to an experienced specialist.
Before starting the installation, you should prepare all the schemes and recommendations of the manufacturer, as well as accurately identify the places where there will be adhesion to the sewage system, installation of electrical wiring, and ensure the water supply. Because of the need to connect electricity, the installation of such a model must occur with strict observance of fire safety requirements, otherwise everything can lead to dire consequences. Particular attention should be paid to the power of the device and the voltage in the electrical system of the apartment or house.
When installing a jacuzzi, you should also take into account the fact that sockets, switches and other appliances should be located at a distance of at least 70 cm from the bath itself. Otherwise it may lead to oxidation (as a result of increased humidity).This may cause a fire.
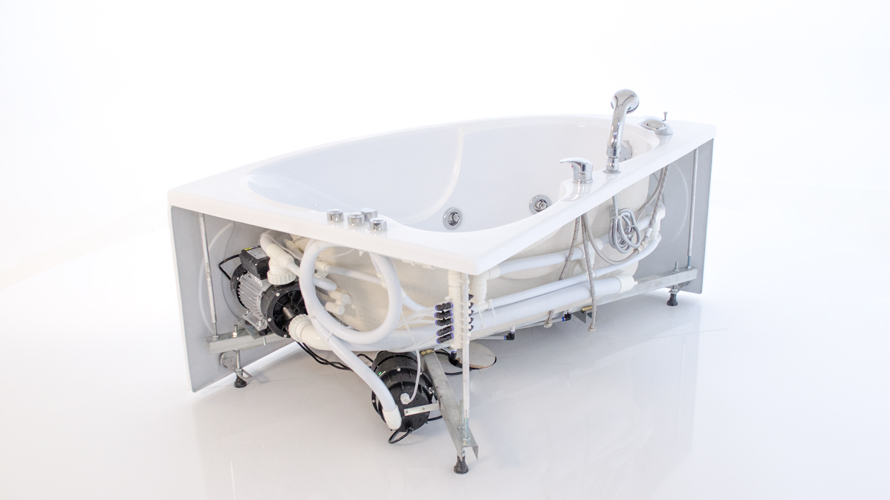
Complete with any hot tub are special legs that allow you to fix the model in the desired position and at a certain height, so that there are no distortions. If you do not install the Jacuzzi on the legs, then during operation it will vibrate, which will not allow to get the proper effect from its operation.
Installation of the legs should be carried out as accurately as possible, using a construction level that will allow to achieve accuracy. After alignment, the jacuzzi can be connected to other communications through the gate.

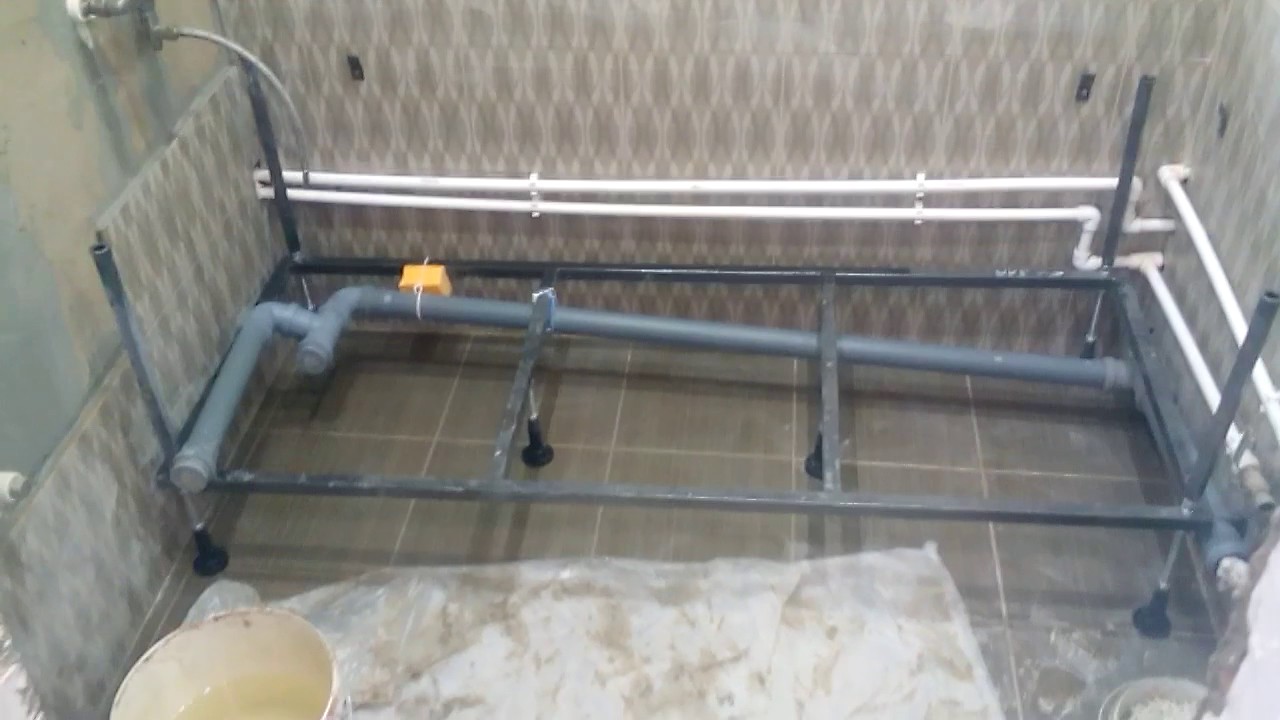
Built-in option
Installing a built-in bath in the floor will not work without a pit. Moreover - the usual dug pit will not work here. It will also be necessary to conduct concreting of the walls and the floor, thereby guaranteeing the space required for the installation and maintenance of the sanitary fixture. In the process of installing a built-in bath should take into account certain nuances:
- The contours of the pit should coincide with the contours of the bath and overlap its sides. In other words - the bath should be held thanks to the sides.
- The depth must be such that the sanitary ware is raised above the base 50 mm or less.
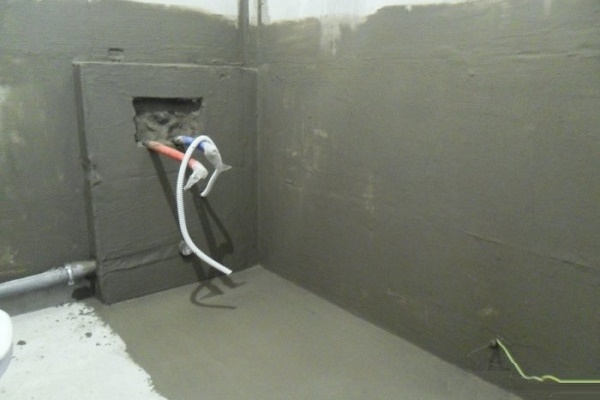
- Access to the pit should be provided so that the bath can be connected and installed without any problems. All water and sewer communications are displayed here. The ideal solution would be to hide all the pipes in the invisible hatch.
Work order
To understand the general principles of installation of the bath, you should consider the sequence of work that will be unchanged for any models, including acrylic and cast iron versions. Of course, each type has its own distinctive features, there are also certain subtleties of installation, but first you need to find out the general principles and rules of installation.
So, installing a bath includes the following steps:
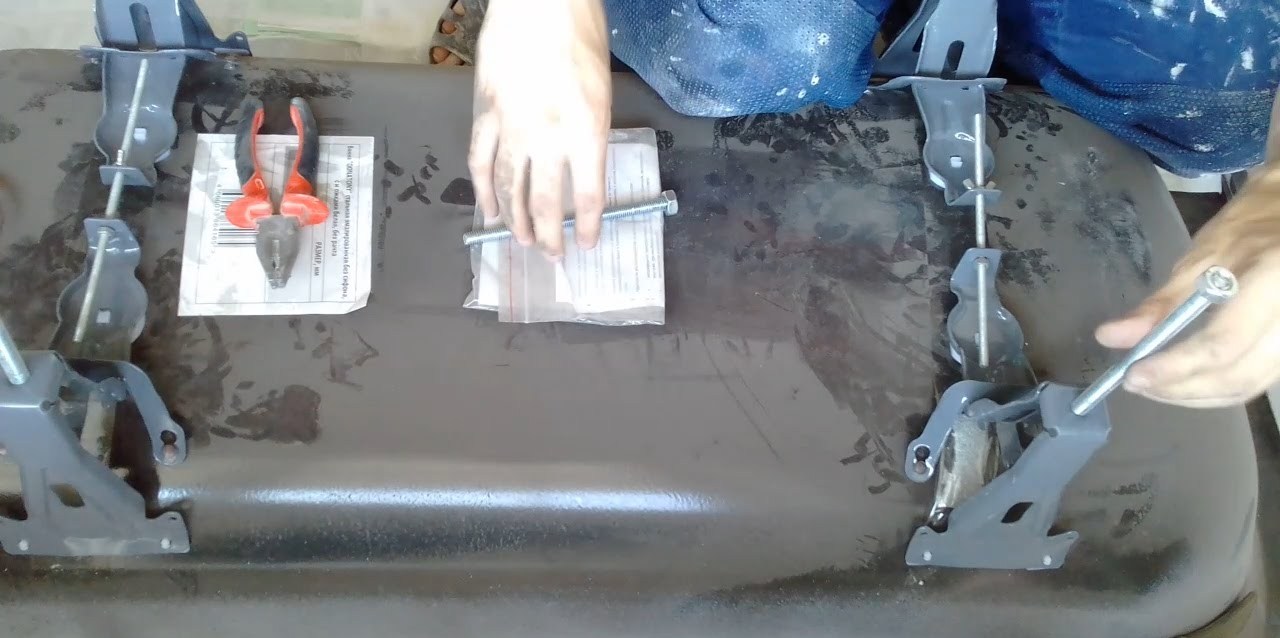
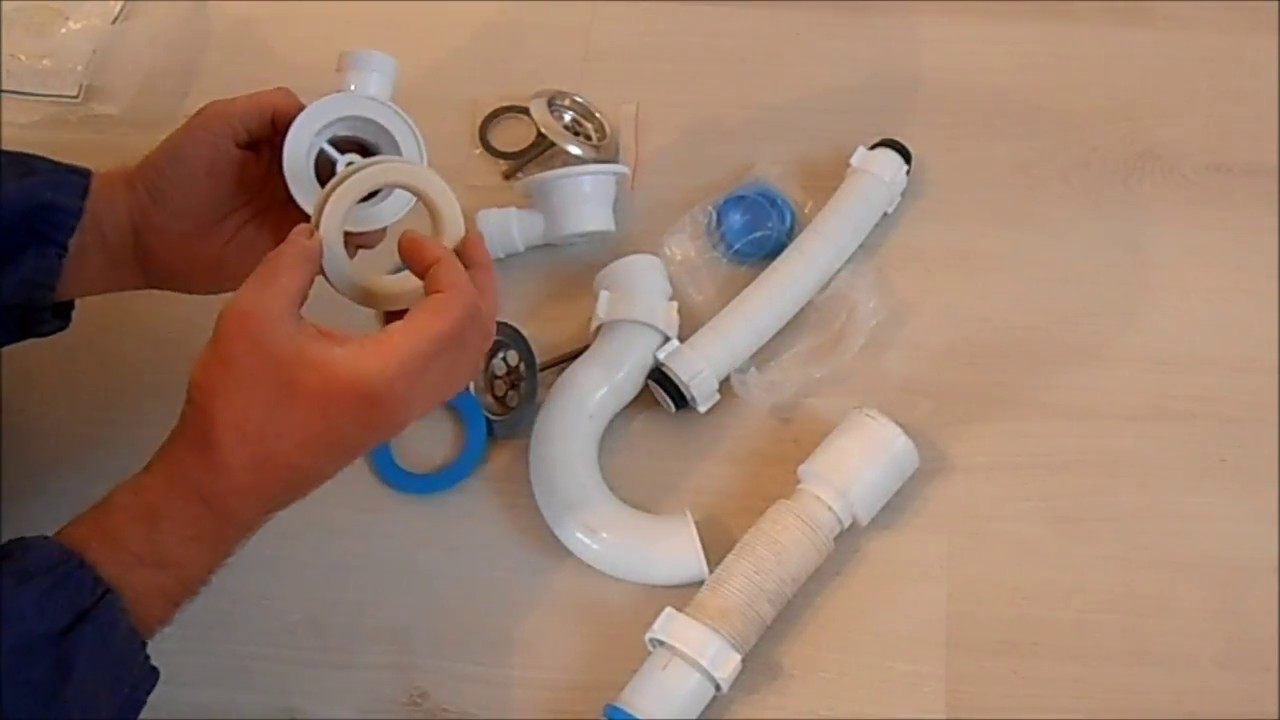
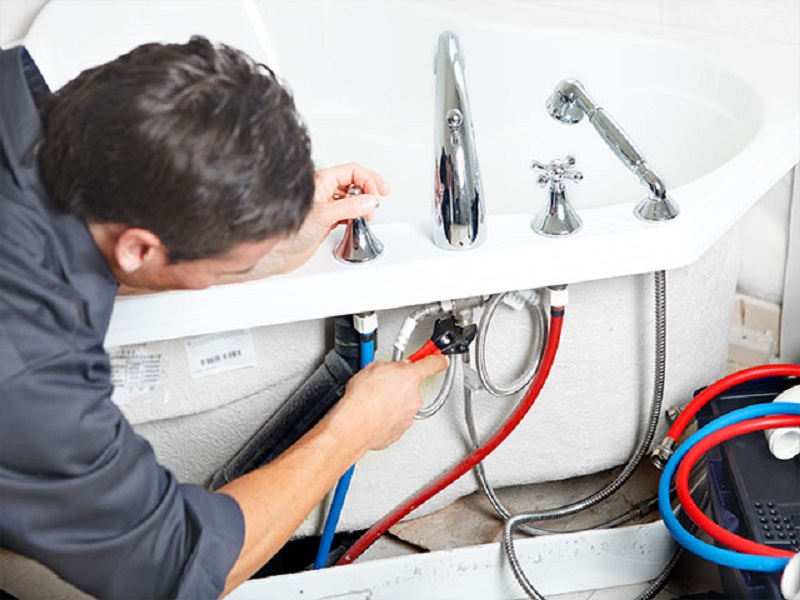
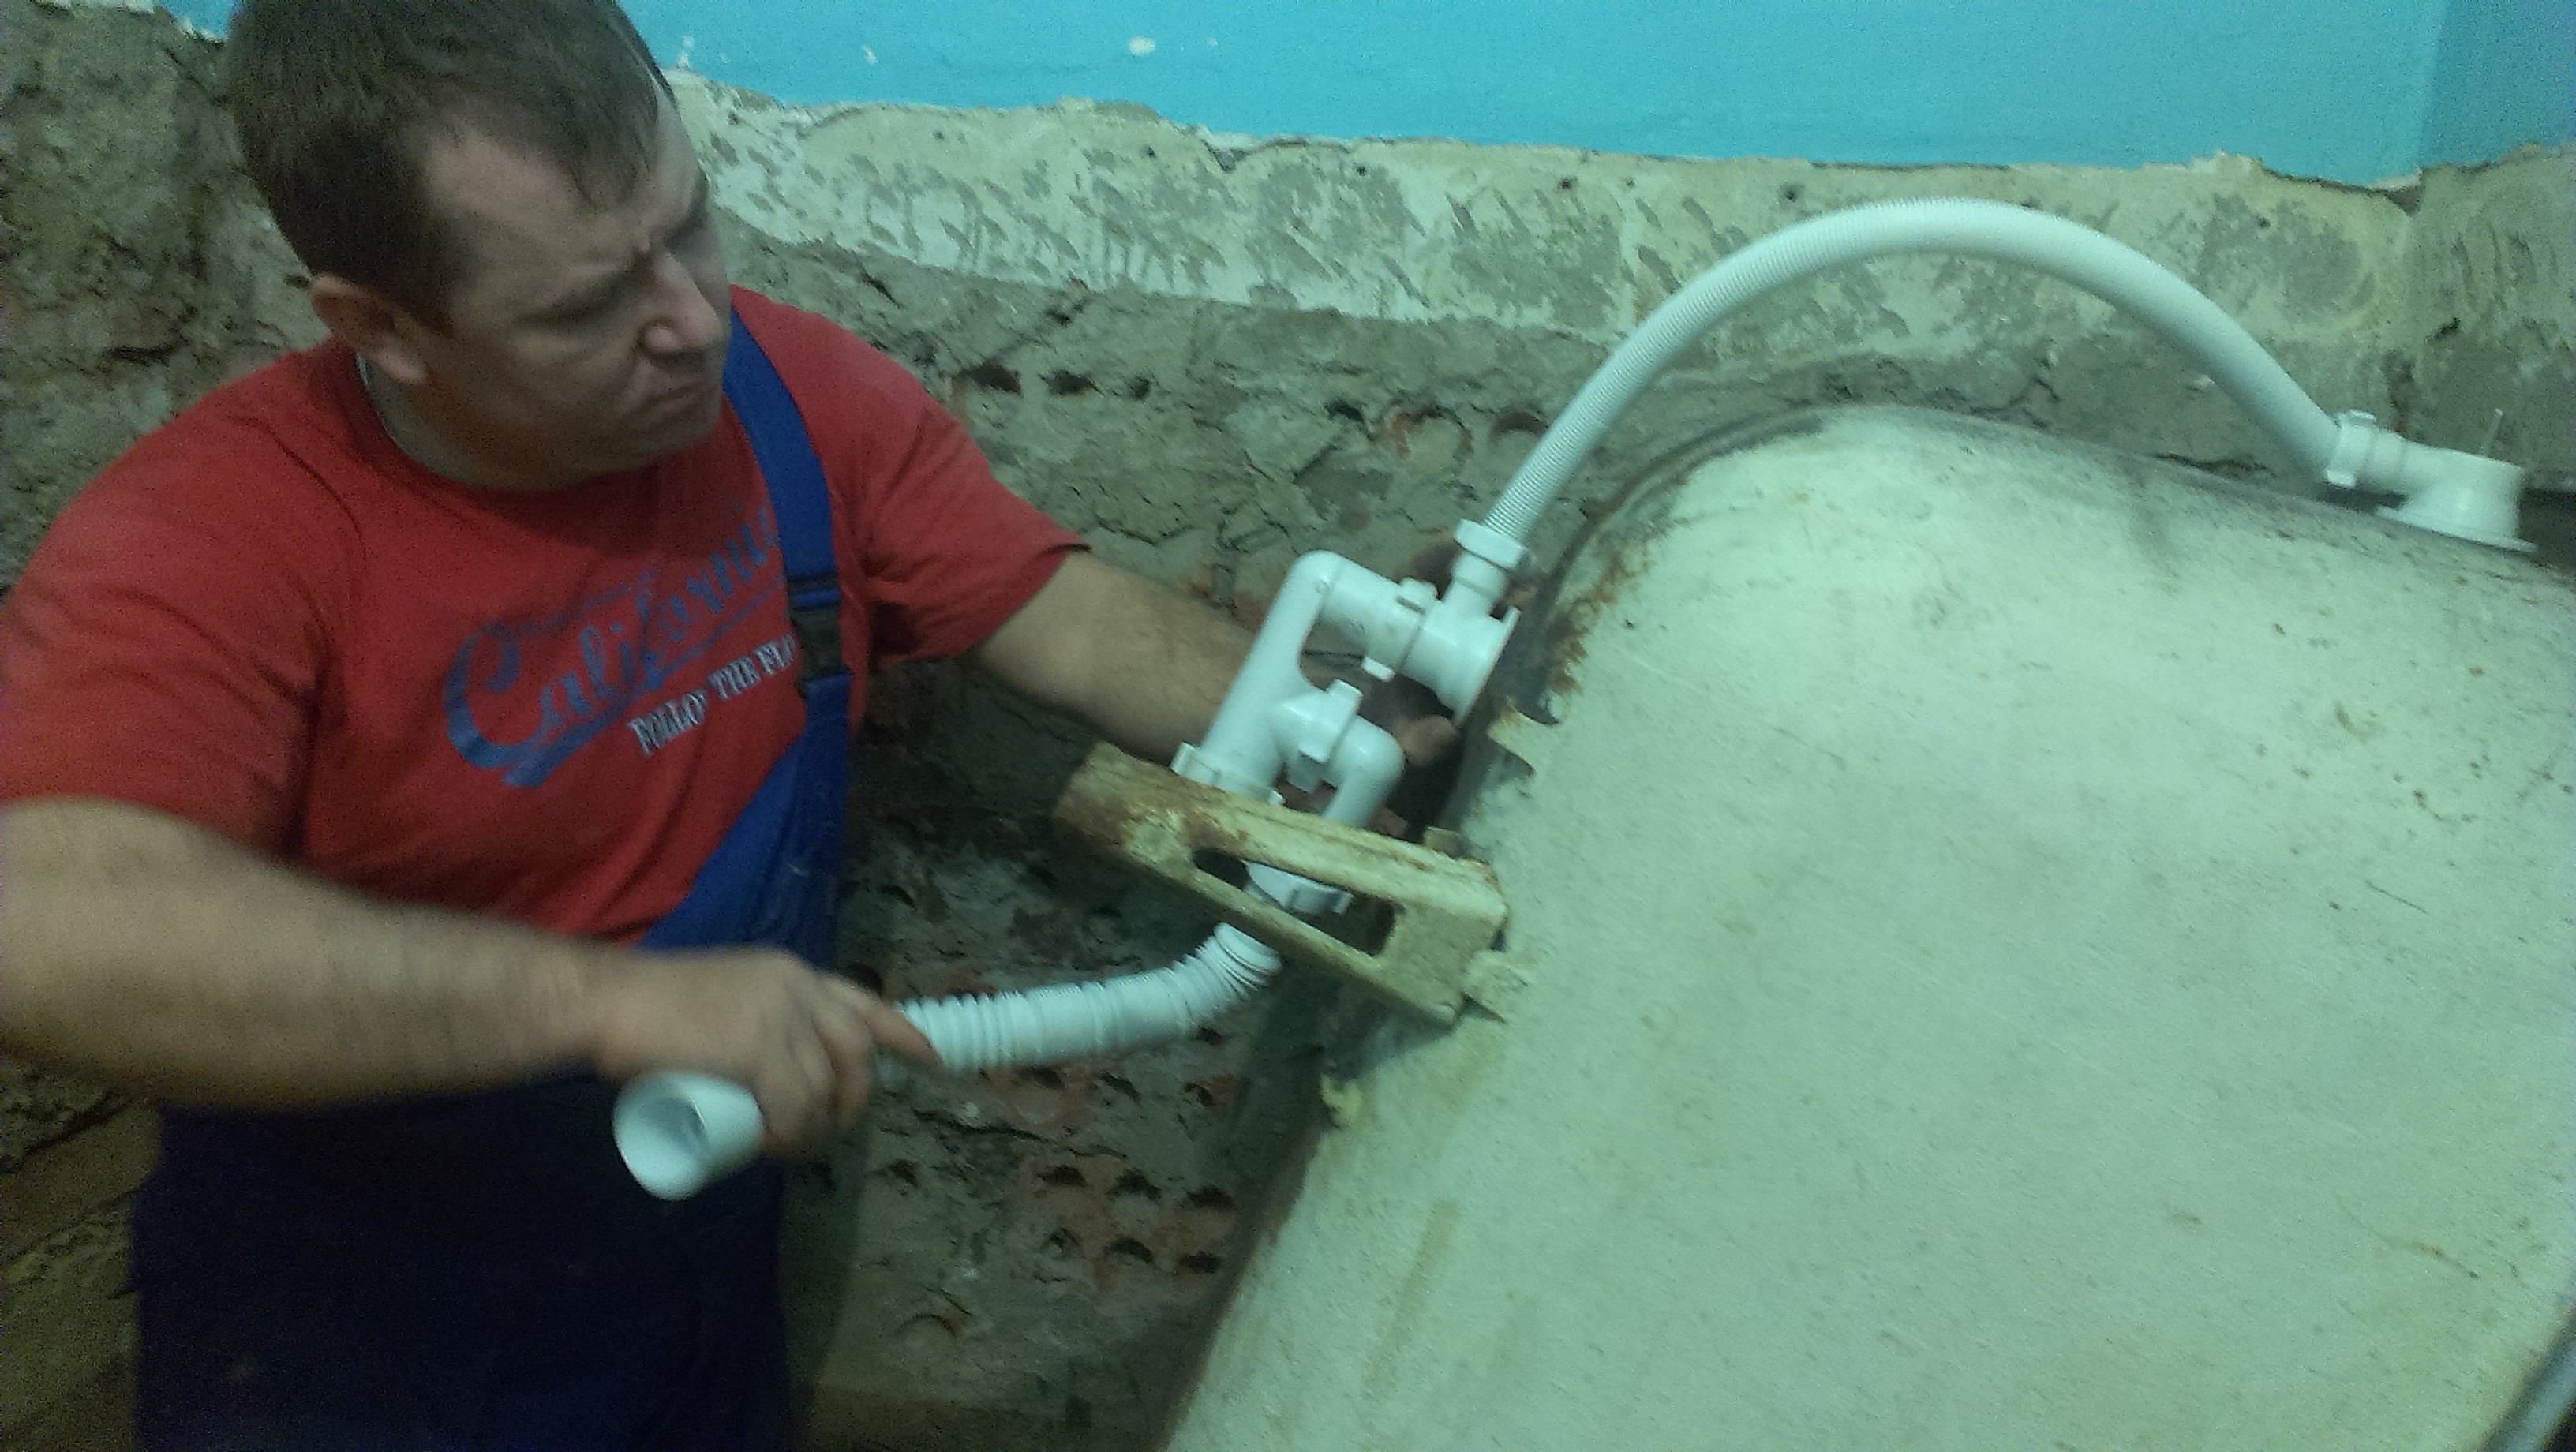
- Assembly and installation of a drain siphon. Most of the models on the market are assembled thanks to cap nuts and rubber seals. Beginners often make the mistake of sealing the joints, which in the future will cause the product to break. An assembly scheme should be used.
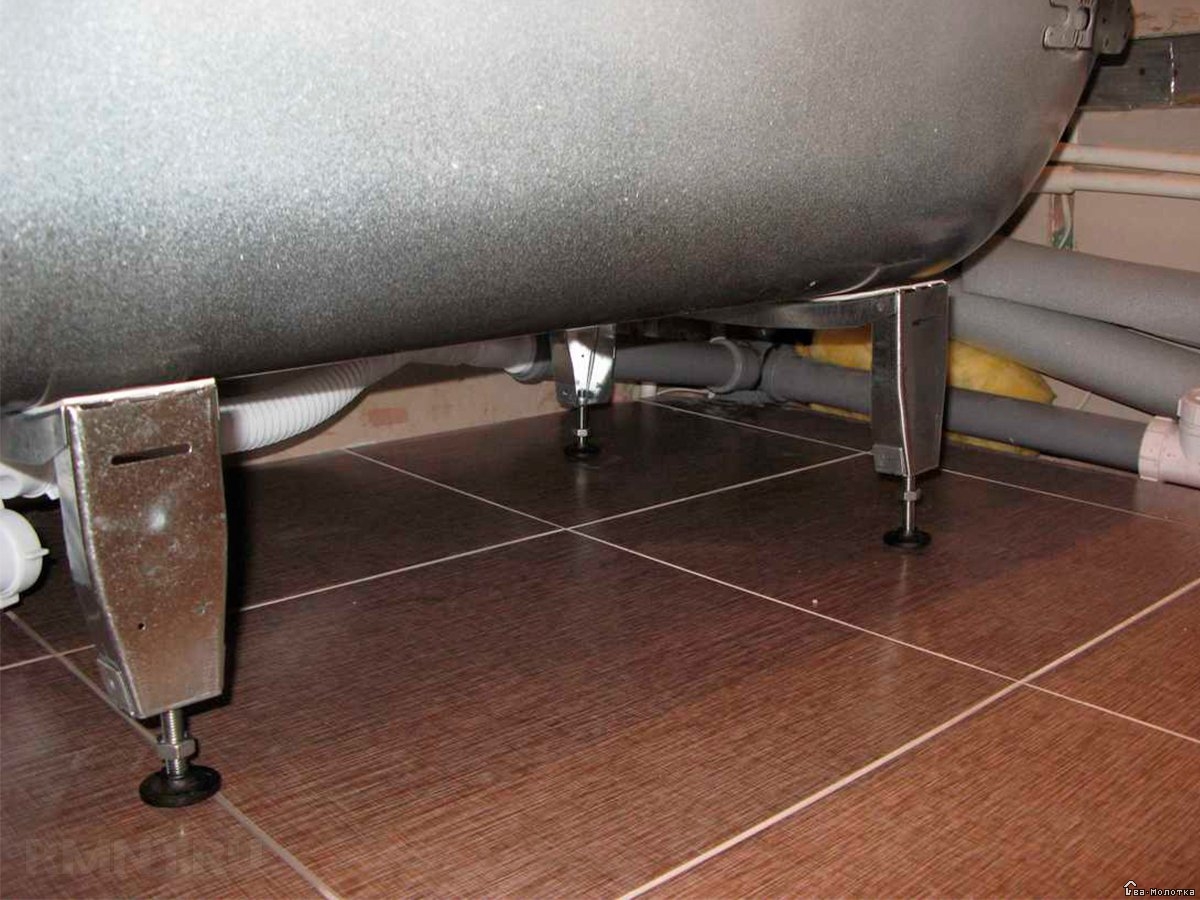
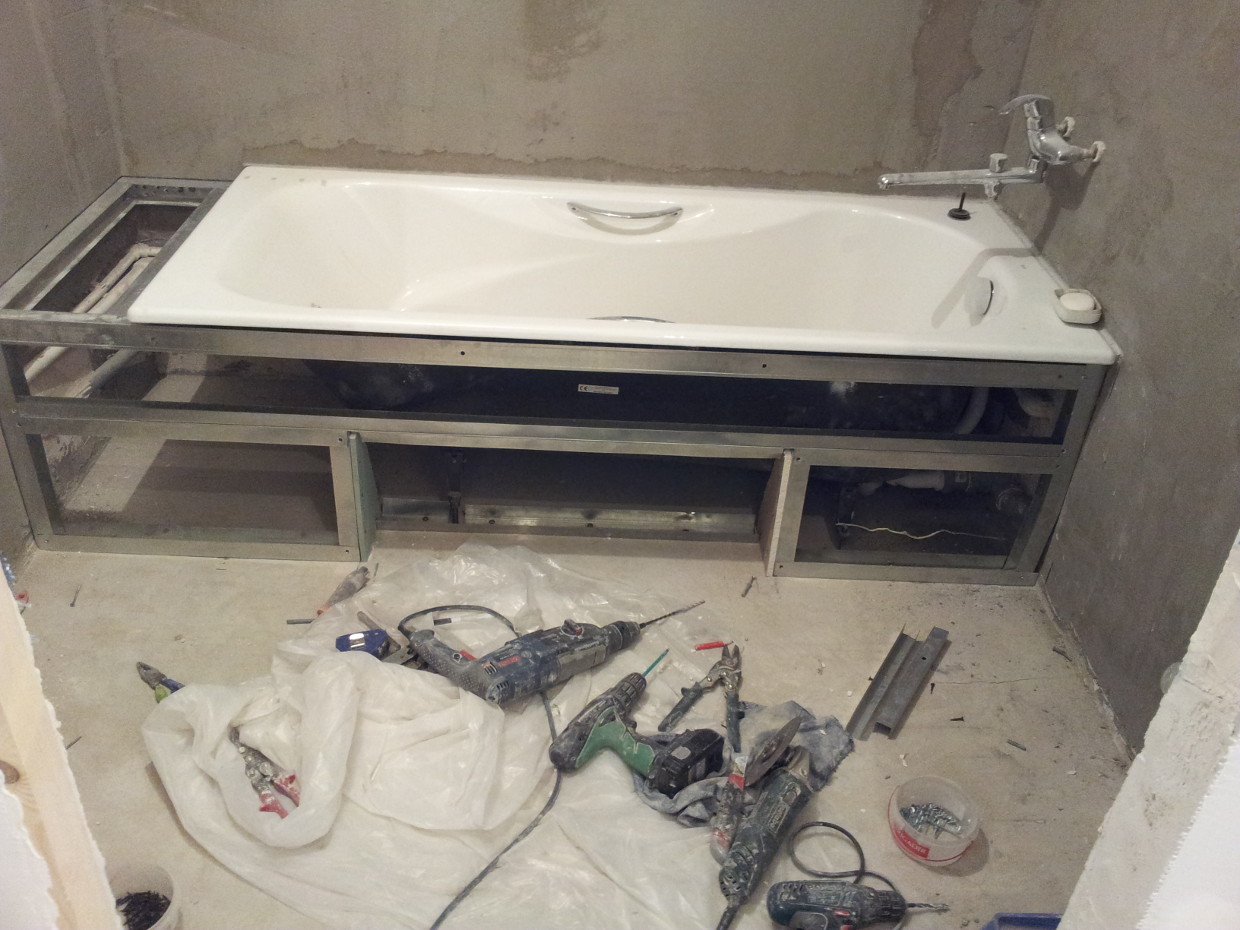
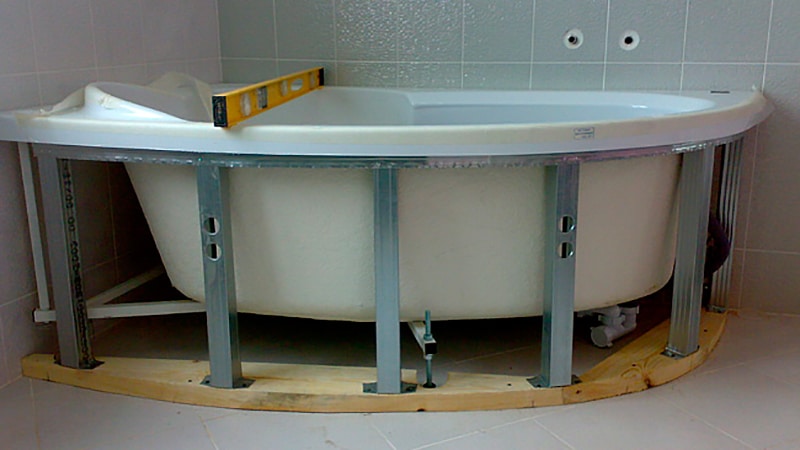
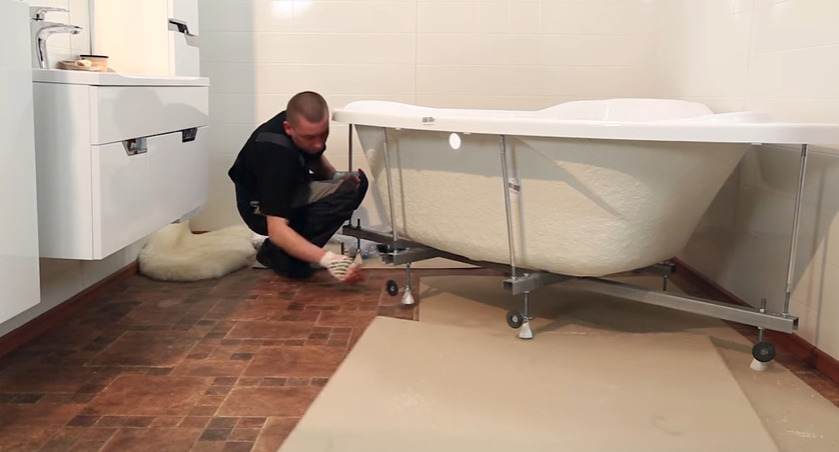
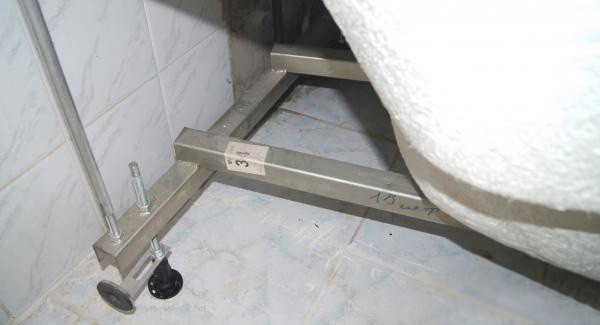
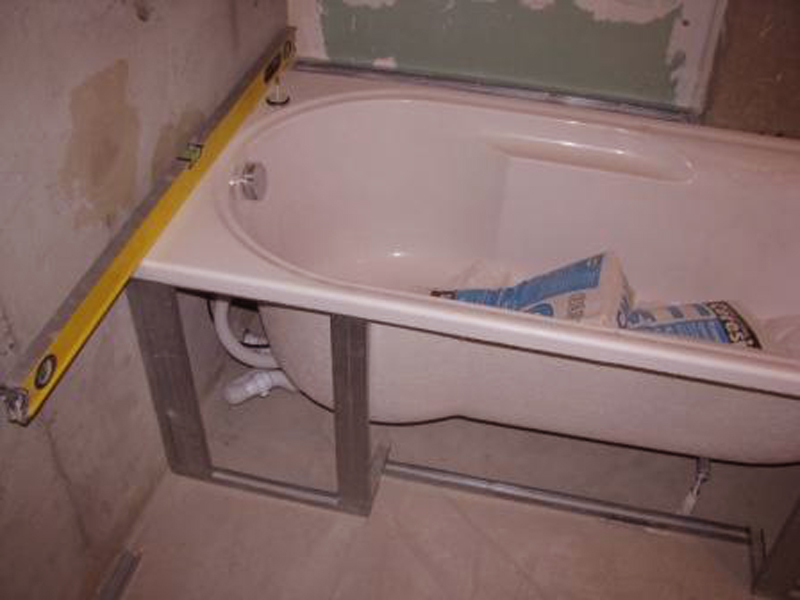
- Installation of the bath on the support. You should also be extremely careful here.There are a lot of constructions of supporting elements for the bath. You can find both complex and simple options. Some craftsmen prefer to use foam blocks or bricks rather than factory legs. Steel versions look much better when installed in this way.
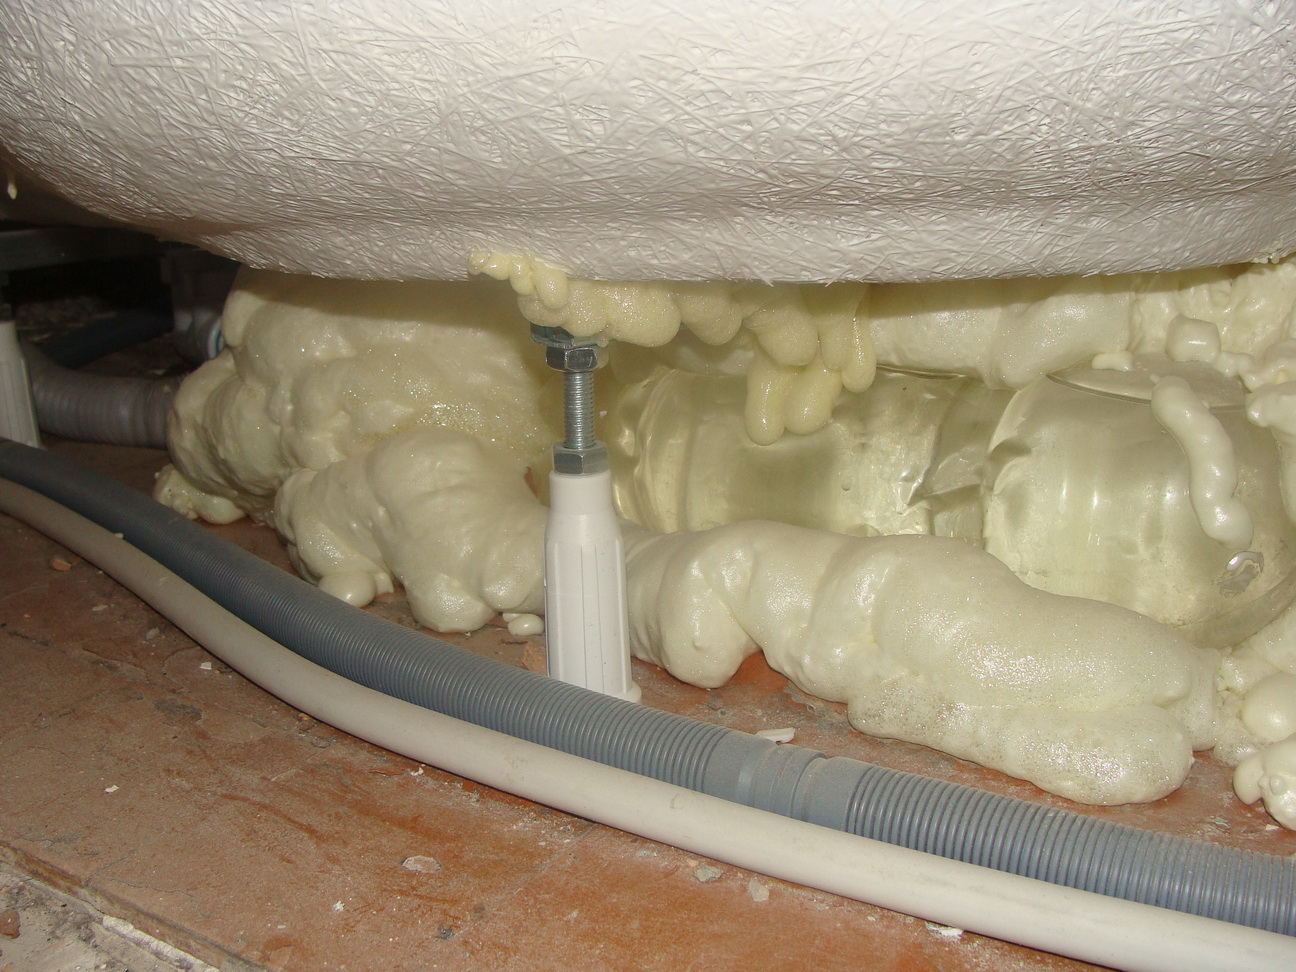
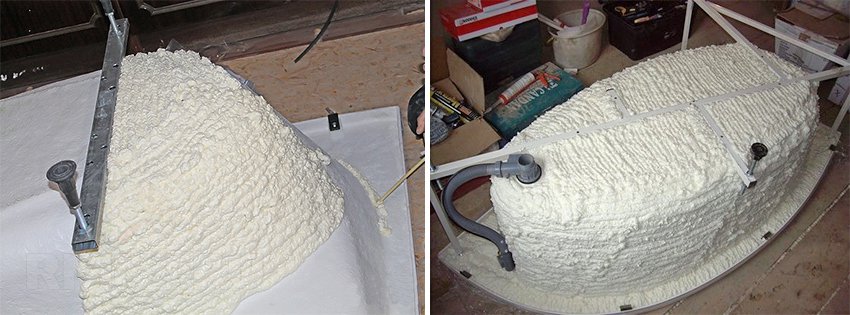
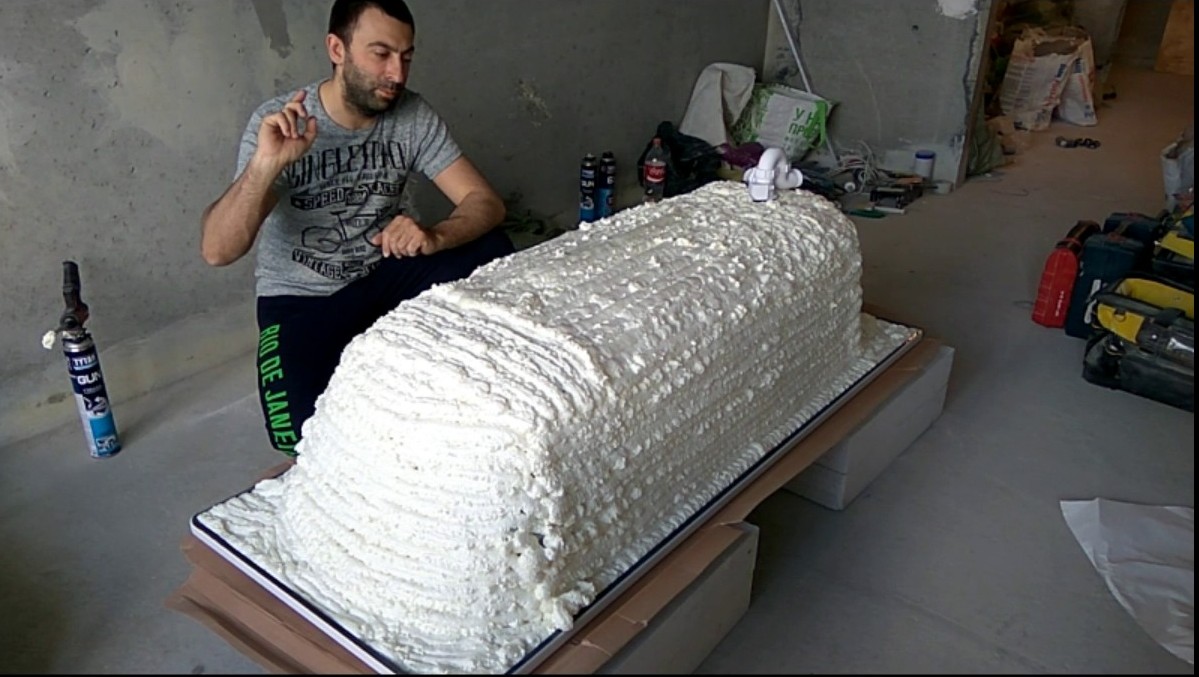
- Insulation and insulation. This stage applies to all types of baths, except cast-iron ones, which are already well heated and retain heat for a long time. In addition, they do not produce too much noise when filling. Heat and noise insulation should be carried out using foam, which is applied not only to the bottom, but also to the sides of the sanitary ware. The amount of foam depends on the size of the bath.
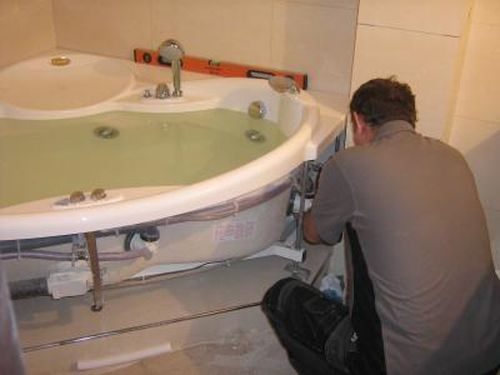
- Installation For ease of use, any bath should be set relative to the level of the horizon. In the process of installation there is no need to lay down the slopes, since this moment is taken into account by the manufacturer when developing the bath. The support legs are equipped with screws for adjustment.
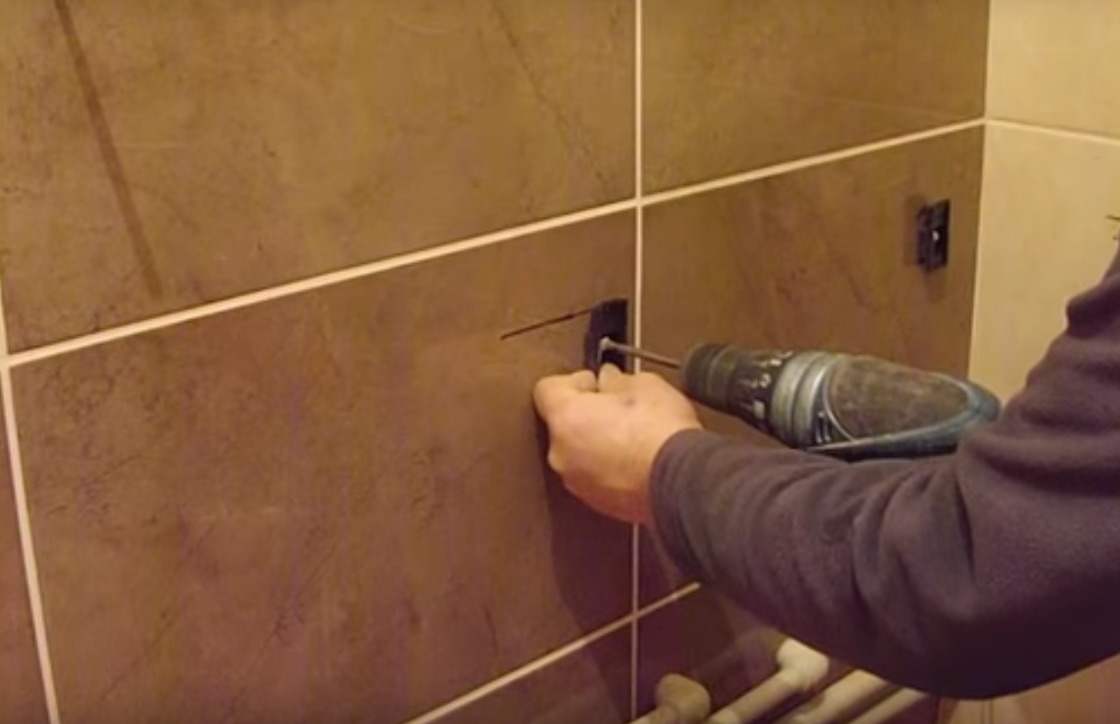
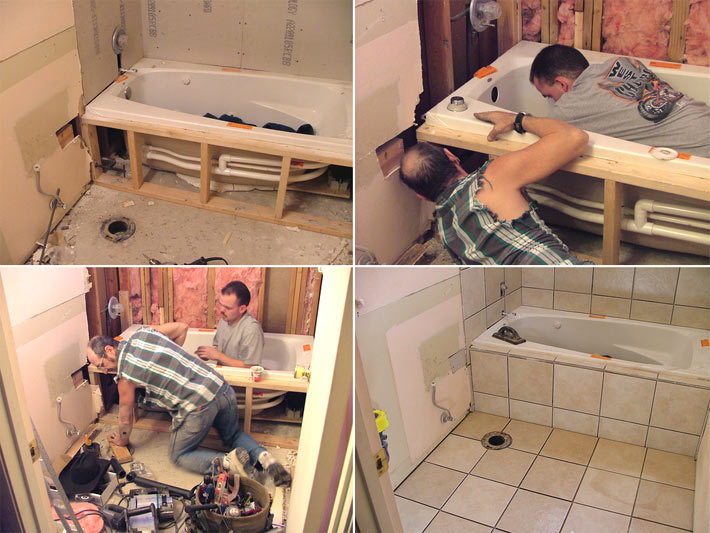
- Mount. This stage also applies only to steel and acrylic baths, since the own weight of the cast iron product is enough to not bend under the pressure of water and man.Mounting is necessary with the help of metal hooks, which are usually used for installation of boilers. In addition, you can use special brackets supplied by the manufacturer with the bathroom. Such fastening allows to prevent depressurization during the operation of a sanitary product.
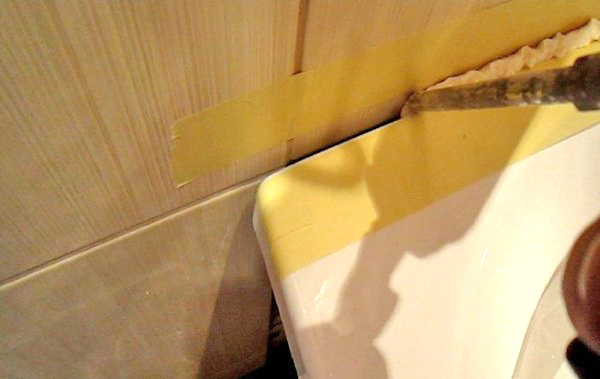
- Sealing joints. This stage is the last. Such work can be done in several ways. In most cases, it would be advisable to use a white corner, but you can do with self-adhesive curb tape. If the gap between the bathroom and the wall is minimal, you can limit yourself to one cylinder of sanitary silicone.
In that case, if the installation of the corner bath will be carried out, you need to pay attention to a number of features. Such products are rounded or oval, and they must be mounted on a previously prepared pedestal or wooden frame.
Important nuances
In the process of installation of the bath should be extremely careful to the product was able to fully perform its functions and serve as long as possible. Pay attention to such moments:
- the legs are mounted in such a way that the siphon outlet element (piping) is easily installed in the sewer pipe;
- bath is necessarily installed with a slope;
- Be sure to take into account the parallelism of the side of the floor.
Be sure to monitor the tightness of the bath and sewage connections. If you are going to start using the sanitary device, you should pour 10 liters of cold and hot water into the bath.
If you install a bath with hydromassage or other electronic functions, you need to check the correctness of the piping for additional communication.
In the process of installing the bath should also take into account the main problems associated with the material from which the product is made. Acrylic variants have the following disadvantages.
- When dialing hot water, the walls of the sanitary ware begin to “play”. This is due to the fact that the heated acrylic walls lose their original rigidity.
- The legs are another weak side of acrylic plumbing. Standard legs cannot boast impressive stability.Even if you put everything on an ideal level, you still will not be able to save the situation.
- The bottom of such a bath feels great under low loads, but it can sag because of its considerable weight.
- When typing water occurs drum effect caused by the thinness of the walls of the acrylic bath. This disadvantage is seen in any baths, however, acrylic is most pronounced.
Cast-iron and steel baths can boast of good thermal insulation, but the acrylic options in this plan leave much to be desired. Heated water quickly warms the walls, but also cools them quickly. To solve this problem, you can use conventional cylinders with foam. In addition, this method allows to solve the problem associated with sound insulation bath.
Zaping is as follows:
- the bath is turned upside down, and under it is placed a cardboard or other protective material (this insert is necessary so that the acrylic surface is not scratched);
- the surface is cleaned from dust and dirt;
- foam is applied and residues are removed from the surface.
It is much more economical and more comfortable to use a foam gun, but in its absence it can be limited to a simple balloon.
To ensure the durability and efficiency of the whole structure, it is necessary to correctly select the material of the drain fittings.
Most of the products on the market are made of polyvinyl chloride or propylene, which are distinguished by their reliability, attractive appearance and durability. The latter material is much more expensive, but the walls are smoother, which greatly reduces the likelihood of blockage.
The idea to purchase cheap models of drain fittings should be immediately abandoned. The fact is that budget models are non-separable, therefore they are unsuitable for repair. Already after a couple of months of operation, rust so tightly grabs the bolt that it is impossible to unscrew it.
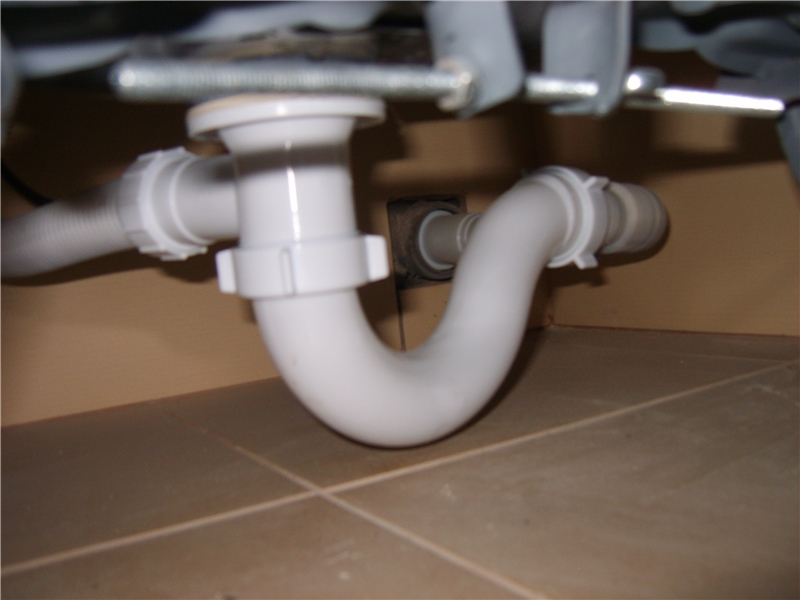
Do not buy a hard pipe. An excellent solution will be a corrugated hose, which is extremely easy to install and guarantees excellent water flow. Thanks to this, you can be sure that the bathroom will not be flooded with water.
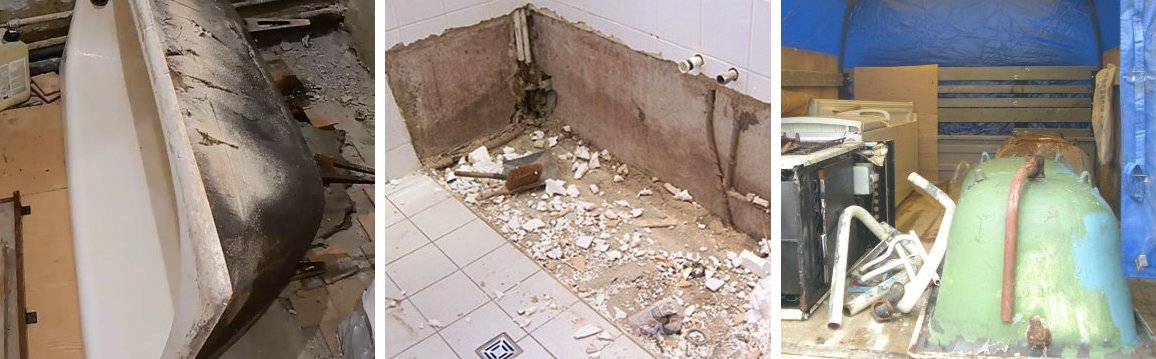
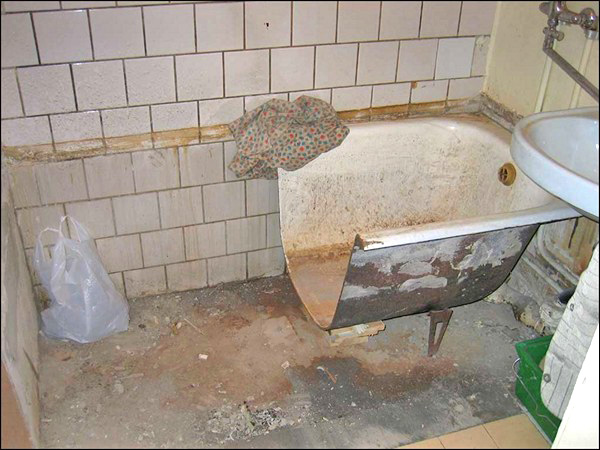
Dismantling
If the term of use of the bath is out, siphons have rusted or become unsuitable for use, it is better to replace the old bowl with a new one.
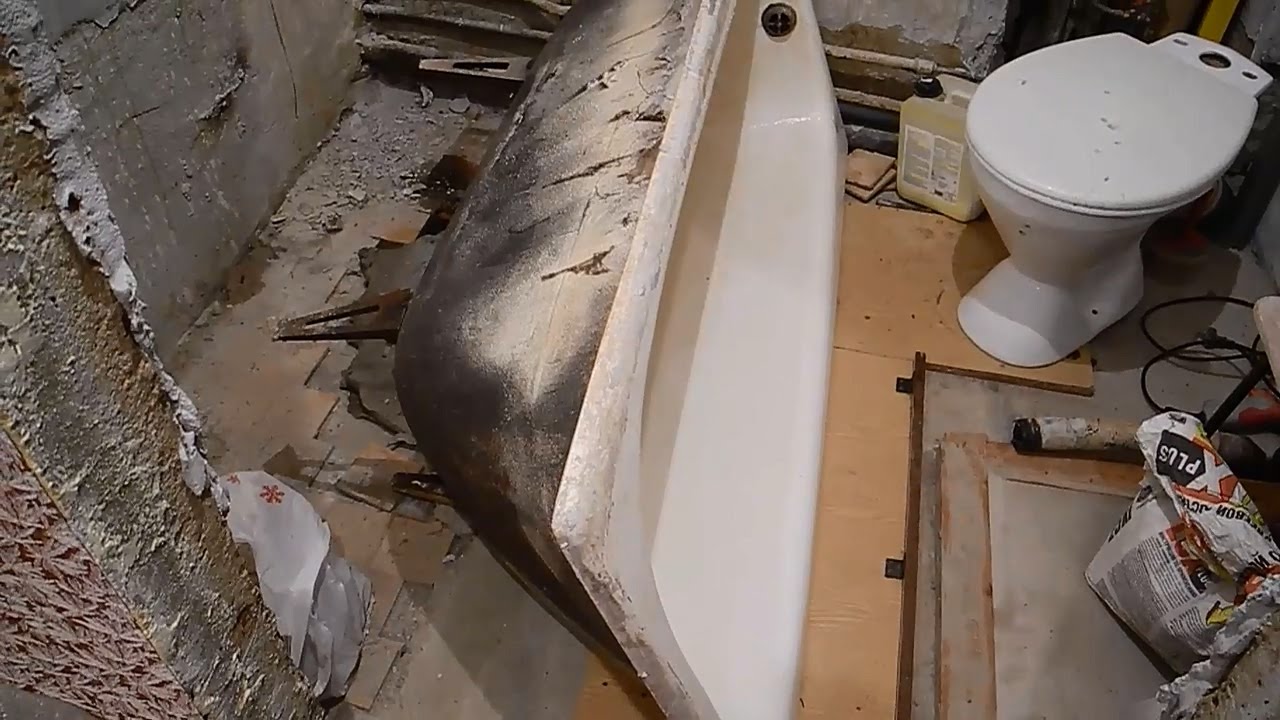
Initially, it seems that this is quite simple and does not require professional skills, however, it is extremely difficult to properly remove the bath in order not to damage the enamel or other parts of the product. We need to act as follows:
- Ensure that the feet of the bath are securely fastened., because during the dismantling the sanitary ware can fall and damage the fingers of a person. This may well happen if one of the legs is rotten or deformed. To fix the supports should use special wedges, which should be fixed properly.
- Now you can proceed to disconnect the siphon and drains. The drain construction is usually easy to disassemble, but there are cases when it is made of the same material as the bath. As a result of long-term operation, parts can become rusty to each other, therefore dismantling will be possible only with the help of a grinder.
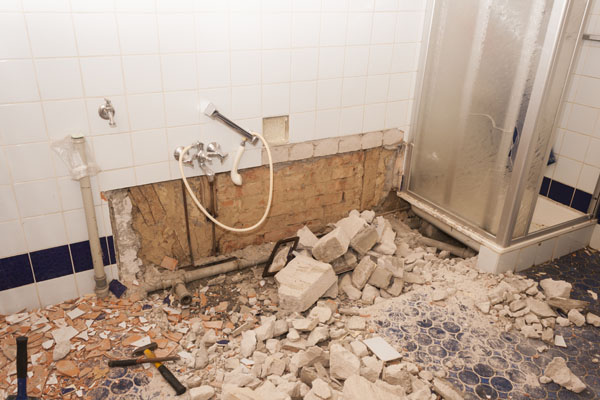
- The bath is fixed around the perimeter due to the cement-sand mortar. To get rid of the connecting layer, you can use a hammer or perforator. Frozen solution should be beaten as carefully as possible so as not to damage the tile.
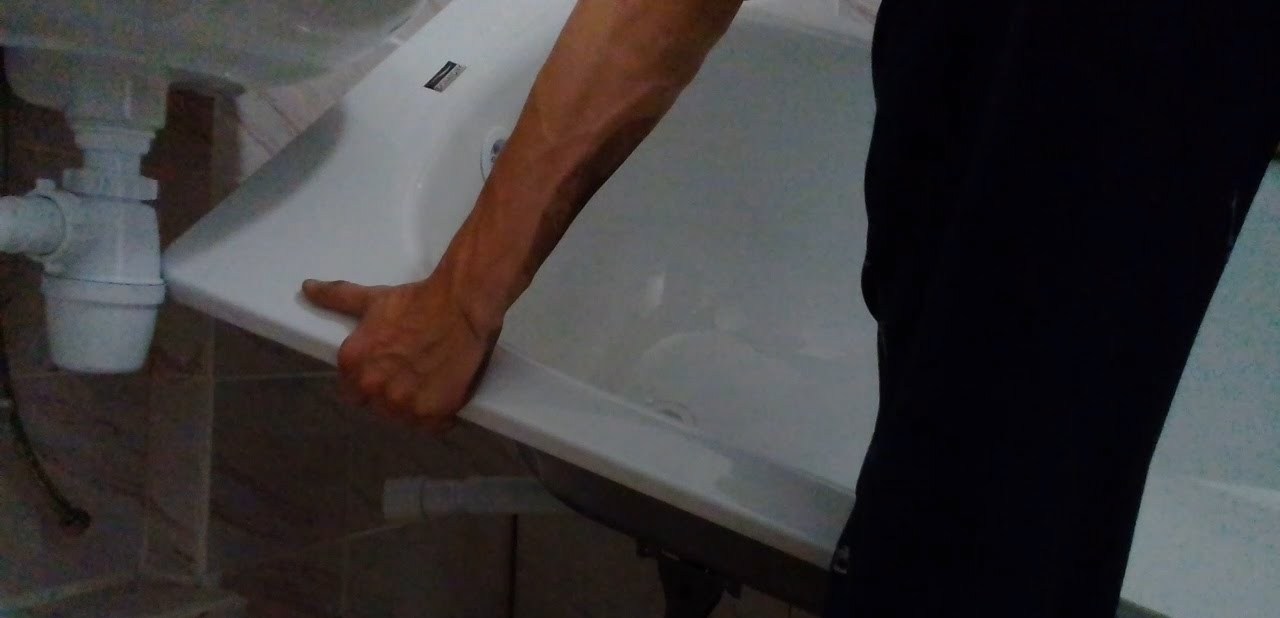
- When the bath is detached from the wall, it will be possible to proceed to the next stage of dismantling. The bath is moved away from the wall with the help of a mount that is used as a lever.
In this case, be sure to take into account the weight of the structure. Do not forget that it greatly exceeds the weight of acrylic or iron products.
It is much more difficult to dismantle the cast-iron bath if it is necessary to preserve its integrity and attractive appearance. This type of plumbing is characterized by large size and considerable weight, so dismantling it yourself will not work. Over the years of use, the bath is so firmly fixed to the wall and floor that it is extremely difficult to remove.
Cast iron baths can last a very long time, so that they are in great demand. Starting dismantling, determine whether the protective coating can be rebuilt or not. There are many ways to significantly extend the life of the bath, one of the most effective and popular in recent times is the use of acrylic liner.The complexity of the restoration work depends on a number of factors, among which are the weight and size of the model.
The above instructions are designed to dismantle the product with a minimum deterioration of the type of the room itself. The implication is only the replacement of plumbing equipment.
If you decide to overhaul the bathroom (with the replacement of all communications and plumbing fixtures), then the integrity of the product can not worry.
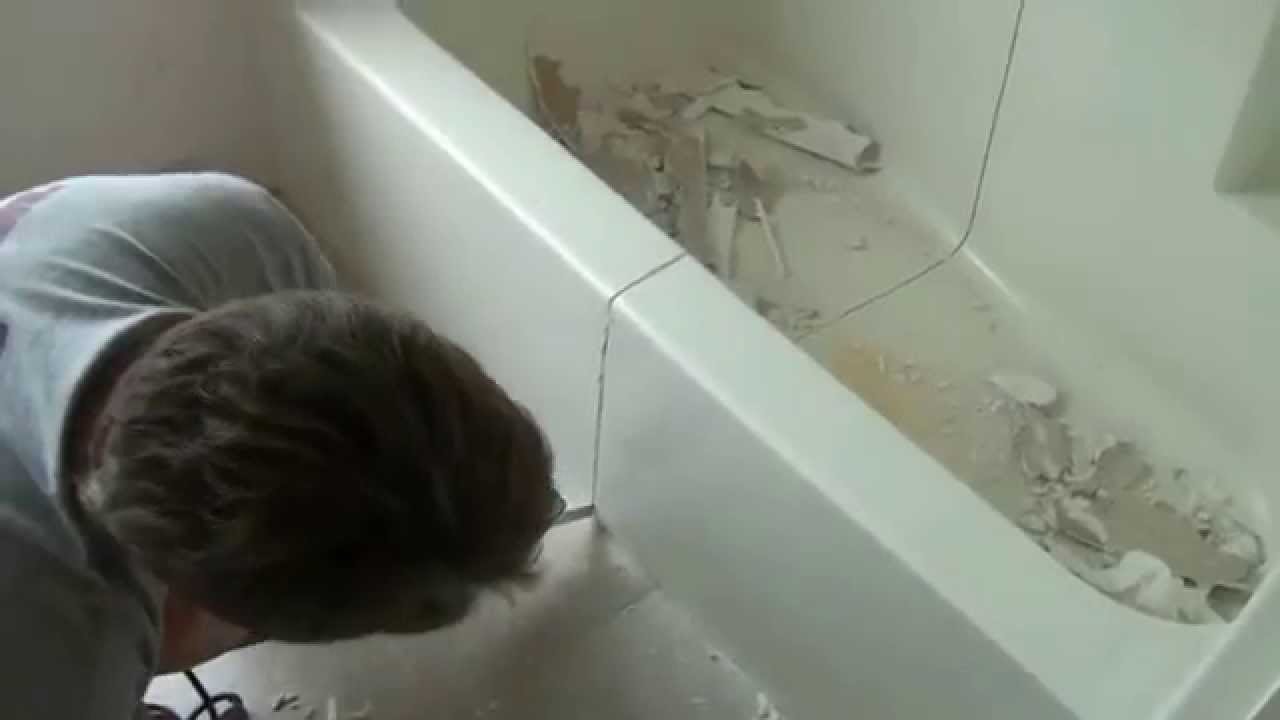
Dismantling without saving the bowl will be faster, as the algorithm of actions is very simple. The only thing you need to pay attention to is safety, because with the wrong approach you can hurt your legs or hands.
To clean the bath, it is necessary to carry out the following work:
- First, disconnect the siphon from the sanitary device itself. This can be done with the help of the usual grinder.
- Using a perforator, you need to disconnect the bath from the wall.
- Since the bath will not be used in the future, you can cut it into several pieces. This not only simplifies the process of dismantling, but also allows you to easily remove it from the premises.
- You can hit the bottom with a sledgehammer.Usually one good strike is enough for the product to be divided into several parts. Effectively disassemble the bath into several fragments and get a gas cutting.
- If the dismantling is carried out by one person, the bath should be divided into many parts. Cast iron models are significant weight, so each piece will be quite heavy.
Getting started, first of all pay attention to the material from which the sanitary product is made. This will help you choose the most suitable way to dismantle.
So, it can be noted that the installation of the bath - a complex and demanding process that requires a competent approach and care. It is important not only to choose the sanitary device, but also to professionally prepare the room for its installation. In the selection process should pay attention to the material, size and shape of the product, as well as its manufacturer.
Move steel and plastic plumbing products should be very careful, because such a coating can be damaged, deformed. The easiest way to work with a cast iron bath, which is so heavy and durable that it is almost impossible to break it.However, improper transportation can cause damage to the wall or door in the bathroom, as well as increased pressure on the floor. All this is also complicated by the fact that the installation of the bath takes place in a small room where it is extremely difficult for two people to fit.
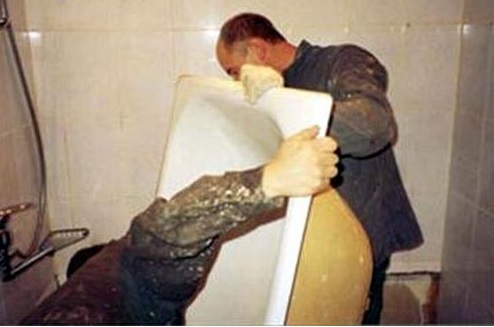
One of the most important conditions for self-assembly of the bathroom is the presence of a skilled assistant who can maintain the sanitary ware, supply the necessary tools and provide other necessary assistance. When installing this type of plumbing, you must be careful and tidy, because accidentally fallen bath can lead to the appearance of cracks or breakage. If the cast-iron models can somehow be reanimated, then the damaged acrylic product cannot be repaired, so it will have to be replaced.

Follow the step-by-step instructions clearly, because only in this case it will be possible to install the bath, which will last for many years, while maintaining its attractive appearance.
For information on how to properly install the bath so that it does not leak, see the following video.


