Cement-sand plaster: composition and scope
The application of universal plaster is one of the stages of finishing work and performs a number of tasks. Plaster masks the external defects of the wall and levels the surface under the "finishing" finish. It serves as a solid foundation for subsequent finishing works, as well as reduces costs, allowing you to reduce the amount of work and limit yourself to minimal finishing: plastering and painting. Plaster improves the waterproofing of the surface and enhances the heat and sound insulation of the wall.
Application area
Cement sand plaster is used for such works:
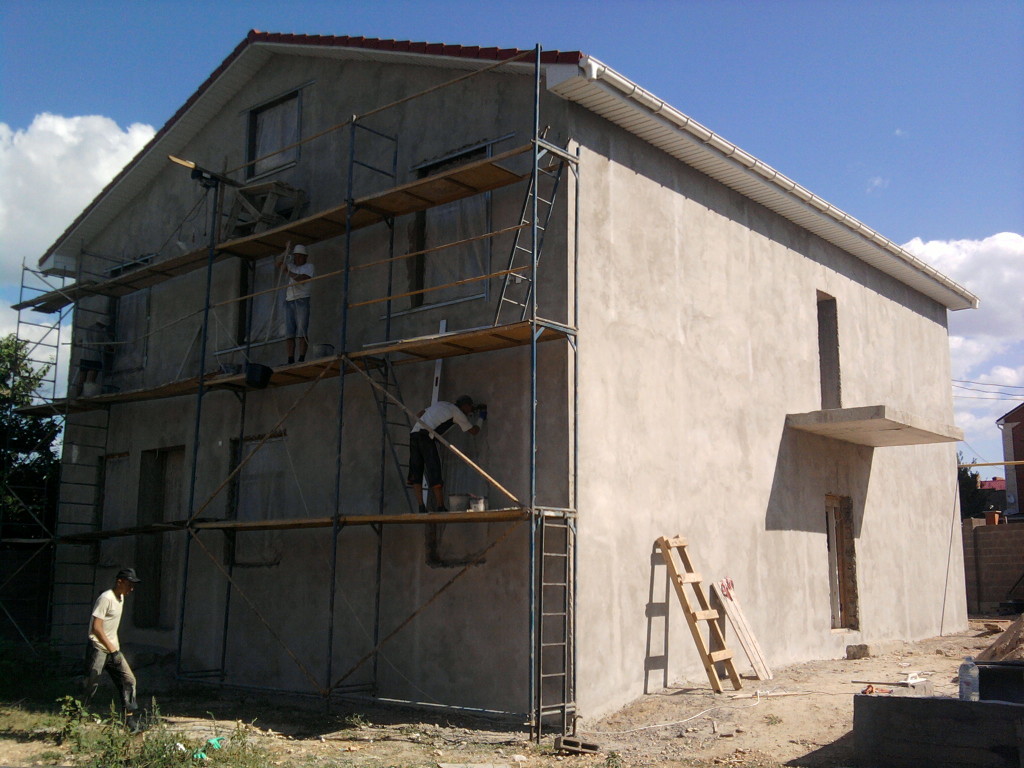
- decoration of the facade of the building;
- alignment of the walls inside the premises for further finishing (rooms with high humidity or without heating);
- concealment of screeds and cracks both on the inside and on the front side;
- elimination of significant surface flaws.

Advantages and disadvantages
To the positive qualities of plaster include such features:
- high strength;
- immunity to temperature extremes;
- excellent moisture resistance;
- durability;
- good frost resistance;

- good adhesion (ability to glue) with certain types of surface: concrete, brick, stone, cinder block;
- simple solution formula allows you to find all the necessary components in any hardware store;
- affordability, especially when preparing the solution yourself.
The negative aspects of working with cement-sand plaster include the following:
- working with a solution is physically difficult and tedious, it is difficult to level the applied layer;
- the frozen layer is very rough, it is not suitable for direct dyeing or gluing thin wallpapers without additional finishing;
- the dried surface is difficult to grind;

- increases the weight of the walls and, as a result, weights the structure as a whole, which is especially important for small buildings, where there are no powerful load-bearing supports and a massive foundation;
- poor adhesion to wood and painted surfaces;
- strong shrinkage of the layer requires a minimum of two layers of finish and can not be applied with a layer thinner than 5 and thicker than 30 millimeters.
Composition and features
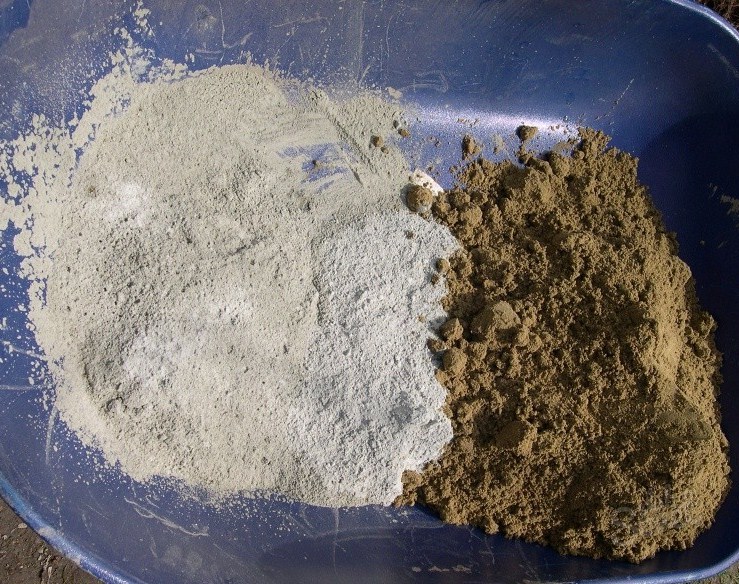
The standard solution consists of the following components:
- cement, depending on the brand which varies the strength of the composition;
- sand - you can use only coarse-grained (0.5-2 mm) sifted river or quarry;
- water.
When mixing the solution, it is important to respect the proportions, as well as use the right kinds of ingredients. If the sand is too small, the mixture will quickly set and its strength will decrease. If sand is not used at all, then such a composition can only be patched with minor irregularities, whereas it is completely unsuitable for large-scale works.
With the use of fine sand, the chance of cracking increases. The presence of impurities in the form of clay or earth reduces the strength of the hardened layer and increases the chances of the appearance of cracks. If the size of the grains of sand is larger than 2 mm, the surface of the frozen layer will be too rough.The sand fraction of 2.5 mm and more is used only for laying bricks and is not suitable for plastering.

Specifications
Cement-sand mixture has a number of basic parameters that determine its properties.
- Density. One of the main characteristics determines the strength and thermal conductivity of the solution. The standard composition of the plaster, without the presence of impurities and additives, has a density of about 1700 kg / m3. This mixture has sufficient strength for use in facade and interior work, as well as to create a floor screed.
- Thermal conductivity. The basic composition has a high thermal conductivity of about 0.9 watts. For comparison: in a gypsum solution, the heat conductivity is three times less — 0.3 watts.
- Vapor permeability This indicator affects the ability of the finishing layer to skip the air mixture. Vapor permeability allows evaporation of moisture trapped in the material under the layer of plaster, so that it does not dampen. Cement-sandy solution is characterized by vapor permeability from 0.11 to 0.14 mg / mchPa.
- The drying rate of the mixture. From this parameter depends on the time spent on the finish, which is especially important for cement-sand plaster, giving a strong shrinkage, and therefore is applied several times.When the air temperature is from +15 to + 25 ° С, complete drying of the two-millimeter layer will take from 12 to 14 hours. With an increase in the layer thickness, the hardening time also increases.
It is recommended to wait a day after the application of the final layer and only then engage in further surface finishing.
Mixture consumption
The normal consumption of cement-sand mortar with a standard composition at a layer of 10 millimeters is approximately 17 kg / m2. If a ready mix is bought, this indicator is indicated on the package.
When manually creating a solution with a mixture flow rate of 17 kg / m2 with a layer of 1 cm, you should take into account the flow rate of 0.16 liters per 1 kg of dry components and the ratio of cement to sand 1: 4. Therefore, to finish 1 m2 of surface you will need the following amount ingredients: water - 2.4 liters; cement - 2.9 kg; sand - 11.7 kg.
Work surface preparation
To ensure a reliable basis for plastering the wall must first be prepared. Depending on the thickness of the applied layer, the type of working surface, additional plaster reinforcement and other conditions to obtain a quality result, the following actions are performed:
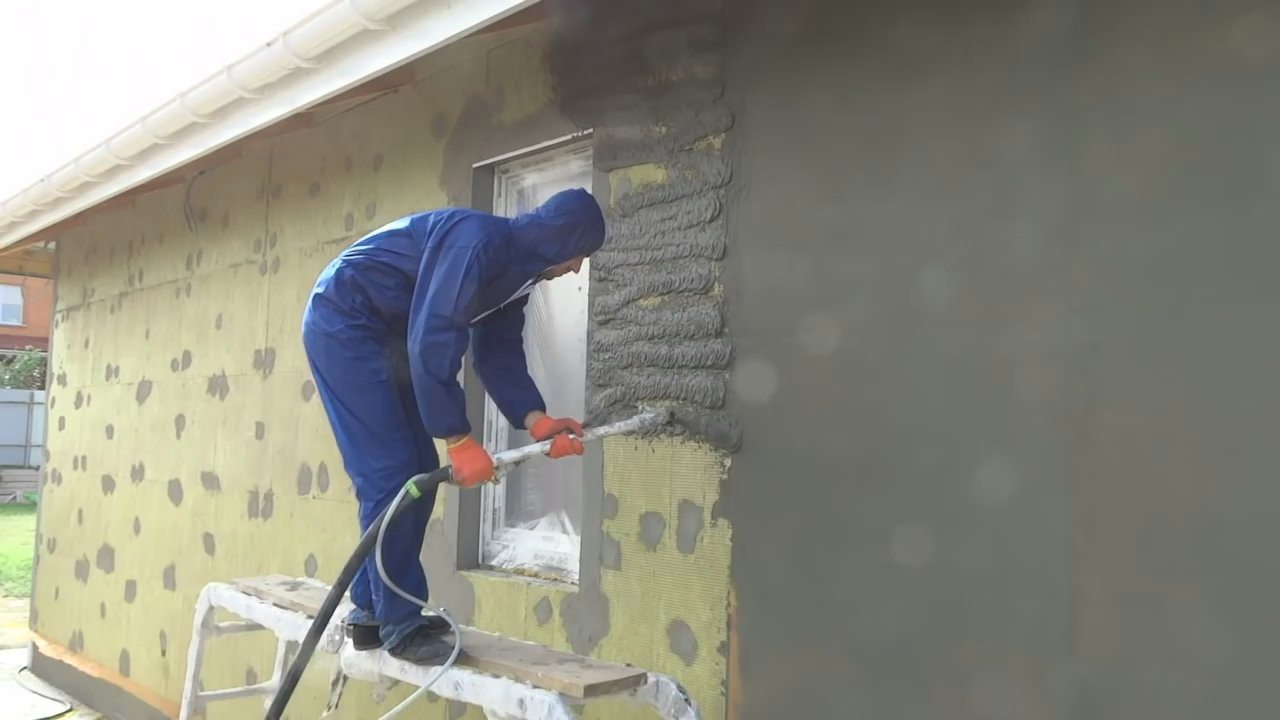
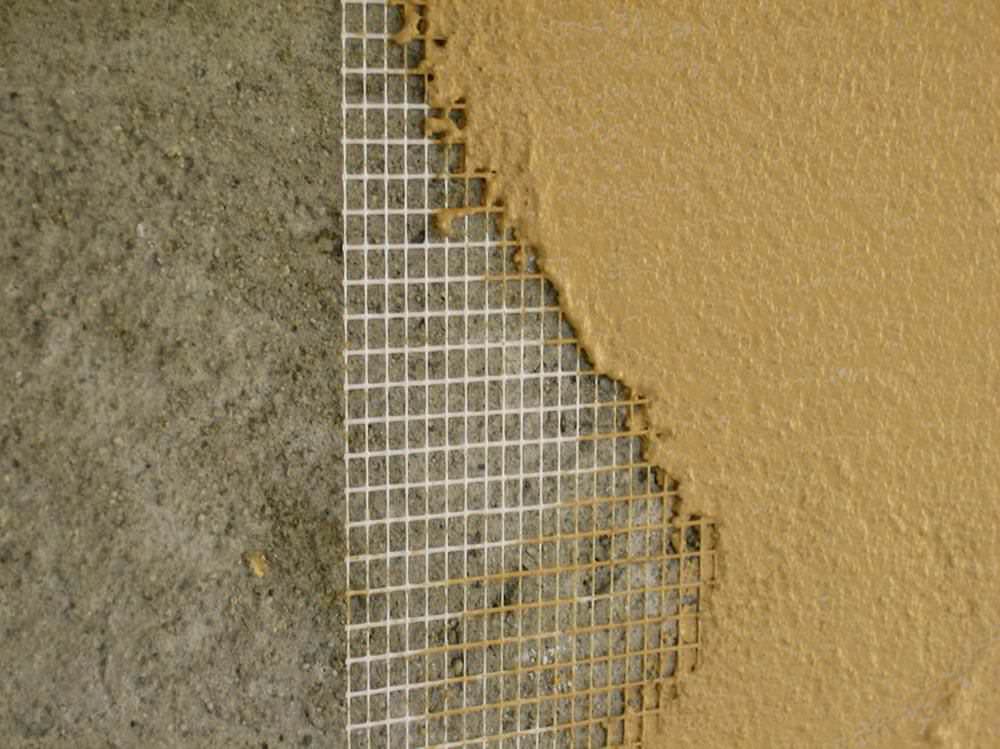
- A special glue is applied to the wall with a thin layer, it has excellent adhesion (adhesion to the coating material), strength and will serve as the basis for plaster. A plaster grid is applied on top of the applied layer so that the edges of the adjacent fragments overlap 100 millimeters. After that, with the help of a notched trowel, the grid is leveled and pressed into the applied glue. The dried layer will be a strong base for cement-sand mortar plaster.
- For additional strengthening of plaster the reinforced grid is used. It is fastened to the wall with screws, creating a solid base for applying plaster in a thick layer or providing a quality plaster coating on wooden and clay surfaces. Alternatively wire can be used. It is wrapped between nails or screws that have been hammered into the wall. This method is cheaper, but a large amount of manual labor is costly and time consuming. Crate is often used in small areas, where its ability to cover any area without cutting the mesh has its advantages.

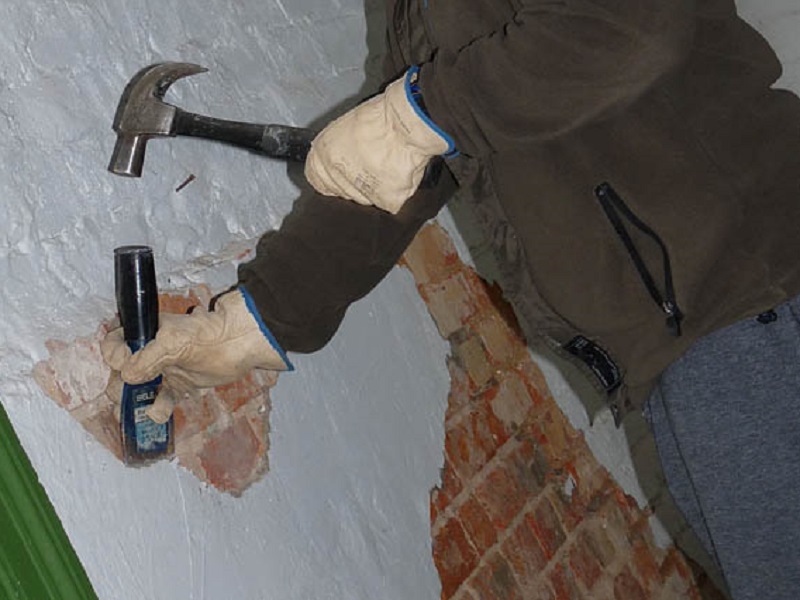
- To enhance the strength of the connection with the concrete wall, an adhesive primer is used.Before it is applied to the working surface by means of a perforator or an ax, notches and small chips are knocked out.
- When applying new layers of plaster on top of existing older ones, it is worth checking for reliability by carefully tapping them with a hammer. The exfoliated fragments are removed, and the formed depressions are cleaned with a brush from small pieces.
- When working with porous concrete materials before applying the plaster surface is treated with a hydrophobic primer. This is done to reduce the absorption of moisture into the work surface from the plaster solution, which leads to its dehydration, rapid solidification and decrease in strength.

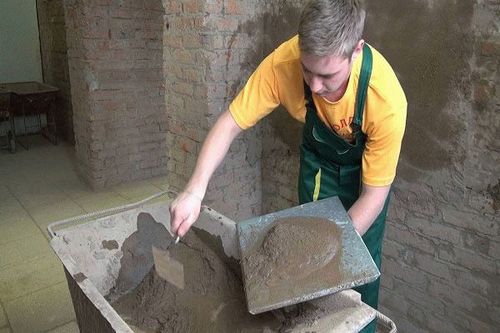
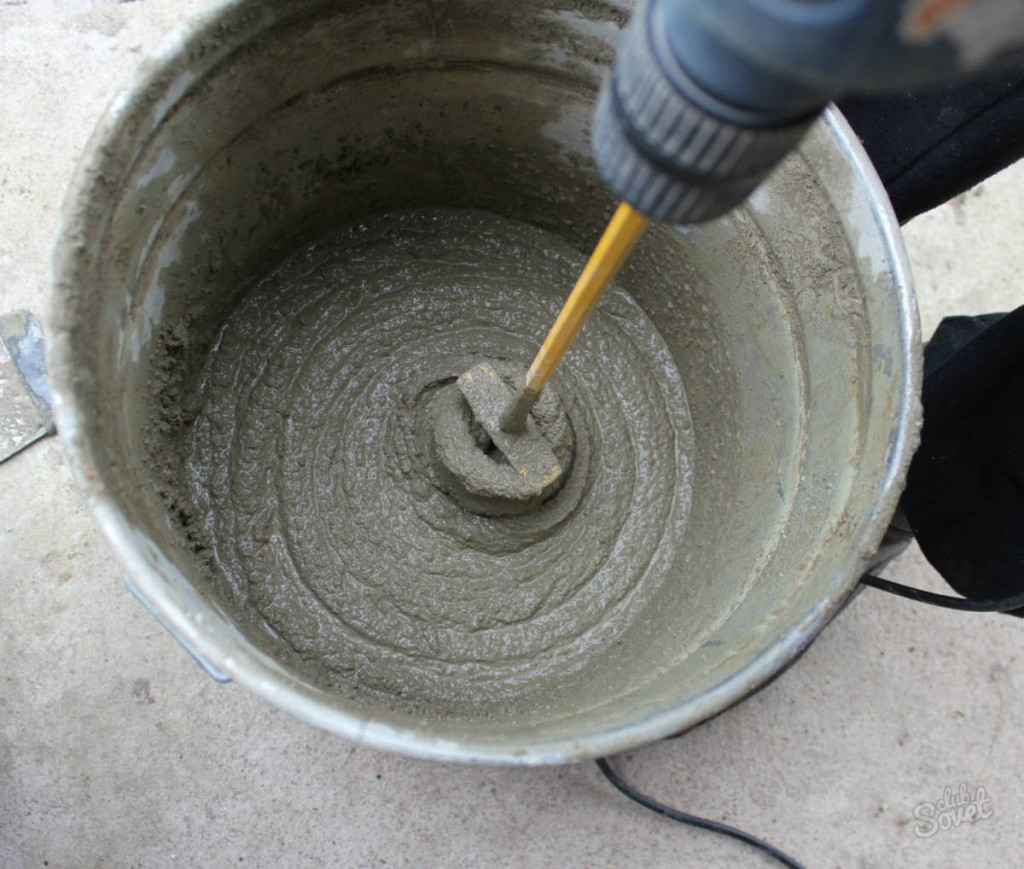
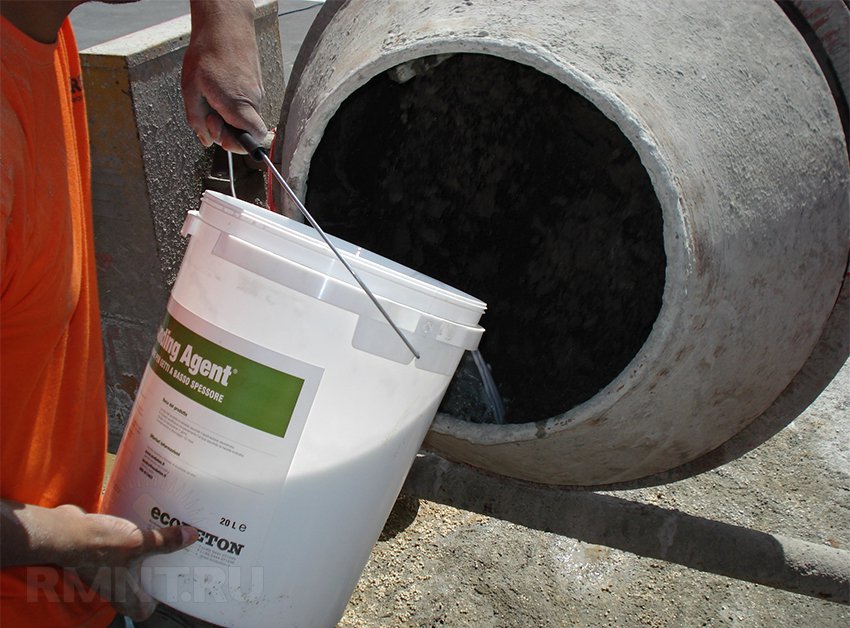
Preparation of the solution
The finished mixture is easier to use, it is advisable to buy for a small amount of work. But if you need to cover large areas, the difference in price grows into a significant amount. In order for the solution to meet all standards and give the desired result, you need to correctly select the proportions of the ingredients. The main indicator here is the brand of cement.
There are such options plaster:
- "200" - M300 cement mixed with sand in a ratio of 1: 1, M400 - 1: 2, M500 - 1: 3;
- "150" - cement M300 mixed with sand in a ratio of 1: 2.5, M400 - 1: 3, M500 - 1: 4;
- "100" - M300 cement mixed with sand in a ratio of 1: 3.5, M400 - 1: 4.5, M500 - 1: 5.5;
- "75" - cement M 300 mixed with sand in a ratio of 1: 4, M400 - 1: 5.5, M500 - 1: 7.

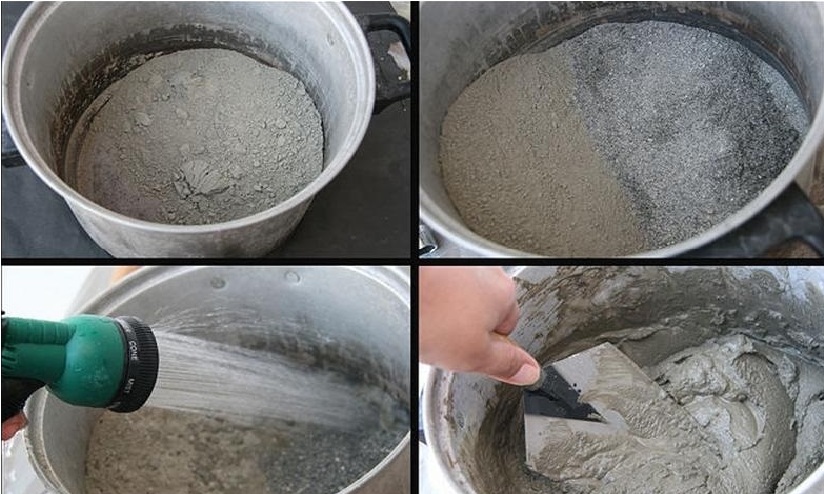
For mixing cement-sand mortar, you need to perform a number of tasks:
- Sift the sand, even if it seems clean.
- If the cement is crushed, its use is not recommended, but it is possible that it can also be sifted by removing lumpy inclusions. In such a mixture, the sand content is reduced by 25%.
- First, the cement and sand are combined in a dry form, then they are mixed to achieve a relatively homogeneous dry mixture.


- Water is added in small portions, thoroughly mixing the solution in between.
- Further additives are added - for example, plasticizers.
An indicator of a qualitatively mixed solution is its ability to keep in the shape of a slide, without spreading. It should also be easily distributed over the work surface.

Wall coating technique
Proper application of putty in compliance with all recommendations - one of the components of high-quality finishing works.
To do this, do the following:
- Before applying the plaster surface is treated with a primer - this will provide a stronger adhesion to the solution. Next the wall is allowed to dry.

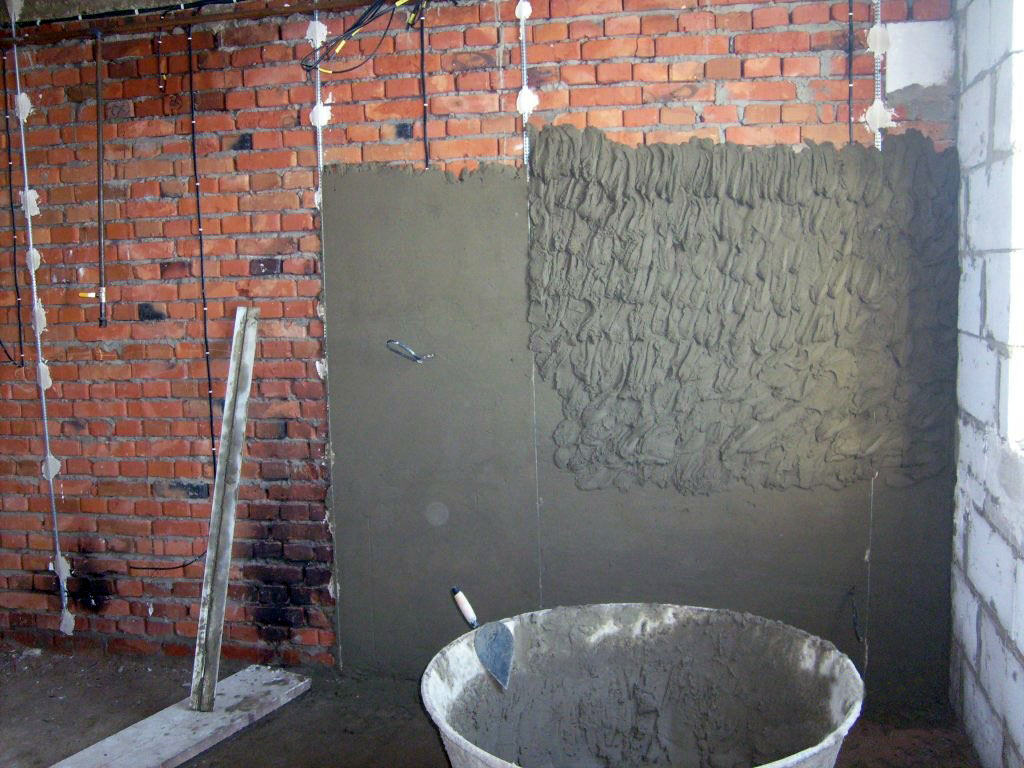
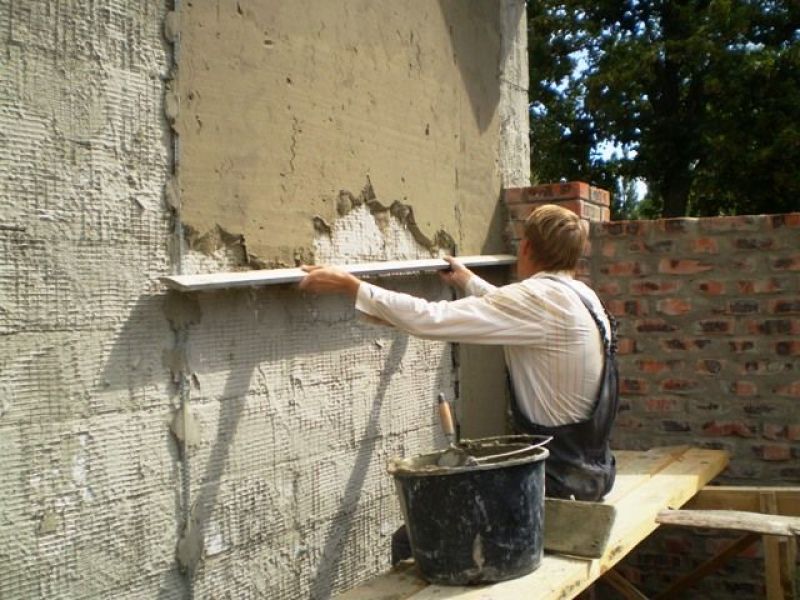
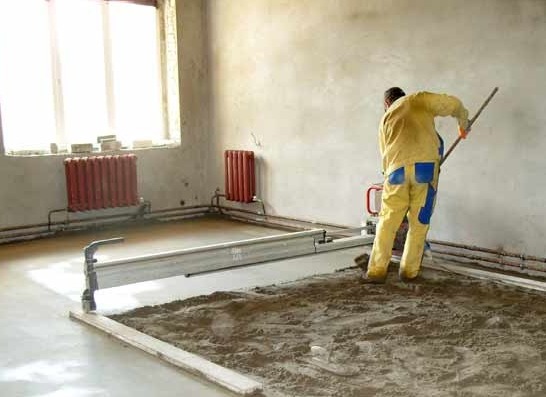
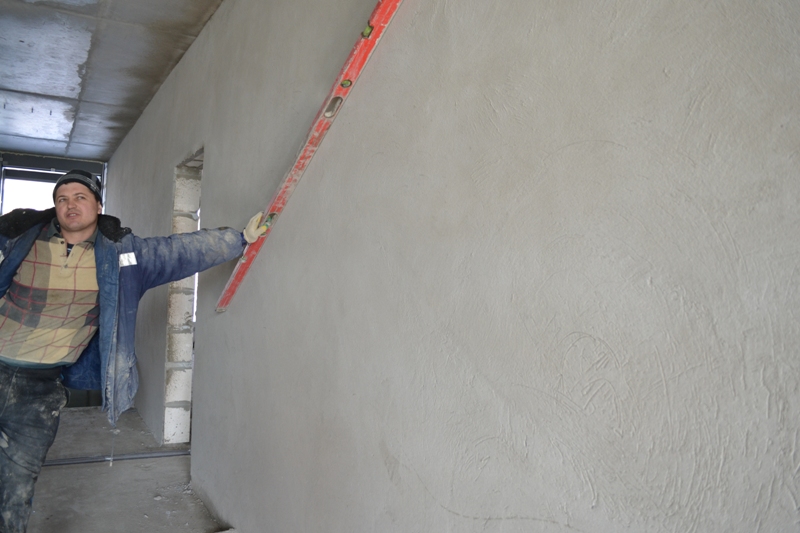
- Guide beacons are placed on the surface, along which in the process it is possible to determine the boundaries of the created plane. Their height is set at the level, in shallow areas they are replaced with slaps for putty. The material for the lighthouses is often a metal profile, which is attached to the mortar or slats, or wooden bars on self-tapping screws. The interval between the beacons is the length of the rule for leveling minus 10-20 cm.
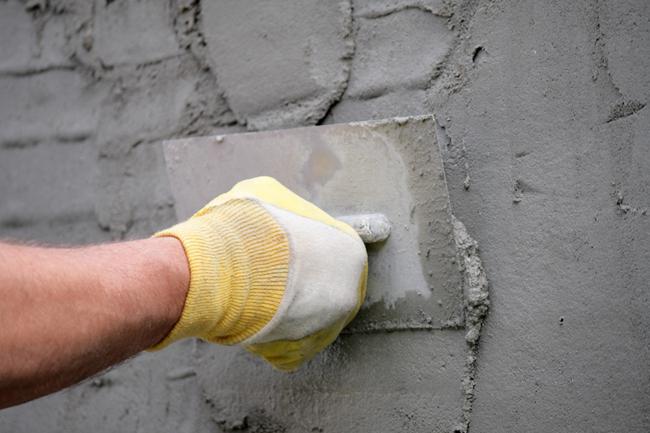
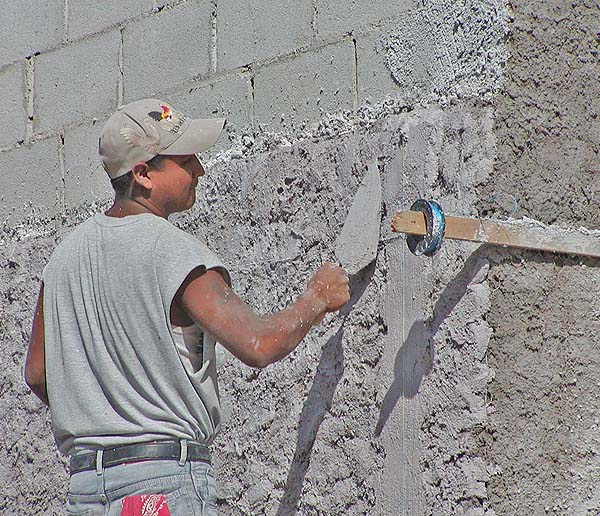
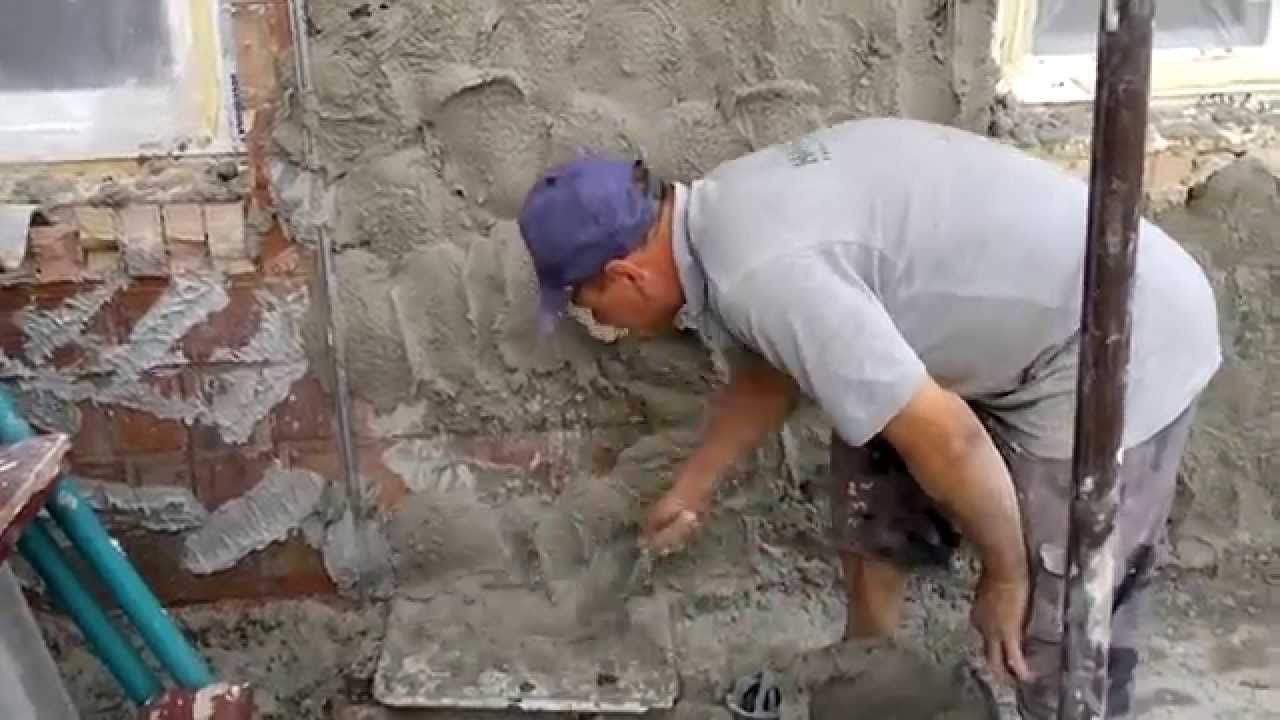
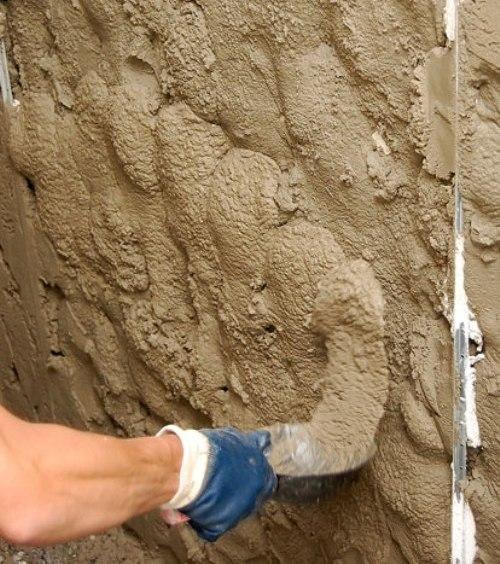
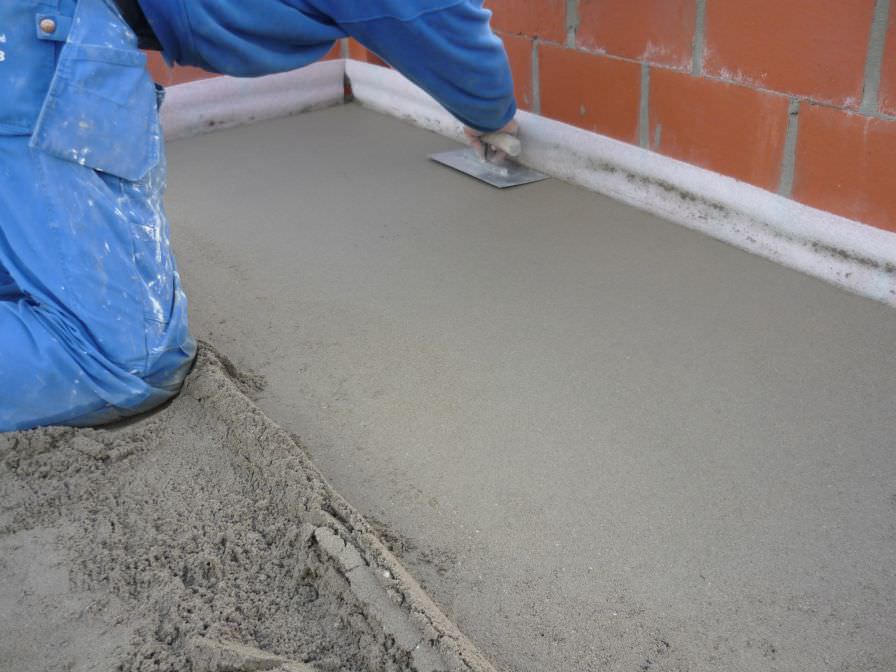
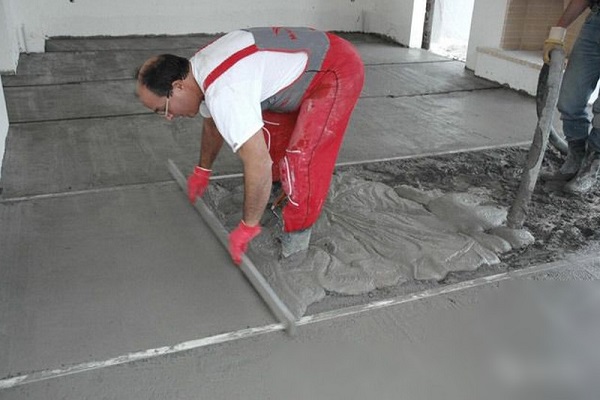
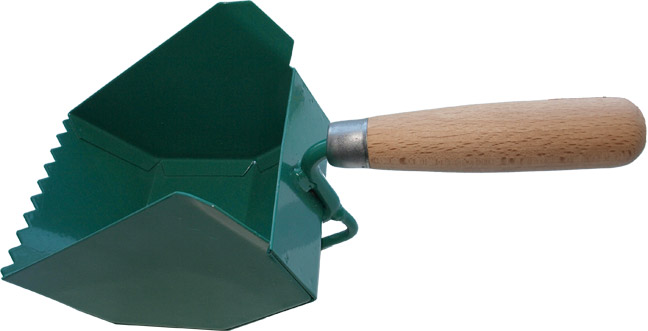
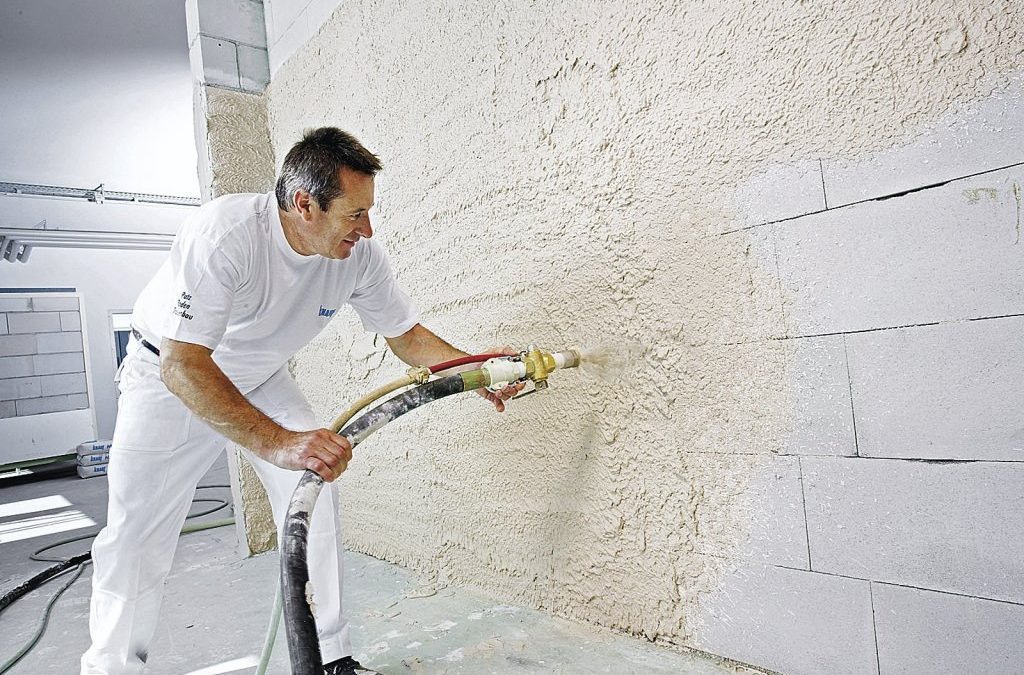
- To apply a standard layer (10 mm) of plaster, use a trowel, a thick one - a ladle or other volumetric tool.


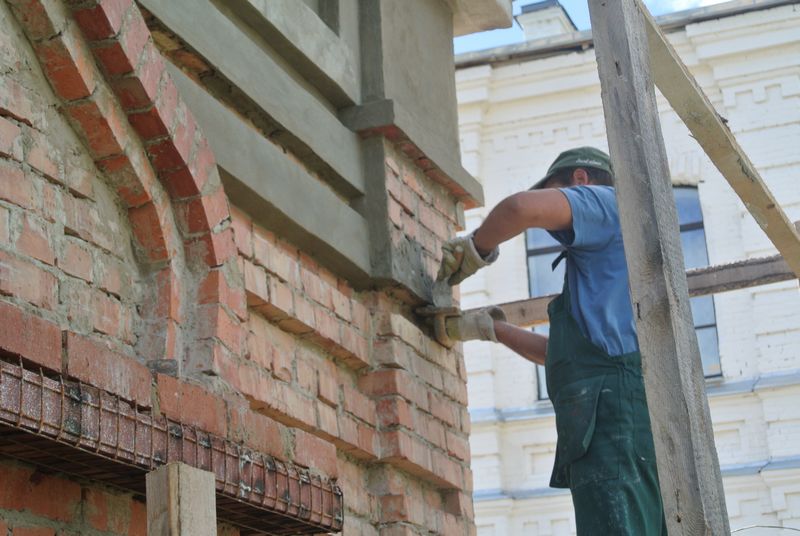
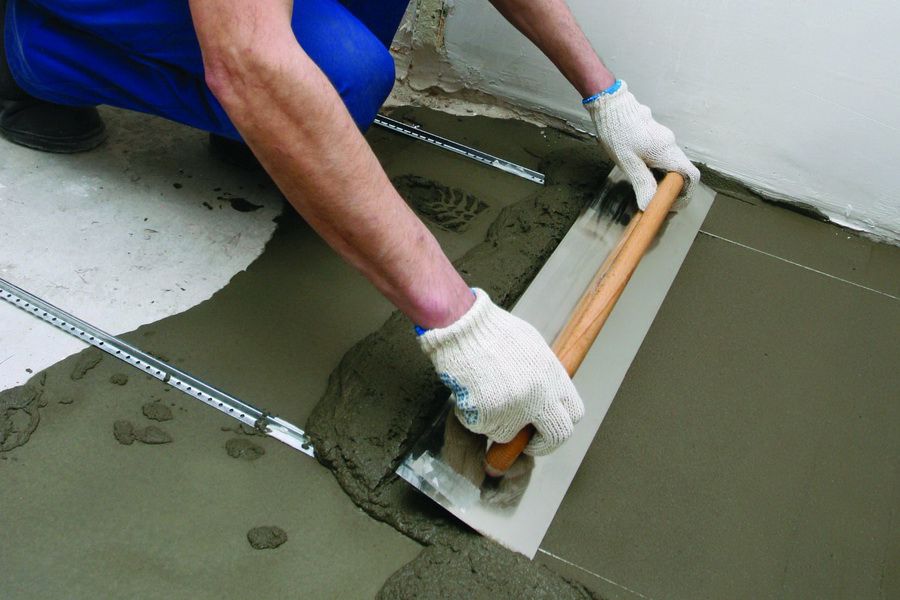
- A new layer is applied 1.5-2 hours after the previous one is completed. It is applied from the bottom up, completely overlapping the previous one. It is more convenient to work by breaking the wall into sections of a meter and a half. Next, the plaster is pulled and leveled by the rule. This is done by tightly pressing the instrument to the beacons, with a rise and a slight shift to the left-to-right. Excess plaster removed with a trowel.
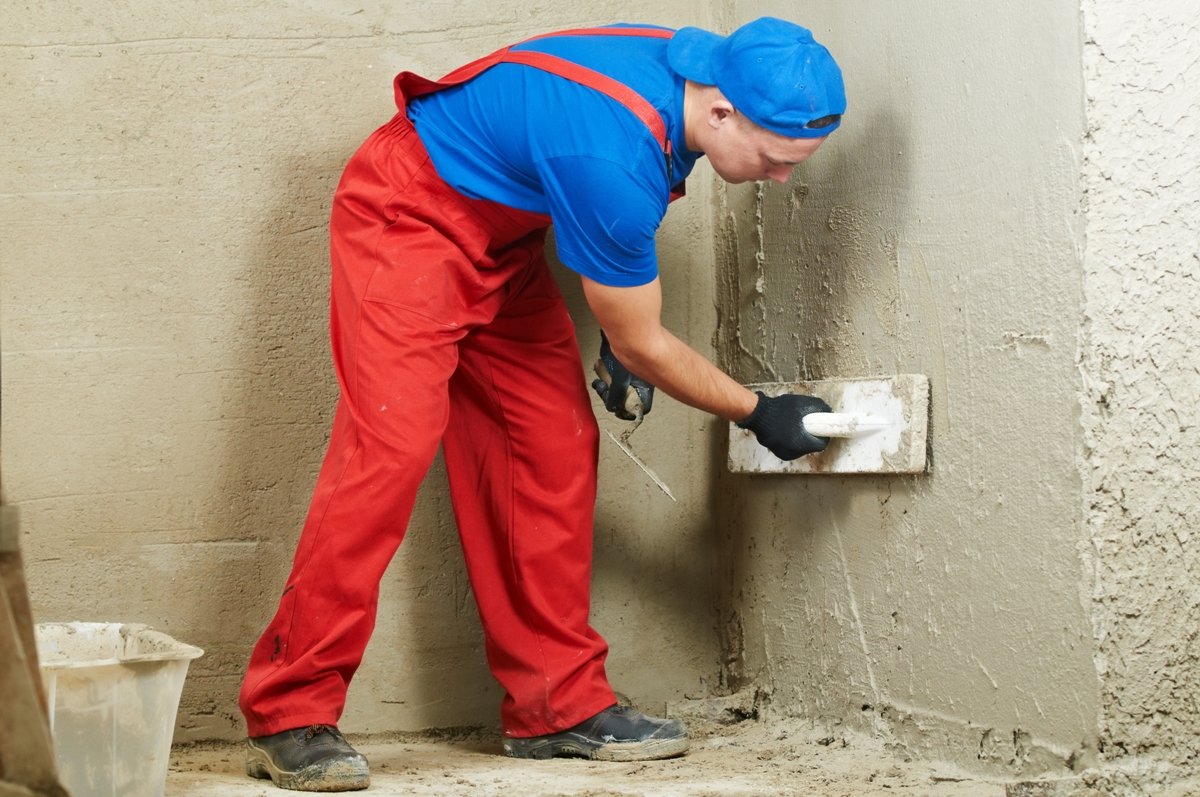
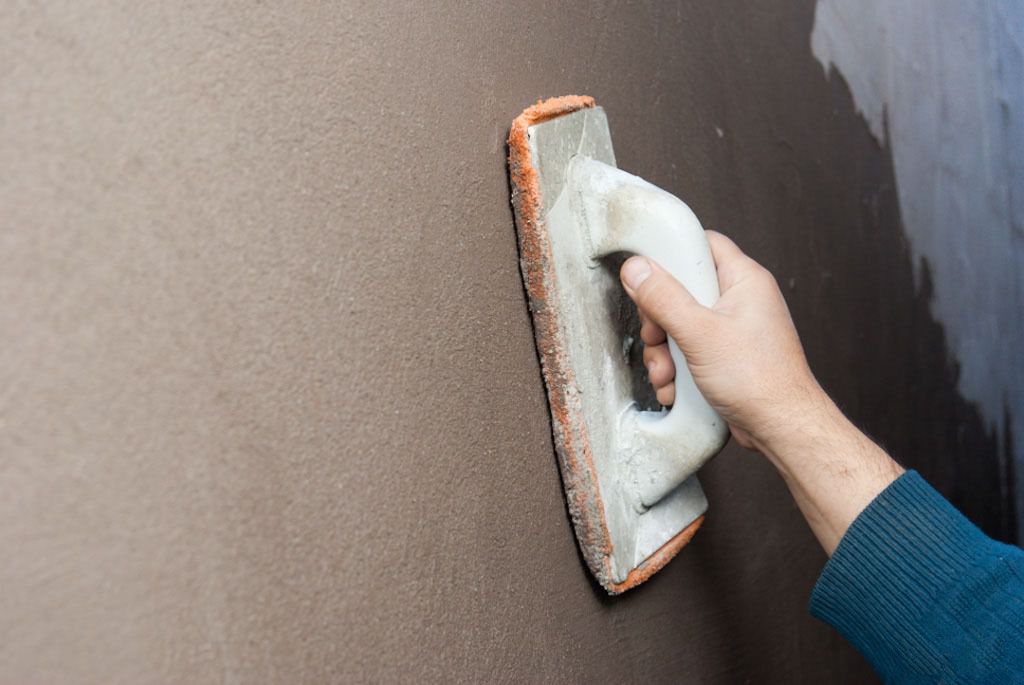
- When the mortar has gripped, but has not yet stiffened, it is time for grouting. It is carried out in circular movements of the grater in places with irregularities, grooves or protrusions.
- For interior work, final hardening occurs within 4-7 days after application, subject to normal humidity. For outdoor work, this interval increases and can reach 2 weeks.
General tips
To improve plastering work, it is worthwhile to delve into various subtleties, for example, machine application. To prevent cracks during fast setting, the layer is moistened from time to time with water from a spray bottle or covered with a film. There should also be no drafts, the temperature should not be raised or fluctuate. When small cracks appear, additional grouting of problem areas is made.
It is inconvenient to use in curved places, recesses or in the presence of various obstructive objects, such as pipes. For such purposes, a suitable template is made, and the beacons are set according to its dimensions with the required interval. A corner is used for work with corners; it can be factory-made or manual production.
In the next video you can clearly see how to prepare a solution for plaster walls.


