What are beacons for plaster and where are they used?
Nowadays, many owners of private houses and apartments face the problem of uneven walls. Such defects are especially noticeable in the corners. Because of this, rooms may look less attractive, and putting furniture will be quite problematic. In many cases, plaster is used to level the walls. It is most convenient to apply it on such bases with the use of such elements as beacons. Let us consider in more detail the features of this process.
Special features
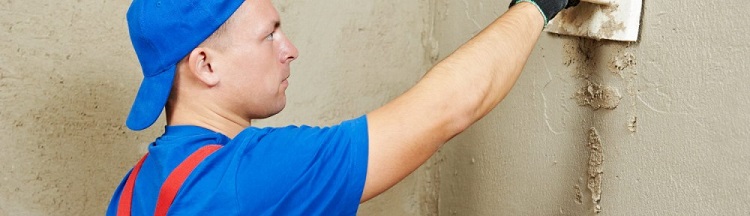
In most cases, before applying paint, sticking wallpaper or laying tiles, the walls need to be properly leveled, otherwise the lining will simply not be held securely in place.Many home and professional masters to solve this problem have resorted to the use of high-quality plaster mixes. It is recommended to apply them on uneven or cracked walls with the help of special beacons.
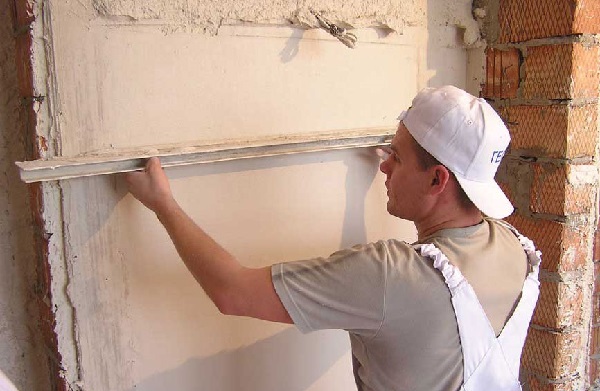
To begin with, let's answer the main question - what are plaster beacons? These elements are used when it is necessary to make the walls even or to hide the cracks on them. Based on the position of the beacons, the builder applies the plaster on the base, thereby aligning any irregularities and drops.
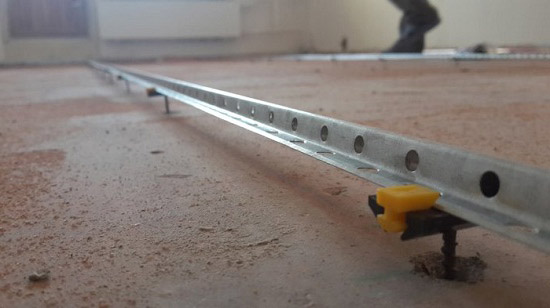
Most often, lighthouses are installed along the entire length of walls requiring plastering. For this reason, fasteners located at their two ends would be too small to fit snugly to the base. This feature explains the fact that the plaster beacons are fixed at several points at once.
It should be noted that the installation of beacons on walls with large cracks should only be after identifying the main cause of the appearance of such defects. The source of the destruction of floors must be eliminated. In some cases, you have to turn to reinforcement.

Too large cavities and technological openings on the walls must be repaired before installing the beacons.As a rule, the same mortars are used for this, which will later be used for plastering the foundations.
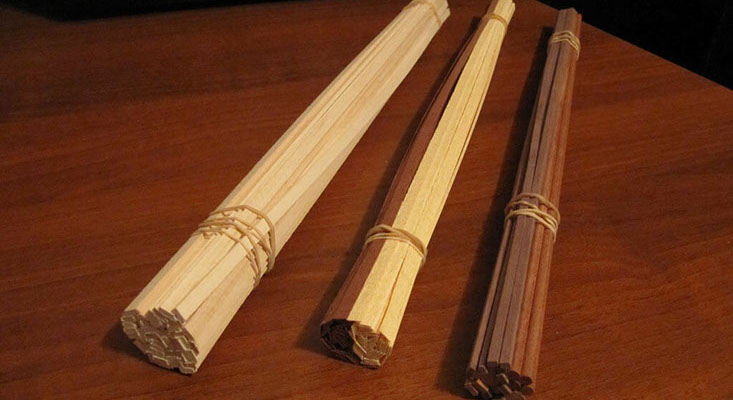
Plaster beacons are made from different materials. They can also vary in size, length and shape. Thanks to such a rich choice, it will be possible to choose suitable elements to any wall floors and their individual sections. In addition, the owners can do all the work with their own hands, saving money on contacting specialists.
But do not think that lighthouses are used only when finishing walls. These details can be accessed in those cases, if you arrange such planes as the floor, ceiling or slopes. In all cases, the beacons will be very useful and convenient components that allow you to put a layer of plaster quickly and evenly.
Few people know, but beacons are not only factory produced.


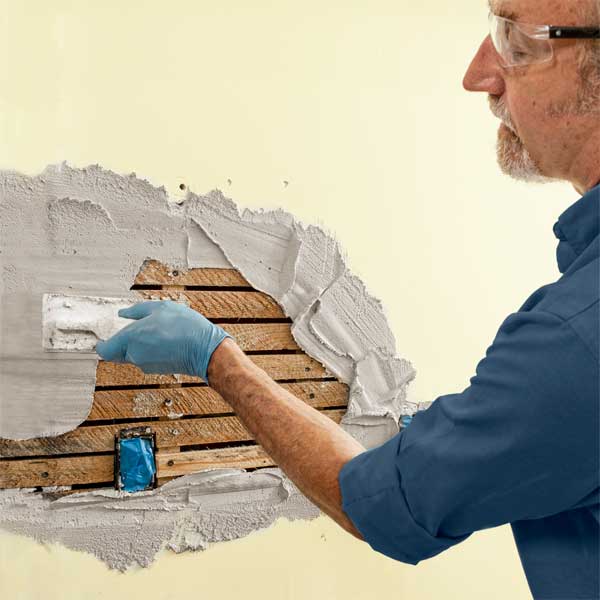
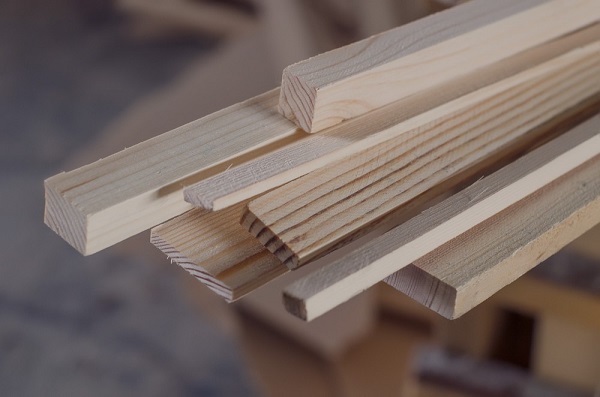
Some craftsmen make their own. Most often, such bars are wooden bars (they are especially relevant in cases with wooden buildings). Such parts are attached to the walls to be trimmed with screws,thanks to which the plastering process becomes easier and faster.
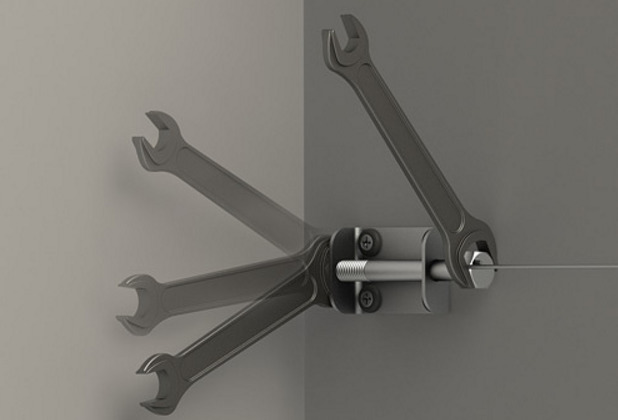
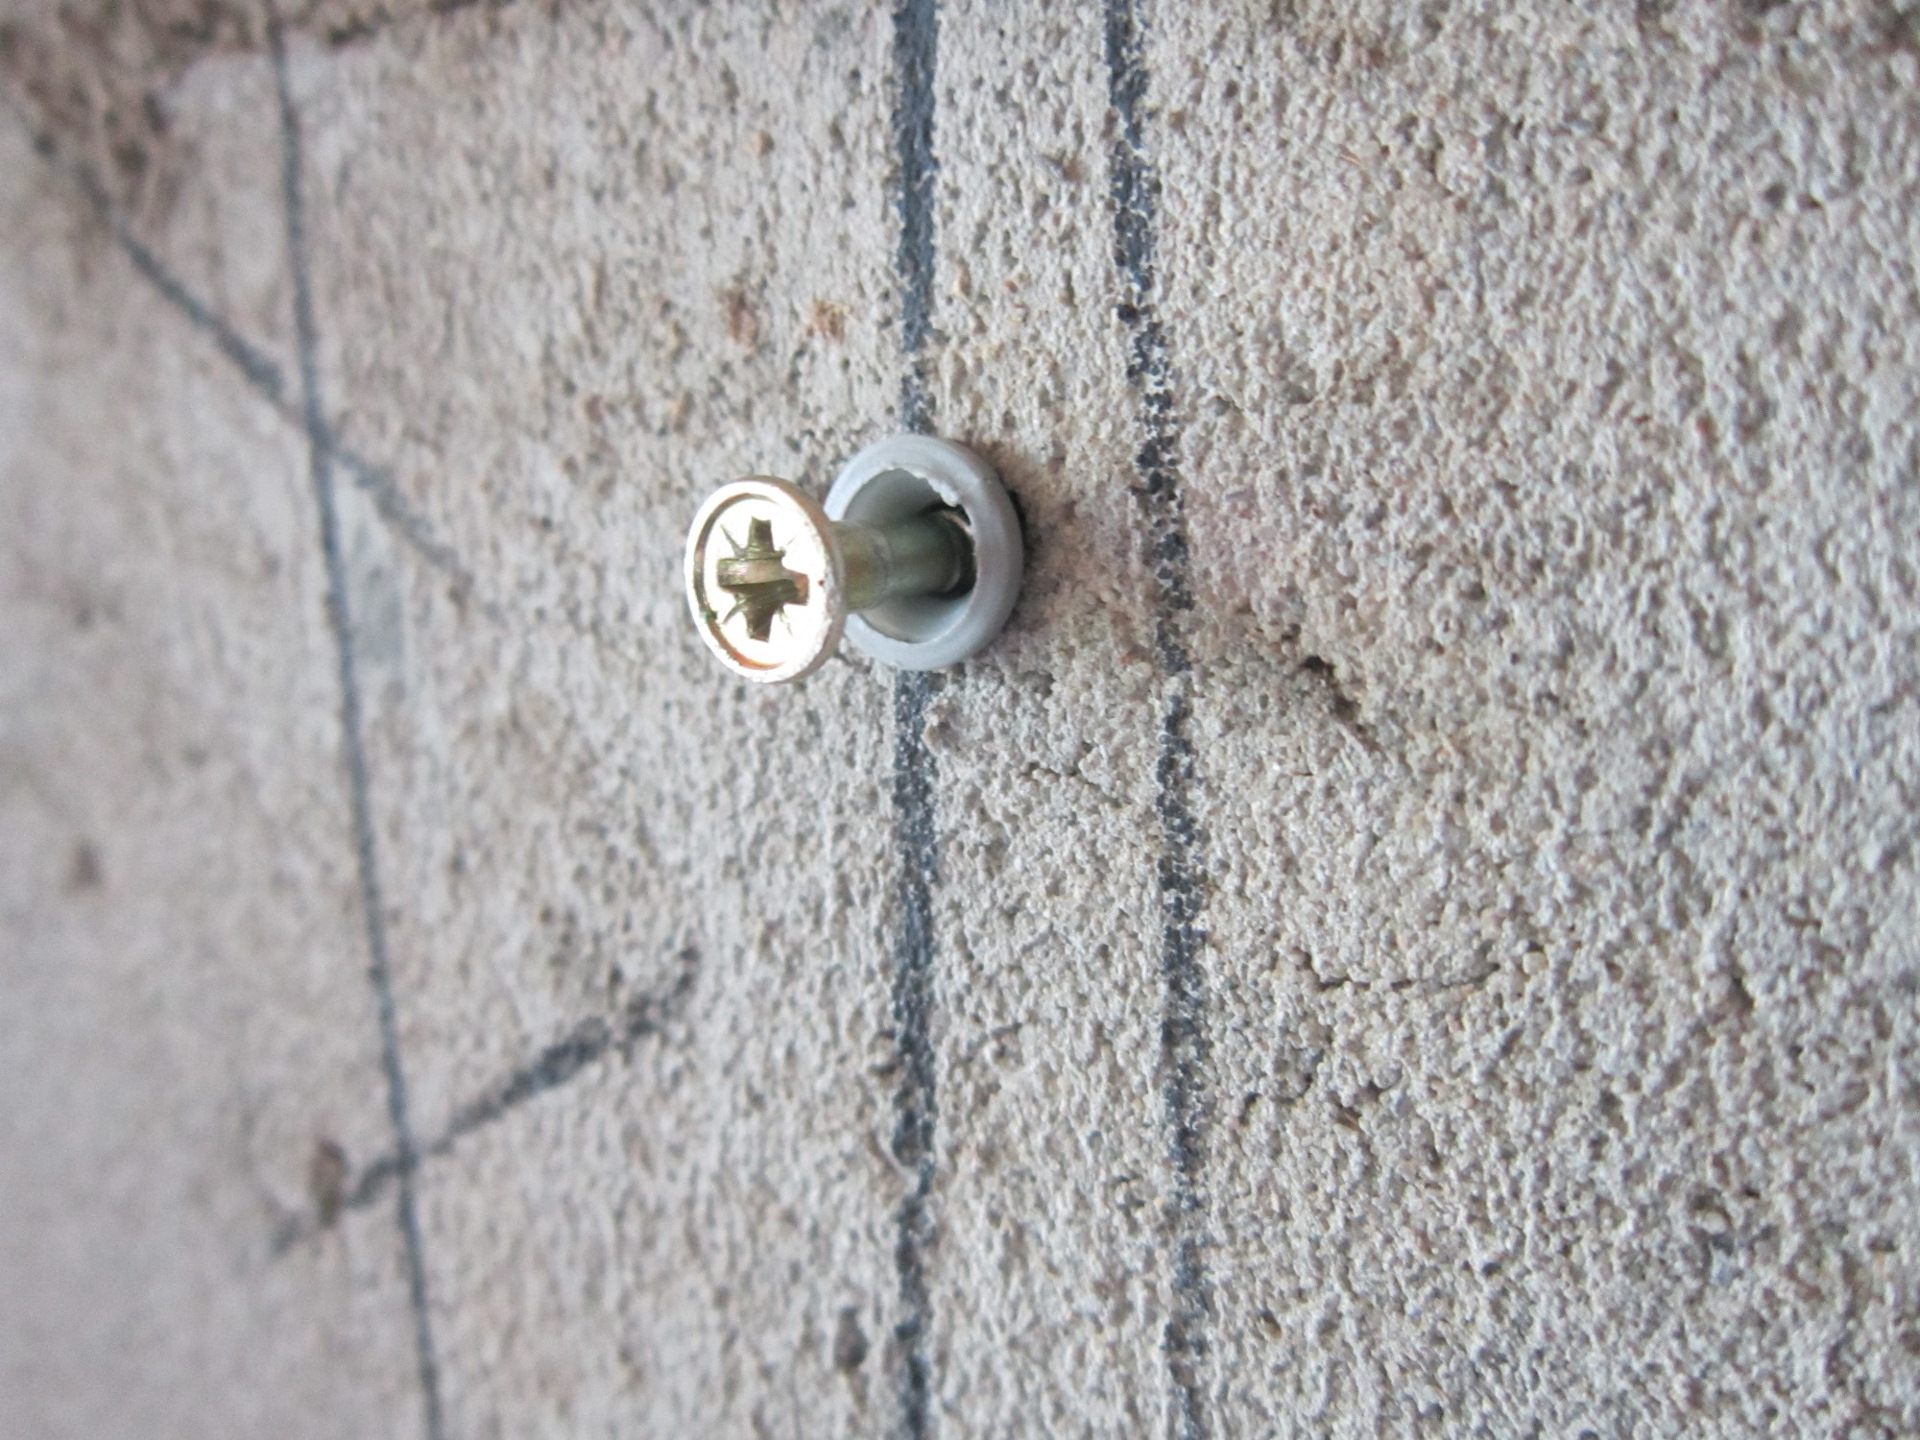
More experienced repairmen often turn to plaster lighthouses. For this purpose, screws are fixed on the necessary areas. Their caps play the role of a peculiar level by which a solution is subsequently applied.
Kinds
As mentioned above, today when applying plaster on floors, different types of beacons are used. Each type of these landmarks has its own characteristics that must be considered before starting work. Let us consider in detail what are the distinctive features of different types of plaster beacons.
To begin, consider the properties of beacons made from different materials.
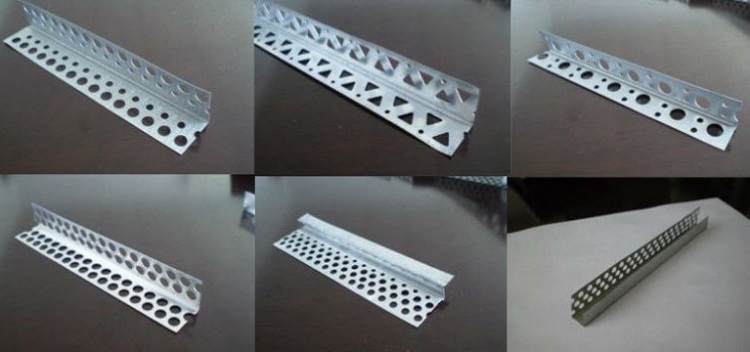
Metallic
Iron
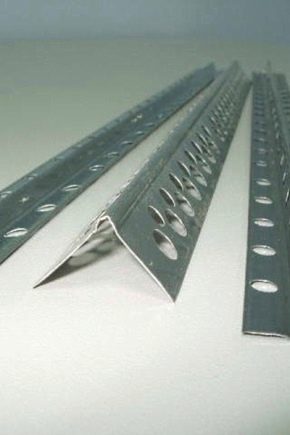
Iron beacons are among the most common and sought after. Modern manufacturers make them in the form of perforated pads with a strong rounded top. As a rule, these structures are coated with zinc, therefore, being under plaster, they do not corrode. Installation of these types of beacons is made with the help of fasteners and quickly setting plaster mix.
Let us dwell on the main advantages of iron lighthouses.
- Many owners are turning to such elements, as they have a low cost.
- Iron lighthouses are found in many hardware stores - they don’t have to be searched throughout the city.
- Working with such elements is very simple. The main thing is to follow the instructions.

However, modern galvanized beacons made of iron have their drawbacks.
- The most common drawback of such products is the deformation of the geometry. This problem can also occur if certain standards are violated during manufacture, or if transportation or storage is incorrect. For this reason, before buying a beacon, it is important to carefully inspect for damage or deformation.
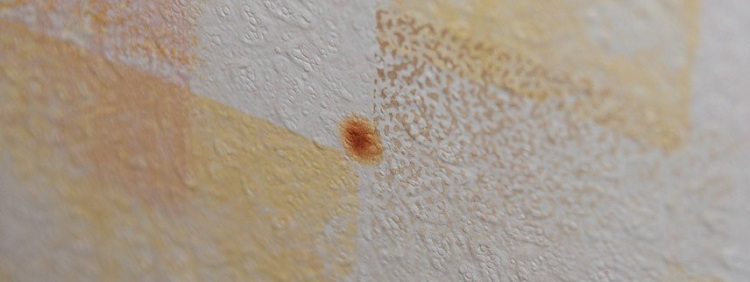
- In some cases, after all the work has been done, ugly rusty stripes appear on the walls. Such problems appear as zinc, which is present on the surface of iron, begins to deteriorate and oxidize. In order not to encounter such minuses, beacons are advised to clean immediately after finishing the floors.
- Another disadvantage of such parts is that they are highly flexible.Because of this, in the course of their installation, it is necessary to create conditions to guarantee the rigidity of the guides, for example, to fill the surface under the beacons.
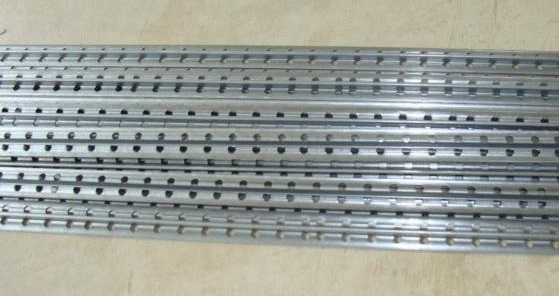
Steel
Steel varieties of plastering rails are reusable. Most often they are used by experienced craftsmen. You can use such items many times, thereby recouping the costs incurred in purchasing them.
The main advantages of steel guides.
- This beacon profile has excellent strength characteristics.
- Steel guides are very rigid, therefore it is permissible to install them without worrying about the possible deformation. For this reason, these elements need to be fixed only in certain places.
- You can use these guides several times.
Steel beacons do not have serious drawbacks, however, there are some “weaknesses”.
- They are expensive (more expensive than simple metal copies).
- They can be broken or spoiled if removed after the plaster composition has completely dried.

Plastic
The second most popular are the beacons of plastic.
They are similar in many characteristics to metal versions, but they have a number of distinctive features.
- They are made from reliable and high-strength plastic.
- To install them do not require any experience or special knowledge. All work is easy and trouble-free.
- Such elements retain the original geometry. After slight deformations, the plastic beacons return to their former appearance. For this reason, there is no reason to worry about what will lead them in time.
- Plastic is a material that is not susceptible to oxidation and rust. On the walls with similar plastic beacons just do not appear rusty streaks and stains.


Unfortunately, plastic beacons have a number of drawbacks. Consider them.
- These details can not be accessed if you are engaged in exterior decoration. This results from the fact that in the conditions of low temperatures plastic sometimes breaks.
- The material from which such beacons are made is not designed for impressive external loads, for example, shocks. Under their action, they simply break.
- If the plastic guides are incorrectly mounted, then they can bend when pressed by the rule, which will cause the finished base to deform.
- Note that plastic guides made of cheap and toxic material can leave dark spots on the trimmed surface, if you do not remove them after all the work is completed.It is impossible to get rid of such defects on the finish.
Lighthouses differ from each other not only in materials. Consider what else there are guides for plastering the grounds.
Homemade
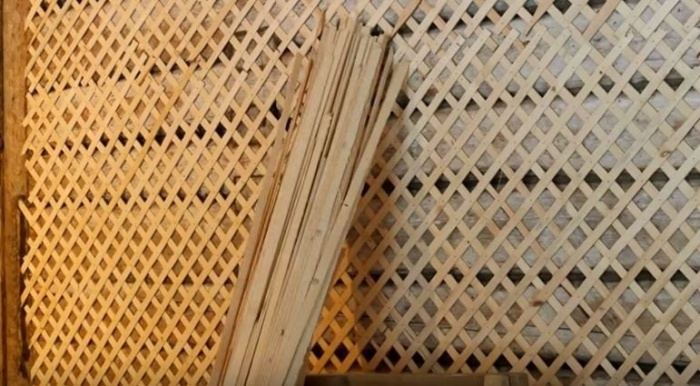
As mentioned earlier, plaster beacons are not only factory produced, but also self-made. They cost the masters cheap, and their creation can not be called too complicated. For self-production of beacons, people usually use a corner made of metal or a pipe. Of course, it is permissible to refer to other suitable items that have a similar structure. For example, it may be wooden slats. However, they are not so often approached because of their susceptibility to deformation.
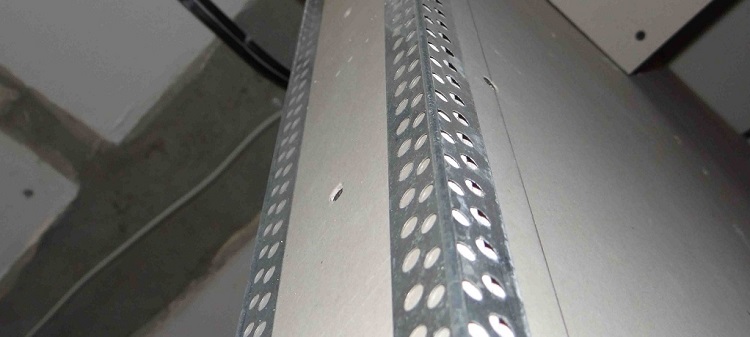
It should be noted that the use of improvised foundations usually increases the consumption of plaster. As a result, the cost of finishing work is also increasing. There is another popular option for homemade beacons - a metal profile for drywall. These landmarks are the cheapest. Suitable for cases where you need to put a thick layer of plaster.

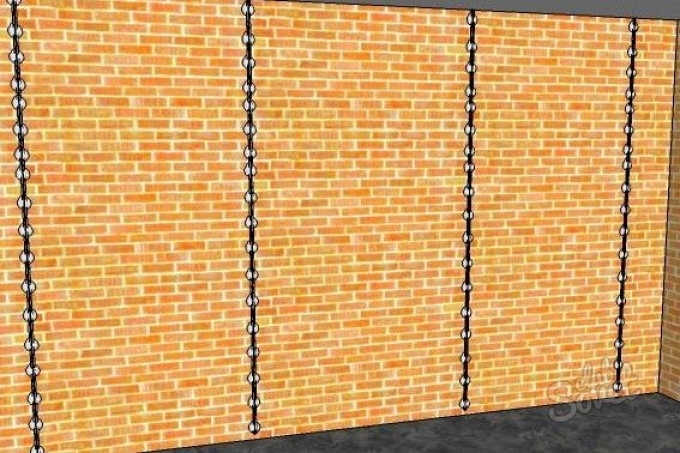
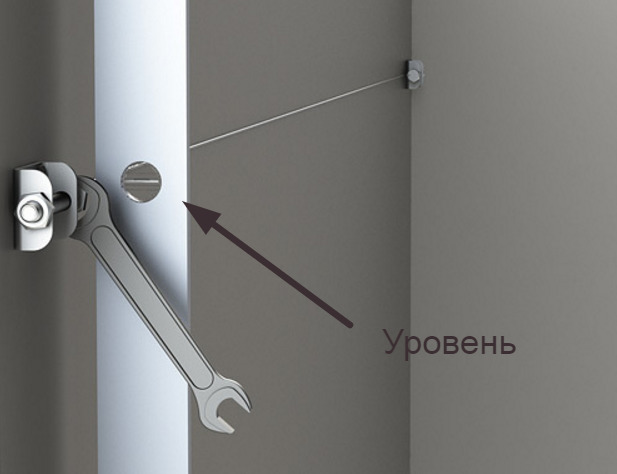
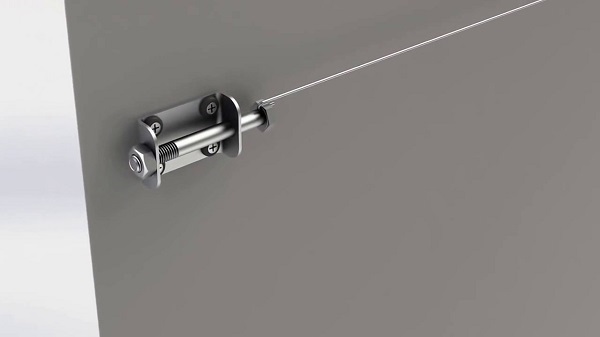
Strings
There are also special string beacons.
They are cheap, and make them so.
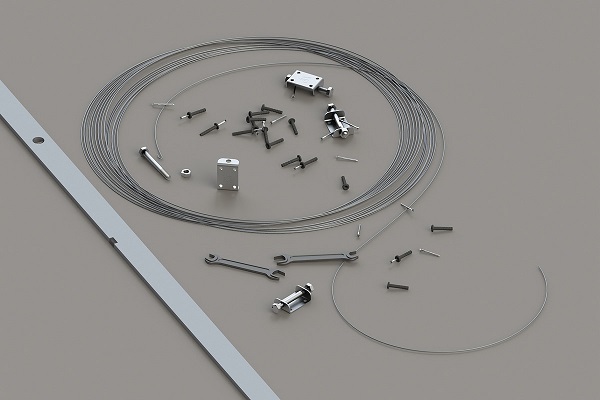
- First, prepare the screws, perforator and wire.
- Then using a perforator, drill holes into which the dowels will be inserted.
- In the dowels need to screw the screws. They should be located on the same level. Next you need to pull the wire.
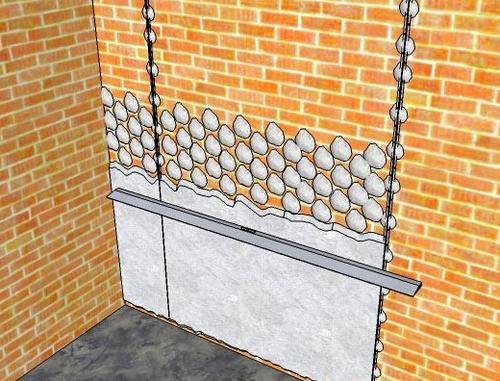
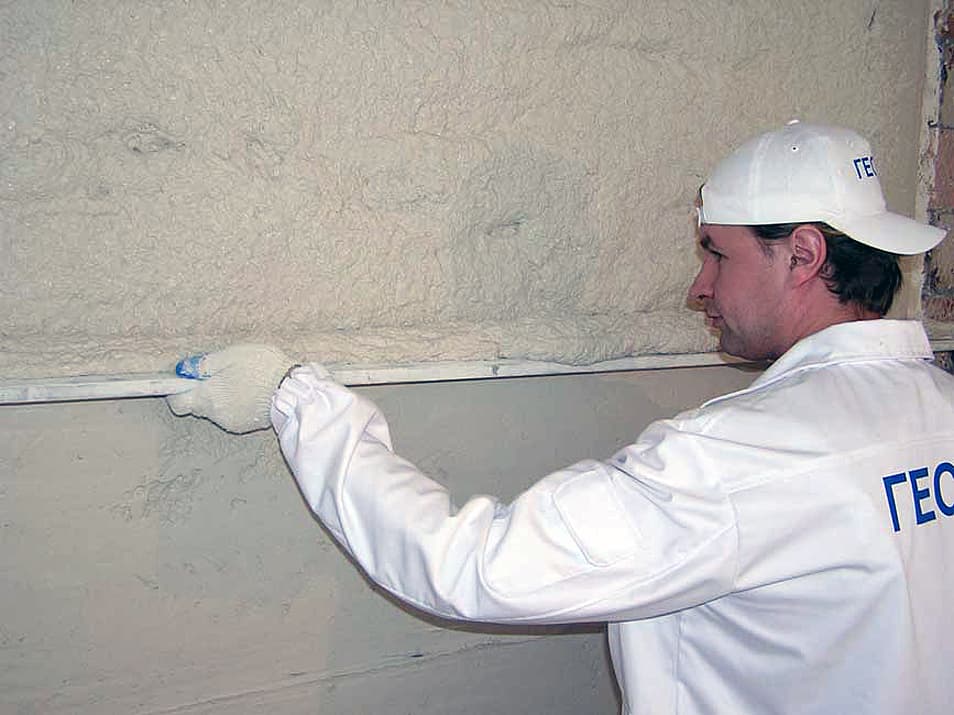
- Apply the plaster mix under the wire so that the surface of the layer is slightly above the string.
- When the plaster mortar dries slightly, the top layer must be cut off. So get a guide by which and will need to produce alignment.

The main advantage of the string beacon is its low cost. The wire is cheap, and the screws are at home in almost every master. In addition, these types of beacons are not subjected to deformation, such as metal or plastic.
As for the minuses, these include the following.
- Masters often carelessly install self-tapping screws. Because of this, the mortar surface may be bent.
- Curvature can also occur if the upper plaster layer has been removed incorrectly, based on the level of the wire.

Dimensions
Lighthouses for plaster can have different dimensional parameters.So, the most common are the guides with dimensions of 6 mm x 3 m. Such elements are most often used when laying the plaster layer in 6 - 10 mm.
Also there are lighthouses with dimensions of 10 mm x 3 m. If you use parts that have such width and height, you can lay the plaster with a layer of more than 1 cm.

How to make yourself?
Today, many home craftsmen are turning to the use of homemade plaster beacons. You can make them in different ways. Consider some of the most common options.
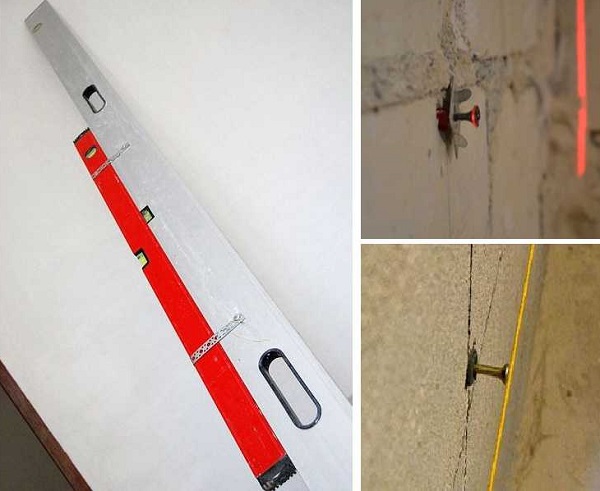
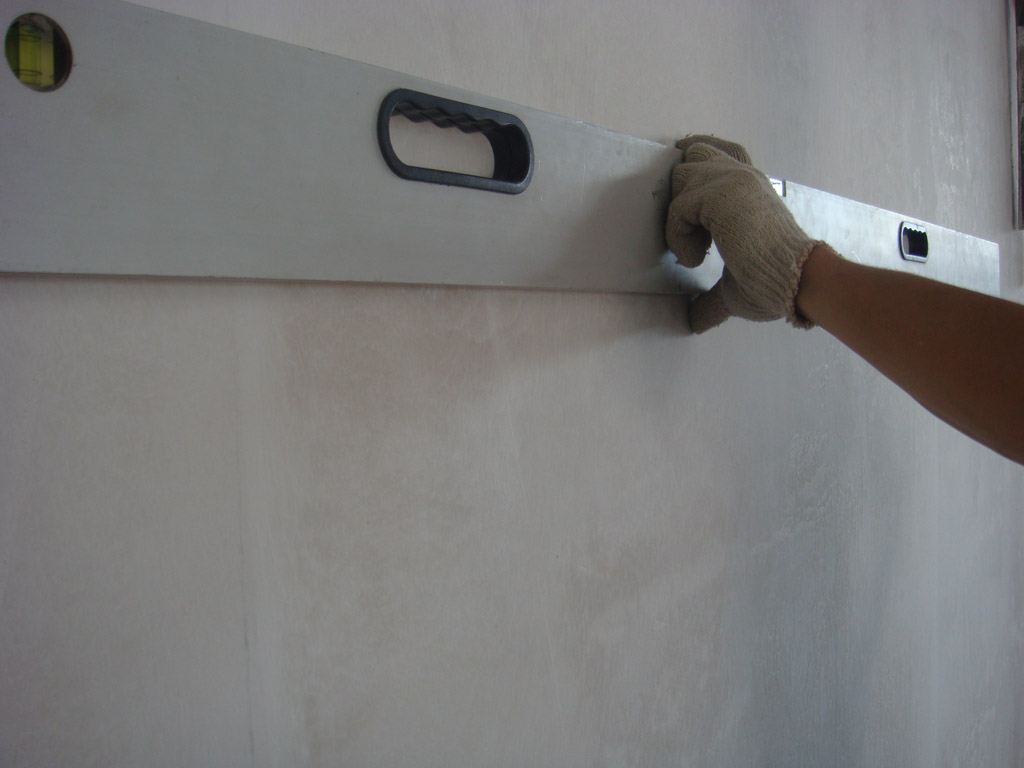
So, to create a long beacon, which is suitable for walls, floor, and ceiling, you need to stock up on a long level or a perfectly flat profile, rail. It is recommended for such work to enlist an assistant. Then one person will hold the rail on which the level is located, and the second person will be responsible for laying the solution along the rail length. It is also recommended to add asbestos or alabaster to the plaster to organize this lighthouse. This is due to the fact that the dense layer of the mixture will dry a little longer than normal.
First, you will need to lay the solution level along the entire plane of the base, mark the last point and work, starting with the first. Put the rail and put it under the mixture.
Short homemade beacons are made on the same principle. However, they must be done by 30 - 50 cm and set in staggered order. As a rule, such elements are addressed when it is necessary that the meter and half-meter rules are enough for the entire gap between the lighthouses.
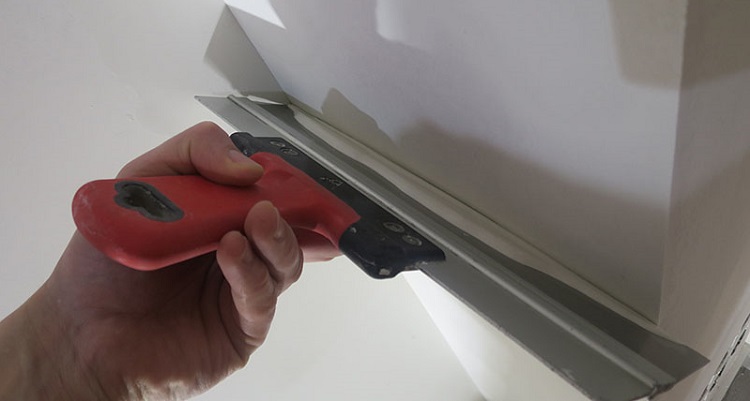
You can also set your own lighthouses with self-tapping caps. So, on the drawn and verified level of the line fasteners are installed. Based on the location of their caps, put plaster. To do this, use a spatula or a wooden bar, which presses the solution to the fasteners. This type of lighthouses do not need to be cleaned after all the work.
You can make string beacons with your own hands. To do this, you need to install several screws and skip wire between them.

Subtleties of installation
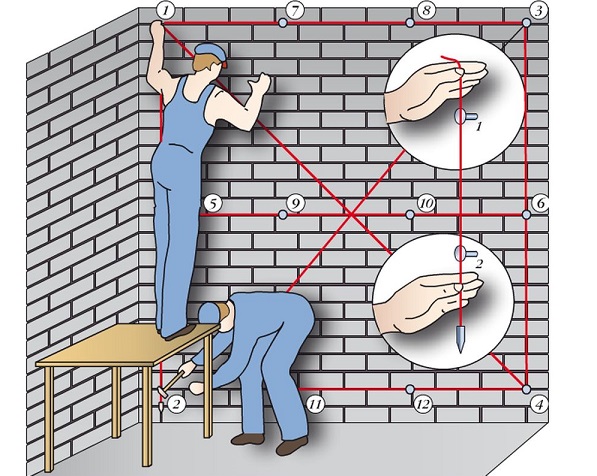
Before fixing the beacons under the plaster it is necessary to mark the base. In this case, you can rely on various techniques.
Let us consider in more detail the easiest way to mark the ceiling for mounting guides.
- First, make a distance from the angle of 30 cm (15 cm from the floor and ceiling).
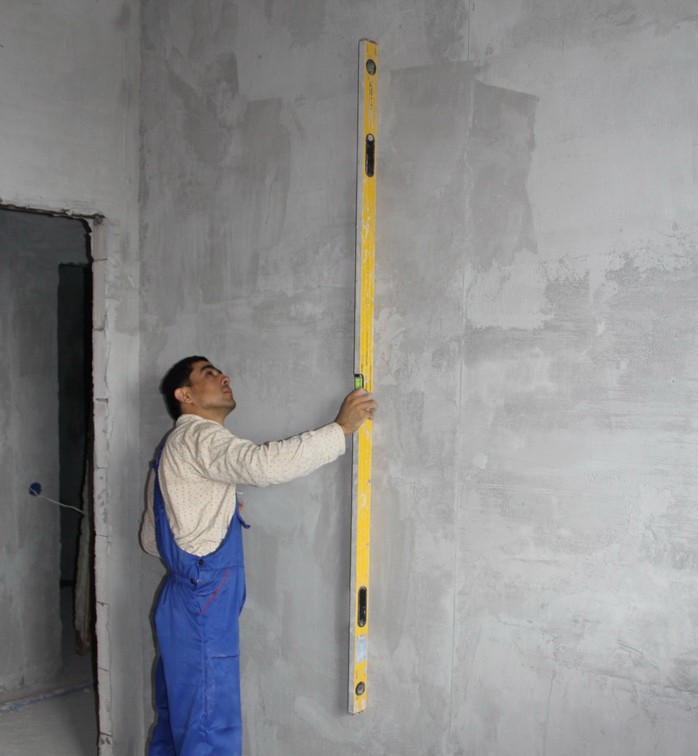
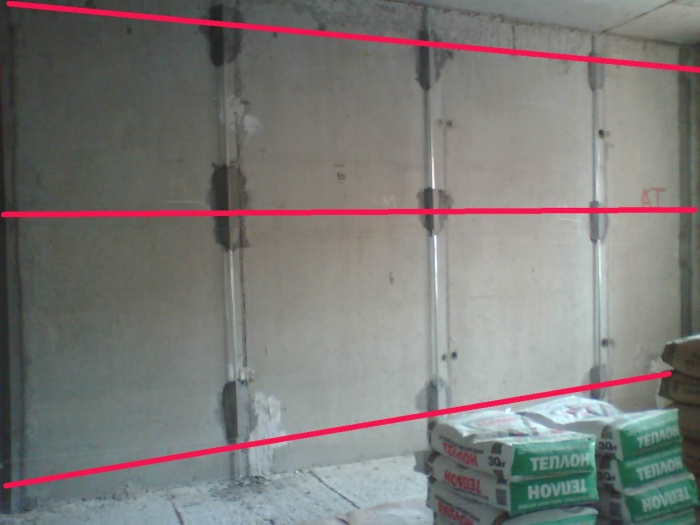
- Run a vertical strip, check it with a level, and then repeat this operation, but from the opposite side.
- Now it is necessary to measure the gap between the applied lines and divide it by 1.5 m. The resulting number will indicate the desired number of beacon guides. The elements must be cut so that they become 30 cm shorter than the ceiling height.
- At the points of the lines below and above, it is necessary to drill holes for the installation of dowels.
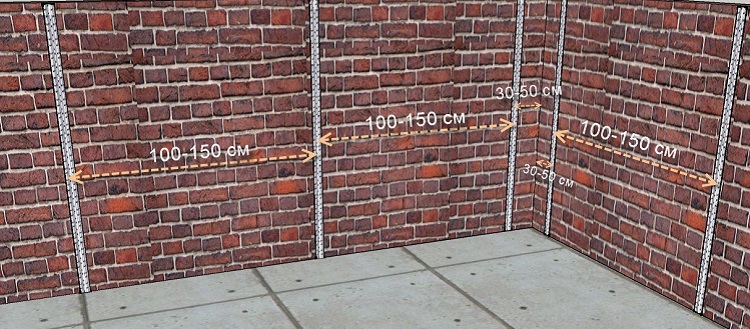
- Now it is necessary to draw out all the wall overlapping lines, maintaining a step of 1.5 m.
- Screw the screws into the holes. Stretch two threads between the caps. In the areas where the rope intersects (as well as the drawn lines), you also need to make holes and insert dowels with screws in them.
- Now trim the level of the fastener caps. To do this, add up the values of the overlap, the parameter of the thickness of the beacon and leave a small margin (about 0.5 cm). The result will indicate how much the fasteners should retreat from the ceiling.
- Having set the screws, you need to tension the threads diagonally and keep the beacons under this plane. Make sure that the guides just lightly touch the thread.
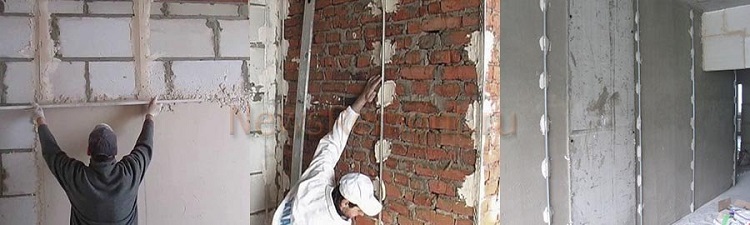
After marking the base, you can proceed to the direct installation of beacon guides.
To begin, consider how to do this with a solution or glue.
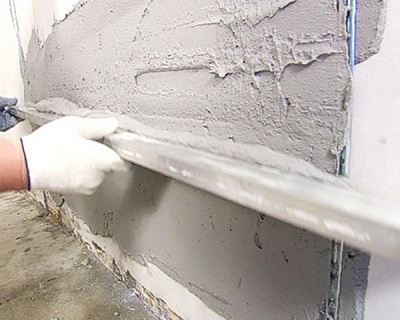
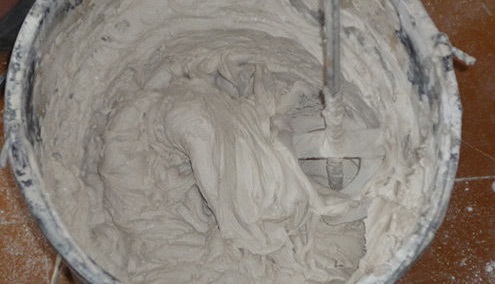
- First prepare the solution. To do this, be sure to use the instruction - it should be on the box.If you want to finish the walls with cement or lime composition, which are fixed for a very long time, then plaster or alabaster should be mixed into them.
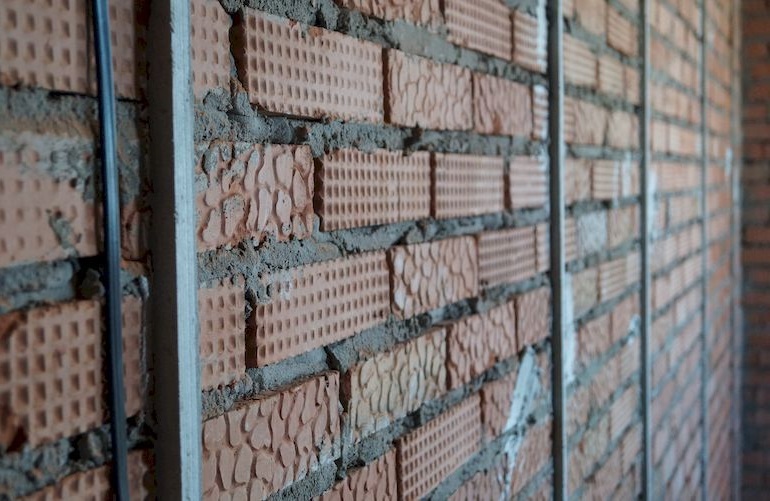
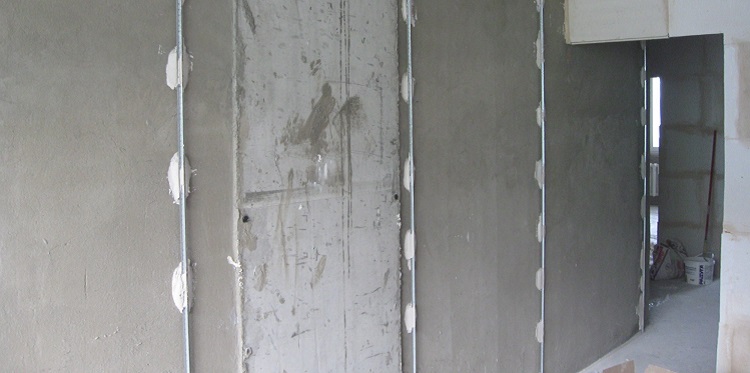
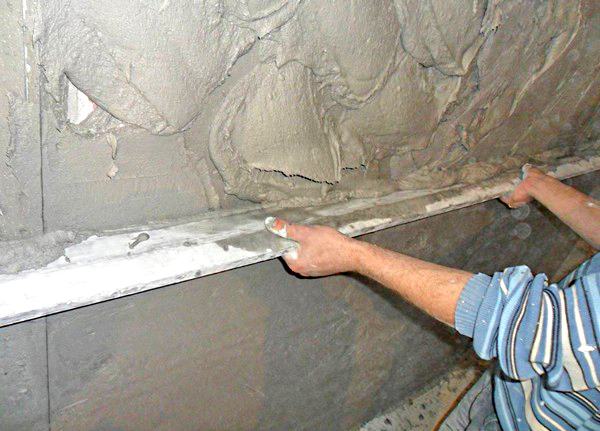
- Apply the finished composition on the wall in small portions. It should be laid every 15-20 cm, based on the marked lines.
- Now you need to attach the profile to the composition layer and press it to the base. When using the simplest markup, the lighthouse must be set in such a way that it stands on a level with self-tapping screws.
- Verify that the location of all the parts match the level.
- Remove excess solution and proceed to fixing the following parts.
Installation on fasteners is a little different.
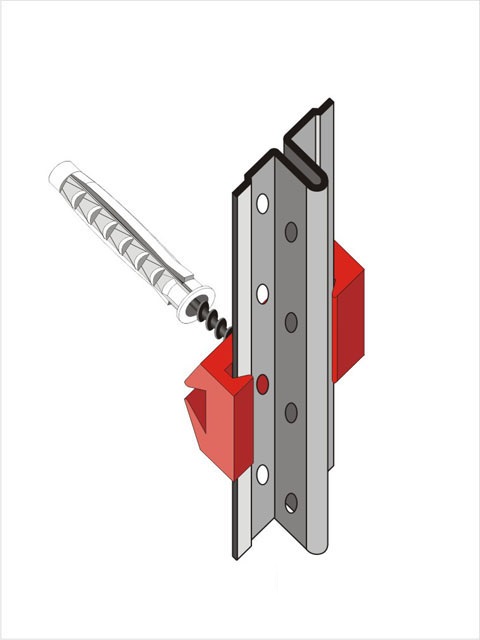
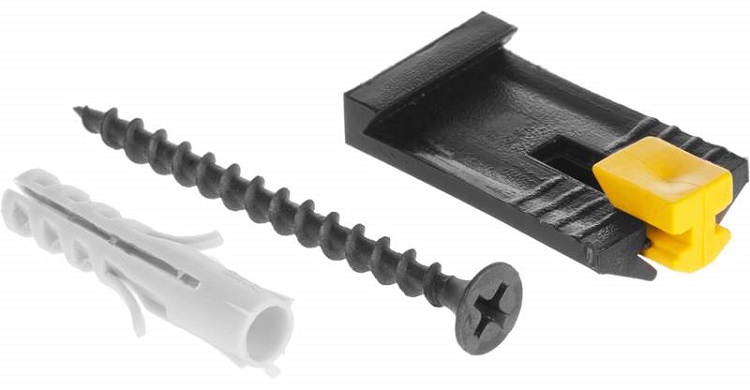
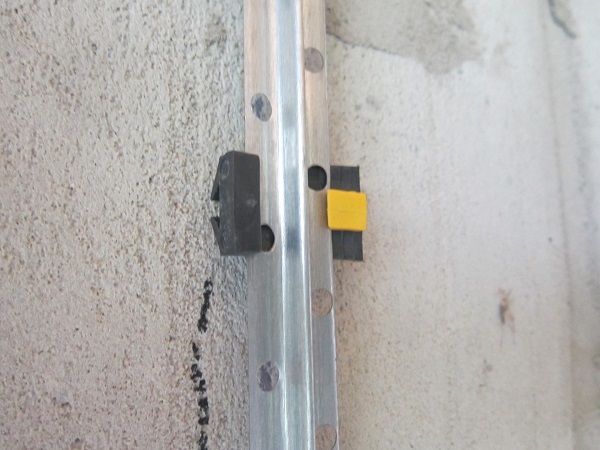
- For fastening beacons used parts called "eared mouse" or clips. In this case, for mounting, the guides are put on the caps of the self-tapping screws, previously screwed into the prepared holes (in 30 cm steps).
- Next, the beacon element is attached and the retainer is installed at the right place
This method is chosen by many masters, as it is simple and fast. However, it should be noted that with this the thickness of the plaster layer will be slightly more - by 0.5 cm.This will affect the total amount of work.
Reviews
Most of the house craftsmen, who have decided to self-plaster the walls in their home, speak positively about the use of beacons. In their opinion, the use of such parts greatly simplifies the finishing works, and also makes it possible to refuse the expensive services of experienced repairmen.
What confuses many people is that metal beacons can eventually leave rusty stripes on the walls that will ruin the whole decoration. The owners rarely encounter a similar problem, but the probability of the occurrence of this defect still remains.
According to homeowners, long beacons are not very convenient to transport. This is especially true of flexible parts that are easily damaged by inaccurate handling.
As for the direct work on the installation of lighthouses, then the lion’s share of home craftsmen does not see any problems. The main thing is to be careful and always use the level - then the bases will not be crooked and unaesthetic.
Tips
- If you are looking for beacons for exterior finishing work, it is better to use thicker and stronger parts, as the outer walls require the use of materials in large volumes.
- For galvanized and plastic rails in stores sold special fasteners. When using them, lighthouses are held much safer and stronger.
- Before you buy, be sure to inspect each beacon holder. All elements must be in perfect condition - without bends and any damage. The use of substandard parts will eventually lead to an ugly and curved base surface.
- When designing the corner sections it is recommended to use comfortable V-shaped beacons. T-shaped elements can act as intermediate components.
- Do not forget that the beacon will be held on the basis of the most tightly and securely only if you fix it at several points, and not just above and below.
- If you carry out work using cheap home-made lighthouses, then you should take into account that then the consumption of plaster will increase significantly. This results from the fact that alignment of a basis with similar guides is made with use of a larger amount of solution.
- When mounting, the first two beacons are recommended to be installed on both edges of the wall ceiling, and only then proceed to fixing the remaining parts. Do not forget that between them should be the same distance.
- If the walls (floor or ceiling) are too large and noticeable protrusions, then they will be easier to remove than align. Otherwise, you risk spending a lot of money on a large amount of plaster mixture, and even carrying out such work may be too difficult for a home craftsman.
- If you are afraid to face the deformation of the beacon elements, then you should turn to string variants. These parts are not subject to deformation.
- It is important to remember that the distance between the individual beacons should be 15 - 20 cm less than the length of the rule, pulling the plaster layer. If you are finishing the walls with plaster for the first time, then this value should not be more than 0.5 - 1 m. Otherwise, it will be quite difficult for you to cope with the impressive area of the surface being trimmed.
- Many masters wonder whether it is necessary to remove the beacons at the completion of the finishing work. If we are talking about metal options, then they can be left on the trimmed surface only if they are of excellent quality. Low-quality metal parts will oxidize over time, which will lead to rust spots on the finish.Anyway, most experts still advise to remove the lighthouses.
- Being engaged in a marking of the basis, it is necessary to consider the locations of door cloths. If they are planned to be done, the level of the screed is performed in such a way that it is at a level below the future threshold.
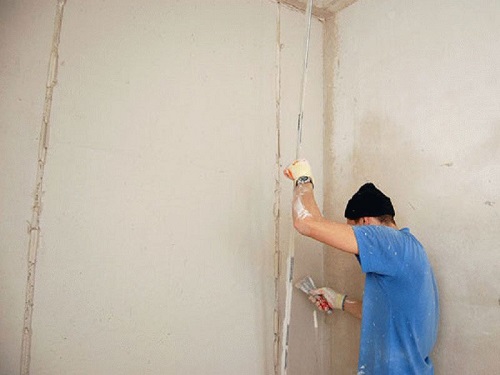
- In the process of finishing floors used primer. Before installing the beacons it is very important to wait until it is completely dry. This is due to the fact that the guides hold much stronger and better on a dry surface. In addition, if this rule is followed in the future, the plaster layer will not crack and break.
- If you want to save finishing material, you should use not very high beacons. For example, when decorating walls in new buildings erected from blocks that are fairly smooth, it is permissible not to use these landmarks at all, but in old brick buildings you simply cannot do without these parts.
Reusable steel beacons are not recommended for home craftsmen to decorate ordinary dwellings, as more often experienced repairmen, who regularly carry out similar work, turn to these elements.Otherwise, the cost of such parts may be unjustified.
In the next video you will find a modern way to install high-quality beacons under the plaster.


