How to make a wall of plasterboard?
The layout of any dwelling is a purely personal matter, and what one likes may be completely different from others. In order to be able to make adjustments, redraw the space for yourself, there is a simple but reliable way that involves the use of sheets of drywall, which even a beginner can work with. The main thing is to know how to make a wall of this material.
Special features
Home is a real fortress for everyone, because it is so important to equip it so that you feel confident, comfortable and good in it. Buying a new home or changing the number of tenants of the old may require redevelopment of the space so that everything will be comfortable in it. Additional space may be needed in the old house if there is a replenishment in the family or someone from the family needs a private, enclosed space where you can be alone.
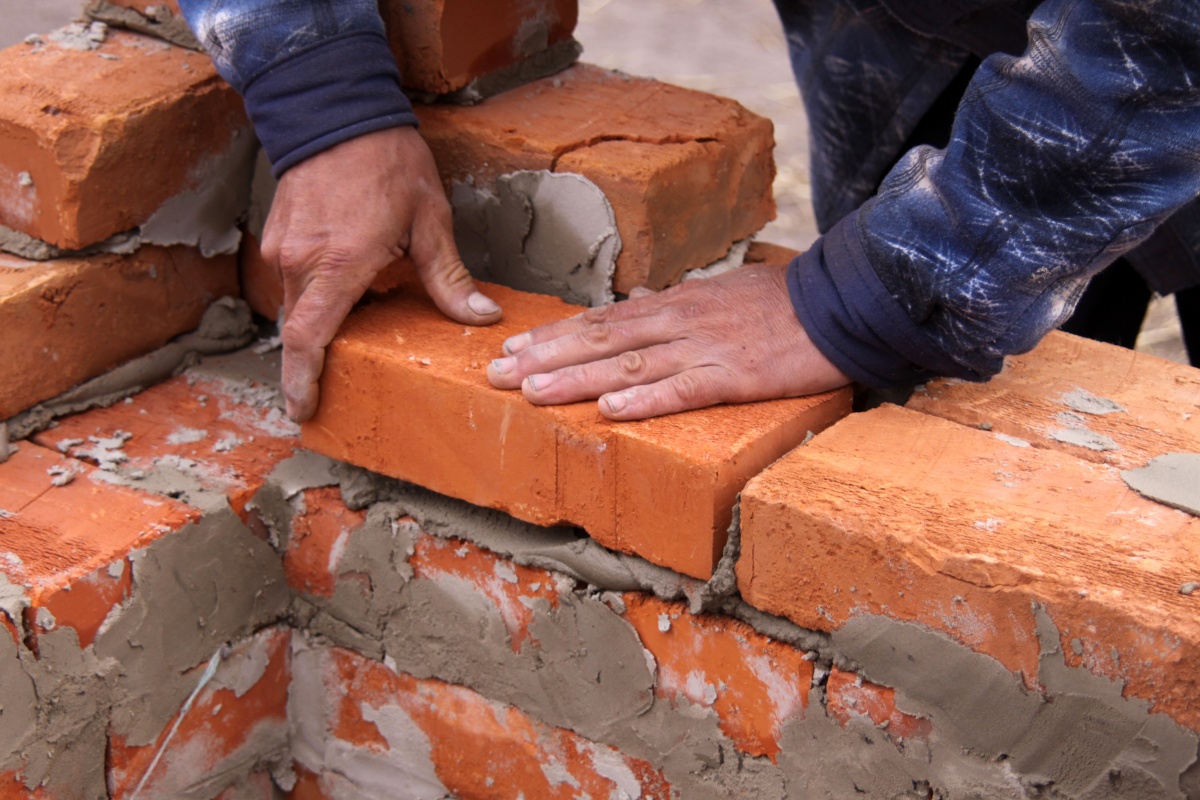
Especially acute is the question of planning in new buildings of free type.where there is no clear frame of the room, and each tenant can make the design that he likes. It is possible to build brick walls, this has its advantages, because such a construction will last a long time and nothing will happen to it. But it is not easy to build such walls, and most importantly, it requires a large amount of materials. For those who have never laid a brick, it will not be easy to cope with this task and make a high-quality and durable partition.
In view of all these circumstances, one of the most simple and convenient options is the construction of walls made of plasterboard. Such designs are easy to do on your own, and this process can be done even by non-professionals. In this case, it is important to know what is needed to build a wall and what difficulties you will have to face.
Plasterboard wall has several important advantages. compared to brick - it is easy to install, does not create a lot of weight on the floor due to the frame of thin profiles and simple sheets, the thickness of which does not exceed a centimeter.
Another factor that can be considered an advantage of such structures,is the possibility of building partitions, walls and walls without obtaining permission for redevelopment, which will speed up the process and eliminate the unnecessary procedures. To work on the creation of new space boundaries, it is necessary to determine what will change and where, mark the territory and calculate how much materials will be needed.
Sheets of gypsum plasterboard are quite compact in thickness and when added together one to another one can bring a lot of material at once. Its weight is also small.

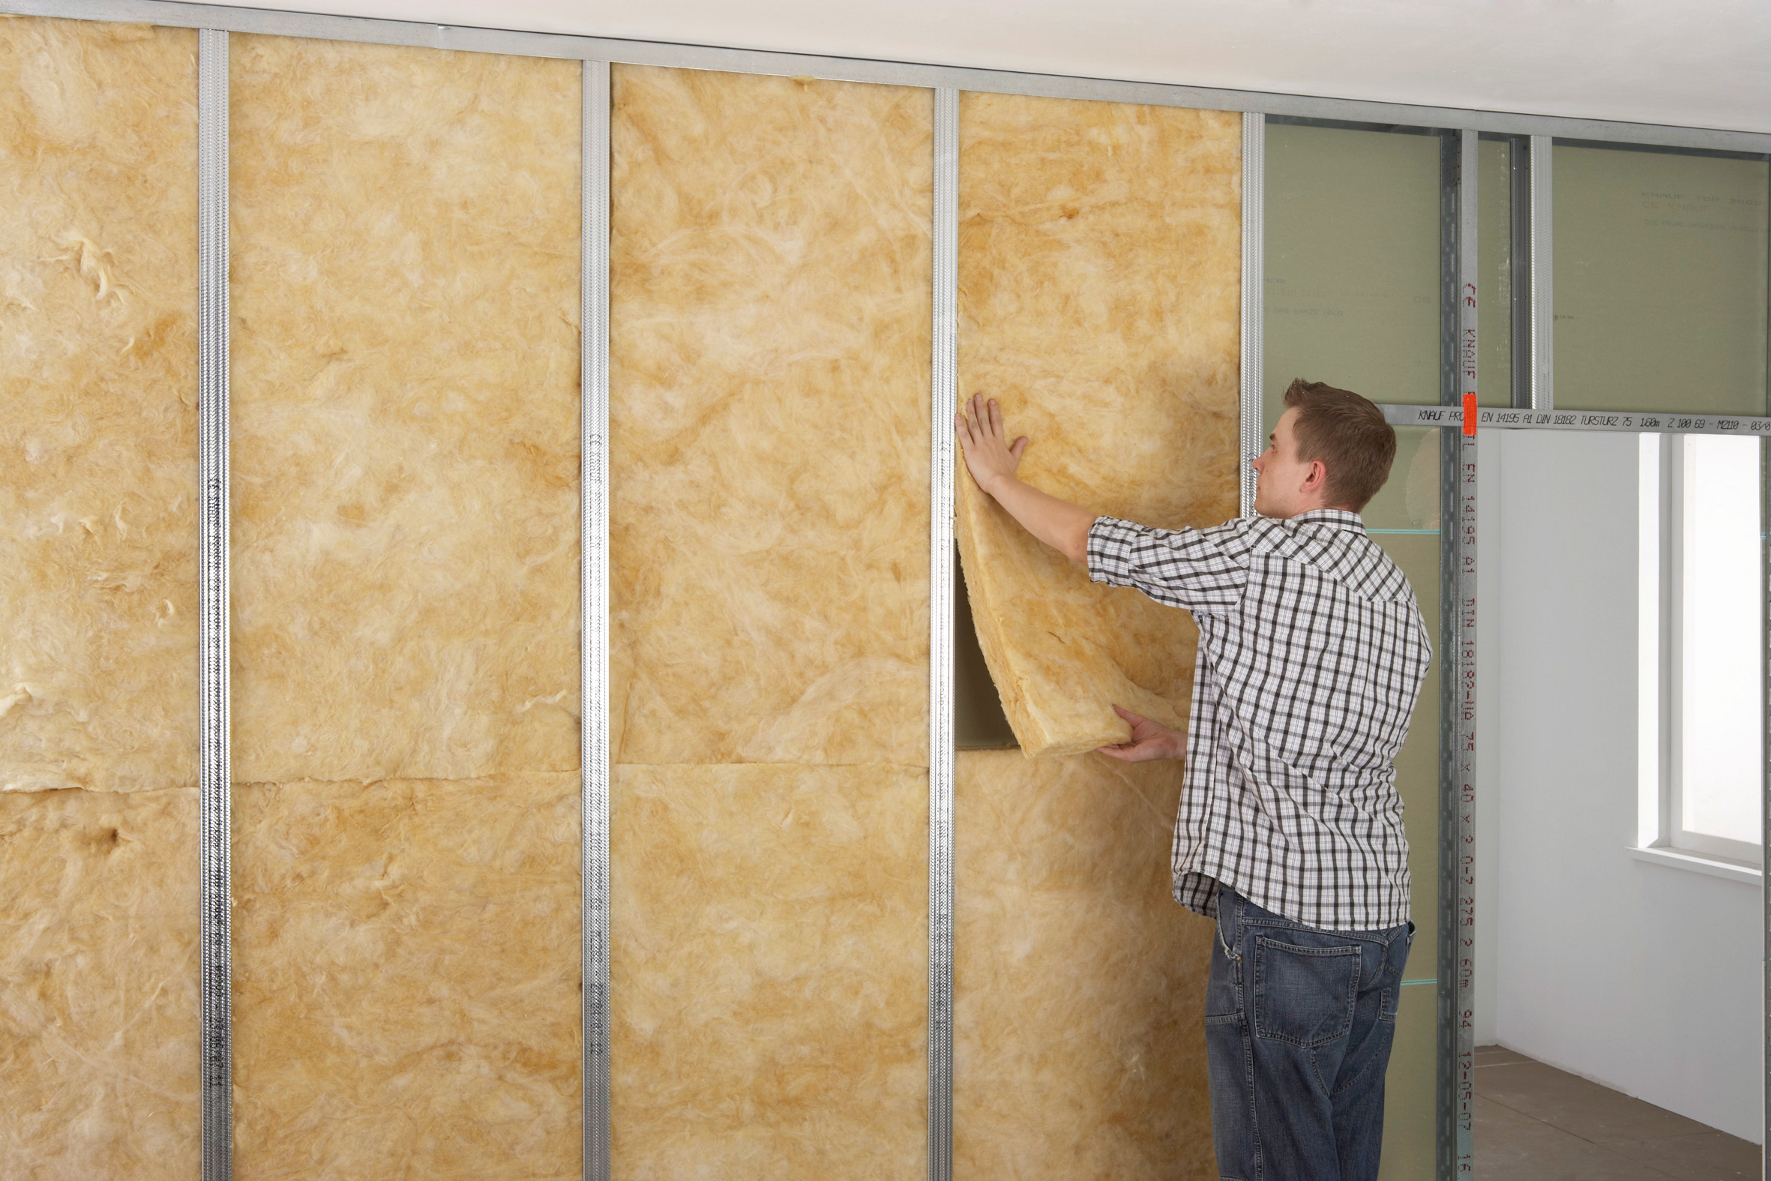
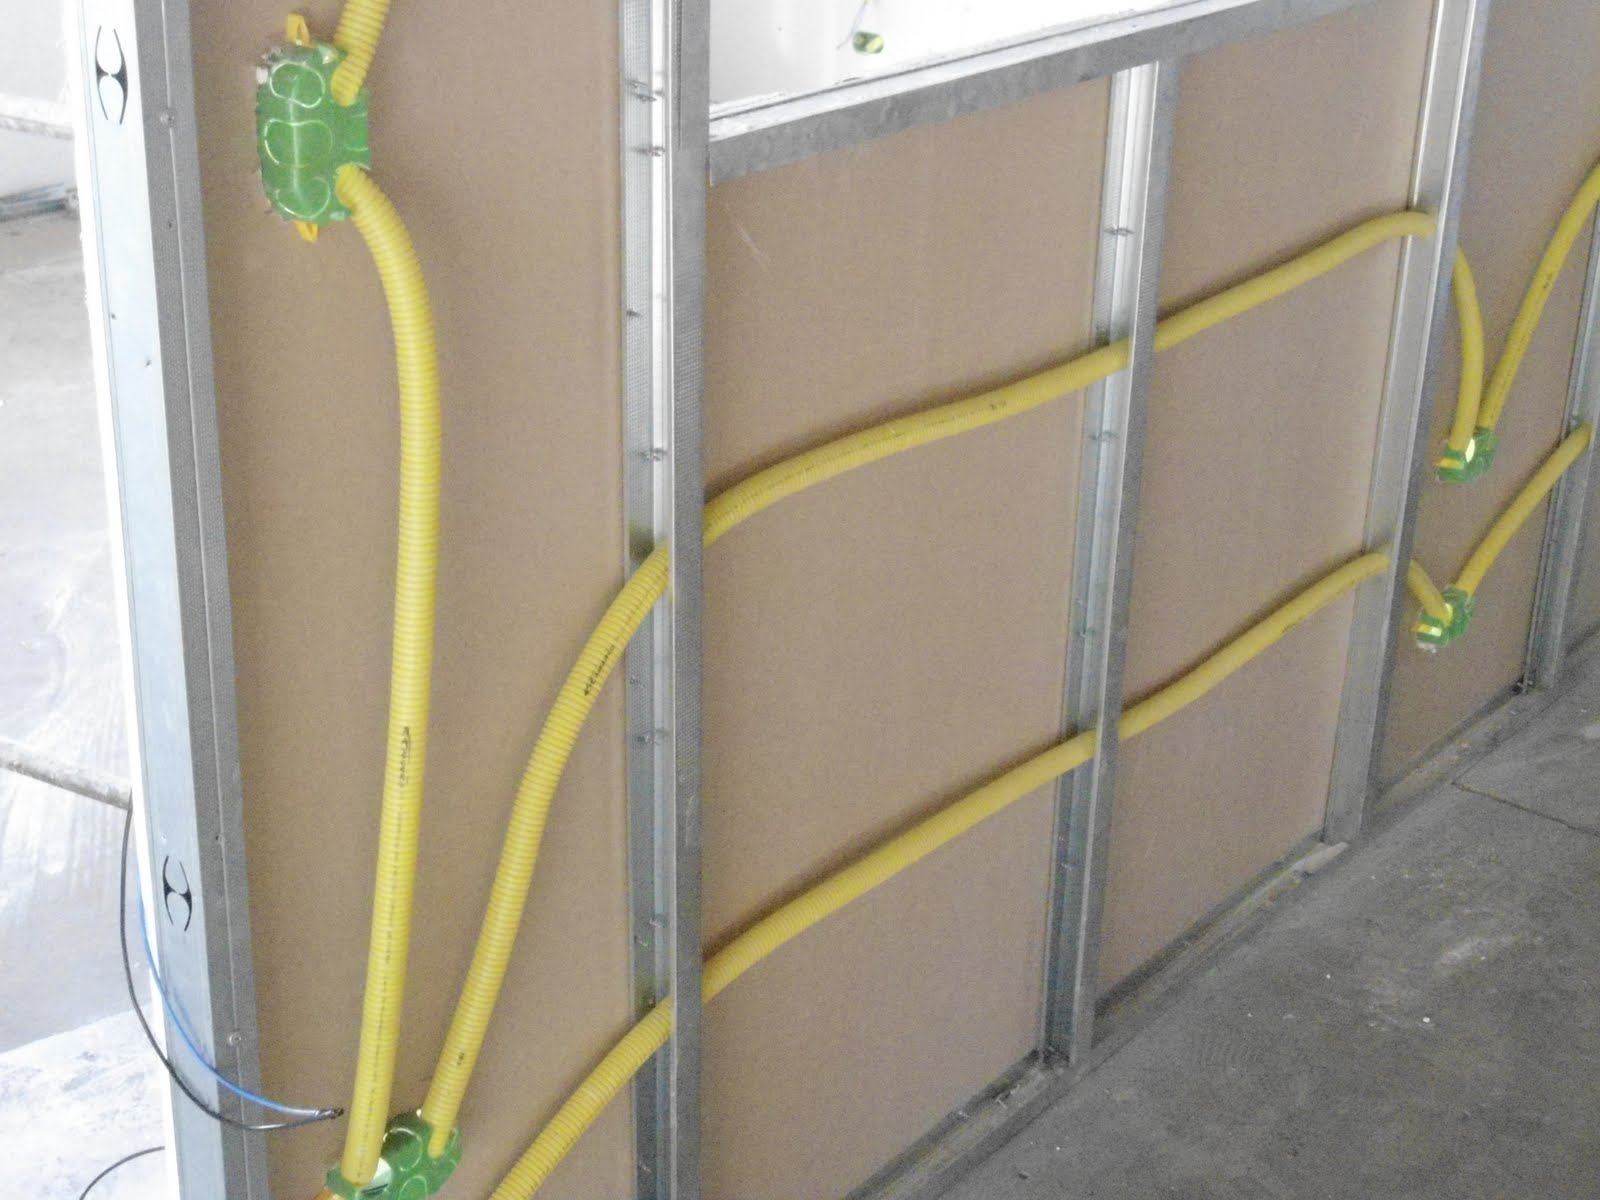
In order for the new walls to be warm and not to let the sound through, a heater and sound insulation are placed inside the structure. It can also be used for wiring, install a switch and a socket, so that the room’s functionality will not suffer from its redevelopment.


When planning the reworking of large-scale objects, it is important to understand how justified the use of this or that material will be, because it is just necessary to clearly understand the pros and cons of drywall and what it will allow to create in a residential area.
Advantages and disadvantages
The use of drywall allowed us to get fantastic opportunities that were previously extremely difficult,or even completely impossible to implement, using brick as the main material and erecting walls, walls and partitions from it.
From this material in the room can be made:
- a wall that will divide the room;
- a partition that allows you to zone the space or give a decorative effect due to the intricate design;
- complex decorative design and achieve the original forms and textures in the room.
A feature of drywall is the ease of working with him. In order to build a wall, you need to form a frame and sheathe it with sheets. The frame design can be either from metal profiles or from wood. The resulting structure is sheathed with drywall on both sides.
Sheets can be conventional, waterproof and fire resistant., their choice will be dictated by the place where a new wall or partition is created. When one wall is sheathed, it is necessary to put glass or mineral wool inside the structure so that the walls not only help to divide the room into two parts, but also perform the function of heating and sound protection.
Among the advantages of this material are:
- easy installation of any type of construction and complexity;
- ability to build structures of any shape and type;
- when carrying out works on the construction of walls or partitions, it is not necessary to have any special or expensive tools;
- Inside the wall you can put the wiring, telephone cable, duct, which makes it also functional;

- the resulting wall will be absolutely flat and smooth, because the work on its alignment will be reduced to grouting the joints between the plates and puttying the entire surface for further decorative works;
- after all the preparatory work, the finished wall can be painted in any color, covered with wallpaper or even tiled.
This material has its drawbacks, which include:
- change of material properties upon contact with water; drywall may swell from this;
- any load should be thought out in advance and the place of fastening of the picture, sconce, lamp or lamp should be initially strengthened;
- too heavy objects should not be installed on this surface, which should initially be taken into account when planning and determining the places of each decorative element.

So, with the help of drywall, you can make a wall of any shape and appearance that you can imagine.at the same time sound insulation and heat in the room will be at a high level, because for this, the corresponding filling is placed inside the structure. Sockets with switches will not limit the possibilities of the new space.
Materials and tools
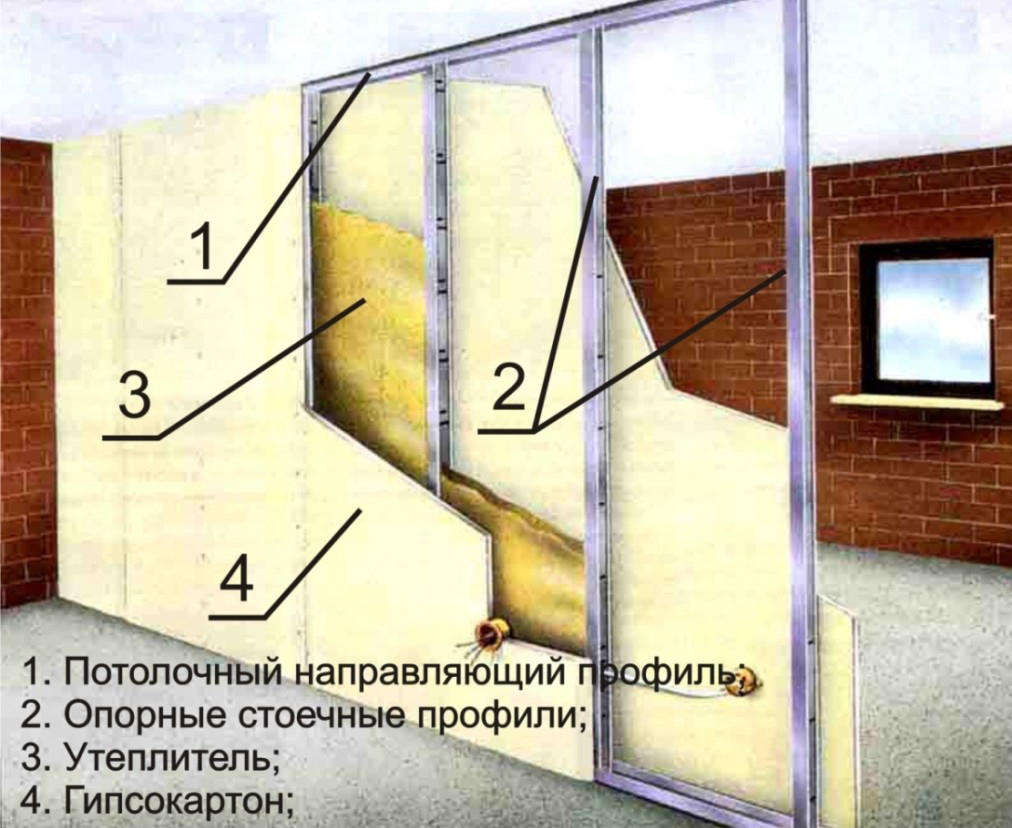
When planning the construction of a wall of plasterboard, you need to choose the right materials and have all the necessary tools with you so that the work process takes as little time as possible and does not take a lot of effort and energy. In order for the wall to be strong enough, a frame made of a metal profile is erected for it. For different purposes, there are different profiles.
Most often for similar designs two options are used:
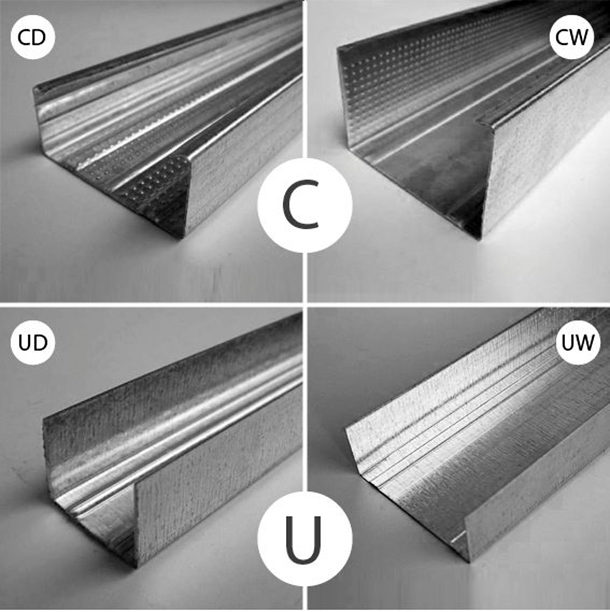
- Profile, but which will be fastened directly drywall itself. It is smaller and is conventionally referred to as "D".
- The profile with which the main frame of the wall will be erected. It should be more powerful and large, conventionally denoted as "W".

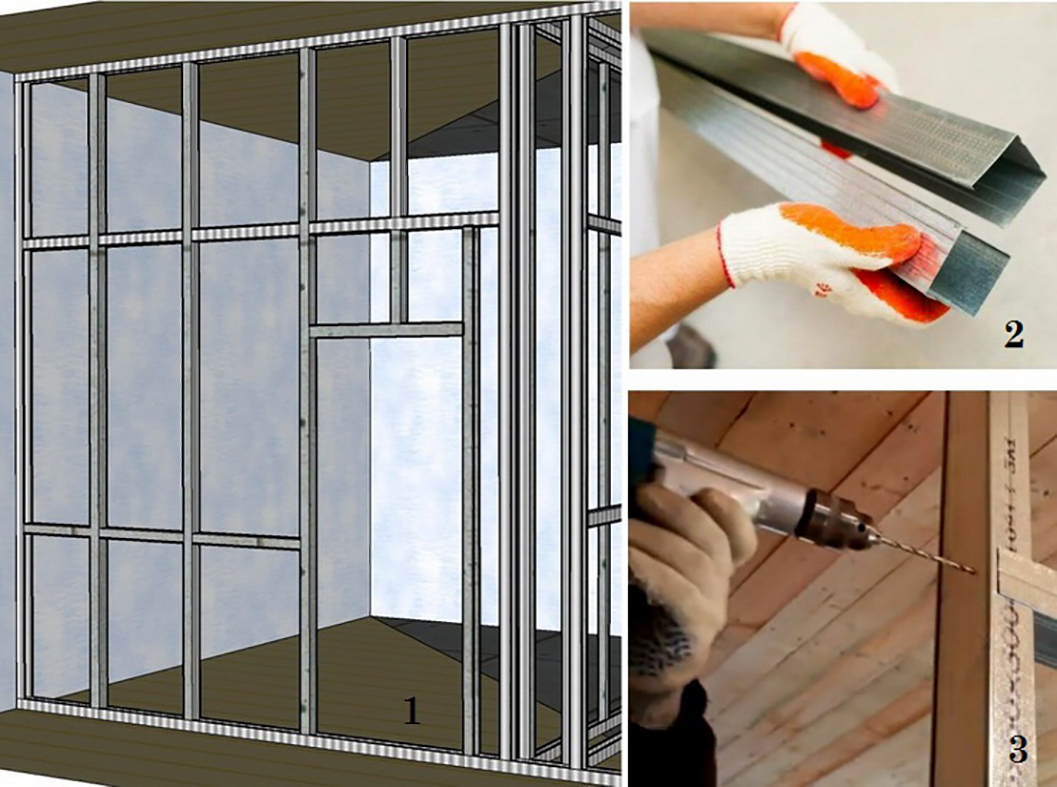
For each of the above profiles there are two more options, one of which is the reference one and is designated as “C”, and the second one is guiding and has the designation “U”. The guide profile is simpler, it looks like a U-shaped structure and smooth walls. The support profile is inserted into it by the end.It also has an additional difference from the guide in the form of ribbing, which gives greater strength to the material and does not allow it to bend spontaneously.
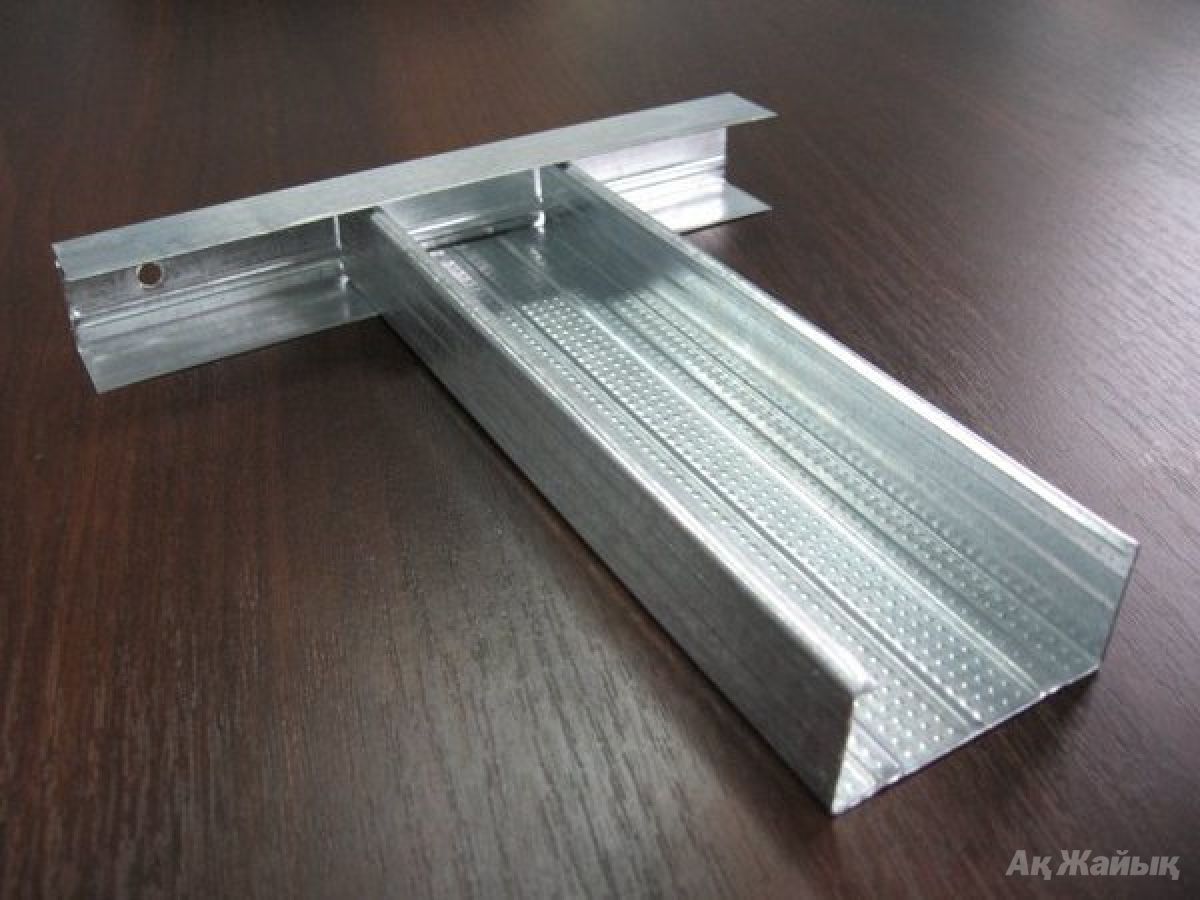
As the main carrier element of the frame, you need to use a support and a smaller profile, to which the sheet of drywall will be attached. Its size is 60 by 27 millimeters. As guides for fixing this design, you need to use a narrow guide profile with dimensions of 28 by 27 millimeters. In order to form the skeleton of the wall, you need to take a support and a large profile with dimensions of 50 by 50, 50 by 75 or 50 by 100 millimeters. As a guide for this design, a large profile guide is used with dimensions of 50 by 40, 75 by 40, 100 by 40.
There is another version of the profile, which is a thicker and fortified version of a large support profile. For the construction of simple walls, only wide profiles are used, but for more complex structures, in which any communications are planned to be laid, it is already necessary to use thin variants of profiles.
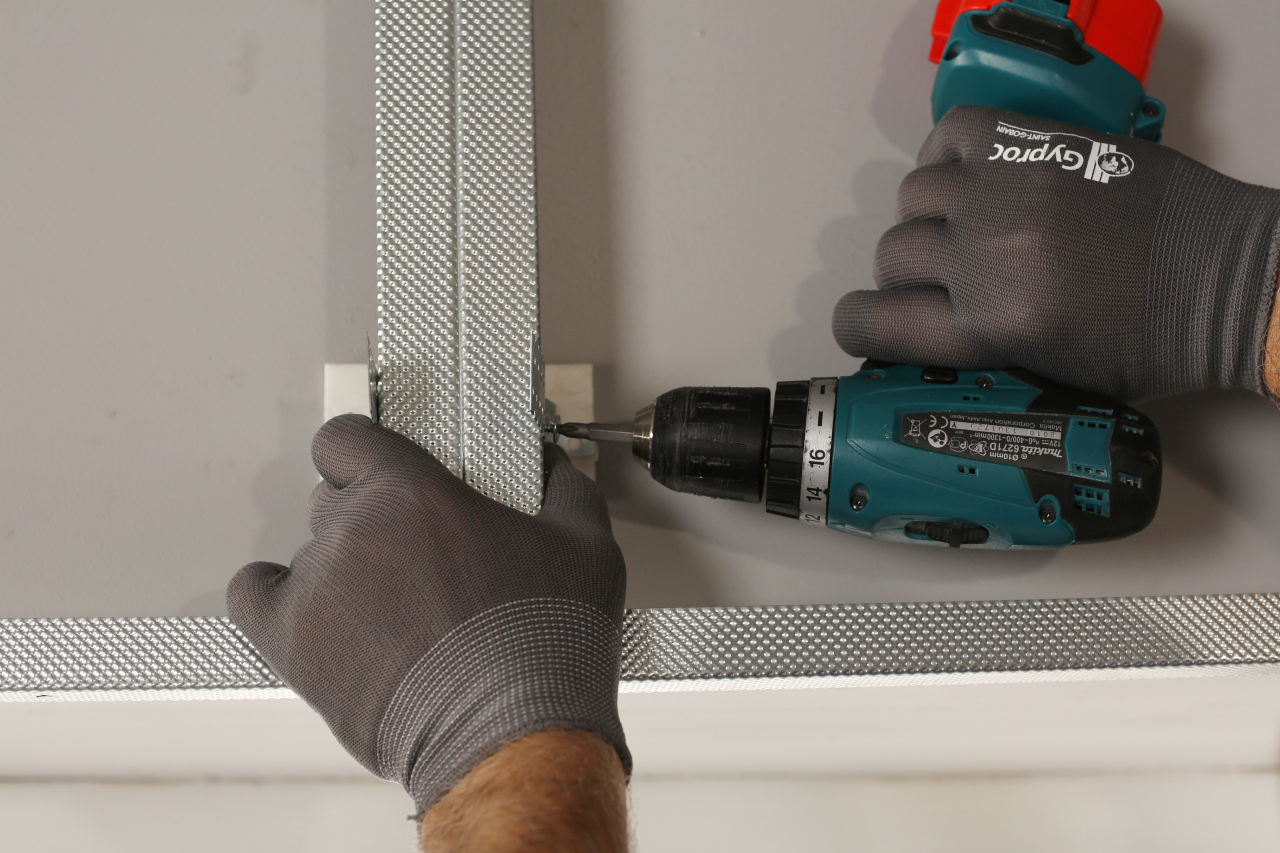
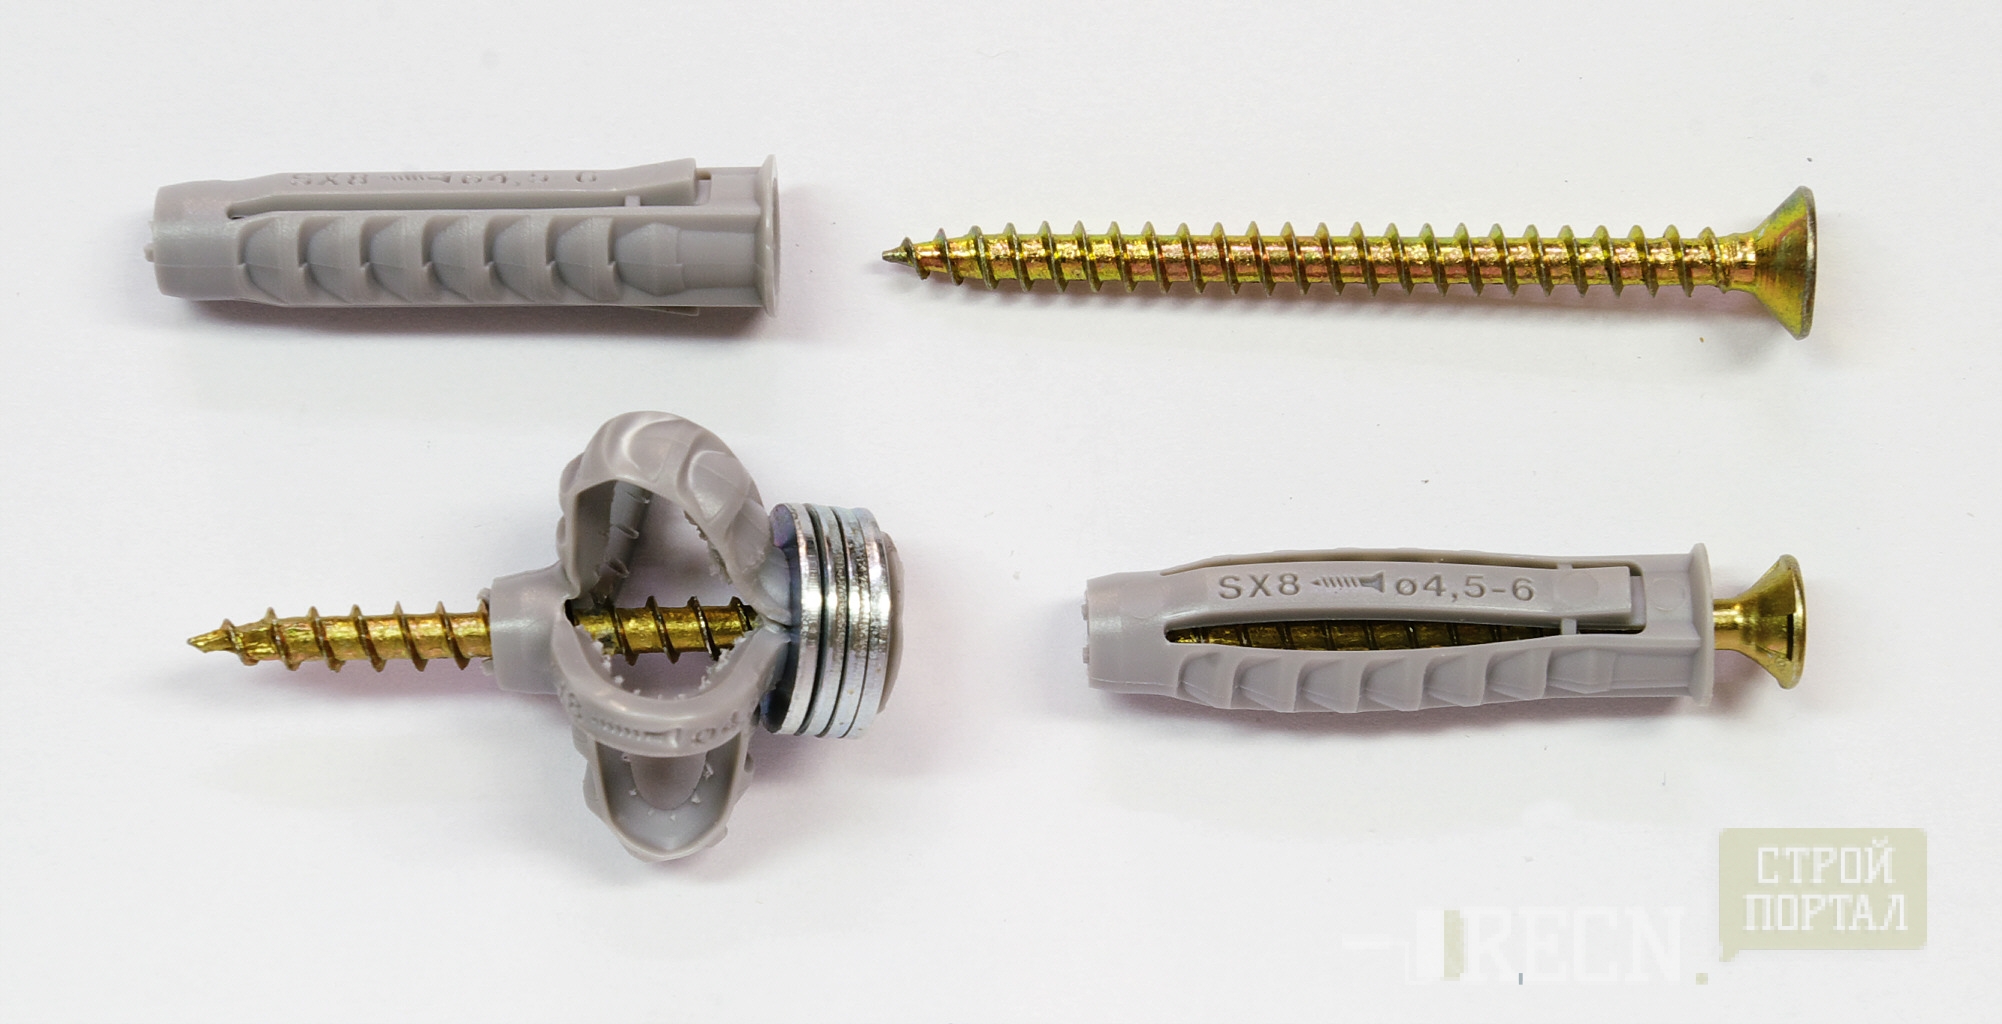
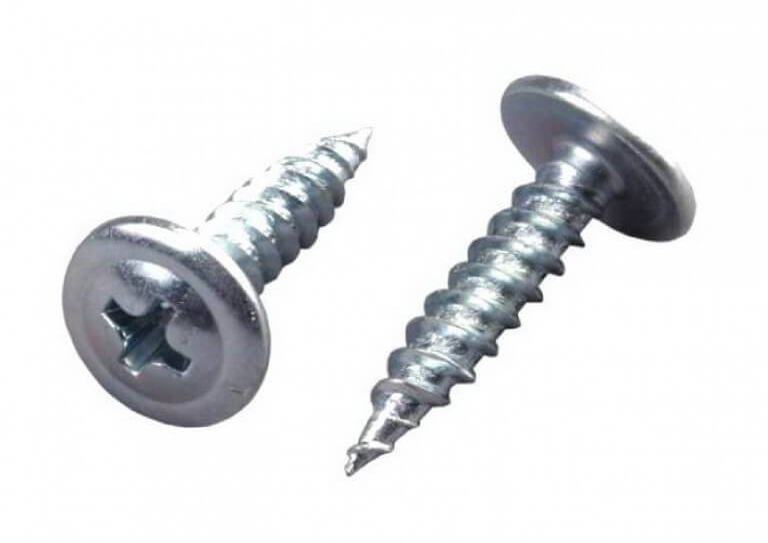
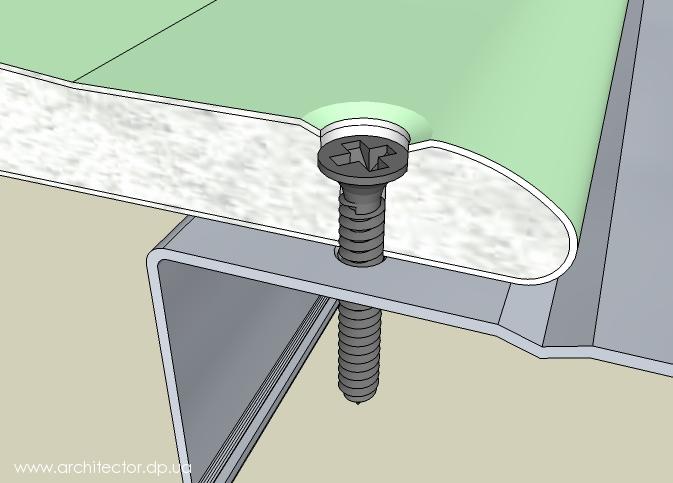
In order for the profile to be connected into a frame, you need to have a direct suspension or use a universal connector.The twisting process is performed with the help of small self-tapping flea-blades, which have a drill at the end. In addition, special metal screws are used, which have a secret head. To secure the frame to the wall, one cannot do without plastic dowels and self-tapping dowels.
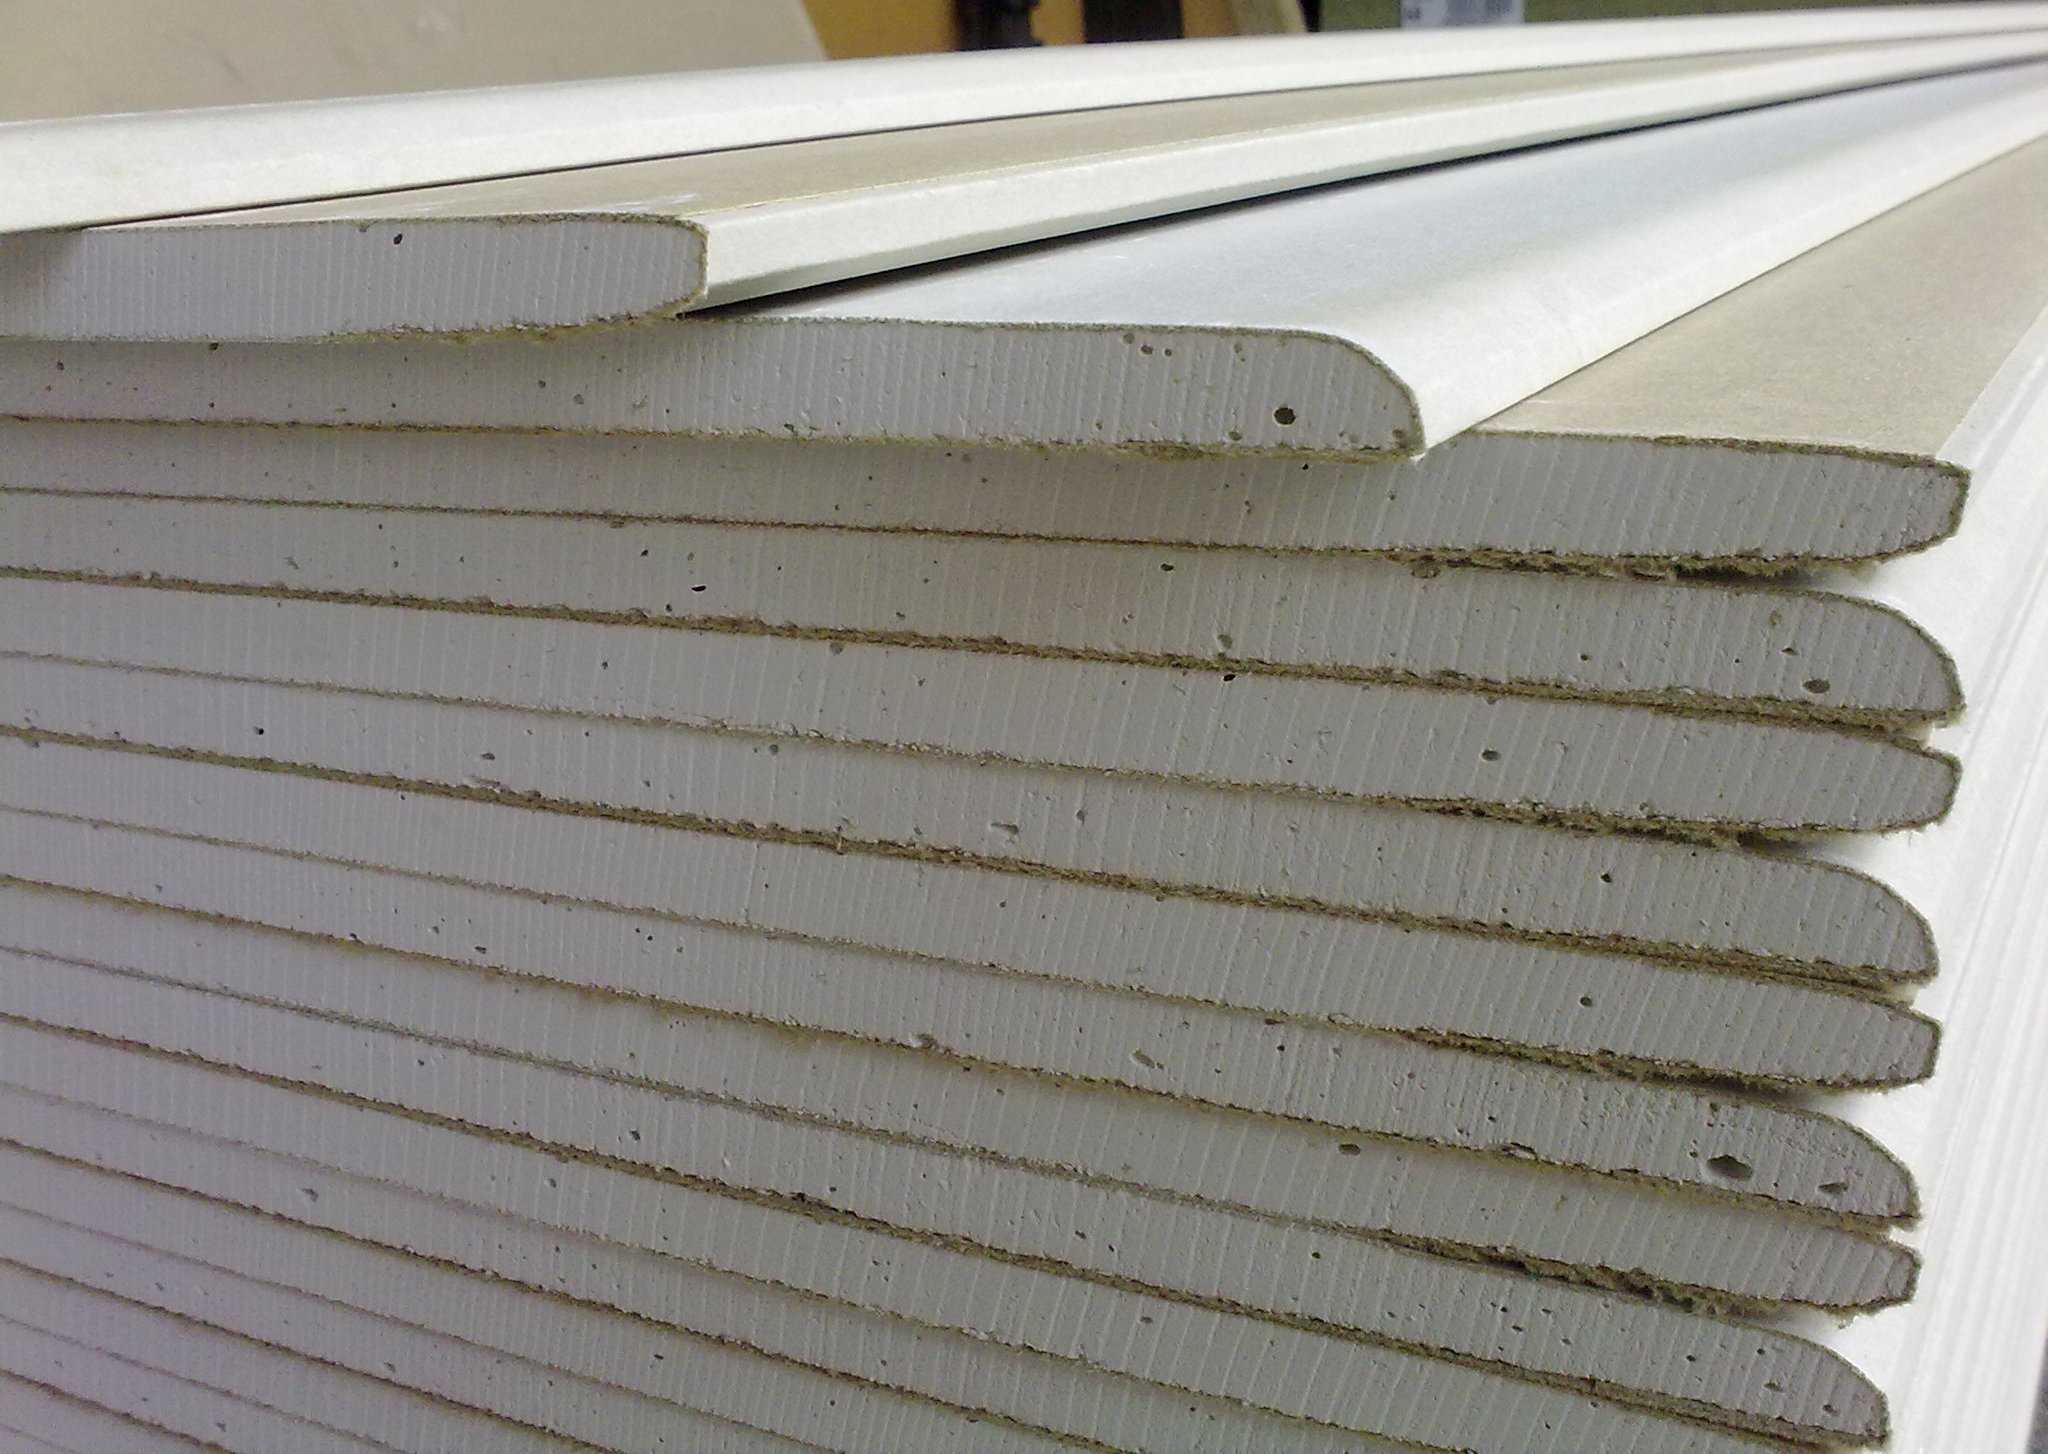
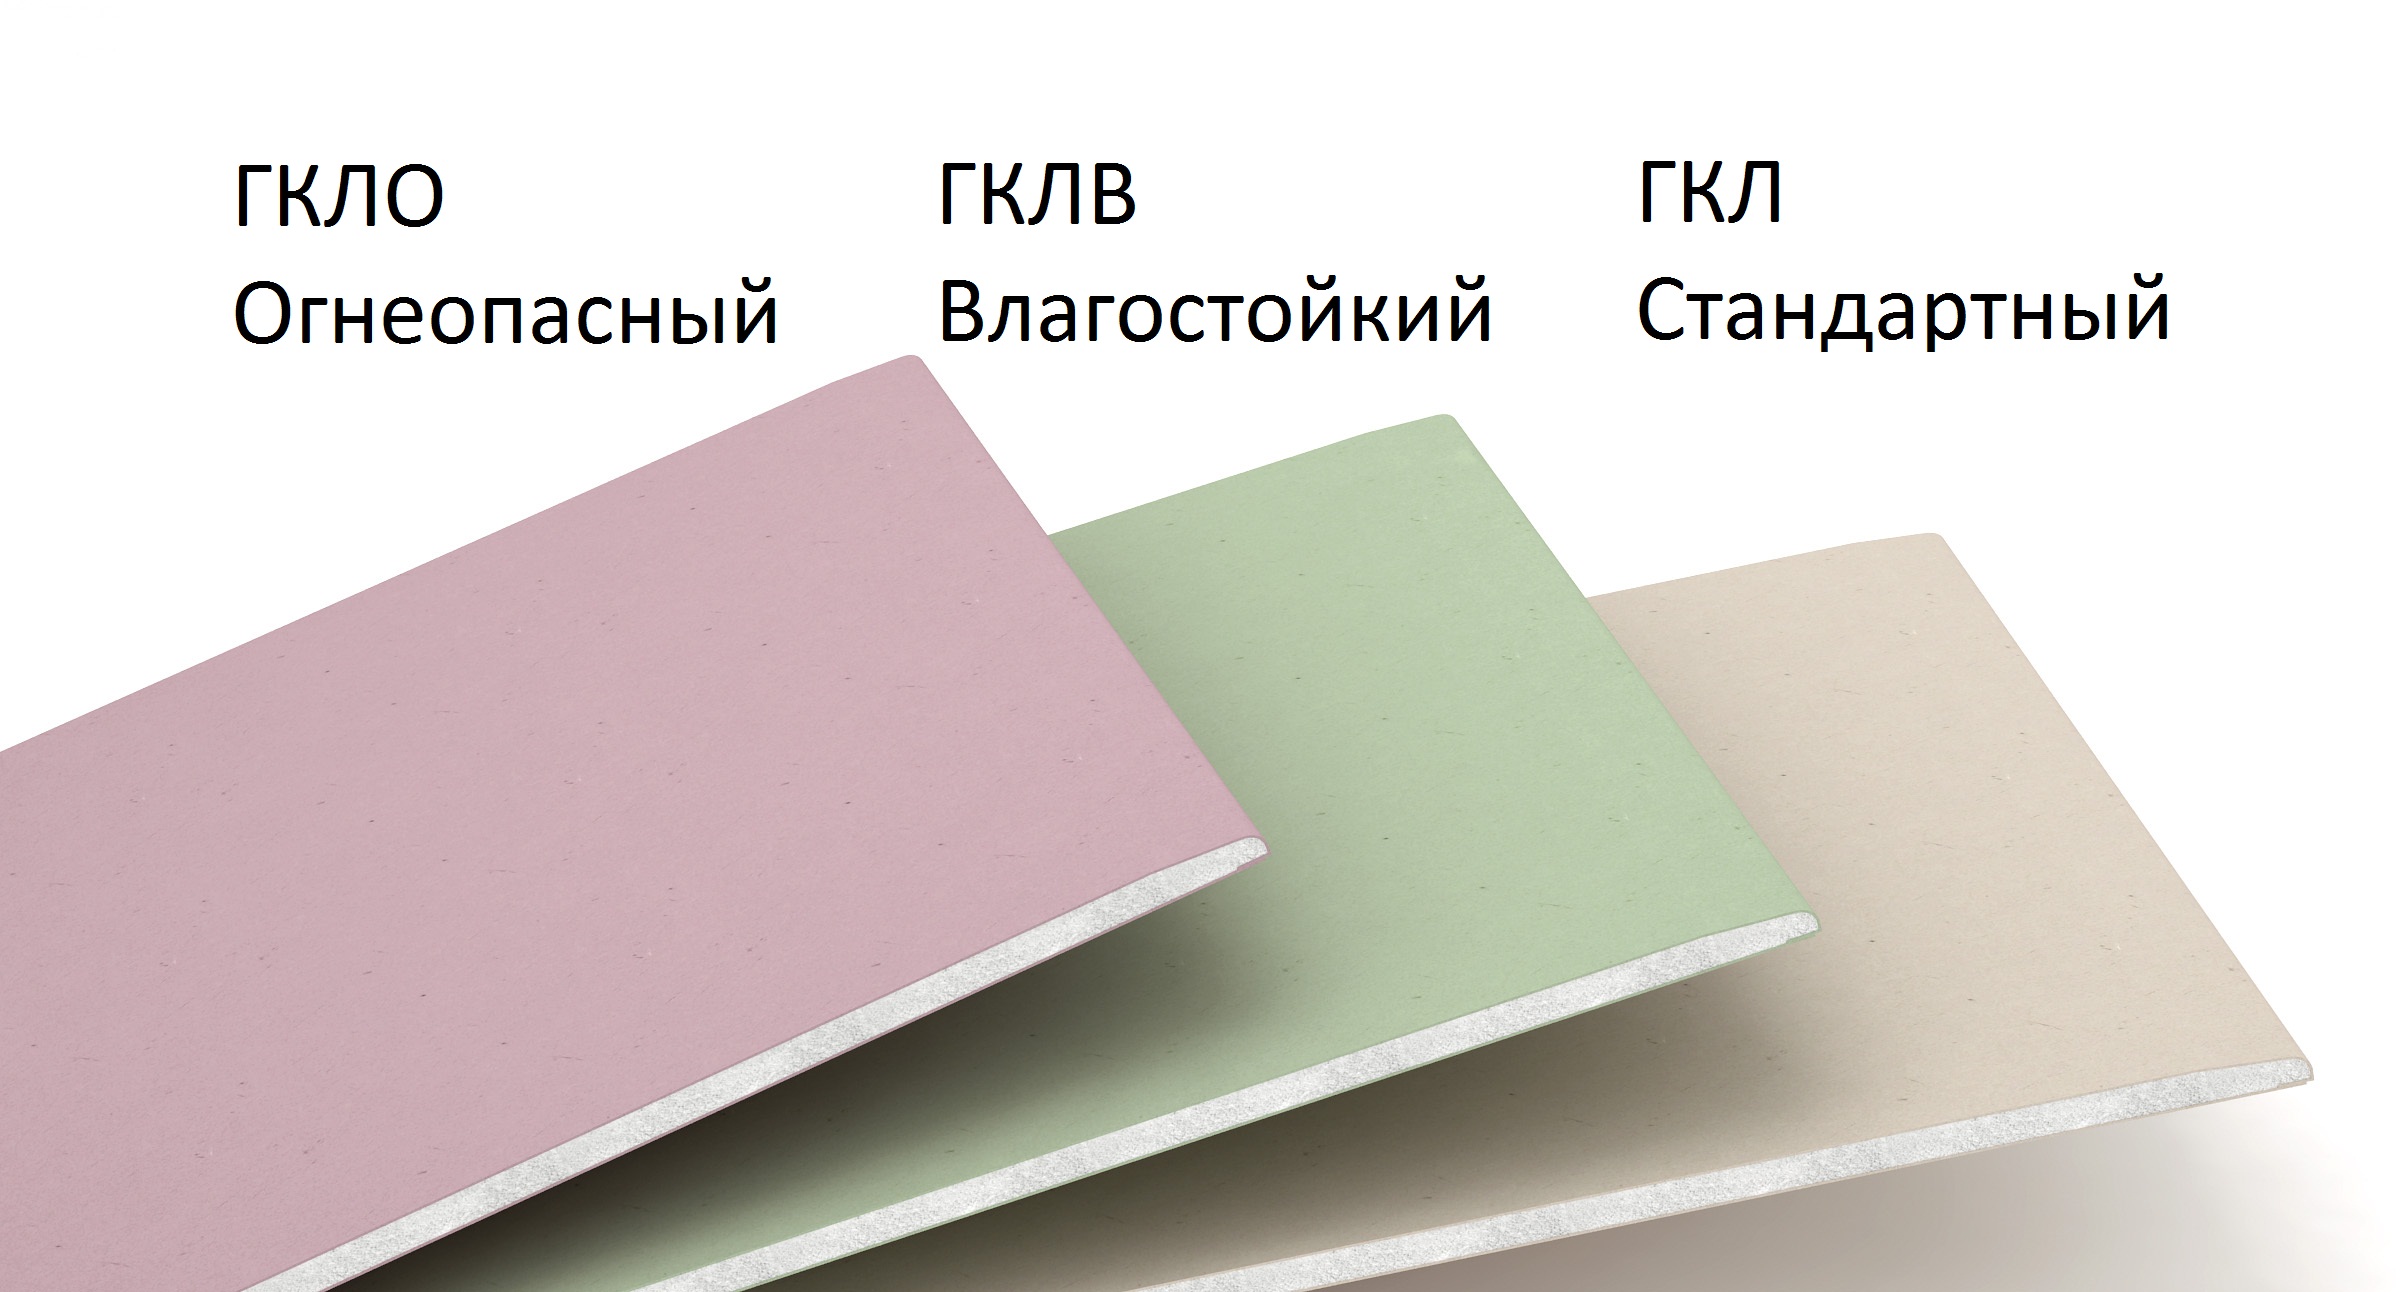
The optimum thickness of drywall sheets for a wall is 12.5 millimeters. A mandatory element should be a wide chamfer with the side of the sheet. Depending on the room, you need to choose the appropriate material - a moisture-resistant sheet is needed for the kitchen and a bathroom, and a regular one is suitable for an ordinary room. The distinctive sign will be the color - for moisture-resistant sheets it is green, for ordinary - gray.
Thus, the drywall construction is most often made from a metal profile, but in some cases you can also use wood. Depending on the type of construction, it will be possible to choose one or another material and choose its thickness.
Tools that will be needed during the construction of walls of plasterboard sheets:
- a tape measure not less than 3 meters long;
- level of 80 or 120 centimeters;
- plumb lines;
- fishing line with a rope;

- network or cordless screwdriver, impact drill with nozzles for screws;
- perforator;
- scissors that can cut metal;
- construction knife for cutting drywall sheets;
- plasterboard grater.

Frame
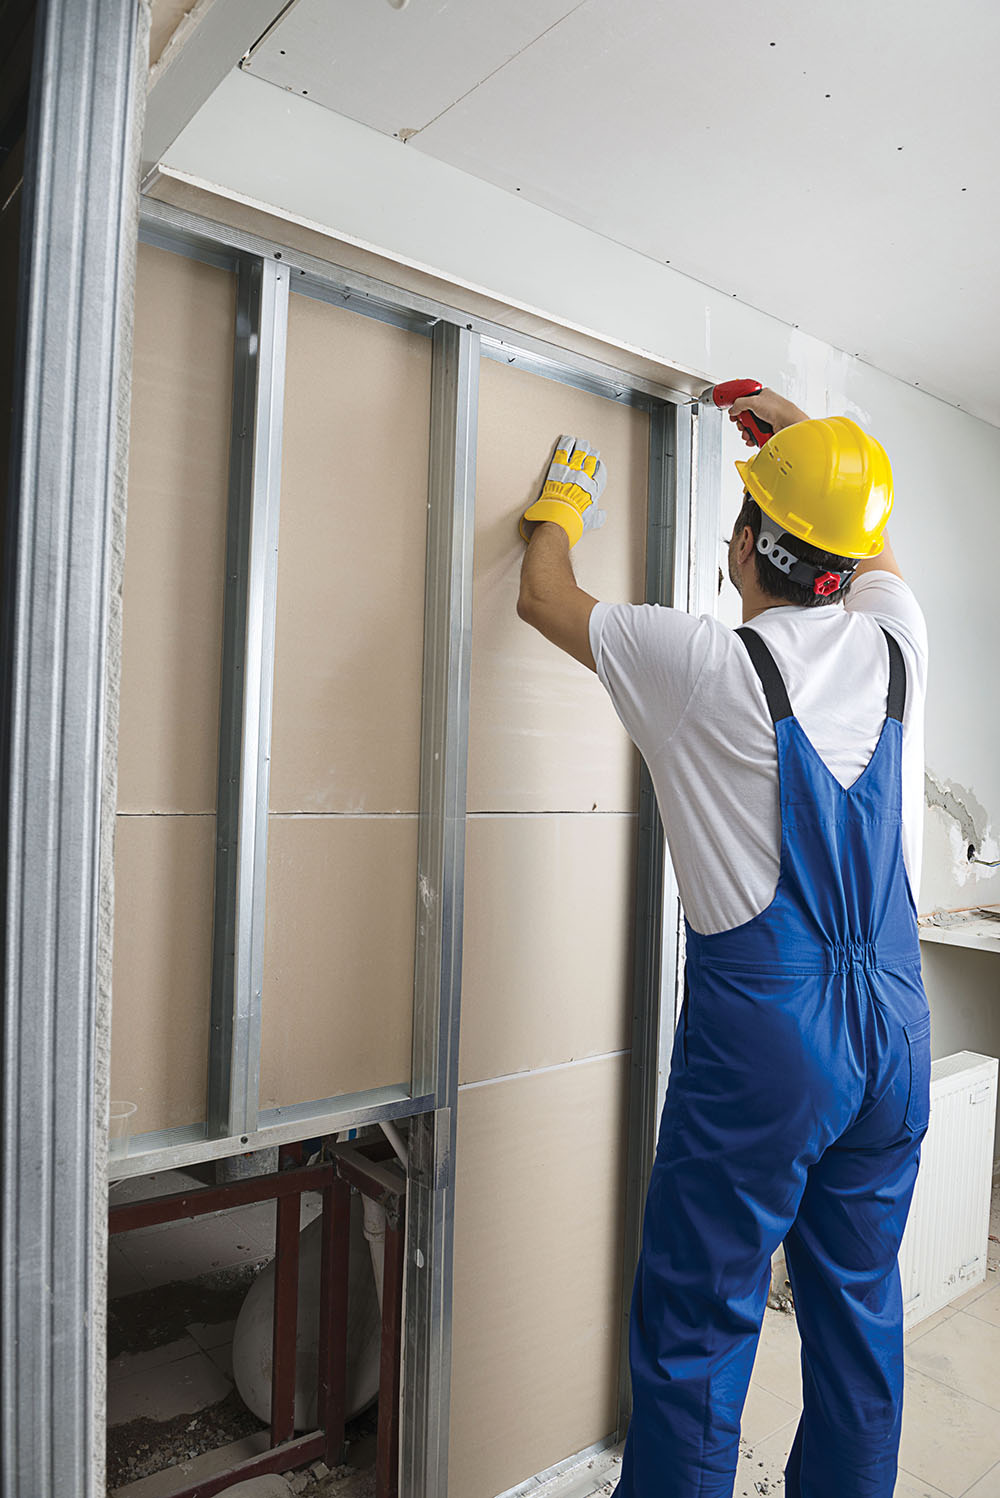
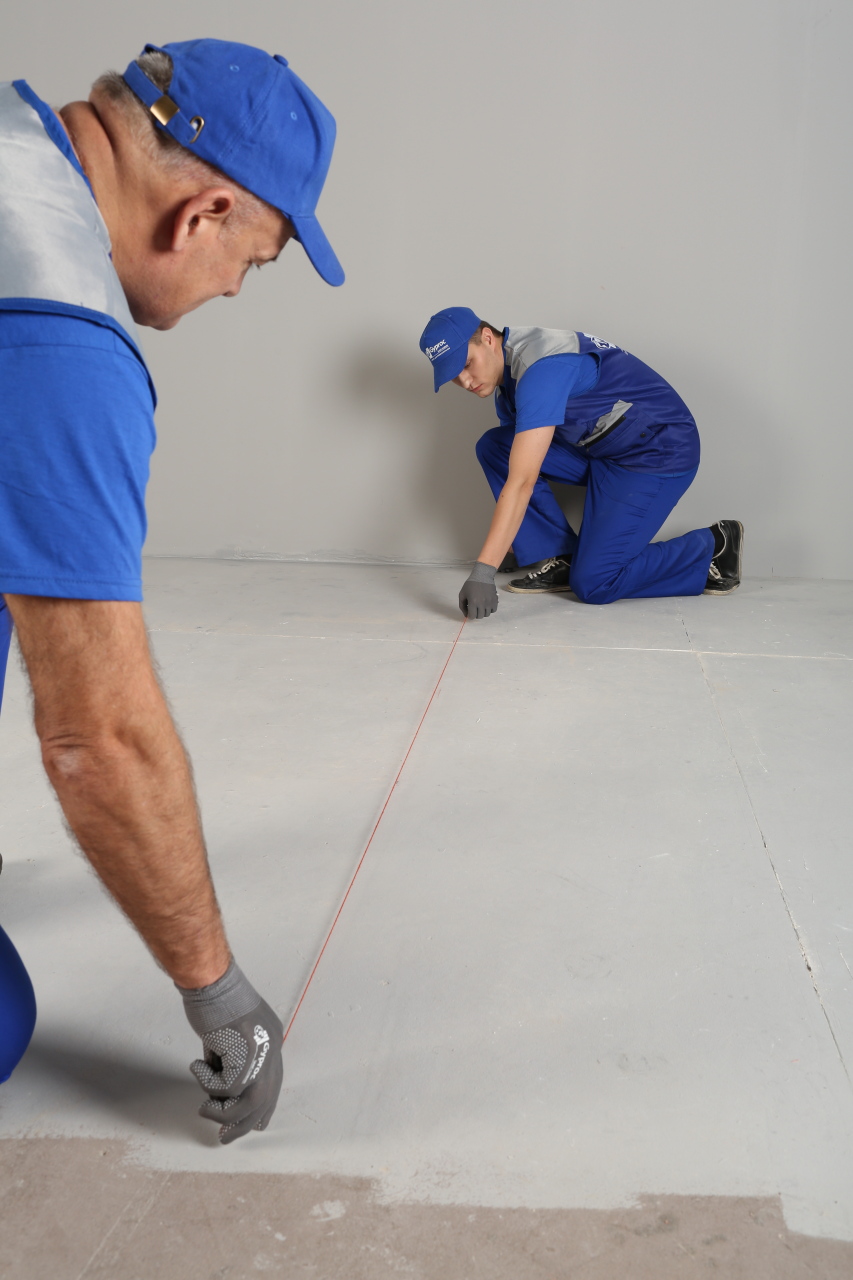
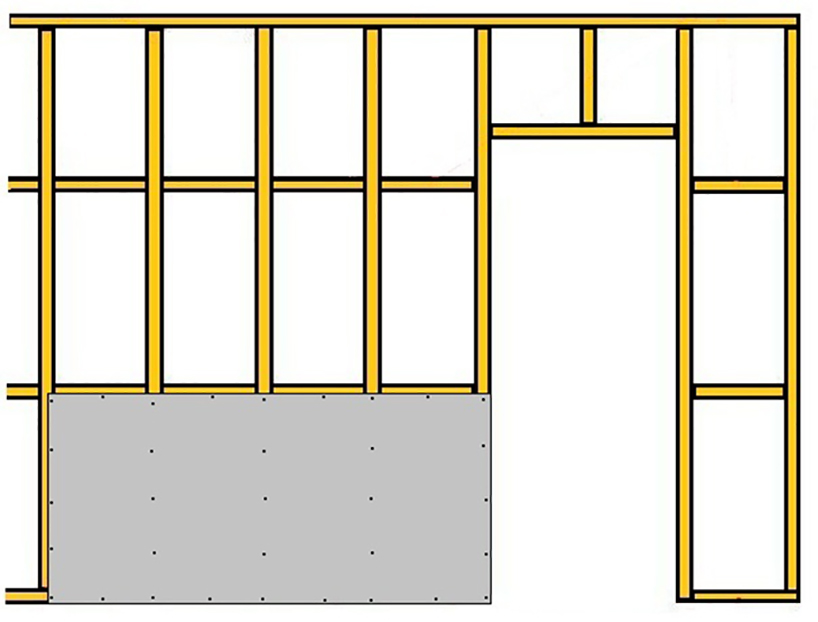
In order to make a high-quality and even wall of plasterboard, first of all, it will be necessary to erect a metal frame on which the sheets will already be attached. To install was carried out correctly, you need to take into account certain patterns. The first step is to mark the territory where the construction of the structure is planned. The next step is to check the evenness of the corners.
Due to the fact that the walls in the room are often not too smooth, when building a new wall, you need to focus not only on one wall, but also take into account two opposite sides. If the walls have too uneven corners, the easiest way is to glue each of them with drywall, which will level them. Only after this approach to the installation of a new profile.
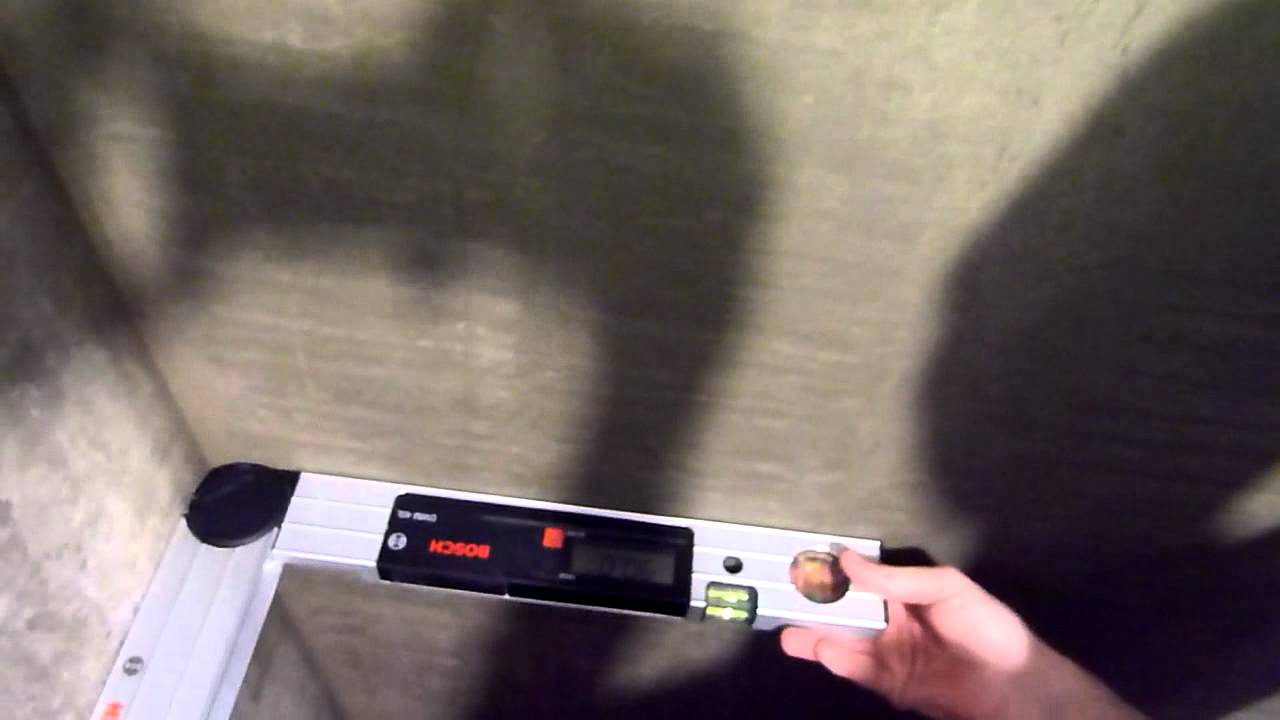
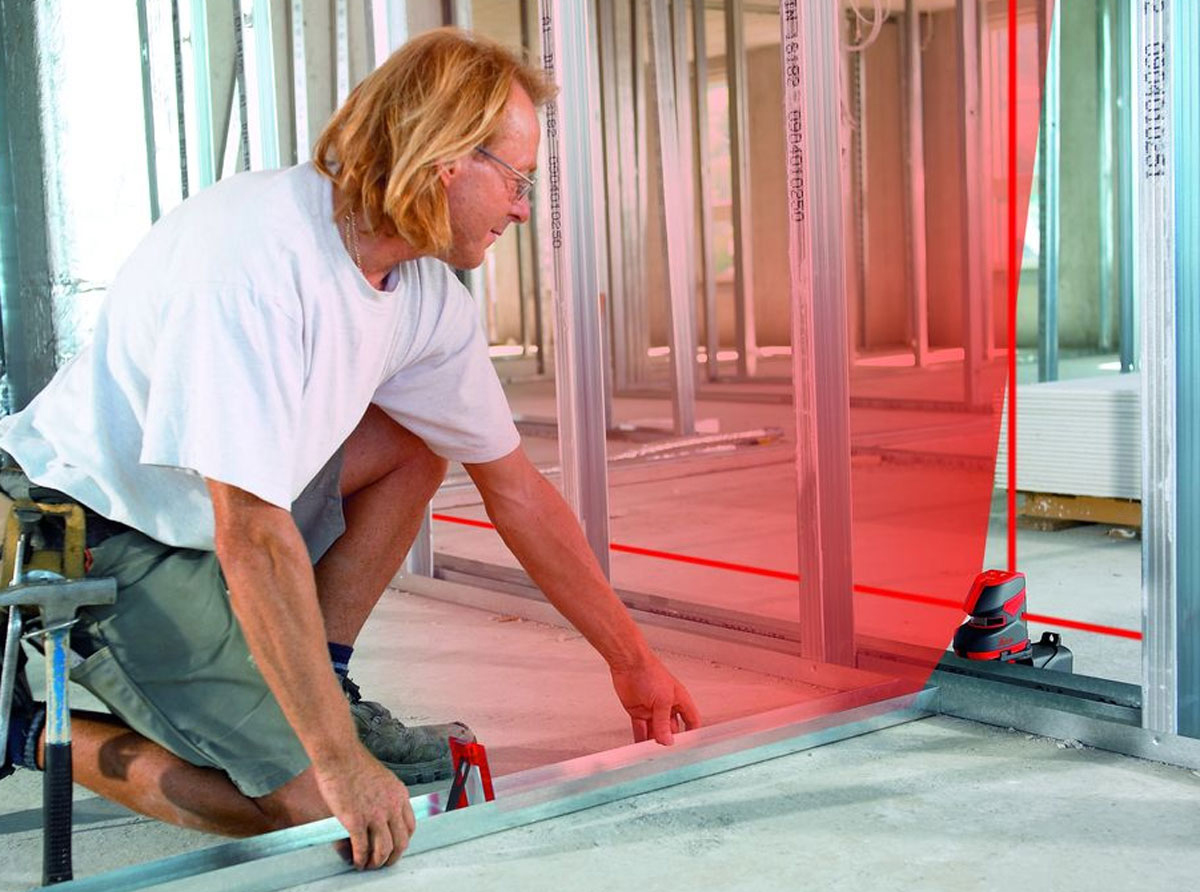
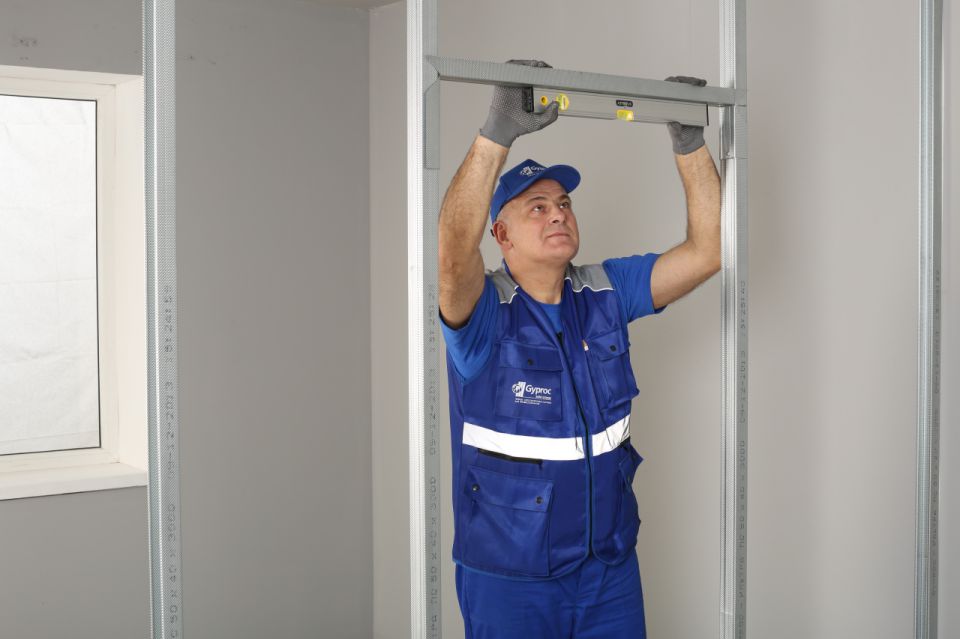
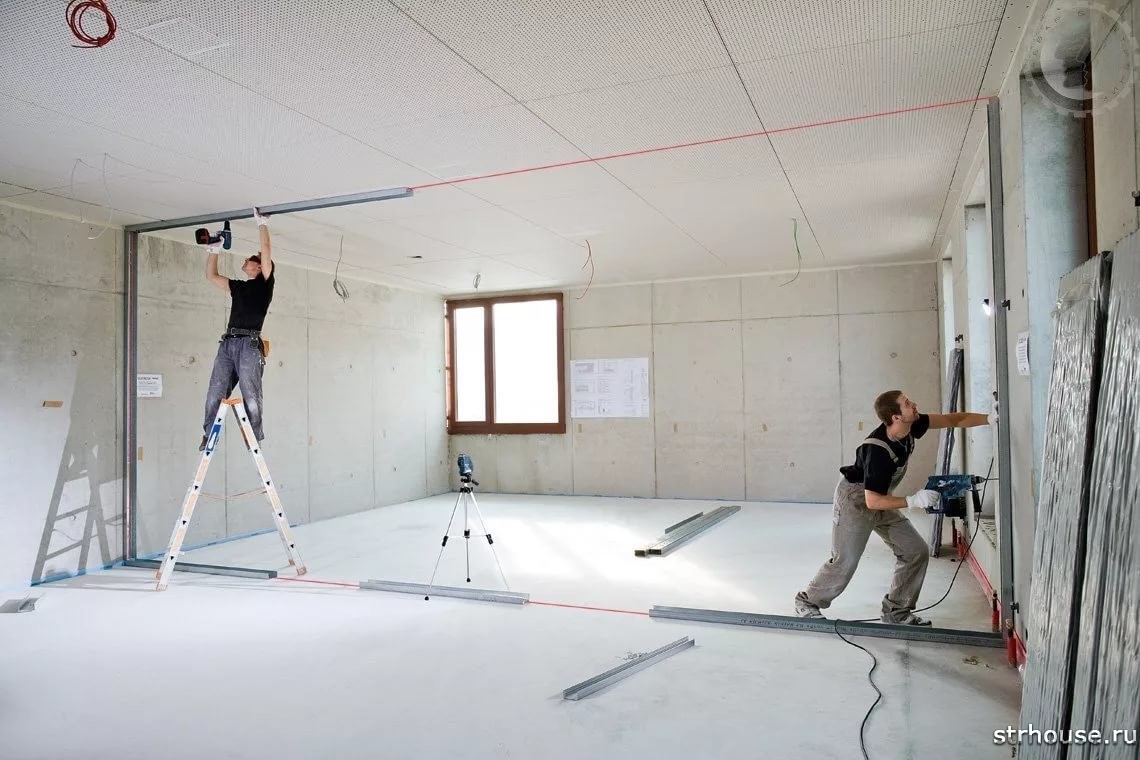
To level the racks, the laser level is best suited., but if not, you can use a simple plummet. Before you install the profile for walls, ceiling and floor, you need to paste it with a special sealing tape. It will help in depreciation and sound insulation.Before you begin to fasten profiles, you need to make a clear marking of the places on the floor, wall and shelves, where the framework for the frame will be attached.

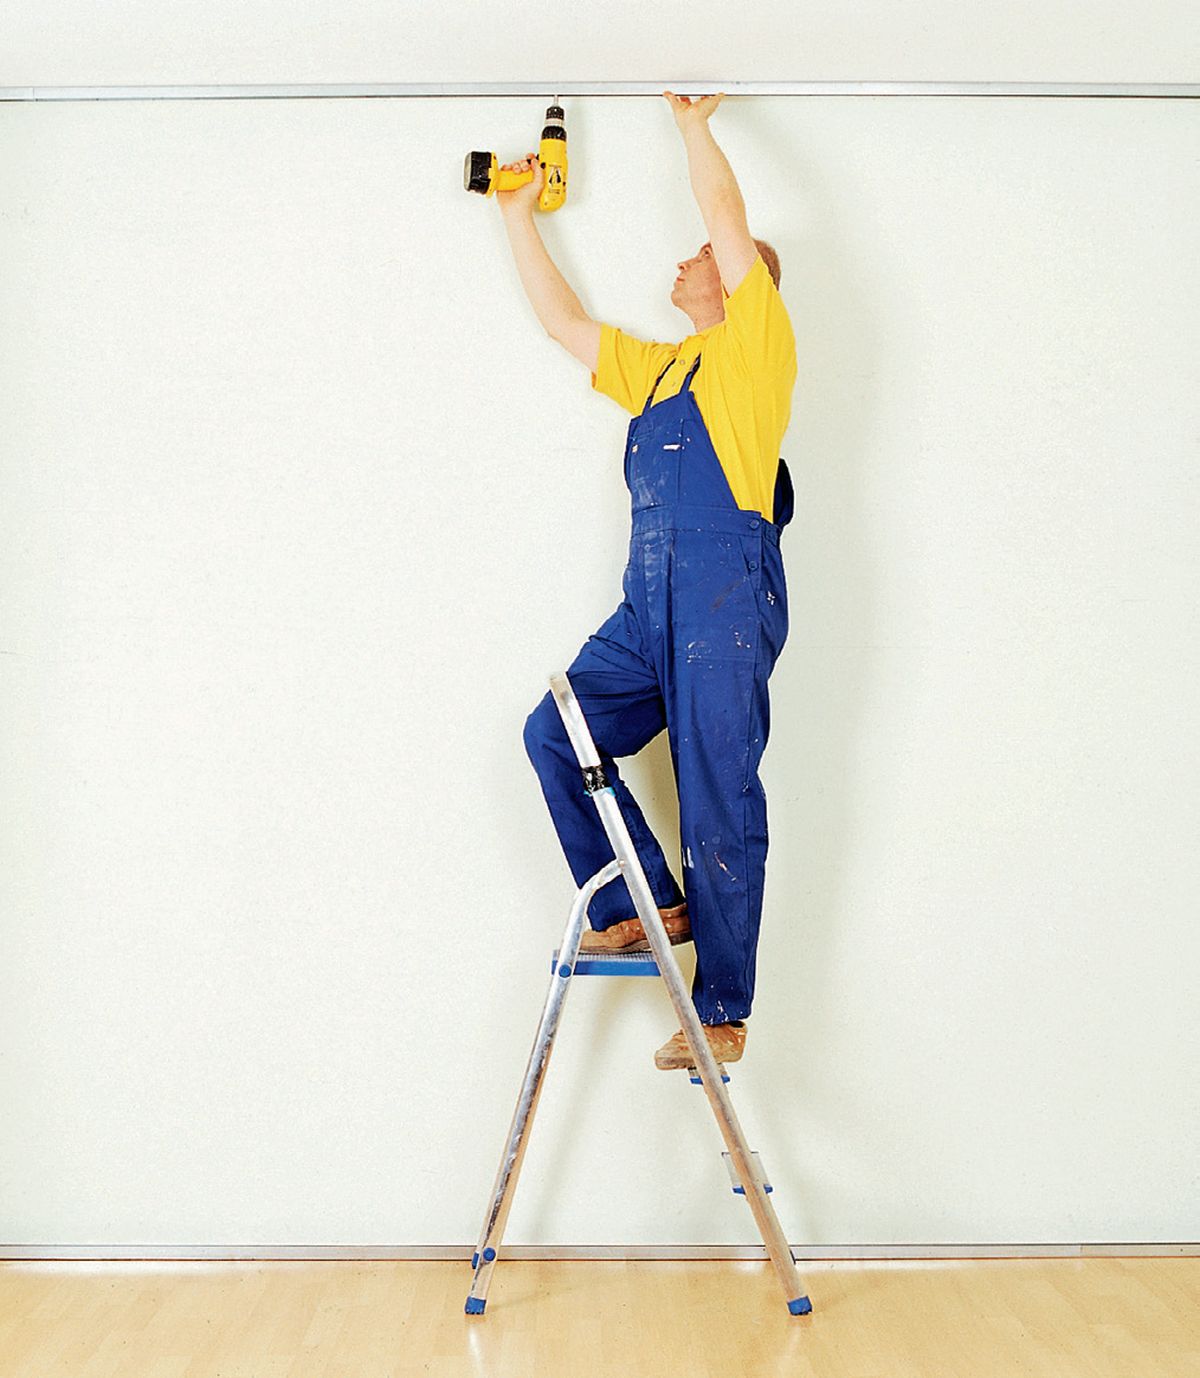
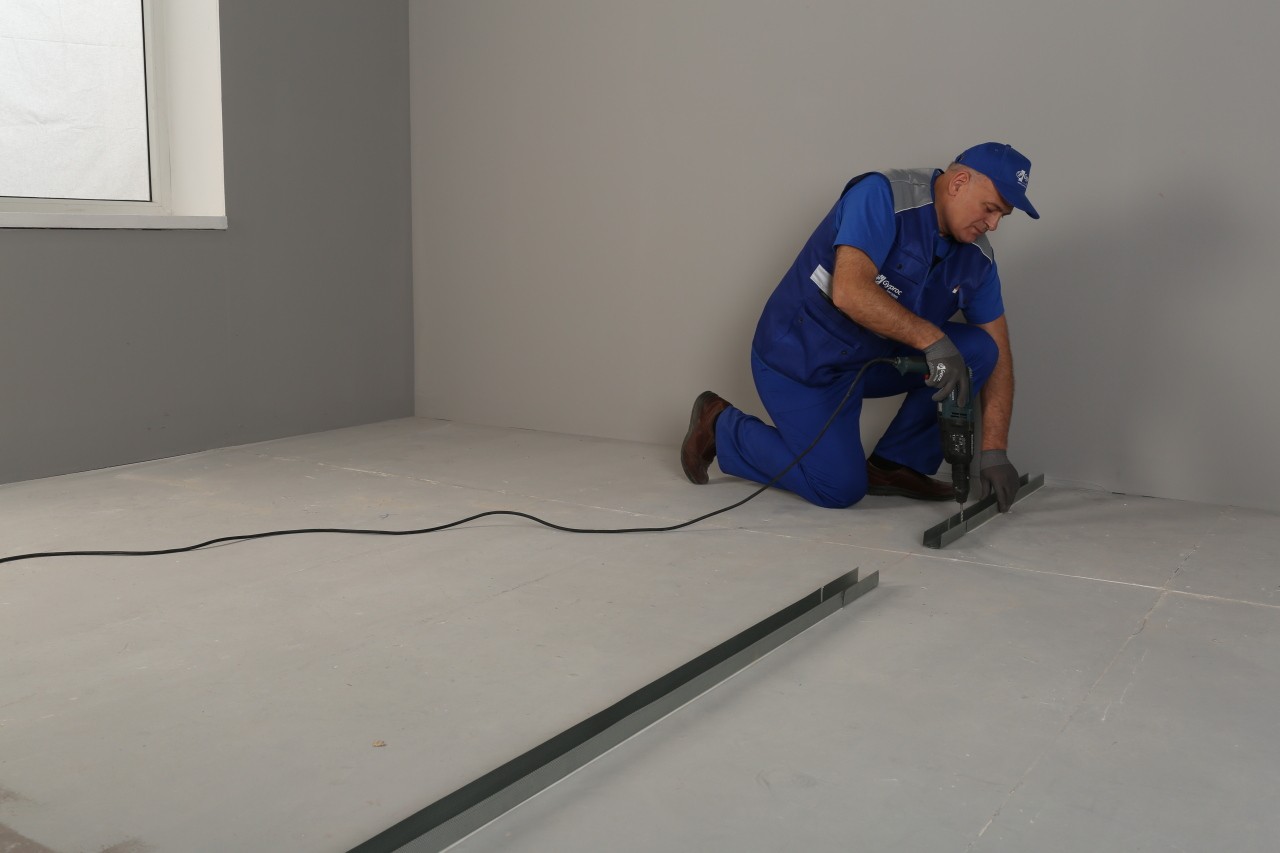
When everything is ready, you can begin to fix the guide profile, taking a step up to one meter. If the mount goes to a wooden surface, the distance is 50 centimeters and the grip goes with the help of screws. If the work is done with a concrete surface, the frame is screwed with dowels in 75 cm steps. In this case, it is important to make holes in advance.

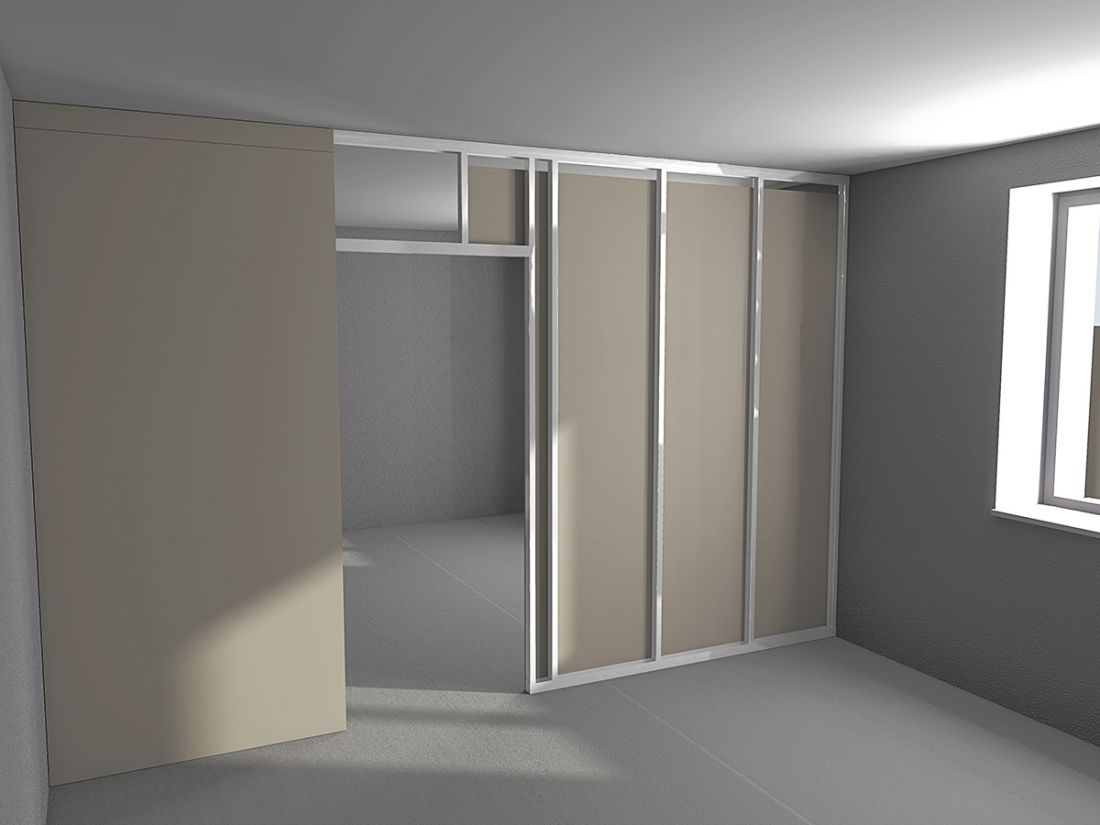
It is possible to mount both the carrier and the rack profile to the wall, but it is important that it be solid. If the height of the canvas is more than three meters, then the construction will have to use longer materials. In the event that a door is planned in a new wall, it is important for it to leave an opening of the required width on the floor. In the case of standard door dimensions of 80 centimeters, it is important to make the opening 8 centimeters wider in order to be able to install the door frame.
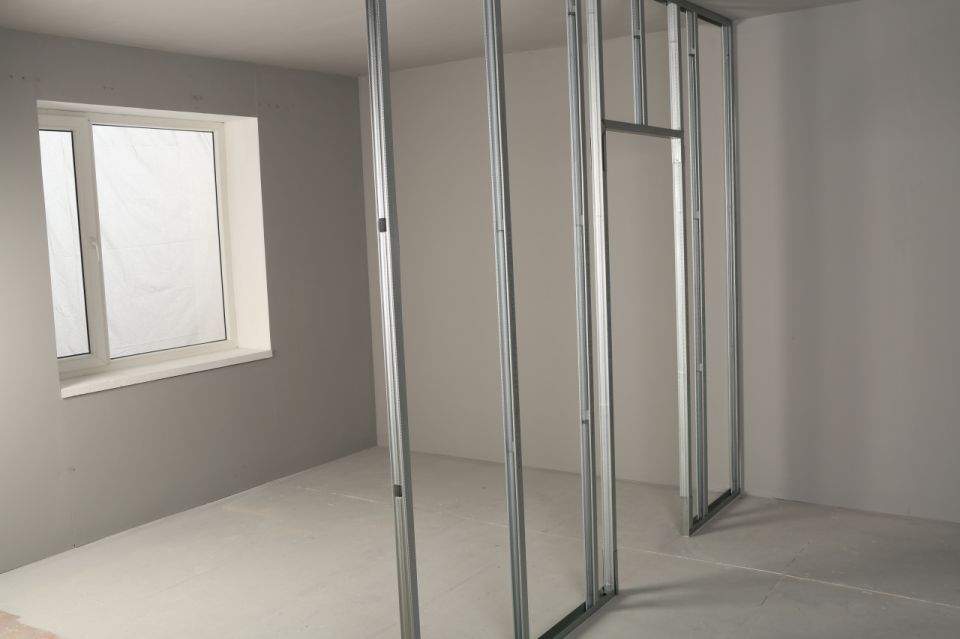
The rack profile is installed from the doorway and determines its width. The first place to fix the profile is the floor, then the level of the whole structure is checked and it is attached to the ceiling. Racks can be installed with any step, it depends on the sheets of drywall.Most often they are installed as a fixing tool for sheets with an edge and in the middle of the whole structure. The junction of two sheets should lie clearly in the middle of the profile.


If the racks are installed frequently, then the strength of the wall increases; As for the profile framing the doorway, for greater rigidity it is possible to place a wooden bar or carrier profile in it. You can also use transverse struts, which are also reinforced with a bar and installed where there is a horizontal drywall joint.
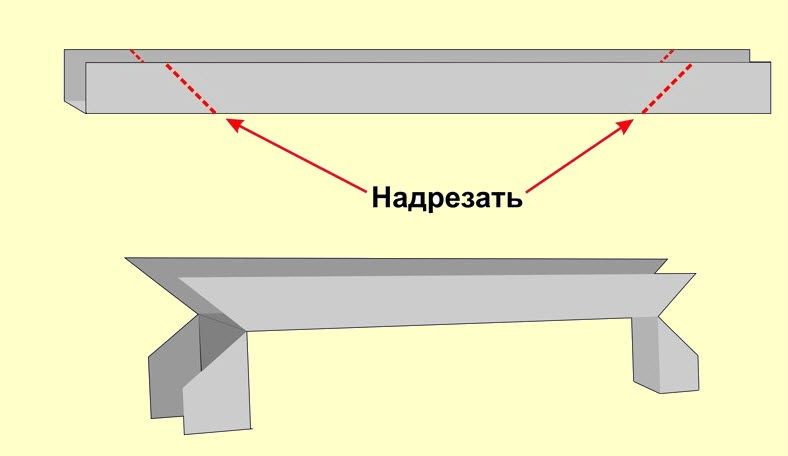
The doorway on top is additionally equipped with a jumper. Installation height depends on the dimensions of the door. If it is two meters, then the jumper should be installed at a height of two meters and five centimeters. They make it from a rack profile that needs to be cut longer — not 20, or even 30 centimeters. Departing 10 or 15 centimeters from each side of the profile, you need to make an incision at 45 degrees. Bevel should look out.

The sides that were trimmed need to be bent down and give the design a U-shape.Vertical parts need to be put on racks and secured with metal screws. When working with sheets of drywall, it is important to use only special screws that have a press washer. It helps to easily pass through the canvas without damaging the cardboard and allow the cap to go a deeper distance.
Step by Step Installation Guide
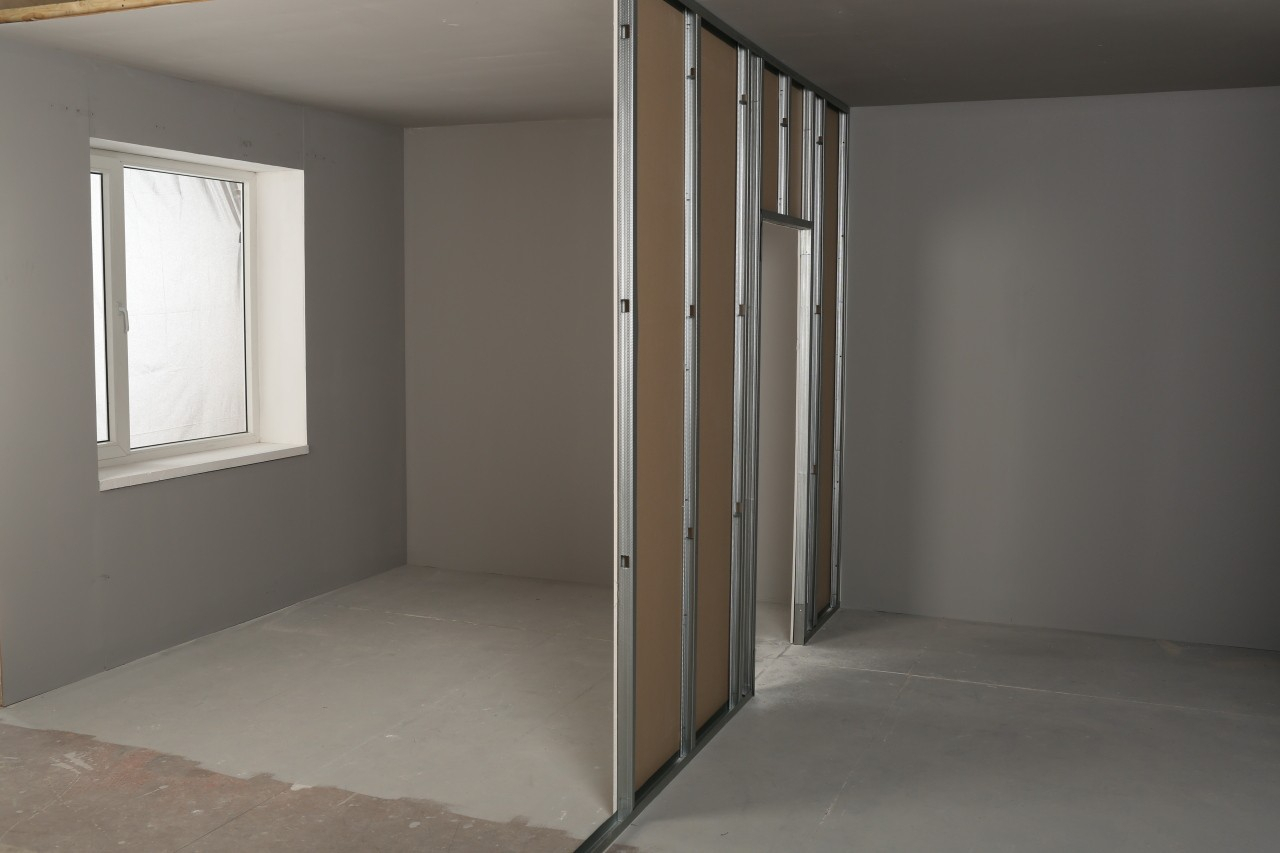
If you need to create a drywall construction yourself, you need to properly organize the progress of work. The first thing that is needed is to level the floor and walls to which the construction of the future wall will be attached. Only then can the markings be made on the floor, taking into account both parallel walls to bring out the correct angle for the structure. If the adjacent walls will also be covered with plasterboard, then the sheathing is initially erected for them, and then the installation of the framework for the new wall begins.
By marking, which is applied to the floor and walls, you only need to level the profile, and the width of the entire wall will increase after the installation of plasterboard and putty. Be sure to note the location of the doorway, if provided.After the marking is completed on the floor, the next step is to mark the wall and ceiling. To make everything perfectly accurate, it’s best to use a laser level. If there is no such, a simple plumb will do.
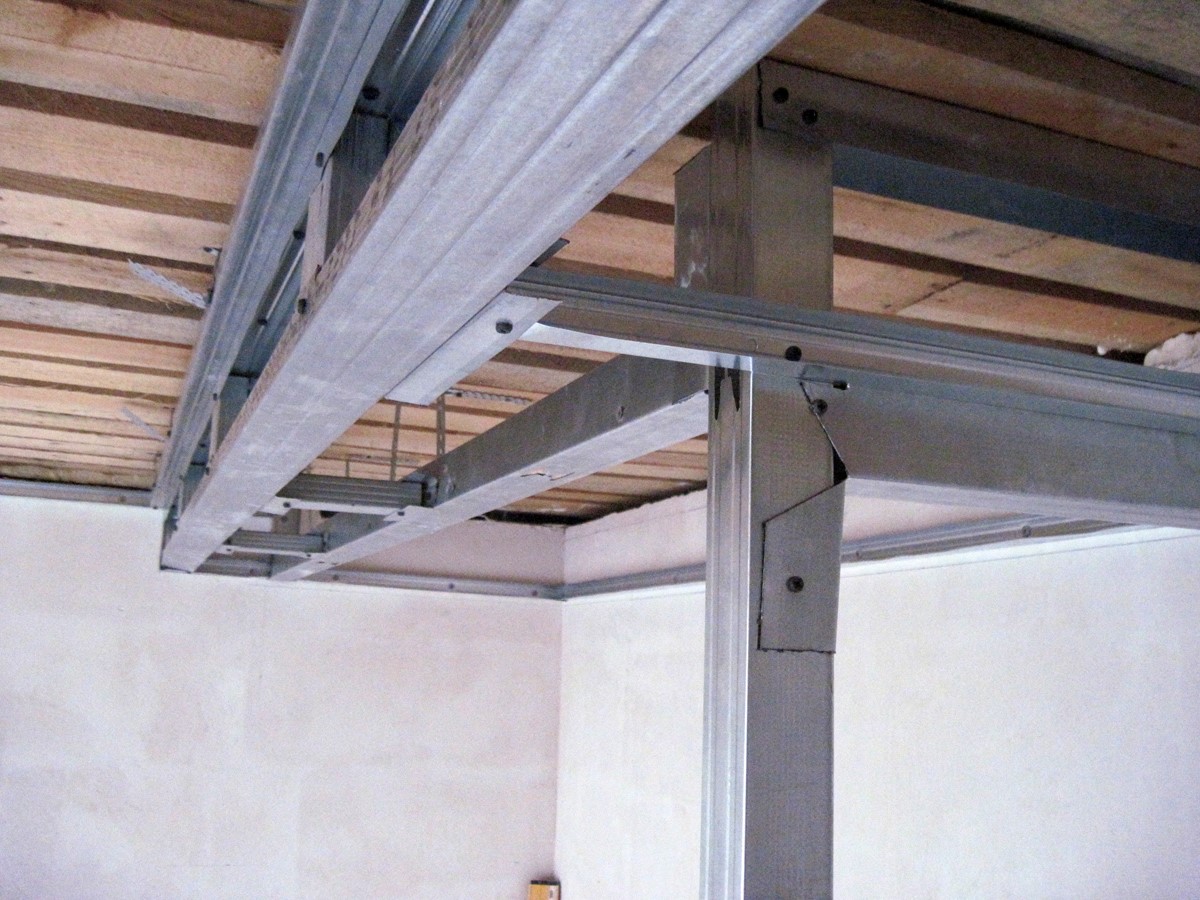
When everything is ready, a metal frame is erected. The first profile is attached to the floor with dowels. The second stage is the construction of part of the structure on the ceiling. When both parts are ready, they are connected to a common structure with the help of CW support struts. If there is a door or a window, you need to use the same racks for them. Installation takes place from the bottom up, the front side should be directed inside the window or door openings.
The next step is the installation of vertical supports. from the same CW profile with a distance of 55 and 60 centimeters from each other. When everything is ready, the level checks all supports. After that, work is underway to install horizontal faces with a UW profile. When all these works have been completed, you can begin to fasten sheets of drywall.

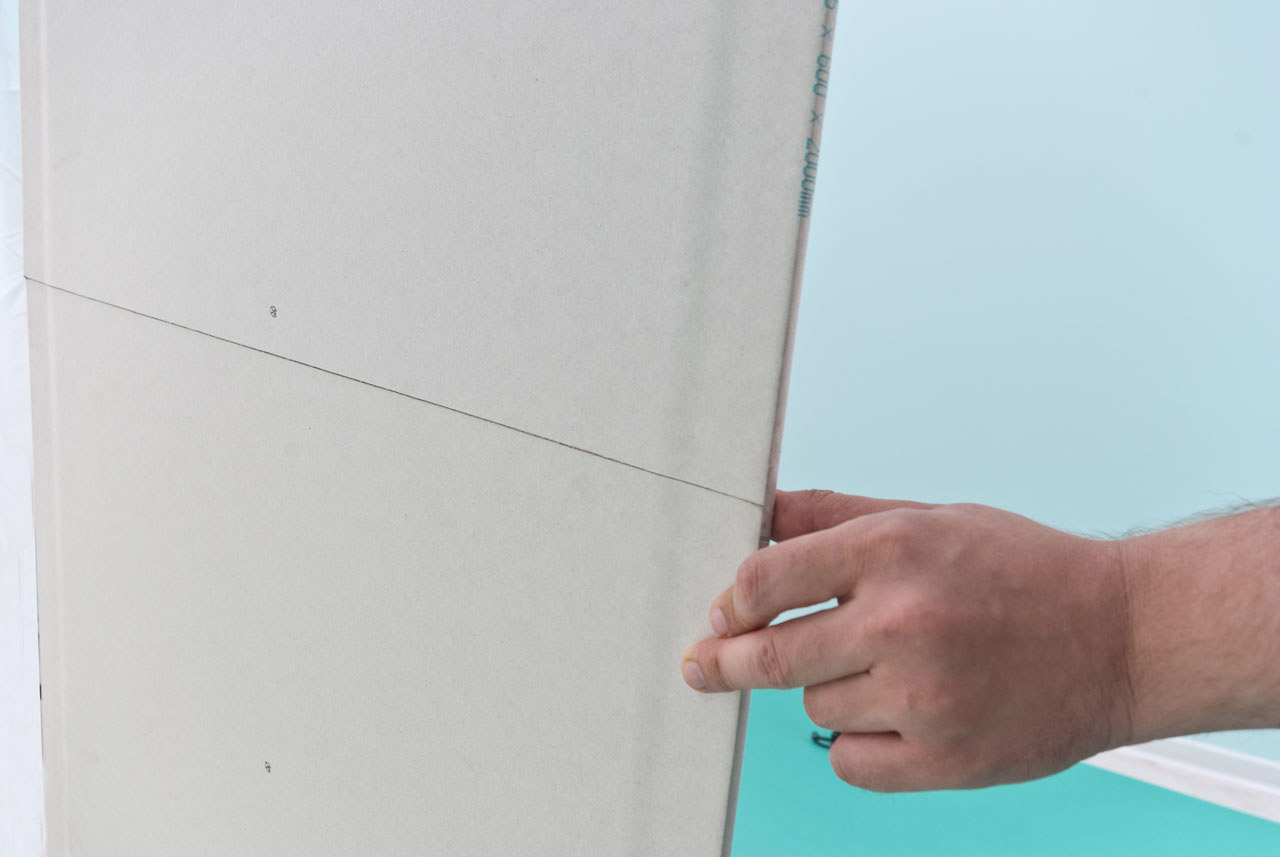
Assuming that this material has standard dimensions of 2 by 1.20 m, 2.50 by 1.20 m, and 3 by 1.20 m, different dimensions will be needed for different ceilings.If the room is not high, then the sheet will most likely have to be cut, the same principle is used for ceilings over three meters, when the length will have to be increased.

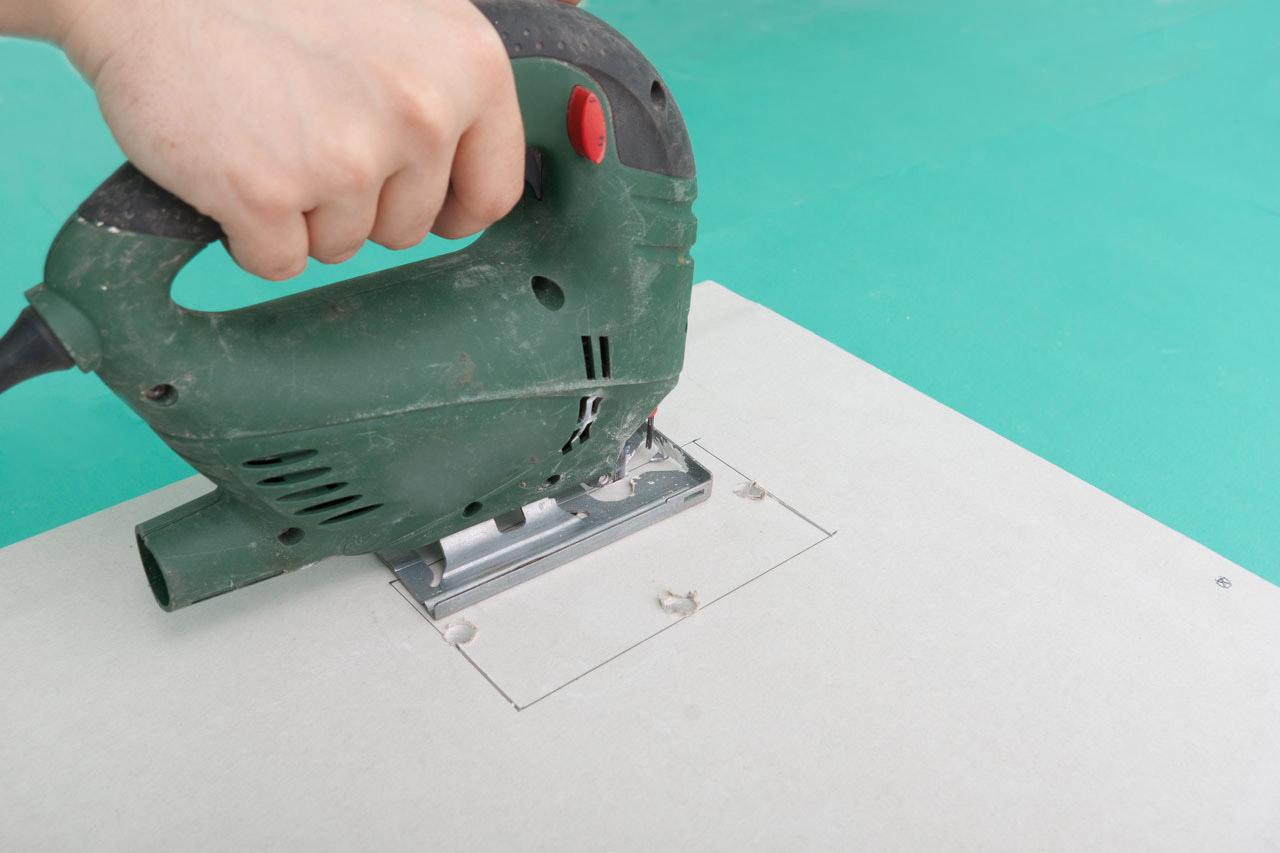
In order to cut a sheet, use a construction knife.
The cutting process consists of the following steps:
- laying sheet on the surface, which should be as smooth and firm as possible;
- you need to draw a line along which the incision will go with a pencil;
- cut carefully and only the cardboard itself;
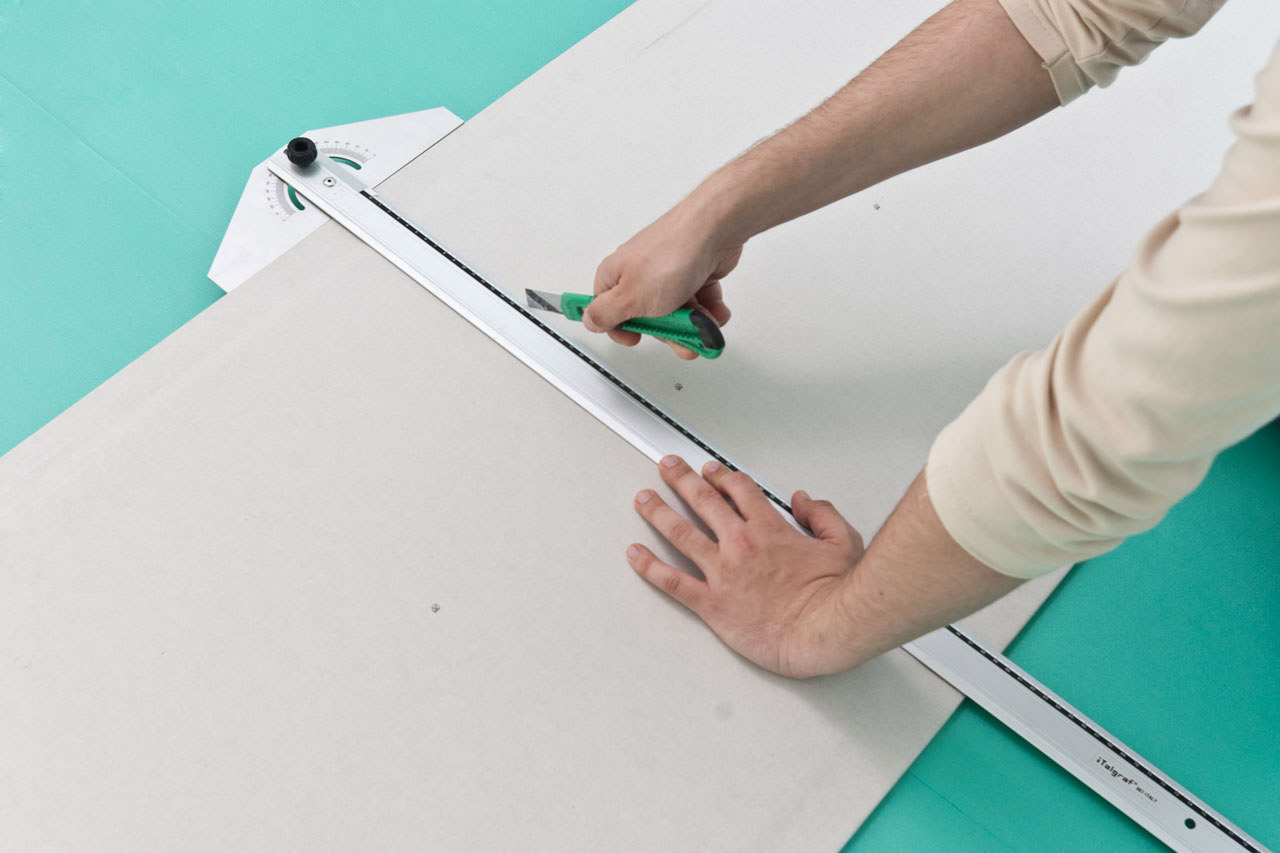
- the sheet is displaced to the edge of the level support to the drawn line, by pressing it is necessary to make a fracture along it;
- flip drywall and draw the same line on the reverse side, on which to make the same cut;
- displace along the incision line, press down and completely break the gypsum board.

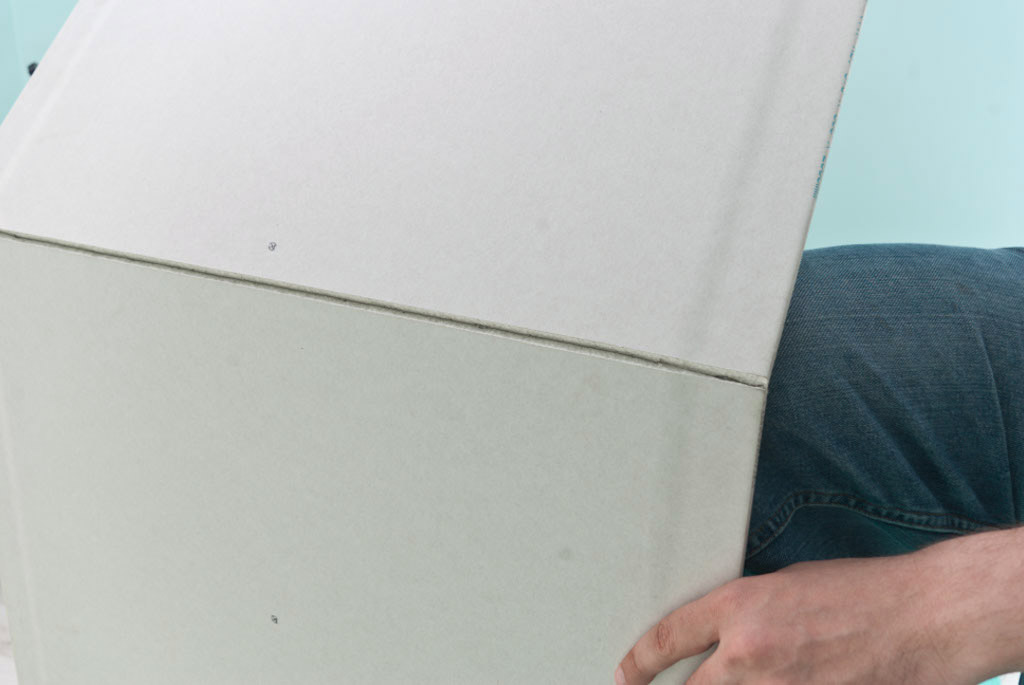
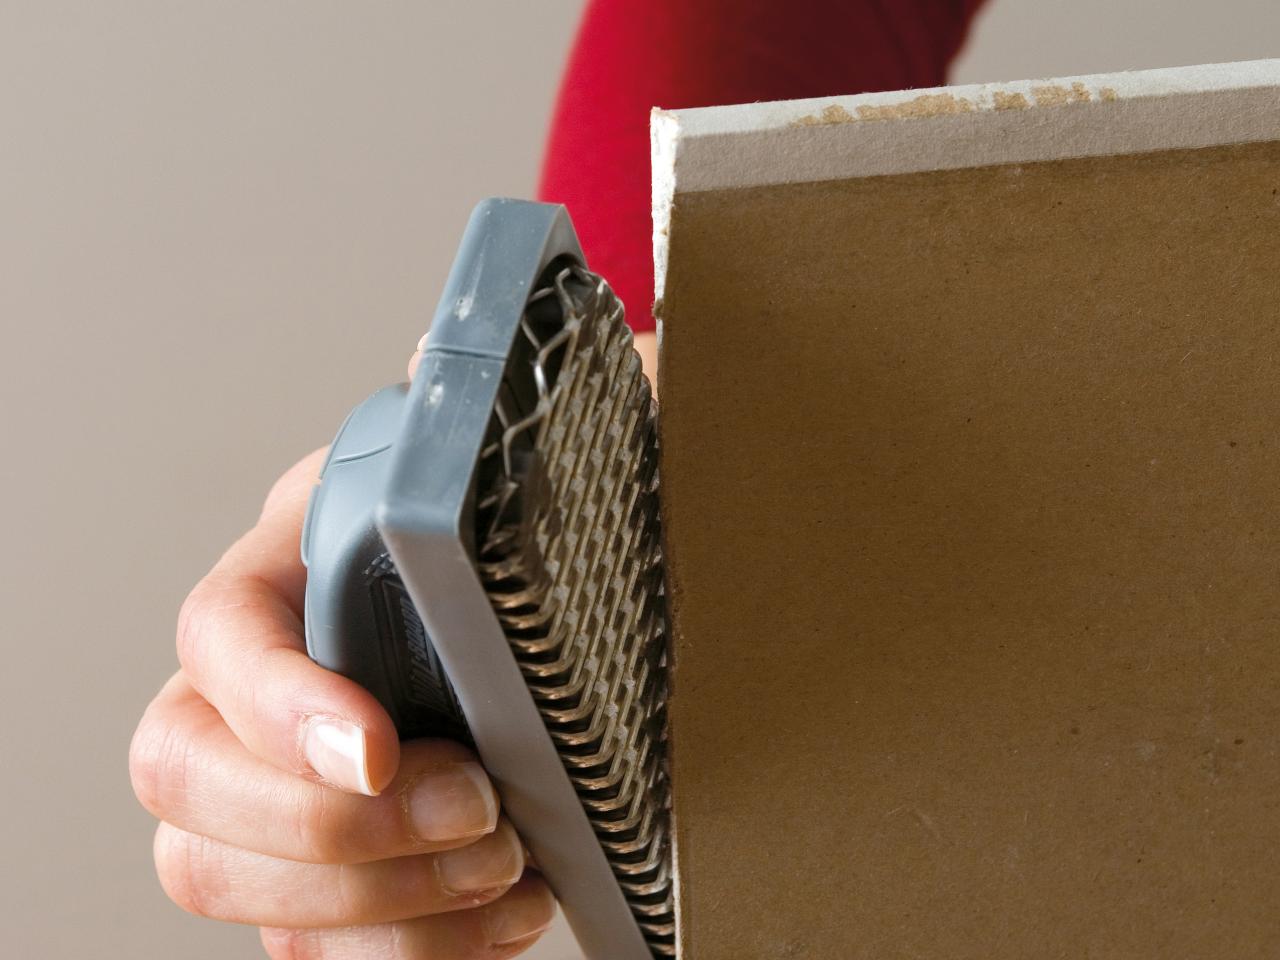
The extreme part is recommended to do a little sloping, which will contribute to better finishing the finished wall. To give this form it needs to be cut using a drywall trowel.
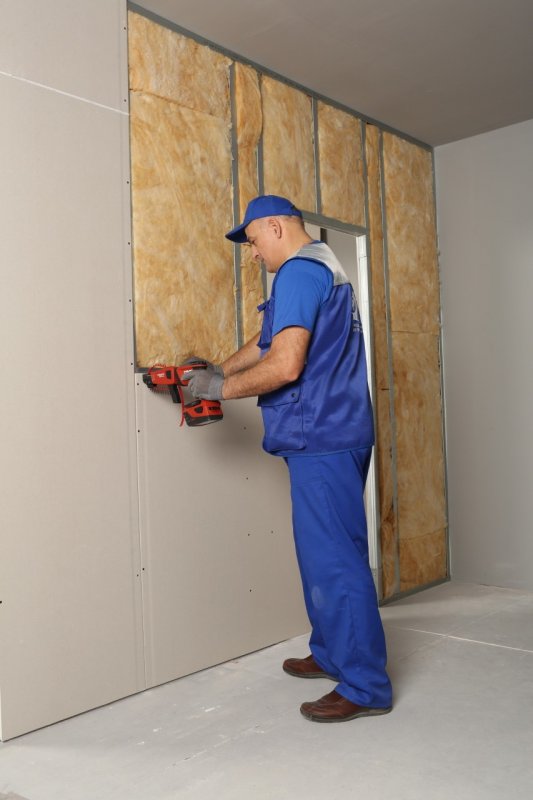
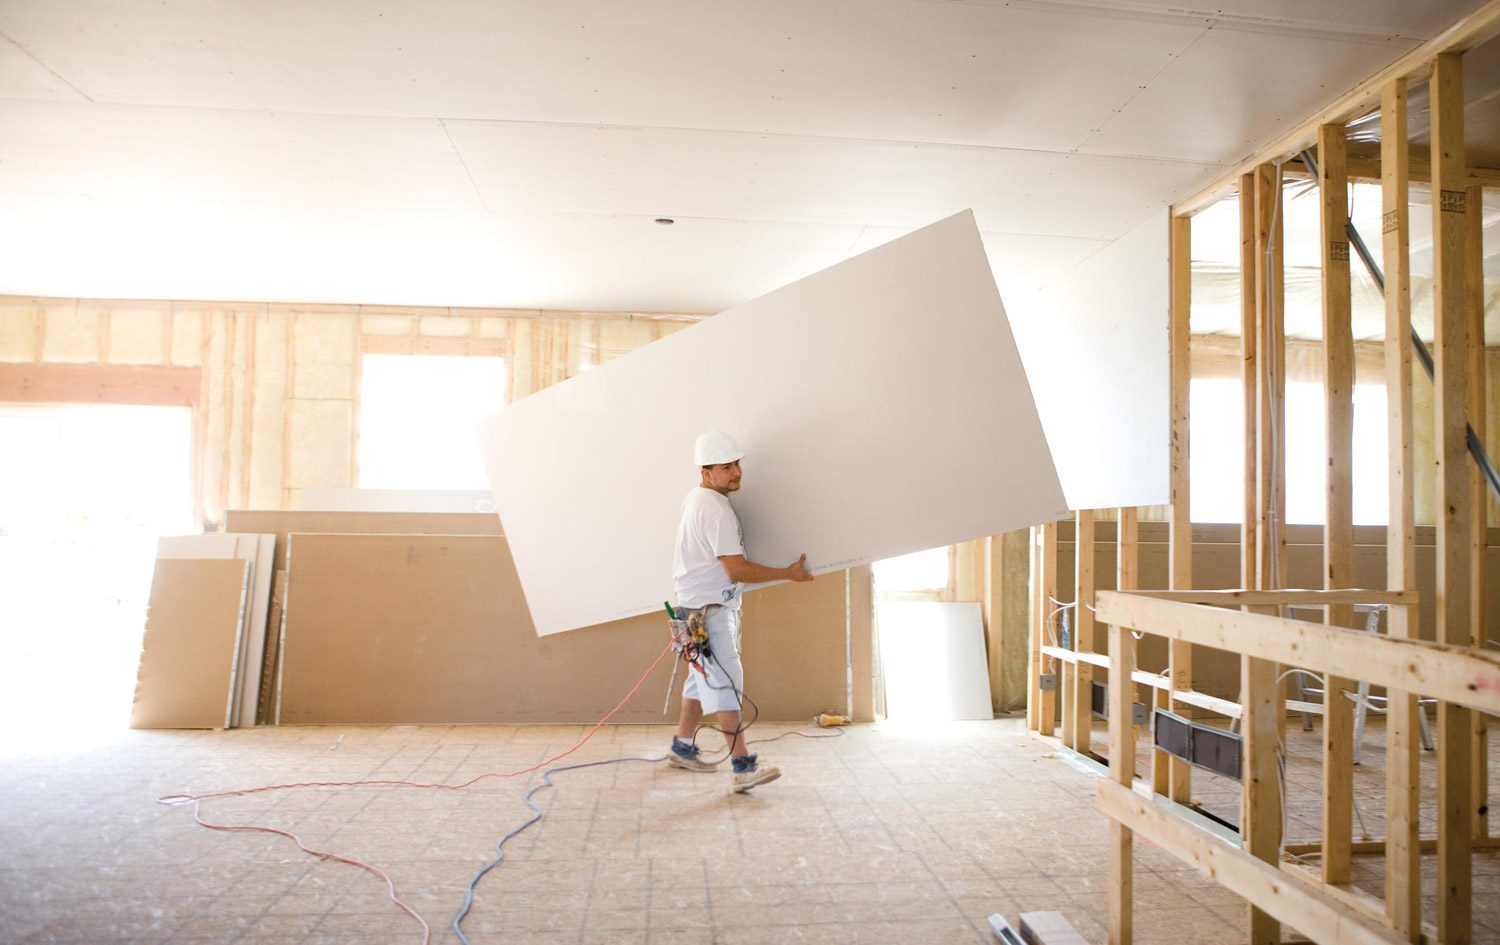
The next step is to mount the plasterboard to the finished frame.
For this you need:
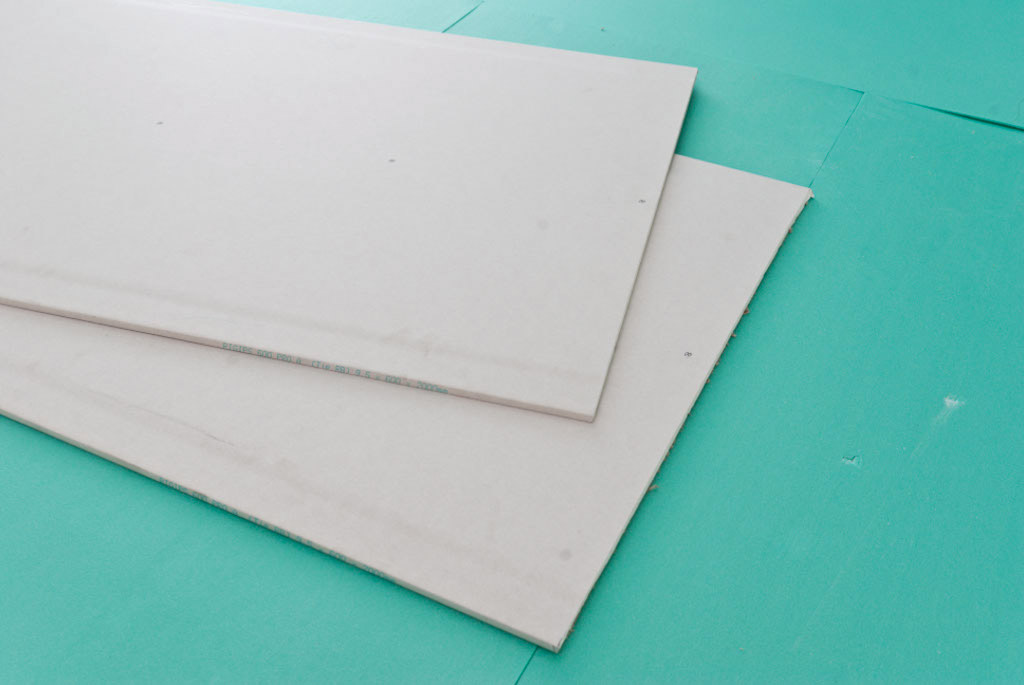
- On the first sheet, the side chamfer is removed, for which a strip of 55 millimeters is cut.
- Fastening of sheets is carried out from the lower corner of a wall. It is important to make a small indent from the floor in 10 or 15 millimeters.
- Fastening the sheet to the crate with self-tapping screws 3.5 by 35 millimeters. The edges are fastened first, and then they go to the middle. The width from the screw to the screw should not exceed d25 centimeters. Hats should be slightly deepened into the surface of the sheet.

- After installing the first drywall element, you need to measure out the distance to the ceiling and cut off the corresponding piece.
- Formation of chamfer on the sheet.
- Install it on the frame.
- The following sheets are important to fix in a staggered manner, but there is no need to cut the chamfer. This is how the whole sheet is fixed, without trimming. The mount goes from the ceiling to the floor. Thus, the entire side of the future wall is sheathed.


When work with one side has been completed, it is important to consider whether wiring and telephone cable will be needed in the new premises. If so, the next step is to install them. For wiring, it is necessary to prepare corrugated pipes and wire them. After this, in the profile it is necessary to make holes with a diameter of 3.5 cm and thread pipes with wires into them.It is important to determine the holes for sockets and switches and make them in advance.

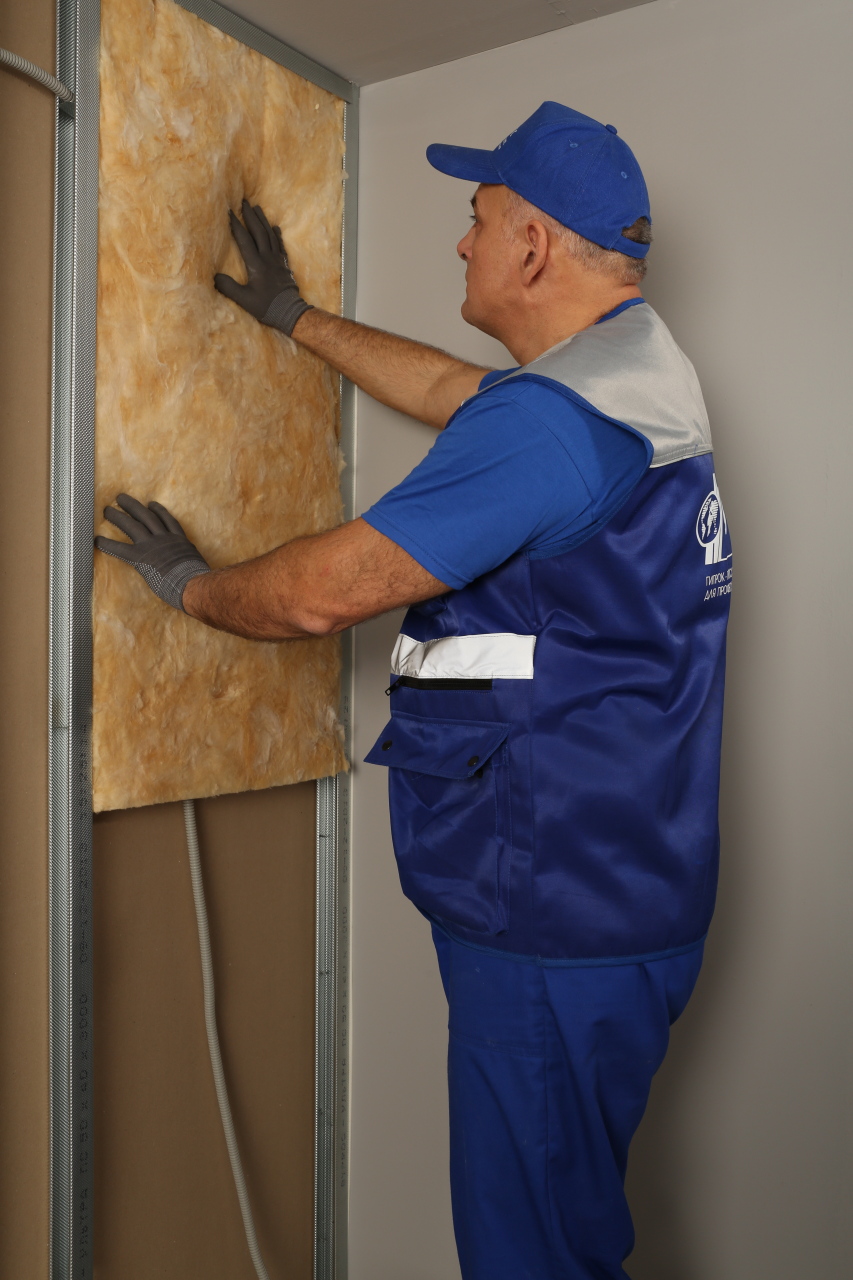
To build a high-quality wall, you need to supplement its interior with appropriate materials., which will have sound insulation and will make it possible to feel confident and comfortable, as if behind a stone wall. This should be done correctly using rolled mineral wool 6 or 12 centimeters thick. Wool fits tightly between the profiles, this will be enough for good fastening. After everything is done, you can put a second wall.
The technology of its sheathing is the same. As soon as all installation work is completed, it begins A new stage, where the finished wall is being processed:
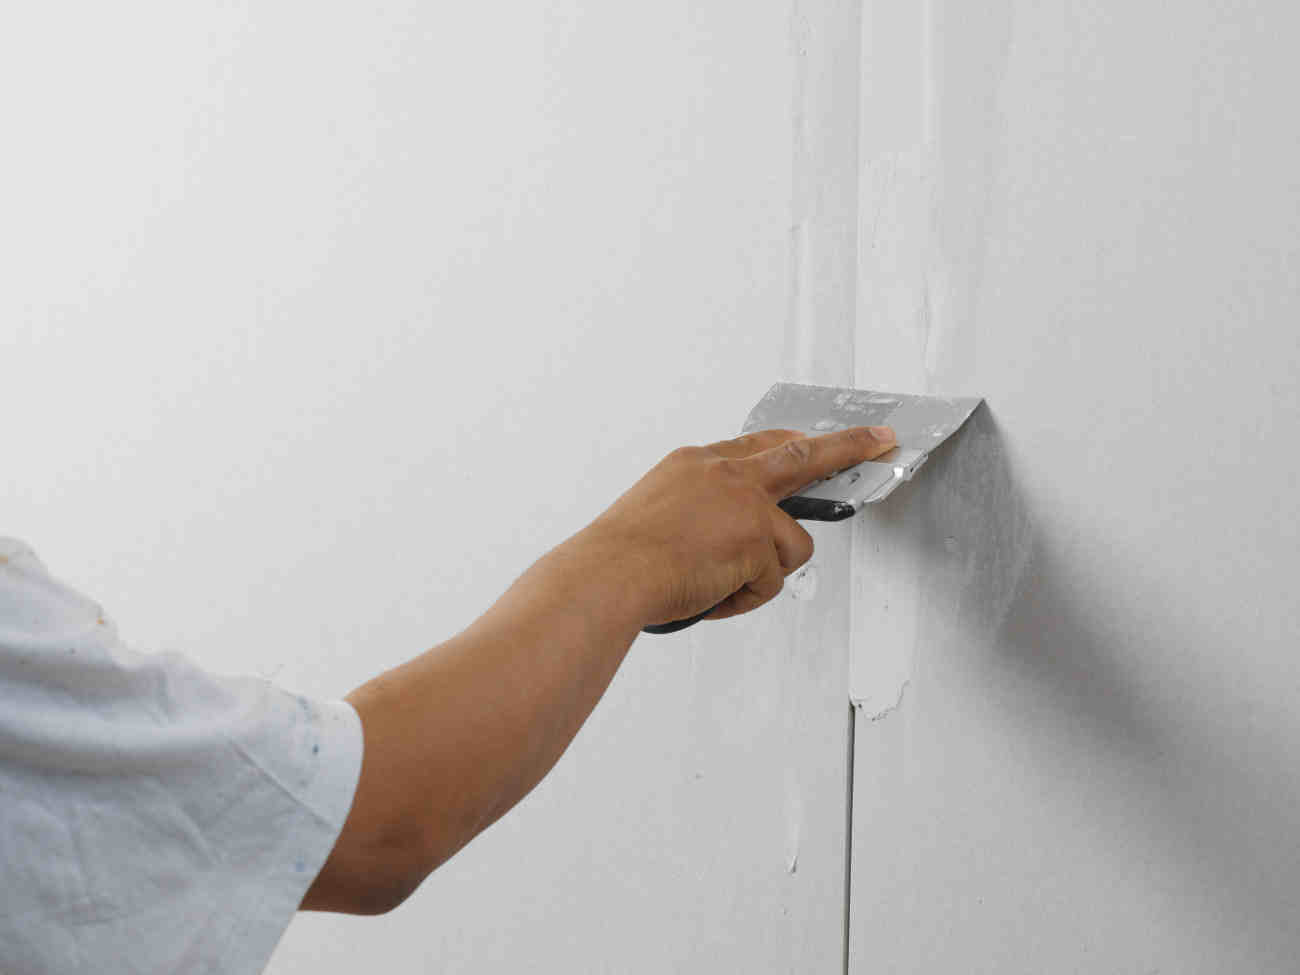
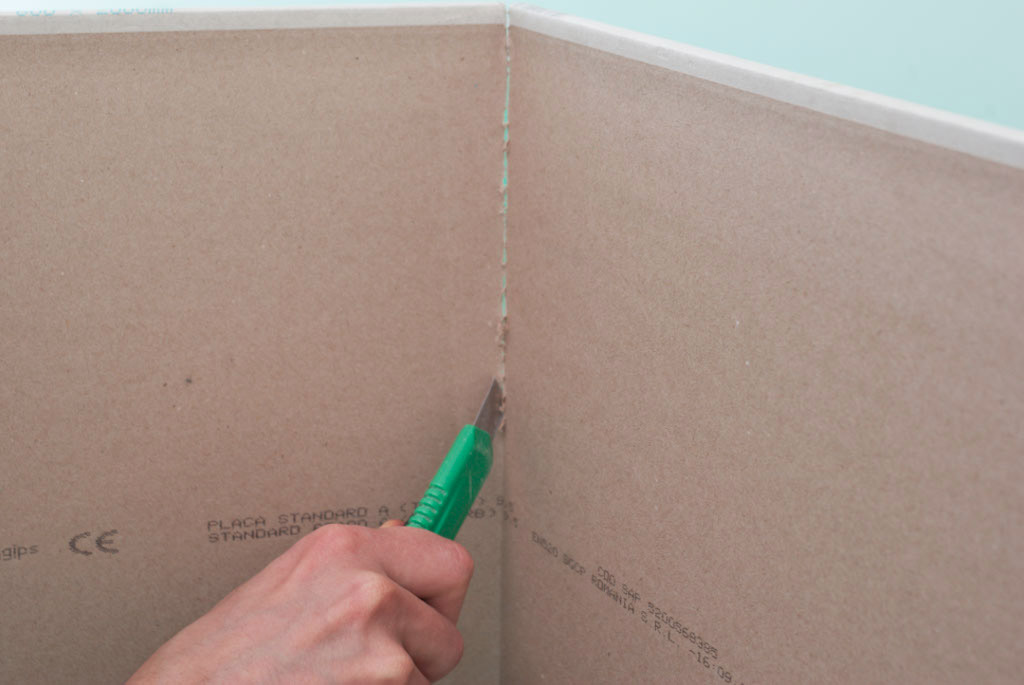
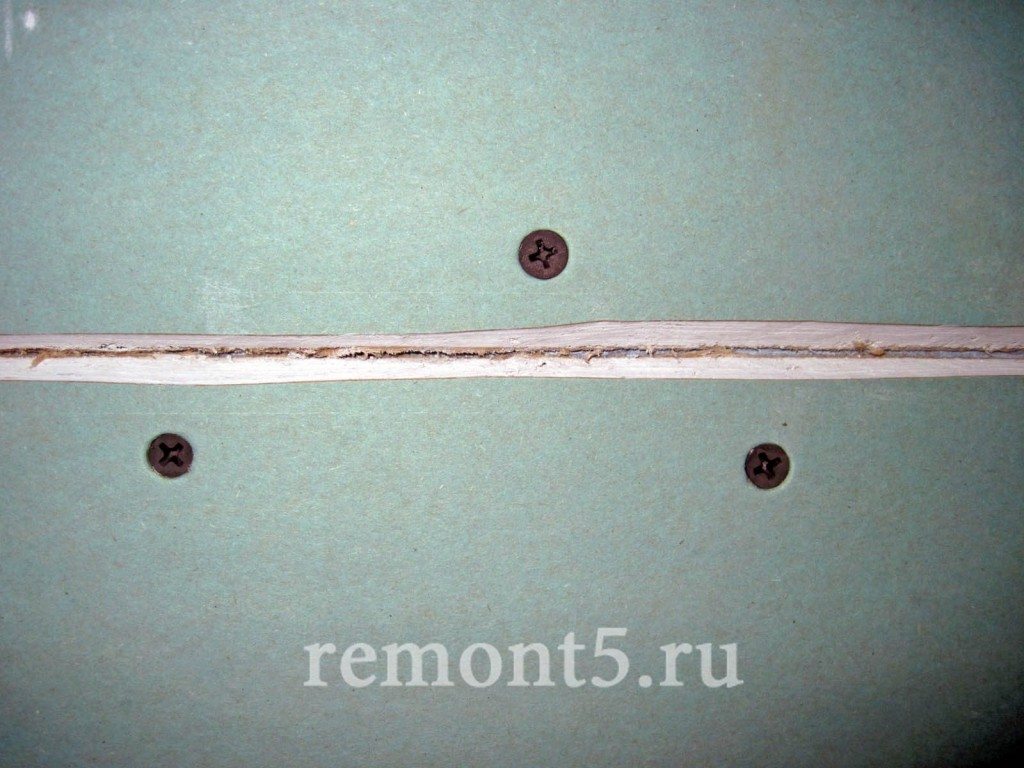
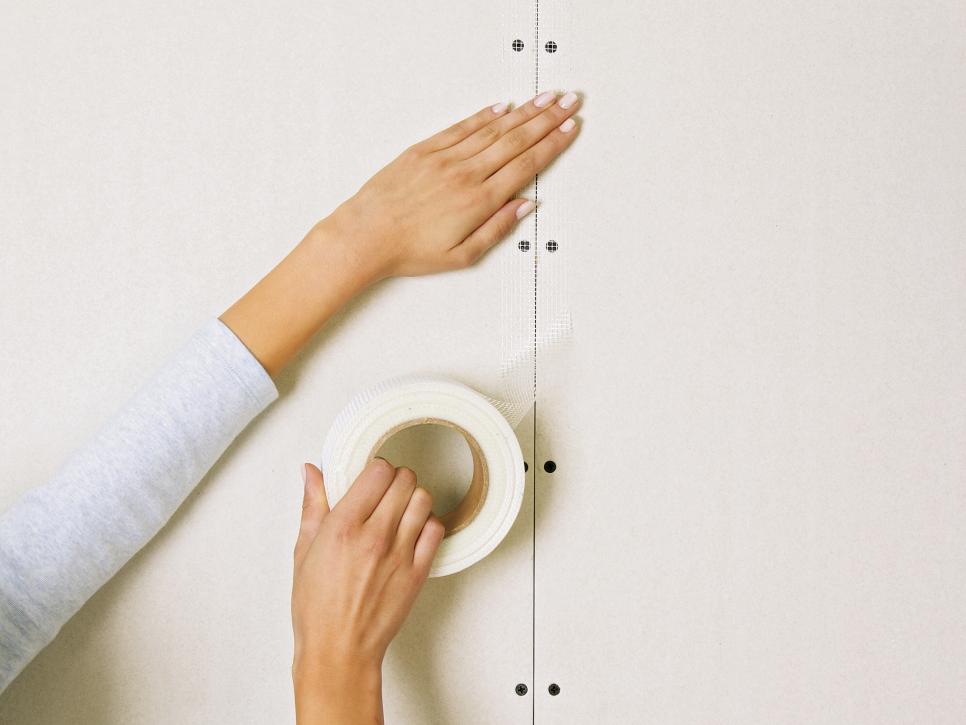
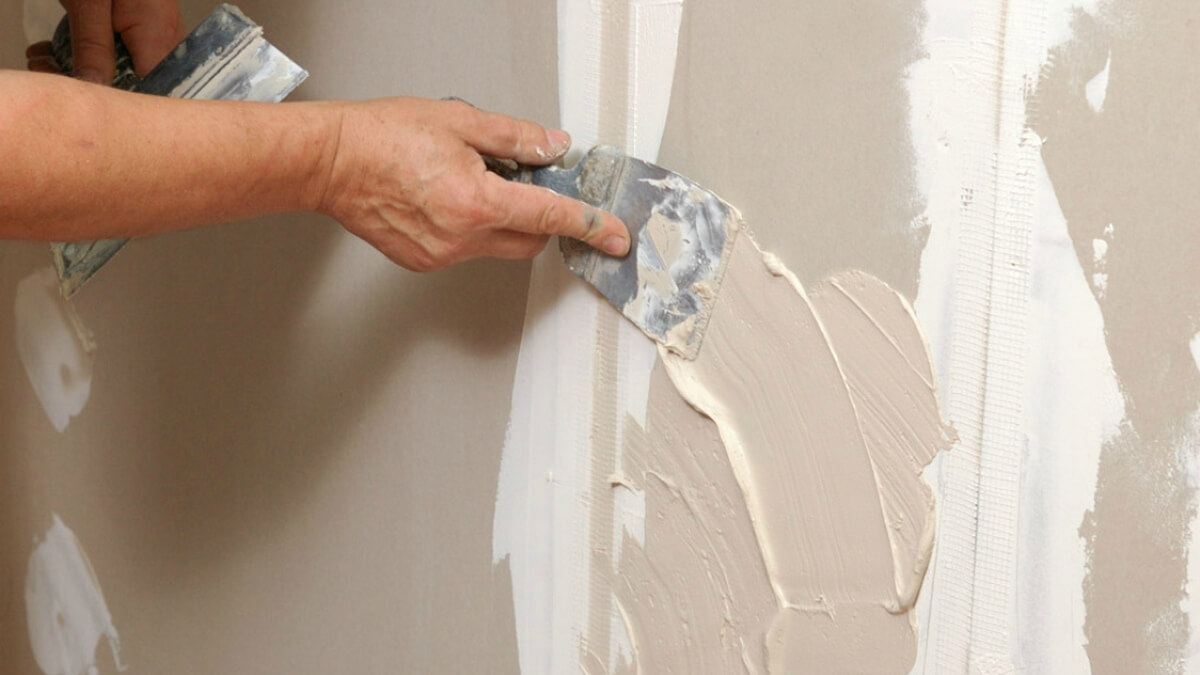
- the joints between the drywall sheets are glued using serpyanka;
- wall treatment starting putty;
- processing the wall with a finishing putty; leveling the places where the self-tapping screws are located;
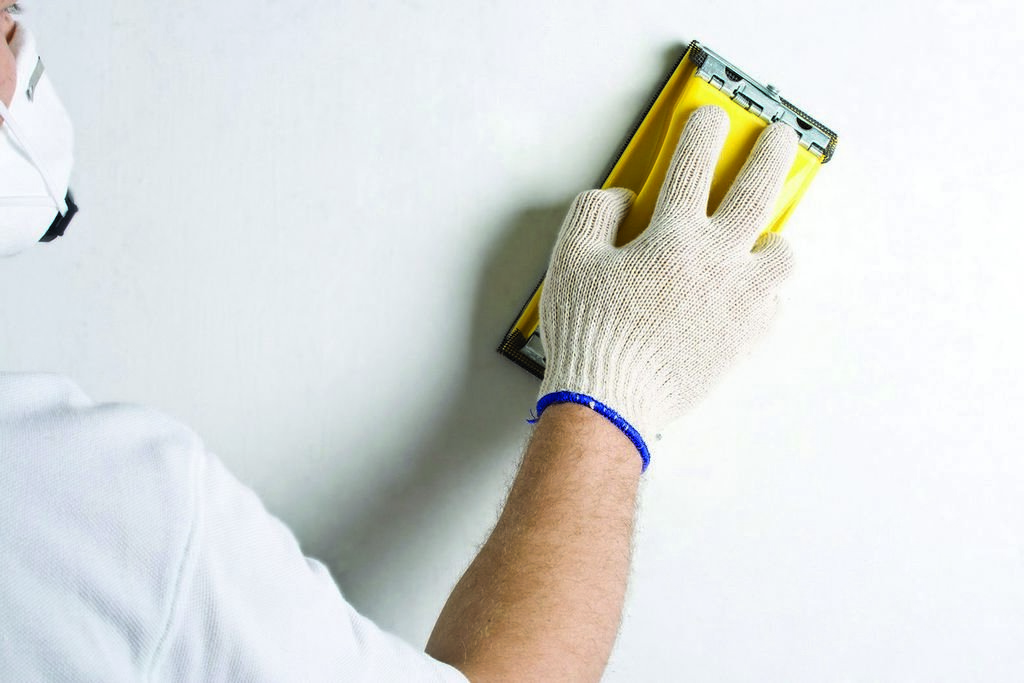
- grouting with sandpaper;
- decorative wall trim.
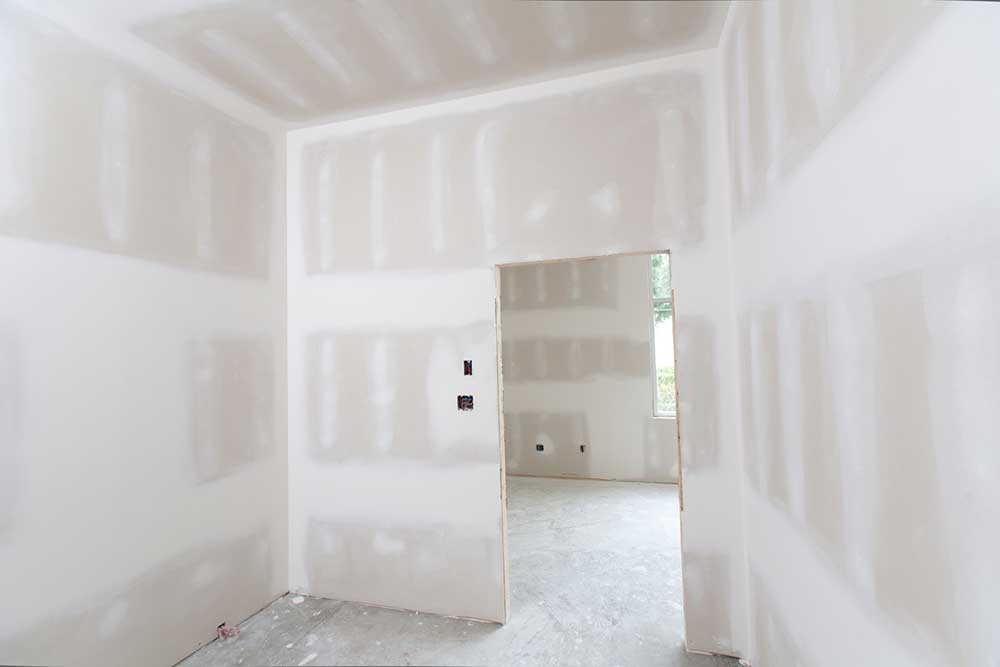

Falshstena can be ready quickly enough, it all depends on the skill of the master and his experience. Beginner can also assemble such a constructionit just takes him more time.
Interior walls will serve for a long time, the main thing is to monitor their operating conditions. You can use paint, wallpaper or tile as a decor for such elements, it all depends on the room, the interior and the desire of the owners themselves.
Design
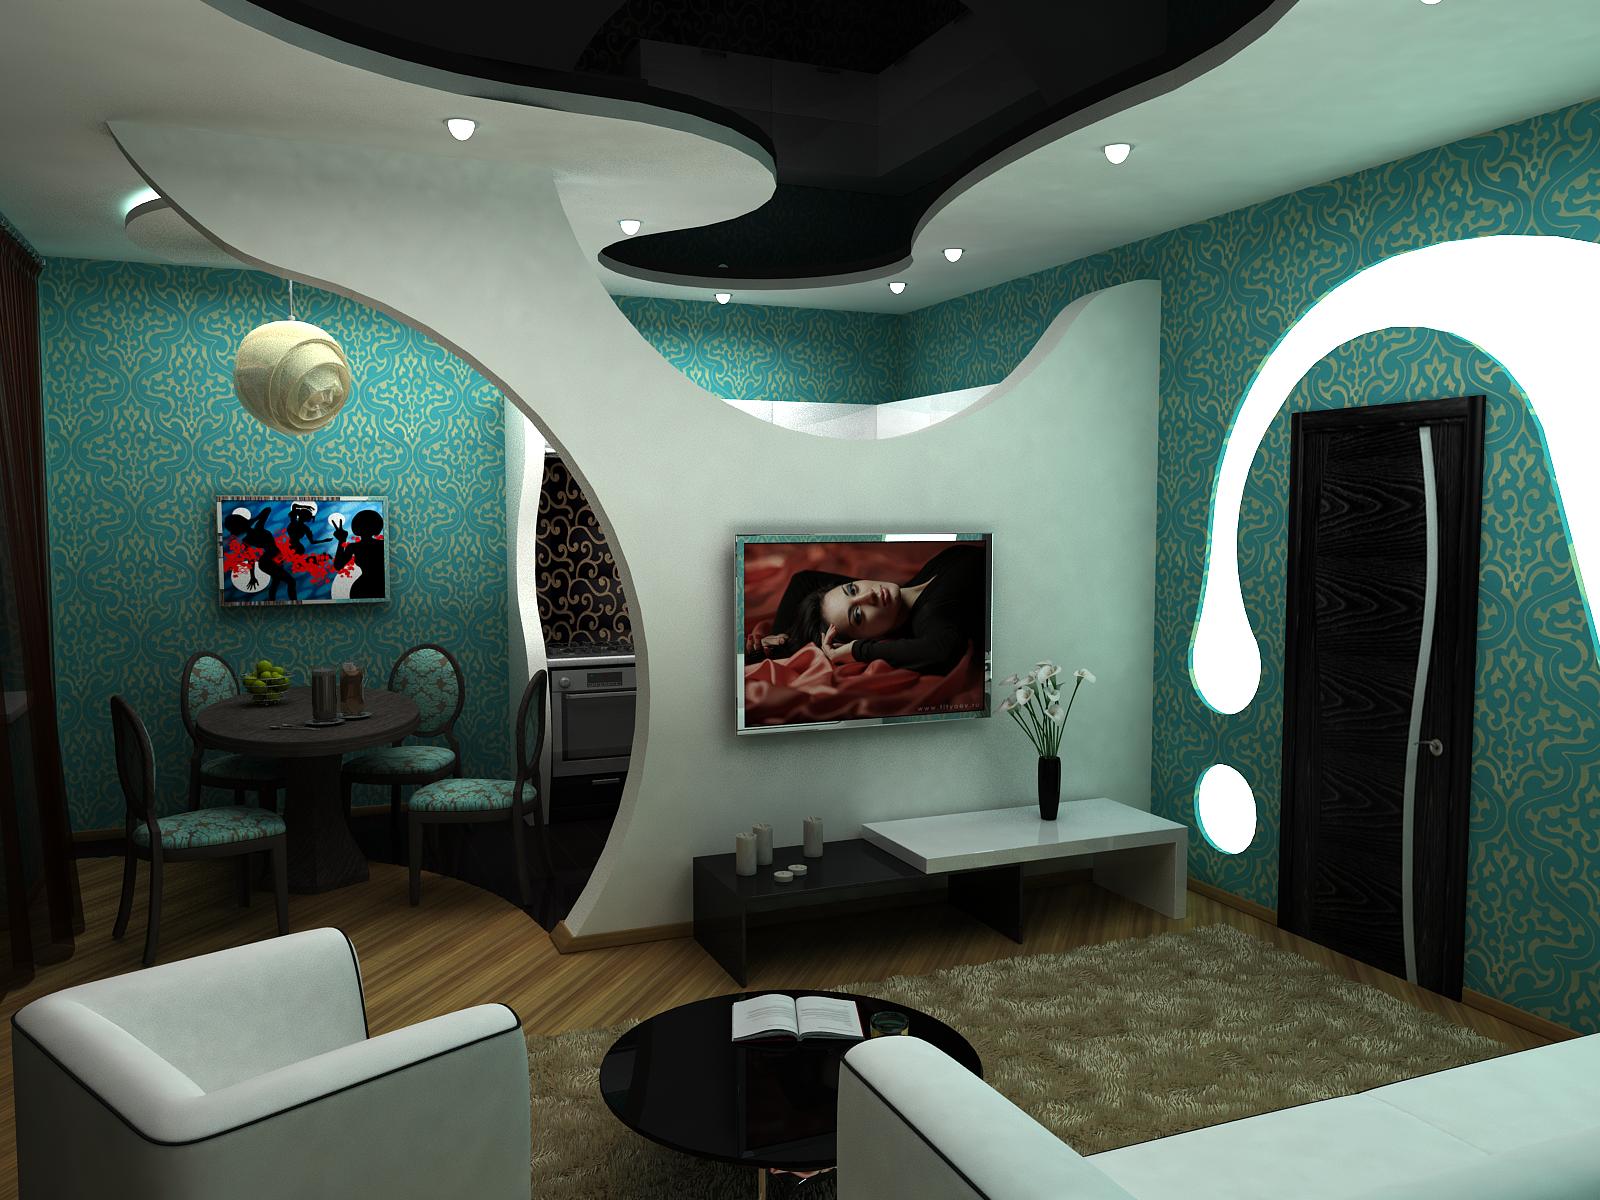
Drywall is a very convenient material for work, especially for creating interesting and unusual images in the interior. This is possible due to the fact that the sheets can take the most diverse form, they can not only be cut, but also curved, for which it is enough to wet the sheet and give it the desired shape.
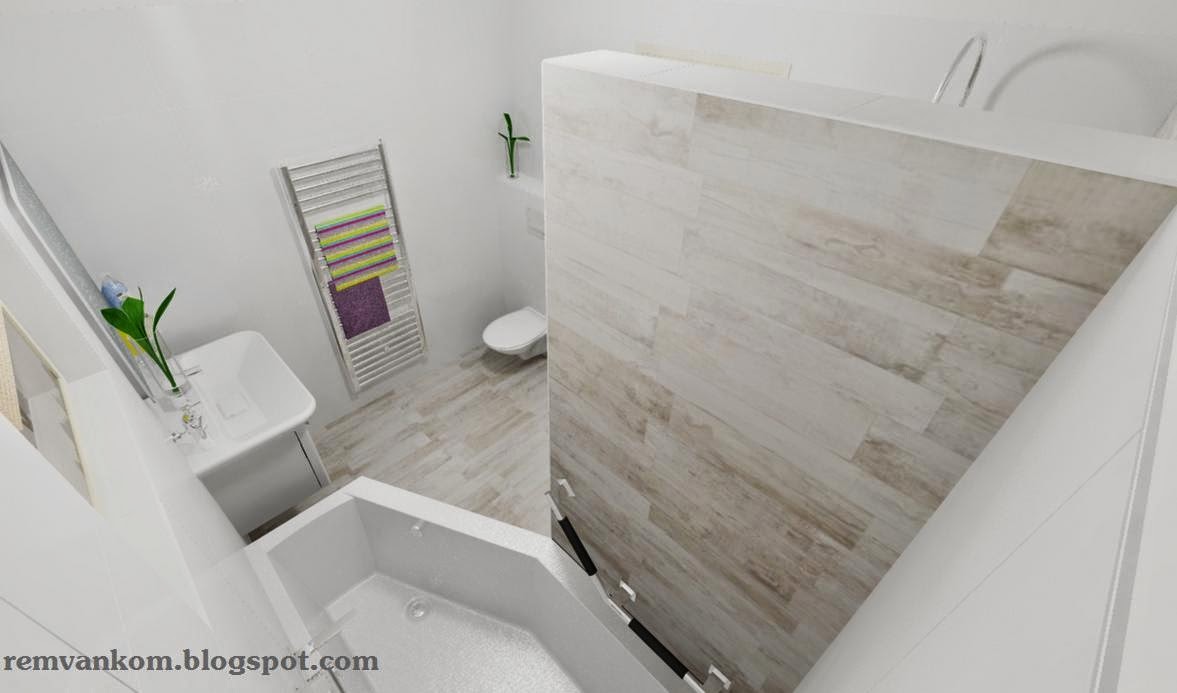
You can use this material anywhere. - in a private house, in an apartment, and in each of the cases, the design may be completely different. Variants of exactly how a particular space may look may vary in style, shape, and texture. It is possible to build structures with gypsum plasterboards in the bathroom, bedroom, corridor and any other room, only the finishing material will be different. For rooms with a high level of humidity, moisture-proof sheets are used.
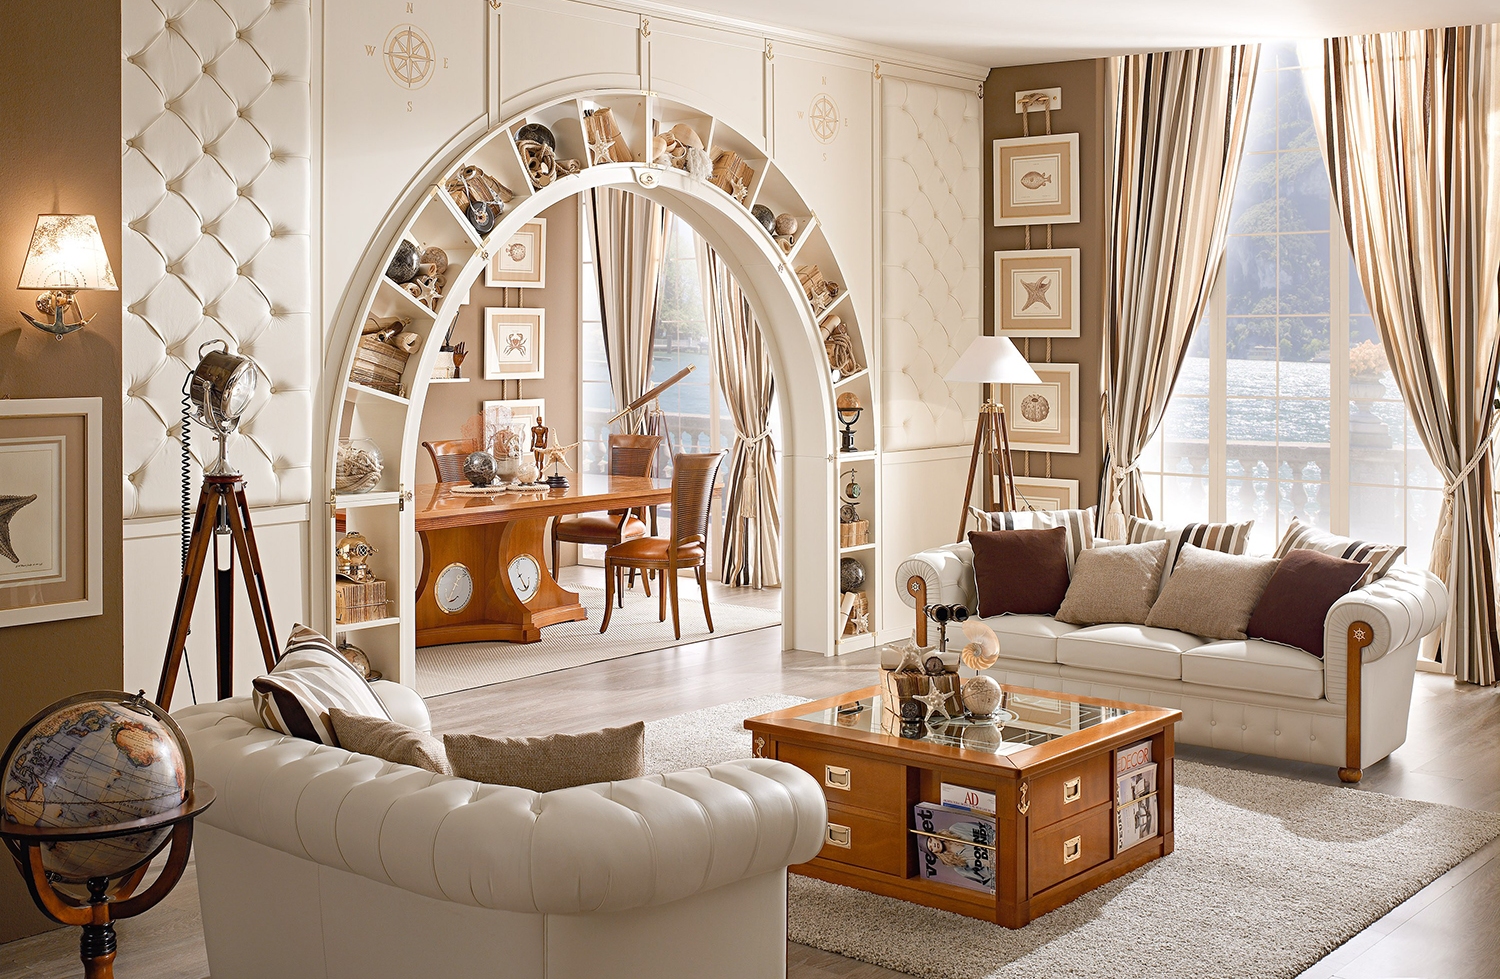
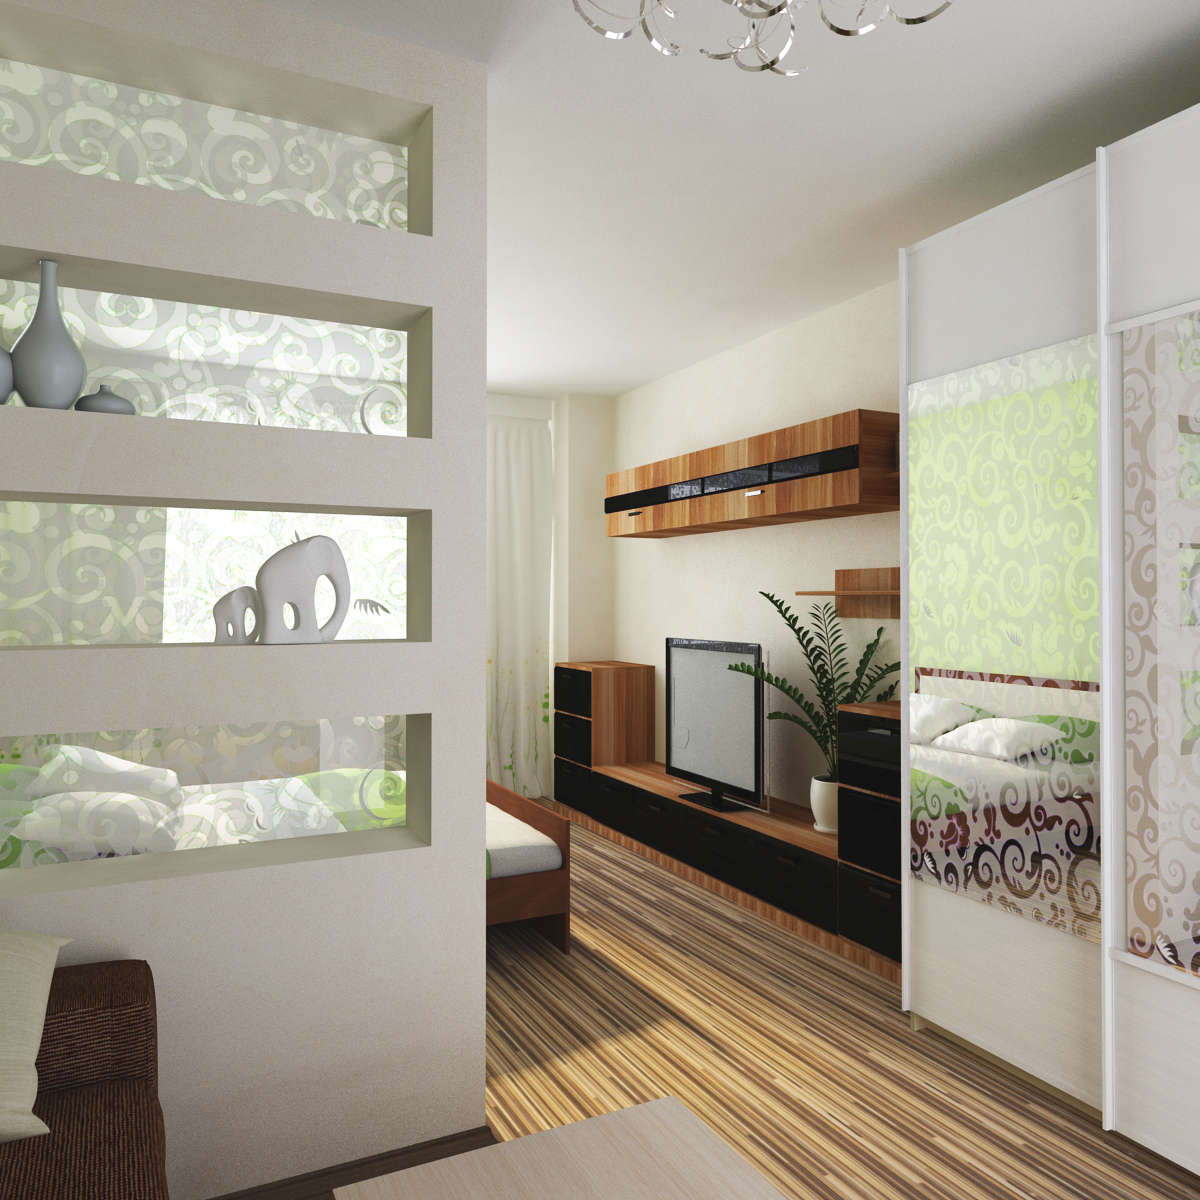
False wall is completely similar to the usual, moreover, it can be equipped with a door and fully serve its owners to separate certain areas of the room.For the execution of such ideas in the design leave room for an opening and later place the doors in it.

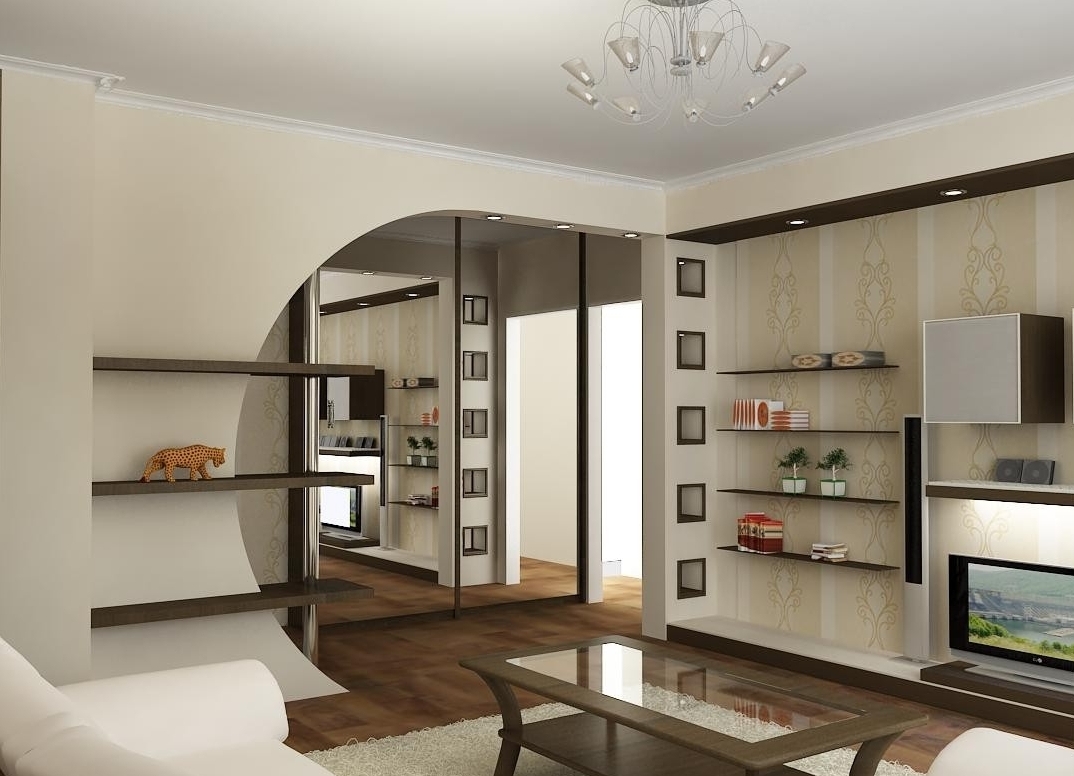
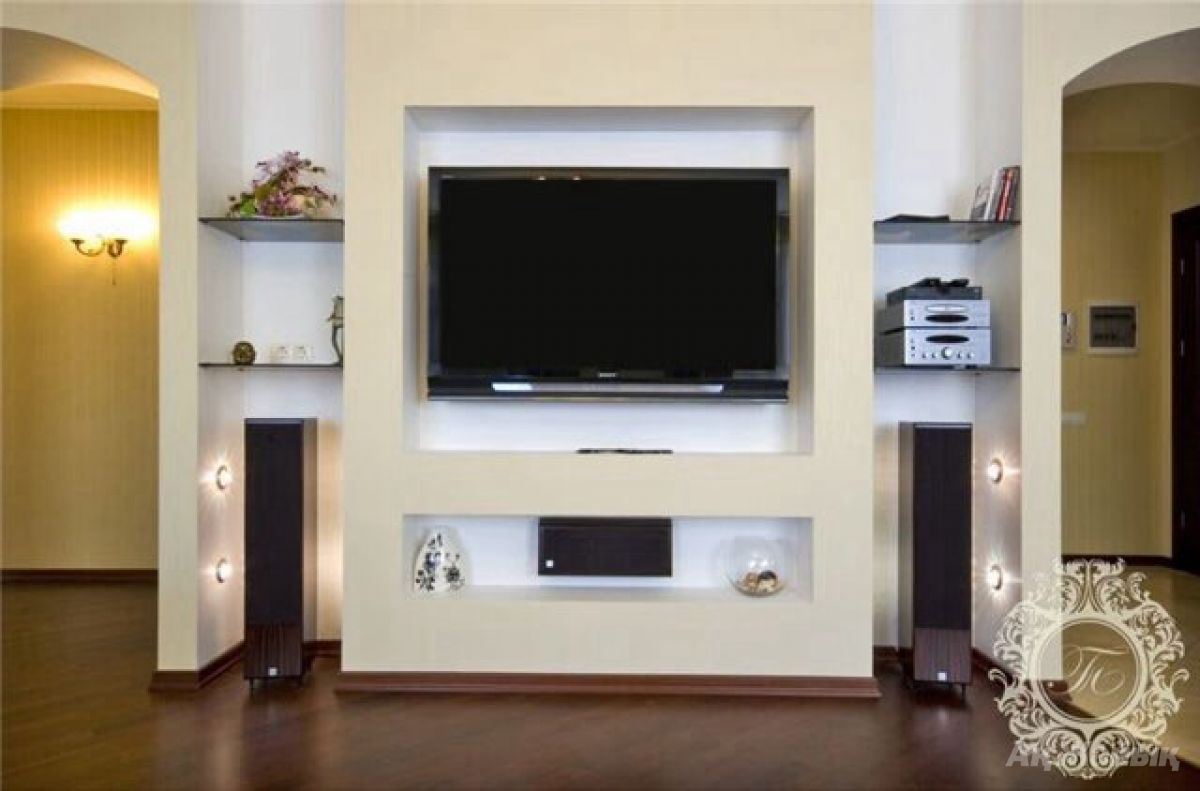
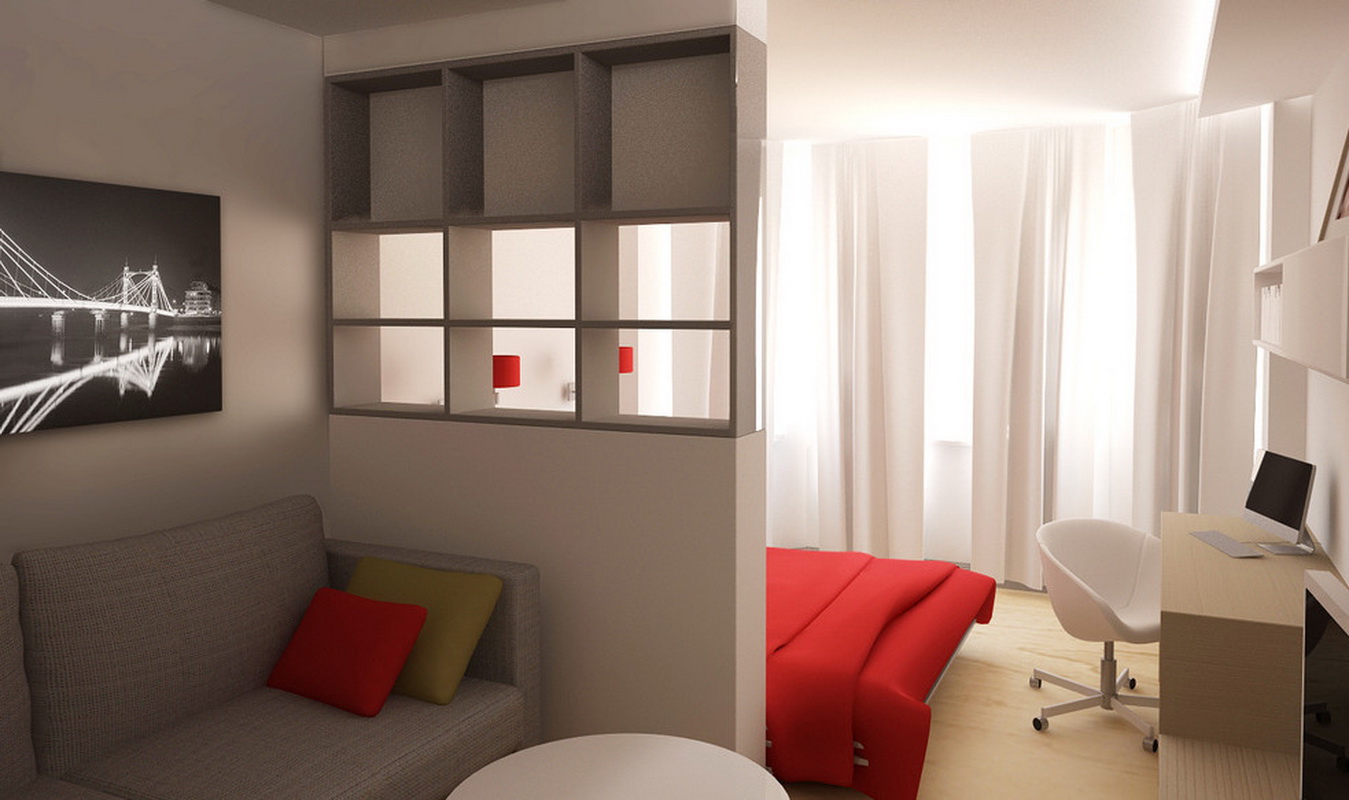
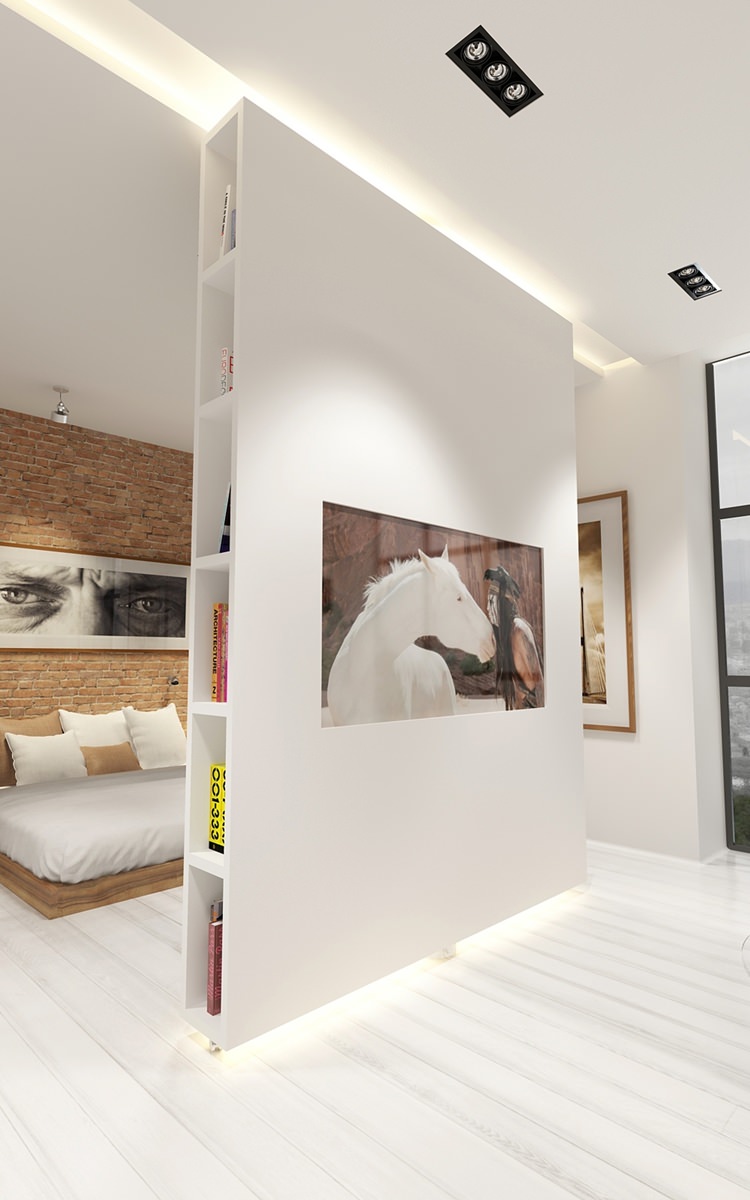
For the zoning of space it is not necessary to erect whole walls, you can restrict a small partition, which will look spectacular with lighting from above and decorative drawers. The implementation of the partition is not a continuous cloth allows you to give the design lightness. A set of shelves will help add comfort and hide small things in a secluded place. This option is best suited for the living room, but you can use it in the hall.
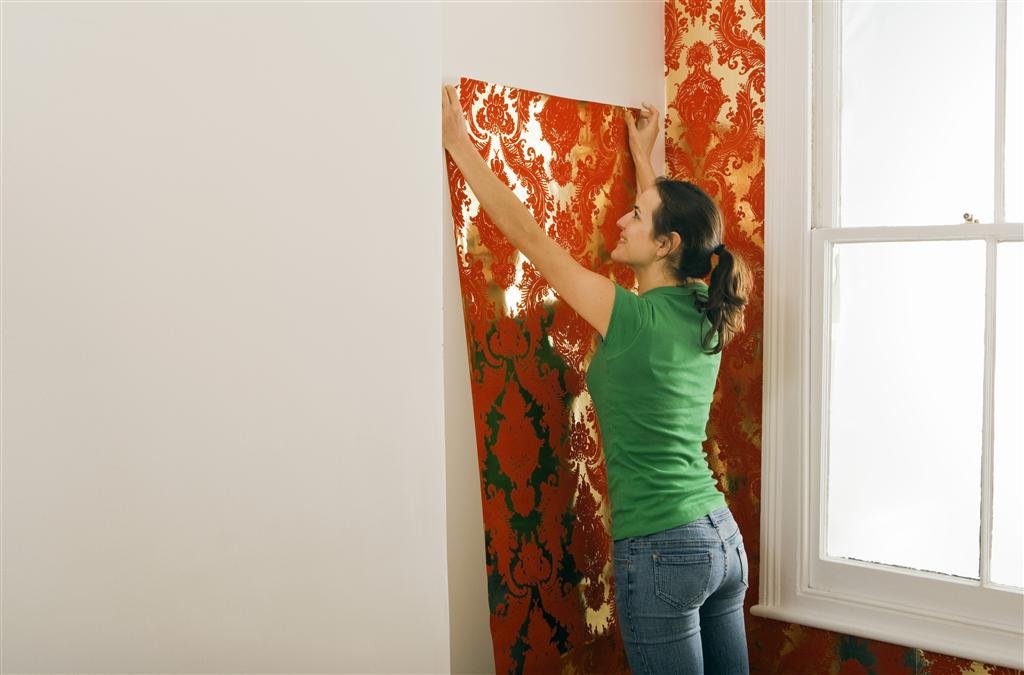
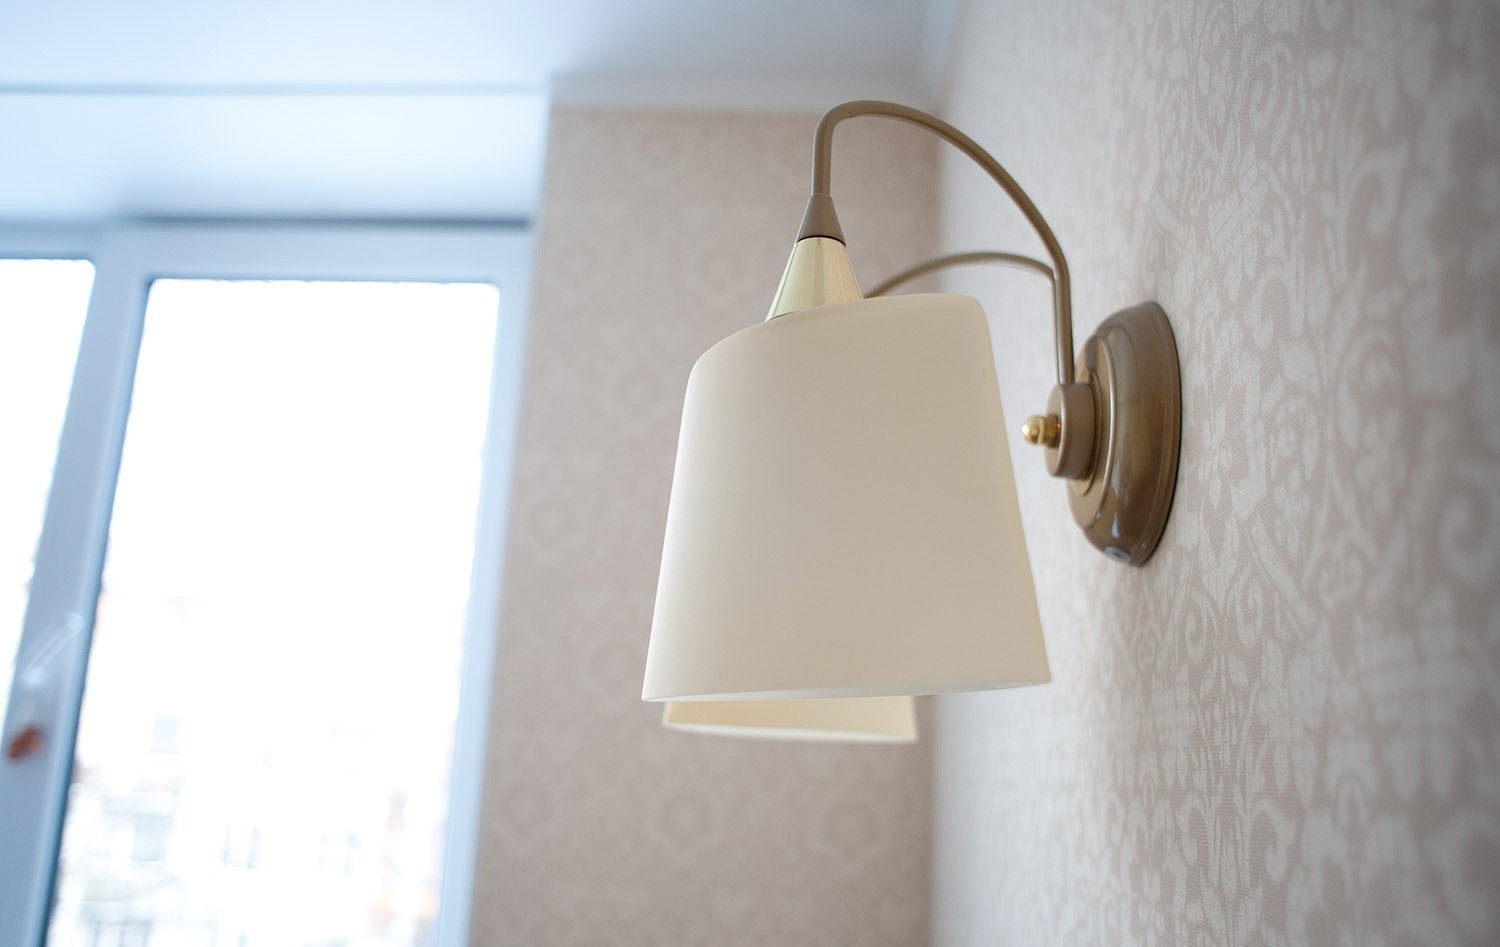
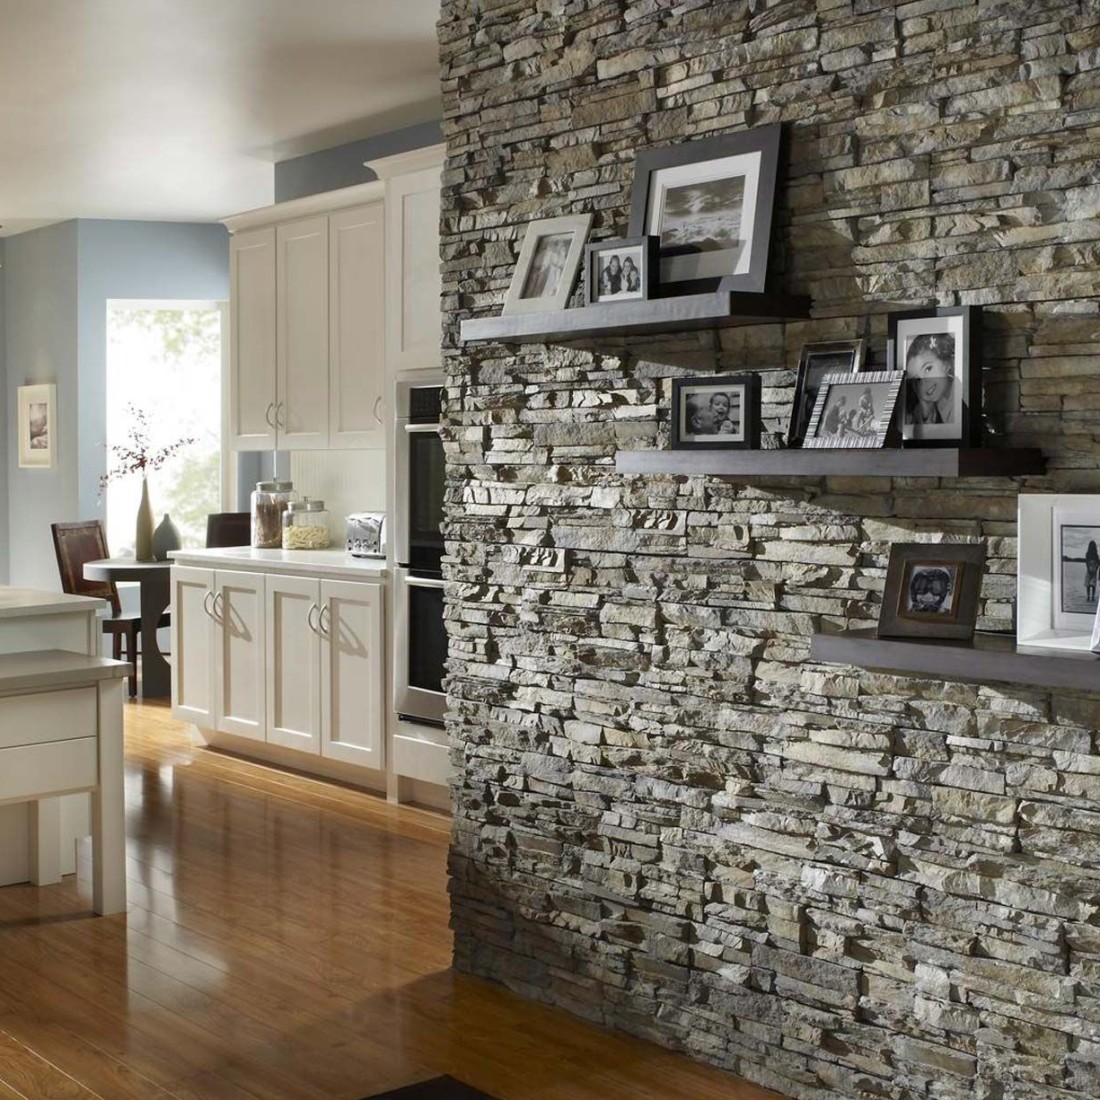
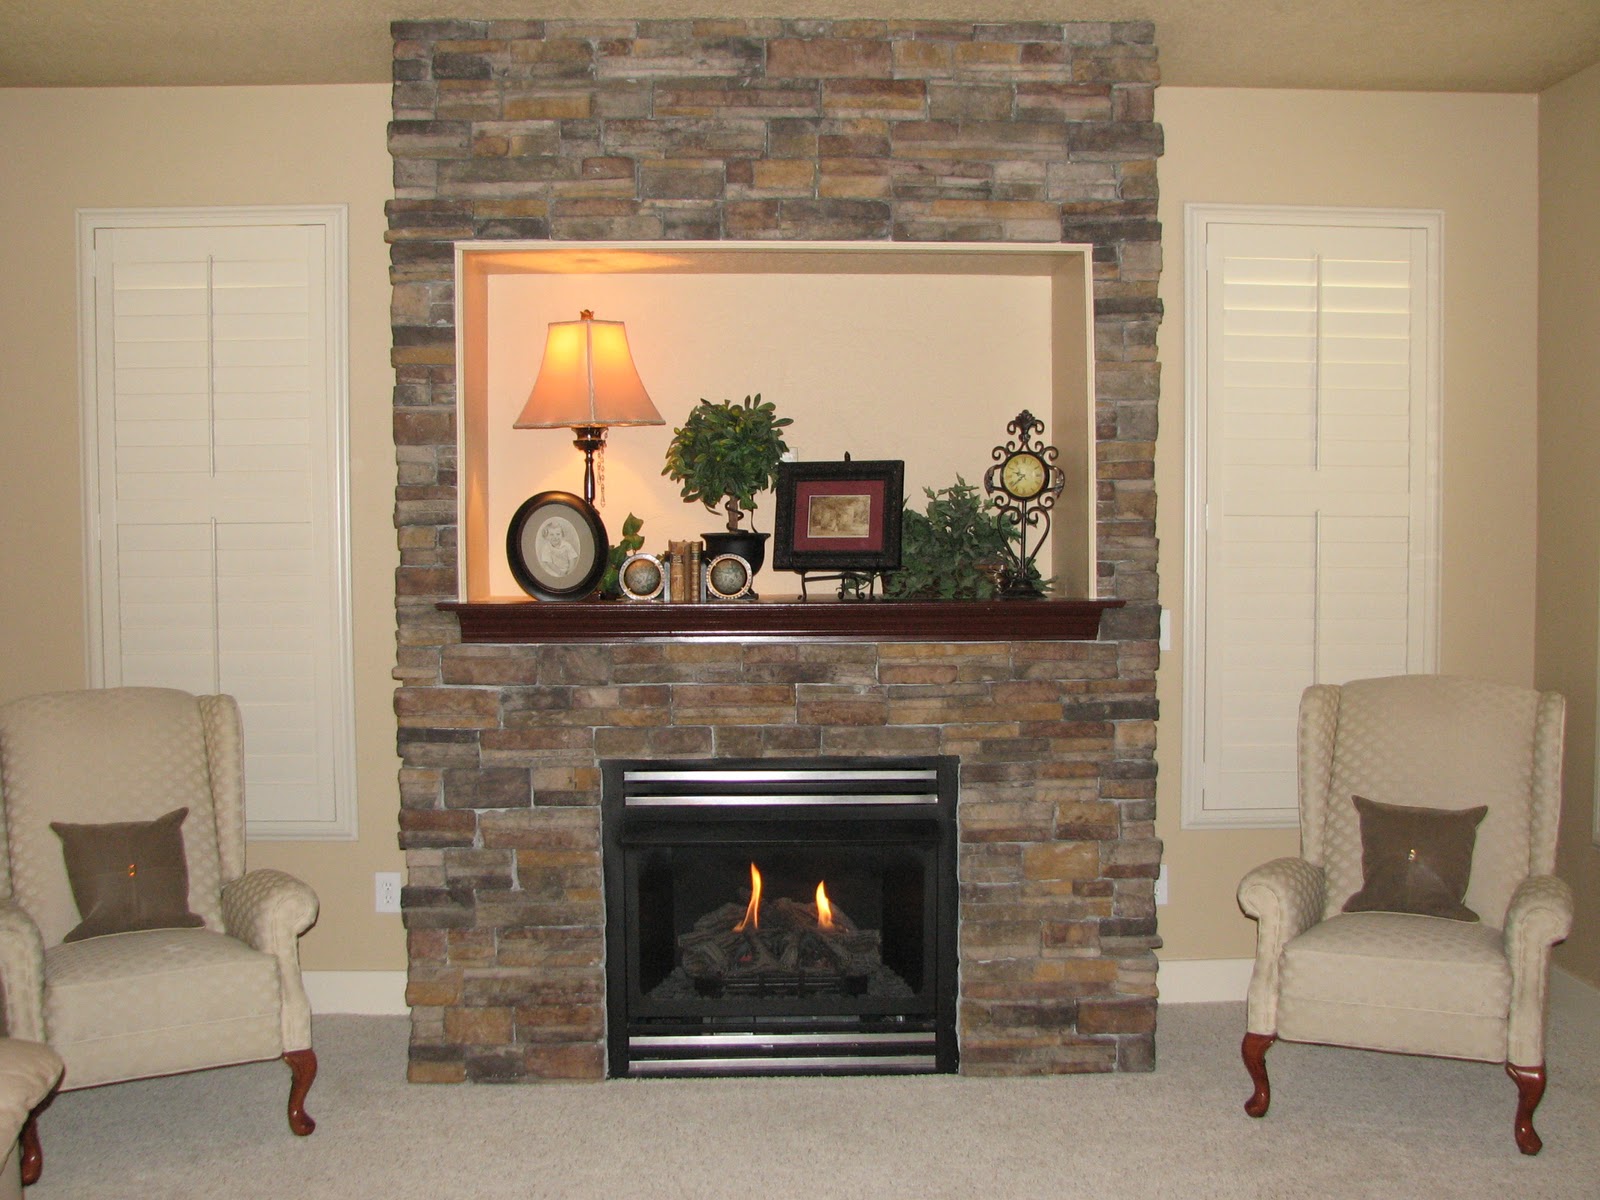
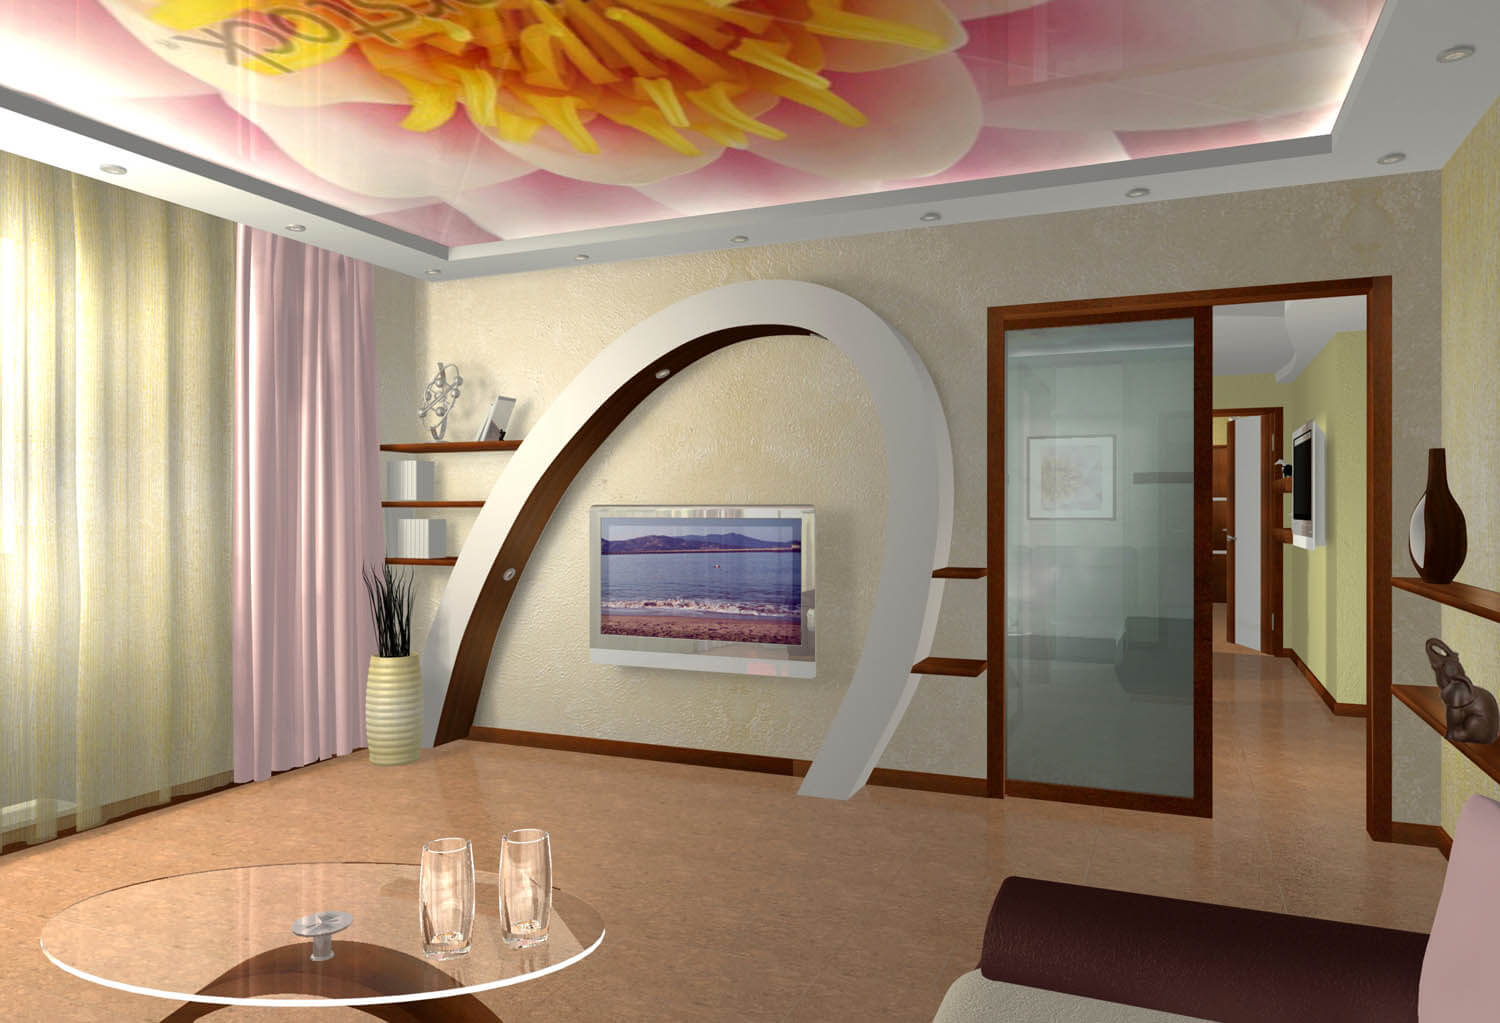
A distinctive characteristic of drywall is the ability to apply to it any methods of decorating. To create a cozy atmosphere in living rooms, you can glue the wallpaper on the finished wall or paint it in any color and even impose a natural or artificial stone. The latter option is particularly well suited for the fireplace, which can also be made from GCR. In the kitchen or bathroom, the option of painting is also suitable, but you can also lay tiles to precisely protect the walls from excess moisture and create a full-fledged feeling of a real brick wall.
Tips
Planning the construction of a plasterboard wall, it is necessary to prepare the premise initially. It should not be anything superfluous, because it will not be easy to place a sheet of 2 or 3 meters in it. The room should be clean enough so that the plasterboard sheets do not get dirty, because then you will need to get rid of stains so that they do not show up on the surface of wallpaper or paint.
It is important to plan the premises correctly., take into account the heating system, and if necessary, bring the batteries into a new living space. It is necessary to take into account the light that will overlap the new design. If the windows are located only on one side, it is important not to completely block access to them.
If it is not a wall that forms, but a partition, it is better to do it with shelves, and not with a one-piece construction, which will allow space to be divided, storage space to be made, and access to the second part of the room to provide light.

Examples in the interior
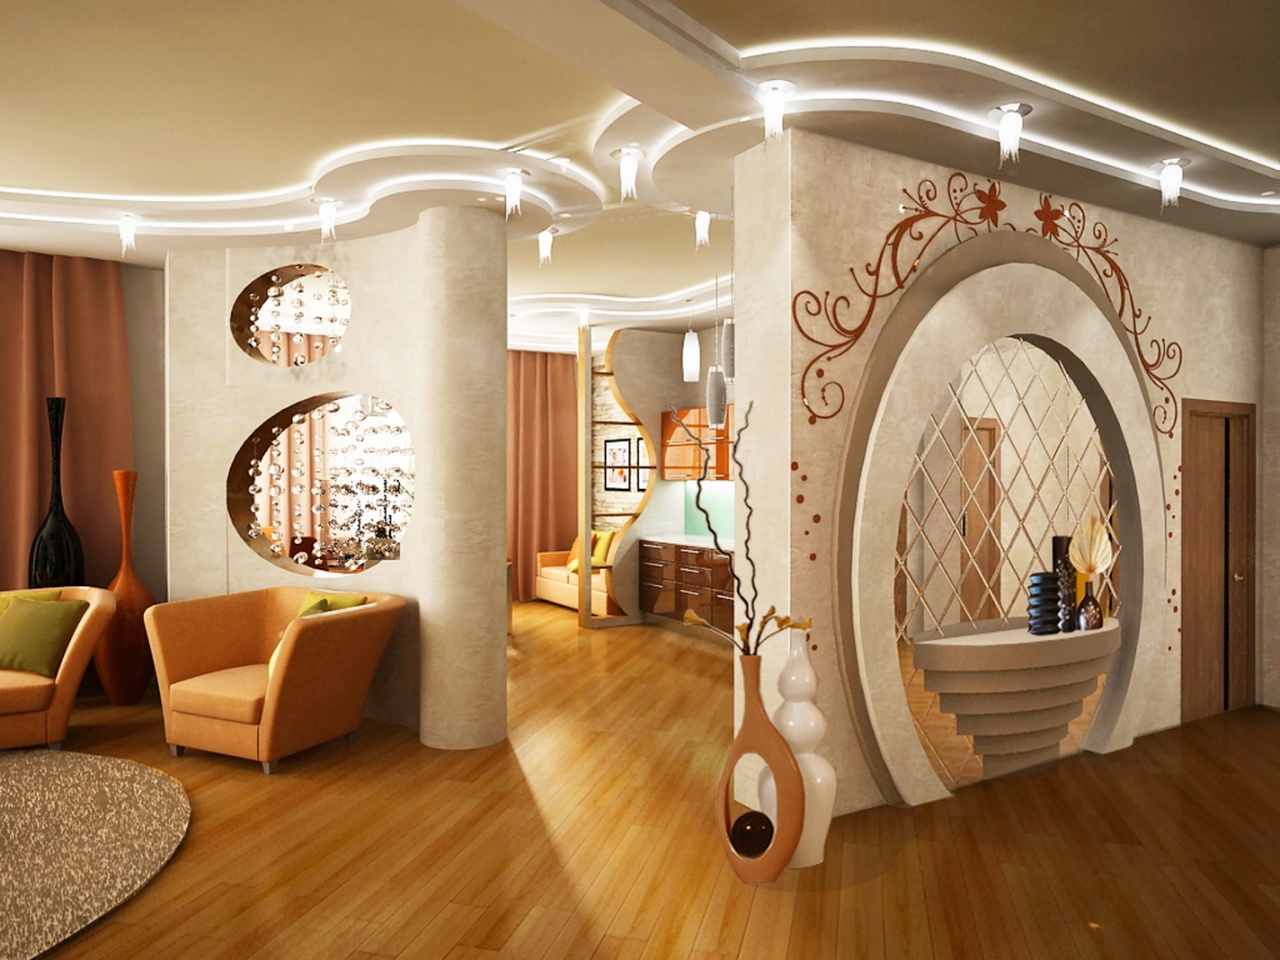
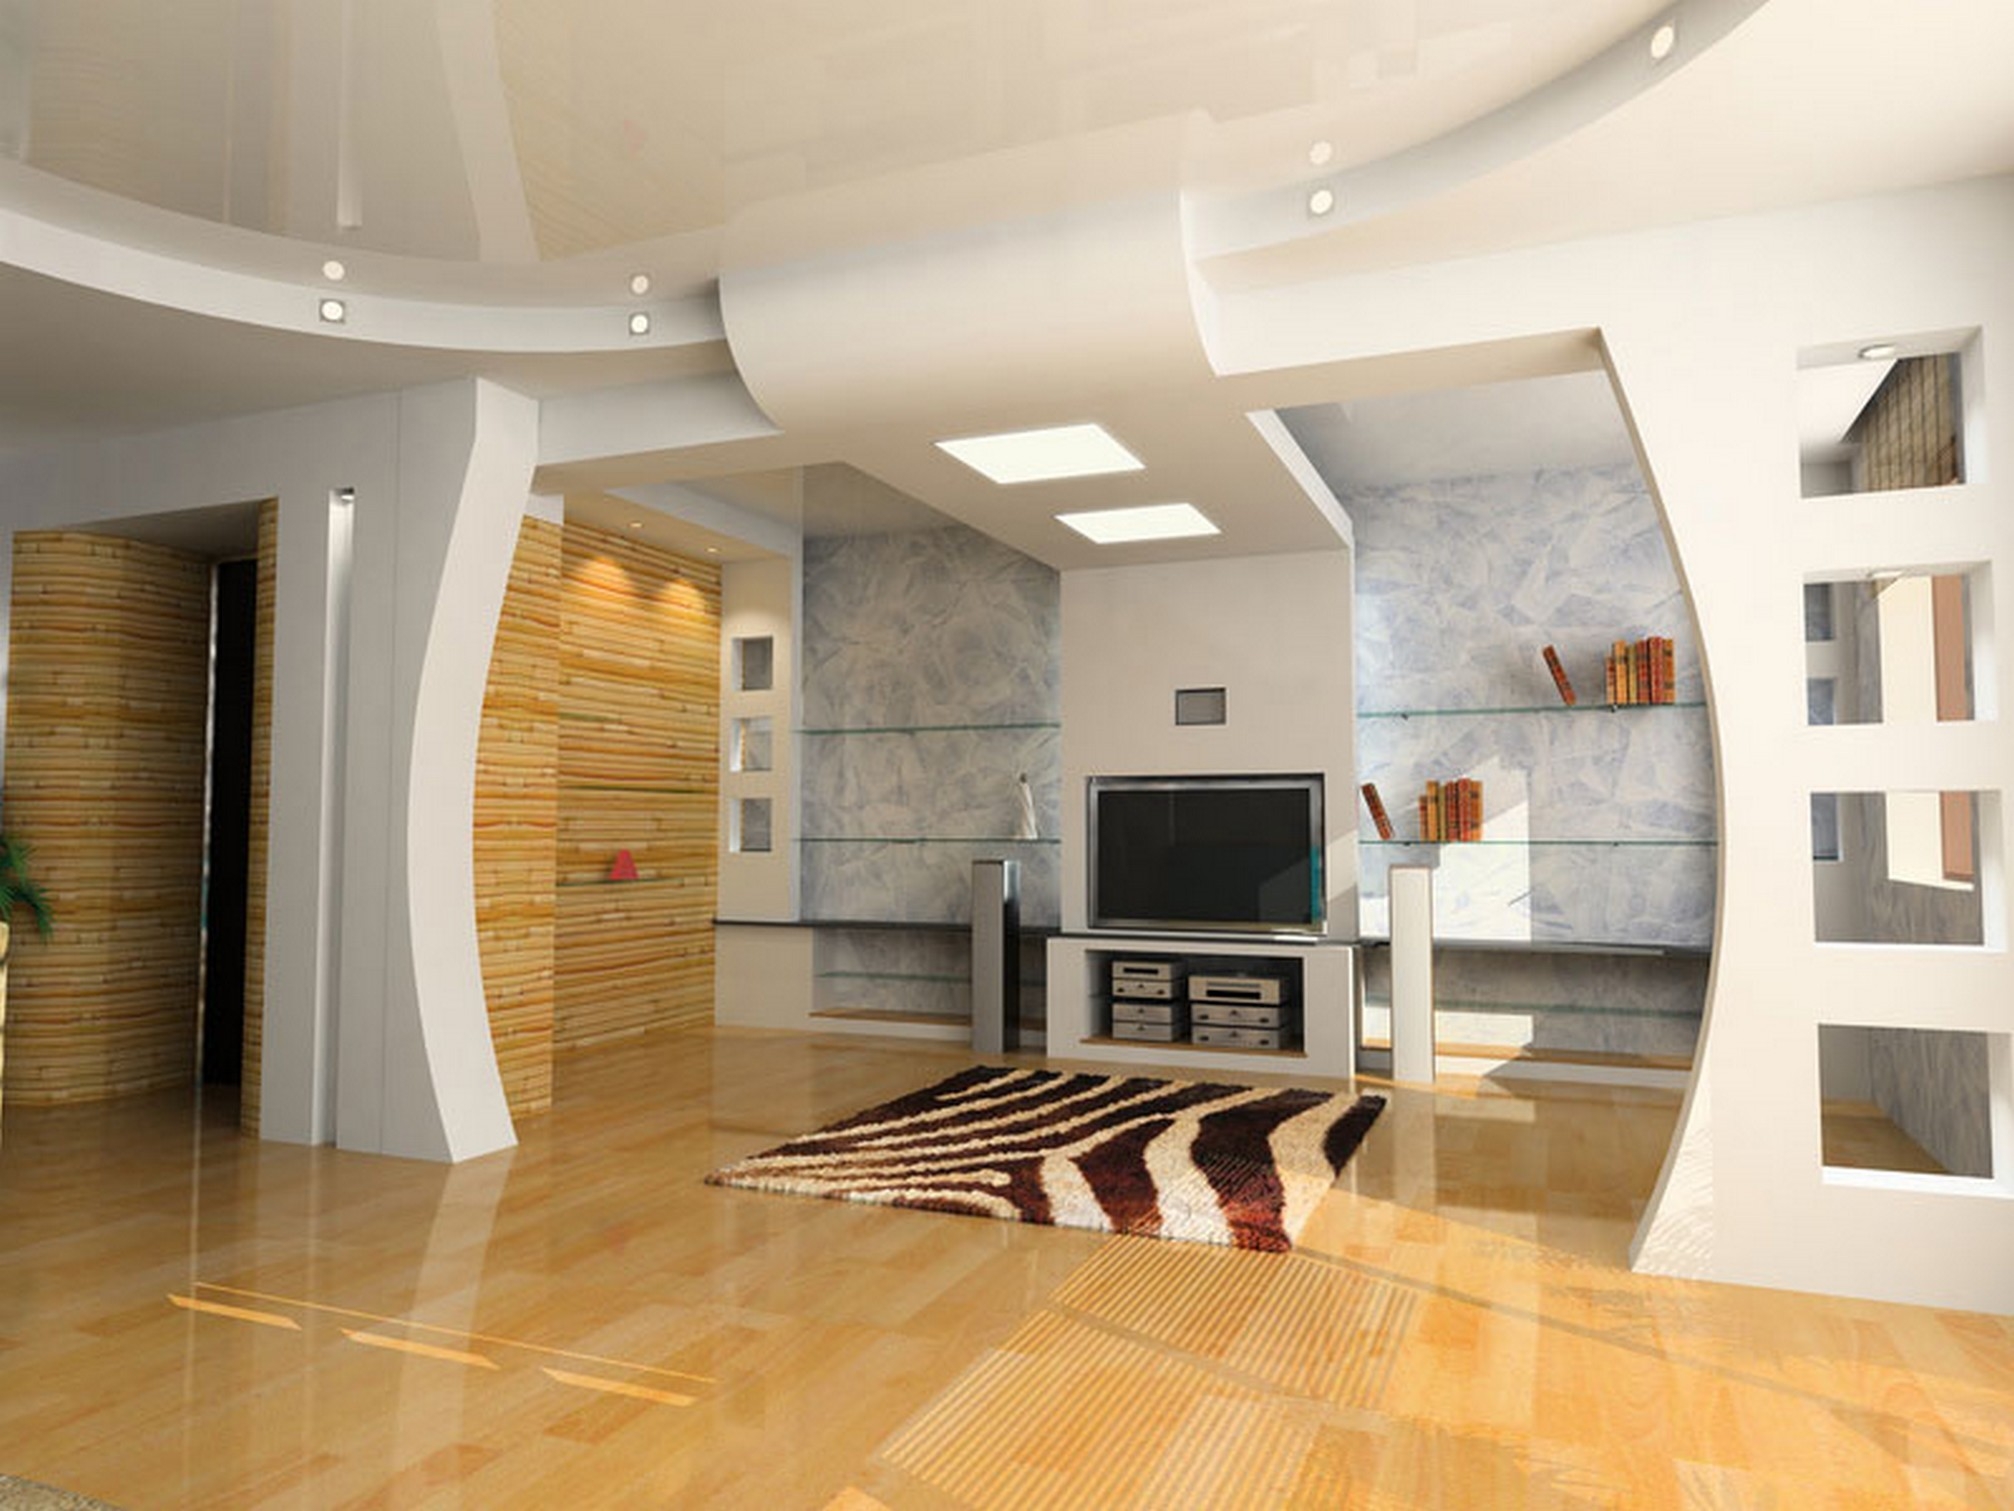
Gypsum wall can be a real highlight in the interior, most importantly, the right approach to the process of its design, choose the right materials that will help decorate the room and emphasize its features.
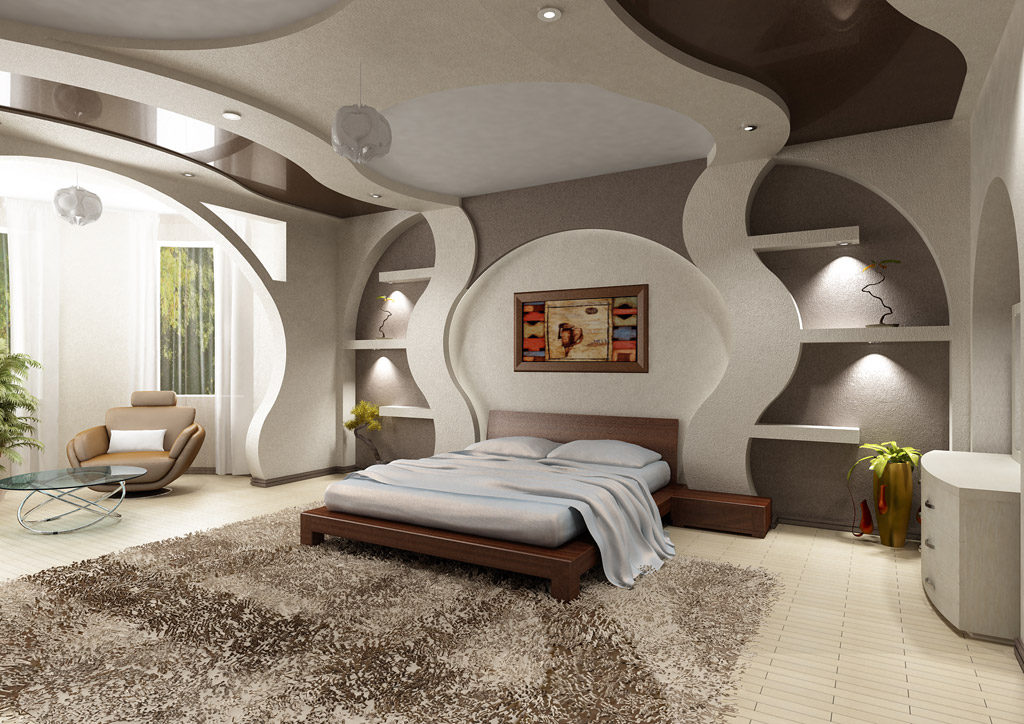
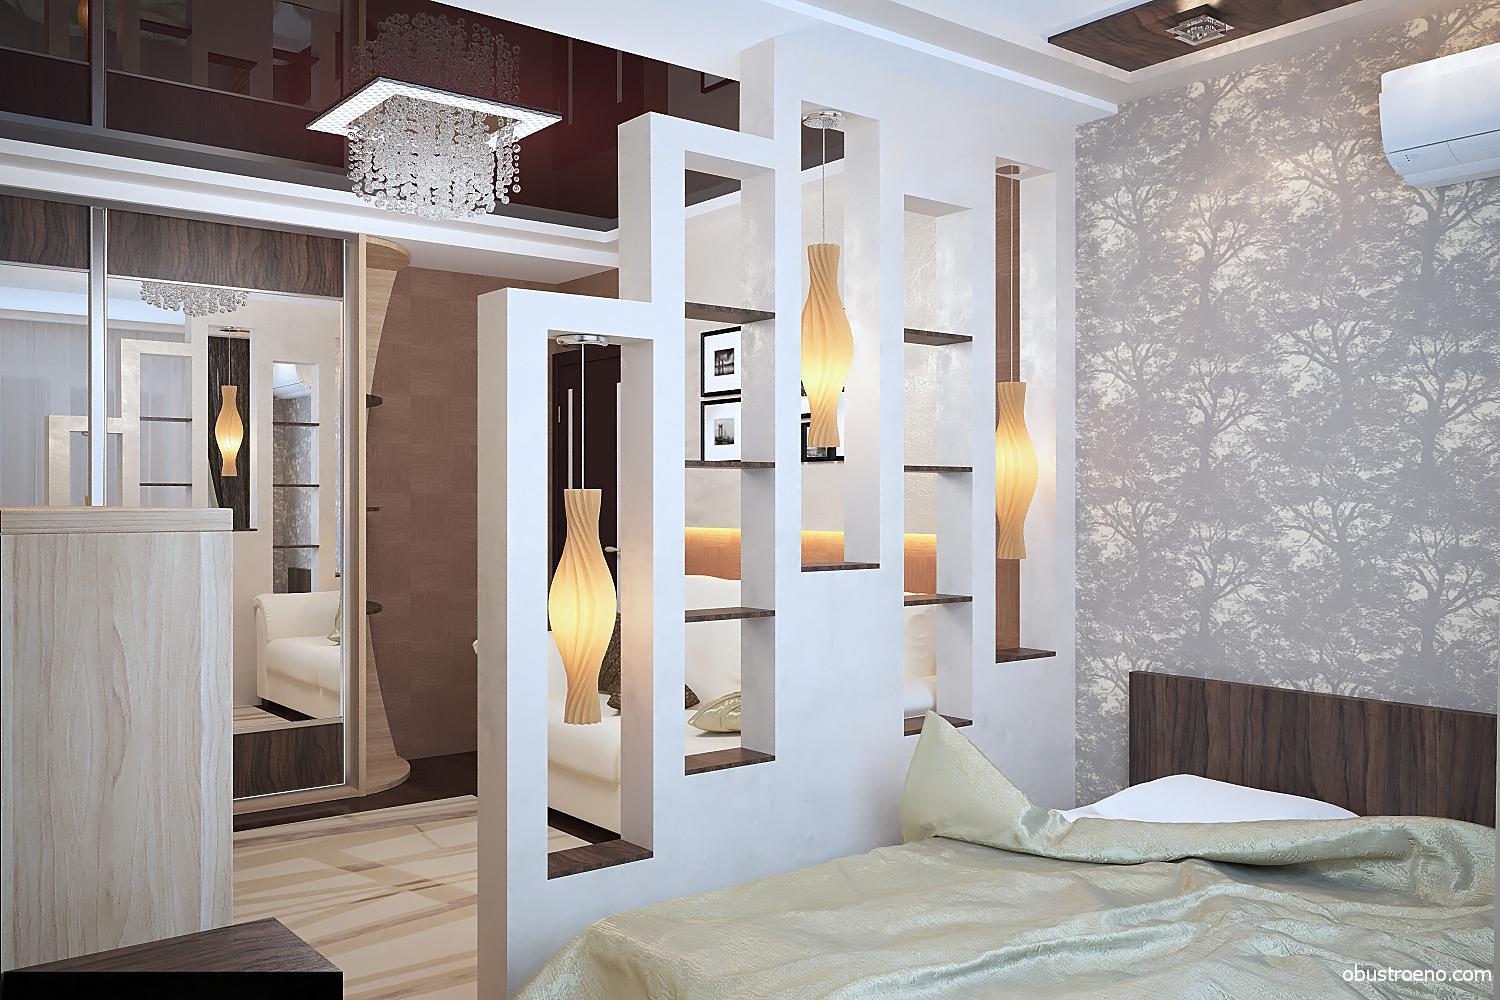
In the bedroom with the help of drywall, you can create an original and unique design. The wall at the bed is made with the help of flowery lines, soft forms give comfort and contribute to proper rest. The presence of shelves allows you to store small things there and use them as a place for lamps.
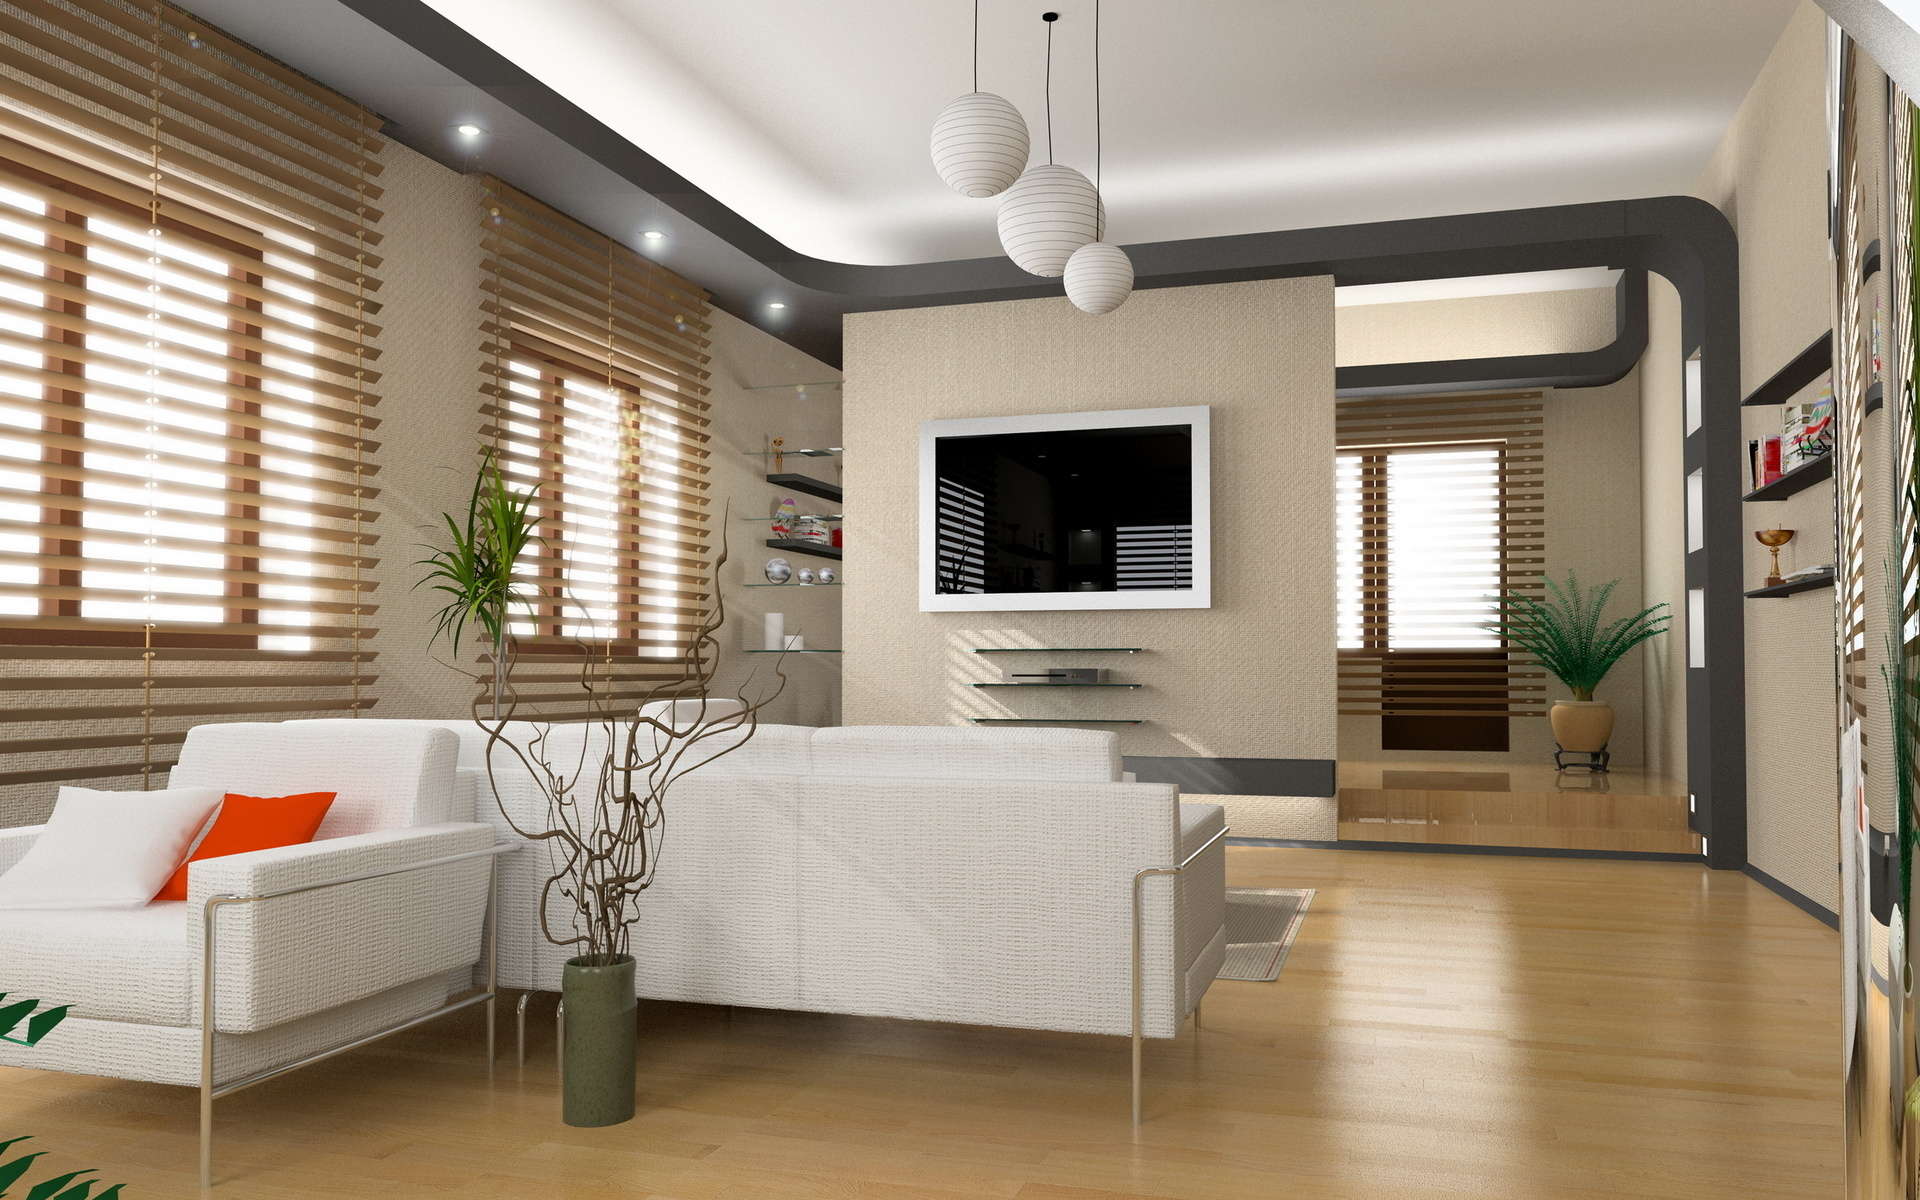
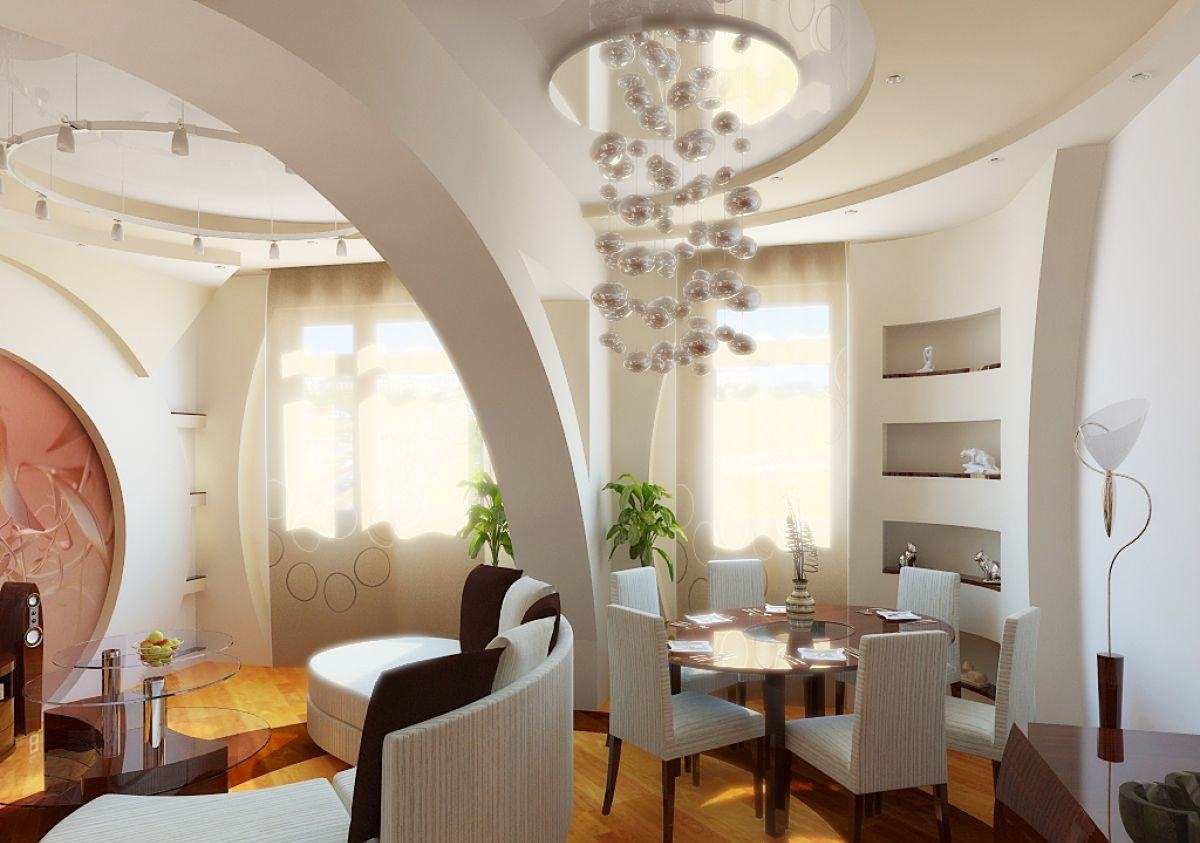
For the living room, especially when it is bordered by the kitchen and is not divided by the walls, you can use the original semicircular structure, which rises from the wall to the ceiling. The space is divided into two zones. In this case, the use of white color is best helps to increase the space of both zones.
Plasterboard wall can be designed immediately with a doorway to divide the space between the two rooms. Doors can be single or double, with glass or deaf, it depends on the design of the room.
To learn how to make a plasterboard partition, see the following video.


