Ceiling lamps for do-it-yourselfers
We create our own home. And how comfortable it will be depends on us. Even if you are temporary owners of the home, you can make it cozy without global costs. The main thing in this business - to invest the soul. But having improved the walls and windows of the apartment, one cannot leave a single bulb hanging from the ceiling bare. Let's think about how to make lamps with your own hands.

The advantages of homemade ceiling
The need for hand-made luminaires is dictated by different circumstances: someone could not pick up a chandelier to the updated interior, someone has a difficult money situation, and someone feels the need to decorate his house with his own hands.
The advantages of homemade ceiling:
- store independence;
- low budget;
- self-realization;
- uniqueness (exclusivity);
- originality;
- availability of material for work.


Materials
To help determine the choice of material for the lamp you should choose the concept. What is your room, what kind of lamps fit here, where will they be (on the wall, ceiling, floor)? In this case, absolutely different things can come out as material for the ceiling: threads and veneers, bottles and branches, paper and pelvis, cup and lace, wire and disposable spoons, cloth and beads. From the frame and scrap materials you can make real beauty.


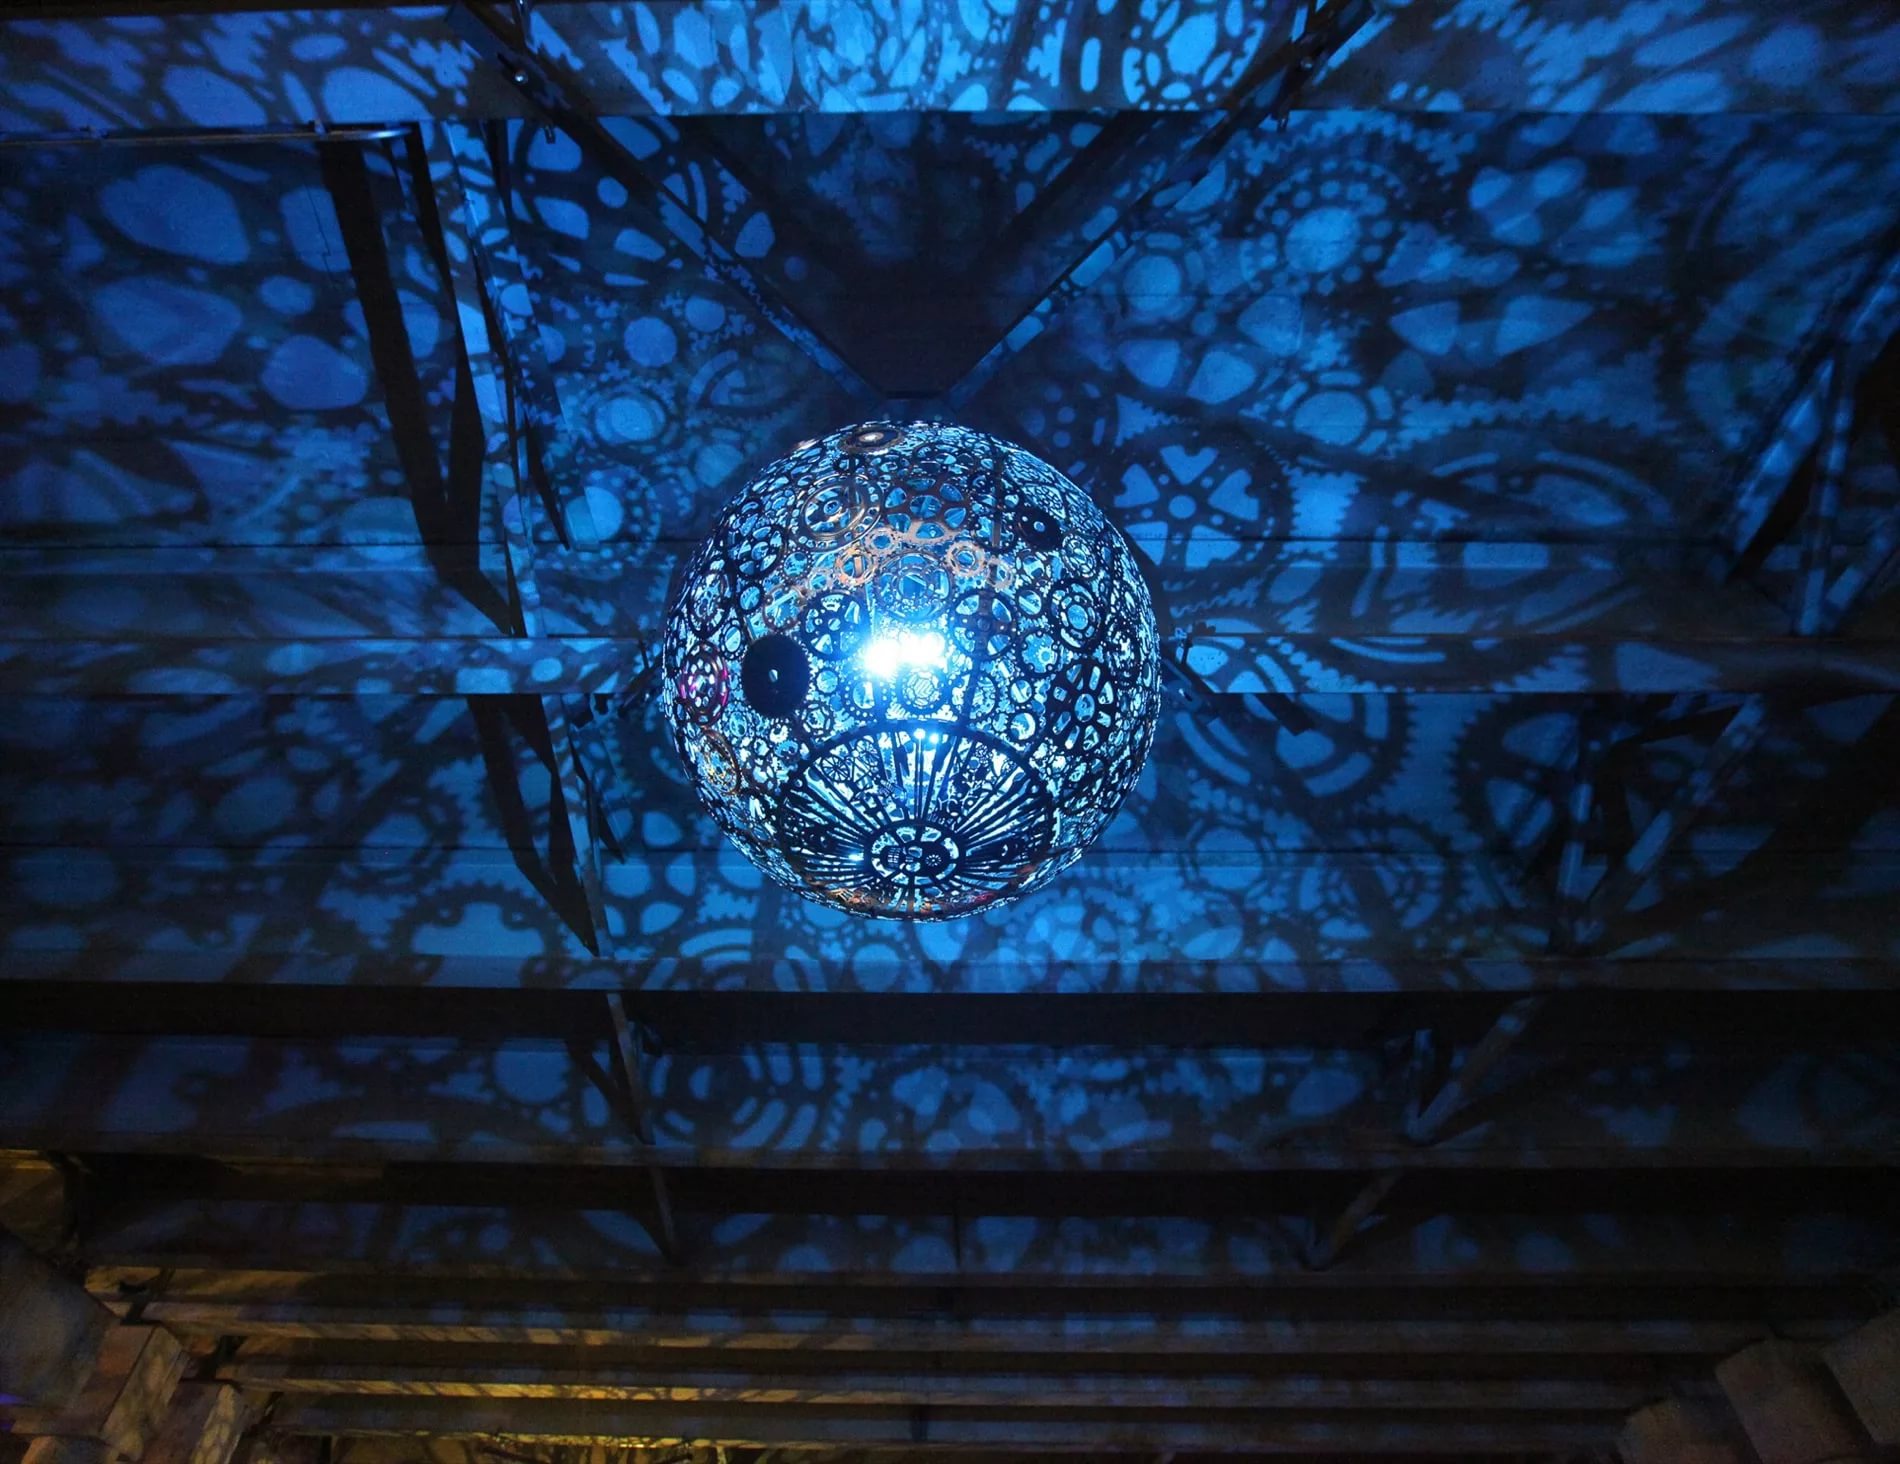
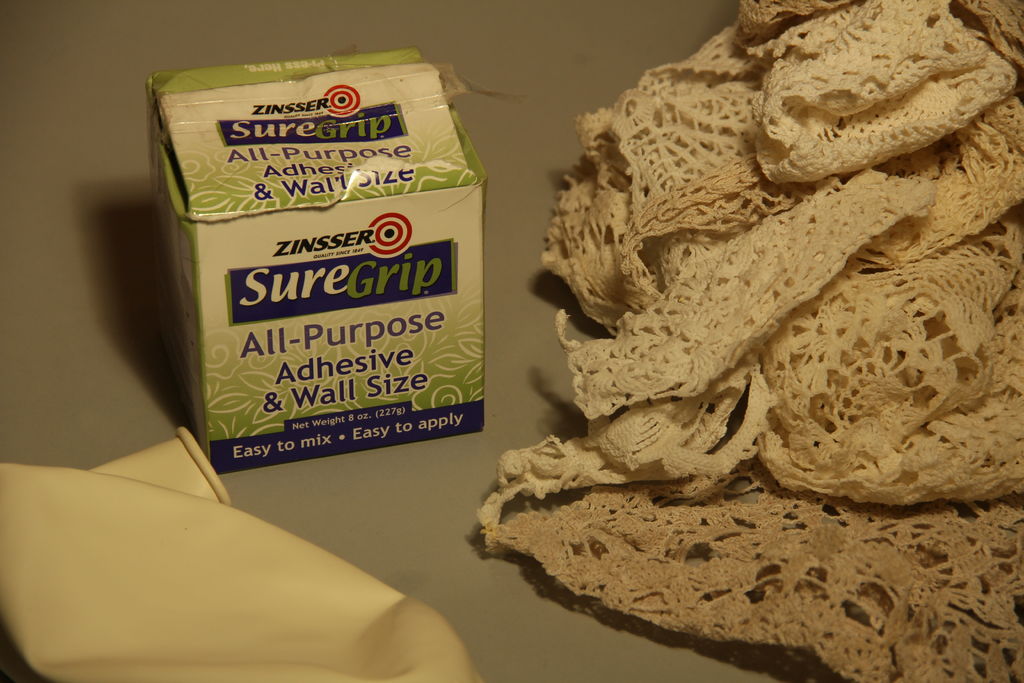
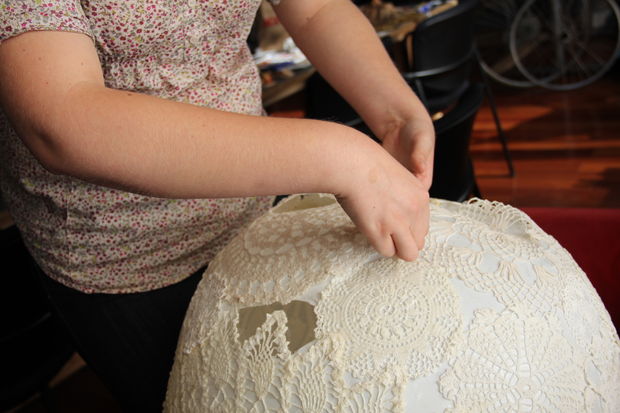
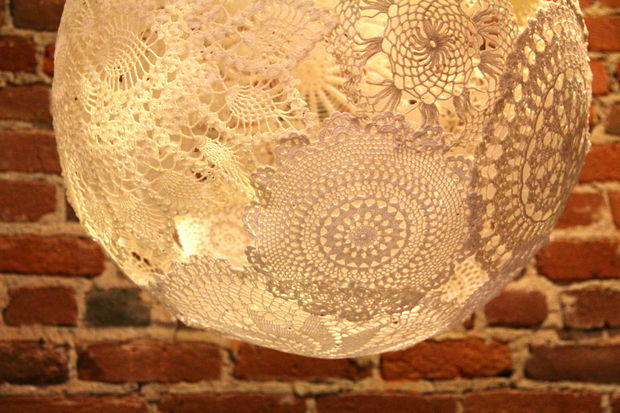
Lace Ceiling
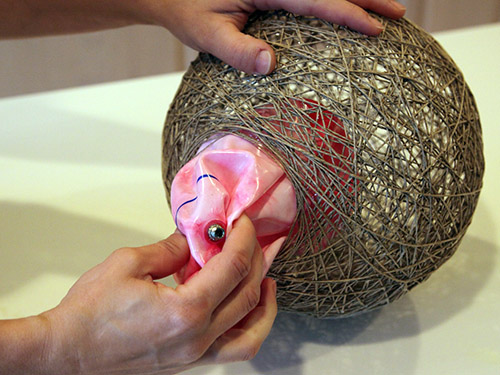
For its manufacture, you will need about 10 knitted identical or different napkins of one or several colors (optional), a balloon, wallpaper glue and a container for it, a brush, threads, a cartridge for a light bulb, a light bulb, oilcloth or newspaper for bedding. The exact number of napkins depends on their size and the size of the ball.
The sequence of our actions:
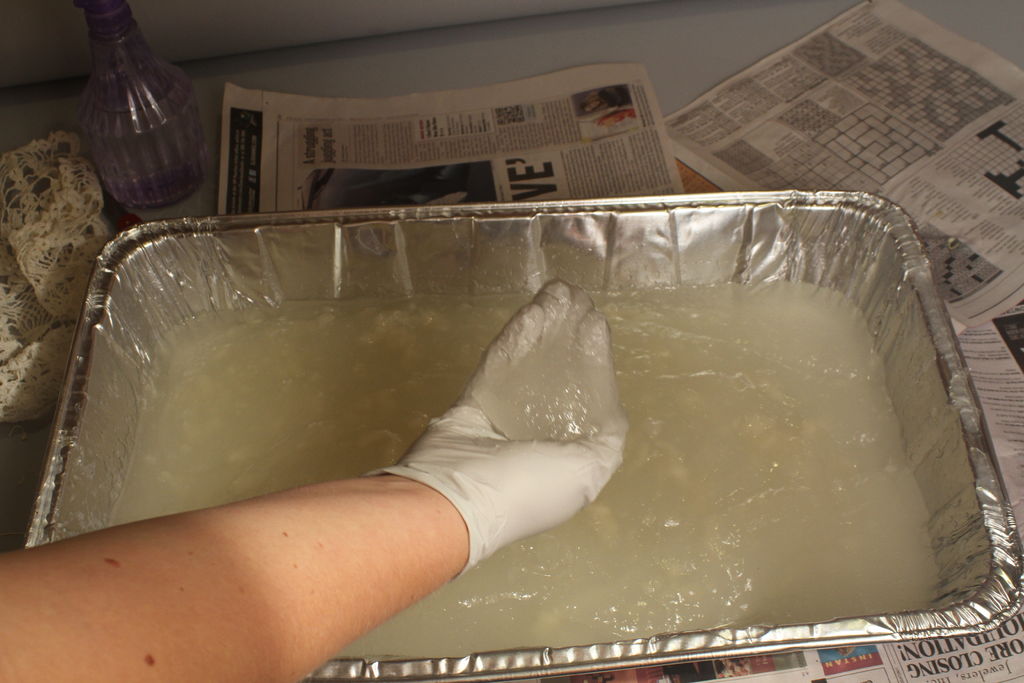
- Dissolve wallpaper glue (one pack should be enough).
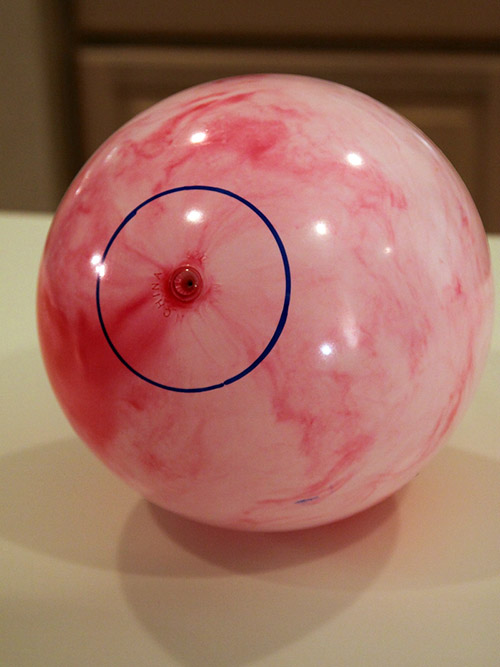
- Inflate the ball, tie it up.
- Tie it in such a way that it is approximately in front of your eyes or below. For example, on a clothesline or stepladder.
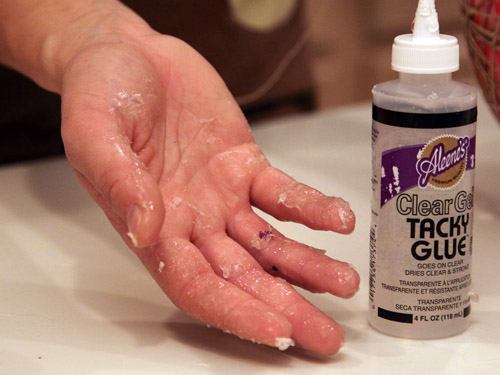
- Spread one cloth on the litter and spread it abundantly with glue.
- Gently stick the napkin on the ball.
- Smear the next napkin and glue it so that one napkin a little bit on the other.

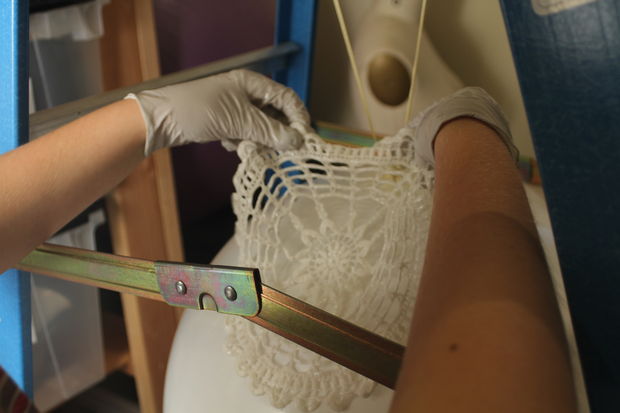
- Glue all the napkins, slightly connecting with each other.
- Leave a small hole in the bottom without a napkin so that you can later install a cartridge and a light bulb.
- Your ball should dry for about a day.
- After a day, making sure that the glue has dried completely, pierce the ball and remove it from the ceiling.
- If you want to give the lamp a different color, before you pierce the ball, paint napkins with acrylic paints and again leave to dry.
- Through the center of the napkin at the top of the plafond, pass the electric wire to which the cartridge will later be connected. Attention! Do not forget to disconnect the power from the wires!
- Install the cartridge.
- Screw the light bulb.
If you install such a ceiling on an already hanging cartridge, you can do the following:
- at the top of the ceiling, leave a circle with a diameter of about 10 cm;
- on a cartridge, hang a circle of cardboard in a tone to napkins with a diameter of about 15 cm;
- Carefully pass the cardboard inside the plafond and fasten them together with a stapler or double-sided tape.
Plastic bottle cover
Most likely, no one will call, how many options for ceiling lamps from plastic bottles exist. But there are two principles of use: the bottle is decorated with other materials or elements for decoration are cut out of the bottle.
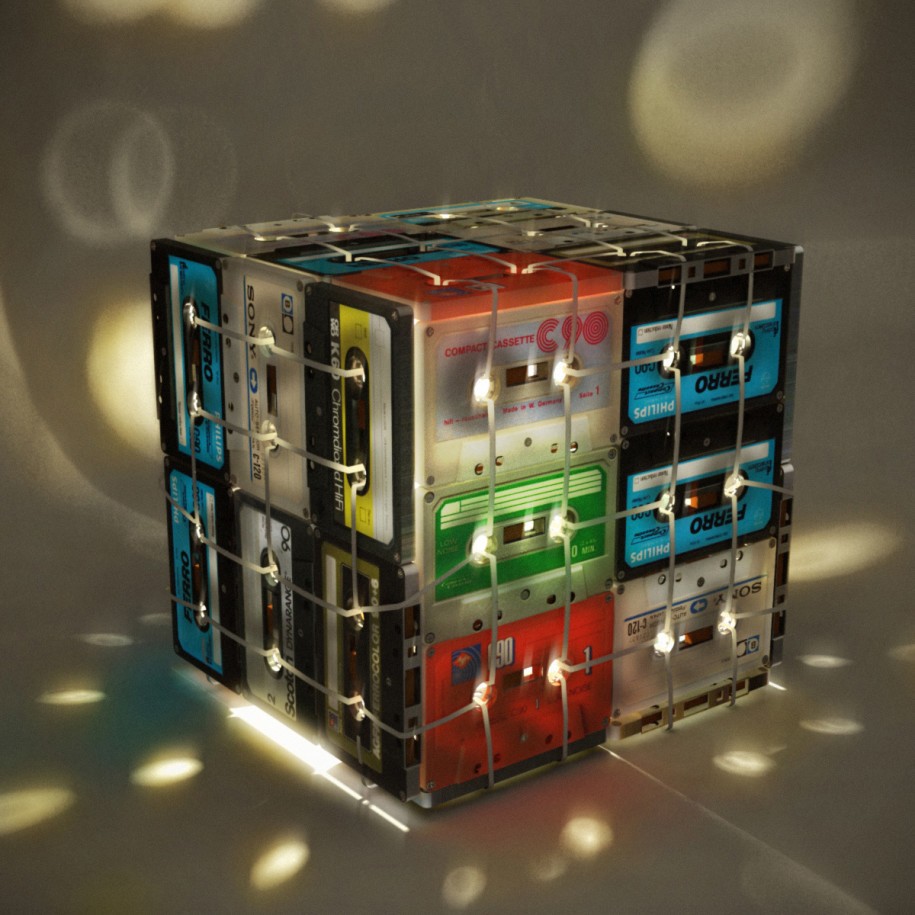
To implement the first principle, we need a three- or five-liter bottle. Her neck will be put on the cartridge, and the bottom must be cut off. If a bottle of colored plastic, the simplest chandelier for a simple country house is ready. But plastic can be painted with drawings, glued with liquid nails, small elements such as buttons, pieces of a mirror, and seashells. Or cover with acrylic paint of one color, and on top apply an uneven layer of paint of a different color using a comb. In a more complex version, plastic disposable spoons without cuttings in the form of scales are glued over the entire bottle.
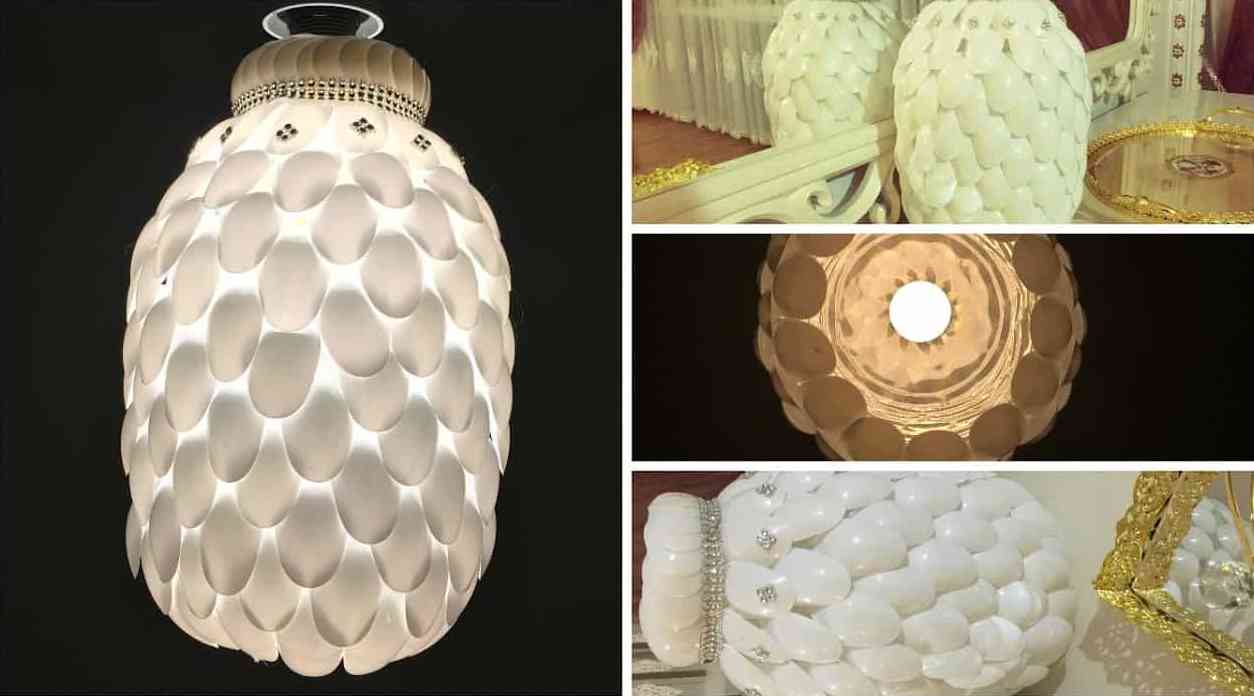
Such a ceiling will be harmonious for retro style.
To translate the idea of the second principle, you need bottles of any size, but in different colors. Cut out any figures from them: leaves, flowers, geometry. The main thing is that there are a lot of them. The ceiling will need a frame in the form of rings of wire.Connect different levels of the frame with a vertically arranged wire. With the help of a fishing line or thin wire, you will implant a huge number of carved figures on the frame. They can fit snugly to the frame or hang freely from it.


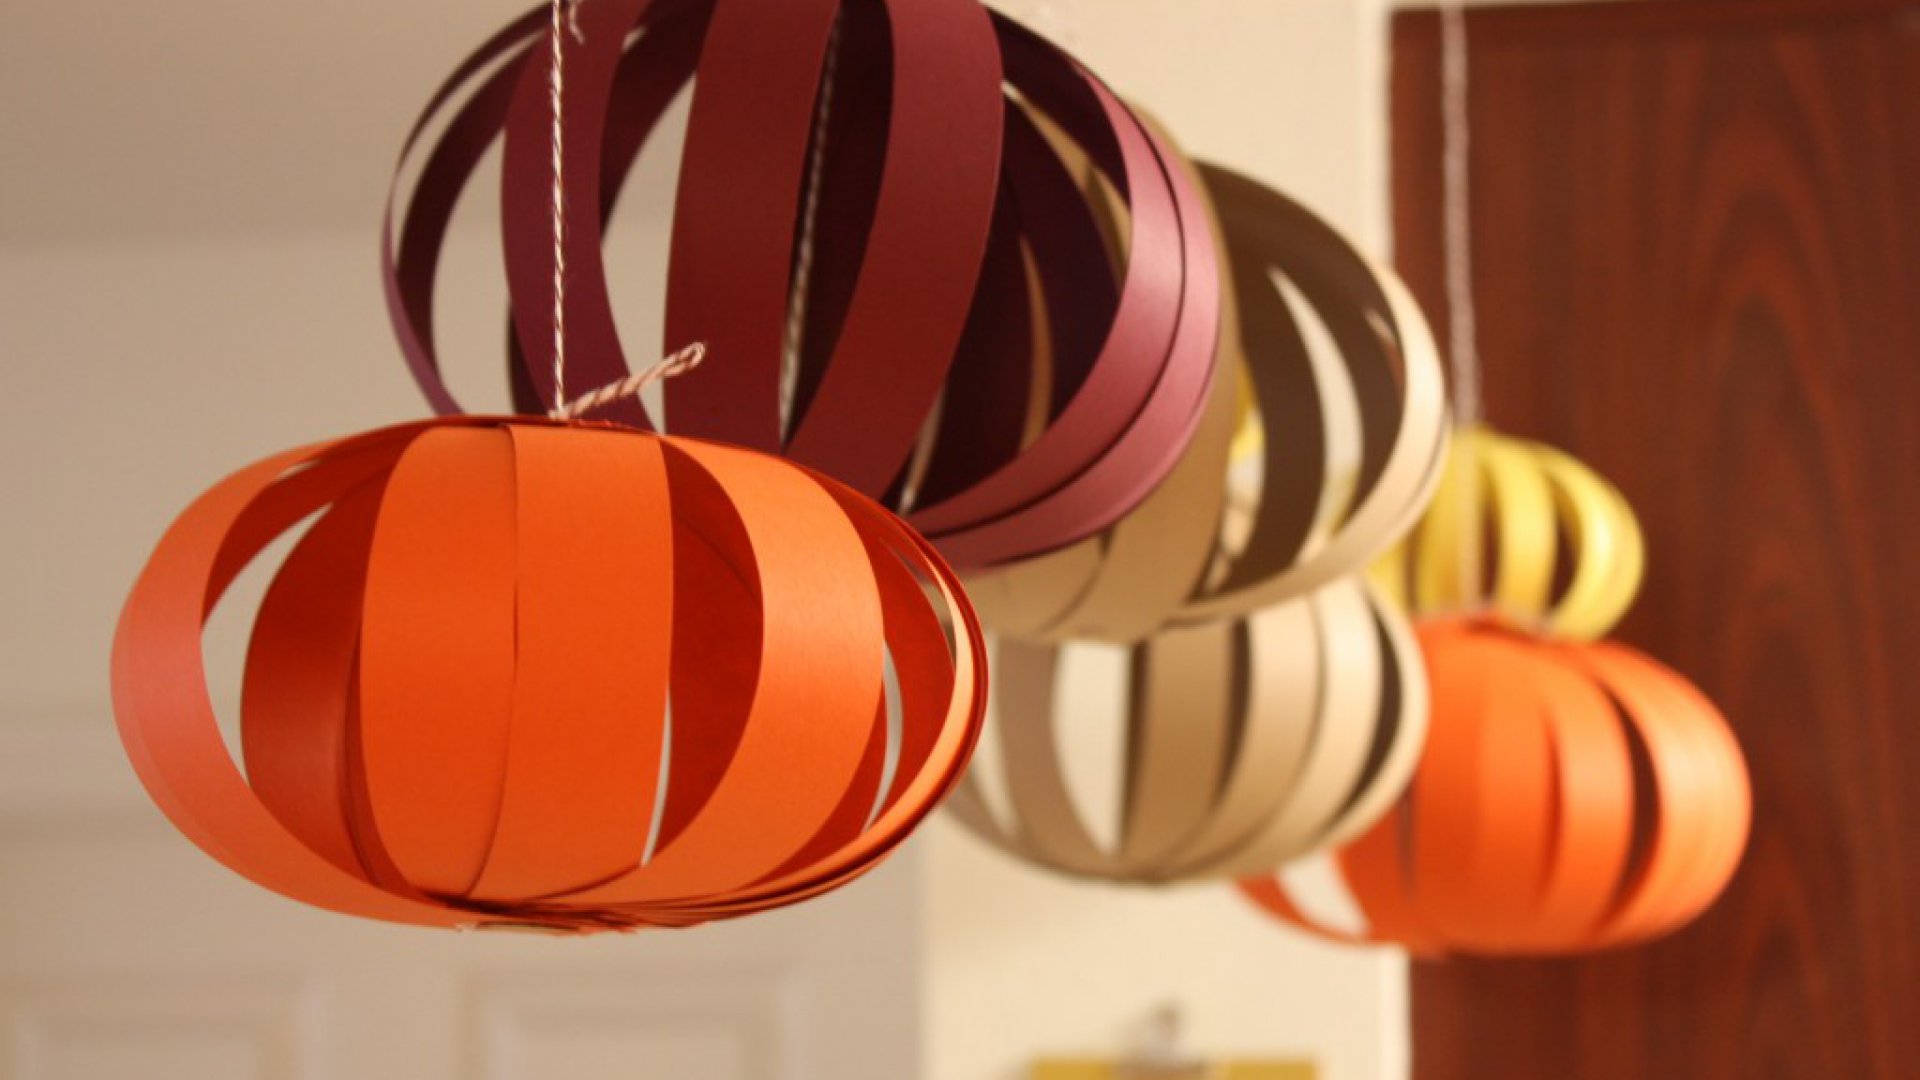
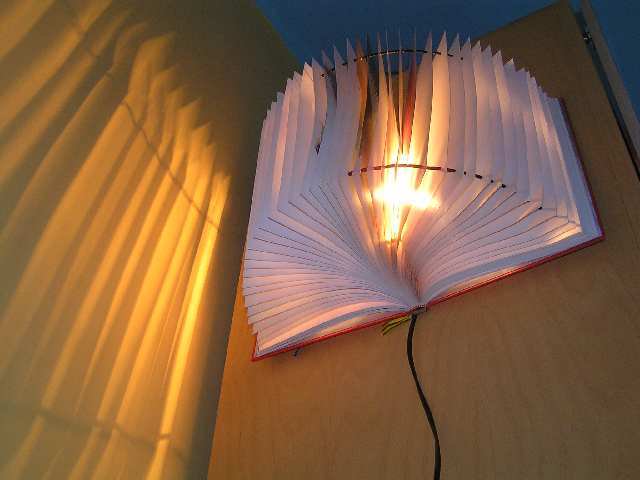
Paper canopy
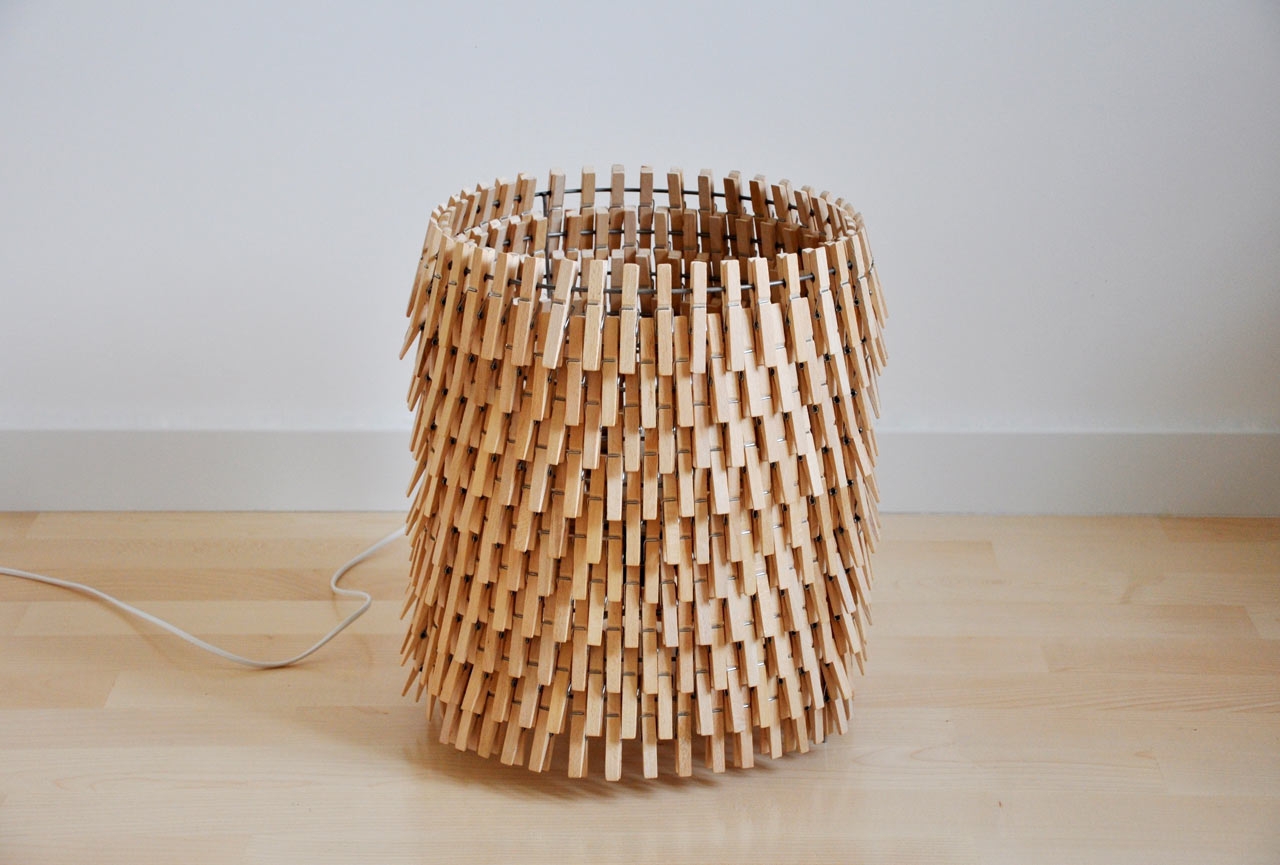
Cardboard, rice paper, self-adhesive, corrugated - which paper alone is not used for homemade ceiling lamps. For the Art Nouveau style, we suggest you to make a ceiling of colorful cardboard ribbons. Pick the colors. Prepare strips 2-4 cm wide, a stapler or a good glue. Arbitrarily, threading the strips into each other, hold them together in such a way as if you have a lump of different threads in your hands. It should not be tight, so as not to interfere with the light bulb.
Size - at your discretion. Slightly opening the strip, you can easily hang the ball on the cartridge.

Use an energy-saving lamp - it heats less and is safer.
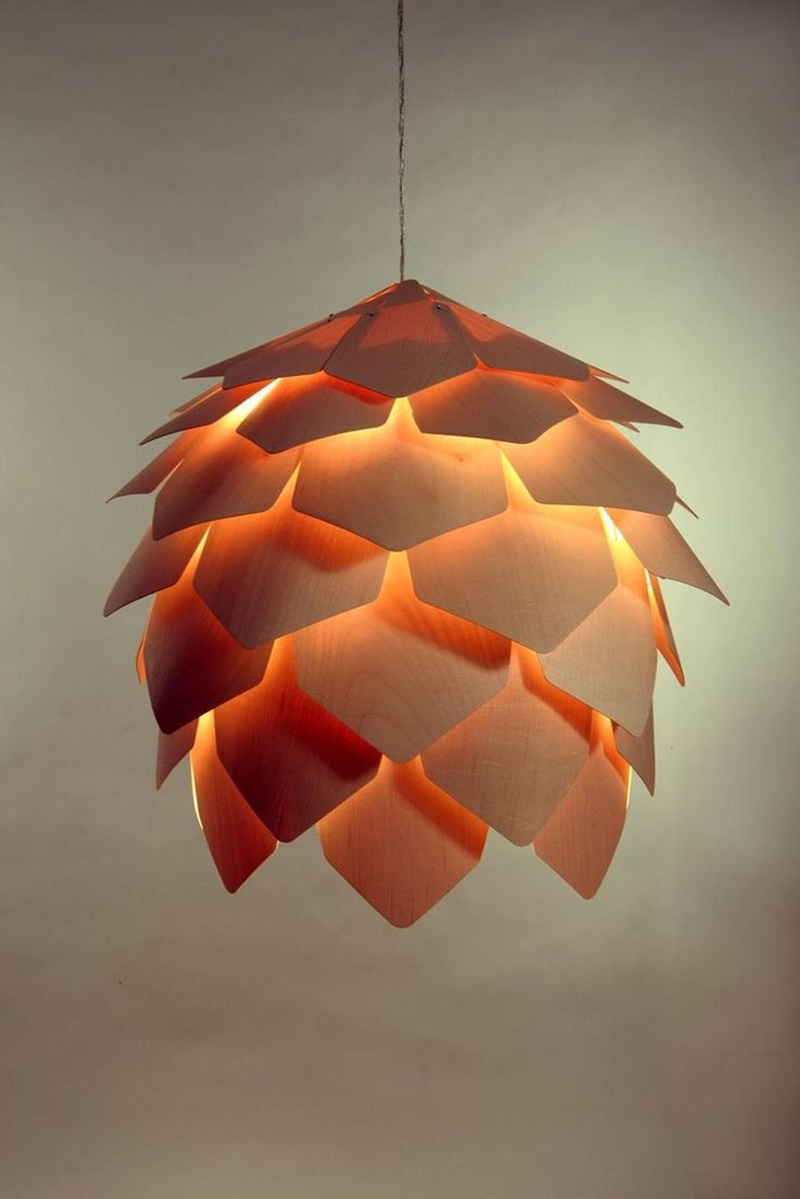
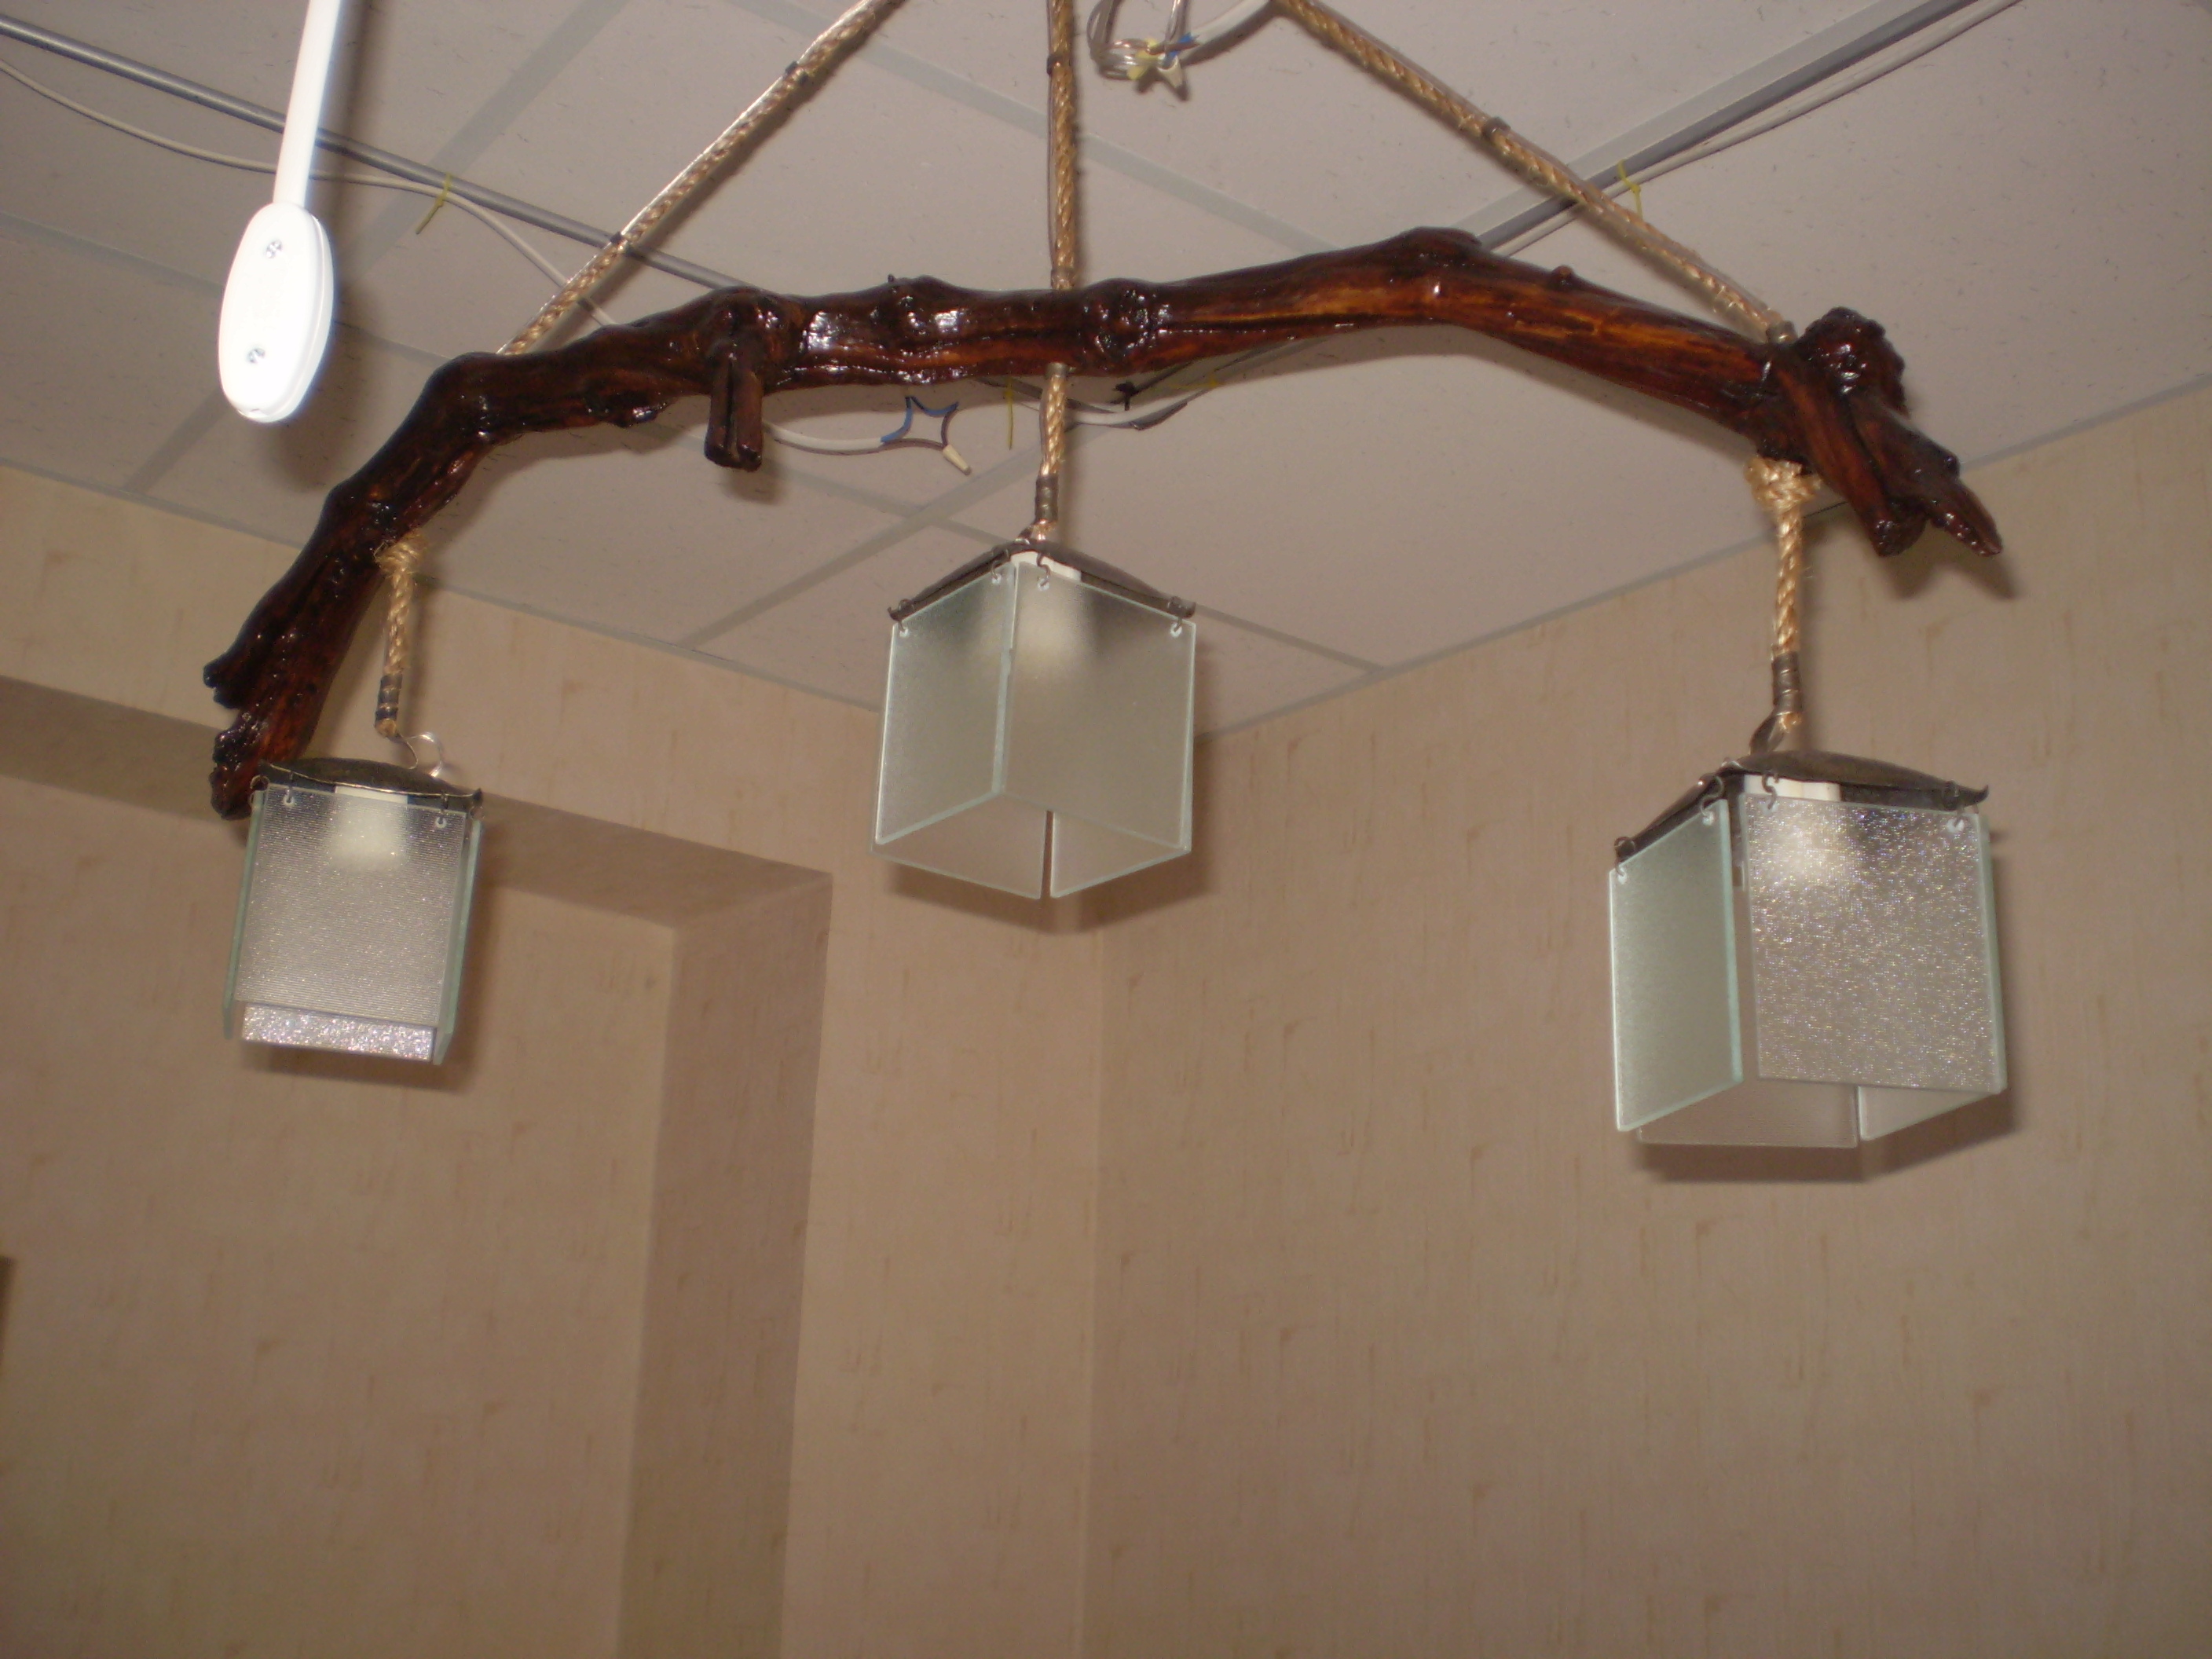
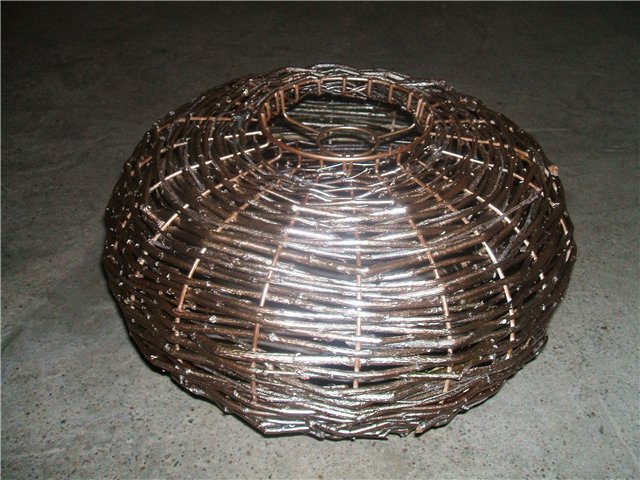
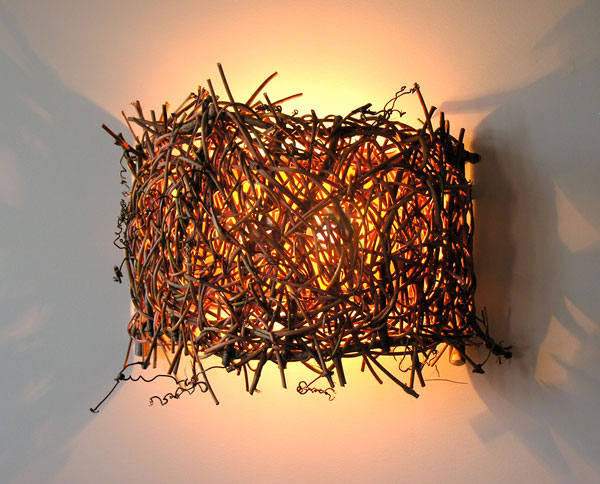
Vine lamp
To make the ceiling of the tree, you need to pick a suitable snag or branches and process them properly. In the case of the vine - almost anyone is suitable, with stepsons and even dry leaves.Such a ceiling can be and wall, and floor, and ceiling. It requires a metal frame of any shape, through which the twigs will be passed. When the cover is ready, cover it with furniture varnish - it will be very beautiful.

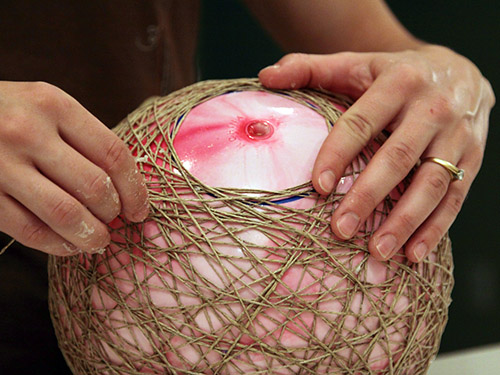
How to make a thread and ball?
One of the simplest, but original ideas is a ceiling made of threads wound on a balloon. We need threads (wool, twine, thick cotton), PVA glue, brush, balloon, petroleum jelly.
Then everything is easy:
- Inflate the ball. The more it is - the greater your ceiling. A more familiar option is a round ball, but who said that it is necessary? Perhaps your chandelier will be of three oblong shades.
- If your ceiling is open at the bottom, then draw a border on the ball for further winding.
- In order to subsequently the ball is easily detached from the thread, coat it with a brush with petroleum jelly.
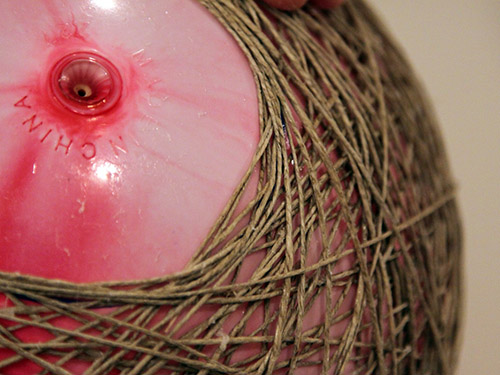
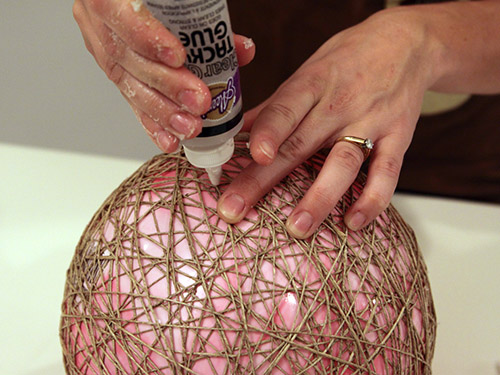
- As the ball is wrapped with threads, coat them with glue, layer by layer. Clay do not regret.
- The more layers - the stronger the design. Try using different thread textures, wind them in different directions.
- Leave your chandelier to dry.
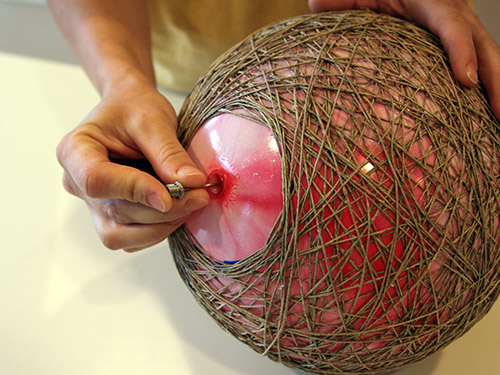
- After about 24 hours, pierce the ball and remove the rest of it from the lampshade.
- Carefully cut the hole for the cartridge.
- Insert a light bulb - the ceiling is ready.
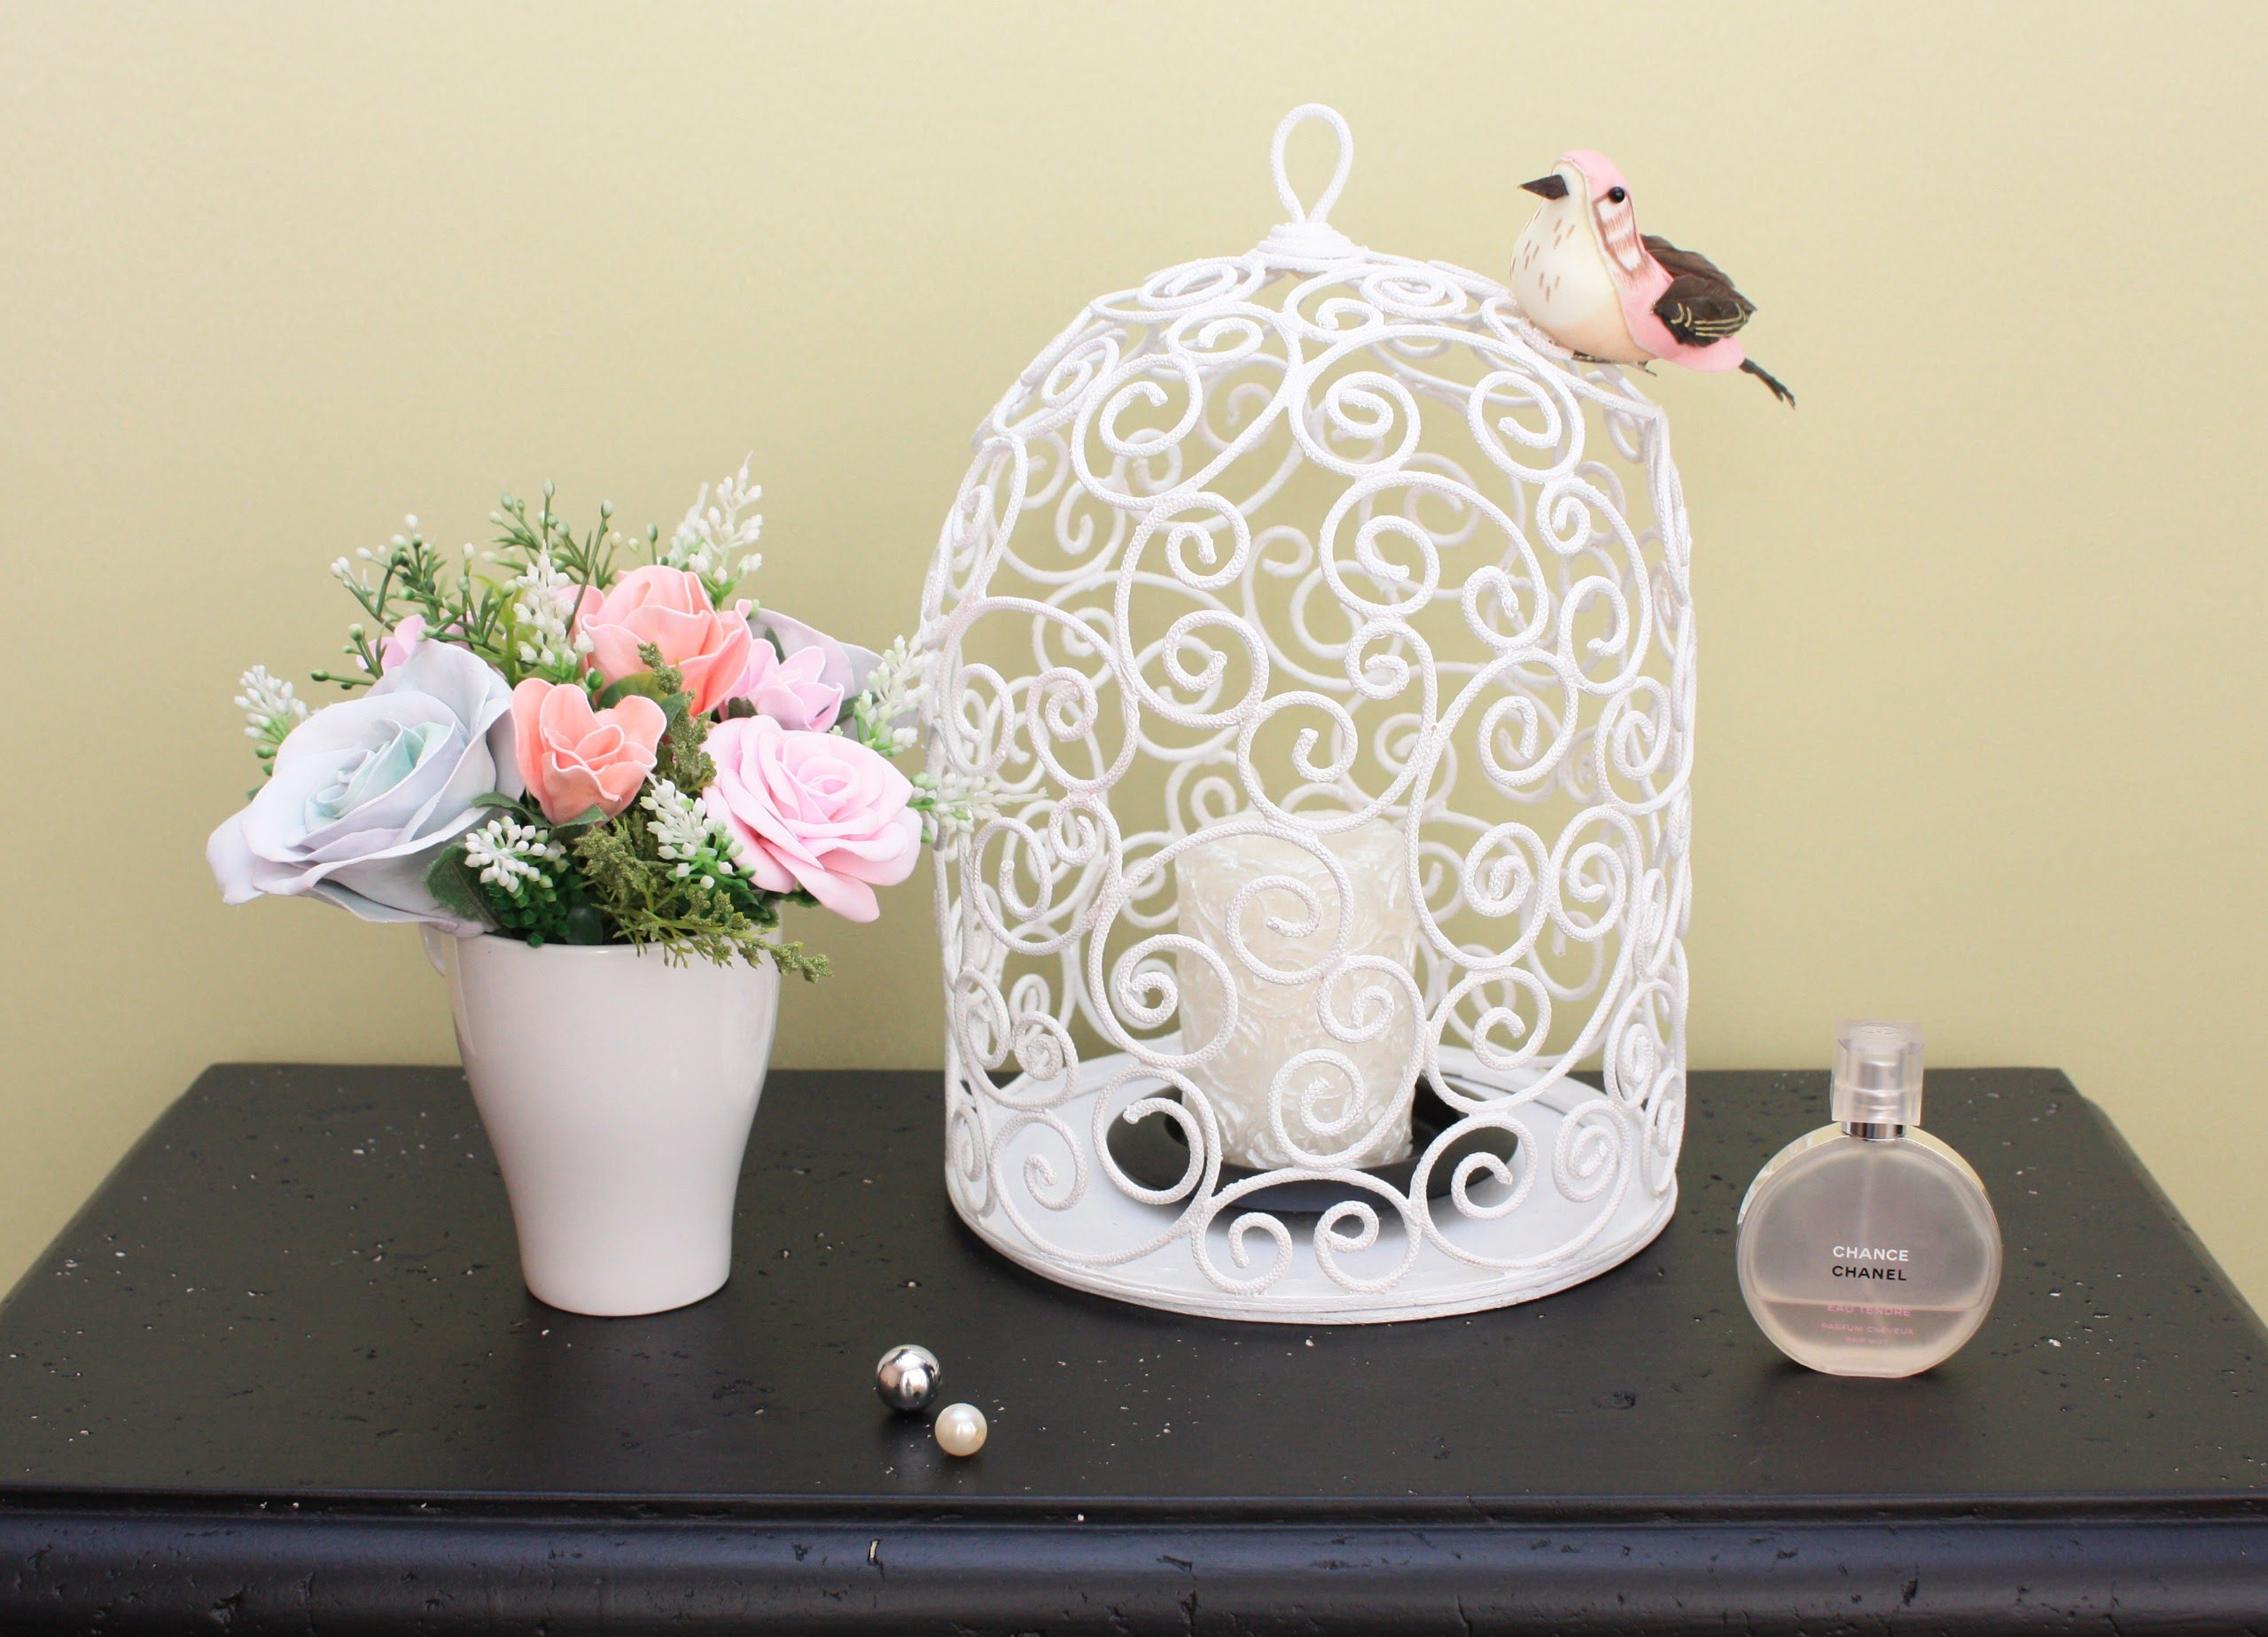
- If it is solid, then it can be decorated with artificial flowers, air butterflies or other medium-sized elements.

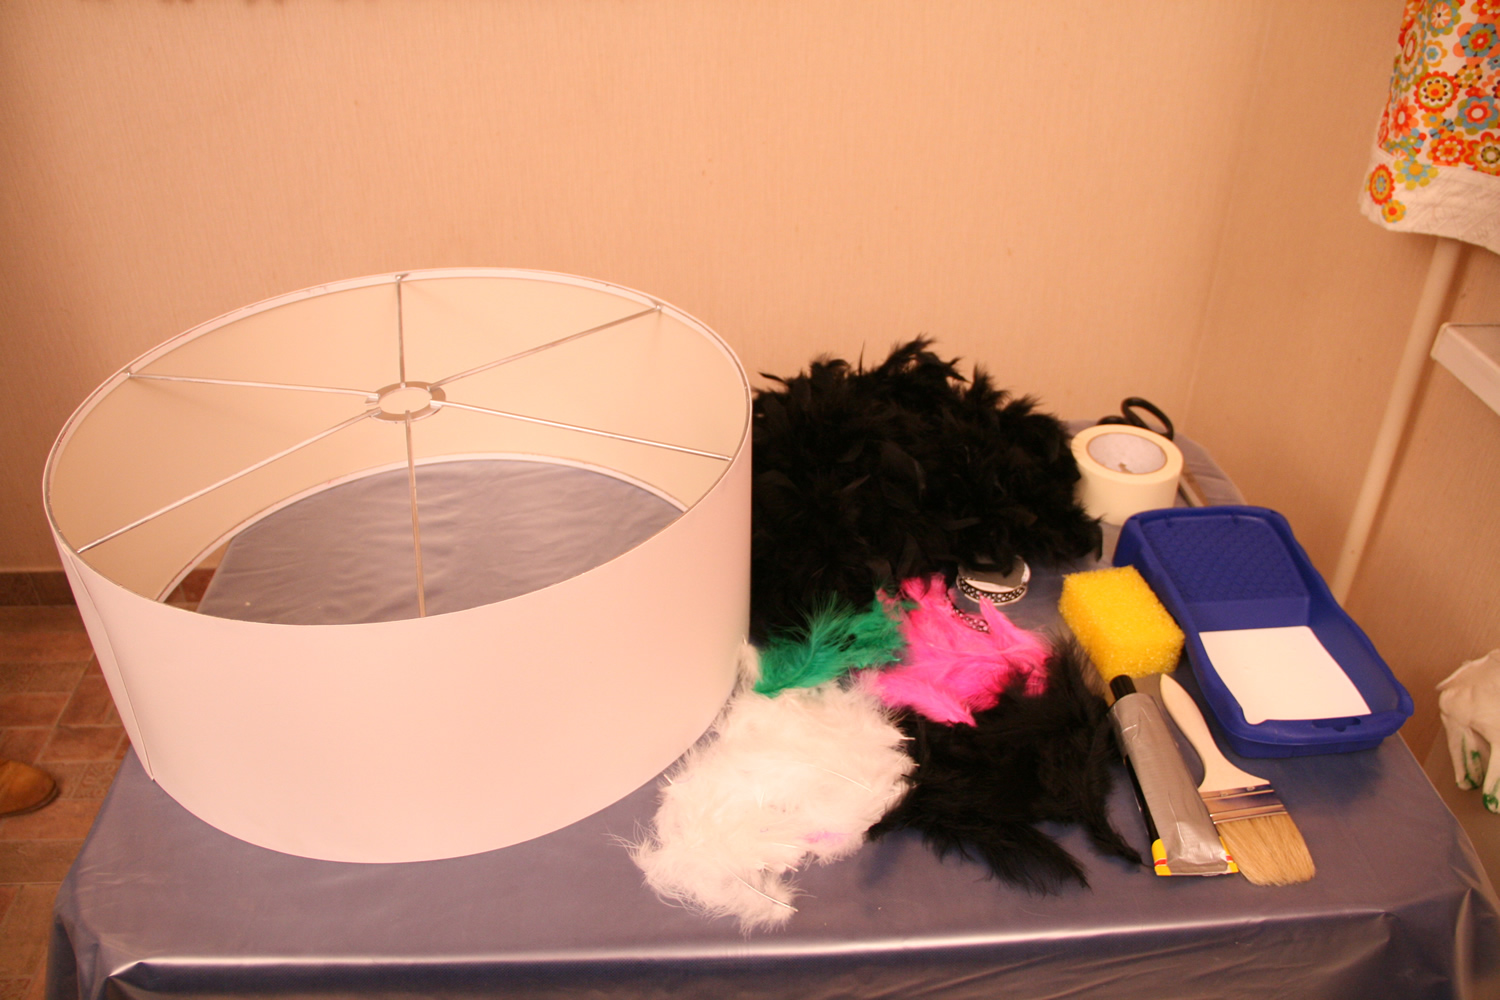
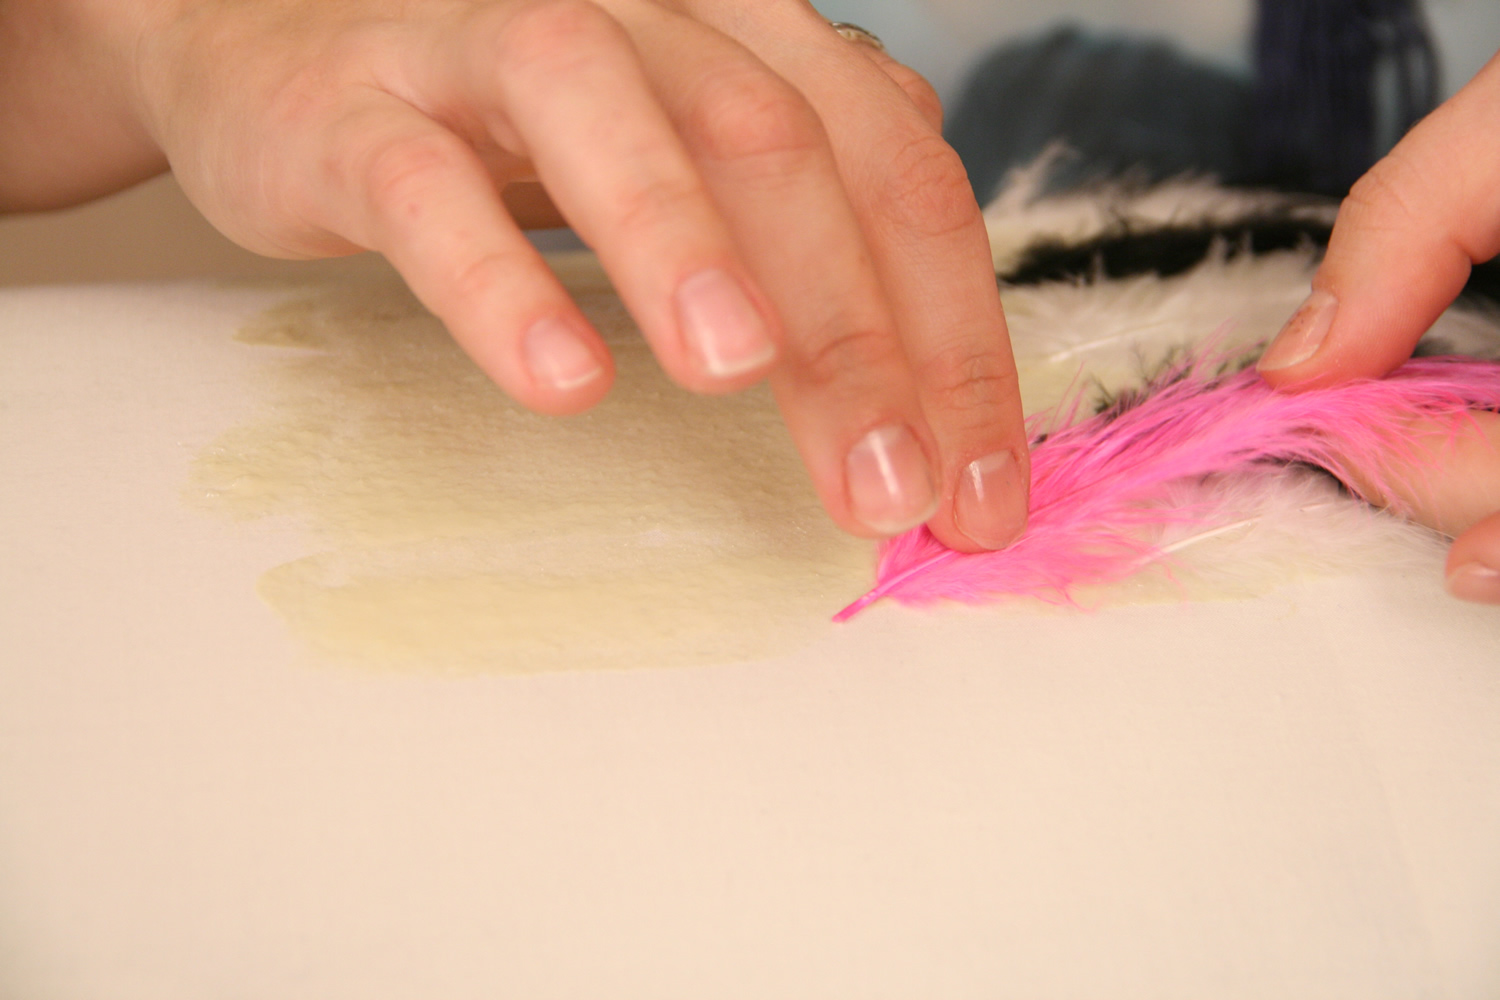
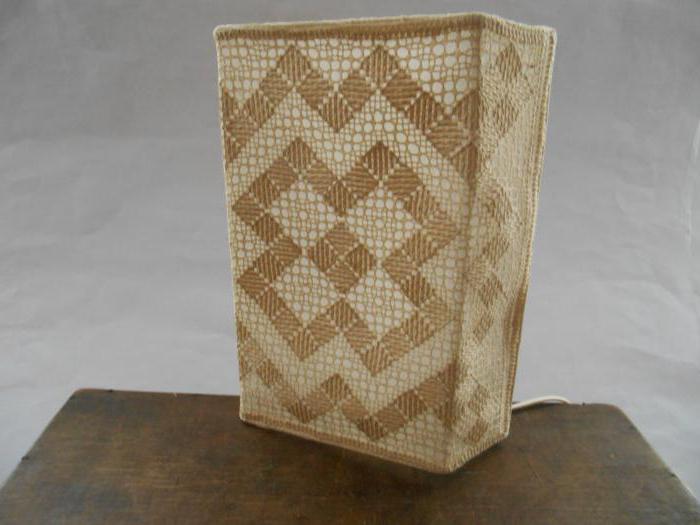
Plafond for the standing lamp: master class
Such a lamp is not only in the field of view, but also in the field of touch.
To create a pleasant atmosphere, make the floor lamp soft:
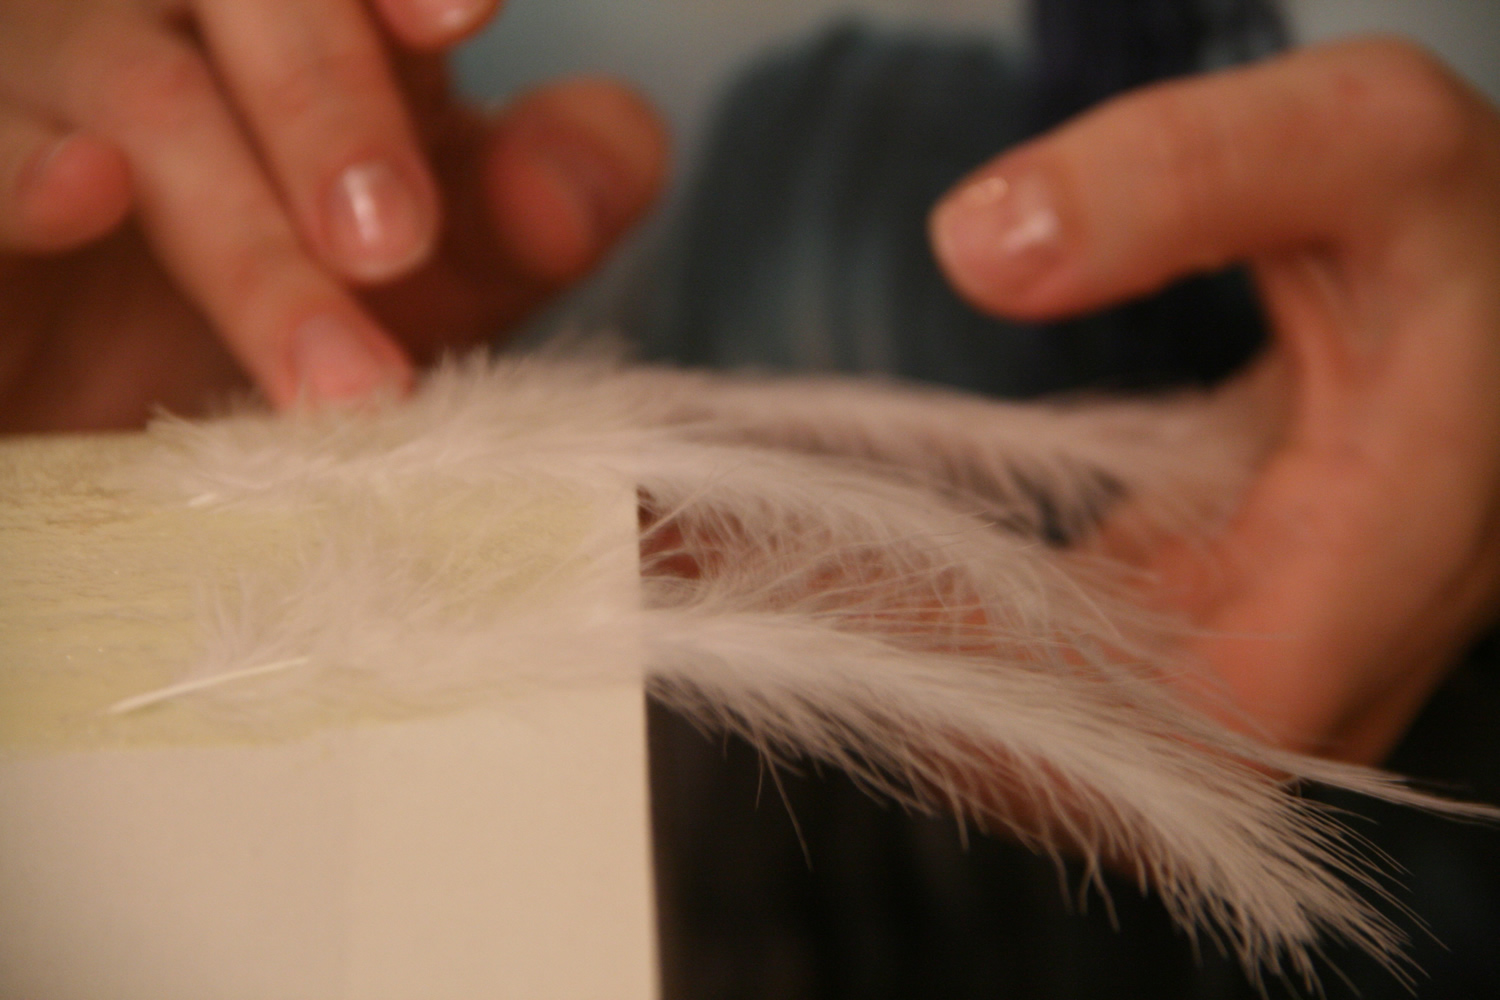
- Pick up a boa or fringe with fluffy threads of one or several colors.
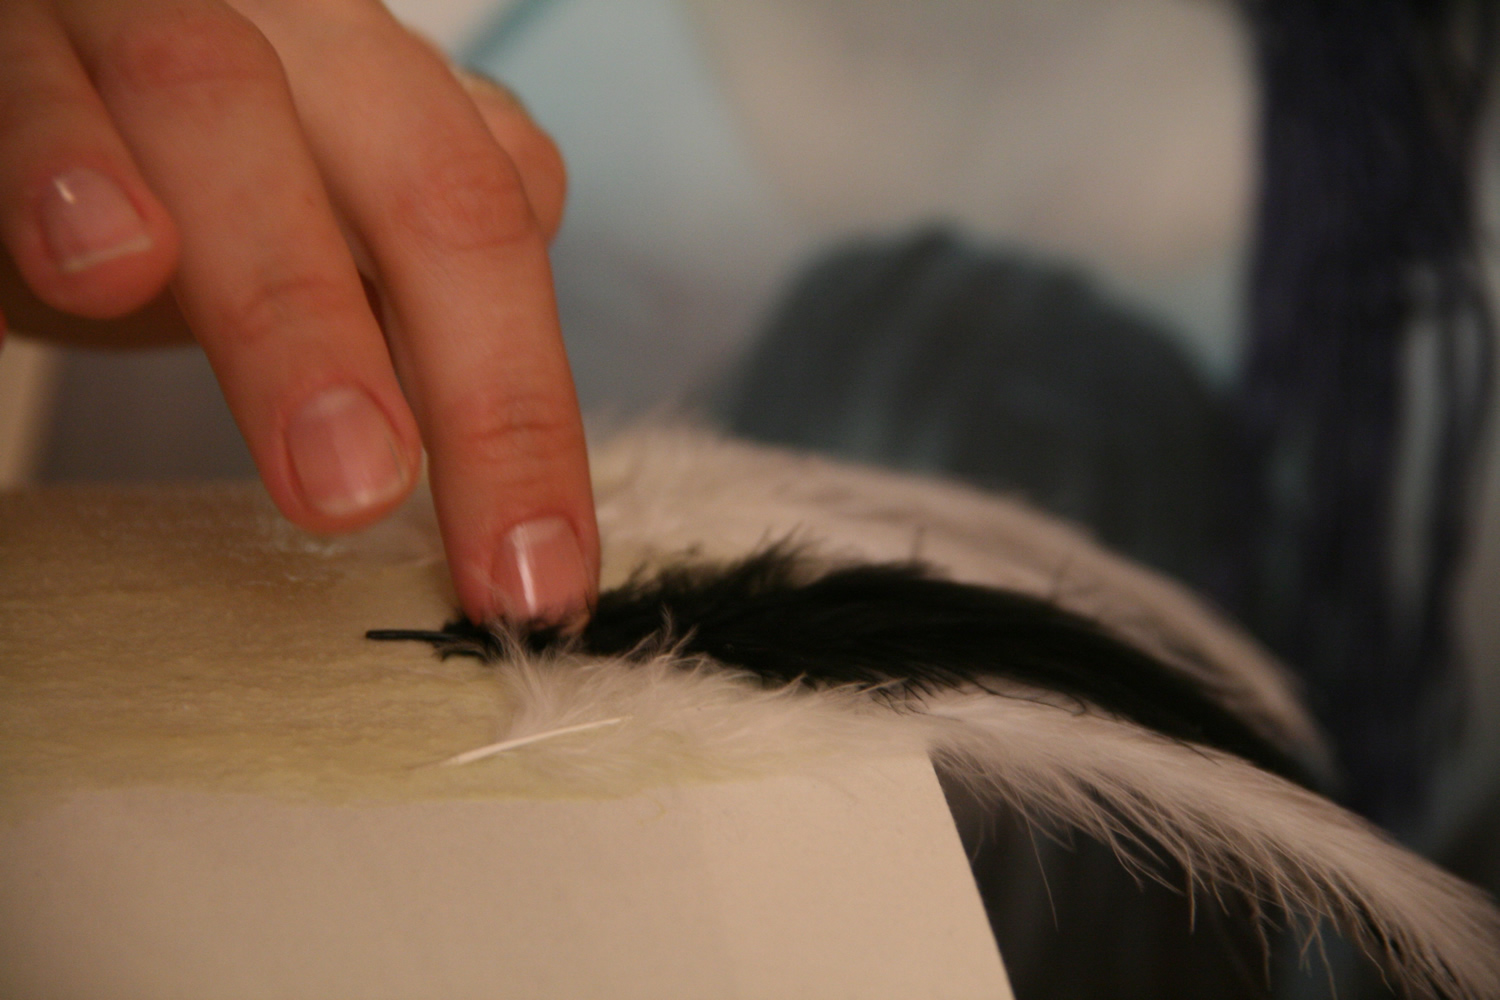
- Glue the boa or fringe on the old ceiling strictly along the circumference, wrapping around the ceiling several times.
- Colored material can be decorated not only in a circle, but also randomly, in spots.
- At will it is possible to decorate a leg of the lamp and the basis itself.

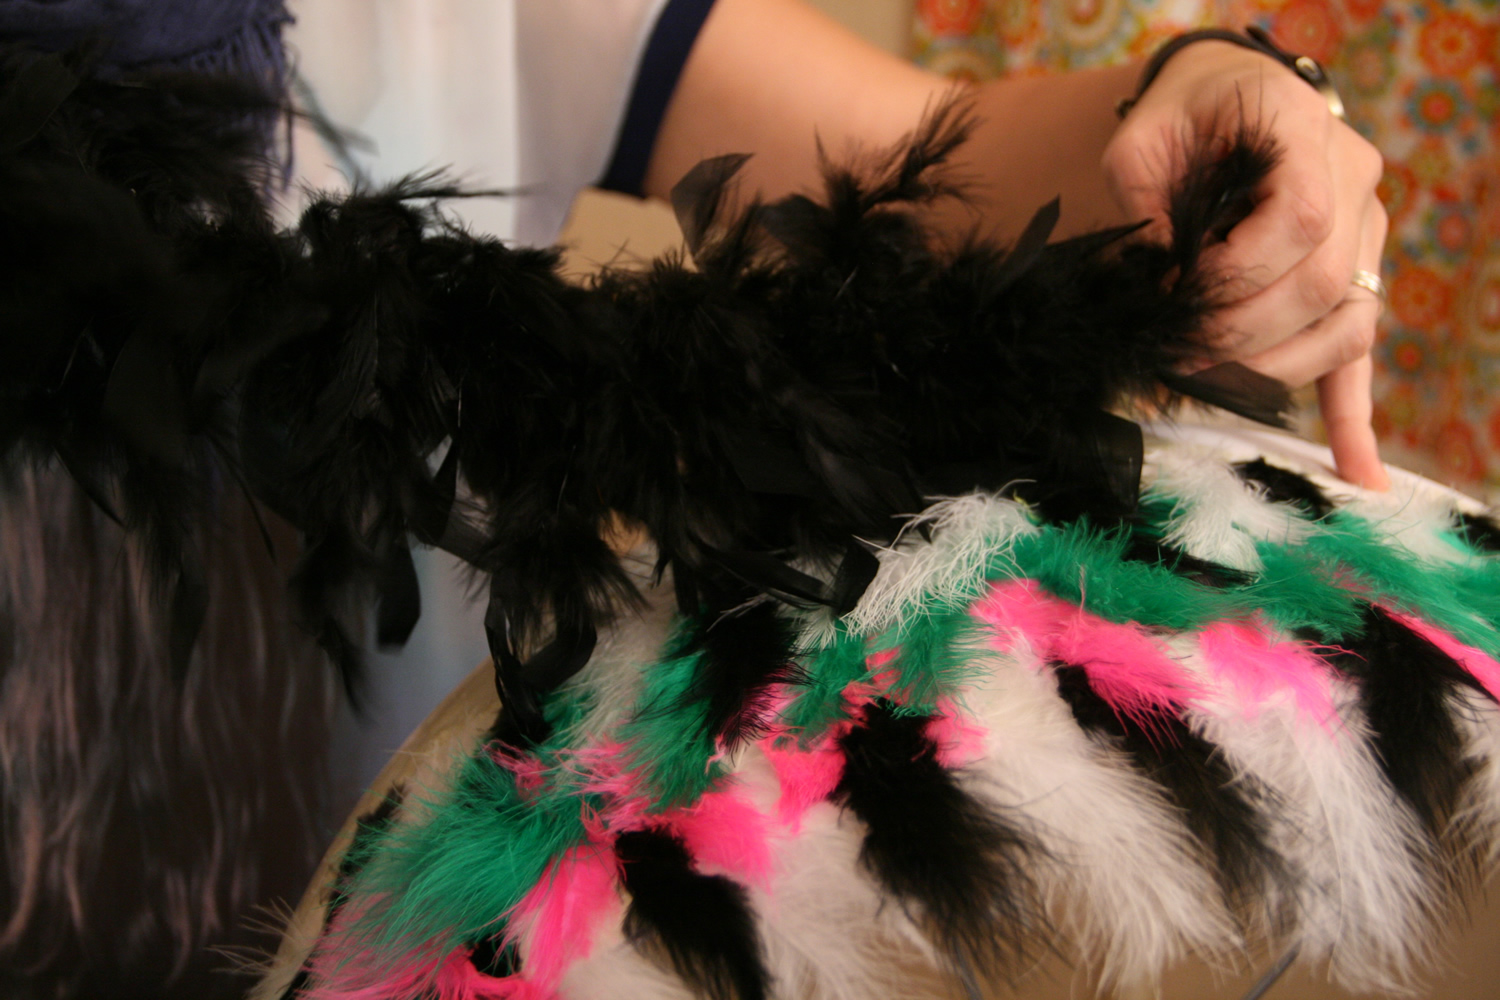
By itself, the design will be voluminous, not requiring additional elements.
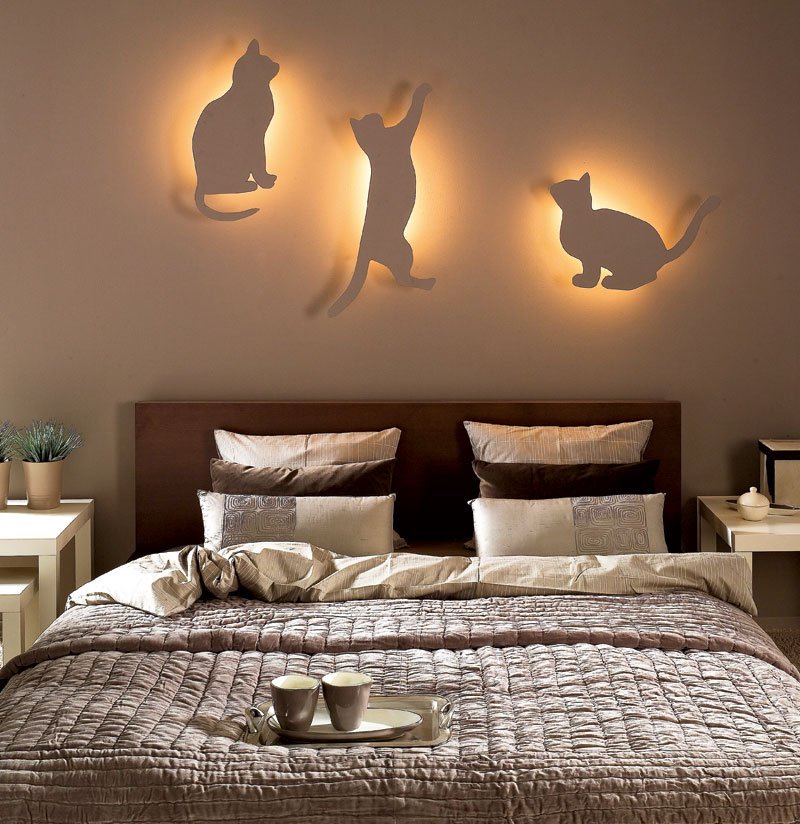
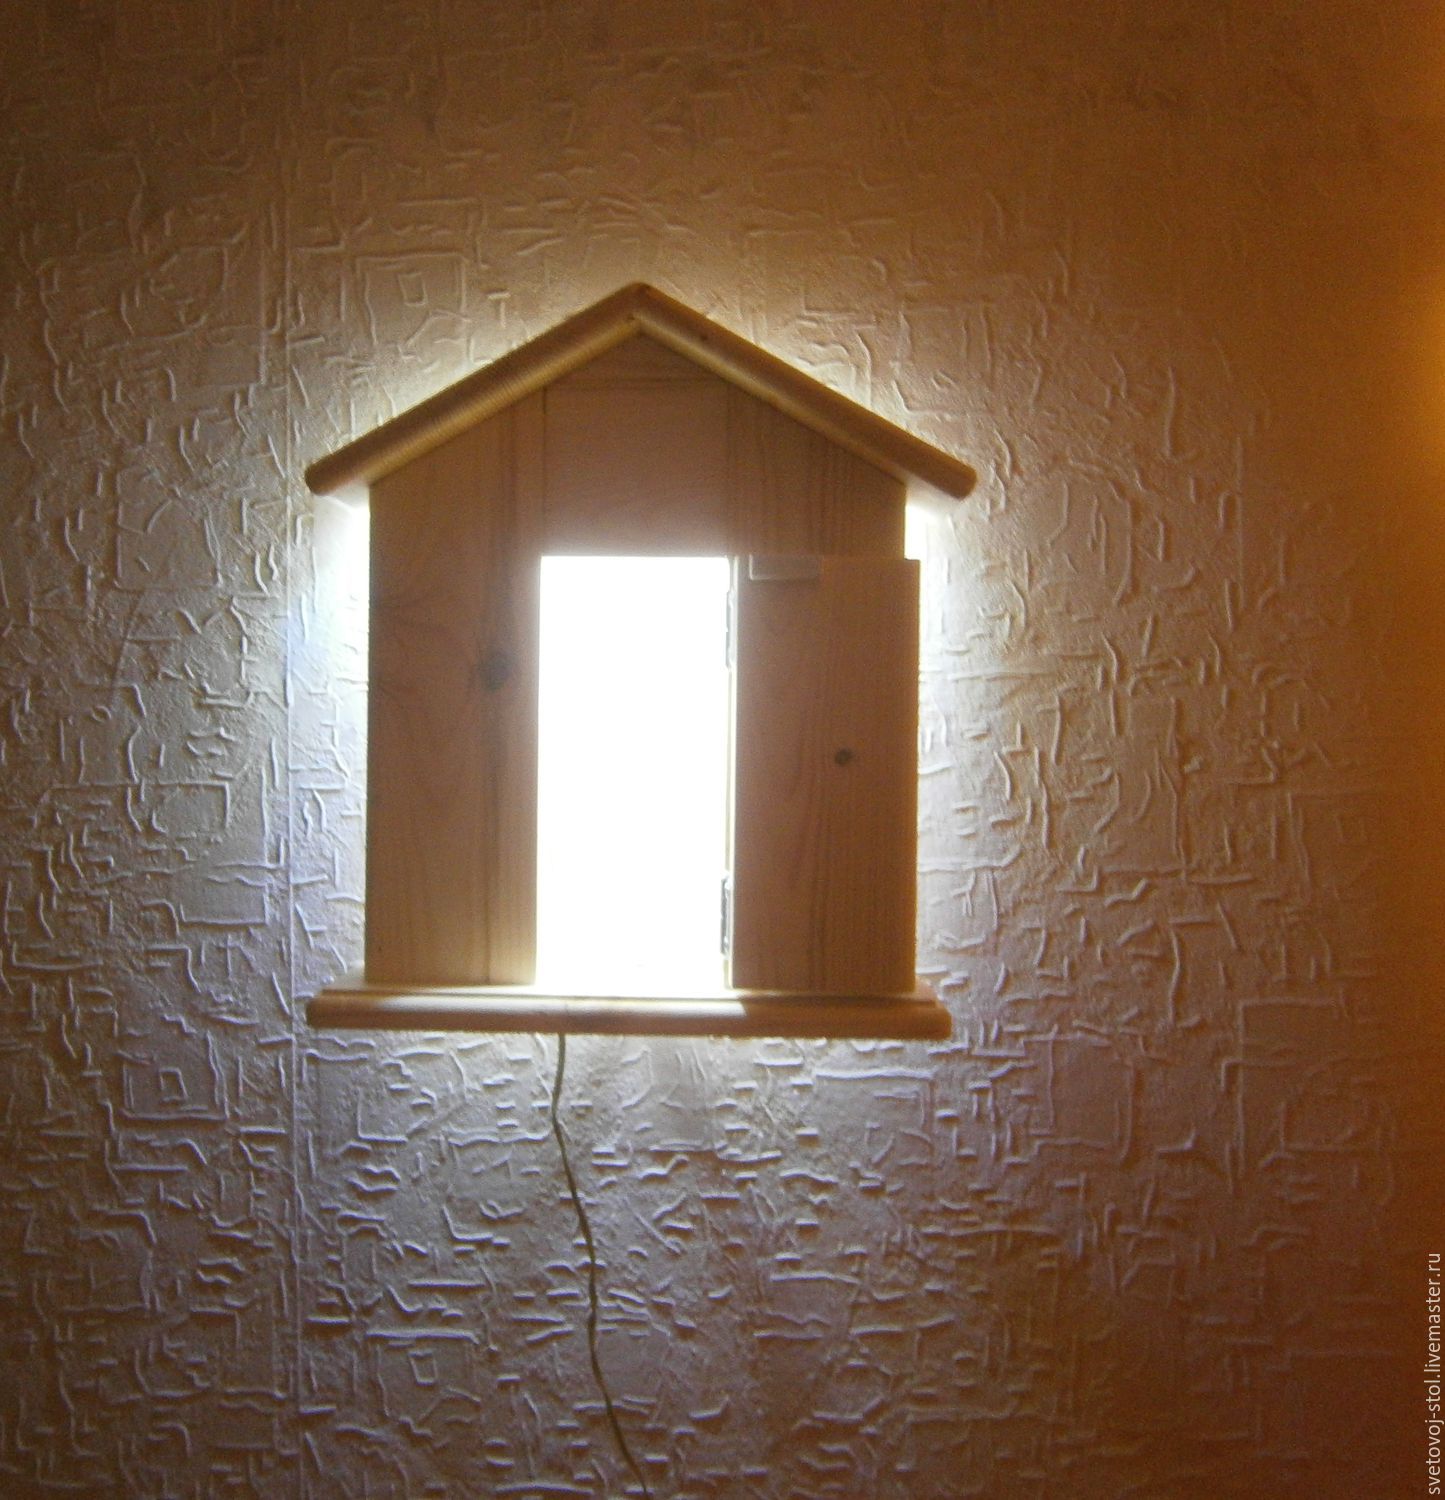
Making for wall model
Looks great on the wall lamp house. It can be completely different models. But if you install such a lamp in the child’s room, put the baby’s favorite toy at the door of the house where the light is coming from (for security reasons, not fabric and away from the light bulb).
No less interesting are the figures of dense materials (cat, flower, month), planted on the frame. Light does not come through the figure, but from under it, scattering the beam. As a rule, sconces are used to dim the light, which means that any opaque models will be appropriate here.

Handmade options for street lighting
Speaking of street lighting, we mean the area in front of a private house or cottage. Although, if you live in a multi-storey building, where people take care of what is in the yard, then these ideas may come up to you.
Lighting in front of the house can be:
- facade, when the lamps are mounted on the walls of the house and verandas;
- landscape, which is able to emphasize the beauty of your site, emphasizing the paths, plants, figurines;
- street, represented by lanterns, creating a diffused light in the territory.

The types of light source are also different:
- from the mains;
- from batteries;
- from solar panels.

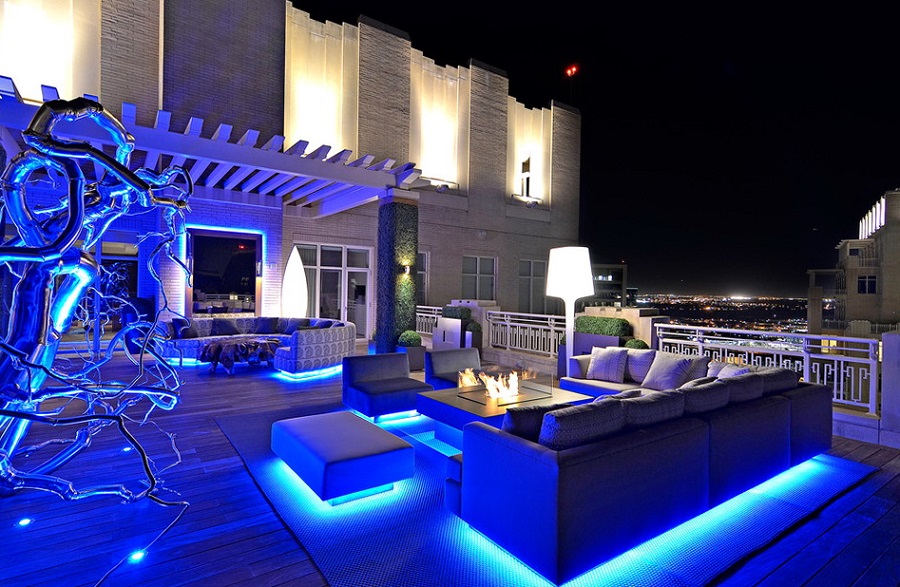
Facade lights may look different: LED strip around the perimeter of the house, wall sconces and twigs. The light source will be the power grid.
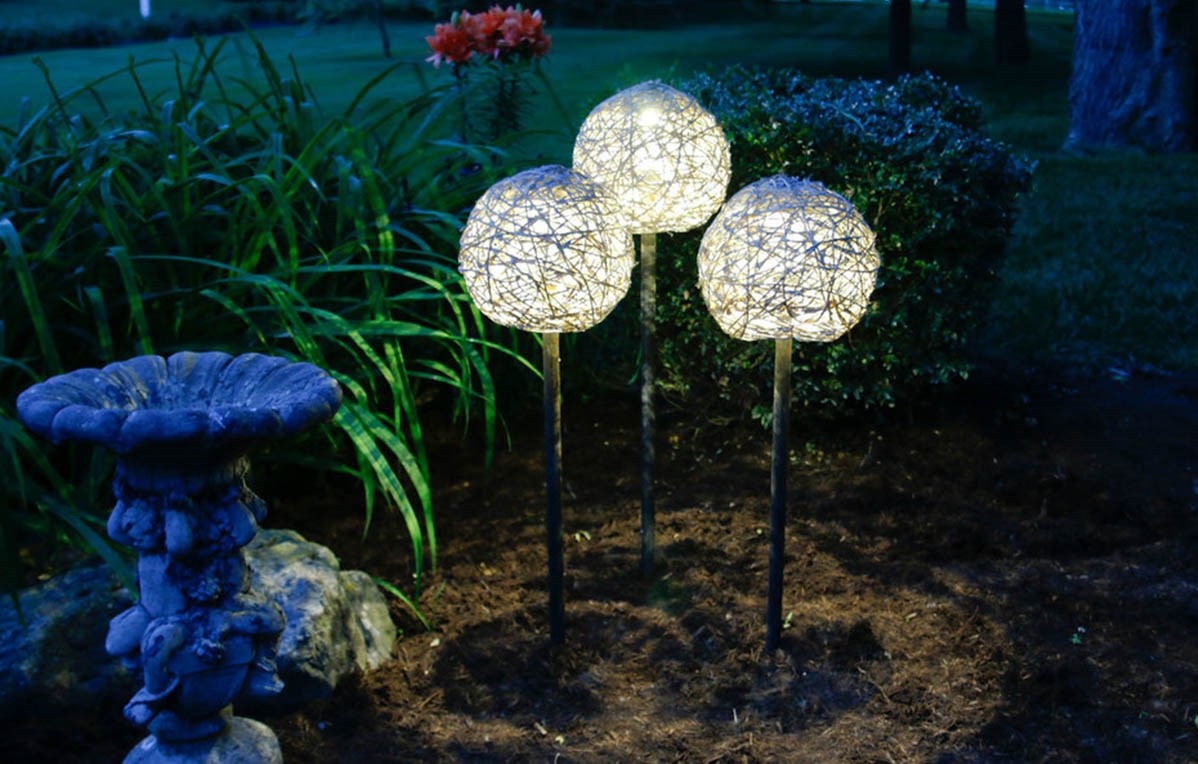
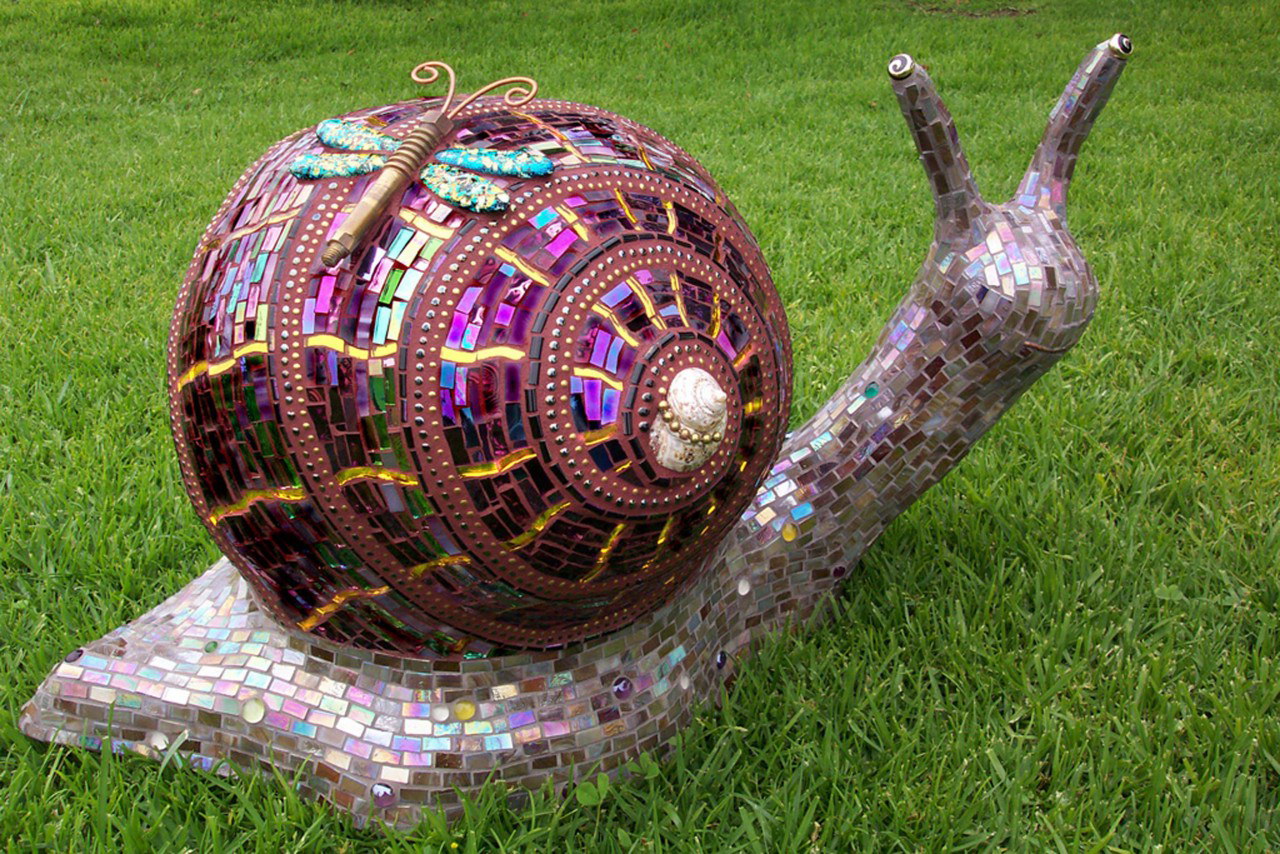
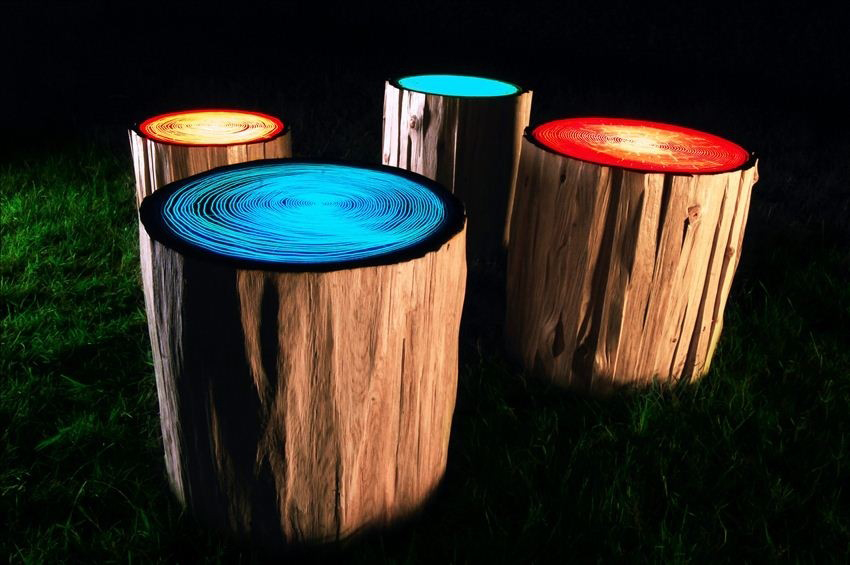
Much more fantasy can be applied in landscape lighting.Mount multi-colored lamps from batteries in several figures of animals and fairy-tale characters from plaster, wood or polyresistant and place them on the territory - the effect will be stunningly beautiful. But turn on - off uncomfortable. Try to build solar-powered lights. In the evening they will light up on their own.
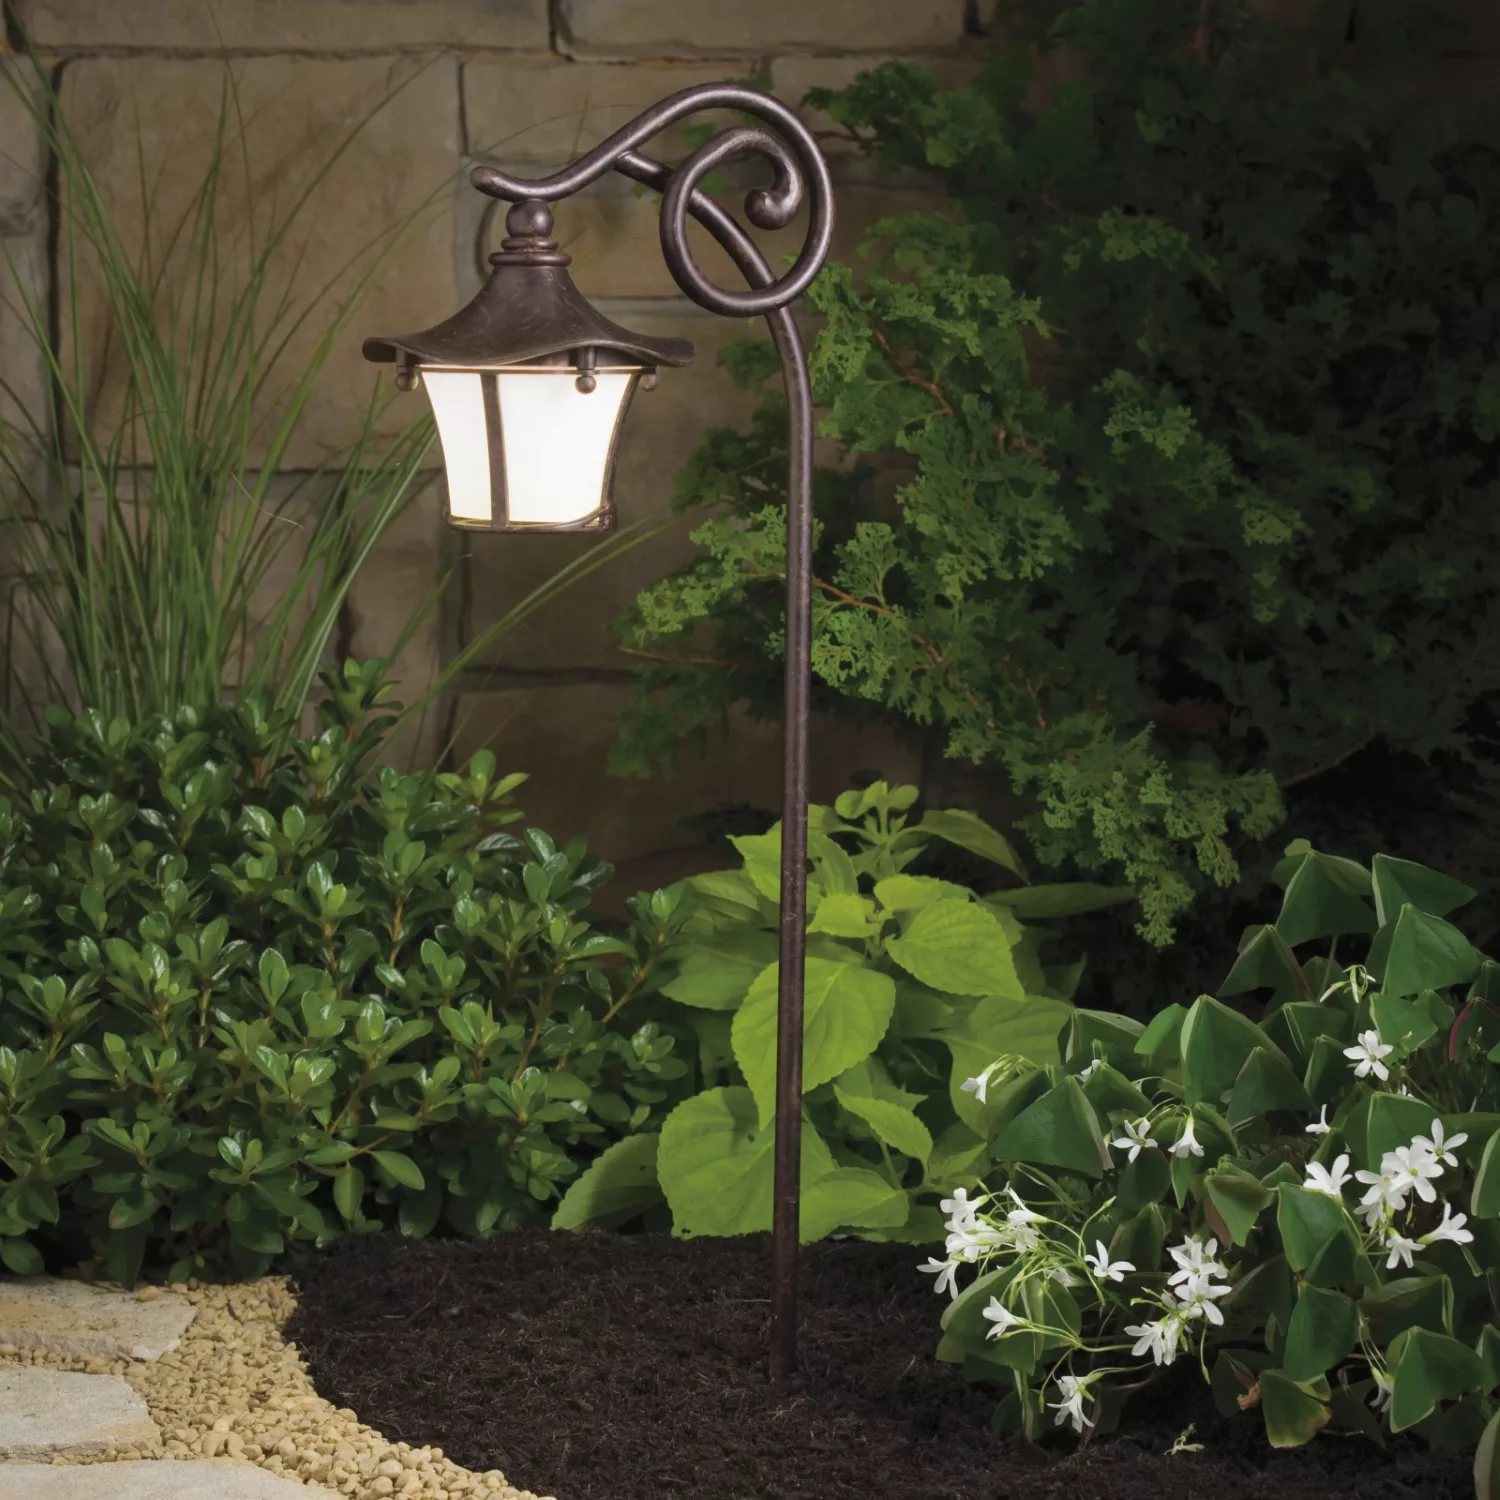
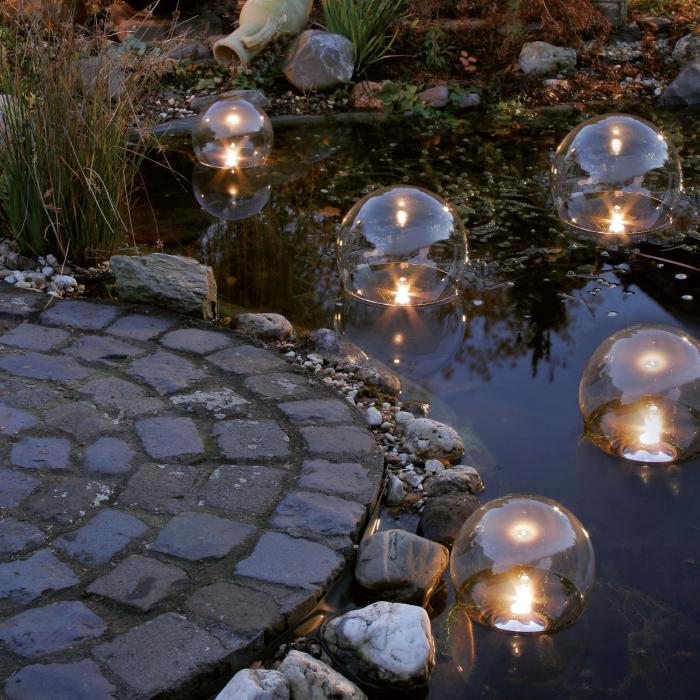
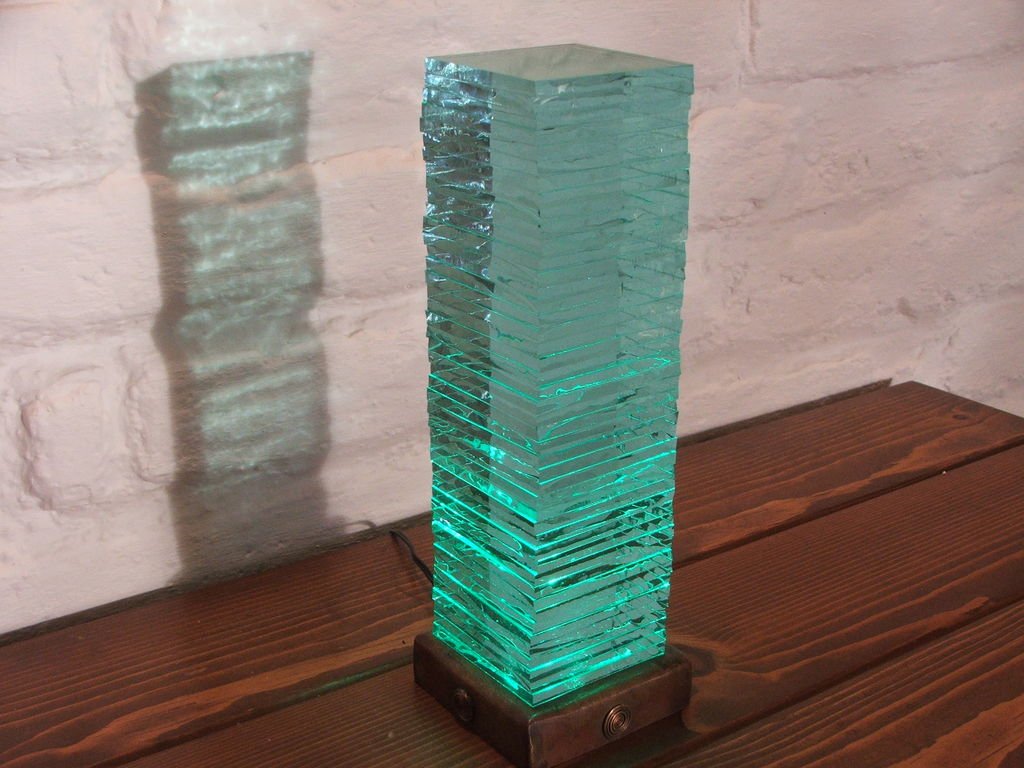
Throw on the trees and bushes LED strip, powered from the mains, in the evening you will find yourself in a fairy tale. In stores and the Internet are sold lamps, working on the principle of solar panels, with a rack that you just need to plug into the ground in an arbitrary place. In this way, you can decorate the pond, arbor. Pre-glass luminaire can be covered with a pattern or monochromatic paint.
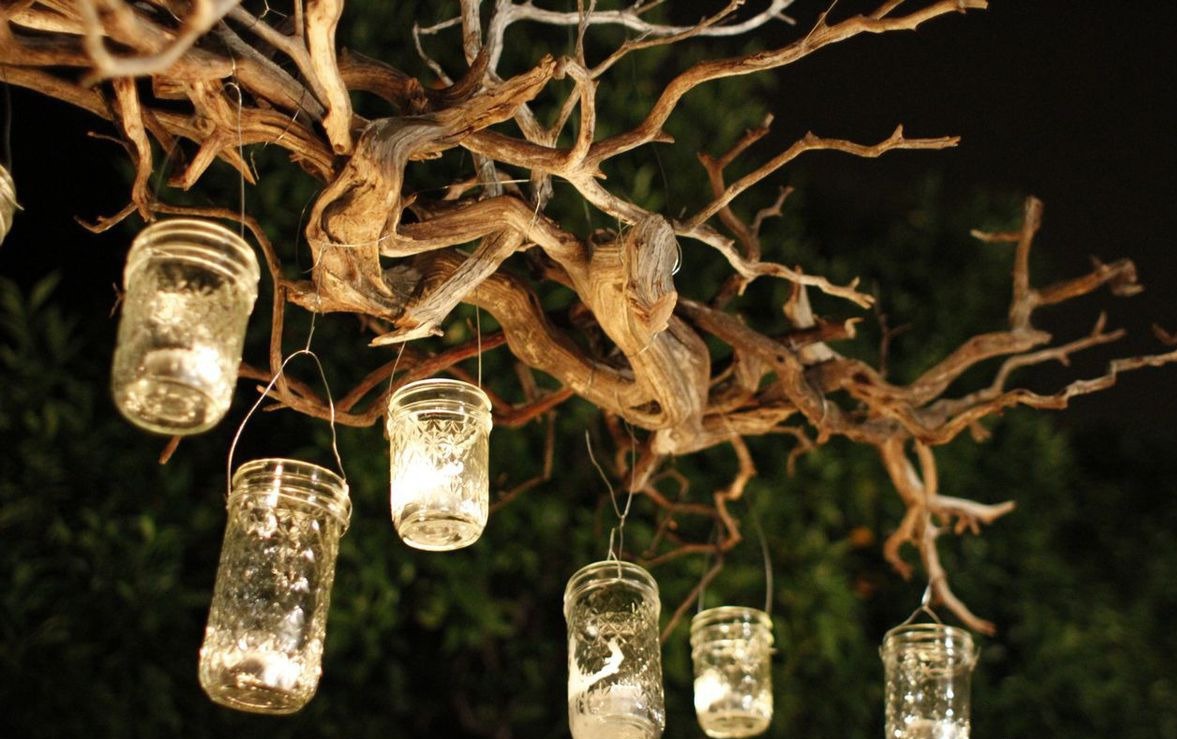
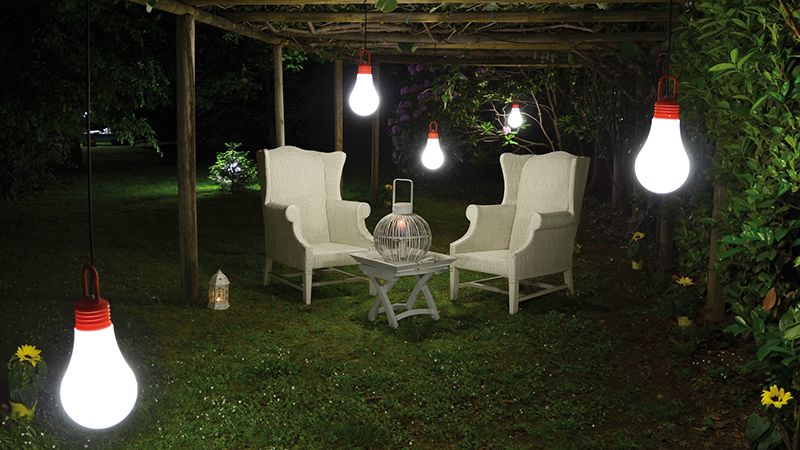
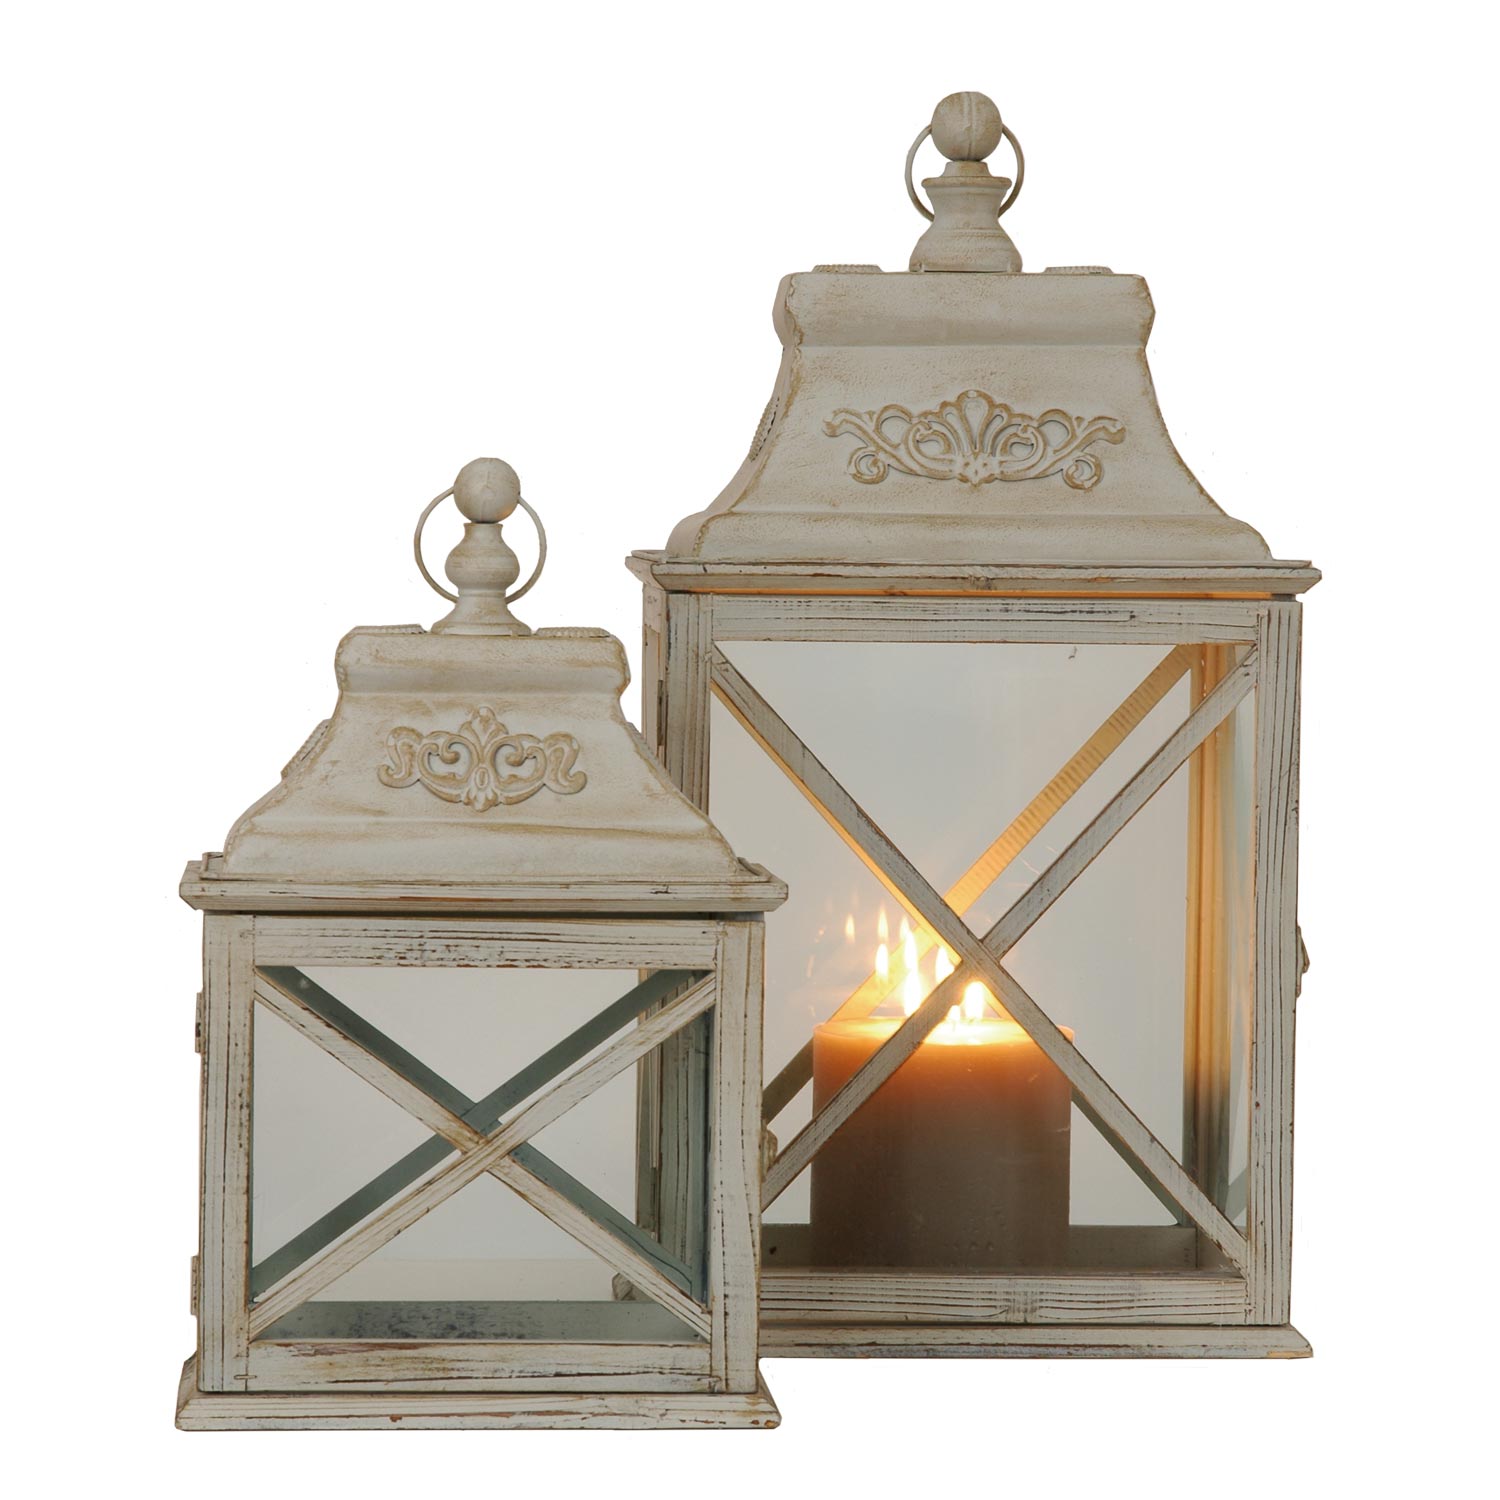
If there is no electricity and solar panels, then the evening you will paint the candle lights, hidden in glass jars and suspended from the gazebo, fence, trees. Banks can be decorated with threads, paint, colored self-adhesive paper, corrugated paper. But be careful with such illumination - open fire loves the careless.

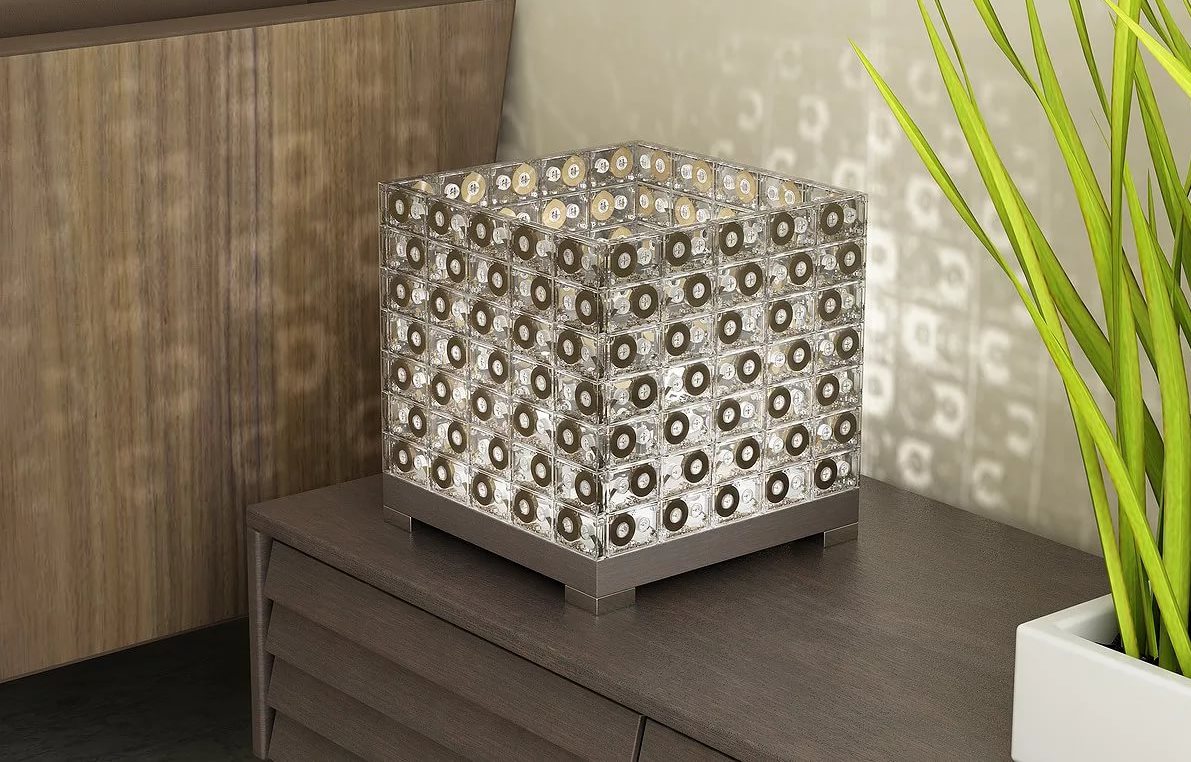
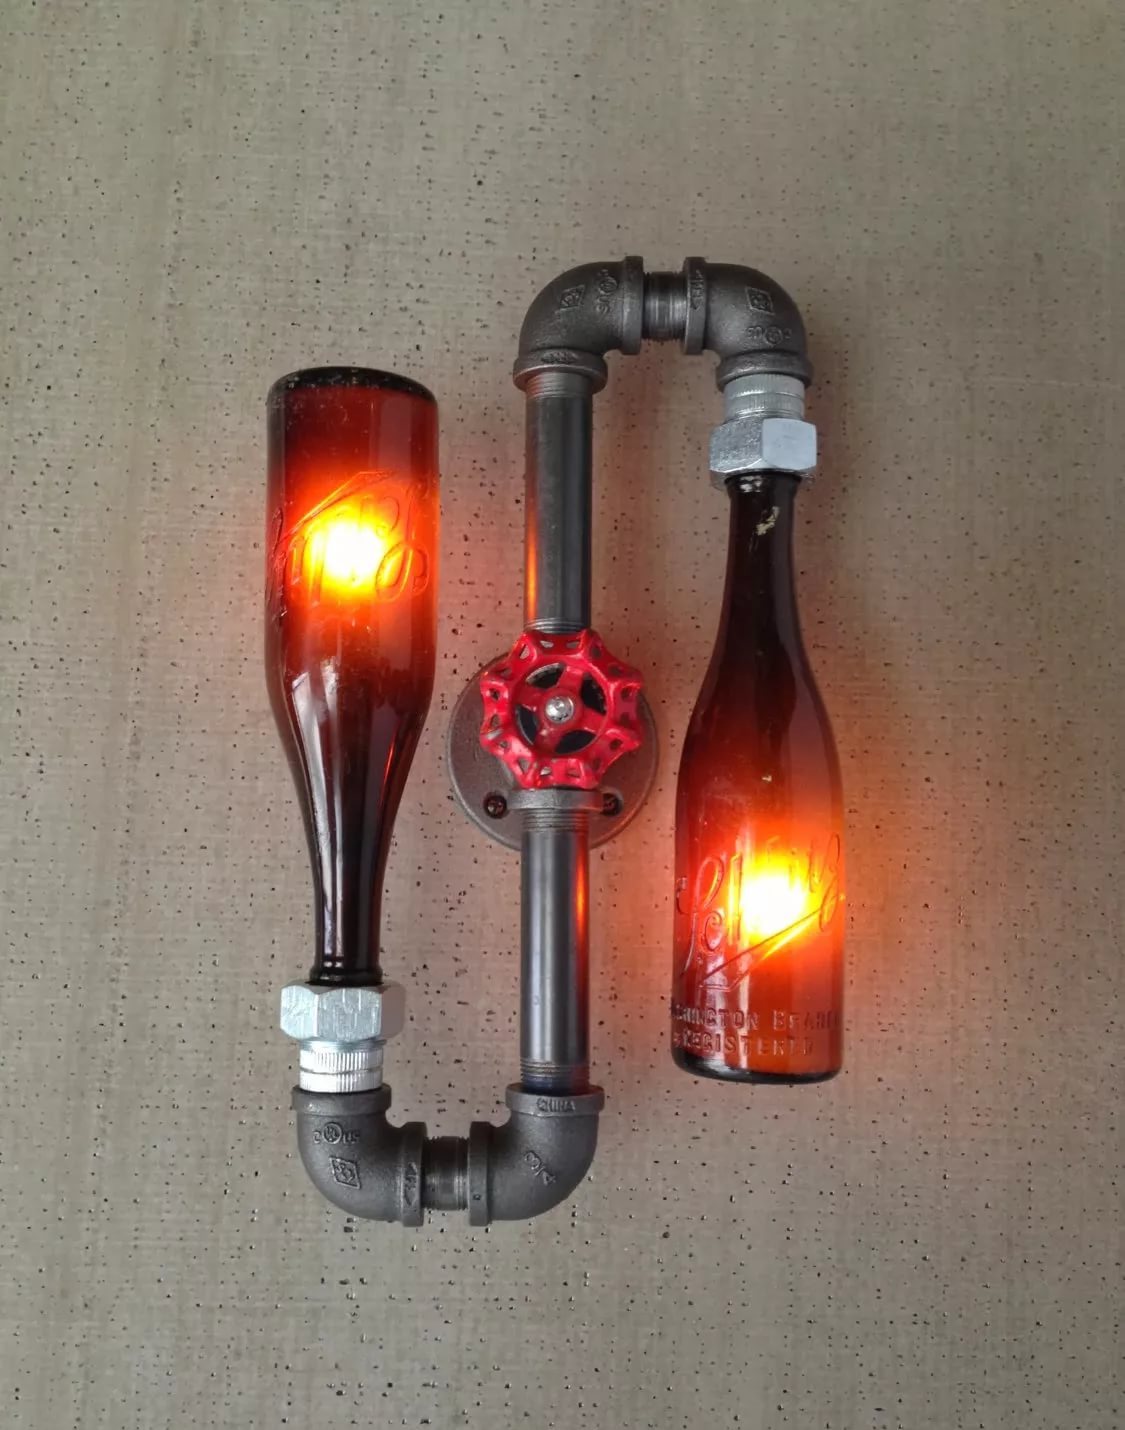
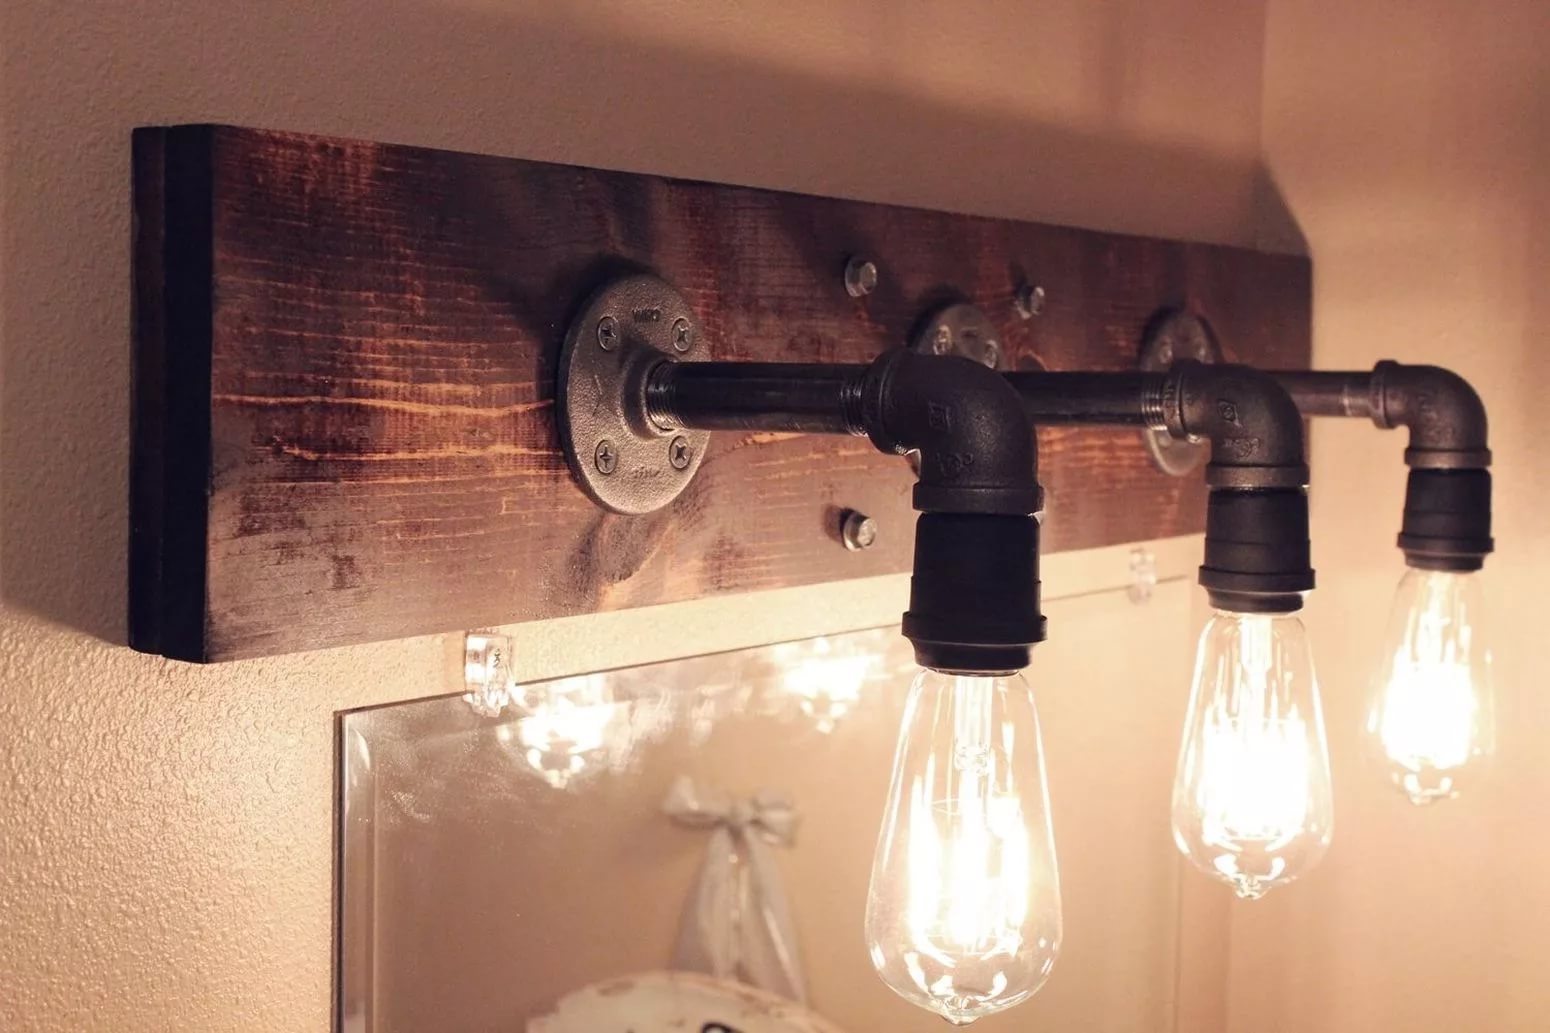
You can install the lamp in the gazebo directly on the table, summing up the electricity from below and drilling through the middle of the table.And the plafond can make a cup with a saucer, a lid with a broken fragment, a tin can with a pattern carved on it. All our tips for people free in their fantasies. Look at what you have on the plot: a beautiful girdle, a pot-bellied glass bottle, a pumpkin - everything can be useful for a lampshade!

How to decorate?
It is not enough to make a lamp with your own hands or to restore the old one - it must also be beautifully decorated.
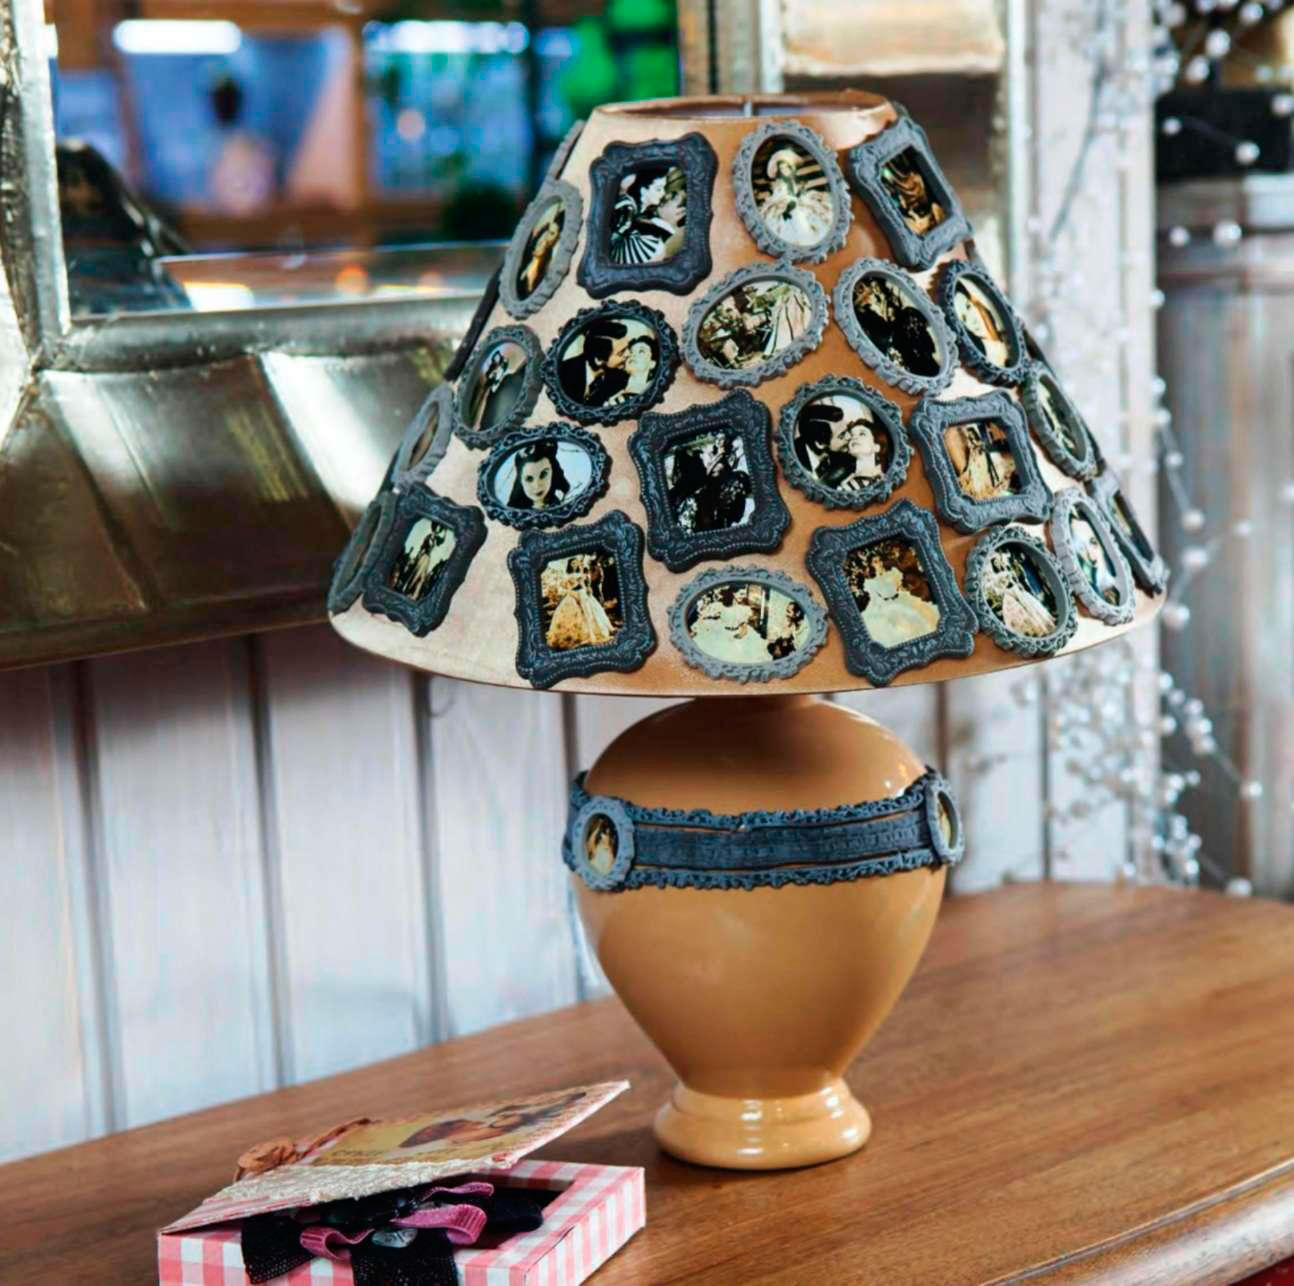
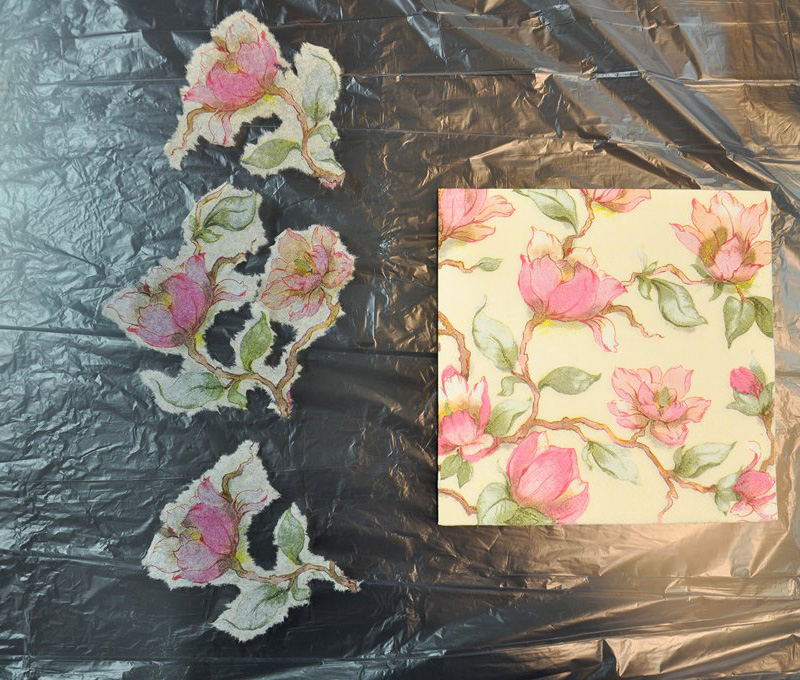
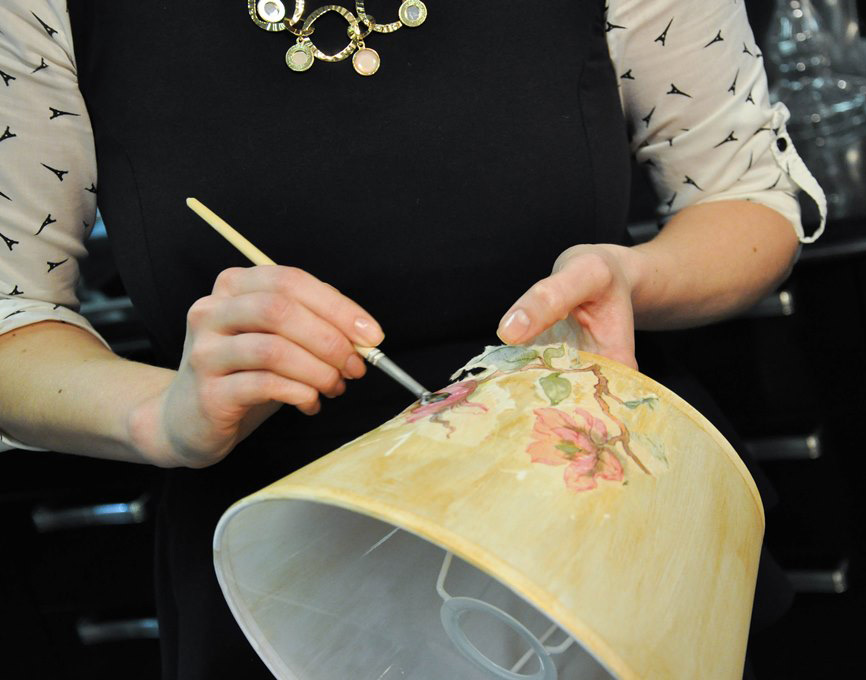
Decoupage - one of the techniques of decorating a variety of things. It requires special care and diligence, but extremely beautiful.
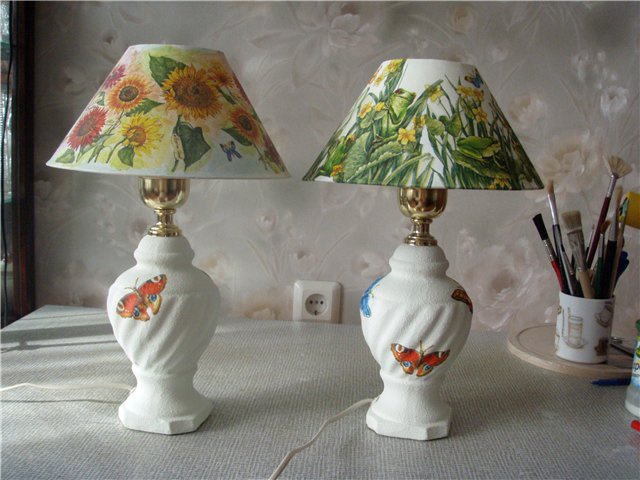
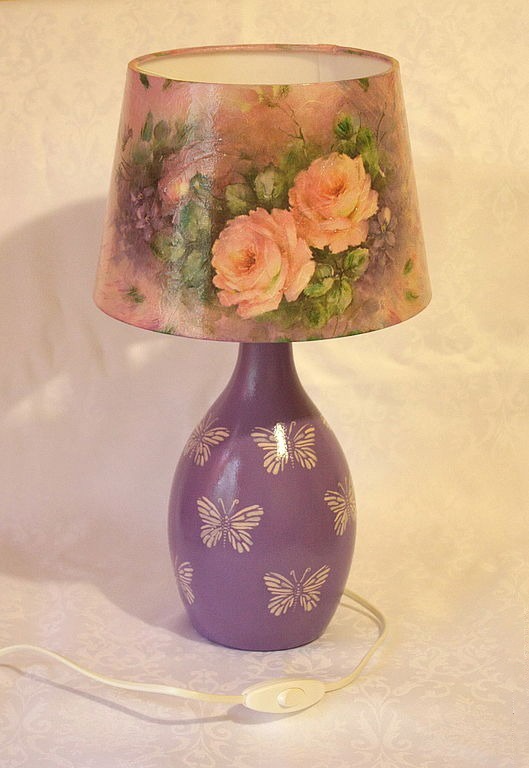

For its execution, you need special napkins that are sold individually or in packaging. Napkins contain drawings of the most various contents. They are cut with nail scissors, soaked in water and applied to the lamp. After the element is completely dry, the pattern is covered with a special lacquer for decoupage. Decoupage the shades and the horns of the chandelier will give you a completely new look at the old thing.
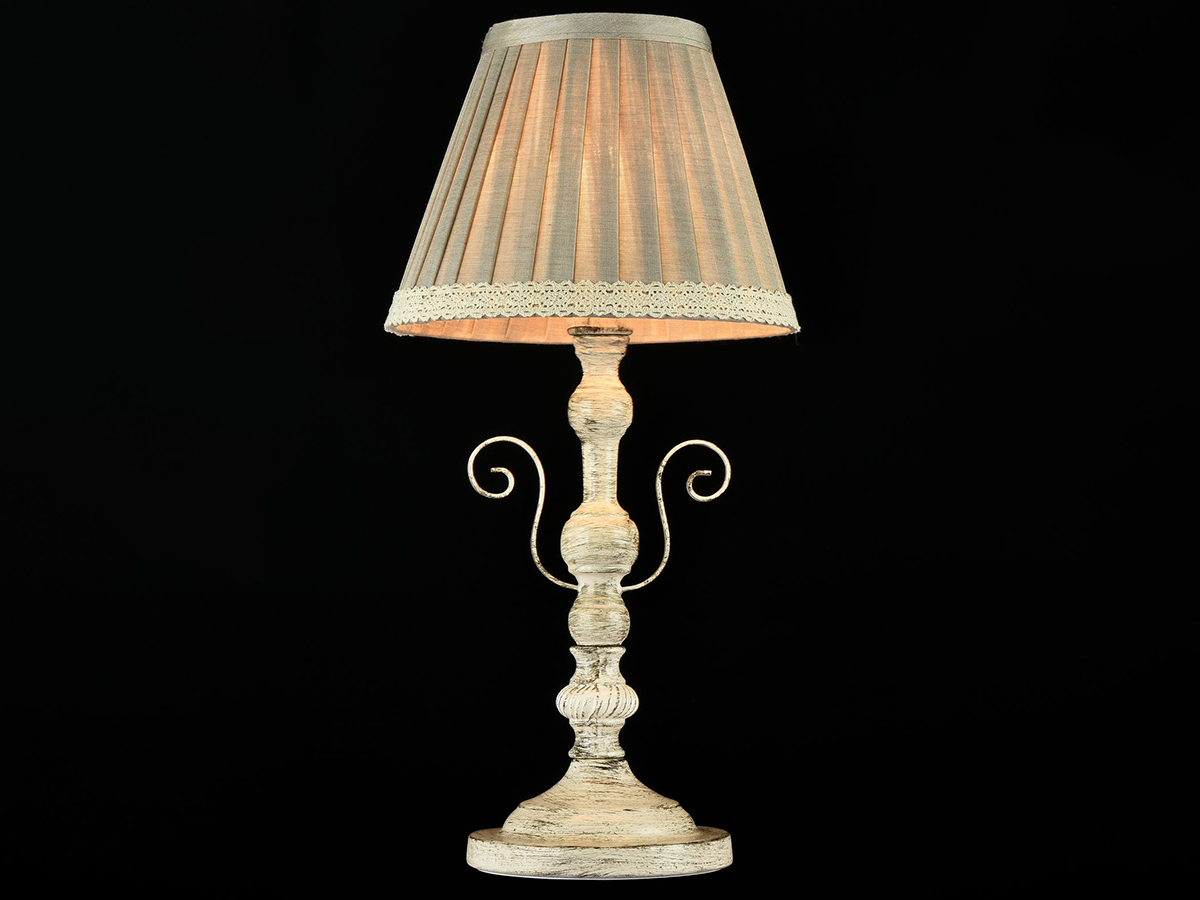
You can also change the style of your room with patina. Patina is an artificial or natural aging of things.Not every interior can be used this technique semi-antique. But on the metal leg of the old floor lamp from the room in the style of Provence, it will be very appropriate. Artificial patina will give your lamp a touch of noble antiquity, calm and reliability.
Ideas for creativity
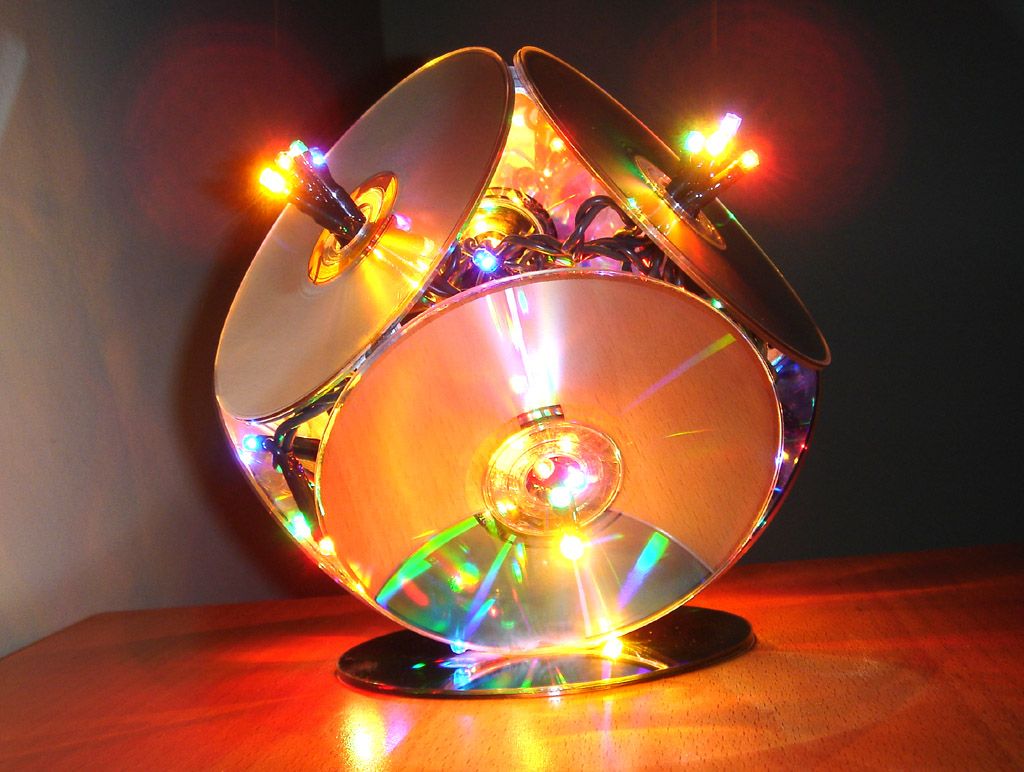
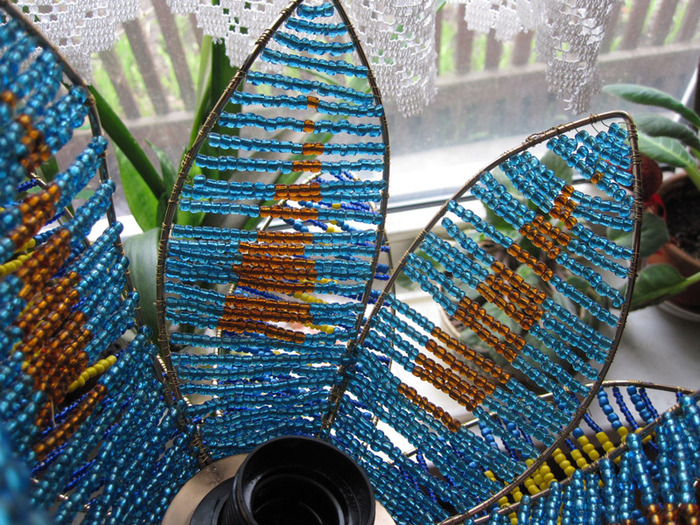
What is your imagination capable of? On the Internet you can find fixtures made of marmalade bears, hanging on a fishing line in the form of a ball. A cup and saucer attached to the ceiling "upside down", from which a light bulb hangs. Soaring butterflies and fish on a fishing line of different levels. Beaded pattern around the existing old ceiling. And how many ideas of lamps from glass bottles!

Ideas - a lot. The main desire!
To learn how to make a lamp-star with your own hands, see the video below.


